Table of Contents Show
An overview of Gothic Armada 2 along with an in-depth look at every faction and strategies used by players.
Other Battlefleet Gothic: Armada 2 Guides:
Introduction
Thank you for taking the time to look at this guide. It is my hope and intention that from this you will not only learn how to play Battlefleet Gothic Armada 2 to its greatest potential, but also learn and facilitate strategic thought when playing. I’ve loved Warhammer all my life and I played the first Battlefleet Armada a lot. I enjoyed the mechanics and how we finally had a game in which we can take our spaceships and smash them into each other. It is good to see a new launch of the game and continued support not only from the developers, but also from a excellent fanbase.
A little about me before we continue on. In the current beta I’m been placing around the top 10 for Imperial Navy on the leaderboards, hopefully I’ll be moving up even further. I’m still unsure what faction fits my playstyle best because this game is quite different from the last Gothic Armada where I did main the Imperial Navy. I enjoy seeing everything the game has to offer from all factions and love seeing how players play and react to all kinds of unique situations. It is my hope that whatever faction I decide to main, or whichever one I enjoy playing most, I’ll be able to give my own personal insights and tips to all of you.
I simply wish to bring my knowledge and experiences to all of you. This guide will give a brief overview of subfactions, skills and upgrades in the game. Next we will begin to focus on specific factions and I’ll add in strategies that are common from these factions and what you can bring to combat them. Within each of these factions we will also be examining some standout ships that are available. As this is essentially a tabletop game getting the most out of your points is extremely important.
“Sometimes the only victory possible is to keep your opponent from winning.”
– The Emperor of Mankind before the Battle of Terra
Subfactions
Subfactions are a category that can be selected to provide your fleet with a different asthetic. I encourage all of you to simply make your own fleet of your favorite factions and filter through the subfactions category while in the ship-viewer. This will allow close inspection of details and pick out which one fits the theme of your fleet.
Please note: There is no statistical advantage when it comes to choosing a subfaction, so simply choose what you think looks best and what will intimidate your enemies. The four Chaos subfactions dedicated to the worship of the Chaos gods each recieve an additional skill and upgrade to choose from. Each of the Orc subfactions also recieve and additional skill and upgrade. Because this applies to all Orc factions, I will not list them but I will list the specific Chaos ones below.
- The Death Guard, the horrifying followers of the Plague-Father Nurgle
- The Emperor’s Children, the seekers of perfection who answer to Slaanesh
- The Thousand Sons, those who desire knowledge and favored servants of Tzeentch
- The World Eaters, the murderous and bloodthirsty agents of Khorne

“Embrace your hunger, your lust, your desire. The universe is ours for the taking!”
– Sanctifer LeVay, Cult of the Sacred Union
Skills
Skills are unique cooldowns exclusive to the flagship of your fleet. These abilities range drasticly between factions and can support a multitude of playstyles. The overall concept when picking these skills is to choose things that either augment your fleet in some capacity or make up for some inherent weakness. These abilities can be offensive in nature focusing on dealing direct damage to a area-of-effect within the battlezone to depleting the shields of all ships (friend or foe) within a large radius, to pulling micro-warp jumps. There is no skill that is inherently better than any other. All of these skills are subjective and there are far to many variables that go into situations and personal playstyles for me to recommend specfic ones. There are certain skills which may work for some factions better than others, but again players don’t always play to their factions strengths and can bring suprising compositions and strategies.
The best skills are the ones that you find to work best for you, the faction, your playstyle and fleet. If you like doing damage, take an offensive skill. Scared of your flagship being destroyed? Take skills that focus on defense and maneuverability. Need more vision of the battlezone? Look at getting probes or some sort or a secondary scouting skill related to your faction.
Please be aware that skills can only be used by the flagship of your fleet, meaning that in order to capitalize on getting the most of your abilities, you must keep your flagship alive. These skills are not available to you if your flagship is destroyed or incapacitated in any way. Play wisely.
“To gaze into the Warp is to look into the abyss. To understand insanity itself is to become insane. Worst of all is the knowledge that while you are gazing upon it, the Warp is looking back at you and laughing.”
– Kartr Hollis, Nobilite Emissary
Upgrades
Upgrades differ from skills both in their application but also in terms of use. While skills are single use abilities that operate on cooldowns, upgrades are passive abilities that enhance your fleet in unique ways. This is another layer of customization to further add to your fleet and is supposed to replace the upgrade system from the previous Gothic Armada where every ship could be customized from top to bottom with stat boosts, bonuses and passives. There is one last layer of differentiation between skills and upgrades, while one can easily argue that all skills are useful in their own ways, upgrades… not so much. Let me explain.
First we must understand that upgrades focus on different aspects of your fleet. They either apply to just the flagship, the fleet as a whole, or some specific category of ships. When comparing these upgrades to one another we must weigh the different values that come from boosting specific areas or singular ships of the fleet versus things that benefit every ship under our command. For new players I recommend that you look at fleet-wide bonuses as these don’t force you to play in a particular way (generally) and are easier to get effective use out of. When looking at upgrades that focus on the flagship, they had better be GOOD in order to justify boosting one ship up more than an entire fleet, espeically considering the flagship is a prime target for your adversary. Upgrades which focus on boosting specific categories of ships or something similiar usually lead people to building fleets which only consist of that specific category in order to maximize the bonuses that are to be had. This min-maxing strategy is common in gaming but can be jarring for new players who are simply looking to understand game mechanics first, this is not an easy game to learn. Gothic Armada 2 has a steep learning curve and is punishing for new players in the multiplayer environment, look at what is easy first then specialize.
Please experiment for your faction and see what you like and what works best for you, you are the master of your own strategy and the person whose enjoyment matters most.
“One cannot consider the fate of a single man, nor ten, nor a hundred, nor a thousand. Billions will live and die by our actions here, and we have not the luxury to count the cost.”
– Inquisitor Kryptman
Imperial Navy Summary

“If the Adeptus Astartes are the Emperor’s wrath, and the Imperial Guard His hammer, then His Holy Navy is His mighty shield.”
– Cardinal Kregory Hestor
The Imperial Navy is arguably the most iconic and most powerful navy in Warhammer 40k lore. It is the shield that defends Imperial worlds from alien and heretical incursion while also being the sword that strikes at the enemies of mankind. In game, the Imperial Navy functions as the games “balanced” faction, being that it does everything decently and is a good place for beginners to start. The reason for this is that while no strategy may be “optimal” when comparing the Imperial Navy to its counterparts, it also doesn’t fail at anything either. Want torpedos? Done. Want to use carriers? Sure. Wanna get in close to the enemy and blast them to pieces with broadsides? Easy.
Another benefit the Imperial Navy has is a filled out roster of ships to choose from in multiple tonnages. Featuring several ships across the classifications of cruisers (all variants), escorts and heavier vessels a fleet can be designed almost in any way. Weapons available to this faction vary as well as you will see more specialized vessels focusing on macro-batteries, to mixed weapons platforms featuring lances and hangar bays. A simple strategy for new players is to find what aspect of the Imperial Navy they like and what areas of gameplay they enjoy most, then transfer over to a faction that does that particular thing better.
One particular design of the Imperial Navy is that their ships are on the slower side. In order to compensate for this weakness, nearly all vessels are armed with torpedos or in some cases Nova Cannons. These weapons are to be used to encourage an opponent to either engage with you if they are trying to run away, or to disengage with you should you need to keep your distance. Mastering this aspect of Imperial strategy is essential to playing this faction effectively. Without these weapons most opponents will simply charge at you if they wish to close or kite you as you try to catch up to their faster ships. Even if you don’t cause any damage at all with these weapons, they can be used to cut off escape routes or force an opponent to manuever in a way that gives you an advantage. Going further you might even force your enemy to burn an activated ability that they may have wished to save for later, such as a displacement/movement ability or something to counter mass-ordinance volleys.
Imperial Navy Skills
Supercharged Void Shield
- Makes the ship’s shields invulnerable (except to Disruption Bomb) and multiplies shield regeneration by 10 for 10 seconds.
This skill is very useful for keeping your flagship alive and completely negating enemy abilities such as plasma bombs or high damage abilities that don’t bypass the shields. It is powerful in the aspect that if you need to pull your flagship away from the fight or it is the target for focus fire by the enemy fleet, it will buy you time to readjust to the situation at hand. This skill is very new player friendly as it is a simple activation that stops the enemy from doing what they want.
Plasma Bomb
- Teleports a bomb to a maximum distance of 10,000 units. The bomb explodes after 10 seconds and deals 200 to 400 damage, ignoring armur, to all ships within a 1,500 unit radius.
A very simple skill to use, more difficult to master however. This is because of the 10 second delay which allows enemy ships to move out of the blast radius. The bomb is best used on ships that have already used up their movement guages or special movement based abilities (Eldar’s Wraithbone Shift/Vauls Manuever and Necron’s Inertialess Drive as examples) or ships that have had their engines either disabled or destroyed.
While a bomb providing a nice boost in damage output is always a plus for a fight, the most important ability of this bomb isn’t the damage it causes but the fact that it ignores armor. This means that factions such as the Space Marines and the Necrons will be very vulnerable to this ability as they have high armor values which can cancel out a significant amount of damage from non-armor-piercing weapons.
Augur Probe
- Launches a probe to a designateed location. The probe moves in a straight line and detects enemy ships within a 4,500 unit radius. Once it has reached its destination, it is deployed after 10 seconds. The deployed probe detects enemy ships within a 9,000 unit radius. Once activated, it lasts for 120 seconds.
- If it collides with an enemy ship, it sticks to it and automatically deploys itself.
This probe is an essential utility skill used for scouting and detecting enemy vessels. If you are also lucky enough to have it hit an enemy ship (it is very easy to dodge, so don’t expect this) then you have free mobile intelligence of the enemy fleet. This effect may force the opponent to split this ship from the primary fleet in order to not give away its current posistion, use this to your advantage but beware of clever players who may use this as a bait to get you to commit to going after one ship.
Mastering this skill doesn’t take quick reactions, but more calculated thought. It is important to aim the probe in an area where you don’t want your enemy to stay, such as gas clouds or asteroid clusters. By doing this you deny the enemy an ambush posistion and force them into the open. You may also aim this at a capture point so that an opponent has to reveal a ship in order to capture the zone. This is especially useful for countering or at least forcing redeployment of fleets which specialize in ambushes or stealth based warfare, such as the Eldar (all variants) and the Tau.
Disruption Bomb
- Teleports a bomb to a maximum distance of 10,000 units. The bomb explodes after 10 seconds and ulifies all ships shields/holofields/shadowfields within a 4,500 unit radius. Their regeneration as well as the Necron Hull Cauterisation effect are interupted for 20 seconds.
This bomb is excellent at destroying the shields of your opponents ships and negating the racial bonuses that the Eldar and Necrons receive. This skill while still effective vs Necrons as it does cancel out their innate “regeneration ability” doesn’t have as satisfying of an effect versus them as they don’t have shields of any kind.
It should be noted that this bomb does have the largest radius of effect compared to any other bomb, meaning that its viability is generally limited to pre/post engagement of fights. You don’t want to use this in the center of a fight between your vessels and your opponents because the bomb will disrupt your shields as well. Considering that Imperial ships are slower overall compared to most factions, this can end up hurting you more than them if you are unable to escape the blast radius. Also, due to the size of the radius this bomb is more effective against battleships that are in the fight considering the have the slowest speed of all ship classes and don’t have access to many manuevers that smaller ships have (this does not apply to Eldar or Necrons).
Stasis Bomb
- Teleports a bomb to a maximum distance of 13,500 units. The bomb explodes after 15 seconds. The speed of all ships, squadrons and projectiles within a 2,500 unit radius is reduced by 90% for 20 seconds.
The most utility based of all bombs on this list, this is simply a “nope” bubble which you can deploy on the battlefield. This sphere changes the battlefield more than any other bomb because of the duration of the effect, once ordinance/squadrons/ships are trapped in it, they are going to be staying there for a significant duration unless they are on the outer periphery of the zone where they might escape sooner.
This skill has an odd synergy with the Imperial Navy, it doesn’t work well with most of our weapon systems because they are projectile based and what lance ships we have don’t usually work in large numbers. This means the only real use for this skill is to be used in conjuction with Nova Cannons or simply as an area denial ability to shape the combat zone.
Augur Disruption Bomb
- The flagship launches an augur disruption which affects all enemy ships on the battlefield. Every affected ship’s detection range is removed for 45 seconds.
A very situation skill which compliments stealth-based or lance-focused fleets nicely, however unless you are runing either of these, I wouldn’t bother with using this skill. Imperial ships are slow and easy to detect regardless.
Emperor’s Tarot
- Reveals and marks the targeted detected enemy ship for 90 seconds.
This is a secondary scouting skill similar to the Augur Probe. It works and does reveal ships nicely, however new players may not be able to spot what ships they should reveal. When you click on an enemy “blip” if the targeting priority for sub-systems comes up in the lower left of the screen, you have selected a line ship. Don’t do this on ships that don’t have this option as this means it is an escort.
As a side note, this skill is useless versus Tyranids becaues they start the game stealthed meaning that you can’t select enemy radar “blips”.
Micro Warp Jump
- Allows the ship to teleport itself within any ally ship’s scanning range at a minimum distance of any other ship. The processs requires a 2.5 second delay during which the ship can neither move nor use skills nor perform any manuevers.
Want to have your flagship teleport around the conflict zone? Perfect. The offensive and defensive utility this ability offers is quite high and is very valuable for suprising opponents and setting up to ram an enemy ship. If you are going to be taking a battleship, please take this skill. Battleships are very slow and easily picked off when isolated making this skill essential. For any other category of ship, this is optional.
Imperial Navy Upgrades: Part #1
Navigational Shields
- Damage caused by asteroid fields, minefields and spore fields is nullified.
- Applies to all fleet’s ships
This passive ability is a decent upgrade for the fleet that simply removes enviornmental damage. This ability is more useful for kiting/ambushing/harassing types of fleets as these battlegroups tend to hug the outer edges of the map. It also allows players to more easily put their ships into asteroid clusters as being stationary within them allows ships to be stealthed. For the Imperial Navy this skill has little value unless you plan on using any of the strategies previously mentioned. Most Imperial vessels aren’t fast enough to catch enemy ships by suprise, but this may have more merit with a massed Nova Cannon strategy.
Improved Augur Array
- The indentification range of the ship is increased by 4,500 units.
- Applies to fleet’s escort ships and light cruisers
An excellent ability for improving the scouting potential of your fleet, this upgrade gets better with the more ships you have under the escort/light cruiser classification within your fleet. If you are only taking this upgrade to simply improve around 2-3 ships in your fleet, I would pass on it. There are better upgrades available to you. If however you build a fleet consisting of only light cruisers and escorts, this is a must.
Power Ram
- Ramming damage is increased by 50%
- Applies to fleet’s Imperial Navy ships with spurs.
Do you want to smash your ships into your opponents? This is the perfect upgrade for you. Aside from the coolness factor that this ability brings it is at times questionably viable. Here are the reasons why:
- First, if we look at what “spurs” are for the Imperial Navy, they increase ramming damage on ships that have them equipped by 300% to escort class ships and 50% to line ships (everything else that isn’t an escort). This ability would stack with these passives to bring it to 350% damage versus escorts and 100% damage bonus versus line ships. You have to ask yourself if this minor damage boost is honestly worth considering, if it was higher say 100% then it might make it more promising.
- You have to remember that Imperial ships are slower than most other factions, so if you take this against Eldar and go against a good Eldar player who doesn’t let you get close to their ships, this upgrade is wasted.
- There are some factions that the Imperial Navy doesn’t want to get into close combat with. The Tyranids and Space Marines are prime examples of this. Both of these factions want to get close so that they can board you with their superior troop efficiency. Why would you allow what these factions want to do and play into their hands?
Auxiliary Shield Capacitors
- Increases shield regeneration speed by 25%
- Applies to all ships
This upgrade is the first amazing one of the list. In no way is this upgrade ever wasted or useless unless someone destroys the generator system on your ships. The fact that you have your shields recharging faster means that they are up more and absorbing more damage. Over the course of an engagement this can mean that your shields were up 1 to several more times than they would have been without this upgrade. Understand that the amount of damage mitigation in the long term of a fight can counter an opponent quite well and can mean the difference between you outlasting your opponent and just falling short of victory. Even if your ships are hit by something like a disruption bomb, the fact that your shields will be up sooner means that you recover faster and are better able to disrupt future attacks.
Aurent-Pattern Weaponries
- The range of macro-weapons is increased by 4,500 units, and by 4,500 units for lances.
- Applies to the Flagship
This upgrade is questionable at best. That doesn’t mean I discourage players attempting to make it work or by trying new strategies, but considering that this upgrade applies to only one ship and simply increases range, it falls quite short. If it improved accuracy or had other sort of effect, it might make this good, but consider the following:
- The fact that it improves the range of macro weapons isn’t really a buff. Considering the accuracy drop off for macro-based weapons is 20% per 4,500 units of increased range, this means that your weapons will become less efficient.
- It works well with a ship whose primary armarment is lances, as lances do not suffer an accuracy penalty. However, there are only two lance-focused ships in the Imperial Navy, the Gothic Cruiser and the Apocalypse Battleship. Unless you plan on runing either of these ships as your flagship what is the point?
- One of the ship stances you can select in game is called “Lock On” which increases the effective range of that ships weapons by 4,500 units AND increases accuracy by 20%. There is a stance on your ships that is better than this upgrade…
Imperial Navy Upgrades: Part #2
Short-Burn Torpedoes
- The speed of torpedoes is increased by 50%
What a simple and beautiful upgrade all in one. This one shouldn’t be that hard to understand and see the value of. Considering nearly every ship that doesn’t have a Nova Cannon has access to torpedoes makes this upgrade very tempting. The fact that these weapons fly faster demands that your opponent be cautious and very reactive to mass volleys.
Emission Dissipater
- The ship can use maneuvers while in the “Running Silent” stance without being revealed
- Applies to fleet’s escort ships and light cruisers.
This ability allows you to basicly move across the battle zone undetected while going at max speed. Obviously, this upgrade gets better with the more ships you have under the escort/light cruiser classification within your fleet. If you are only taking this upgrade to simply improve around 2-3 ships in your fleet, please pass on it. There are better upgrades available to you. If however you build a fleet consisting of only light cruisers and escorts, this is a must.
Culexus Assassin
- Lightning Strikes inflict a 500 morale loss in addition to other effects
- Applies to the flagship
An upgrade that makes your flagship’s lightning strikes incredible effective at breaking enemy ships morale and maybe even causing a mutiny. This upgrade is a lot of fun as it simply allows you to click on an enemy warship that is somewhere around 50% morale and instanly make it abandon the battle. It is interesting and sits on a pendulum when it comes to effectiveness:
- Completely useless versus Space Marines as they don’t suffer from morale based effects.
- Highly effective versus the Orks as the primary way to beat them has never been by destroying them but by making them flee the field.
- Will force a “Rally” ability from the opponents flagship which will make ships with the “mutiny” effect rejoin the battle.
- If used on the opponents flagship however, they will lose it unless there is another way that a faction can get it back (of which I’m aware of none). Very useful for removing flagships from fights if you are able to get their morale down.
- Some factions have inherently high morale values, such as the Necrons, because they field fewer ships. This ability loses potential against factions like this.
Armor Piercing Ammunition
- At short range (4,500 units), the armor of the target is reduced by 50 against macro-weapons.
- Applies to ships with macro-weapons
This upgrade is very strong as it is a very potent buff for the Imperial Navy’s most used weapon, the macro battery. This gives the Imperial Navy an effective way of dealing with heavily armored factions since access to lances is limited. However, this ability does suffer from the same negative effect as the ram does, in that there are some factions the Imperial Navy simply will not do well against up close. Again this upgrade doesn’t do anything outside of short range so against enemies that will kite or harass you from afar (Chaos/Eldar) this does nothing. This upgrade however is incredibly powerful and will devestate your opponents in close range broadside-based combat. The choice is yours.
Agripinaa-Pattern Void Shield
- Gives a 25 armor value to shields
- Applies to all ships
Another shield based upgrade and no suprise its good. This upgrade essentially makes your shields more durable and resist more oncoming fire before they deplete. While this upgrade is not as effective as regeneration, it does make the shields of your ships stronger and more of a headache for your opponent. The reason why it is not as good as regeneration comes down to the fact that this has no effect on things which bypass shields or simply nulify them, whereas regeneration will make sure they come back online faster from said abilities.
Imperial Navy Ships
In this section I will outline all ships of the Imperial Navy at the disposal to the players. I will not be including pictures of these vessels as that would be far to time consuming and I will only be giving very brief descriptions of them, not a list of every stat they have. As players you can look more into these stats by creating your own fleet and looking at the information provided for every ship.
I will not be organizing ships I list here by their classification or class. While this is an efficient way to list them for a game, I think a better way to visualize these will be to categorize them by their weapons arrangements and their perspective roles within your fleet. Ships will be listed from this category further from top to bottom by point values.
“The Imperium! How mighty its aspect! How far-reaching its boundaries! As one world dies ten more are brought into the fold. Fear us, for we count the lives of planets, not men!”
– Apocalypse Expansion Book for Warhammer 40k (pg 21)
Carriers
Dedicated Carriers are ships that primarily carry squadrons of fighters/bombers/troop transports into battle for offensive and defensive purposes. Please be aware that these are not the only ships which carry these craft, simply that these are actual dedicated carriers. Ships that do have launch bays as augments to their weapon arrays will be listed in the “Multi-Purpose” section.
Defiant
- Class: Light Cruiser
- Cost: 153 points
- Role: Long-Range Carrier
- Launch Bays: 2
This is the smallest and cheapest carrier available to the faction. It should be be kept away from the primary engagement zone as being a Light Cruiser means the ship is fragile. It also comes armed with 2 lance turrets but these are almost negligible. You use this ship if you want a small carrier to stay on the outskirts of the fighting.
Exorcist
- Class: Grand Cruiser
- Cost: 308 points
- Role: Long-Range Carrier and or Mid Range Support Ship
- Launch Bays: 4
This Grand Cruiser is a formidible opponent and has the ability to pack a decent punch while being armed with macro-batteries. Because of the increased durability that comes from being in a higher class, you can use this ship more offensively than the Defiant and use it support your engagements.
It should also be considered that 2 Defiants bring the same number of squadrons as an Exoricist for 2 points cheaper. So while you do gain a more durable package, you lose the flexibility of having squadrons deployed to other areas of the map and if you lose this ship you lose your squadron capabilities.
Emperor
- Class: Battleship
- Cost: 367 points
- Role: Long-Range Carrier and Heavy Support Ship
- Launch Bays: 4
- Special: Advanced Detection Radius
The Emperor Battleship is an incredible ship worthy of its title in the lore, it provides several squadrons while being very durable. This is also one of three ships in the Imperial Navy which has an advanced detection radius, meaning you will see enemy radar blips from farther out. This is very useful for a carrier-oriented ship as it can send fighters out for scouting and harrasment duty.
This ship is good but not optimal, the reason being its point value. You can get an Exorcist for 59 points cheeper and still get the same number of squadrons out onto the field. The only real trade off is durability. Considering that battleships that don’t have mobility based skills are easy prey for opponents I wouldn’t recommend this vessel. The advanced detection range can also be accounted for by using scout ships or scout orriented skills/upgrades.
Escorts
Escorts serve the purpose of being viable scouts and ships to capture zones with. They also serve as “filler” points within a fleet in the case that points are leftover but there are not enough to purchase another line ship. These vessels simply augment the fleet by providing additional firepower, high speed, and scouting potential.
Cobra
- Class: Destroyer
- Cost: 34 points
- Role: Torpedo Patrol Craft
An easy ship to understand, the cobra is akin to a small patrol boat. It has a macro-turret and can launch torpedoes. Outside of this, the destroyer is extremely fast and mobile.
Widowmaker
- Class: Destroyer
- Cost: 37 points
- Role: Torpedo Scout Craft
- Special: Advanced Detection Radius
This ship is the most advanced scout available to the faction. The increased detection range makes this an excellent ship for surveying enemy posistions and marking enemy ships. If you are having problems versus stealthed or kiting strategies, bring one of these and you will know where the enemy is.
Firestorm
- Class: Frigate
- Cost: 41 points
- Role: Lance Patrol Craft
This escort ship features a forward fixed lance weapon and a macro-turret. This is a good option to take over the cobra if your fleet doesn’t focus on torpedoes. The lance weapon makes it useful if you lack armor-piercing weapons in your fleet.
Sword
- Class: Frigate
- Cost: 41 points
- Role: Macro Patrol Craft
The Sword escort focuses on doubling up its firepower with an additional macro-turret instead of introducing a new weapon system like the previous two. If you just want more firepower, take this.
Falchion
- Class: Frigate
- Cost: 41 points
- Role: Heavy Torpedo Patrol Craft
This ship is the heavier version of the Cobra Destroyer, featuring an additional 2 macro-turrets and increased survivability. If you want to take an escort that brings torpedoes but don’t care about the scouting function of the ship, pay the extra points and get this one over the Cobra.
“Between the stars the ancient unseen enemies of mankind wait and hunger. Every voyage into the nothing is a confrontation with horror, with the implacable things of the warp, and with man’s own innermost fear.”
– Unknown
Lances
Ships which focus on using lances as their primary way of dealing damage are excellent at getting through the tough armor of some factions and being able to sit at any range and be effective. The Imperial Navy has access to many lance based weapons but it mainly uses them to augment their current weapons.
Endurance
- Class: Light Cruiser
- Cost: 105 points
- Role: Mid-Range Lance Cruiser
This ship is BAD… Not because lances are not useful or that the dps is unacceptable, its because of the range. Lances are good weapons, the fact that they don’t miss and generally have lower dps output means that you want them to be as far away as possible. The fact that this ships lances are only useable at 9,000 units or less (13,500 units or less if using “Lock On” stance) means that this ship is easy for your enemy to engage. Also the fact that you have to use a stance to make a ship viable is not good. I would skip this ship when building your fleets.
Gothic
- Class: Cruiser
- Cost: 162 points
- Role: Mid-Range Lance Cruiser
This ship has all the same characteristics as the Endurance, except that the Gothic comes in a more sturdy package as a result from being in a higher class. Is the Gothic better in the sense that when enemies engage it, it will take more time to kill? Yes. Is it still a waste of points? More than likely.
Apocalypse
- Class: Battleship
- Cost: 284 points
- Role: Heavy Lance Support Ship
- Special: Nova Cannon, Overload Lances
So first let me explain why this ship is catagorized in “Lances” and not in “Nova Cannons”, this comes down to cost. If you want to spam Nova Cannons or simply use them, there are far cheaper options available to you as a player. You take this ship to have lances in your fleet, the Nova Cannon is just a bonus.
The second bonus to this ship is that while it suffers the same problem as the Gothic Cruiser and Endurance Light Cruiser in that its lance weapons can only be used at 9,000 units or less, the “Lock On” stance boosts that to 18,000 units. This is more viable than the Gothic and Endurance as a result. Is it good? It certainly is better than the other two by far.
Nova Cannons
The space nukes of Gothic Armada, these weapons are devestating to enemies caught in the blast radius. The weapons do take time to charge and will give your opponents time to flee from the area-of-effect, but if you can predict movement or simply target enemies whose movement has been impaired, the damage will be immense. As a bonus to the large amounts of burst damage Nova Cannons cause, they also deal morale damage to enemy crews.
Dominator
- Class: Cruiser
- Cost: 188 points
- Role: Mid-Range Attack Cruiser
The Dominator has a very appropriate name, if you manage to land Nova Cannon shots you will be dominating your opponent. This ship is also good at being a standard ship-of-the-line and engaging with other vessels due to its macro-battery armament. If engaging at medium range, it can also use its Nova Cannon mid fight if oriented in the direction you want to use it.
Mars
- Class: Battle Cruiser
- Cost: 260 points
- Role: Multi-Purpose Attack Cruiser
The Mars is in many ways a direct improvement to the Dominator. By paying an extra 72 points you get an increased range out of you macro-batteries, 2 lance turrets, and switch a pair of macro-batteries for launch bays. The only downside many people will see with this vessel is that instead of having such a heavy armament of macro-batteries it does integrate fighters and bombers. You as a player will have to decide if paying these extra 72 points is worth it for your specific fleet.

“What fear of death have we who know there is immortality in the great and noble deeds of men?”
– Warhammer 40,000 5th Edition Rule Book (pg 110)
Macro-Batteries
The absolute and final word dispensed by the vessels of the Imperial Navy via the broadsides and turrets of its many ships. These projectile weapons are the primary weapon that this faction uses and they come in many varieties across their ships. The following are ships that use these weapons to brawl with the enemy at short to medium ranges, making them excellent ships-of-the-line.
Endeavour
- Class: Light Cruiser
- Cost: 107 points
- Role: Light Attack Cruiser
The cheapest ship amongst the vessels meant for “brawling” with the enemy fleet. This ship comes loaded with macro-batteries and macro-turrets. It also has access to torpedoes. An effective and cheap ship.
Dauntless MK2
- Class: Light Cruiser
- Cost: 116 points
- Role: Light Attack Cruiser
This light cruiser is simply an improved Endeavour. It features higher frontal armor along with a similar armament which has a slightly higher dps output. Also has the access to torpedoes.
Dauntless
- Class: Light Cruiser
- Cost: 128 points
- Role: Light Attack Cruiser
This ship takes that Dauntless MK2 design and simply replaces the torpedo tubes with a forward fixed lance weapon. If you want to utilize torpedoes, go for the MK2, otherwise this is arguably an upgrade. The reason for this is that the lance provides a more consistant source of damage. It is also useful when pursuing fleeing craft as it can forward fire. For best results with the lance, the ship should be enganging the enemy at short range so it will rotate more and fire on as many targets as possible.
Tyrant
- Class: Cruiser
- Cost: 178 points
- Role: Mid-Range Attack Cruiser
This is a mid-tier ship that has access to two different versions of macro-batteries: plasma, and regular. The plasma variation simply has a longer range than the standard. This means the ship is still effective if it is forced to disengage or if “brawling” with the opponent is not the correct course of action. This vessel also has access to torpedoes.
Avenger
- Class: Battle Cruiser
- Cost: 199 points
- Role: Short-Range Heavy Attack Cruiser
This is the easiest ship to understand and use for the Imperial Navy. It is a wrecking ball that pounds the enemy with relentless macro-battery fire. Because of its higher ship class, it is very durable with a high hull value and shield rating. Beyond that this ship has no other funtion, drive it at the enemy and watch it work. Due to this ships lack of flexibility however, it will usually end up being “amazing” or “useless”. Since it doesn’t have any forward facing weaponry, it is not good for pursuing fleeing enemies.
Overlord
- Class: Battle Cruiser
- Cost: 216 points
- Role: Heavy Attack Cruiser
This ship is a beast in combat. Featuring two plasma macro-batteries on either side of the ship along with a compiment of two lance turrets, we finallly have a ship that can do well in close, medium and even long range. The fact that the ship also has lance based weaponry is a nice bonus because it means the ship can effectively do damage at very long range and deal with high armor values. To top it all off, this ship has access to torpedoes.
Retribution
- Class: Battleship
- Cost: 306 points
- Role: Heavy Attack Vessel
The might and fury of the Imperial Navy incarnate. This ship has three plasma macro-batteries on either side of it, a compliment of 3 lance turrets, and a heavy torpedo launcher. This ship is a nightmare for opponents to deal with at close range or to attempt to take a strategic point from. This vessel is very vulnerable to long range attacks however as it can’t return fire effectively and doesn’t have the speed to close the gap. You take this as the anchor of your fleet or not at all.
This ship has varying degrees of effectiveness as mentioned above. Its lack of mobility and sheer inability to react to the field around it make it a cumbersome choice. Unless you are taking a movement based skill/upgrade I would suggest you save points and pick something like an Overlord to fill this role instead. It is faster, has a higher turn speed and has around two-thirds the weapons at a 90 point discount.
“The Emperor is master of the galaxy, but the captain is master of his ship.”
– Battlefleet Gothic Rulebook (pg 10)
Multi-Purpose
This last selection of ships fill multiple roles or have several different weapon systems to fill gaps within your fleet. They take the roll of being “in the middle” compared to the earlier mentioned specialized ships.
Lunar
- Class: Cruiser
- Cost: 165 points
- Role: Lance/Attack Cruiser
The Lunar, like the Dictator, trades a set of macro-batteries for a set of lance batteries. Ok if you are desperate for more armor-piercing weapons but lances at short range do not compare to micro-weapons in terms of dps. Comparable to the Tyrant Cruiser at a decreased cost of 13 points.
Dictator
- Class: Cruiser
- Cost: 206 points
- Role: Carrier/Attack Cruiser
This ship trades offensive firepower for the ability to use have access to launch bays and the squadrons that come with them. Comparable to the Tyrant Cruiser at an increased cost of 28 points.
Armageddon
- Class: Battle Cruiser
- Cost: 210 points
- Role: Heavy Lance/Heavy Attack Cruiser
This battle cruiser trades micro-batteries in exchange for lance weapons. This one is a more resonable trade compared to the Lunar Cruiser above as it also has two lance turrets to augment a more long range playstyle. This ship is comparable to the Overlord Battle cruiser at a decreased cost of 6 points.
Vengeance
- Class: Grand Cruiser
- Cost: 260 points
- Role: Heavy Lance/Heavy Attack Cruiser
Again this ship trades micro-batteries for lance based weapons. The macro-batteries on this ship also get upgraded to plasma macros which increase their range. This is not a ship I would suggest trading up to from the Avenger considering the massive point increase. This ship is comparable to the Avenger Grand Cruiser at a increased cost of 61 points.
Oberon
- Class: Battleship
- Cost: 334 points
- Role: Heavy Mixed Weapons Platform
- Special: Advanced Detection Radius
Imagine a ship that uses all weapon systems available to the Imperial Navy, that is the Oberon Battleship. It has access to launch bays, macro cannons, lance weapons, and turrets. Overall I don’t think this ship is a reasonable choice to make your fleet more “balanced”. Because of its lack of a dedication to any particular weapon system, it makes it ineffective and hard to see the promise of. This heavy vessel is similar to the Emperor Battleship in that it loses a pair of launch bays to pick up a pair of heavy lance-batteries. This ship is comparable to the Emperor Battleship at a decreased cost of 23 points.
Imperial Navy Strategies
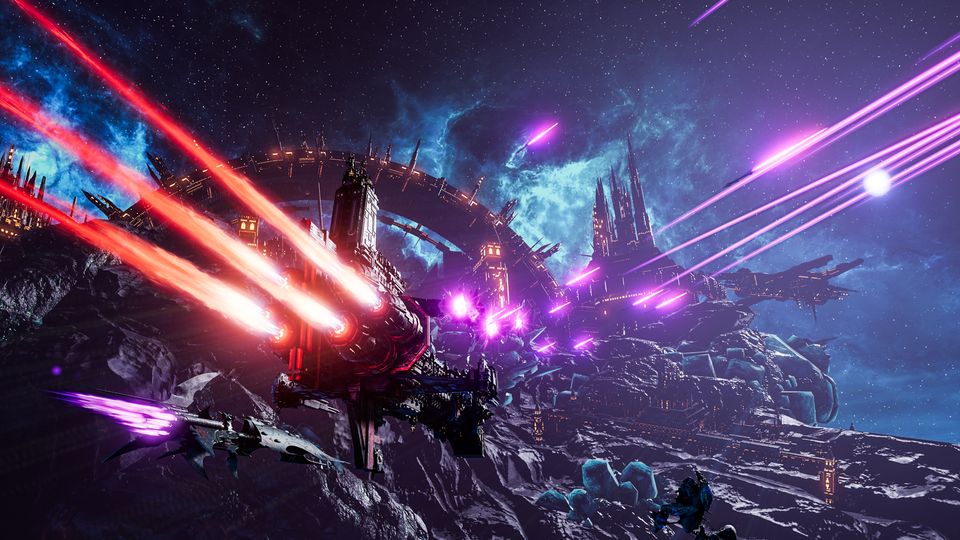
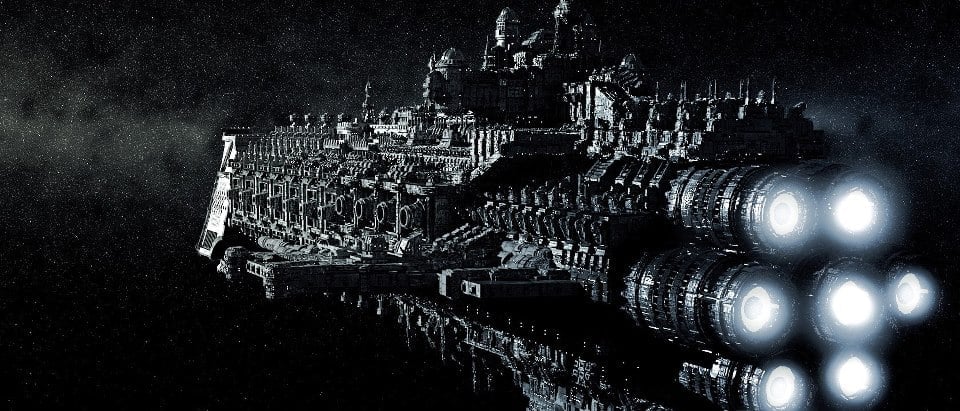
An Imperial fleet gathers on the periphery on an Imperial Space Station, awaiting deployment.
“You are expected at all times and in all situations to conduct yourself in a manner appropriate to, and mindful of, the great duties and traditions of the Emperor’s Most Glorious and Honourable Navy.”
– Battlefleet Gothic Rulebook (pg 5)
After a lengthy look at this faction as a whole we come down to basic strategies and tips available to players who wish to bring the Emperor’s wrath upon the enemies of mankind.
Synergistic Skills/Upgrades
- Supercharged Void Shield (skill)
+
Auxilary Shield Capacitors (upgrade)
+
Agripinaa-Pattern Void Shield (upgrade)
=
This allows your entire fleet to have a 25% faster recharge on shields, stronger shields due to them no having an armor value and your flagship being able to become semi-invulnerable and recharging its shields very quickly when using its Void Shield skill. - Stasis Bomb (skill)
+
Plasma Bomb/Disruption Bomb (skills)
+
Any ship with a Nova Cannon
=
If an opponent’s ships get caught in this, they will feel the hurt. A Stasis bomb followed by the detonation of the Plasma Bomb will do more damage while a Disruption Bomb will eliminate shields and hurt Eldar and Necrons in its own ways. Couple this with Novas and you have yourself one satisfying explosion. - Augur Disruption Bomb (skill)
+
Improved Augur Array (upgrade)
+
Emission Dissipater (upgrade)
+
A fleet consisting only of Light Cruisers or Escorts
=
You now have a fleet which can be all stealthed, have advanced detection ranges, use manuevers without revealing itself, and reduce the enemies detection range to zero. Very effective for ambushing your opponent and catching them off guard as this is not what the Imperial Navy is known for doing. - Power Ram (upgrade)
+
Short-Burn Torpedoes (upgrade)
=
Every ship in the Imerial Navy above the class of Light Cruiser that carries torpedoes also has a “spur” equipped onto the ship which increases ramming damage. This combination simply applies buffs to both. - Micro-Warp Jump (skill)
+
Any Battleship
=
A playable battleship. This class of ships is way to immobile to not have this skill equipped.
Helpful tips for Constructing your Fleet
- Include some form of launch bays into your fleet, not having any screening fighters of any kind will hurt you when going against any player that spams carriers or mass ordinance. The “Brace for Impact” stance on your ships is not enough to counter this. Players who are interested in this faction far to eagerly take a fleet without squadrons and lose.
- Take escorts with you, they are essential in capturing zones and scouting for the enemy. Running a massed battlegroup is fun, but leaves you vulnerable to several strategies.
- Try to get around 4-6 line ships in your fleet, this provides enough mass that your fleet will be powerful. Any more than this and you really can’t take enough escorts, any less and you may not have the staying power you need for longer fights.
- The Imperial Navy has a deep enough roster of ships to make almost any strategy playable or viable. Experiment and see what works best for you, there is no “right” way to play this faction unlike some of the others in the game who rely on gimmicks or singular ways to win.
In Battle Tips
- Target the engines of factions that you don’t want to get close to (Orks, Space Marines) and of factions that want to get away from you (All Eldar variants, Chaos).
- Target the generators of factions with strong shields (Imperial Navy, Tau).
- Against carrier spam or specific carrier ships, target their decks. Also use the “Brace for Impact” stance to decrease hull damage and increase defense turret efficieny.
- Against factions or ships which only have brought heavy weaponry (Mechanicus, Necrons) target their weapons.
- The “Brace for Impact” stance is generally the correct stance to use across your entire fleet. Only when you need to snipe particular systems on enemy ships (an Eldar ships engines), should you rotate to “Lock On”.
- Use the “Lock On” stance against factions you need distance against (Space Marines) and can’t risk getting close to so your macro weapons are still effective.
- The “Reload” stance is really only useful on carriers and ships equipped with Nova Cannons before the primary engagement.
Personal Tips
- If you are getting beaten by a specific strategy and getting frustrated, try to relax and think calmly. A good admiral will never allow emotions to toy with tactical decisions. More than likely you are getting beaten by a specific thing because you aren’t countering it effectively or aren’t prepared to fight it. Either look at this guide for more information or go to the community for help. The Warhammer community is generally friendly and willing to help out its own.
- In the off chance that something is broken, report it with what you have seen and evidence of it to the developers. There is a fine line however between “broken” and “I don’t like that” or “that seems unfair”.
Videos
The following are videos available on Youtube that I think are good representations of the Imperial Navy and strategies found by other members of the community. All credit to the content creaters of said videos.
More videos will be added as content is made on the game after official launch.
Imperial Navy Counters
“He who seizes the moment, he is the right man.”
– Battlefleet Gothic Rulebook (pg 11)
Considering the wide array of ships the Imperial Navy has access to and the fact that it is defined as being a balanced faction means that finding hard counters is relatively difficult. This more will depend on what faction you are playing, how your opponent is playing the Imperial Navy and what the current situation is on the battlefield. General tips to follow are:
- If you are a faction which has faster ships then target the engines of Imperial ships. This will prevent them from giving chase.
- If you are playing a faction which has higher-than-average troop efficiency, try to board Imperial ships and see if you can get some critical hits off.
- Dogdging Nova Cannon shots and Torpedo volleys will greatly limit the Imperial ships effectiveness at longer ranges.
- If you are not worried about out-running Imperial ships, target their generators. The Imperial Navy has access to excellent shield boosting upgrades that will make them incredibly durable and take a lot more punishment than they should be able to.
- Try not to let Imperial ships ram you, this is something they excel at in closer ranges because many of their ships are equipped with “spurs” which makes them very potent.
Thank you so much for this article.
It helps to get more comfortable with the game.
Great read, a lot of work and thought went into it. Thanks!
Thanks, just bought the game and since I’m new with it, this was an excellent article for building up a baseline understanding of what should I look at when building fleets.
A fantastic and helpful read for those that love the BFGA 2 game. Many thanks.
Your welcome! Thanks for comment.