Table of Contents Show
Starting Guide (Tips & Tricks)
A guide that goes over basic gameplay, basics, etc. with a couple strats for the game.
The Hub
Starting in the Hub.
You’ll notice a few things.
- The Scrap Wall
- The Music Player
- The Supplies Box
- The Elevator
- Mystery Box
The Scrap Wall
As you go on with the game you’ll find lockers.
Scraps have a small chance of appearing in them, there’s 7 scraps to collect and once you collect them they’ll appear on The Scrap Wall in the hub. You’ll need to find all scraps to get the ending
The Music Player
Similar to scraps, music tracks can also be found in lockers. These can be played on The Music Player in the hub.
The Supplies Box
Bottom right of the hub, near the elevator, you’ll notice a box that has supplies written on it.
Once you hop into the elevator and finish a level you’ll interact with this box to secure items you’ve found.
The Elevator
To the bottom left of the hub, you’ll find The Elevator. Once you enter this you will load into a randomly generated level.
Mystery Box
Interacting with the mystery box will shake it, it’s not currently known what this box does.
The Gameplay
- Randomly Generated Levels
- Items
- Stamina
- Stamina Stations
- Hiding Stations
- Lockers
- Ink Bendy
- The Elevator
- Tape Logs
Randomly Generated Levels
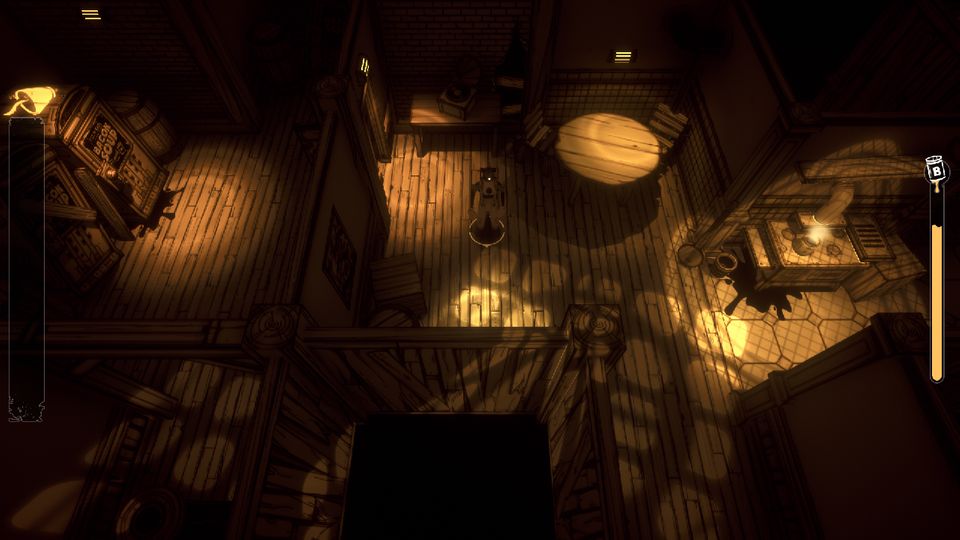
Every time you hop into the elevator from the hub you’ll be placed down into a randomly generated level. You’ll notice at the beginning it’ll flash up the current day. These are endless, there’s no day the game stops at.
You’ll start in a 4-way intersection with the elevator in the middle. You can choose which way to go in any order, though some paths might be blocked off.
You’re likely to find yourself either in a hallway, another 4-way, or a room, the generation can get very confusing if you don’t keep track of where you’re going.
Items
They will be placed around the randomly generated level. There’s 6 items each level. You’ll usually find the first one in the starting room with the elevator.
The items you can get consist of
- A Book
- A Bone
- A Plunger
- A Wrench
- A Spoon
- A Radio
Though, the items are randomly chosen, so you could end up having to find more than one of the same item.
Once you’ve collected all items, Ink Bendy (See Ink Bendy) will start chasing you no matter what, you can still hide in a hiding station (See Hiding Station) to get him of your tail temporarily. Once you hop out, he’ll start chasing again.
Items can also be found in lockers (See Lockers) rarely.
Stamina
The bar on the right shows how much stamina you have. This only goes down if you’re sprinting. Once the bar is empty, you can’t sprint. The only way to refill stamina is interacting with a stamina station (See Stamina Stations).
Stamina Stations
You’ll find these spread out around the level. Interacting with these will refill stamina. They have a glowing coffee symbol on the top of the booth.
Hiding Stations
Like stamina stations, they will be found spread out across the map, there will also always be on in the starting room. you’ll use these to hide when Ink Bendy (See Ink Bendy) is near. They’ll blur your vision while inside. You can hide in these as long as you want. Hiding stations have a glowing halo symbol on the top of the booth.
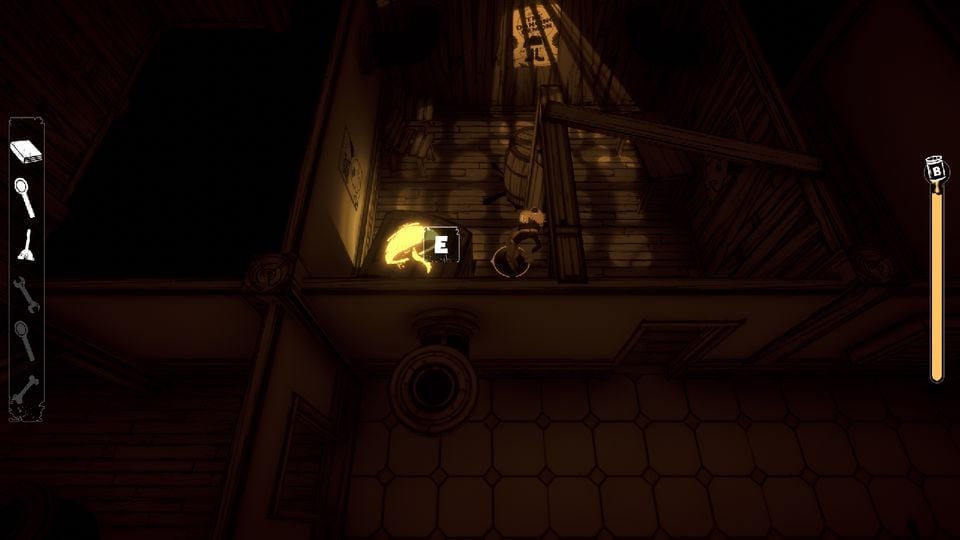
Lockers
Lockers will also be randomly found across the level. Interacting with these will provide you with a spinning quick time event where you have to press the button as soon as the arrow is pointing to the correct spot on the wheel. Once you succeed the locker will open up, having a small chance of giving you scraps or a music track.
Don’t worry if you fail at the quick time event, you get more chances.
Ink Bendy
a few seconds after you get off the elevator, Ink Bendy will spawn in around a random place in the map.
Ink Bendy patrols around the place constantly, you’ll be able to know when he’s coming by the moving ink near him and a heartbeat sound. Once he sees you chase music will play and he’ll limp towards you quickly. This is when you will want to hide in a hiding station.
Ink Bendy is very forgiving once you hide in one, so if you’re able to reach it you should be fine, he’ll usually stop in front of it, look around for a second, then move on. Wait until he’s off-screen to hop out.
Ink Bendy doesn’t teleport, so be aware of that. He’ll continue to walk at his pace.
The Elevator
Once all items have been collected, you’ll want to book it towards the elevator before Ink Bendy catches you. Once you reach the elevator you’ll succeed and end the level, taking you back to the hub.
Tape Logs
Rarely in a level you will find Tape Logs. Interacting with them will play the tape.
Strats
Small Strats
- Leave an item near the elevator so once you collect the final item, you’ll be able to get out easily.
- Take notes of where the hiding and stamina stations[‘i] are around you. It’ll be very helpful.
- if your stamina bar isn’t full and you have a chance, use a station. Even if you feel you don’t quite need it yet, it’s always very nice to have your bar full.
- Don’t be afraid to sprint. There’s plenty of stamina stations around. If you’re in a long hallway with no hiding station and you’re not sure where Ink Bendy is, dash back to safety.
Strats for escaping Bendy
Sometimes, you can get yourself into sticky situations, here’s tips on how to get out of them.
- When Bendy’s cornered you and you’re in a room with an obstacle in the middle, try to juke/trick him. Make him walk one way around the obstacle, then once he walks to the side of it, dash to the other side and keep running until you find a hiding station.
- Don’t take risks, take your time, if you think Ink Bendy is near, either hide in a station or dash out back into a 4-way room.
- The stickiest of all situations, being trapped in a hallway with no rooms and Ink Bendy is blocking you.
- What you’re gonna want to do is, if you can, run back to a room and try to juke him there, if there’s an obstacle use the earlier first escaping Bendy strat.
- If there’s no rooms around, run to once side of the hallway and back up enough for Ink Bendy to run against the wall, once he’s near/against the wall, dash towards him then to the other side of the hallway quickly. If you’re lucky he won’t be able to grab you and you can run off and escape.
Extras
- Peeking Holes, hidden messages can appear.
- Meatley can appear as an easter egg in a peeking hole.
- Sometimes you’ll find a mechanical heart, picking it up, the Projectionist’s scream will play.
It’s end. I hope “Boris and the Dark Survival Starting Guide (Tips & Tricks)” helps you. Feel free to contribute the topic. If you have also comments or suggestions, comment us.
Can you please make a guide of the Wolf Trials DLC & The Unleashed DLC? I need help beating the Alice Angel and Butcher Gang stage, and I would like you to cover all of the secrets, if you could do that please?