Table of Contents Show
A quick guide on how to simplify the game’s most challenging achievement as much as possible.
Glutton for Punishment Achievement Guide
When attempting Glutton for Punishment you’ll quickly start to notice how much RNG plays into your runs. Fortunately, there are some steps we can take to tilt the odds in our favour by choosing the right character, preparing for the run by banking/insuring or ranking up from a previous run, and by making smart decisions during the run itself.
1. Character Selection
Some characters are much better suited for Glutton for Punishment than others. While it can be completed with any character, it’s much easier with characters who either have more health or can gain the capacity to effectively regenerate during the run. Movement capability also goes a long way, as does, to a much more limited extent, potential weapons. I recommend using either The Soldier, The Brigand, or The Hellion. I strongly discourage using The Revenant but The Fool/Traveler is a decent middle-of-the-road pick. Personally, I used The Soldier my first time through the achievement.
The Soldier
Average base movement speed but excellent and useful combat options for both melee and range. The Soldier starts with four hearts. A good mix of speed, survivability, and damage. All of her weapons are useful, but depending on what you find I suggest prioritizing Trident of Puncturing (best damage) > Rod of Howling (throw gives unbreakable long-duration AoE CC) > Any CC-on-hit spear.
Disadvantage: No class-innate regen weapons
The Brigand
Fastest character in the game with solid ranged weapon options but only starts with three hearts. I initially tried to do the achievement with The Brigand but found he felt too squishy and didn’t hit hard enough when RNG didn’t go in your favour. Still a very good pick but a bit more luck dependent. For weapons, I recommend prioritizing Slicer of the Leach (very fast health regen but very low damage) > Sting of Bewilderment (enemy charm on hit) > Edge of Ricochet.
Disadvantage: Can take very few hits. While regen can help, it also can’t be relied upon too heavily as time spent attacking things is time the enemies behind you can catch up, and since enemies respawn when doing this achievement it’s debatable whether or not it truly compensates for the class’ lower health. Also, if you get unlucky with exploding jugs, expect the 2nd and 4th boss fights to be extremely dangerous and risky.
The Hellion
Extremely slow base speed but very high health. Normally, his base speed would disqualify him but his melee charged attack can launch you across the map if you jump at the right time during it so he’s actually the fastest character in wide open spaces. His charged attack can also punch through enemies that would normally block your path. For weapon, try to find Sheath of Rapidity or Fetters of Refutation.
Disadvantage: Though his slow speed is offset by his charged lunge, it can be a liability… especially if you haven’t disabled traps yet. His charge time combined with the fact you can’t whip while charging means if you let enemies catch up to you, it can be hard to get away in time before taking a hit. Also, The Hellion has a harder time dealing with the 4th boss if you can’t find an explosive jug, having to run up under it and punch its bottom. No innate regenerative capability.
The Fool/Traveler
This is a good all-rounder, average in most categories. Where they shine is in their comfortable weapon handling and wide conal pbaoe + cc sword attack. Very handy for knocking back enemies in your path while maintaining momentum but, like The Hellion, not great for the 4th boss. Most weapon options are great but I recommend against taking the torch or the Needle of Tears. The hammer is also a liability given it’s slow attack speed and narrow angle of attack.
Disadvantage: Short attack range and no innate regenerative ability.
The Revenant
With average movement speed and only two hearts, you really are a glutton for punishment if you try to complete this with The Revenant on your first time. The Revenant is all about safely clearing from a distance, which is time consuming and inefficient in this mode because we have very little time to complete levels and enemies respawn anyways. Even his regen weapon won’t really help with his health being so low. You basically have to either go 100% glass cannon with a solid DPS weapon or mainline the Quarrel of the Fowl and dump charged shot chickens everywhere to distract everything while you run.
Disadvantage: Squishy af. Pretty much any mistakes and you’re dead. Extremely RNG dependent.
2. Preparation, Insurance and Banking
Once you’ve decided what character you’re going to use for the achievement, start a brand new game with at least Discerning, Helpful, and Leisurely Blessings turned on and Burdens disabled. In the early levels, you’re going to want to take your time to make sure you find all the shops and insurance. It doesn’t hurt to stock up on gold but you’ll have time to find more if you need to.
Basically, the goal is to pump as much money into next-run-insurance as possible and bank three important items for your Glutton attempt. Your top priority from the start is finding a map to make sure you don’t miss any shops or insurance genies. Once you have a map, use it to stop at every gambler, shop, and insurance genie on the map as you progress through the game.
Preparation Wishes
Use your wishes on insurance (buy insurance at every opportunity), Banking, and the shop. Insurance/Bank are mandatory to maximize prep and the shop upgrade just helps you find a map faster.
Banking Priorities
#1 – Chart of Revelation
With only two helpful genies per map in Glutton runs, it’s very important that we always know where they are from the very beginning to help turn RNG to our favour. Taking advantage of potions is also extremely important, as many will trivialize a map or help us recover. The map allows us to pause the game and think about our route, avoid harmful genies when needed, and find safe zone if we need to recover while using regen characters/weapons. It is by far the most important and helpful tool at our disposal and a must-have for simplifying the achievement.
Note: Don’t bank your Chart of Revelation until you find another one on the same map as a bank genie (ie. once you find a send map + bank genie, bank the Chart you’re holding then go buy the 2nd one to ensure you don’t miss insurance genies).
#2 – Fleet of Foot
Since traps are everywhere and enemies move much faster and spawn forever in Glutton runs, speed is critical. This is especially true on boss levels where we’ll really feel the time pressure of getting out before we get swarmed by Dervishes. Fleet of Foot gives most characters the speed to run through trigger-based traps safely and avoid enemies altogether.
#3 – Talisman of Confusion
Adds several seconds before enemies recognize and attack you. This really helps give us a clear path through levels. Decent alternatives that do something similar are Pads of Silence or Cloak of Obscurity (have to turn run off) but I prefer the Talisman.
Honourable Mentions:
Footfall of the Feather: You no longer trigger floor-traps with this, so it makes your run less dependent on finding a trap disabler genie. Makes life easier in the earlier levels but won’t help as much later on.
Sands of Time: Give yourself an extra chance to recover if you die. Not a bad choice since you’re unlikely to find this in your Glutton attempt, but not that helpful since it also starts you at the beginning, doesn’t reset the clock, and all of the enemies have respawned.
Shield of Advancing: Super helpful, allowing you to negate most frontal-incoming damage when used correctly.
Vessel of Vigor: Add a heart to your max life total.
Lash of Reach: The single most powerful item in the entire game due to the manner in which it trivializes the final boss fight.
Note: If you’re playing as The Brigand or The Revenant, it’s worth banking the weapon you want in the 3rd slot since their ability to finish is extremely weapon dependent.
Ranking Up
Even if you manage to bank everything early on and insure everything, it’s still worth finishing the game to rank up as much as possible, since each rank grants items towards your next run. These can make or break a run depending on the kind of RNG you encounter.
3. Glutton for Punishment
Now that the prep is done, you’re ready for the main event. If you prepared correctly, you should have over 5000 gold, a map, and the ability to safely speed run every level however you need to. It’s still RNG hell though, so keep these priorities in mind:
1. Turn off the traps: Use your map to find a trap genie asap and blow a wish to disable every trap in the game (remember the lava and wall-spikes can still hurt you later on). Remember to be very careful until you have the traps disabled, as each trap will take a full heart away. When going through doors, listen for the sandblasts in the earlier levels especially.
2. Don’t waste time getting gold or going out of the way for chests: Unless you get extremely lucky with genies, you’re likely not going to be able to spend all of the gold you insured anyways. Pick up gold that’s in your path already and don’t be afraid to grab nearby chests (they may have helpful items) but don’t lose time on it or let yourself get surrounded.
3. Stop at every shop and gambler genie: You’re going to want to buy most items and relics you come across, with a few considerations. I strongly recommend against buying Heels of Rising, as they make your jumps slow and floaty and are more likely to get you into trouble in the long run; they also add unwelcome air-time to your power slides that makes them pretty slippery dangerous. Also, the charm of fortune makes it harder to find common items, so if there are common items you still want/need you may want to hold off on buying it if you see it (major judgment call here, since shops can be few and far between on Glutton). Lastly, never replace the Lash of Reach if you can find it. As previously mentioned, it trivializes the last boss by allowing you to get your hits in from extremely far away without being a sitting duck.
4. Hold onto Vessels of Volatility (explodey jugs): The bomb jugs trivialize the boss fights, so always try to make sure you have a bomb (not a molotov aka Beacon of Combustion) in your hands leading up to each boss fight. This is especially true for the 2nd and 4th bosses, where you’re fighting in a relatively open area and the longer the fight takes the more random enemies wander in and aggro you.
5. Be careful with potions: All of the “put a constant pbao burst of damage + cc around me while I run” potions are great but be super-conscientious of two very important things: 1. They aren’t all equally effectively, eg. enemies can slip through Unguent of Harm’s needle attacks and hit you sometimes, 2. Most of the potions like this will also detonate any casks you walk by, so it’s easy to blow them up in your face and get yourself burnt/frozen/poisoned and possibly outright killed. Don’t be afraid to use potions, just keep your eyes open and watch where you’re going.
6. Summon a guard every chance you get: The base guards are a godsend for distracting enemies, even before you yourself encounter them. They make life a lot easier and, when speedrunning, they tend to survive a very long time.
Wishes
As per above, I strongly encourage you to burn one wish disarming every trap in the game asap. I recommend using one or both of the remaining wishes on the hostile genies, since these show up a lot during Glutton, tend to mess up the 2nd boss fight for us, and help us a lot when turned to our side by distracting/killing enemies in our path. They also help us out in the final boss fight by distracting the army-genie’s troops.
You can try to save your wishes for the final boss to quickly wish away the three genies but the final boss isn’t nearly as dangerous as trying to finish all the levels with the traps/genies left enabled. Also, I don’t find using wishes on the last bosses much safer than killing them normally because you have to approach at a weird angle if the traps are left on and there’s a weird and dangerous delay.
Boss Tactics
Grand Sorceror: This boss always spawns tucked away in a corner where you can safely engage her without worrying about aggro from trash mobs (but keep an eye out for clingers-on who may have followed you into her “arena” area). Whip her blue balls then smack a jug in her face and finish her with a few jabs for an easy win. This fight is pretty chill.
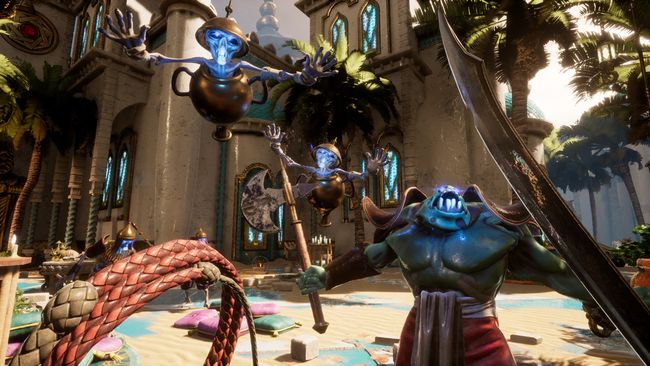
Fallen Champion: This is generally the most dangerous fight in the game because her arena is usually smack dab in the middle of wide open area replete with enemy spawns and she herself spawns a ton of self-replicas. If you fail to find the correct copy of her quickly, things get out of hand fast. If you’re lucky, you’ll jug her quickly and it won’t be too painful. If not, keep moving and whacking away at the clones until she drops. With the Soldier, you can line up multiple clones for a single spear toss to make life easier. Having used wishes on the red genies and having a summoned guard helps for this fight. It’s also worth considering the use of a chicken instead of a bomb to distract everything while you find the right clone.
Gatekeeper: This guy is all bark and no bite. Drop a jug on him then poke him once and call it a day. To get your hit in, either pull his shield off with your whip or side-step his charge then get him in the back.
Elevated Glutton: Like the 2nd boss, this guy likes to spawn in an open area. However, he’s much easier to deal since he doesn’t clone himself. Drop a jug on him or throw spears while strafing til he drops. This is a much harder fight on a non-ranged character w/o a jug but still manageable. Be wary of trash mobs joining the fray from outside the arena and dodge his summons.
The Genies: I recommend going Middle > Right > Left. If you wished on the red genies earlier, they’ll both appear to help you now and effectively distract most of the fire skeletons summoned by the left genie. You’ll want to always keep moving but if you have the Lash of Reach you don’t need to use the stairs to whip their hands, as you’ll be able to reach them from quite far away. Important note: do not stop moving/evading once you’ve trapped the final genie! His summoned adds are still out there flying at you and the game doesn’t end until you activate the blue chest.
RNG
At the end of the day, Glutton is very much RNG-hell Rogue-like gameplay so don’t be disheartened if you’re having a rough go of things. Don’t give up if things seem bad. On the first run I cleared, it took me a long time to get a trap genie and I only saw 1-2 shops the whole time, instead getting useless bank+insurance genies on almost every level. Be fast but cautious and think ahead for bosses and you’ll be fine.