Table of Contents Show
100% Achievements Guide for Crash Bandicoot 4: It’s About Time.
Crash Bandicoot 4 Achievement Guide
- Crash Bandicoot 4 features 43 levels (5 are boss levels and 38 are Normal Levels).
- The 38 Normal Levels each have a Platinum Time Trial Relic and N.Sanely Perfect Relic.
- There are also 21 Flashback Levels, that are unlocked by collecting the Flashback Tapes in Normal Levels without dying.
- The 43 main levels must all be replayed in N.Verted Mode.
- Some levels must be replayed in different timelines with other characters. There’s a lot to do and you’ll have to earn every Relic and get 106% game completion for doing everything possible in the game. It’s a skill dependent achievement list.
This guide is being updated with pictures/videos as long as I have the time to do it.
1. Main Story Achievments
Finishing the main story by completing all 38 levels and winning the 5 boss battles will net you the majority, if not all, of the following trophies:
- Taking the Side Road – Complete a Bonus Path
- The Whole Picture – Complete all Timelines
- Putting Things In Perspective – Complete any Timeline
- What Has Been, Will Be Again – Defeat Dr. Neo Cortex Again
- The Fourth Time – Defeat Dr. Neo Cortex
- Master Mixologist – Defeat N. Brio
- Beaten With His Own Drum – Defeat N. Gin in a Drum Off
- Twinsanity – Defeat the N. Tropy Twins
- Like a Rhinestone Bandicoot – Earn half of the Clear Gems (missable)
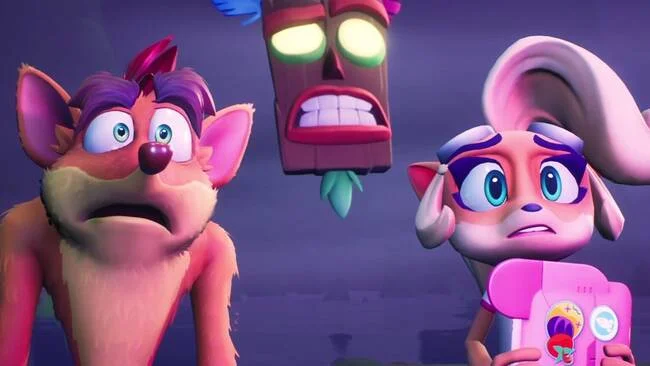
- Silent Protagonist – Meet ‘Akano
- Ups & Downs – Meet Ika-Ika
- Reality-Shattering Proportions – Meet Lani-Loli
- I Can See Through Time – Meet Kupuna-Wa
- Sudden But Inevitable – Betrayed! By your worst enemy.
- A/V Club Founder – Acquire a Flashback Tape (missable)
Taking the Side Road
Complete a Bonus Path
Every level playable with Crash and Coco contains a Bonus Path.
A Bonus Path is a circle platform with a large question mark which will take you to a side-scrolling section where you will be able to obtain extra lives if playing in Retro Mode, Wumpa Fruit, and crates that will count to your total crate count for that level.
Simply complete any bonus path to earn this trophy.
You can achieve this trophy during the first level, Rude Awakening.
The Whole Picture / Putting Things In Perspective
Complete all Timelines / Complete any Timeline
Timelines are optional levels unlocked as you progress through the story and play as one of three other characters (Tawna, Dingodile and Cortex) for the first time.
After completing the character’s introductory level, you will then be able to play a timeline variant of an already completed level where you will play as one of the three characters for the first half of the level.
The second half of the level will be a more difficult variant of the original level with Crash/Coco.
There are a total of nine Timeline levels throughout the game.
Completing one of the nine will award you with Putting Things In Perspective.
The nine levels are:
- Truck Stopped – Timeline variant of Hit the Road in The Hazardous Wastes Dimension. First half played with Tawna.
- Thar He Blows! – Timeline variant of Booty Calls in the Salty Wharf Dimension. First half played with Dingodile.
- Potion Commotion – Timeline variant of Give it a Spin in the Tranquility Falls Dimension. First half played with Tawna.
- No Dillo Dallying – Timeline variant of Run It Bayou in the Mosquito Marsh Dimension. First half played with Dingodile.
- Ship Happens – Timeline variant of Snow Way Out in The 11th Dimension. First half played with Cortex.
- Building Bridges – Timeline variant of Bears Repeating in The 11th Dimension. First half played with Tawna.
- Rock Blocked – Timeline variant of Dino Dash in the Eggipus Dimension. First half played with Dingodile.
- Shipping Error – Timeline variant of Out For Launch in the Bermugula’s Orbit Dimension. First half played with Cortex.
- Seeing Double – Timeline variant of Cortex Castle in the Cortex Island Dimension. First half played with Cortex.
Completing all nine will award you the achievment..
What Has Been, Will Be Again
Defeat Dr. Neo Cortex… again
You will fight Cortex for the second time and as the final boss in The Past Unmasked after completing the Cortex Island Dimension.
Cortex has 8 hit points for the fight.
The fight consists of five phases, each with checkpoints in between:
- Each phase consists of square tiles called “Shoot-o-matics” that emit a shockwave which you must jump over. To destroy these tiles, jump on them three times. After destroying the first in the middle of the arena, two more appear in opposite corners that you must destroy while some tiles on the arena disappear. After destroying these two, the tiles rearrange on the arena and an assistant wielding a rocket launcher spawns on the arena. Don’t wait around as their rockets track and kill you if you hang around too long. As soon as the assistant appears, run to him and attack him, automatically hitting him against Cortex to lose one hit point. This is the main pattern that every stage in this fight follows.
- In the next phase, Cortex will use Lani-Loli to phase out some tiles in a simple pattern that you must jump over. Eventually, two Shoot-o-matics at either side of the arena will spawn. Destroy them, and one assistant will appear on the left that you can attack to take out a second hit point for Cortex.
- In the third phase, Cortex will shoot laser from his machine that you must avoid. Jump over the red lasers and crouch under the blue lasers. After three rounds, Cortex will summon Ika-Ika to flip the arena and repeat the lasers another four times. Two Shoot-o-matics will then spawn at either end of the arena. Destroy them and then attack the assistant that will spawn in the middle of the arena to take out the third hit point for Cortex.
- In the fourth phase, Cortex will use Kapuna-Wa to slow down time and revert to normal speed to attempt to throw you off as the tiles disappear in an anticlockwise pattern. Keep up with the tiles and destroy the two Shoot-o-matics that appear (you may need to use Double Jumps/Slide Double Jumps to quickly reach them because of the gaps in the arena). This will spawn an assistant on the left side of the arena. Attack him to bring Cortex down to 4 hit points.
- In the final phase, Cortex summons Akano and uses a rotating laser that you must jump over while avoiding the shockwaves from the four Shoot-o-matics on the arena. Destroy all four and then attack the four assistants (while avoiding the spinning laser and rockets being launched by the assistants) that sequentially spawn on the bottom, top, left and right of the arena to take out the remainder of Cortex’s hit points.
The Fourth Time
Defeat Dr. Neo Cortex
You will fight Cortex in 4th Time’s a Charm after completing The 11th Dimension.
Cortex has 4 hit points for the fight and you will have Kapuna-Wa to slow down time.
There are five phases to the fight, with a checkpoint in between.
- The first phase will start with rockets raining down onto the arena. Markers will show where they will land so just keep moving around to avoid them. After a little while, a robot known as Punchbot will emerge while the rockets continue to rain down. Punchbot will eventually get dizzy after a few seconds of spinning, which you can then attack that will send it hurling towards Cortex to take out the first of four hit points.
- The second phase has no rockets but uses round green laser discs similar from the N. Gin fight earlier in the game (which you can jump over) and laser “columns” that you can run in between. If you’re about to get caught in a sticky situation, don’t forget to slow down time with Kapuna-Wa to navigate in between! Punchbot will soon emerge and you can use him to take out Cortex’s second hit point.
- The third phase is a fusing of the first two stages. There will be rockets, laser discs and laser columns that you will avoid. Repeat the process of dodging in and out until Punchbot appears again so that you can attack him to take out Cortex’s third hit point.
- The fourth phase will have Cortex make the arena smaller twice while you dodge some rockets falling from the sky.
- The fifth phase is a mix of all the stages above. Rockets, laser discs, laser columns and gaps throughout the arena that you must dodge and navigate around with the help of Kapuna-Wa until Punchbot appears so that you can attack him to take out Cortex’s final hit.
Master Mixologist
Defeat N. Brio
You will fight N. Brio in Trouble Brewing after completing The Tranquility Falls Dimension.
N. Brio has 7 hit points for the fight.
There are two phases to the fight, with a checkpoint in between:
- The fight is very similar to the N. Brio boss fight from the original Crash Bandicoot, and will have N. Brio toss four beakers that emit a shockwave that you must jump over. The fifth beaker will spawn a green sludge monster that you can spin to take out N. Brio’s first hit point.
- N. Brio repeats the same process, this time with six shockwave beakers and two green sludge monsters that you can spin to take out another two hit points.
- He will then “N. Vert” the stage to have a visual effect and toss eight shockwave beakers in a clockwise fashion before summoning three green sludge monsters to take out three of the four remaining hit points.
- The stage will return to normal and on his final hit point, N. Brio (similarly to his first boss fight in the original Crash Bandicoot), will drink his beakers and transform into a Hulk-like monster (and regain two hit points) that will follow you around, hammering the floor creating shockwaves. Continue to dodge until he comes to a stop due to dizziness and you’ll be joined by Akano. Use Akano’s spin to push N. Brio off the arena. Repeat this process two more times (the stage will be N. Verted the third time) to defeat N. Brio!
Beaten With His Own Drum
Defeat N. Gin and his Weapon of Mass Percussion
You will fight N. Gin in Stage Dive after completing the Hazardous Wastes Dimension.
N. Gin has 4 hit points for the fight.
There are four phases to the fight, with a checkpoint in between:
- The first phase will commence by sending three flame-head enemies running towards you. Spin three of them into N. Gin’s amplifier to damage it, causing the bridge to extend and creating a wall of amplifiers you can jump to the top of to attack the red and yellow spot on N. Gin’s machine to take away the first hit point. You have 15 seconds to attack N. Gin the moment after the bridge extends in every stage. This will be the general motif for the rest of the fight.
- The second phase will introduce the round laser discs that you must avoid. Jump over the green discs and crouch under the red discs. Every now and then a flame-head will pop out, which you can spin towards the amps to damage. Three flame-heads and the bridge will extend again. This time, you must use Lani-Loli to phase some amps in and out to get to the top and attack N. Gin for his second hit point.
- The third phase is an amped up version of the second round, where there will be a lot more of the laser discs to dodge and the flame-heads will appear less frequently. Spin three flame-heads to extend the bridge and again use Lani-Loli to phase some moving platforms to help you get to the top and hit N. Gin for a third time.
- The final phase will have the arena divided with large gaps in between while N. Gin continues to shoot laser discs at you. The flame-heads will now be dancing on moving platforms that move left and right on the arena. Spin three of them, jump across the moving platforms, use Lani-Loli again to help you to the top and take out N. Gin.
Twinsanity
Defeat the Doctors N. Tropy
You will fight the Doctors N. Tropy in A Hole in Space after completing the Bermugula’s Orbit Dimension.
The Doctors N. Tropy have 2 hit points for the fight.
There are four phases to the fight, with a checkpoint in between:
- During the first phase, you will have Akano. Use Akano’s spin to span the large gaps between the slow moving floating platforms while avoiding the laser that the Doctors N. Tropy holograms will shoot.
- Once you get to halfway of the floating block area, you’ll notice the blocks ahead are moving faster. Akano will then be replaced by Kapuna-Wa, allowing you to slow down time and make your way across to the end of the floating platform section. You may have to slow time a few times until you get to the end.
- For the third and fourth phase, you will have Ika-Ika to flip gravity when required. The stage will start by running from right to left, while avoiding the blue spherical lasers by jumping over them. For the red lasers blocking the path, spin the source of the laser (a yellow and black spinning cylinder with arrows) to destroy the laser and continue on. You will need to flip gravity at times to reach these. Once you break the last one, N. Tropy will chase you with a wall of purple laser from left to right. Repeat the dodging and breaking of cylinders as you were doing earlier and you’ll eventually take out the first of two hit points.
- The fourth phase is identical to the previous, except Fem N. Tropy will be chasing you from right to left, with slightly more lasers to dodge. Break all of the laser cylinders and you will win the battle!
Silent Protagonist
Meet ‘Akano
After completing Jetboard Jetty in the Salty Wharf dimension for the first time, you will meet Akano and unlock this trophy.
Ups & Downs
Meet Ika-Ika
After completing Dino Dash in the Eggipus Dimension for the first time, you will meet Ika-Ika and unlock this trophy.
Reality-Shattering Proportions
Meet Lani-Loli
After completing N. Sanity Peak in the N. Sanity Island dimension for the first time, you will meet Lani-Loli and unlock this trophy.
I Can See Through Time
Meet Kupuna-Wa
After completing Run It Bayou in the Mosquito Marsh dimension for the first time, you will meet Kapuna-Wa and unlock this trophy.
Sudden But Inevitable
Betrayed! By your worst enemy.
After completing The Crate Escape in the Sn@xx Dimension, you will be betrayed by Cortex and unlock this achievment.
2. Miscellaneous Gameplay Achievments
These trophies are rewarded for performing a certain action or task, sometimes in a specific level.
It is likely that you may have acquired some of these trophies already during your initial playthrough.
By the end, you should have the following trophies:
- Fleet of Feet – Play a game of Checkpoint Race
- Settle the Score – Play a game of Crate Combo
- No It’s MY Turn – Complete a level with Pass N. Play enabled
- Ladies First – Complete a level as Coco
- All Gussied Up – Try on a Skin
- Whoa! – Pull off a Triple Spin
- Showoff – Defeat an enemy with Triple Spin
- N. Vincible – Beat a story level without dying
- Tree Droppings – Find the source of the Bumpa Berries
- Here Kitty Kitty – Scare the cat hiding from a party
- Give ‘Em a Broadside! – Aim and fire!
- Bad Signs – Do some target practice
- Junkyard Jams – Make music in an unlikely place
- WOAH YEAH! – Grabbed a bushel of Bumpa
- Silence the Scientist – Shut N. Brio up
- Megaphoning It In – Shut N. Gin up
- Hammer it Home – Make some noise!
- Channel Surfer – Spend some time surfin’ the waves
Fleet of Feet
Play a game of Checkpoint Race
On the Main Menu, select Bandicoot Battle, 2 Players then select Checkpoint Race.
While this is technically a multiplayer mode, it is played using a single controller as an offline multiplayer mode by passing the controller from the first player to the second.
The aim is to see who can get from checkpoint to checkpoint the fastest, with the scores totaled at the end of the level.
The quickest method is to select the first level, Rude Awakening, and intentionally die in between checkpoints as it jumps to the next checkpoint upon doing so.
Complete the level and you are awarded the achievement regardless of who the winner is.
Settle the Score
Play a game of Crate Combo
On the Main Menu, select Bandicoot Battle, 2 Players then select Crate Combo.
While this is technically a multiplayer mode, it is played using a single controller as an offline multiplayer mode by passing the controller from the first player to the second.
The aim is to see who can score more points from crates (the crates double in value within a time limit when broken, up to a maximum value of 32 points per crate) between checkpoints.
The scores are then totaled at the end of the level.
Similarly to Fleet of Feet, the quickest method is to select the first level, Rude Awakening, and intentionally die in between checkpoints as it jumps to the next checkpoint upon doing so.
Complete the level and you are awarded the achievement regardless of who the winner is.
No It’s MY Turn
Complete a level with Pass N. Play enabled
Similar to Fleet of Feet and Settle the Score, it is played using a single controller as an offline multiplayer mode by passing the controller from the first player to the second upon completing a checkpoint.
Complete any level to unlock the achievement
Ladies First
Complete a level as Coco
After completing the first two levels, you will be taken to the Dimensional Map. Here you can switch to play as Coco instead of Crash.
Complete any level as Coco to unlock the achievement..
All Gussied Up
Try on a Skin
Skins for both Crash and Coco are unlocked by collecting gems throughout the game.
To equip a skin, press Y/Triangle while on the Dimensional Map and select an unlocked skin to unlock this achievement.
Whoa!
Pull off a Triple Spin
The Triple Spin is unlocked after defeating Cortex in the final boss fight to finish the main story. Simply revisit any level and press X/Square three times (with a slight pause between every press) while running and you will pull off a Triple Spin, awarding you with the achievement.
The Triple Spin looks different to a normal spin (blue in colour) and also gives you a boost in speed, thus coming in handy for Time Trials.
Showoff
Defeat an enemy with Triple Spin
The Triple Spin is unlocked after defeating Cortex in the final boss fight to finish the main story.
Simply revisit any level and press B/Square three times (with a slight pause between every press) while running and you will pull off a Triple Spin.
Ensure that the third spin (blue in colour) hits an enemy and you will be rewarded with this achievement.
N. Vincible
Beat a story level without dying
Complete any level with zero deaths, most easily acquired on the first level of the game, Rude Awakening.
Tree Droppings
Find the source of the Bumpa Berries
At the beginning of Off-Balance in the Tranquility Falls Dimension, you will see a tree in front of you at the start of the level.
Simply jump and spin the tree branches to make a bunch of Bumpa berries stun you, unlocking this achievement.
Here Kitty Kitty
Scare the cat hiding from a party
In the level Off Beat in the Mosquito Marsh dimension, spin the dumpster to the right of the second checkpoint.
Give ‘Em a Broadside!
Aim and fire!
While playing as Dingodile in Thar He Blows! in the Salty Wharf Dimension, you will reach the top of the level and Dingodile will say “You smell good enough to eat. Hehe!” Here you will see two broadside cannons.
Spin the cannons to earn this achievement.
Bad Signs
Do some target practice
While playing as Dingodile in his introductory level Home Cookin’, you will come across large purple bat signs scattered throughout the level.
There are five of them in total. Destroy them all by sucking up and shooting nearby TNT barrells/crates to get the achievement.
Junkyard Jams
Make music in an unlikely place
In Hit the Road on the Hazardous Wastes Dimension, you will come across three barrels at the beginning of the stage (two to the left, one on the right) and three other barrels to the left of the bonus platform that create a melody when hit.
Hit all six barrels to earn the achievement.
WOAH YEAH!
Grabbed a bushel of Bumpa
At the beginning of A Hole in Space in the Bermugula’s Orbit Dimension, you must grind on a rail before fighting the Doctors N. Tropy.
On this rail are 18 Bumpa berries that you can collect, with the use of Lani-Loli in the later part of the rail grind. Collect all 18 Bumpa berries to earn this achievment.
Silence the Scientist
Shut N. Brio up
After the first Checkpoint of Give it A Spin in the Tranquility Falls Dimension, you will come across a platform with five TNT crates.
On the platform to the right is a beaker filled with green liquid, which N. Brio is seemingly speaking from.
Break the beaker to get the achievement.
Megaphoning It In
Shut N. Gin up
Near the beginning of A Real Grind in the Hazardous Wastes Dimension, after crossing the first two footbridges, you will come across a megaphone with a picture of N. Gin’s face next to it that N. Gin is speaking from.
Spin the megaphone to destroy it and get the achievement.
Hammer it Home
Make some noise!
In Draggin’ On in the Tranquility Falls Dimension, there are four golden gongs in the first half of the level that you must hit in order to get this achievement.
These are the four golden gongs and where to find them:
- The first is hanging in the doorway above the stack of crates at the beginning of the level.
- The second is a little further along the main path, hanging in an archway just before the two dragons.
- The third is hanging in the archway above the three TNT crates further down the main path.
- The fourth and final one you can see on the main path, hanging on a wall just past the two lions not far from the third gong.
Channel Surfer
Spend some time surfin’ the waves
At the beginning of the first level, Rude Awakening in the N. Sanity Island Dimension, you will see a TV on your left.
Spin the TV three times until it shows the title screen for Crash Bandicoot 4 to receive the achievement.
3. Da Gems
It is likely that you will have missed a number of clear gems throughout your first playthrough, so you can come back later to clean up your remaining gems.
Begin with collecting the four coloured (Red, Green, Blue, Yellow) gems before moving onto the remaining clear gems.
These four coloured gems unlock gem paths for specific stages which contain crates that must be broken in order to acquire the gem for breaking all crates for that specific level.
Upon completing this stage, you should have the following achievements:
- Sapphire-er Acquirer – Find the hidden Blue Gem
- Like a Rhinestone Bandicoot – Earn half of the Clear Gems
- King of Bling – Earn ALL of the Clear Gems
- Emerald Gemerald – Find the hidden Green Gem
- Ruby Red – Find the hidden Red Gem
- Topaz Pizazz – Find the hidden Yellow Gem
Sapphire-er Acquirer
Find the hidden Blue Gem
To earn the Blue Gem, you must play through Draggin’ On in the Tranquility Falls dimension without breaking any crates.
It’s a nice little nod to earning the same gem in the same manner in Crash Bandicoot 2: Cortex Strikes Back.
The problem with it this time though, is that this requirement is in a much more difficult stage and that there are crates that you can accidentally break in many places throughout the level.
The Blue Gem unlocks the Blue Gem Path in Crash Landed in the Bermugula’s Orbit Dimension and is required for the Colour Gem Gauntlet in Toxic Tunnels in the Cortex Island Dimension.
King of Bling / Like a Rhinestone Bandicoot
Earn ALL of the Clear Gems / Earn half of the Clear Gems
There are a total of 228 Clear Gems throughout the game, consisting of 6 Clear Gems per level in each of the 38 levels. The boss levels do not contain any gems.
In every level, the six Clear Gems are earned by:
- Collecting 40% of the Wumpa Fruit in the level
- Collecting 60% of the Wumpa Fruit in the level
- Collecting 80% of the Wumpa Fruit in the level
- Breaking all of the crates in the level
- Die 3 times or less
- Finding the Hidden Gem in the level
Earning 114/228 Clear Gems will reward you with the Like a Rhinestone Bandicoot trophy.
Pressing L2/LT during gameplay will bring up the HUD. On the left, you will see the Wumpa meter that will show points for 40%, 60% and 80% which will fill up as you collect more Wumpa Fruit to show how close you are to earning the gems. The middle of the HUD shows your total crate count, and the death counter will be shown on the right.
These six gems don’t have to be earned in one run, you can revisit levels to earn any specific gems that you may have missed on the way.
Emerald Gemerald
Find the hidden Green Gem
The Green Gem is located in Hit the Road in The Hazardous Wastes Dimension.
This Gem is probably one of the most creative methods to obtaining a gem in the Crash Bandicoot franchise!
After being chased by the large truck when rolling in a steel ball, you will break out and reach a checkpoint crate with a Nitro crate not far from it. Don’t hit the Checkpoint just yet. Instead, you’ll notice a bin right behind the Nitro crate. Spin it, and a remote control will appear in front of the Checkpoint box. Repeatedly spin the remote control and a small toy car will make its way out from behind the bins and veer into the Nitro crate, blowing it up, and revealing the Green Gem!
Complete the level to then keep the gem and earn the trophy!
The Green Gem unlocks the Green Gem Path in Jetboard Jetty in the Salty Wharf Dimension and is required for the Colour Gem Gauntlet in Toxic Tunnels in the Cortex Island Dimension.
Ruby Red
Find the hidden Red Gem
The Red Gem is located in N. Sanity Peak in the N. Sanity Island Dimension.
Upon reaching a checkpoint with the doorway leading to the room with the disappearing platforms in a 3×3 grid, you’ll see a drawing on the wall showing the instructions on getting the Red Gem.
What you will need to do is jump on the platforms in the order shown on the drawing. That is, begin on the bottom left platform and jump on each platform in an anticlockwise pattern. The ninth and final platform will be the center platform, which will spawn the Red Gem in front of the sleeping Lani-Loli. As you jump on the platforms, an audio indication will increase in pitch as you land on a correct platform. If you make a mistake you can always start the sequence again.
Complete the level to then keep the gem and earn the achievement!
The Red Gem unlocks the Red Gem Path in Crash Compactor in the Hazardous Wastes Dimension and is required for the Colour Gem Gauntlet in Toxic Tunnels in the Cortex Island Dimension.
Topaz Pizazz
Find the hidden Yellow Gem
The Yellow Gem is located in Run It Bayou in the Mosquito Marsh Dimension.
At the beginning of the level, instead of jumping on the jetboard, look to the right and slide double jump to reach a small platform. In front of the platform you will see three groups of three crates floating in the water. Use these crates to get across to the platform on the other end, however try to only break one crate from each group as you will need the crates to backtrack to the beginning.
Once at the other side, slide double jump to the large moving platform, which will take you to a platform that has a 2×2 crate stack.
The Yellow Gem is located right above this crate stack!
If you die while backtracking, you don’t have to collect the Yellow Gem again.
Complete the level to keep the gem and earn the achievement!
The Yellow Gem unlocks the Yellow Gem Path in Bears Repeating in the 11th Dimension and is required for the Colour Gem Gauntlet in Toxic Tunnels in the Cortex Island Dimension.
4. Flashback Tapes
Flashback Tapes are a new collectible to the franchise introduced in this game which unlock an optional level that can be accessed via the Dimensional Map or through the Level Stats screen on the Dimensional Map.
There are a total of 21 Flashback Tapes scattered throughout the ten dimensions in the game.
To acquire a Flashback Tape, you must play through the level containing the tape with zero deaths, until the tape is found.
Upon collecting the tape, it is okay to die but the level must be completed to keep the tape (i.e. picking up the tape and exiting to the Dimensional Map will not reward you with the tape).
All of the Flashback levels are side-scrolling platforming levels, very reminiscent of the N. Brio/Cortex Bonus levels from the original Crash Bandicoot. There are no lives or death counters in these levels, so take as many attempts as you need to complete them.
Finishing this stage will unlock the following achievements:
- Model Test Subject – Earn any Flashback Relic
- Closing the Experiment Log – Earn ALL of the platinum Flashback Relics
- A/V Club Founder – Acquire a Flashback Tape
Closing the Experiment Log / Model Test Subject
Earn ALL of the platinum Flashback Relics / Earn any Flashback Relic
In order to unlock the optional Flashback levels to collect the Flashback Relics, you must collect the Flashback tapes. To acquire a Flashback Tape, you must play through the level containing the tape with zero deaths, until the tape is found.
Upon collecting the tape, it is okay to die but the level must be completed to keep the tape.
There are 21 Flashback Tapes scattered throughout the ten dimensions in the game.
The levels containing a Flashback Tape are listed below:
- Crash Compactor (The Hazardous Wastes)
- Hit the Road (The Hazardous Wastes)
- Booty Calls (Salty Wharf)
- Jetboard Jetty (Salty Wharf)
- Give It a Spin (Tranquility Falls)
- Draggin’ On (Tranquility Falls)
- Off-Balance (Tranquility Falls)
- Off Beat (Mosquito Marsh)
- Run It Bayou (Mosquito Marsh)
- Snow Way Out (The 11th Dimension)
- Stay Frosty (The 11th Dimension)
- Bears Repeating (The 11th Dimension)
- Blast to the Past (Eggipus Dimension)
- Dino Dash (Eggipus Dimension)
- Out For Launch (Bermugula’s Orbit)
- Stowing Away (Bermugula’s Orbit)
- Crash Landed (Bermugula’s Orbit)
- Food Run (Sn@xx Dimension)
- Nitro Processing (Cortex Island)
- Toxic Tunnels (Cortex Island)
- Cortex Castle (Cortex Island)
Completing any of the Flashback Levels will earn you a Flashback Relic, and the Model Test Subject achievement.
The requirements for the Flashback Relics are as follows:
Sapphire: Complete the flashback level.
Gold: Complete the flashback level, and break 90% of the crates.
Platinum: Complete the flashback level, and break all of the crates.
Collecting the Platinum Flashback Relic will automatically earn you both the Sapphire and Gold Flashback Relics for the level. Collect all 21 Platinum Flashback Relics to earn this achievement.
A/V Club Founder
Acquire a Flashback Tape
Find any of the 21 Flashback Tapes in the game.
You will most likely get this trophy on your first playthrough of Crash Compactor on the Hazardous Wastes Dimension, as the Flashback Tape is right in front of you at the start of the level.
Complete the level to keep the tape and earn this achievment.
5. N. Verted Mode A.K.A Da Grind Part 1
After defeating N. Brio, you will unlock the ability to replay levels in N. Verted Mode, which is a mirror mode with a whacky visual (and sometimes gameplay) altering filter.
This is essentially another full playthrough, as you will be tasked in completing every level and defeating all five bosses in N. Verted Mode and collecting six N. Verted gems per level (same requirements as the normal clear gems).
In this stage you can get the following achievements:
- Beat ‘Em Any Which Way – Beat any boss in N. Verted mode
- Backwards & Forwards – Complete ALL levels in N. Verted mode
- IT’S MESSING WITH MY HEAD, MAN!!! – Beat a level in N. Verted mode
- gnilB fo gniK – Earn ALL N. Verted Gems
Backwards & Forwards / Beat ‘Em Any Which Way / IT’S MESSING WITH MY HEAD, MAN!!!
Complete ALL levels in N. Verted mode / Beat any boss in N. Verted mode / Beat a level in N. Verted mode
After defeating N. Brio in Trouble Brewing in the Tranquility Falls Dimension, you will unlock the N. Verted Mode.
N. Verted Mode will then be available for any level once that level is completed on Normal mode.
In N. Verted Mode, every level will be mirrored and each dimension will have its own visual filter.
While going for this achievement, here are other achievements you will get naturally:
Completing any level in N. Verted Mode will award you with IT’S MESSING WITH MY HEAD, MAN!!!.
Completing any boss level in N. Verted Mode will award you with Beat ‘Em Any Which Way.
Complete all 43 levels (38 levels + 5 boss levels) to earn this achievement.
gnilB fo gniK
Earn ALL N. Verted Gems
There are a total of 228 N. Verted Gems throughout the game, consisting of 6 N. Verted Gems per level in each of the 38 levels. The boss levels do not contain any gems.
In every level, the six N. Verted Gems are earned by:
- Collecting 40% of the Bumpa Fruit in the level
- Collecting 60% of the Bumpa Fruit in the level
- Collecting 80% of the Bumpa Fruit in the level
- Breaking all of the crates in the level
- Die 3 times or less
- Finding the Hidden Gem in the level
Pressing L2/LtT during gameplay will bring up the HUD.
On the left, you will see the Bumpa meter that will show points for 40%, 60% and 80% which will fill up as you collect more Bumpa Fruit to show how close you are to earning the gems.
The middle of the HUD shows your total crate count, and the death counter will be shown on the right.
These six gems don’t have to be earned in one run, you can revisit levels to earn any specific gems that you may have missed on the way.
Time Trials A.K.A Da Grind Part 2
Arguably the most difficult and the reason (along with the N. Sanely Perfect Relics) that the achievements in this section is so difficult to obtain.
Time trials can be attempted after completing a level for the first time by touching the golden stopwatch at the start of the level, but it is advised to wait until unlocking the Triple Spin which is awarded after finishing the main story.
Unlike the previous titles in the franchise where Gold Relics were enough to score the Time Trial Relic trophies, this game tasks you with earning a Platinum Relic for every level.
Ensure that you have a very thorough understanding of the level layout, as the level must be done in one run as there are no checkpoints.
There are 38 Time Trials to be completed; the 5 boss fight levels do not require Time Trials.
https://www.yekbot.com/crash-bandicoot-4-time-trials-for-the-purple-relics/
At the conclusion of this incredibly demanding stage, you will receive:
- Faster Than a Tortoise – Earn any Time Trial Relic
- Faster Than Sound – Earn ALL of the platinum Time Trial Relics
Faster Than Sound / Faster Than a Tortoise
Earn ALL of the platinum Time Trial Relics / Earn any Time Trial Relic
There are no checkpoint crates, and many crates will be replaced by yellow time crates that stop the clock for either 1, 2 or 3 seconds depending on the number shown on the crate.
There are four types of Time Trial Relics; Sapphire, Gold, Platinum and Developer (Purple).
Unlike the previous titles in the franchise where Gold Relics were enough to score the Time Trial Relic trophies, this game tasks you with earning a Platinum Relic for every level.
Earning a Developer Relic will automatically add to your Platinum Relic count.
Earning any type of Time Trial Relic for the first time will reward you with the Faster Than a Tortoise achievement.
Earning the Platinum Relic for every level will earn you this achievement.
While the Platinum times are difficult to achieve, most can be completed with some room for error. However, some levels to look out for with quite unforgiving times are:
- Rude Awakening
- Jetboard Jetty
- Draggin’ On
- Building Bridges
- Rock Blocked
- Nitro Processing
- Toxic Tunnels
7. N. Sanely Perfect Relics Just Make it Stop
N. Sanely Perfect Relics are another new collectible introduced to the series, depicted as the yellow skull and bones icon.
To obtain one, you must play through an entire level without any deaths, while breaking every crate (similar to the crate gems in the original Crash Bandicoot).
There are 38 throughout the game, one for each level (none for boss fights), meaning if you obtain one in the Normal version of a level, it is not required for the N. Verted version of the same level, and vice versa.
It is recommended to go for these after completing the time trials as you will be much more familiar with the level layouts and hazards to successfully completing a no-death run.
Upon completing this task, you will be rewarded with the following achievements:
- Perfectionist – Earn ALL N.Sanely Perfect Relics
- So-Called Perfectionist – Earn any N.Sanely Perfect Relic
Perfectionist / So-Called Perfectionist
Earn ALL N.Sanely Perfect Relics / Earn any N.Sanely Perfect Relic
To obtain an N. Sanely Perfect Relic, you must play through an entire level without any deaths, while breaking every crate (similar to the crate gems in the original Crash Bandicoot). There are 38 throughout the game, one for each level (none for boss fights), meaning if you obtain one in the Normal version of a level, it is not required for the N. Verted version of the same level, and vice versa.
You do not need the Hidden Gem or the Wumpa gems in the level (although you may automatically collect 80% Wumpa Fruit while breaking all of the crates in most levels) to get an N. Sanely Perfect Relic.
Upon earning your first N. Sanely Perfect Relic, you will be awarded with the So-Called Perfectionist achievement.
Earn the N. Sanely Perfect Relic on all 38 levels to unlock this trophy. This trophy and Silver Faster Than Sound are the reason for the high difficulty for the Platinum trophy!
Tips:
- Attempt to earn the all crates gem in a level before trying for the N. Sanely Perfect Relic for any level. This game is notorious for having well-hidden and hard-to-find crates, so knowing the location of all the crates without having to restart because of dying can be very helpful and good practice for the level when you come back for the perfect run. There’s nothing worse than doing a deathless run only to find out that you missed one crate that was sitting high above a bouncy crate off-screen.
- Memorize and learn the enemy and hazard placement for every level. This will help you to always be a step ahead and know what you’re about to face and how you will face it.
- Take your time and don’t rush. Even if you know the location of every crate and enemy/hazard, blindly rushing through just to try to get the perfect run done as soon as possible will force you into an error. The last thing you want is to hit “Restart Level” and sit through another 30 second loading screen. Leave the rushing for the Time Trials!
- While it is possible to earn the N. Sanely Perfect Relic for any level in its N. Verted version (as stated above), I would not recommend doing this in the Mosquito Marsh dimension as the filter speeds up the gameplay slightly. This makes sections that already are difficult in breaking every crate (such as the food truck section in Run It Bayou/No Dillo Dallying and the last rail grind in Off Beat) even more difficult, especially if you are attempting a no-death run.
- Conversely, attempting the N. Sanely Perfect Relics in the N. Verted versions of Bermugula’s Dimension is somewhat easier. The crates stand out more against the pastel filter and reduced background textures and are much easier spotted, particularly in the riding section in Crash Landed.
- For the levels containing the riding segments (Bears Repeating, Building Bridges, Crash Landed), practice the riding sections by doing ‘dummy’ playthroughs to memorise the sections and locations of crates. That is, play the level until the start of the riding section and play through to the end of the level without breaking checkpoints but attempting to break each crate. At the end, die and you’ll spawn at the beginning of the riding section. Keep repeating this as many times as necessary until you’ve memorized the positioning of the crates and maneuvering Polar/Shnurgle becomes muscle memory before attempting the N. Sanely Perfect Relic
8. Sweet Release
There are two bonus endings, one at 100% completion and one at 106% completion.
Watch both both to get the rest of the Achievements:
- Master Marsupial – Get EVERY trophy
- Overachiever – Watch the 100% bonus ending
- OVER-Overachiever – Watch the 106% bonus ending
OVER-Overachiever
Watch the 106% bonus ending
To achieve 106% game completion, you must complete all levels and collect all of the collectibles within the game:
- Earn all 228 normal gems, complete all boss fights on Normal mode (48%)
- Earn all 228 N. Verted gems, complete all boss fights on N. Verted mode (48%)
- Earn all 4 coloured gems (2%)
- Earn all 21 Platinum Flashback Relics (2%)
- Earn all 38 N. Sanely Perfect Relics (2%)
- Earn all 38 Sapphire/Gold Time Trial Relics (2%)
- Earn all 38 Platinum Time Trial Relics (2%). Note: Earning all of the Platinum Time Trial Relics will automatically count the percentage for earning all Sapphire/Gold Time Trial relics, thus awarding you with a total of 4%.
On the way to achieve 106% completion, you will achieve 100% completion by collecting all of the gems and defeating all of the bosses (in both normal and N. Verted modes) along with two of the five 2% requirements. This will fulfil the requirements for the Overachiever Achievement.
To access the bonus endings and achieve the trophies, simply bring up the Menu while on the Dimensional Map, then select the Gallery.
Both endings will be available to view in the Gallery.
This will likely be the final trophy to unlock before Master Marsupial