Table of Contents Show
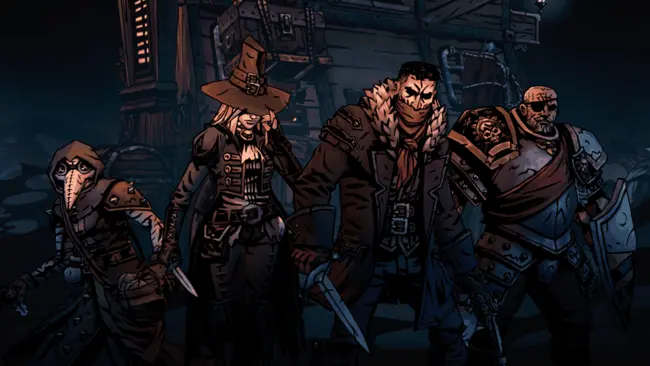
Graverobber immediately contrasts the previous character by very much asking you to build at least some part of your team composition around making her work. She’s served very poorly by being within the starting four, and often comes off as looking like the weakest of the bunch. Thing is, she actually can work well enough in that comp, if she has a few of her skills unlocked.
You can format the starting comp into a double lunge comp by using lunge with the highwayman’s duelist advance or Barristan’s Rampart and Hold The Line. The problem is that this requires her to visit at least 3 shrines, and all five if you want to add pirouette into the equation. The side of her kit that she starts with very much favors a combo setter that she does not have in the starting 4, outside of tracking shot.
Darkest Dungeon 2 Grave Robber Guide
Stats:
- 29 HP
- 7 Speed
- 30 bleed resist, 40 Blight resist, 30 burn resist
- 30 Disease resist, 30 debuff resist, 20 move resist, 20 stun resist
- Movement: 2 Back, 2 Up
Paths
Deadeye: More powerful ranged skills, at the cost of weaker melee skills and some move resist. This is usually what you go for if you want to put out consistent, flexibly targeted crit damage with thrown dagger.
Nightsworn: A more powerful Lunge and Pirouette, and more damage when attacking from stealth, but lowered max HP. A very swingy Audrey that has access to damage ranges on lunge and pirouette that give Leper a run for his money. Given the need for this path to move and be in the front sometimes, the HP cost is usually more dangerous than on someone like PD.
Venomdrop: Turns Audrey into a sort of budget plague doctor. Flashing daggers gains blight on hit, and everything deals an additional 2 blight (even if it had none) when attacking from stealth. Skills that move her ignore some blight resist when doing this. All of this comes at the cost of lowered damage on her ranged attacks and 3 less speed (which, ironically, puts her equal to the PD). This path can be effective, but it makes for a very different Audrey.
Moveset
Pick To The Face: Used from 3-2-1, Targets 1-2. Hits for 4-7/4-10, at 10/15 crit. Crit chance increases by 50 percentage points with combo. Ignores block tokens and removes one on hit (Note: All moves that ignore block or dodge will remove one on hit, except cause of death and backdraft I think).
Pick to the face is a good but not great melee option that demonstrates the weird balancing behind Graverobber. As you can probably tell, and will be able to see when we look at other heroes, the damage range on this thing is very wide. That’s because it’s designed to crit reasonably often: Since crits are 1.5* the top of your range, a wider range with a higher top means that crits are worth effectively more than double damage. Indeed, a crit on Pick+ will deal 15 damage, instead of… well, double the average would be 14. So it is a bit higher. The main thing that holds Pick back is that even with combo, you’re only looking at a 65% crit chance, and the combo is spent whether you crit or not. This makes this move a little awkward when it comes to reliability, a problem that we’ll soon see thrown Dagger doesn’t have. Still, this move gets to hit for 15 reasonably often off combo, which means that it hits some nice thresholds, especially if it’s being used after the combo setter did a little damage, or with smokescreen+ in particular, which will cause it to deal 22 or 23 damage off of the vuln. Stacking some extra crit onto the character can make this move a lot more reliable. The ability to ping off block without using it is reasonably nice on occasion, especially if the result is setting the enemy to Death’s door or killing it, and it is a good melee staple damage move even without combo, though not quite a great one.
Thrown Dagger: Used in 4-3-2, Targets 2-3-4, Deals 3-5/4-7 damage with 15/30 crit. Ignores guard, and ignores dodge if Audrey is stealthed when using it. It’s worth noting that Deadeye’s Thrown Dagger deals 4-6/5-8 damage, at 20/35 crit. Crit is increased by 50 percentage points with combo.
So let’s just get this out of the way. Unupgraded Thrown dagger is too weak to do its job. It has the same inconsistent crit rate of Pick+ in the best of circumstances, and a crit is just going to do 8 damage. Not critting is like tickling the enemy, and you’ll be not critting a good half of the time. If you do crit, well, the result isn’t impressive. Sure, you’ll be throwing it into the backline most of the time, as that’s where the squishy targets you want to hit the thresholds of hang out, but the resultant tickle only does half a damage point more than an upgraded noxious blast’s damage range when Dagger isn’t critting. That’s sad.
What, then, is Thrown Dagger+’s job? It’s to reliably hit damage thresholds on low or moderate health enemies with the help of combo. Thrown dagger+ with deadeye (which is likely the only time you’ll be using it consistently), hits for 12 damage on a crit, and it hits that 85% of the time. You’re more likely to hit that crit than you are to land a lot of the DoTs in the game, and the result on top of a combo setting move like fade to black, razor’s wit, or iron swan + tends to be enough to hit the thresholds of back rank enemies, especially earlier in a run. The problem is that enemies can have too much health for this combination to work well, especially later in a run, so it usually pays to find some ways to boost her damage further or to back this move up with other decent damage moves. The key to Thrown Dagger’s power is that reliability: rolling on an 85 crit to kill the enemy is often far superior to rolling on a damage range to do it. Meaning that while a thrown dagger focused Graverobber will rarely hit the sheer numbers that a character like Leper or hellion might, she’ll hit the same decently high number quite consistently. This can make her the bane of squishy targets in particular, and her output is competitive enough with combo to be usable in other scenarios. This move very strongly exists within this niche though, and doesn’t do a whole lot else other than decent consistent overall output with combo. Its low damage range outside of deadeye can make it hard to scale too, but if you can scale enough damage on it with trinkets or the rare quirk (bloodthirsty especially) in particular and take advantage of combo, it can be very powerful. This is really a strategy that gets more and more attractive the higher you can increase her raw damage, since it already comes with built in reliability.
Note that due to her high speed, this move and Pick to the face are best paired with Virtuoso Jester when using combo, as she’ll almost always go first with other combo setters, which makes combo setups very awkward.
Flashing Daggers: Used from Rank 4-3-2, Targets 2+3. Deals 2-3/3-5 damage to both targets, with a 5/10% crit rate. No special effects, however when using venomdrop Graverobber, it also deals 2/4 blight on hit, meaning it effectively works like a midrank plague grenade.
Outside of venomdrop, this move is at best a token pinger with a weak damage cleave attached. The fact that it does damage means that it does ping both block and dodge, but it only hits two targets, and it doesn’t hit them very hard. Like seriously, this is a cleave and the total damage average (not counting the low-ish crit), is 8 on flashing daggers+, or 10 with deadeye. Why? Sharpshot Dismas gets to hit a better damage range and gain strength with grapeshot.
Venomdrop makes this move quite good, acting as a midrank plague grenade. The biggest weakness of the approach is that Graverobber won’t access the blight chance increase that an alchemist PD inherently does, and that she loses 3 speed on that path, when speed is very useful for DoT users. It is a reasonable way to play a graverobber, and if you gain stealth you can use it with lunge to use the ‘hit them hard to put them onto death’s door while DoTing them’ strategy. It also means that she can more consistently go after combo setters if you intend on playing Venomdrop in 3 with Pick, something that is attractive since Pick is not adversely affected.
Outside of venomdrop, this is perhaps one of the weakest moves in her kit, though it does possess some niche applicability with the token pinging possibilities.
GraveRobber (II)
Poison Darts: Used from 4-3-2, target anywhere. Hits for 2-4/2-5 damage at 5/10 crit. Also possess the same crit boost combo effect that Thrown Dagger and pick have.
Honestly, the best use of Poison darts is twofold. One, to hit rank 1 on a graverobber that otherwise can’t, in which case you’re either using this or glint for the privilege. Between the two, glint probably just deals more damage in most cases, and Darts interacts better with enemies at low HP who have Death’s Door and certain boss-fights. Two, you run this specifically because you think the blight output will be good, or for that aforementioned Incision-Niche. This move’s actual damage output with blight is a little too weak for it to be her primary damage option outside of fights where enemies take multiple actions per round, though it’s more just ‘fair’ than ‘horrifically weak’. This move is, oddly, probably best taken advantage of by a deadeye graverobber, who boosts its direct damage a bit, allowing it to do its job decently, as base darts + will do 3-6 and 9 on crit, which are notably high ranges for this kind of approach. Venomdrop actually just nerfs this move, but you might run it there anyway if you have to put her in 4 for some reason or just have the extra space. If it’s a choice, I’d rather use pick.
Absinthe: Used anywhere, targets self. Audrey gains 3 dodge/dodge+ tokens, and a speed token. If she’s below 33% HP, she recovers 33% HP. Use limit 3
Absinthe is a great self sustain move. It provides a reasonably large heal and an absolute butt-ton of mitigation with the dodge. Dodge+ in particular is the best form of personal mitigation in the game, though it being a high variance form means that you can sometimes get unlucky. This move provides great value to any Audrey that expects to sometimes be in the line of fire, which is fairly common for many Graverobber builds given her movement skills. Outside of bosses it’s often somewhat wasted if you have her standing in the back all the time, but you’ll still probably use it anyway on those builds. The use limit exists because back in the day when it didn’t have it it was nearly impossible for her to get killed by spamming this. That fact probably communicates how powerful the self sustain on this move is.
Dead of Night: Used anywhere, target any enemy corpse. Deletes the corpse (even on miss), Audrey gains 33%/50% HP, gains 2 stealth tokens, and loses 0/1 stress (these other effects do not happen on miss). Use limit of 3, but outside of the dinner cart enemy and beast dens, there’s no fight where you could ever use it more than 3 times.
Possibly the best self recovery move in the game… outside of bosses. It doesn’t care about her current HP, meaning you can use it whenever. It is, naturally, functionally useless in any fights with no corpses. Removing the corpse can be quite nice, though if you want it strictly for its corpse clear, something like magnesium rain will often be better. It’s very powerful everywhere that isn’t a boss fight on any Audrey build, so you should generally run it whether you need the CC or not, unless you basically don’t expect her to ever get hit. The setup portion of this move with stealth is a bit niche, since typically, if she has some corpses to eat she doesn’t need to set-up for much anymore, but it does allow her to use moves like Lung to snipe remaining enemies with moves like lunge with the stealth. Just like Absinthe, this is also very useful on most graverobber builds.
Glint In the Dark: Used in 3-2-1, targets 1-2-3. Deals 4-6/6-8 damage with 5/10 crit. Ignores and removes enemy stealth, and ignores 20% of DBR. Completely ignores DBR if GR uses it when stealthed, and removes her from stealth. This skips the hit they’d survive that would put them on 0 HP, meaning that the stealth version of this is the most efficient way to kill enemies with DBR.
Glint had a hell of a glow-up for the 1.0 patch, dealing more direct damage than Thrown Dagger and Thrown Dagger+ while retaining its utility. Stealth removal is very good in Act 1 and against the little swines in the Sluice in general (which now get 2 stealth tokens), and the ability to reduce DBR on a strong damage move is a good bit of further utility. The glow up also makes the stealth version of this a lot more consistent against all sorts of enemies. Glint is suddenly a very strong contender and an auto-pick for deadeye Graverobbers (where it’s upgraded version does 7-10 damage!), unless you plan to run them in 4.
Lunge: Used in 4-3, Targets 1-2-3. Deals 4-8/6-11 damage, at 20/30 crit. Moves Audrey forward 2 ranks, ignores block and dodge when she’s in stealth. Notably, the nightsworn version of this does 6-11/7-13
So let’s get this out of the way first. Lunge as a move is statistically phenomenal. The damage range is fairly large, but the high crit in particular pushes the average damage of lunge+ past even the leper’s Chop+, and Chop+ is a very powerful move. It also doesn’t debuff the Graverobber at all and theoretically doesn’t have any downside. It reaches all the way to rank 3, and it even ignores annoying defensive tokens if you happen to use it when she’s in stealth. If you happen to be in stealth it will pick up another 50% damage if used there while using the Nightsworn path (which you should generally select if you intend to use this move heavily).
This move is theoretically balanced by the fact that it can only be used in the back of the party, and because it moves her forward 2 ranks when used. This means that if you want to use it consistently, you have to build for it, or you have to get the trophy from the tangle boss that locks everyone in place (needless to say, getting that trophy results in some hilarious output from Audrey). The former isn’t that hard to do using a type of comp known as a double lunge comp. The sample comp that we will cover is an example of this kind of comp. This move is the primary tool for the other kind of graverobber: If deadeye graverobber is all about consistent and flexible output with combo and thrown dagger, nightsworn Audrey is all about huge average damage with lunge and the next move.
Pirouette: Used in 2-1, targets 1+2. Deals 4-7/6-8 damage at 10/15 crit. Moves her all the way to the back, gives her 1 dodge/dodge+ token, and dazes her. Cooldown of 2 turns.
Pirouette is obviously another high value move, and one that you often see in two scenarios. One is with a double lunge comp: Nightsworn powers up both pirouette and lunge, and a comp can be set up using only one other dance character to allow a lunge – lunge – pirouette combo. This gets around pirouette’s two turn cooldown and typically works well in flexible comps that often target rank 3 or the back in general at the start of a fight. The other is within deadeye teams. Pirouette also gains a damage boost from deadeye, and the use of pirouette turn one allows her to function a lot better with slower combo setters; when you want to pair her with characters like Bonnie or Alhazred who will be able to reliably apply combo but who have trouble going ahead of her, opening with pirouette ensures she can do something powerful turn 1 while giving her combo setters ample time to set combo for her (especially given the daze). The daze token here really does hold this move back as an opener, as it means her turn 2 comes out after every other enemy has moved, so I find that it performs better in the double lunge comp, but its use in deadeye is not to be understated. You can also try opening with it in a nightsworn comp, though I find that this strategy is a little slower and can fall flat against certain enemy comps. Overall, this is a high value move that fits well into both mainstay playstyles of Audrey while not stealing the show mainly due to its long cooldown and daze backlash.
GraveRobber (III)
Repartee: Use anywhere, target self. Remove all stealth, gain 2 taunt tokens and 3 dodge/dodge +tokens
Graverobber has one other frankly underdeveloped side of her set, and that’s tankrobber. Tankrobber tanks enemy hits using primarily dodge, and shrugs off the hits that do get through with her incredible self sustain. The main reason you don’t see much intentional tankrobber is, frankly, this move. The activation requirement here is the killer, requiring a setup stealth application to access repartee. Stealth isn’t that easily accessible with trinkets and items in this game, and having to use a button in advance just to activate this is a little iffy. You could, theoretically, use shadow fade, into a lunge, and then into this, allowing her tanking to come online turn 3 when you might want your prime tank to do something else. The problem is that this is naturally slow, and when used with Nightsworn to take full advantage of the lunge and stealth bonus damage, you have less HP to work with. You could also elect to skip the lunge and have the graverobber do no damage for the whole fight, which sounds about as appealing as it is useful. All the effective mainstay tanks in this game are able to access taunt and defensive options without setup so that they can consistently start tanking the very moment it’s needed. Audrey can’t, and for that reason even though she has the superior dodge tokens, she really doesn’t work as a main tank. At best, this move serves as some slow utility, but it mostly just isn’t used in favor of a damage focused GR with self sustain. This move does become a lot more palatable if you have some sort of access to free stealth.
Shadow Fade: Used in 2-1, Targets self. Back 2, gain 2 stealth tokens/2 stealth tokens and 1 speed token. Cooldown of 2 turns
Shadow fade doesn’t do very much, and that is its big problem. It provides a damage bonus with the stealth for nightsworn, though this really just pays off evenly by the end of the stealth while ensuring she isn’t targeted (and only in the absence of other personal modifiers). The speed token on the upgraded version helps cover for the tempo loss this move incurs. So the game basically wants you to do something like Shadow fade -> lunge -> lunge starting from rank 2, or it wants you to lunge repartee or lunge pirouette. The big problem with this is that lunge -> lunge -> Pirouette is a lot more comfortable (in fights that last that long), because not only is it a higher tempo option, but pirouette pushes you back 3 ranks, and this makes a huge difference because of how double lunge comps are set up. Shadow fade probably wouldn’t be good even if it did back you all the way up, but it would be more viable as a somewhat safer option. It’s other big niche is specifically allowing lunge to bypass defensive tokens like Dodge, which can allow for some effective snipes against certain irritating enemies, like Cherubs. Outside of that sort of play, It’s rare that you even want to run this on nightsworn, much less on any other path, and most comps already handle dodge with omni-cleaves or other utility moves in particular.
Grave Robber Analysis and Sample Comp

Graverobber immediately contrasts the previous character by very much asking you to build at least some part of your team composition around making her work. She’s served very poorly by being within the starting four, and often comes off as looking like the weakest of the bunch. Thing is, she actually can work well enough in that comp, if she has a few of her skills unlocked. You can format the starting comp into a double lunge comp by using lunge with the highwayman’s duelist advance or Barristan’s Rampart and Hold The Line. The problem is that this requires her to visit at least 3 shrines, and all five if you want to add pirouette into the equation. The side of her kit that she starts with very much favors a combo setter that she does not have in the starting 4, outside of tracking shot.
As a result she often comes off as quite weak, but she absolutely isn’t. You really have a couple of major choices with this character: Do you pair her with someone like Jester, Alhazred, or Bonnie and use her combo setup with moves like pick and thrown dagger (this is the Deadeye Graverobber sort of set-up in most cases), using her to kill key targets very reliably, or do you build a comp that allows her to use a double lunge setup, allowing for very high average damage with the caveat that it will be a very swingy average damage (This is the Nightsworn Graverobber sort of set-up), maybe also adding in pick to get some of the utility of the first option as well. If you don’t want to do either of these and just want to slot her into a comp, then one could recommend the venomdrop path with flashing daggers in rank 3, allowing her to hit pick to the face and maybe even the odd lunge to do raw damage, while using flashing as a midrank plague grenade.
Regardless of the setup, she typically has room to make use of what are phenomenal self-sufficiency skills, in Absinthe and dead of night. It’s very hard to kill Audrey if she has access to just those two skills unless she’s being focused on or takes a very unlucky crit and follow up. Glint in the dark provides a high dose of consistent damage (which is less common on her kit) alongside its utility, and darts, while not ever a mainstay of her strategy, provide just the right dose of offensive utility to be recommendable on some of her compositions.
Graverobber really excels in these scenarios, providing meaningful damage very consistently, only occasionally rolling poorly with her crit chance or damage ranges. She’s one of the most rewarding characters to play with as a result, though not the kind of pick you can just slot in to any team like you might a PD.
Sample Comp
GraveRobber (Nightsworn) – PD (Alchemist) OR Vestal (Seraph) – Occultist (Aspirant) – Hellion (Ravager)
I usually like to run this with PD just for consistency’s sake, but the value that Vestal can bring to the team with her consecrations is not to be understated. This is a double lunge comp, with the potential to do more than that depending on what you have Hellion do. The way this works is simple. Graverobber lunges turn 1, and then Alhazred immediately hits binding shadows to shuffle her back into 3. Audrey then lunges again next turn, and follows that up with pirouette on turn 3… if you don’t use toe-to-toe, that is. The Hellion’s Toe to Toe is a move that immobilizes her in place and gives her taunt, allowing her to simultaneously tank for an otherwise fairly vulnerable team, and to keep Audrey from shuffling to rank 1 when she uses lunge in rank 3. When you do this, Alhazred can simply swap her back to 3 with binding shadows again, cycling for as long as you want. Because this team really likes Toe to Toe, Hellion can make excellent use of her Howling end skill early in the fight without feeling like she might miss out on damage, causing this team to have the ability to put out a truly phenomenal alpha strike over the course of the first couple of turns, though after the change using Howling End early can be hard to play around.
Depending on speed order, it she can also use Toe to shuffle Audrey back to 3 after Audrey steps in to rank 1, following with Alhazred’s Binding Shadows yet again, though typically this requires a fairly high speed Hellion. Of course, you can simply shuffle Audrey right back to her initial position with Pirouette from 1 or 2 the moment you need to. PD provides the ability to smooth out thresholds and check Death’s door with plague grenade and noxious, and to clear corpses and dodge with magnesium rain, meaning that no enemy stays safe for long. She also provides the heals that Hellion, with her lack of defensive tokens, and any emergency situation always appreciates, as well as an option to remove debuffs in some cases.
Hellion can also help snipe rank 4 very early if you need to, combining her iron swan with grenade. Or you can just pull the rank 4 up with Alhazred’s pull, disrupting the enemy team and opening up a backline target to very strong abuse. This move also combos them, meaning that you can use Audrey’s pick to follow up with a high crit chance, something that is reasonably common to do since using the pull usually means she hasn’t been shuffled back to 3 that turn. Or just follow up with the always solid wicked hack for the 50% bonus damage. This team handles most bosses very well due to its flexibility and high output, without sacrificing much in the way of sustain to get that output. It does, however, carry somewhat less mitigation than other teams, though Audrey and Hellion have self sustain to help make up for that, and Alhazred can tap into wyrd healing in emergencies.
If you choose to use Vestal, the dance nature of this comp allows her consecrations to truly shine, either providing phenomenal extra mitigation or extra damage. I’d often lean towards mitigation here, as the team already often has enough damage, especially given she’ll be dumping fat judgments every turn after setting up. Her heals are also quite helpful, just as PDs are. Her slower approach does clash with this lightning fast team a little bit though.
Overall, if winning most fights in 2 rounds or less sounds appealing to you, and you would really like to do that with Audrey, it’s very hard to go wrong with this damage powerhouse of a composition. You could even replace Occultist with Jester too, though I prefer Alhazred here specifically for his pull and backup healing, and because I like him as a character.