Table of Contents Show
So you’ve picked a team comp to run, either because it sounds fun, or strong, or you’ve only got a few heroes and have to make it work. You ride through the Valley, knock out that first gaunt fight, and find yourself at The Torch and Crown, the first inn of every run. What should you be doing here?
The first inn does as much to set the tone of your run as your team composition does, and you’ll make many key decisions here that can affect how you play out the first region in particular. These mainly involve how you spend those first mastery points, and what you want to pick up at the shop. The first shop contains what will usually be the most run defining choice you make at any shop: The Pet. Let’s talk about what you should do here.

Darkest Dungeon 2 Pets Guide
There aren’t too many pets in the game, so I’ll be able to discuss each one briefly individually.
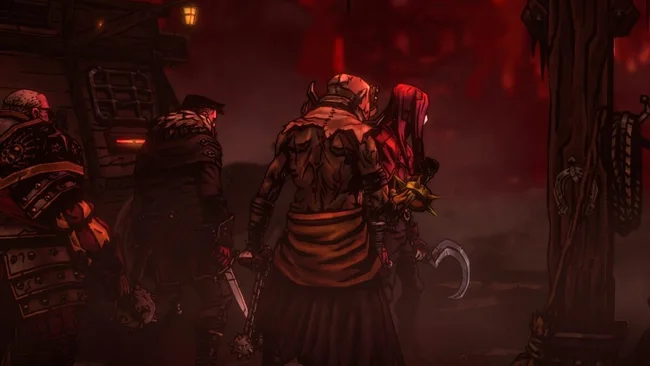
At the first inn of every run, provided you have 3 or more pets unlocked, the game will give you a draft of 3 pets to choose from, like within the above picture. If you have unlocked 3 or less, you will always pick from those same three pets. Pets are free, but You can only equip one and it locks in permanently. Even if it didn’t, if you buy any extras they’ll disappear at the next inn anyway. So you get to choose one pet to do your entire run with, just don’t forget to equip whichever one you get.
Generally, your pet decision will depend on your comp, what you plan to do, and what else is offered at that first store, as many pets synergize very strongly with certain other stagecoach gear.
Here is a list of pets, in unlock order. We’ll look at what they do and some reasons why you might pick them for a run
Orphan Wolf Cub
The first pet you get, and it’s alright. It gives the team 5% stress resist per luxury gear, and a boost to positive relationship chance of 10%.
If you see a lot of luxury gear, the cub is a decent pick. Some luxury stagecoach gear is very good, like the trinket organizer and the two strongbox items. There aren’t really any particularly bad luxury gear items, aside from the one that allows you to hold more candles (which is great until you unlock everything). The positive relationship chance is noticeable, especially with neutral relationships, and the stress resist can come in clutch in some fights. The cub isn’t usually the best pet by any means, but it’s a decent pet to have access to at the start and a consistently decent choice.
Pygmy Pliskin
There are snakes in my dreams all the time. This snake gives the team 10% more healed per medical stagecoach item, and randomly heals someone 10% after each node.
The random heal is okay. Traveling heals are already really strong, and the random heal is only one hero, and only usually for 3-5 HP. If they made the effect heal everyone it would be noticeably better, but this is a little extra value over a run.
The other effect is good, extra healing percent is valuable and the amount this pet provides is quite competitive. There are some really helpful medical stagecoach items, the Mortar and Pestle and Chirugeon’s gear in particular. Heal bonuses are quite helpful in a variety of situations, though a few purple herbs can be used to get a similar effect. Best in teams with some decent healing options if you see medical gear early. Generally not useful if your team has no or few heals or has a very fast tempo, but most have enough to benefit decently.
Unnatural Owlet
5% extra debuff resist piercing on all debuff moves per piece of tinkerer’s stagecoach gear. All stagecoach items that produce stuff produce stuff more often.
One of the most powerful and consistent Pets in the game. It’s at its best in mitigation teams that use debuffs, as debuff resist piercing is generally extremely hard to come by. If you get 4 pieces of tinkerer’s gear, this is like critting every time you use a debuff. All the tinkerer’s gear is pretty great, producing generally excellent combat items over the course of a run, allowing you to produce more of anything with the blueprint tubes, and allowing you to make more money with the Assay gear.
The thing is, the ‘produce stuff more often’ clause doesn’t just apply to Tinkerer’s gear, it applies to everything that makes stuff. More flapjacks, Stews, Bandages, whatever. Owlet is frequently a strong pickup if taken with any stagecoach item that makes stuff that you care about, and doubly if it’s taken with Tinkerer’s gear. I wouldn’t generally grab it over everything else if the first shop didn’t have any of these items though, and possibly wouldn’t be that interested if I wasn’t running good debuffs.
Reanimated Rabbit
Everyone gains 1 speed per food gear equipped. Everyone gains 1 Max HP per 4 food in inventory
Reanimated Rabbit is also frequently incredibly strong, and it’s very easy to see why. More Raw Max HP on a team is absolutely insane, as everyone gets the same raw gain from it. Squishy characters quickly become non-squishy, and bulky characters only get bulkier. Then it gives you the plus speed on top of that for food gear, which is an insane boost to have for free.
Rabbit has some minor anti synergy with very slow characters: The speed buff isn’t enough to get them to go first in a lot of cases, and it can take them out of range of using the less than 2 speed trinkets. On the flip side, it can put more people in range of using the high speed trinkets, which are also very powerful. Food Stagecoach items are often quite strong, so you’re usually happy to pick one up with Rabbit. Stagecoach items like Icebox and Food Barrels are basically designed to be run with Rabbit, and the Flapjacks stagecoach item fuels it well. The stew and whiskey stagecoach items don’t synergize aside from the +speed, as the stew only produces one food item at a time and the whiskey produces whiskey which is not food, however badly we may wish it was.
The biggest downside to rabbit is that it hogs up your inventory space, especially if you don’t get Food Barrels. This problem can be mitigated with certain other stagecoach items as well, and the inventory size trophy in particular. Rabbit is usually a strong pick, and is usually an instant pickup if you see an Icebox or Griddle in your starting Shop.
Mucilaginous Slime
More stuff from looting road debris. 5% debuff resist on the whole team per piece of Road Gear.
Another generically strong pet. Debuff resist is a glorious buff to have, because Debuffs suck. Debuff resistance is, however, often rather hard to come by outside of trinkets and this pet, so this pet serves a very specific and helpful niche, and it serves it quite well. It’s difficult to say how much the road debris bonus gets you, though it makes runs feel a lot closer to the pre-nerfed road debris, so I’d reckon it’s at least decent. The debuff resist is where this shines, and there is some good road gear, mainly the iron brazier in particular. Several other road gear pieces are a bit iffy inclusions, because they do things that you don’t really need, like gaining more wagon tokens. A large part of that is how buffs from carriage tokens work (We’ll discuss that later), and the randomness of some other items. Still, the debuff resist is very strong if you do get some road gear, and the debris value is nice. This guy is a good pickup if you see some road gear you want to buy in the first shop, and is a decent investment otherwise, as he’ll always produce some value.
Shrieker Chick
2% crit per piece of scouting gear, 2 extra baubles whenever you get baubles
A little extra economy and potentially a little extra crit. Scouting gear is decent. They generally scout out certain kinds of locations or offer a general buff to scouting, and some buff the shops of locations. Since some locations are stronger than others, some scouting gear provides much more value than others. Scouting can also let you avoid certain locations that you’d be interested in avoiding, so there’s some reverse value there too. With enough scouting you can determine where virtually everything is. The bonus of a measly 2 crit per piece is kind of iffy though, and stacking up tons of scouting gear can often be overkill. The 2 extra baubles is a nice economy bonustowards buying trinkets and stagecoach items, as well as Stagecoach repairs. Unfortunately, the fact that it’s a flat and relatively small increase means that the amount of value you get from the ability in a run is relatively fixed and usually kind of low.
Larval Carrion Eater
When someone kills a corpse, they heal 30% and gain 1 crit token and 1 block token
A generic pet that can provide a lot of value for smashing corpses if your comp actually does that. Corpse deleting moves like Mag rain don’t activate this effect, which is the main problem with this pet. Much better with that one tangle trophy that I’ve mentioned like 20 times during this guide, since that makes it easier to one shot corpses. It’s very rare that you run a comp that wants to hit and destroy corpses directly, and if you’re running one it’s usually because you either elected to or forgot to bring corpse clear. In those cases this pet may provide an okay level of value. Also does nothing in bosses, which doesn’t help its case.
Hatchling Crocodilian
When anyone in the comp moves, they gain 3% damage for the rest of the battle. 20% of the time, they also lose 1 speed. Both stack forever.
Croc is a pet that on the surface seems like it favors heavy dance teams, and it really isn’t always good there. Heavy dance teams often have fragile speed orders that maintain consistency tenuously, especially in the absence of certain items and trinkets. They are also very often really fast comps that don’t have time to benefit much from the effect. As a result the Malus’ ability to lessen the consistency of those teams, even a little, is usually more impactful on a strategy than the damage is.
Croc excels in dance setups with speed valleys, or dance setups that care far less about order and just happen to shuffle around. It also works better in slower comps and longer fights, where the damage has time to stack up. Croc might mess up, say, a double lunge team that uses a high speed Jester and Audrey, but it will not have any impact on a dance setup that rotates a Jester and Barristan to repeatedly stun enemies, as their speed differences are very wide. Throw a Seraph Vestal in there to make a mitigation focused comp and you’ll have plenty of time to ramp up the 3% damage buff. Losing 1 speed enough times with Jester to flip their speed orders, without also losing it on Barristan, is effectively impossible, but getting some more damage off a 6% bonus per turn on both heroes is likely to stack up over longer fights. Croc is a good pickup in teams that enable these specific kinds of strategies, but perhaps not the end-all be-all.
Crimson Tick
Whenever you kill something, 5% chance to produce ‘The Blood’ Combat item.
The blood is a super rare combat item that you normally only get at a certain version of the Academic’s study. It gives 1 target a strength, crit, and speed token on use, at the cost of gaining horror. So it’s very good, clearly, probably only beaten in direct damage output in some comps by War Horn. If we reckon that each fight has 4 enemies (it’s definitely less on average than that, but for simplicity sake), we see that we get around 1 blood every 5 fights with this. I can’t even begin to guess how many fights a typical run has, but you’re probably looking at 4-8 blood in most runs if I had to guess. Great for sniping in specifically region 2 and 3 (you won’t usually have the blood yet in time for the first possible lair, but if you do it’s obviously excellent there too), and great for some high output strategies against certain act bosses. You generally won’t need to put this on several people unless you simply want to make a certain set of enemies or a specific boss disappear. For the sniping utility and the ability to further empower certain strategies, the Tick is quite nice. It’s mainly held back by its randomness and the fact that this is the only thing it does, not providing you with universal value like some of the best pets.
Shambler’s Spawn
Or Shambly (as I call him), Or Shamblino (as everyone else does).
-100% scouting everywhere, +200% scouting for oblivion’s Ingress (so you see all of those and nothing else by default). Acts as a Dark Impulse for the whole party.
Shambly is the quintessential high roller pet. Having Shamblino will immediately make your run worse because you can’t see anything other than Ingresses. So you’ll typically waste more time taking nodes you don’t want like assistance encounters. You also might get loathing spiked (which is very bad) and are more likely to break your wheels or armor all the way to the ambush, which can result in one of the most dangerous fights in the game. Ingresses are usually great locations, so seeing all of those is nice, though they don’t spawn en masse outside of the bat country modifier.
You are also guaranteed to see the lair and any locations named in your region goal, which means sometimes it isn’t as bad as it sounds. The upside to this loss is the ability to create truly broken trinket combinations if you get cultist trinkets, and to find every cultist fight to do that. Since you don’t need to run dark impulses, you can run them with other strong trinkets or even run them together. You may just never find good cultist trinkets though. Hence ‘high roller’ pet.
Some people think he’s one of the absolute best pets in the game. I disagree. The value loss from the scouting here and the extra danger is very often more impactful than his positive effect is, and that’s partly because the extremely powerful trinket combinations you end up with function as ‘win more’ rather than something actually necessary in many cases. Sure, you can get some amazing combinations, but if you can get the same victory with less, why introduce the risk? He is still strong, however, as simply being able to skip on finding dark impulses is nice, and always being able to find one of the best locations in the game is also nice. The fun factor is also off the charts. Shambly gets a lot stronger if you pick up Trinket Organizer early on, to get more cultist trinkets and good trinkets in general, and he’s generally an autopick if that’s in your first shop unless one of the other really strong pets also has great items available. His malus can be partly turned off with certain scouting gear: +100% to find X from certain gear won’t guarantee it, but it will set it to normal. Certainly the most interesting pet to play with.
If you have Shambly as your pet, Shambler will get a buff when you fight him. I don’t know what this buff is, but you should probably be more careful about potential Shambler fights with this pet.