Table of Contents Show
This is a long and in depth gameplay guide for Dead or Alive Xtreme Venus Vacation for newcomers.
The Steam version of DOAXVV is a localised, English version with some level of censorship. You may or may not have read complaints about the censorship part. First off, there’s no nudity over in the Japanese version either, so don’t get your hopes up, and this guide isn’t going to teach you how you can make it happen either.
Getting Started – The Interface
Please pay attention to the in game tutorial, it pretty much explains the Volleyball aspect of the game. The game is nice enough to give you access to 2 girls right off the bat, so pick the ones that you like the most. Their base stats really only matter at high levels (GIRL level 60+), and even then the majority of their stats depends on their equipped swimsuit anyway. I’ll explain more about this in a moment. From this point forward, I’m assuming you’ve already finished the tutorial.
Now that you’ve got your two starter girls, you’re probably wondering how do you unlock the rest of the cast. The answer is to throw money at the screen. I mean it. There are only two ways to unlock a new girl in this game. The first is simply by obtaining an SSR swimsuit, which will immediately unlock the corresponding girl it belongs to. The second way is to collect 50 SR swimsuits for the girl you are trying to unlock, trading them in for tokens and then exchanging the tokens for the girl.
Got all that? Good. Onwards to the Interface.
Starting out: Strategies and Tips
At Owner level one with only 2 girls and no SSRs, your options are painfully limited. Your goal now is to reach rank C in the main campaign, which can be achieved in an hour. You should be able to get an SR for one of your girls through the tutorial gacha, so all you need to do is to level up a R rarity swimsuit for the other girl and you should be able to breeze past the campaign, at least until you reach rank C. From then on, your objective is to not lose.
Winning and Losing
Losing sucks. You gain nothing, no money, xp or even a consolation prize. You do keep the score in Event matches, but that’s a pittance. Anyway, if the enemy completely outclasses you, look around and play for a bit in either the Event matches, or the Daily matches to farm for materials. Whatever you do, avoid losing.
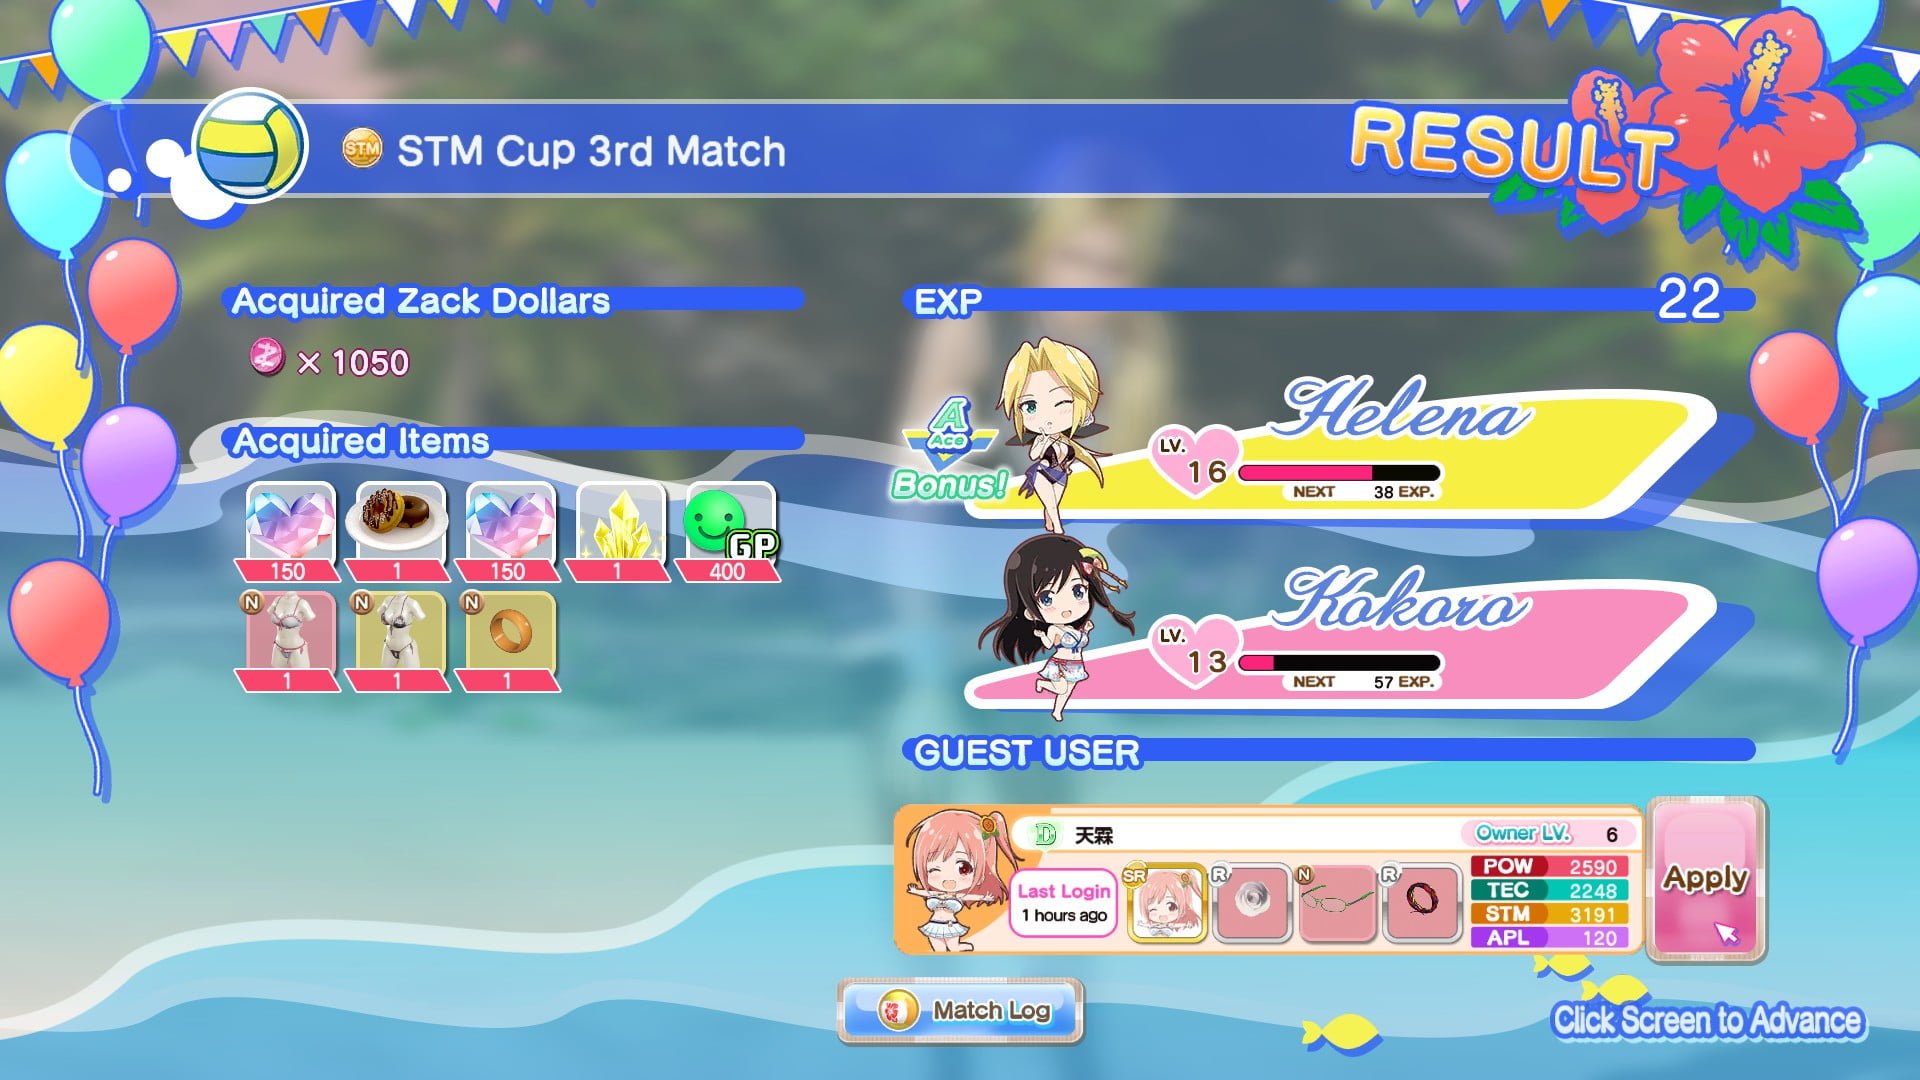
The Ace
The character set as the Ace gets a few bonuses. She gets the full xp every match (her partner only gets 1/2 xp) for both girl level as well as for the gravure panel. Your Ace is also the character that represents you when another player has you on as a guest.
Guests
These guys are potential friends. Once you clear the tutorial, you should be able to see a list of potential guests before you start a match.
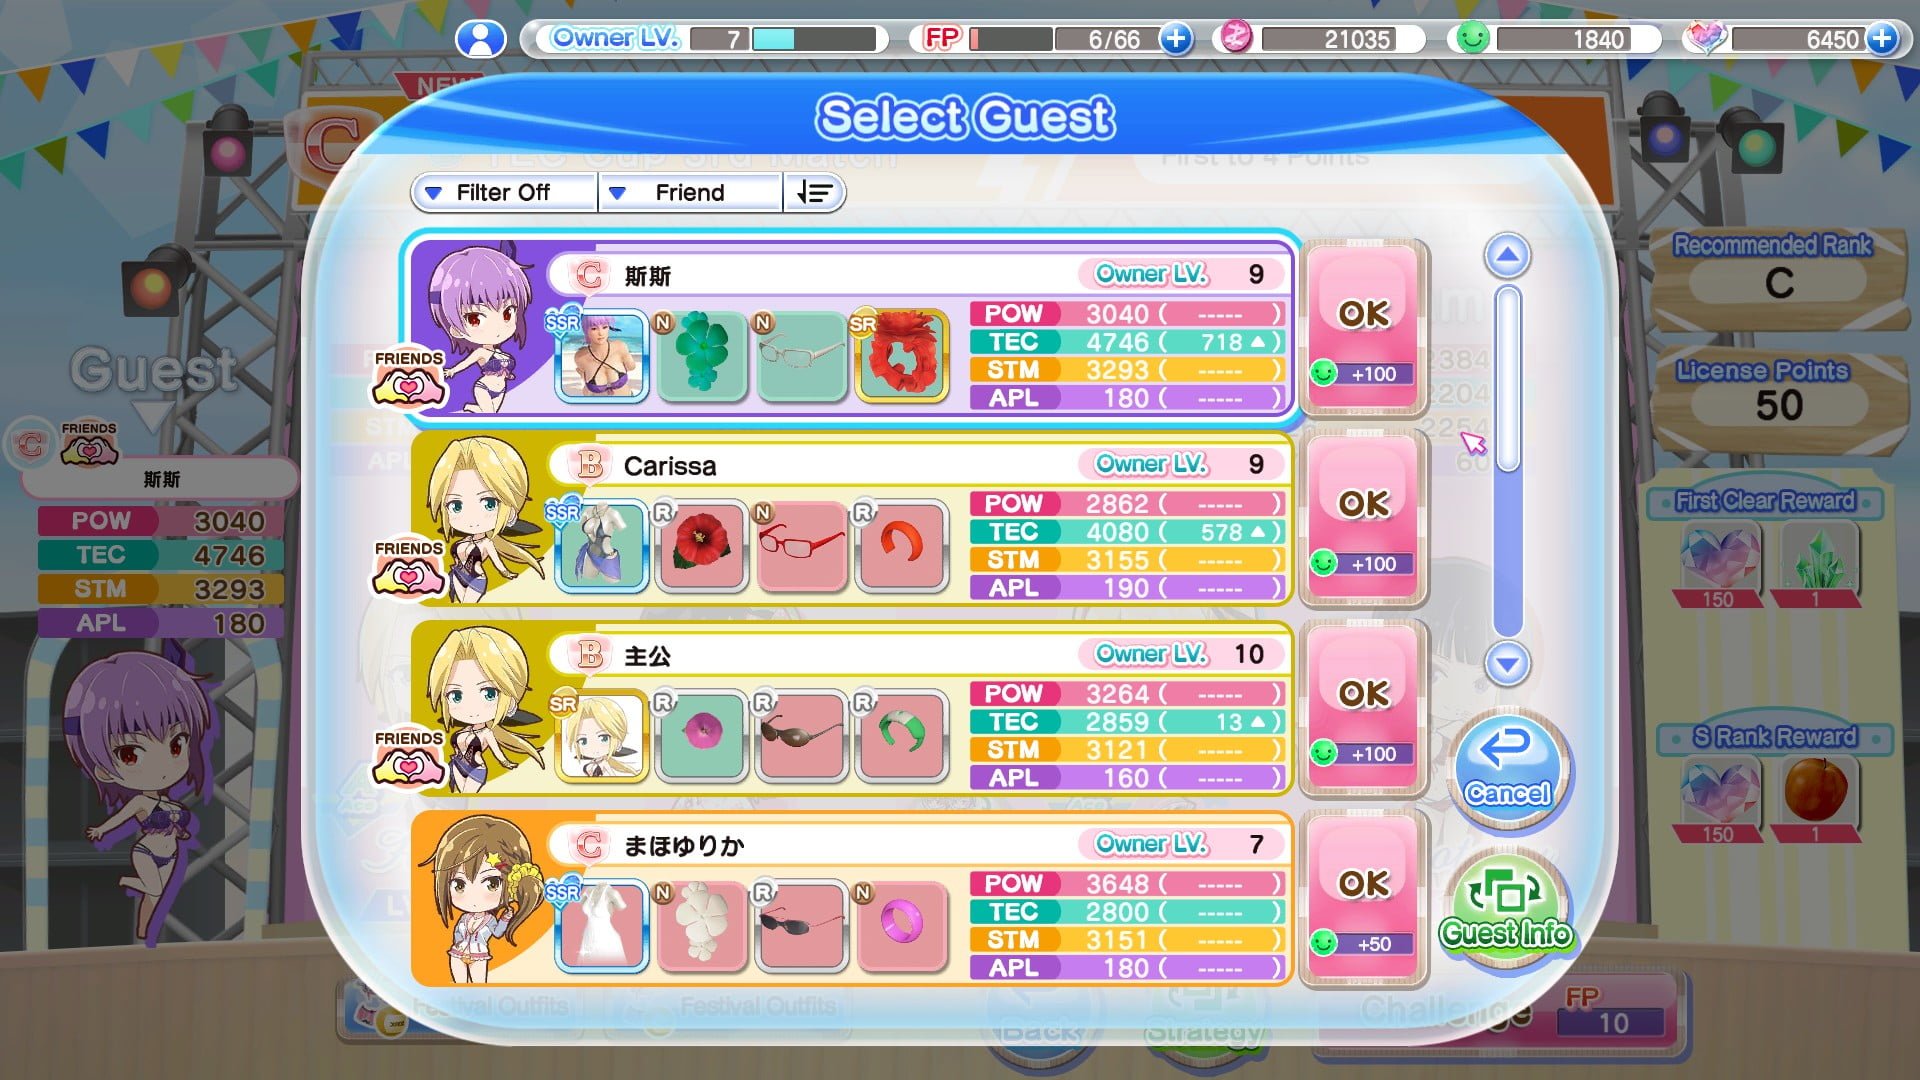
Some of the guests are lucky enough to have gotten an SSR, which would explain their stats. Some have no idea what they are doing, which would also explain their stats. In any case, do yourself a favour and make liberal use of guest characters. At higher levels, they are instrumental in burning the enemy AI’s stamina while preserving yours, which makes it easier for you to break through their defences when your girl returns to the match.
Also, if a guest had some really nice stats, add them. Adding them as a friend increases the likelihood that they will appear on the guest list, and they increase the amount of Guest Point you get if you field them.
Apply to be a friend here.
On that note, a word on Power, Technique, Stamina and Appeal.
Power affects your spikes. Choose spike when using a Power-oriented character.
Feint is governed by Technique, so use that for a TEC-oriented character. Don’t bother bringing in a mixture of POW and TEC for your games, stick to one style and focus on crushing the weaker enemy.
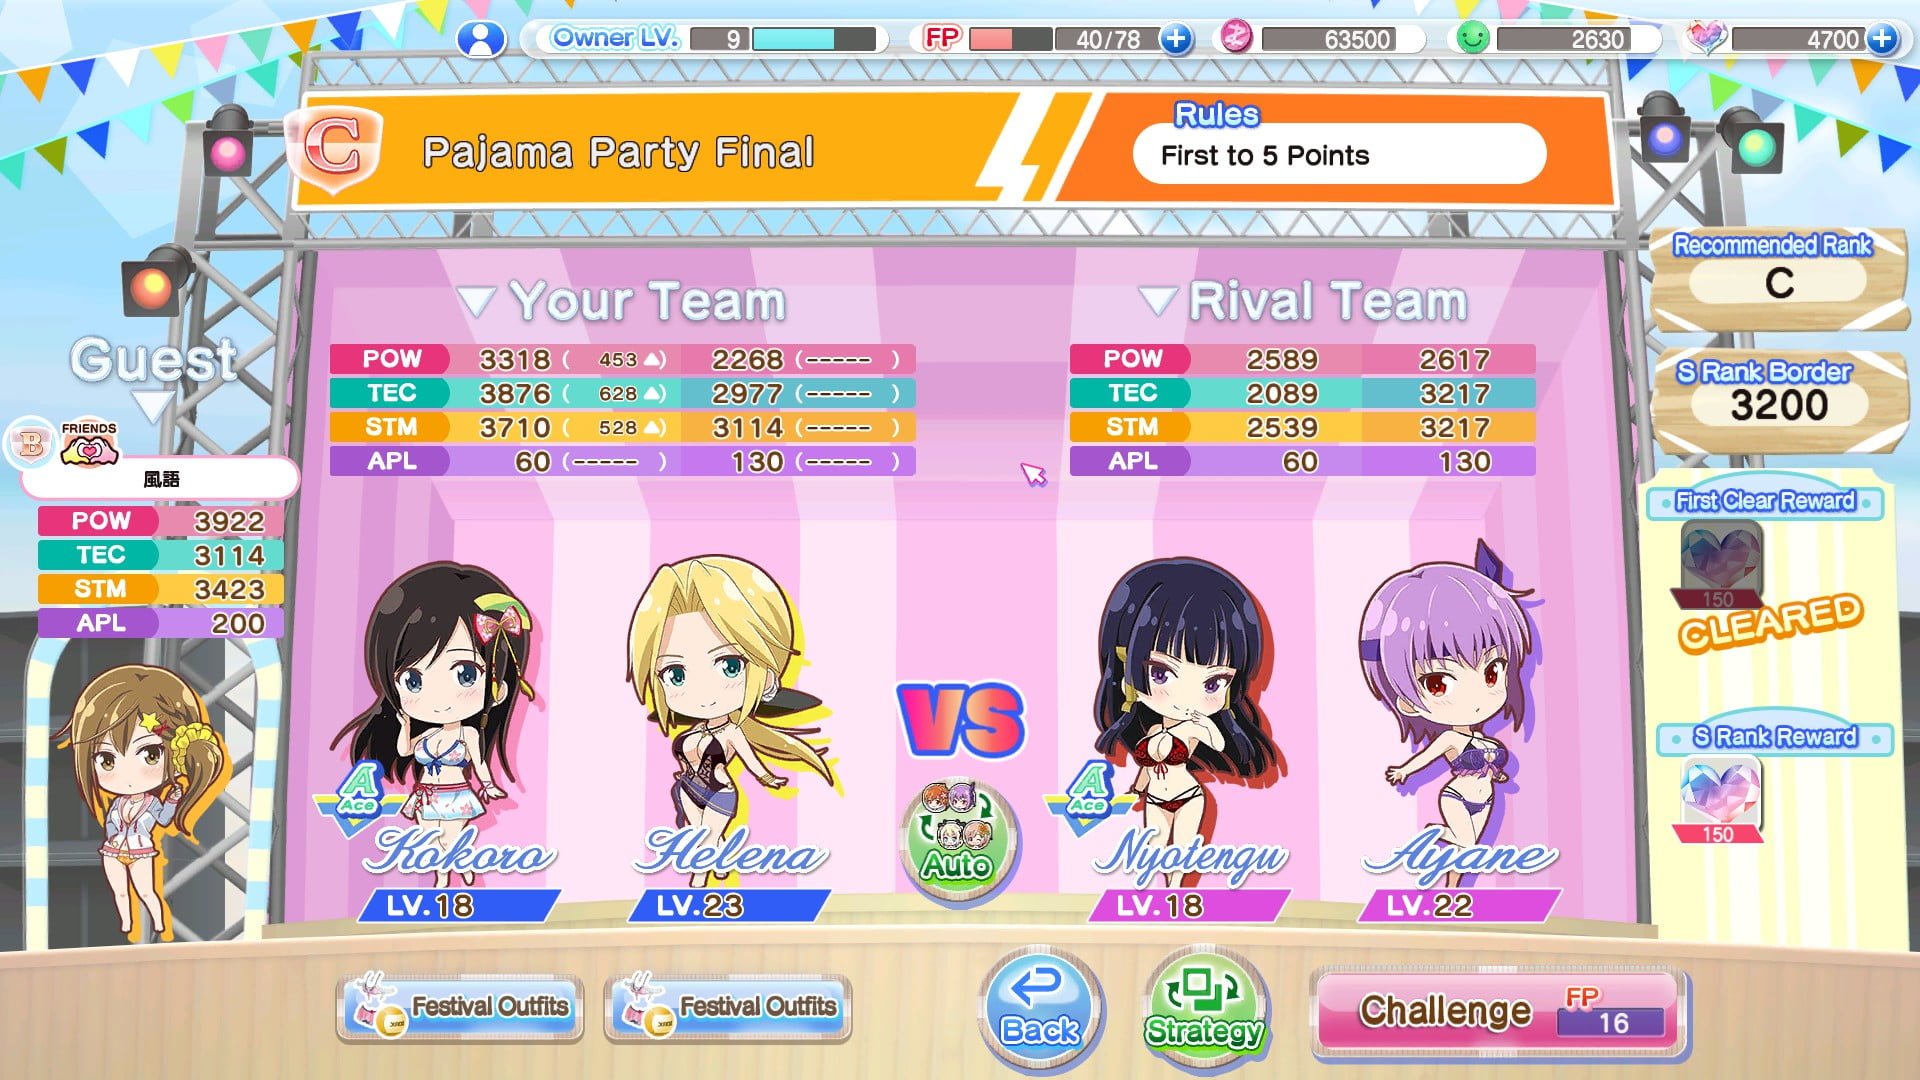
For example, take this matchup.
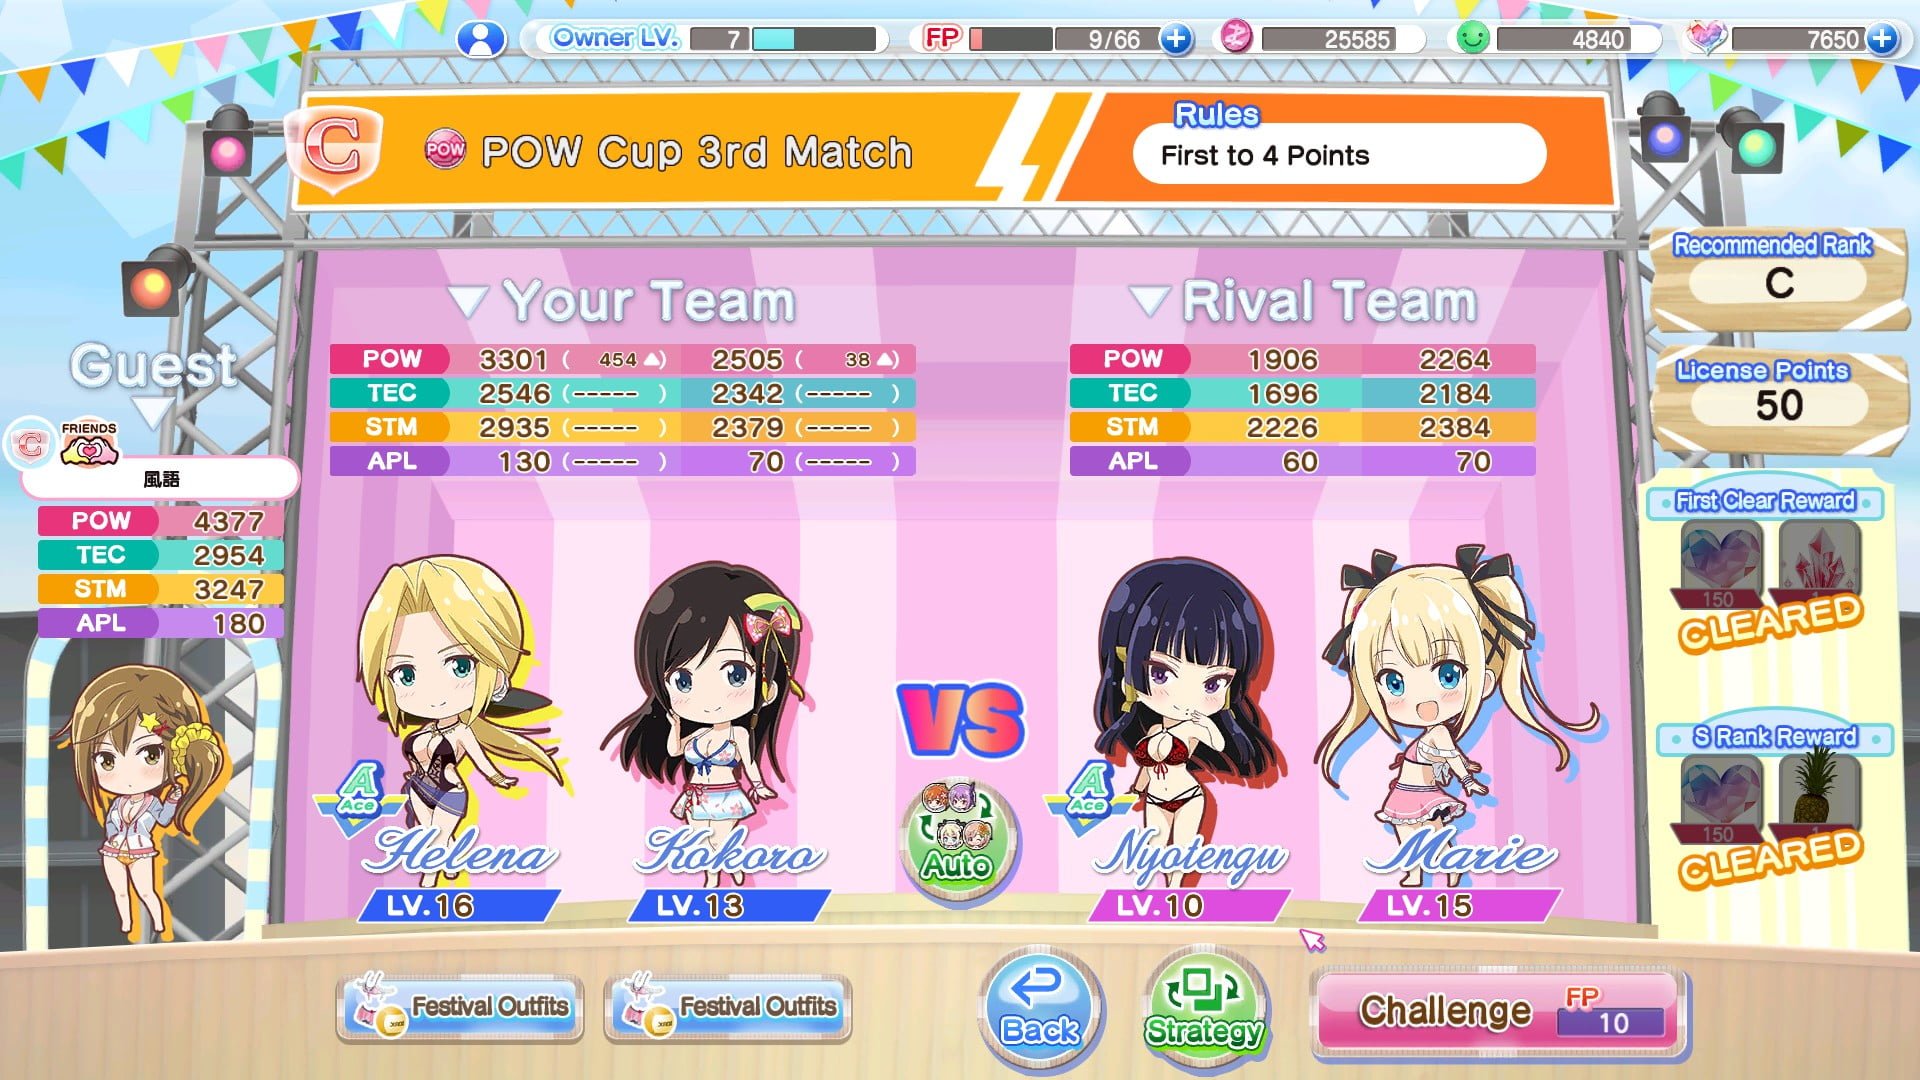
On the enemy team, Nyotengu is significantly weaker than Marie Rose in every aspect. Just go ahead and set her as the target.
Stamina swimsuits boast very high stamina, but average POW and TEC. While stamina SSRs are still pretty decent and viable for most of the game, they begin to struggle once you hit S and SS level enemies. Don’t play the stamina game, you’re going to lose to the AI. Focus on winning games as fast as possible.
Appeal swimsuits are
1) Very rare
2) Difficult to upgrade due to scarcity of upgrade materials
3) Rather bad
Appeal determines how many appeal points you get per round, making it easier for you to S rank a match. I also think it slightly influences the Tension Gauge build up, although I could be mistaken on that. However, they sacrifice POW, TEC and STM for a small boost to APL. The problem is that those stats are crucial to winning the game. There is some use for APL swimsuits for lower level ladders to maximise point gain, but you’re better off using a stronger swimsuit in all honesty.
Tension Burst activates whenever you build up 100% Tension Gauge. You gain a massive 50% boost to your POW and TEC stats for two turns. Guest characters are also affected by it, and the effect carries over even if they swap after one turn. Generally speaking there is no real reason not to activate it immediately upon 100% build up. You will also continue to accumulate Tension Gauge charge while in the midst of Tension Burst, so go ahead and spam it.
Later updates to the game in the Japanese version includes enemies who can affect your Tension Gauge build up, with especially devious foes being able to drain your charge. However, it still remains a powerful tool at your disposal to help against annoying foes.
Your Profile
You can access this screen by pressing the human shaped button beside your Owner level. Literally everything here is cosmetic, even your name so you can change it to your hearts content or to make a bad joke.
This is also the place where you can display your titles, which are these things.
Yes, that is what these random yellow things you keep getting are. Literally nobody cares about this but I might as well get it out of the way.
Finally, clicking ‘Confirm Team’ will bring you to a screen that details your most recent match setup.

The girl on the left will represent you when another player calls upon you as a guest. She is the Ace from the last game you’ve played, and when deployed as a guest retains all of her potentials and stats. The same goes for other player’s guest characters.
The reason for there being two girls on this menu is for PvP events. PvP events is the only time in the game where mirror matches can take place. You will face off against other players and their girls. They are usually a waste of time, but the score rewards are always a nice bonus.
Strategies: How to Win Matches Part #1
You may have have seen this piece of advice on your loading screens.

The game is lying to you.
On average, the girls get anywhere between 12-16 points in POW, TEC and STM added to their base stats when they level up depending on their personal character type. Some characters favor POW, same goes for TEC and STM.
It doesn’t matter because their base stats and growths are too insignificant for it to really have an effect on your stats.
Here is a comparison of the base stats of the same character, one at level 23, the other at level 42.
Level 23
Level 42
The exp needed to level up increases exponentially past level 40 as well.
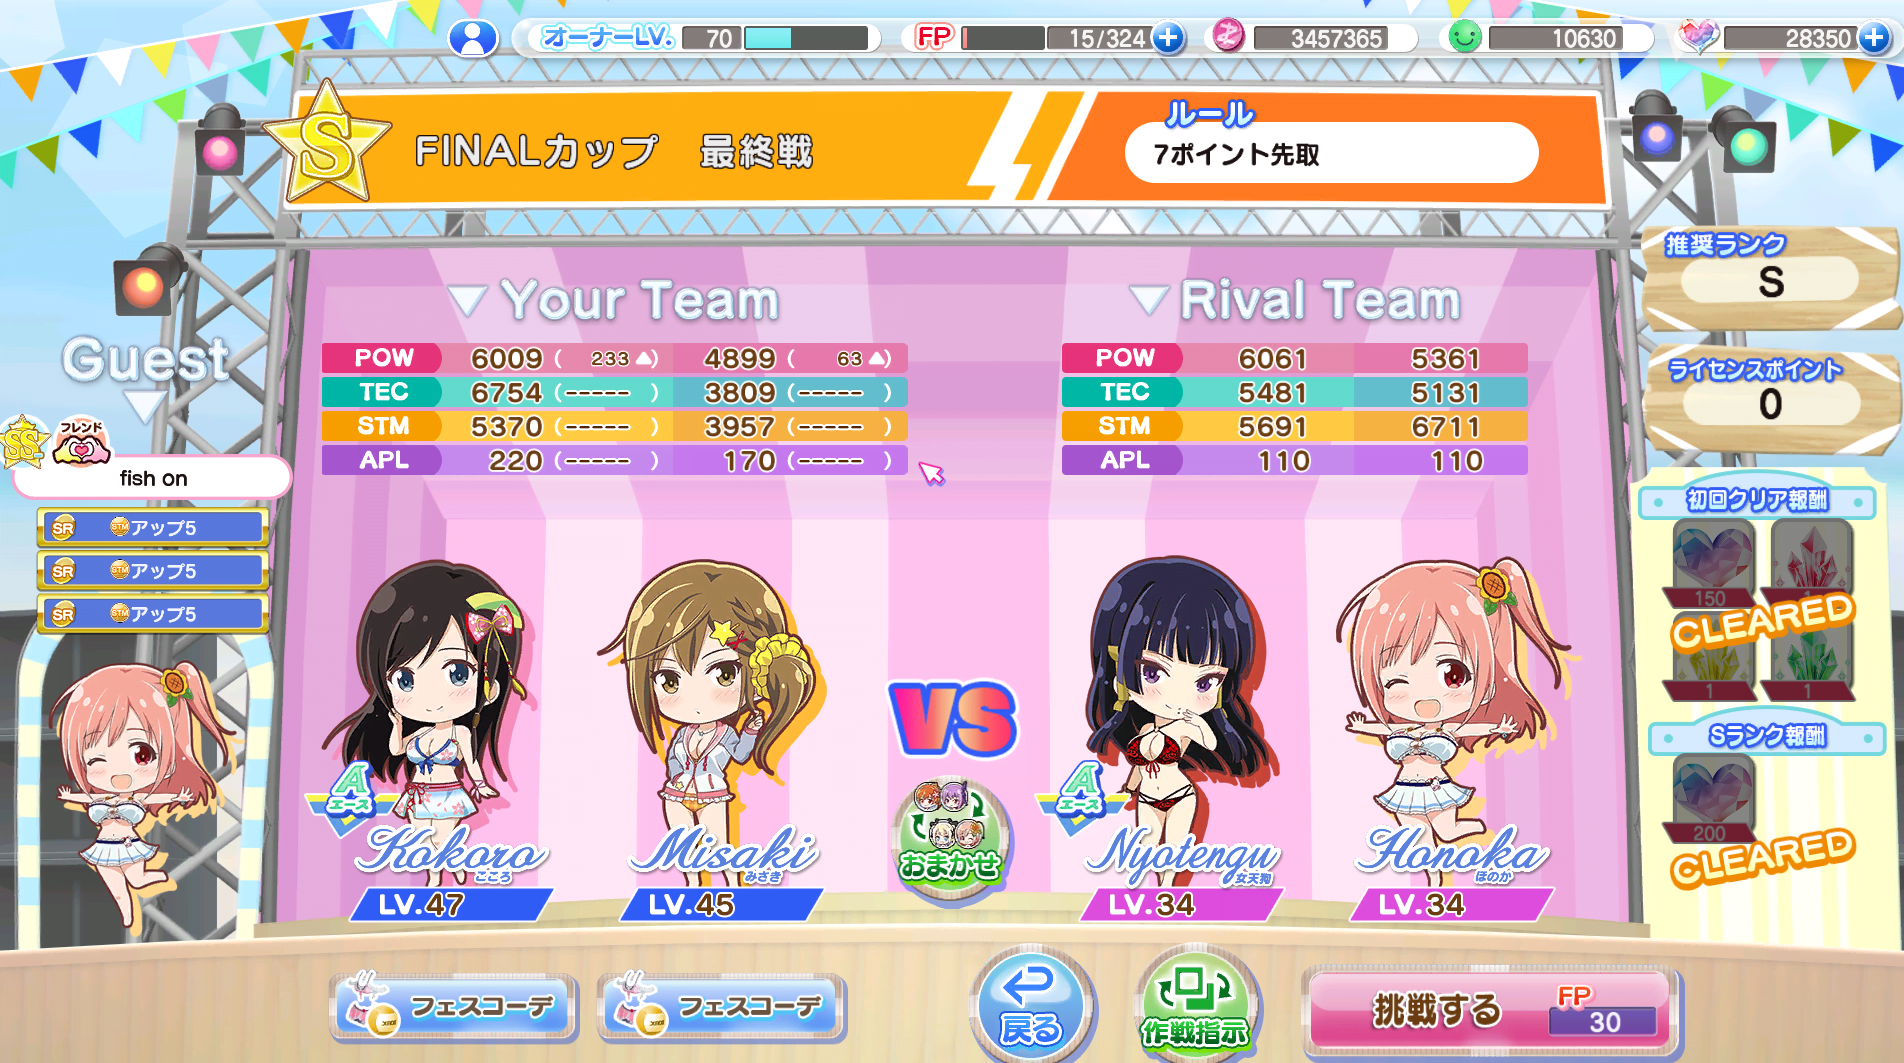
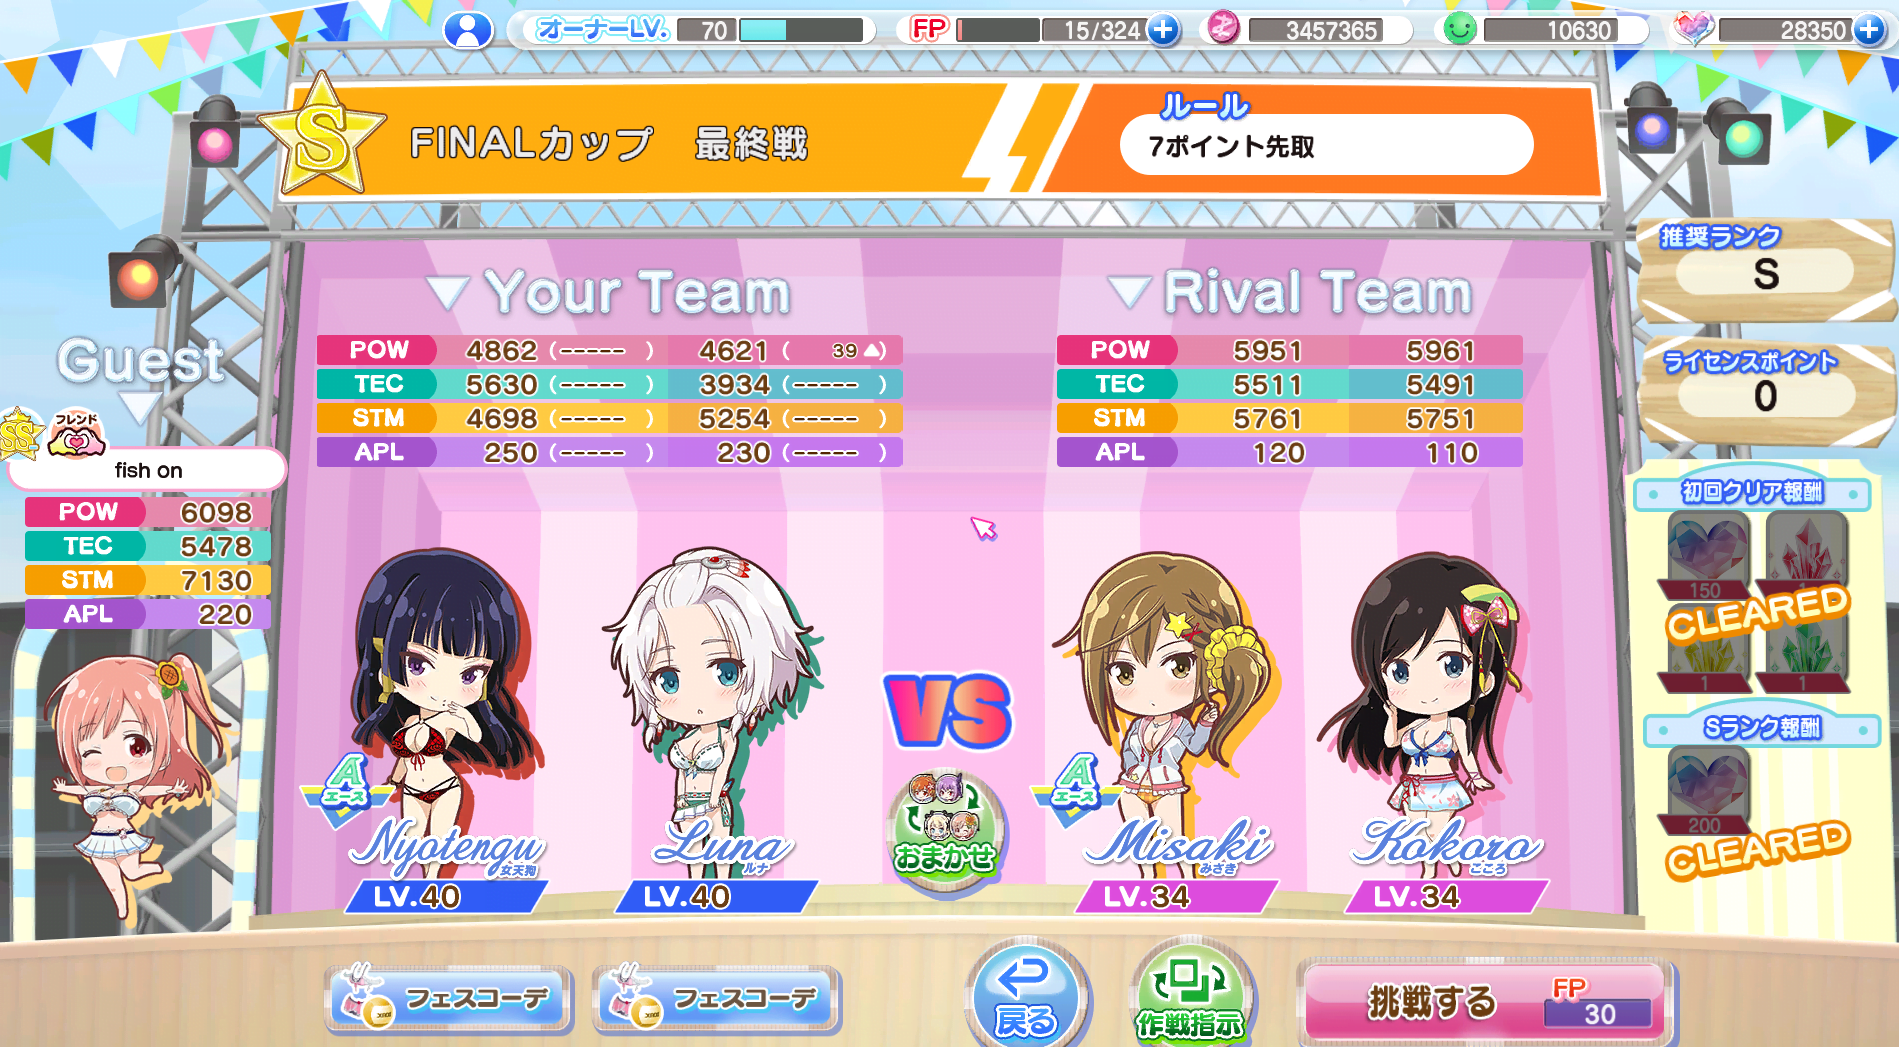
For reference, the final campaign match, at least in the Japanese version, has your opponents with stats approaching 6,000 in each category. And this is considered a very easy match to win as opposed to some of the more insane matchups in the event ladder.
That leaves upgrading swimsuits and changing strategies.
Upgrading swimsuits is technically true. However, they neglected to mention that you’ll need to upgrade an SSR swimsuit in order to win. SRs generally are inferior in every way to an SSR, and this only becomes more obvious when you reach the A ranked matches.
Changing strategies is complete nonsense. If the enemy AI has a stat advantage over you, you are almost guaranteed to lose the match no matter what you do. Don’t bother wasting FP, they’re there by design to try and get you to buy V stones.
Trend SSR/SRs
You have seen this term pop up a few times now, but what exactly are they, and how do they work?
Simply put, it is the way the game tries to get you to spend your money to buy swimsuits.
Trend equipment, which can include accessories as well as swimsuits, are equipment that confer a bonus to your stats when equipped for that event’s matchs.
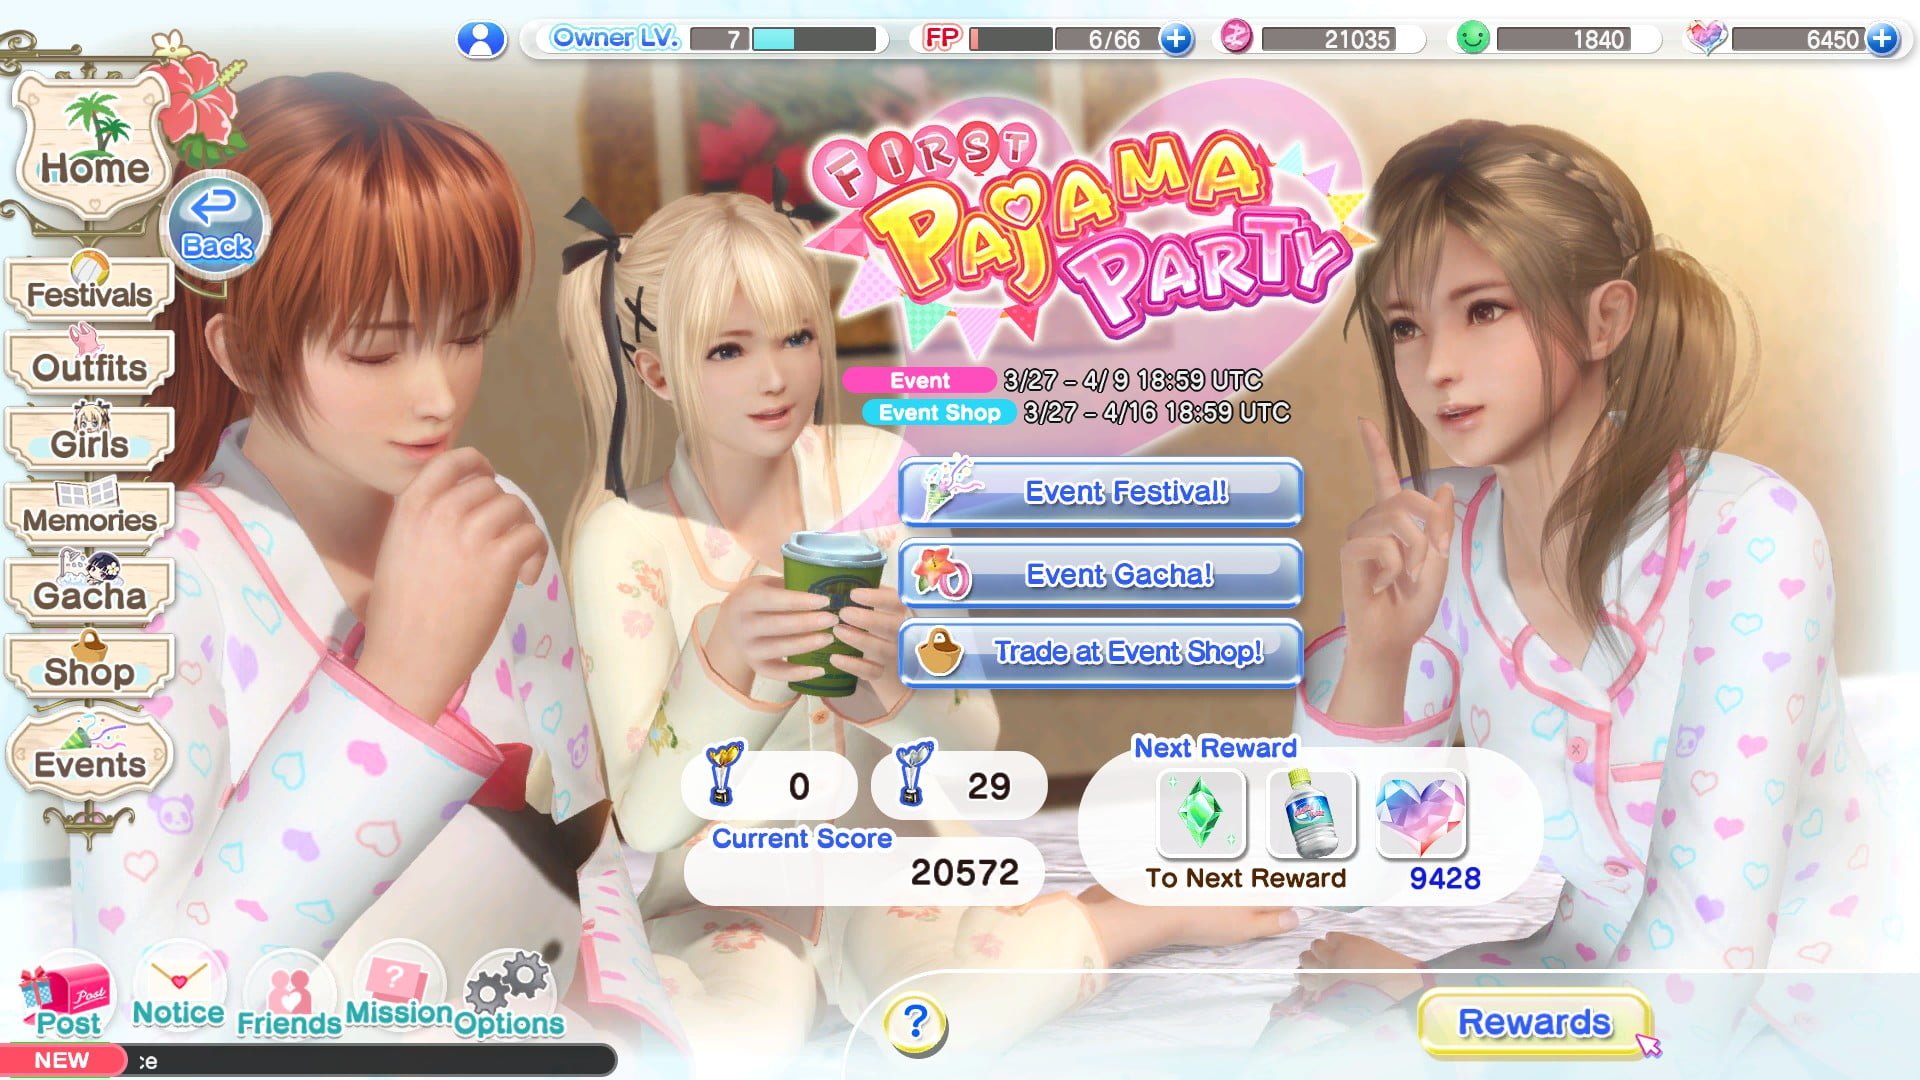
For example, for the ‘First Pajama Party’ Event, I have equipped Kokoro with the ‘Aroma’ SR swimsuit (Yes, it is still a swimsuit), you can see she gets a significant boost to her stats.
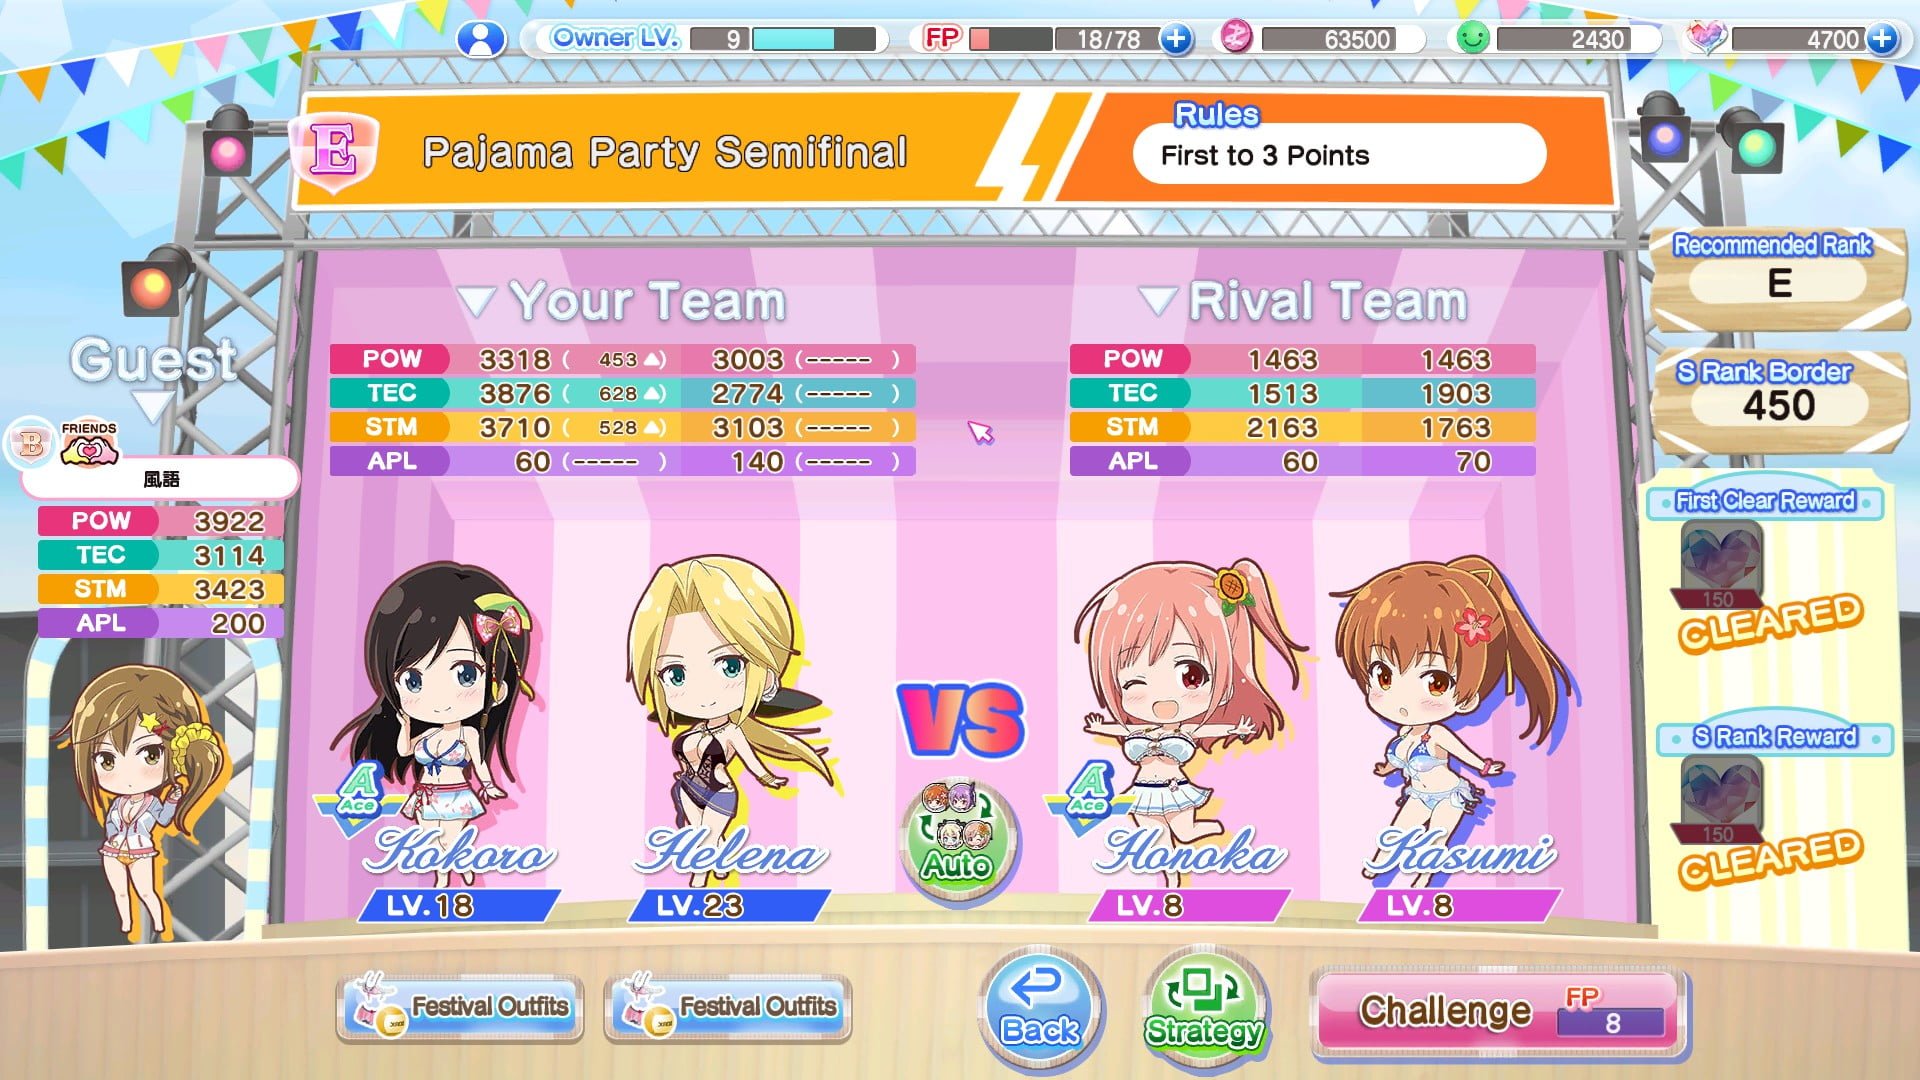
The bracket beside her stats indicate that there is a bonus active. However, this Trend effect only activates for the event it was tagged to. When bringing the exact same character and swimsuit to a normal match, the bonus does not activate.
I should also take this time to point out that while Trend SRs confer a sizable boost to your stats, Trend SSRs give a even larger boost that can pretty solo the event ladder up to C rank and maybe even B.
Trend outfits and accessories also have the added effect of increasing your rewards. Usually they increase the amount of event points you gain, as well as boost the amount of event currency per match. This is why I recommend getting the current Trend SR swimsuit asap to make grinding for the rest of the rewards easier.
Finally, Trend equipment rarely work past their event. They still retain their base stats, but their bonus is unlikely to return, making them mostly cosmetic once the event is over. Trend SSRs, however, have such powerful stats and skills that they can continue to be used long past their event. As a general rule, Trend SSRs are always superior to Venus SSRs if they are of the same archetype (POW, TEC, etc).
Ranking
The rankling system is honestly pointless because the top player is guaranteed to be the guy who drops a few hundred bucks on the latest Trend SSR. That said, if you manage to hit rank SS+, start spamming friend requests to them, because these guys are the guests that can completely obliterate any opponent.
Strategies: How to Win Matches Part #2
This section deals with the more technical aspects of the game that didn’t fit anywhere else.
First off – Lower ranking matches (ranks E – B) don’t follow the same conventions because the enemy AI generally does not have skills at that level. What this means is that these matches are essentially slugfests where your stats are all that matter.
Skills
Example of a lot of skills activating during a match. The girl pictured is Luna, who was released a while back on the Japanese version.
Skills have a wide variety of effects that can range from a flat % increase in POW to reducing enemy stats when attacking.
Swimsuits starting from R rarity have skills built into them, which can be seen simply by mouseovering them in the Festival Outfits menu.

Generally speaking, you pick an SSR for its stats, and not its skills. In that case, think of the skill as a bonus.
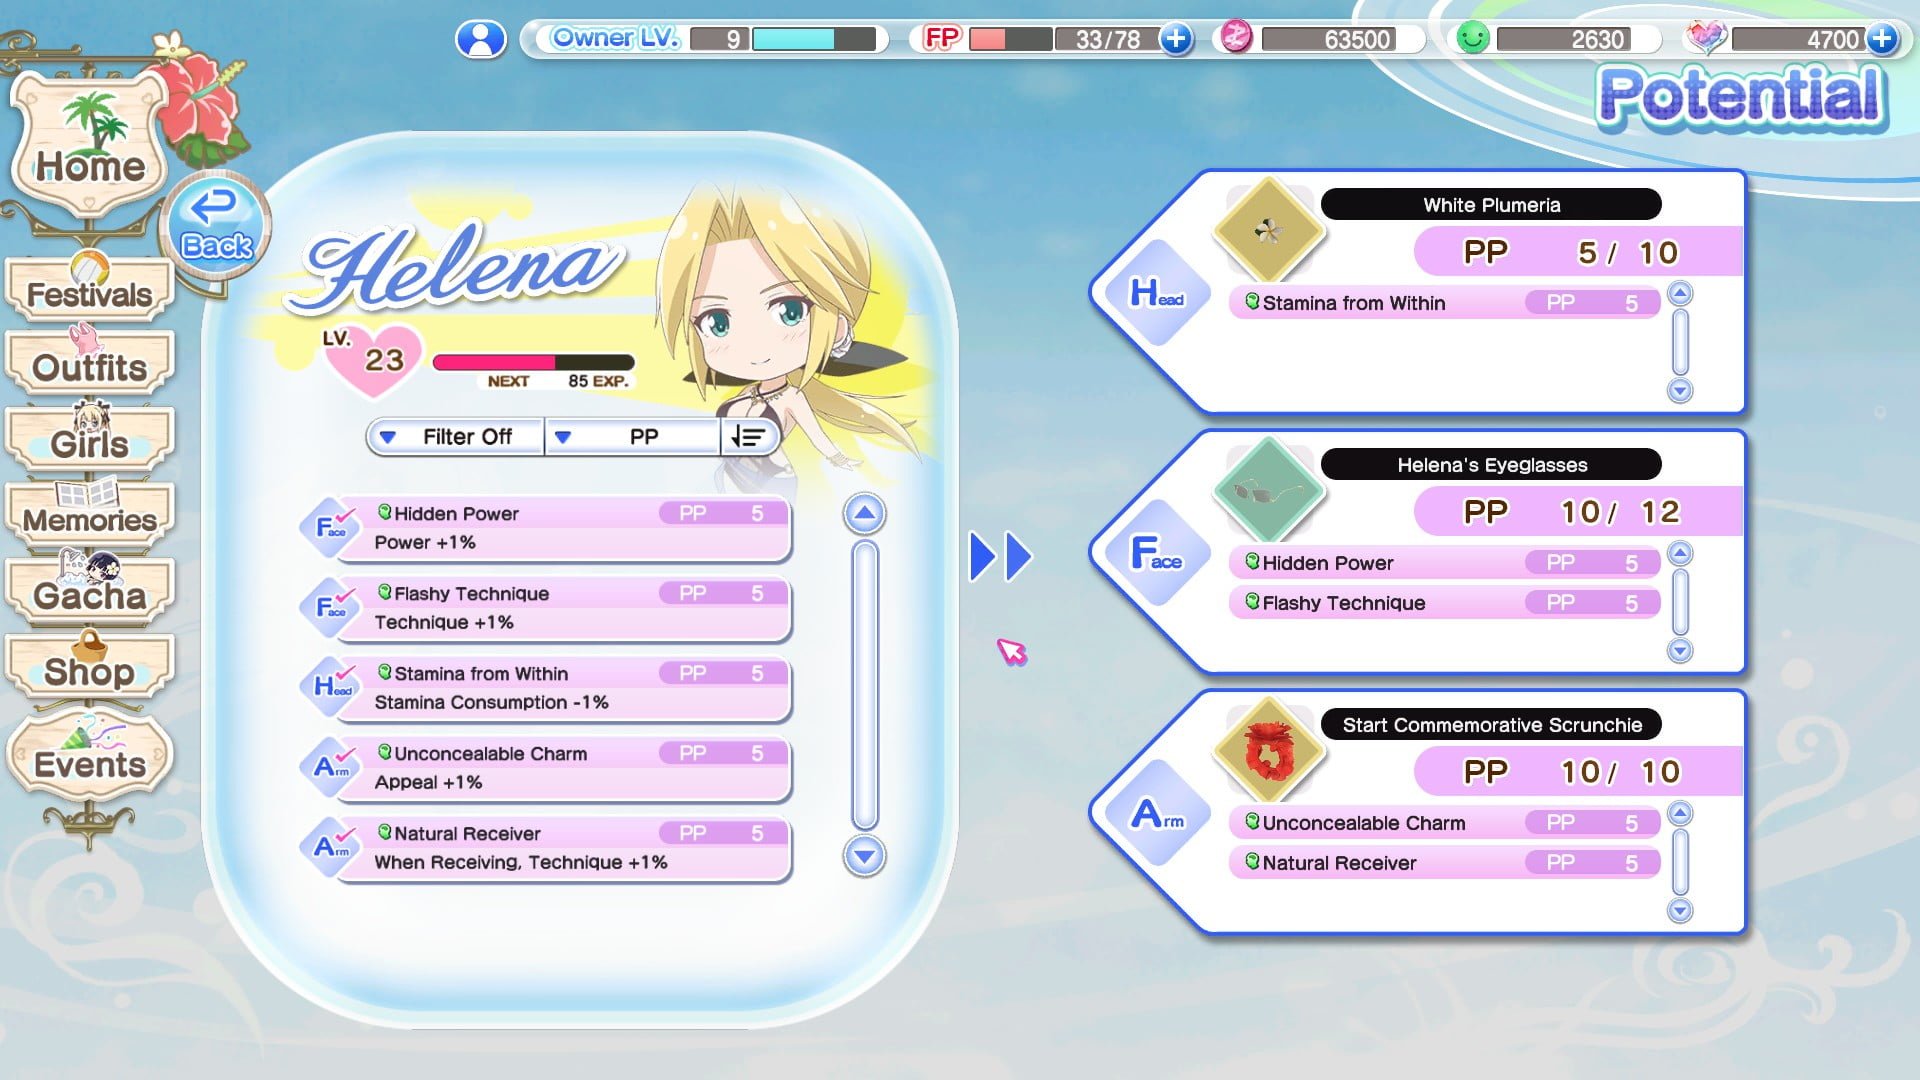
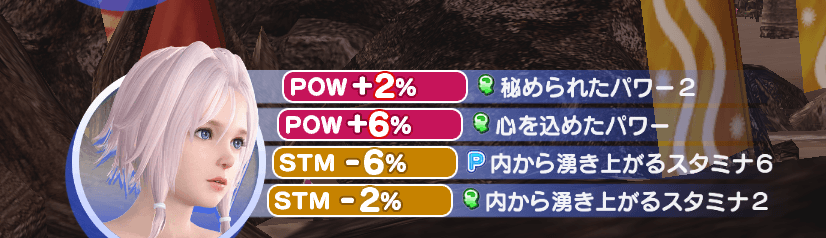
The other source of skills come from ‘Potentials’. The maximum amount of skills you can equip here depends entirely on your accessories’ PP limit. You get potentials either by leveling up the girls, or by fully awakening SR/SSR swimsuits. I’ve never managed to fully awaken an SSR in my life, but you will have plenty of opportunities to awaken SRs.
The best potentials in the game come from fully awakening swimsuits.
Stamina
Why I bring up skills now is because using skills burn through your stamina far faster than just duking it out based on stats.
For reference, Luna started off with 4621 Power and 3924 Technique. I know it’s not the same match, but just keep that number in mind.
By the 7th round, she is considerably weaker, to the point where Kokoro could easily shut her down. Compared to her partner, who still has a decent amount of stamina left.
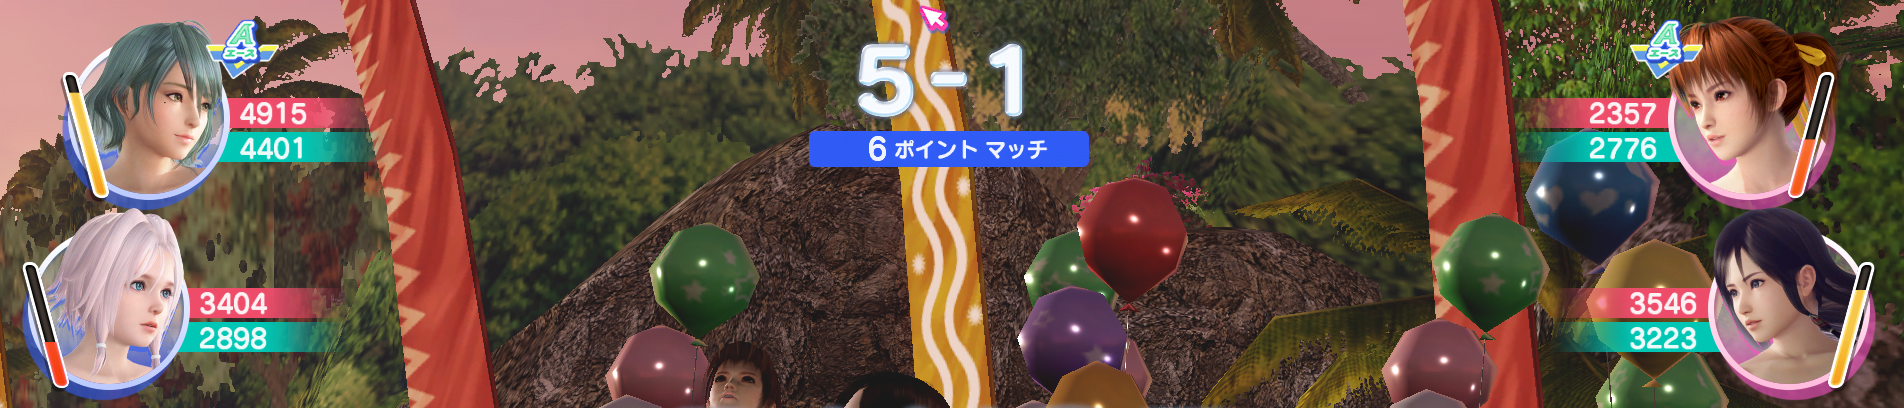
Also note that Kasumi isn’t doing so well either. Her stats have dropped enough that she will be unable to counter any shots directed at her. For this reason, it is recommended that you pick a target at the start and stick to it. You are able to switch targets in between rounds, which you should only do if your opponent constantly intercepts the shot and has a significant stamina disadvantage.
Preparing a Team
The best team is entirely dependent on the number of SSRs you have available. Starting to see a pattern here?
The sad fact is that no matter how much you like a certain character, if you don’t manage to get a decent SSR for her, she’s likely to be benched simply because her stats simply aren’t cutting it.
However, once you manage to get a decent collection, this becomes more manageable. It’s not as impossible as it sounds, trust me. I only started in December 2018, about 4 months ago as of writing this guide. In that time I managed to unlock all the girls with the exception of the current paid exclusive. Granted, there were several promotions that offered really good chances of getting an SSR, but it all comes down to luck.
Back to topic – I mentioned earlier to either pick POW and TEC and stick to it.
There is almost no point in trying to balance POW and TEC in a game because your main goal is to focus all your attacks on a single, weaker target and overwhelm them asap. This means your team composition is entirely dependent on the gacha until you have a few SSRs at your disposal.
POW focused characters should obviously focus their potentials towards POW and STM skills as a TEC increase is useless to them. However, your accessory should always be either the current Trend accessory, or the one that gives you the most PP, ideally both.
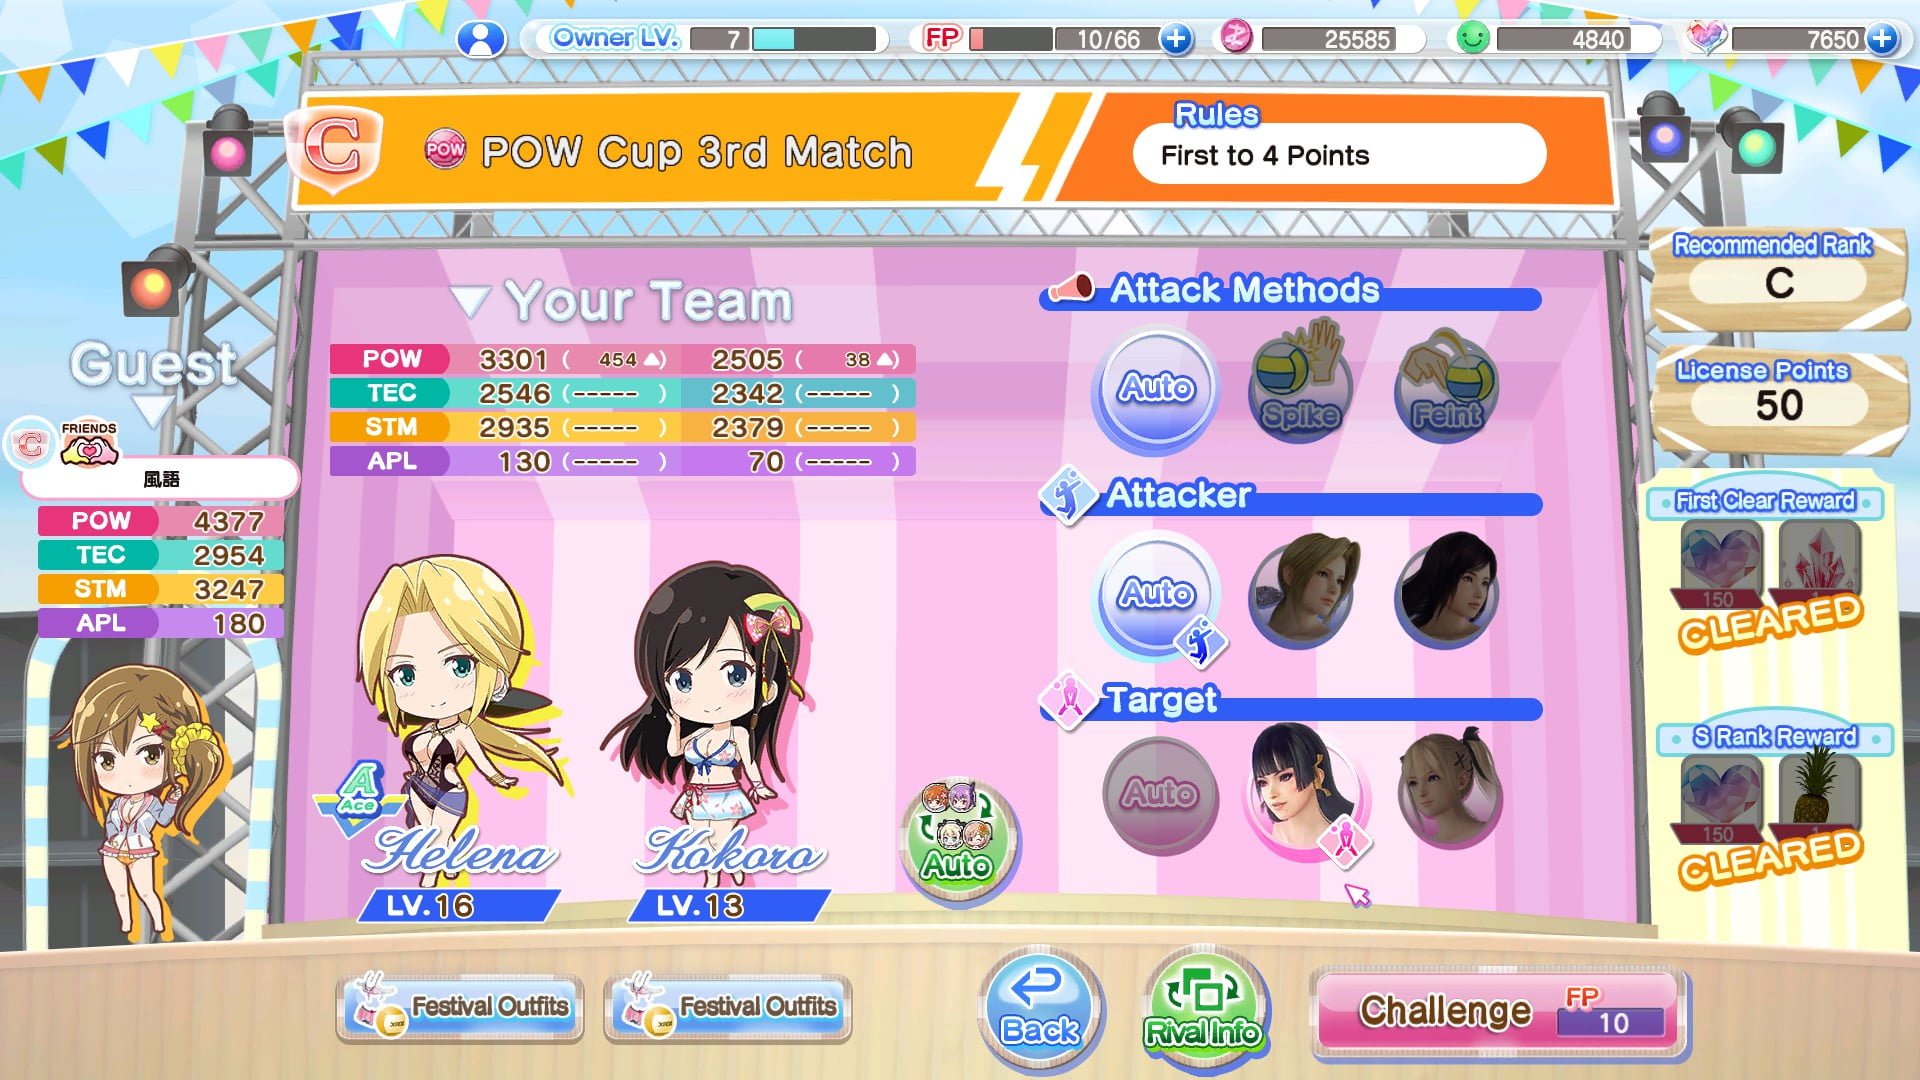
The Strategy Interface
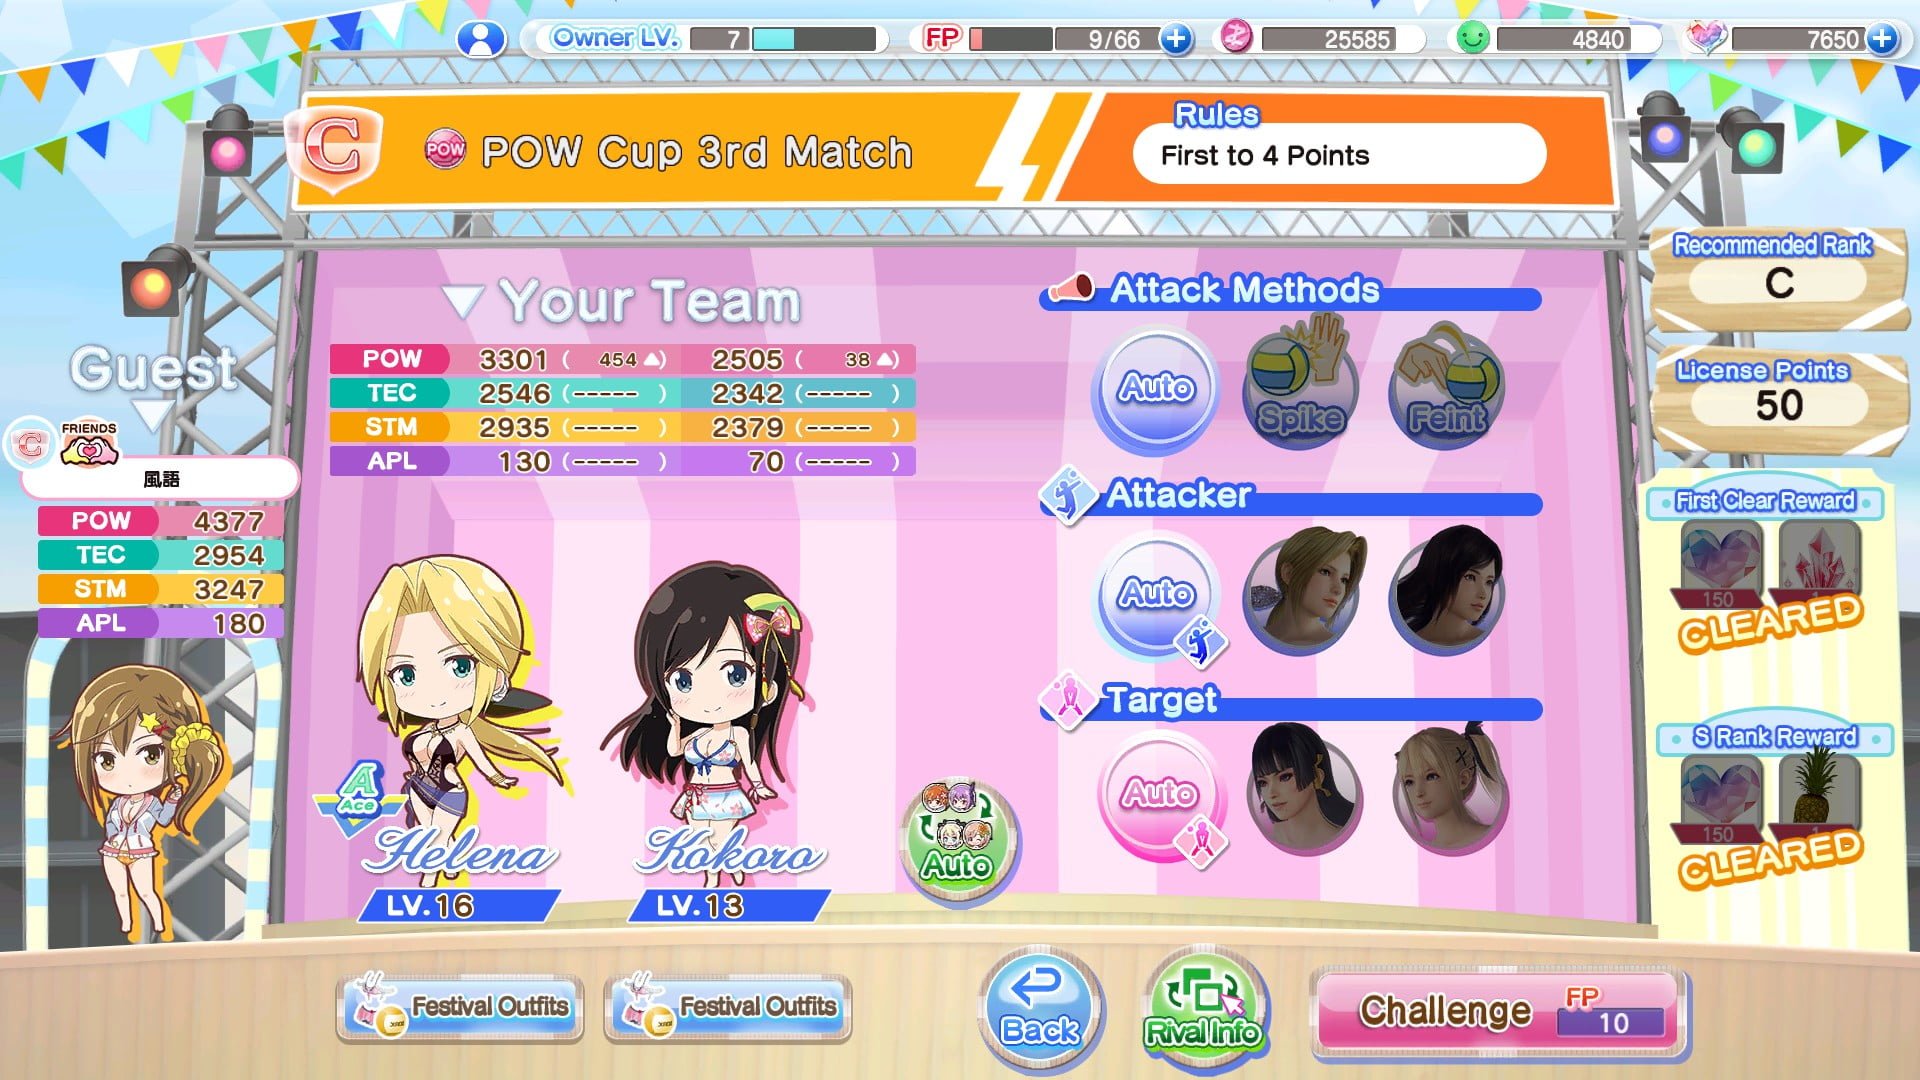
Take a look at the opponent in this matchup. Who should you target?
The answer is Nyotengu, and only her.
You might argue that you should target Ayane so her stats would drop. Unfortunately, while that is true, so will your stats. Stamina cannot regenerate in the middle of a game, and once a character hits 0 stamina they’re sitting ducks.
Attack Methods depend entirely on your team. Part of the reason I strongly recommend against a team with both a POW and TEC character is because you are forced to pick auto for the attack, which is detrimental at higher levels.
Always set your guest to be the attacker as their stamina is free and doesn’t affect your girls. You don’t have enough time outs to micromanage every round, so be strategic about this, i.e. when one of your girl is completely exhausted.
Keep in mind the AI will not always follow your strategy. Occasionally it may do a feint instead of a spike, or if the enemy AI intercepts the attack meant for another. Also, make sure you are targeting the right girl. I had several matches where a misclick cost me the game.
Skip All
You should only ever use this option when you have a massive stat advantage over the enemy. If both of you are evenly match, don’t do it. The difference between skipping a single round and skipping an entire game is that Guests and Tension Burst are not factored into the equation for the latter, both of which which are the most powerful tools at your disposal.
Forcing a match up
You will never come across a situation where the girls compete against a clone of themselves, with the sole exception being guest characters for obvious reasons. You can force the AI to pick another possibly weaker character by deploying the girl in question.
For example, in this match the AI has set Misaki and Kokoro as my opponents.

Since I have both characters, I experimented a little to find this.

While Nyotengu posses a slightly higher POW then the previous girls, Honoka is significantly weaker in terms of POW and TEC.
Naturally, this strategy requires you to have access to as many girls girls and their SSRs as possible before you can really get anything out of it.
Festivals

The festival screen is where you pit your girls and their swimsuits against the AI and occasionally other players during PvP events. Yeah, there’s some PvP. It’s called Dead or Alive 6 It’s still Beach Volleyball themed.
The matches are ranked in difficulty, with the lowest being E (F is tutorial level) and the highest difficulty on the Japanese version being SS+. The enemy AI stats have gone over 10,000, just to give you an idea of what that entails. Naturally, players still won which only means they’re only going to get stronger. But relax, the Steam version just started 2 days ago.
Your license rank is a good indicator of your progress, with the highest possible rank being SSS+. However, you’ll never get there as it is based on actual time spent playing per day and is refreshed daily. By the time you clear the main campaign you’ll be sitting comfortably at SS-.
REC. is basically the next match in line for you.
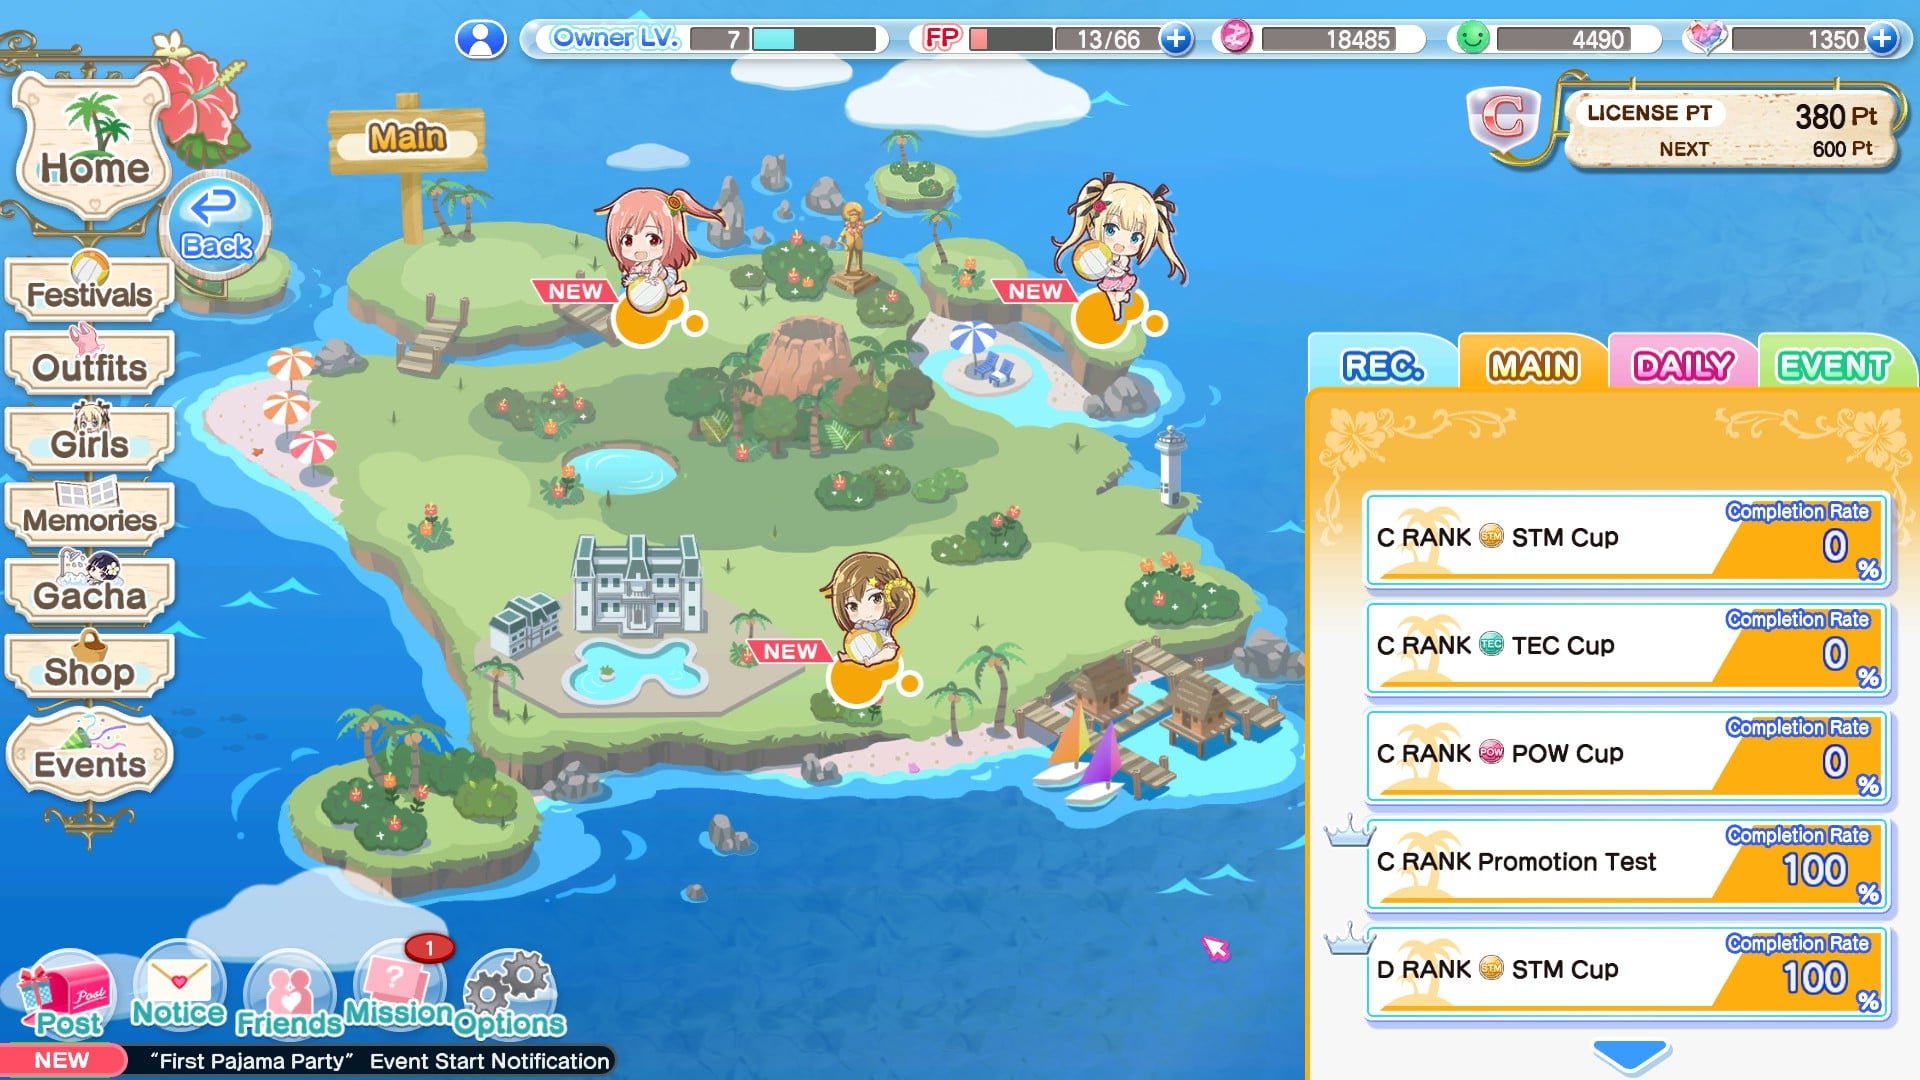
MAIN is the ‘story’ campaign. Yeah, there’s one. It’s pretty decent, rivals Mass Effect 2 imho.
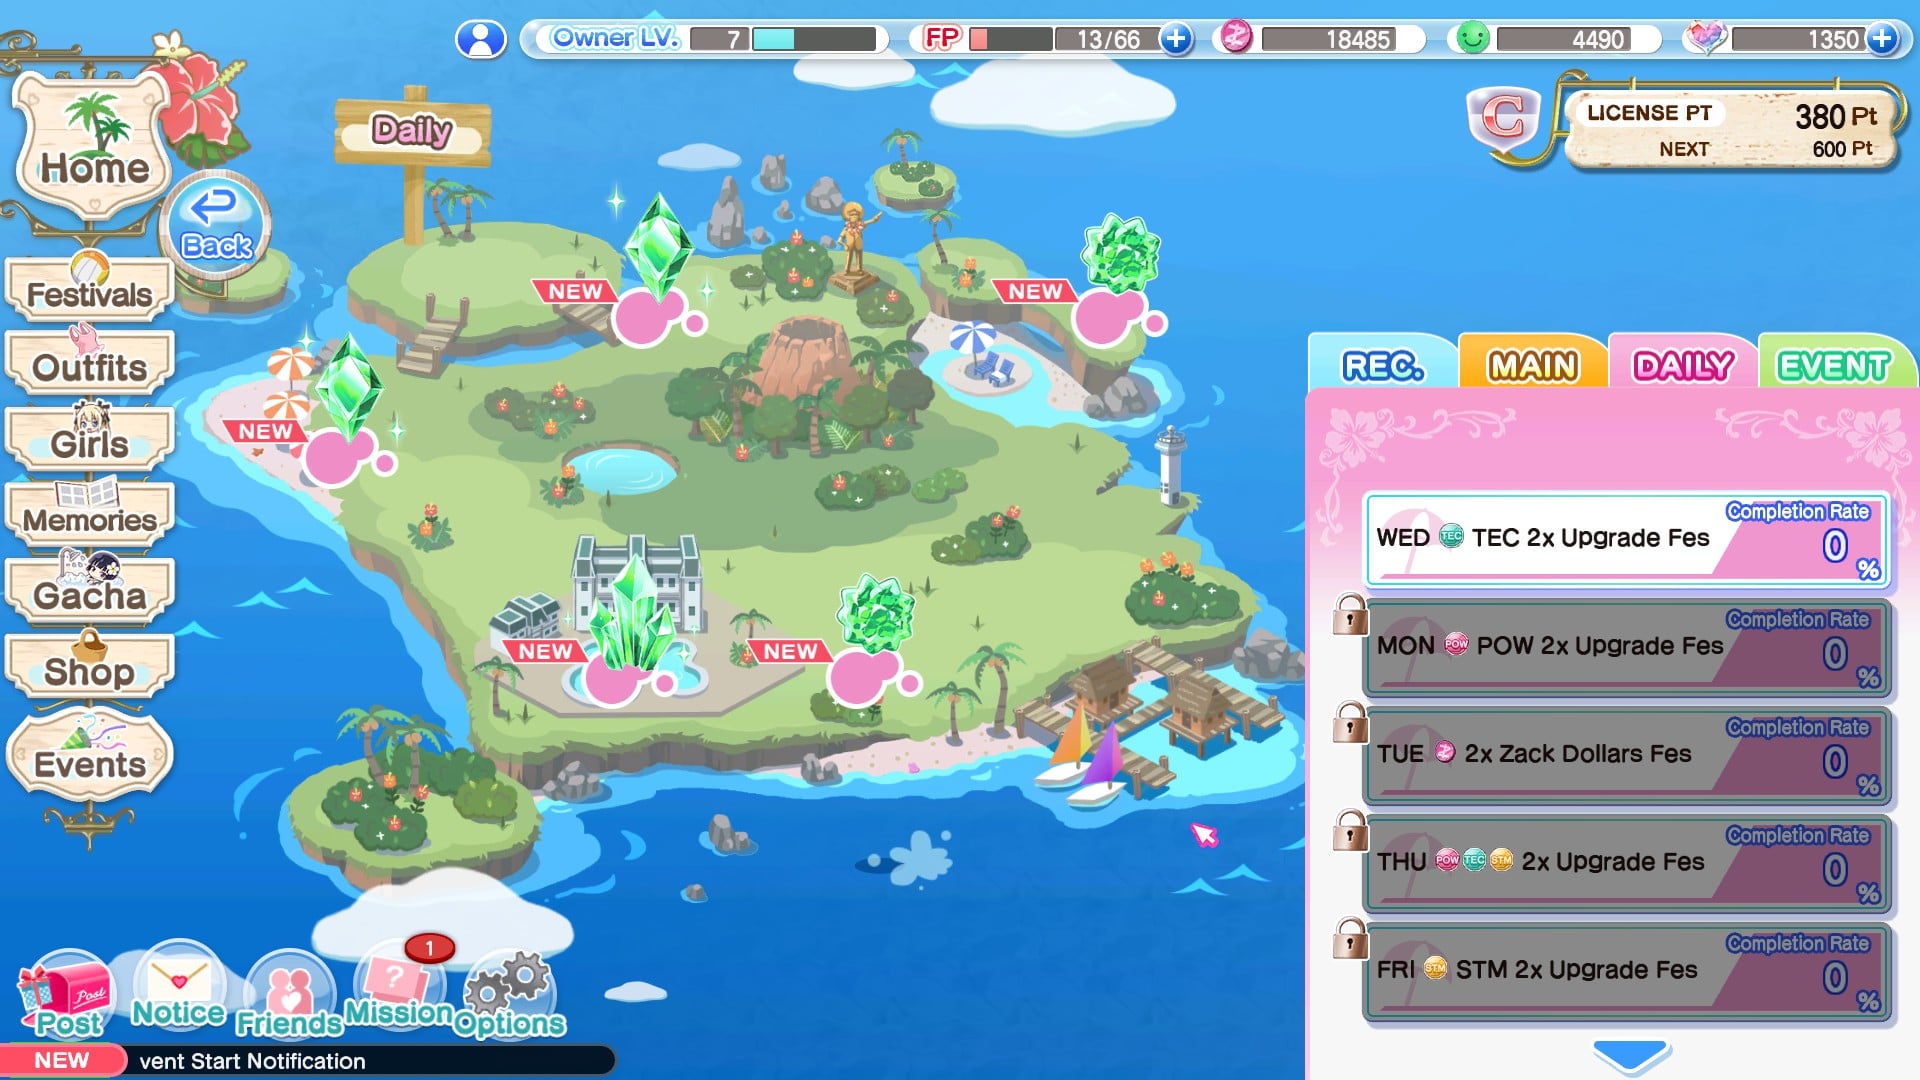
DAILY is a very misleading title. These matches serve to help you farm resources to improve your swimsuits by rewarding you with upgrade stones and Zack Dollars.
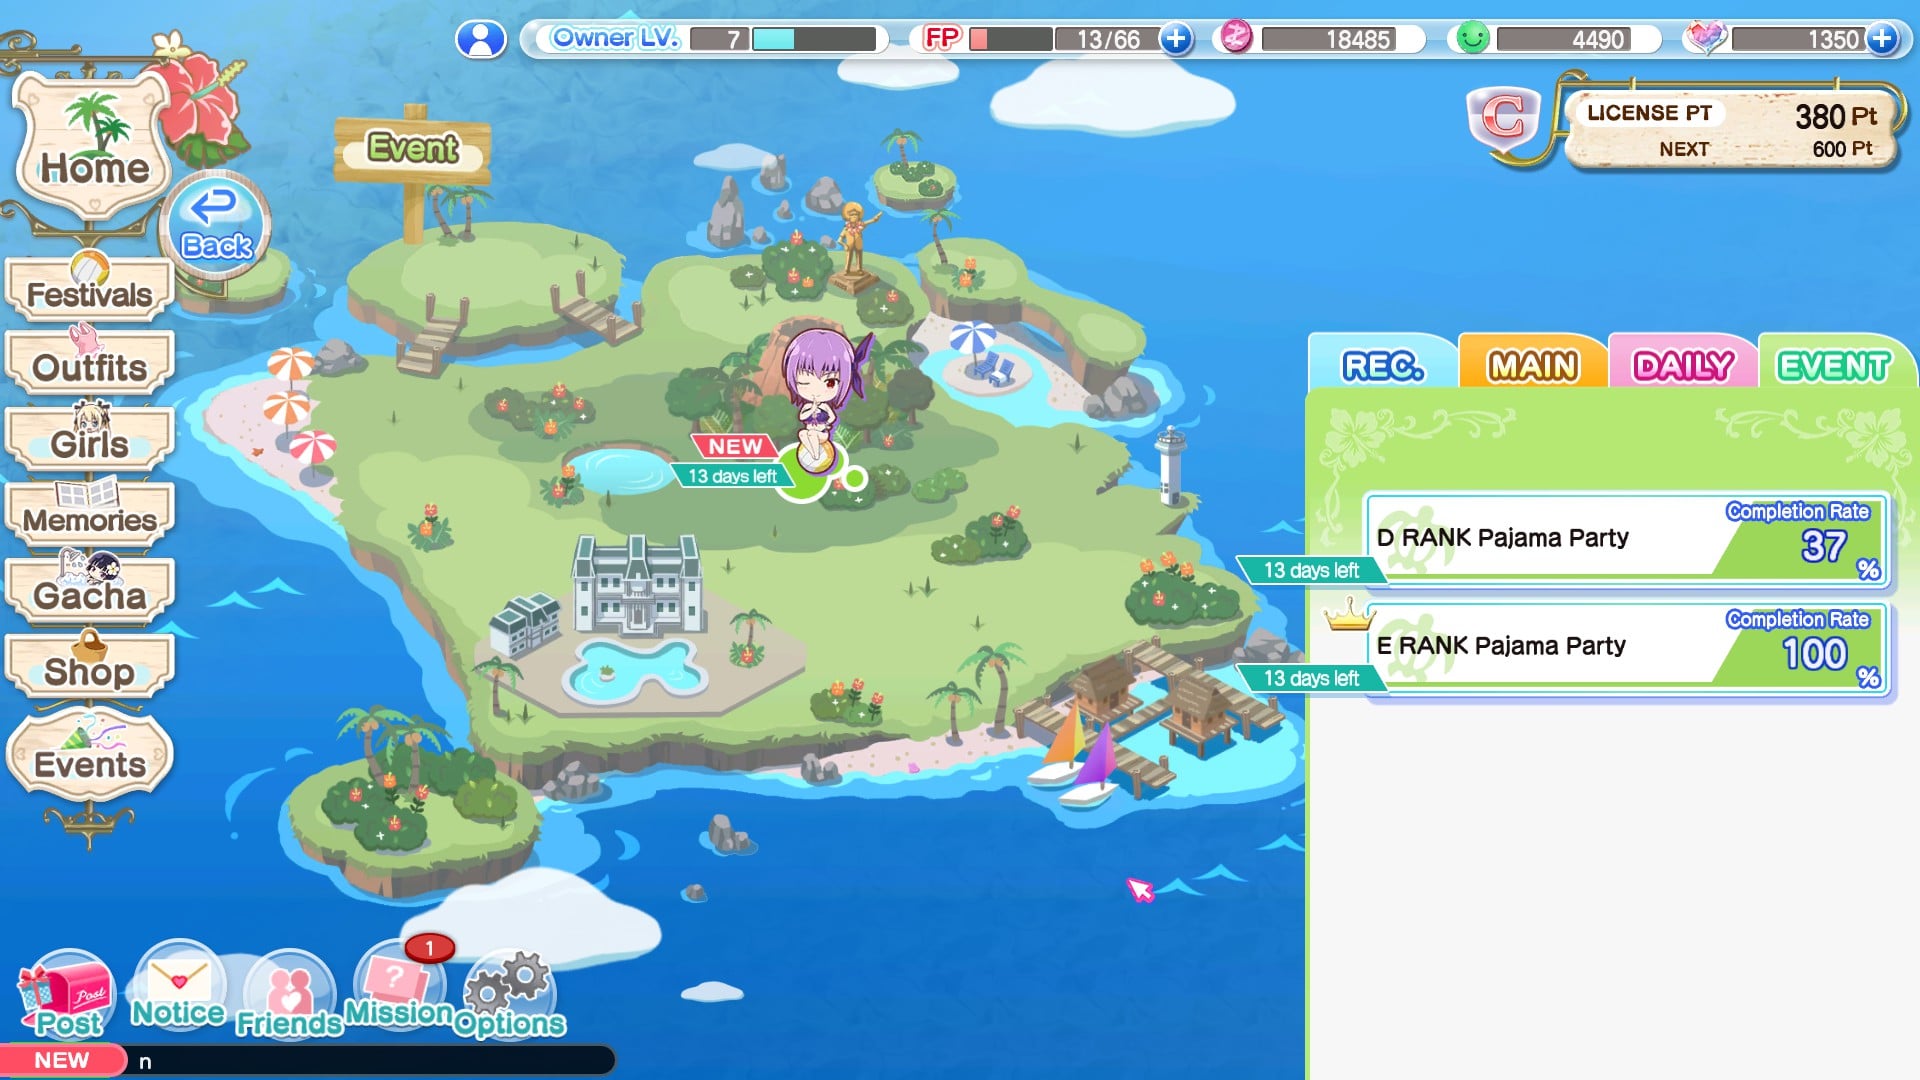
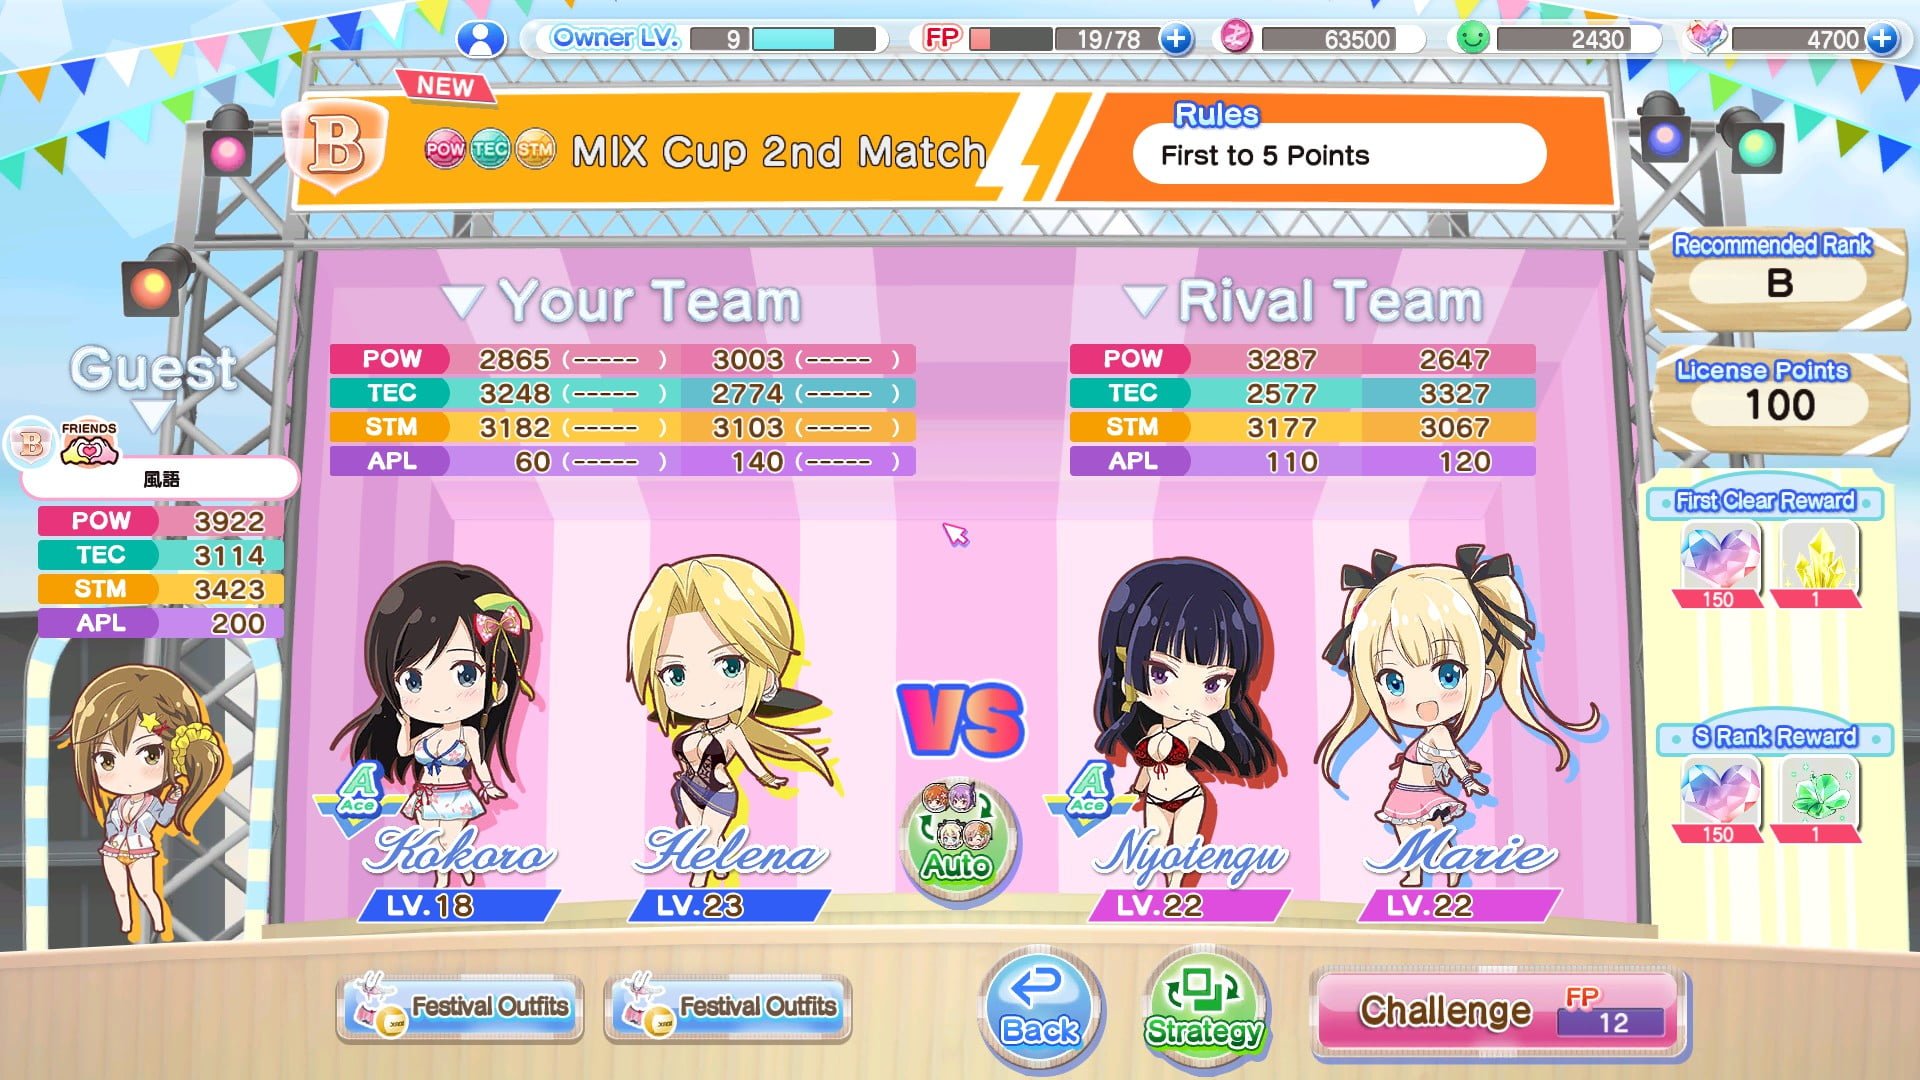
EVENT is a tab reserved for the current ongoing event themed around a girl, Gacha or in-game event, usually a combination of all 3. Don’t worry – the longest this game has gone without an event is about 12 hours. Most events follow a ladder format, where you have to clear E rank first before you can proceed to D, so on and so forth. The higher you go, the better the rewards.
Almost every event has an associated ‘Trend’ swimsuit and accessories attached to them. Using a Trend Swimsuit for the event matches confers a massive boost to the girl’s stats, usually more than enough to clear the entire event ladder. Due to the nature of the game, it is damn near impossible to keep this page updated as it changes every 2 week on average. Once you clear the main campaign, this is where you’ll be focusing your efforts.
That reminds me – if you’ve just started, focus on clearing the campaign and unlocking more girls. Both will require you to get some SSRs, so good luck with that.
Outfits

This is where the bulk of the game lies (heh). Before I go into detail about each tab, I need to go through how swimsuits work.
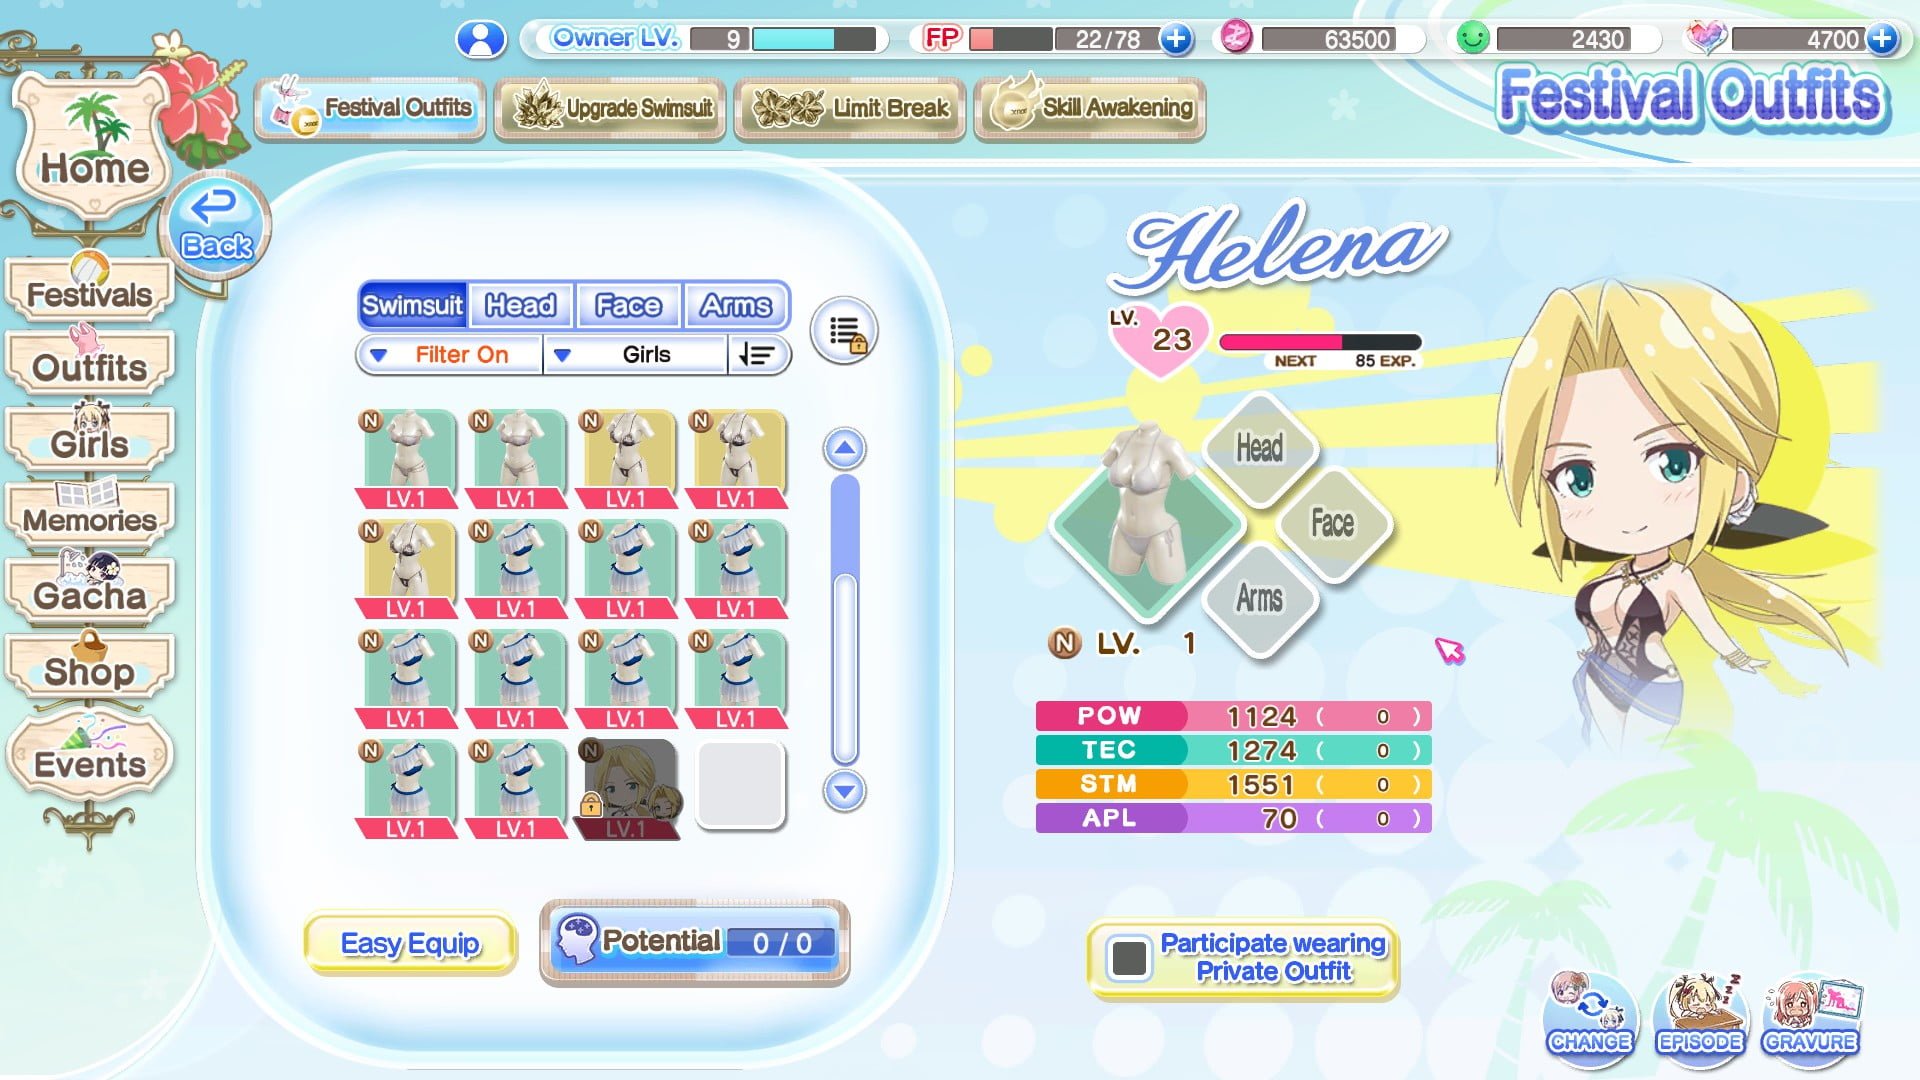
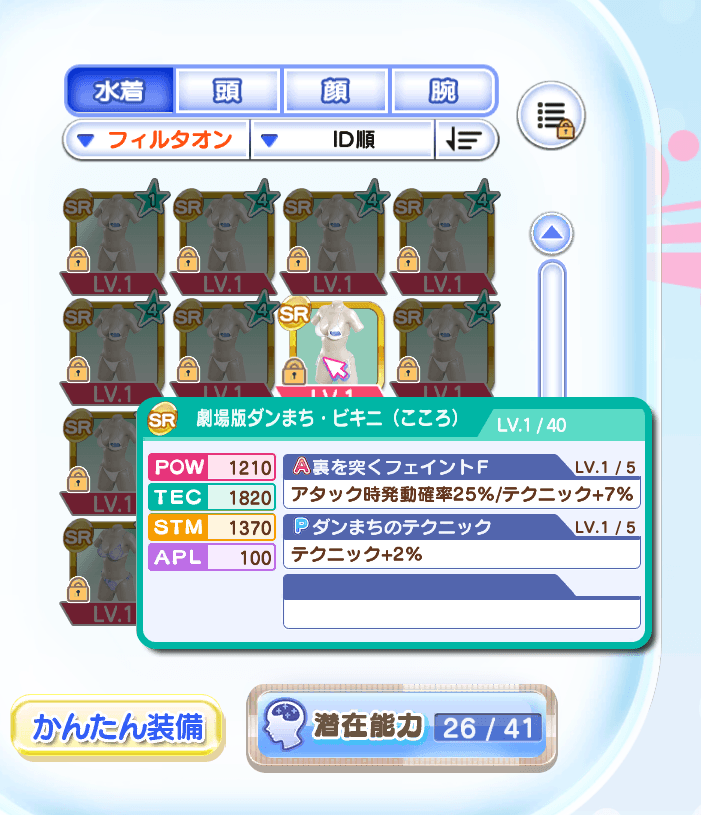
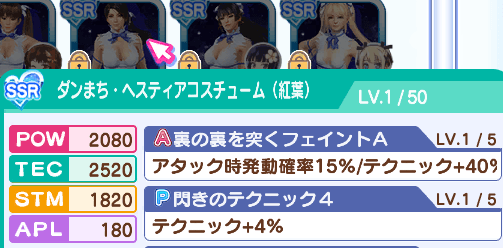
Not all swimsuits are created equal. Swimsuits come in 4 rarities: N, R, SR & SSR.

The SSR is Kokoro’s Venus SSR at level 1.
They are further sorted by type – Either Power, Technique, Stamina or Appeal, identified by the colour when you mouseover them.
Red for Power
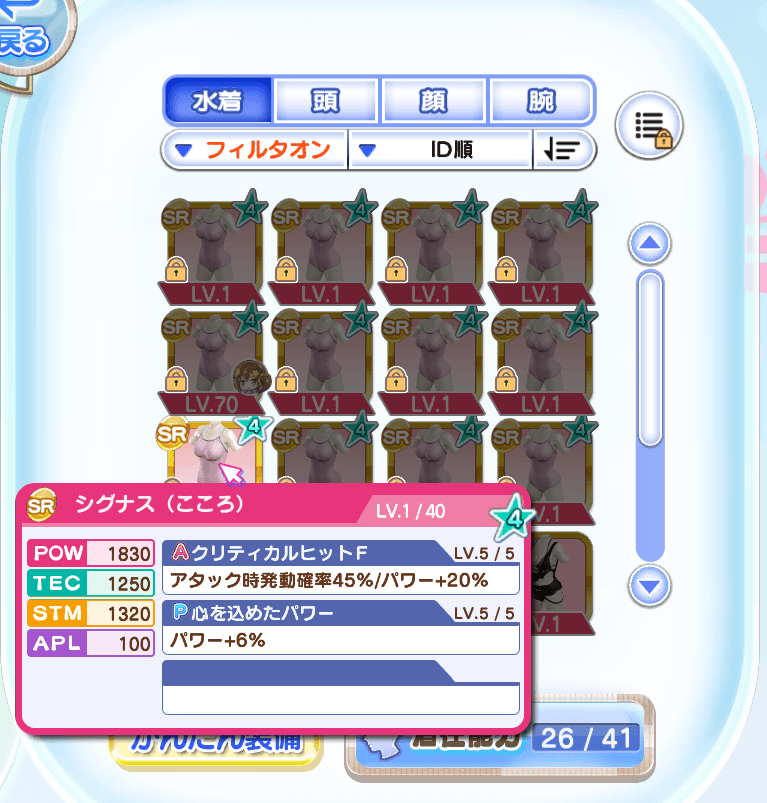
Green for Tecnique
Yellow for Stamina

Purple for Appeal

I used my Japanese account to humblebrag simply because I don’t think there is an Appeal swimsuit in the Steam version yet, and for consistency.
By this point you should have realised that N, R & SR swimsuits are utterly terrible compared to a SSR swimsuit, and you’re right. If by now you are still unable to figure out the true nature of the game, give your credit card to your mom and make her swear she’ll never give it to you no matter how much you beg until you quit this game. This piece of advice is free, unlike 99% of the game.
Another tip: The default swimsuit all characters arrive in is the absolute worst swimsuit in the game. Swap it out asap, literally anything is better.

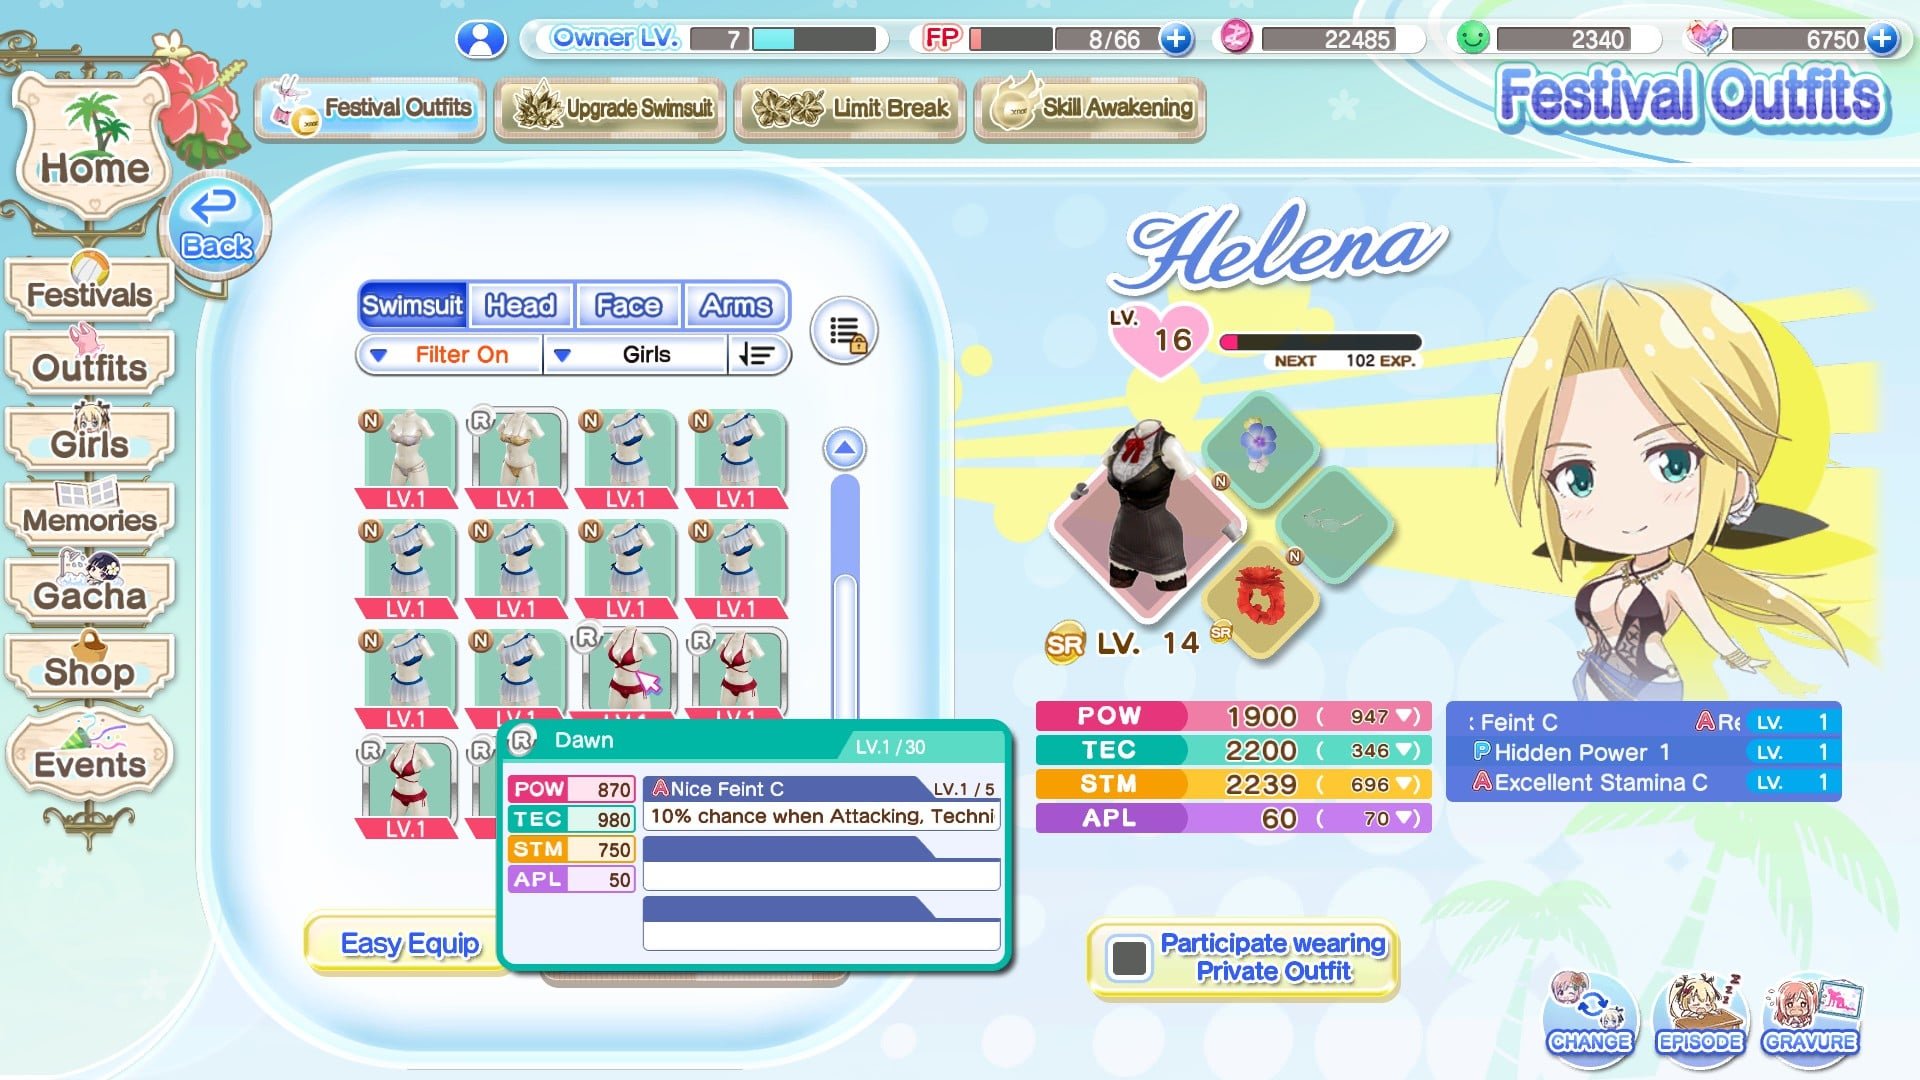
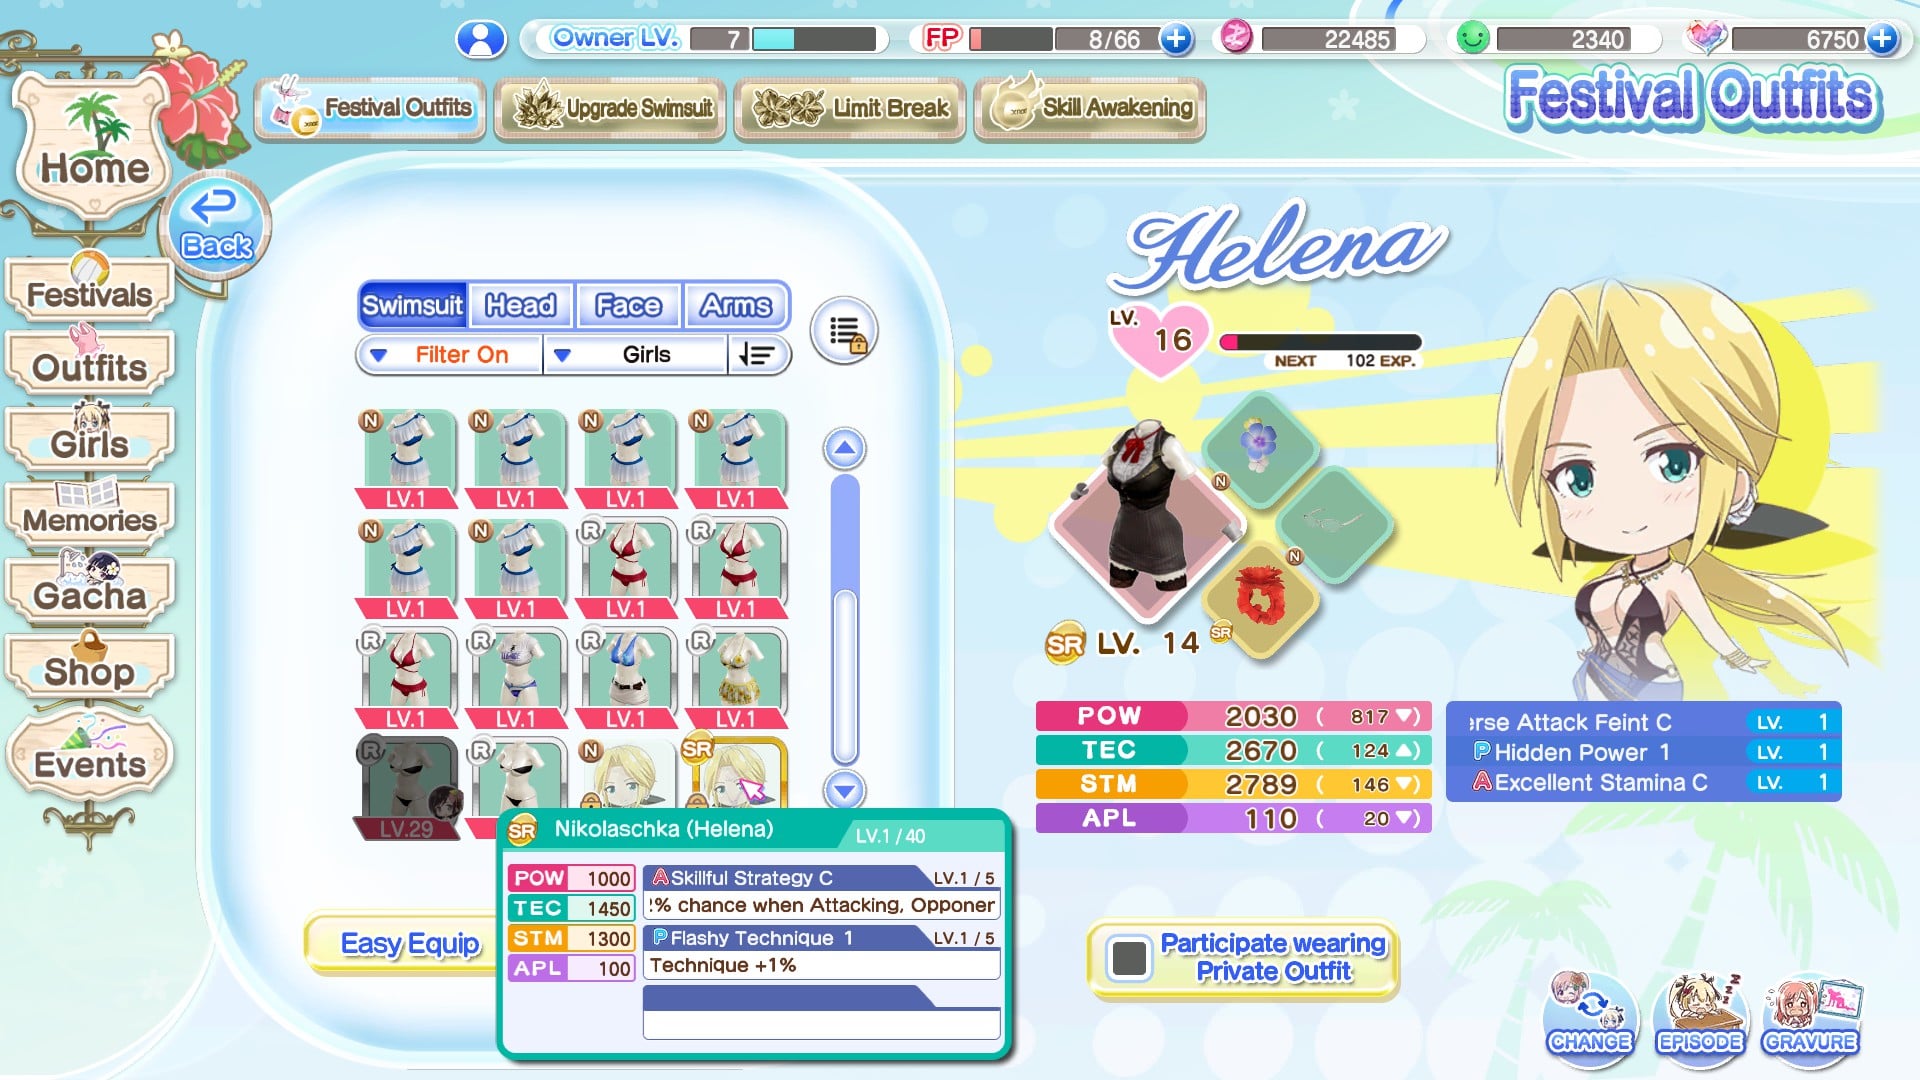
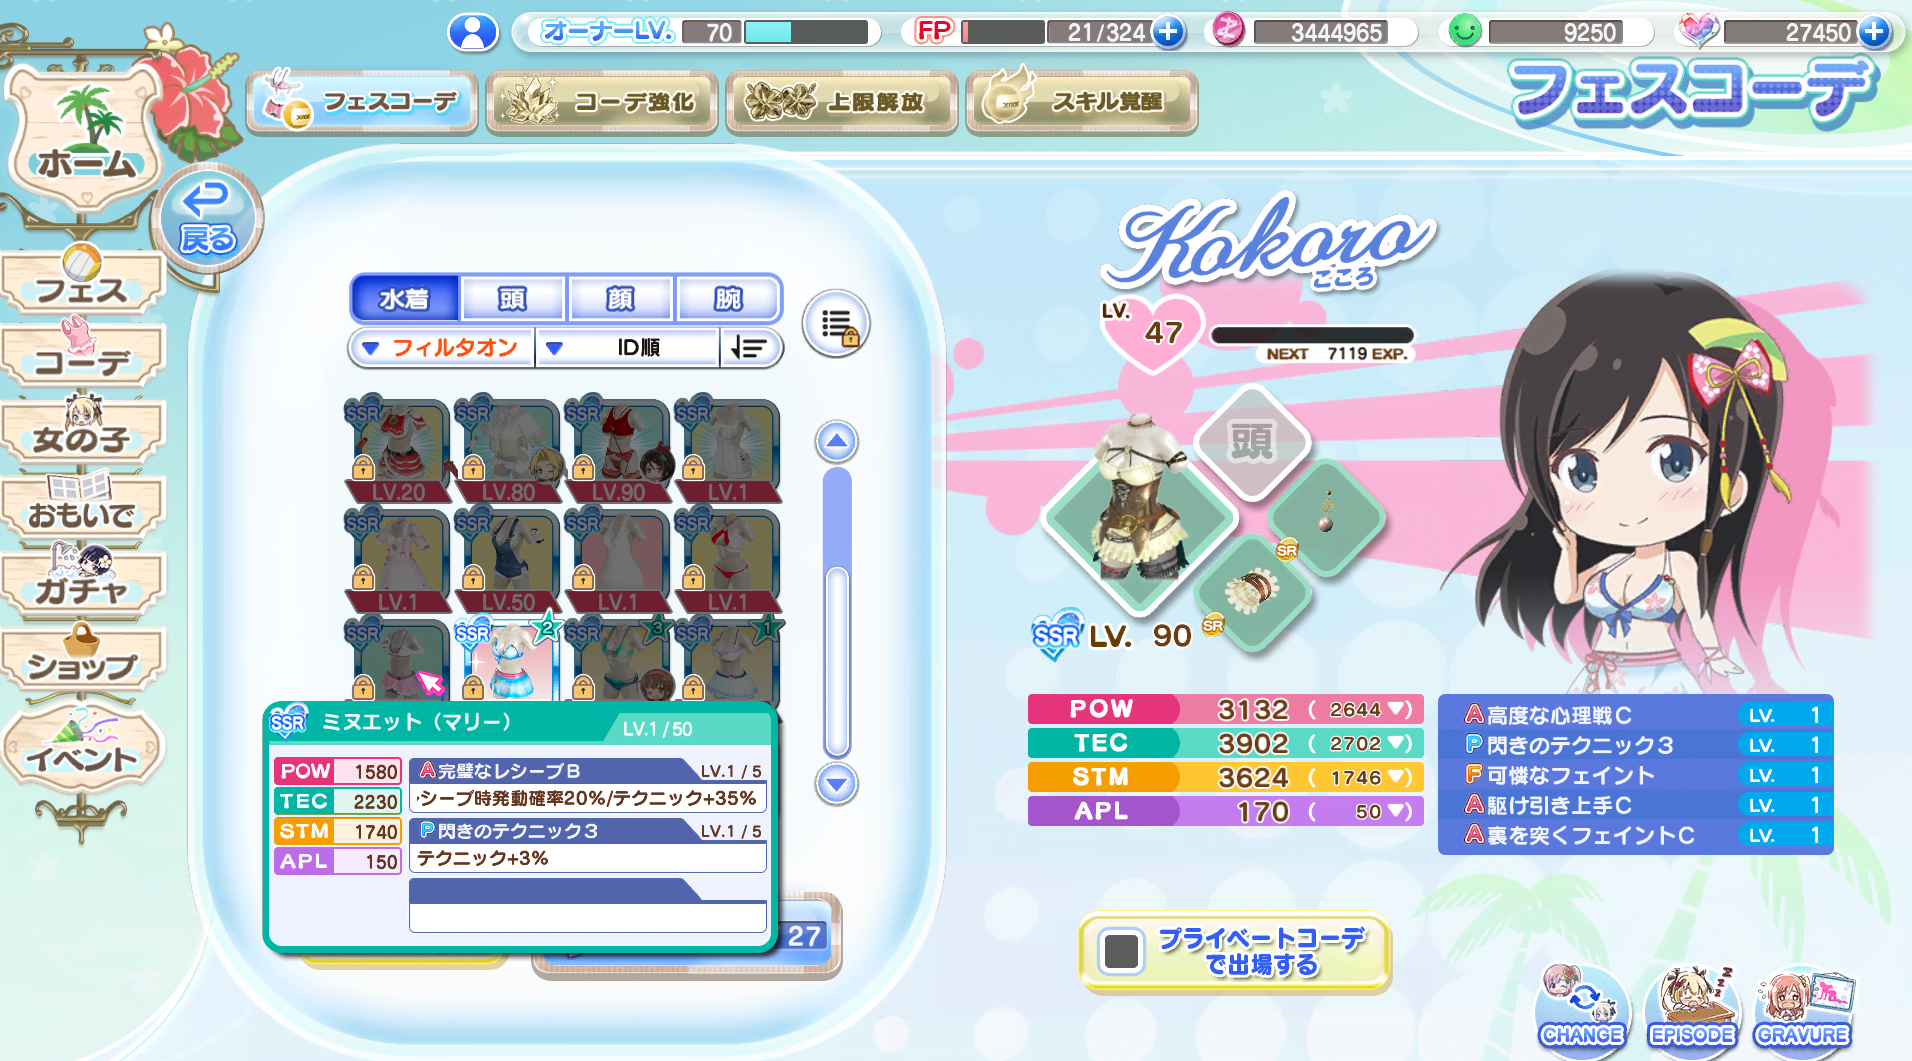
Festival Outfits is where you choose which swimsuits and accessories for each girl to wear into a match. There is absolutely no reason to use an N rarity swimsuit when an R rarity swimsuit is available, same for SR and SSR swimsuits respectively with very few exceptions.
‘Potential’ is basically passive skills you can equip on your girls. These skills are unlocked through levelling up and awakening swimsuits. The max you can equip at a time is determined by your accessories’ combined PP count.
Lastly, the option to ‘Participate wearing private outfit’ acts as a cosmetic override for your girls. The reason for its existence is pretty simple – some outfit combinations are hilarious.
However, there are times when you just want to admire the aesthetics of the game. Or if you really like the look of a certain swimsuit. This options allows you to override whatever gear you have equipped on a character with whatever they have equipped in ‘Private Outfit’, which again is just a case of a horribly misleading translation which I’ll cover in the next section under ‘Girls”.
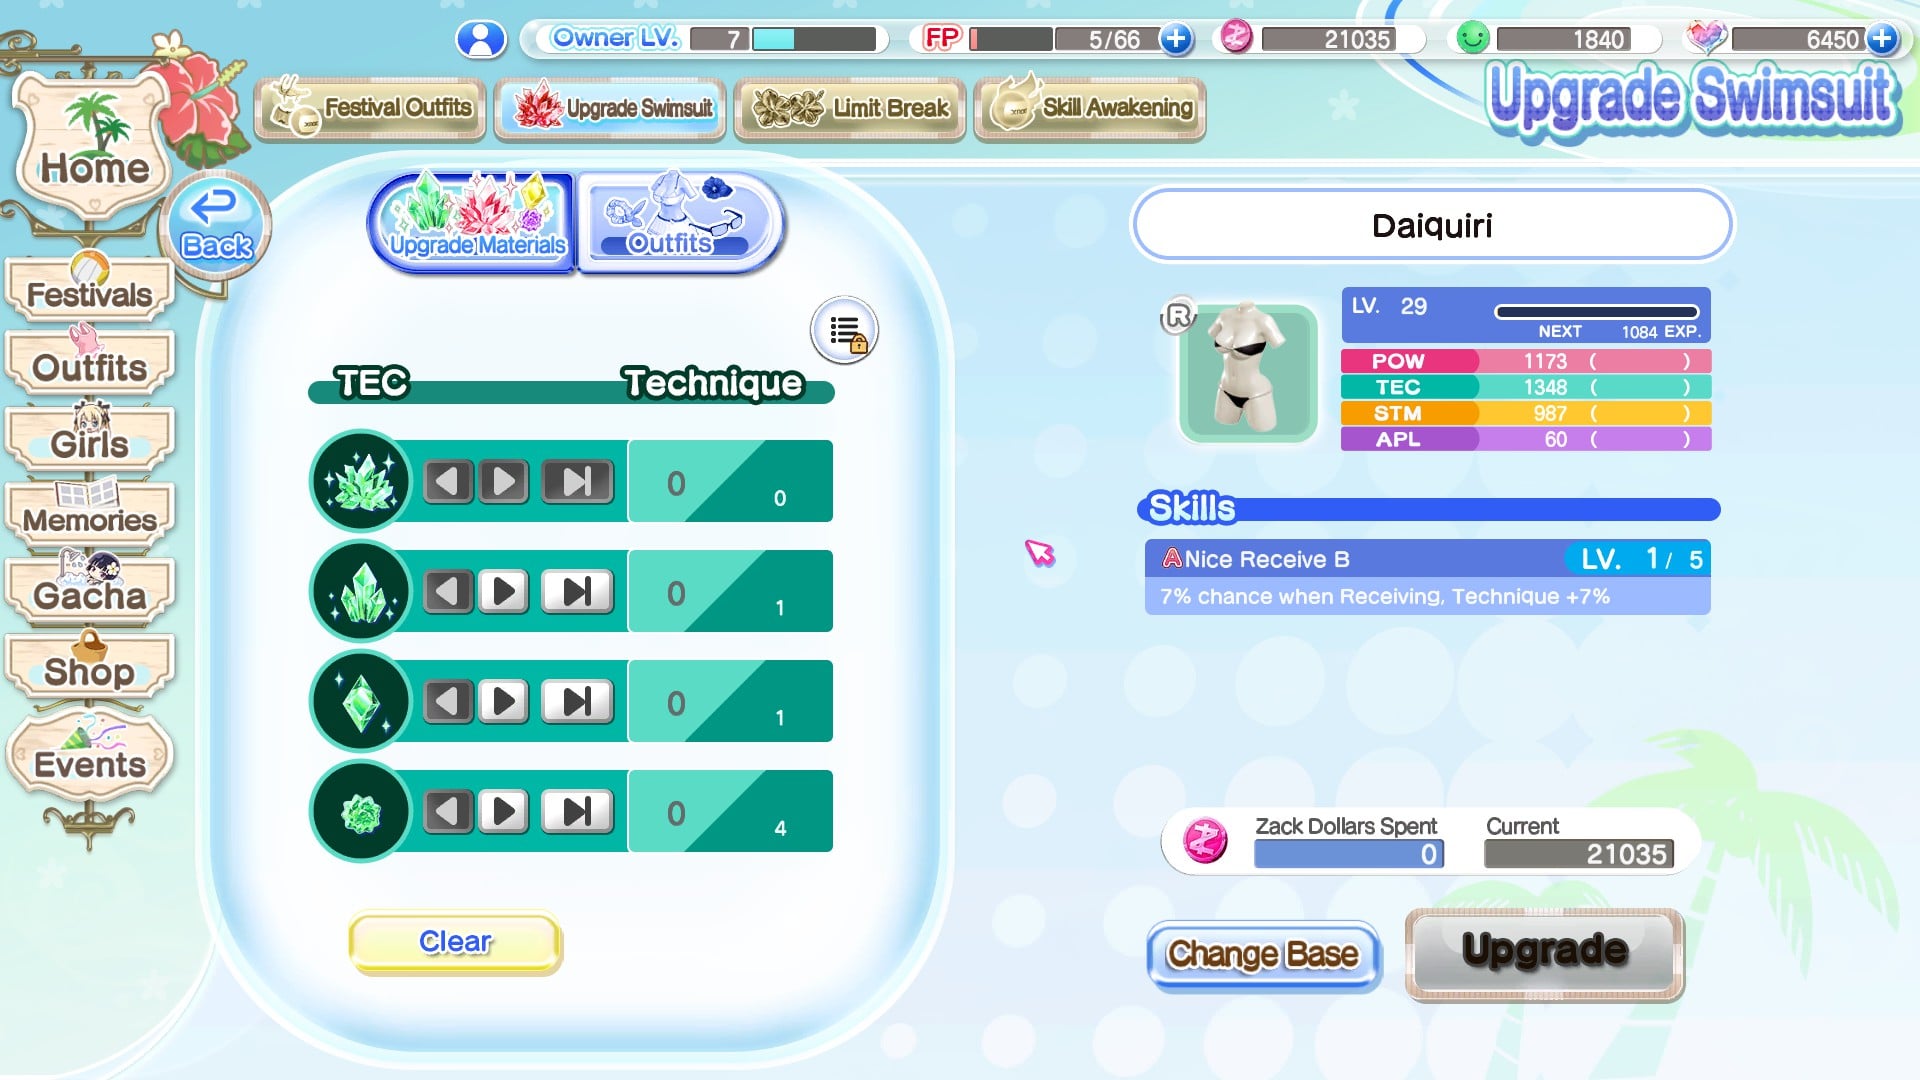
Upgrade Swimsuit is where you level up your swimsuit using either crystals or other swimsuits and Zack Dollars. I recommend using crystals. The upper limit for SR and SSR swimsuits is level 70 and 90 respectively. You really shouldn’t be upgrading N and R rarity swimsuits with the exception for your starting girl since you’re unlikely to have any SR/SSRs at that point.
Limit Break lets you raise the level cap of your swimsuits, For reference, an SSR caps at level 50 by default, with the remaining 40 levels needing lots of materials and Zack Dollars to unlock. This is where the daily mission comes in handy. You’ll only really need this once you reach License rank ‘S’ and beyond.

Skill Awakening can be confusing, so let me explain this component very carefully. When you get duplicate swimsuits of SR and SSR quality, you can awaken them up to 4 times in this screen. Awakening a swimsuit improves its skill, and functions independently of the swimsuit level. Doing so also destroys the duplicate swimsuit.
When you have awakened a swimsuit 4 times*, you unlock a passive skill which the girl can equip in the Potential menu. This is the only way to unlock passive skills for girls apart from levelling the girls up, and the best potentials in the game are unlocked through this function.
*You will need 5 swimsuits to awaken 4 times, 1 base + 4 sacrifices.
There are also ‘Awakening Crystals’ available in the game either through events or the event store that functions as a duplicate swimsuit, which often is the only way to awaken Trend SRs.
Once you’ve fully awakened a swimsuit, any further duplicates you receive can be safely traded for tokens as they serve no other purpose. You cannot get the same potential twice, so save your Zack Dollars for something else.
Lastly, the game auto locks SR and SSR rarity swimsuits and accessories when you receive them so you can’t destroy them by accident. To unlock them for awakening/trading, you need to manually unlock them. How to do so will be explained further below.
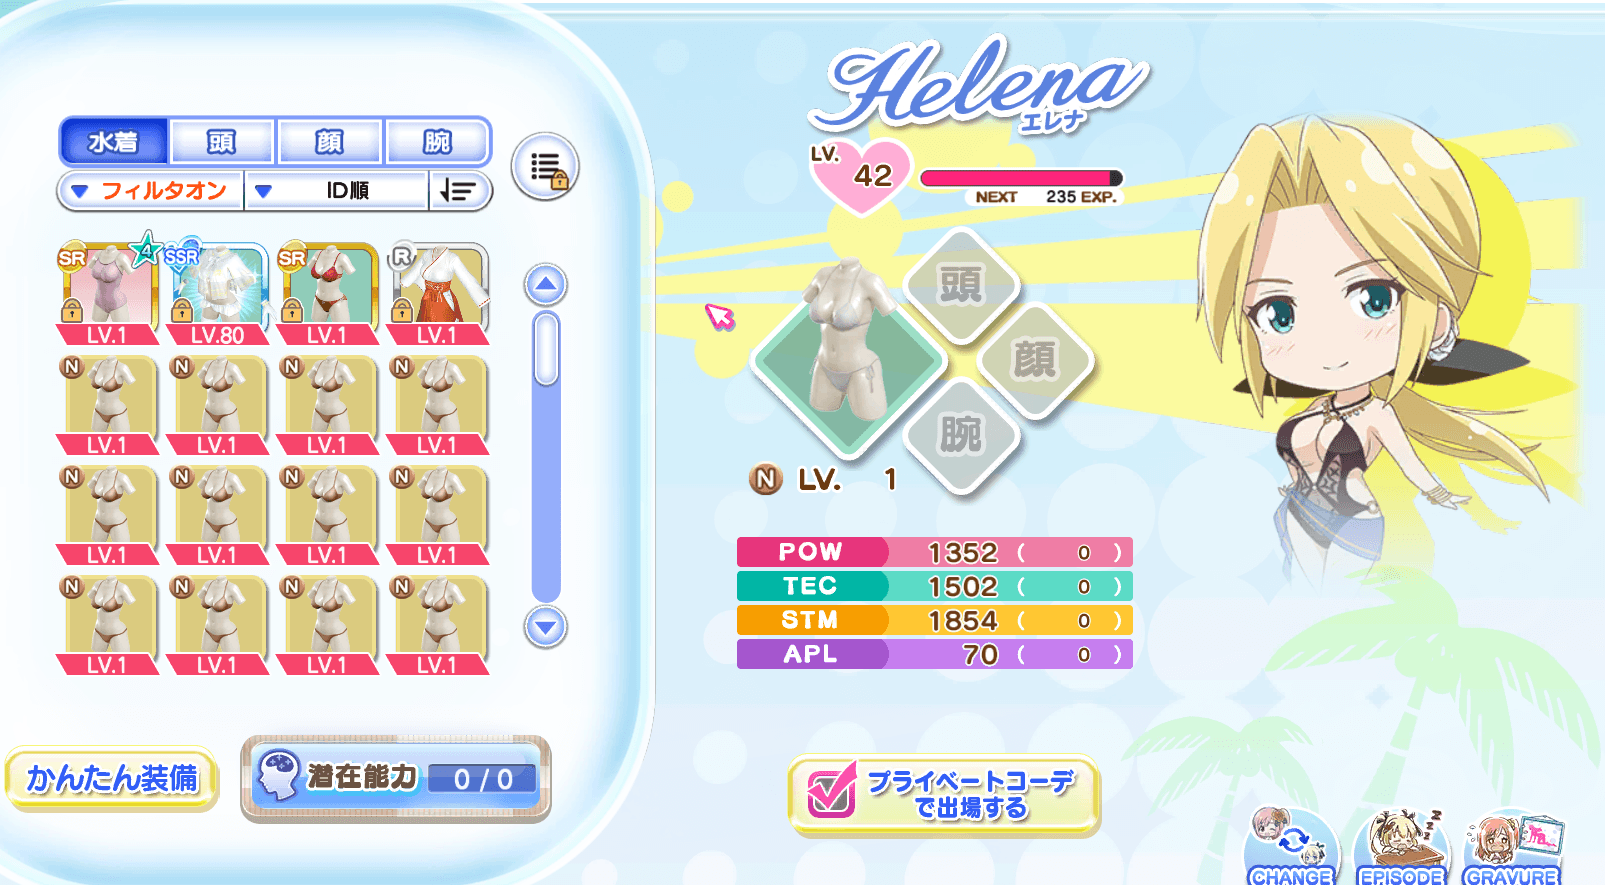
Girls

Private Outfit is what the girls wear when not in matches, namely on the home screen. You can also change their hairstyle and tan level when – say it with me – you unlock the ability to. I’ll explain more on this section in a moment.
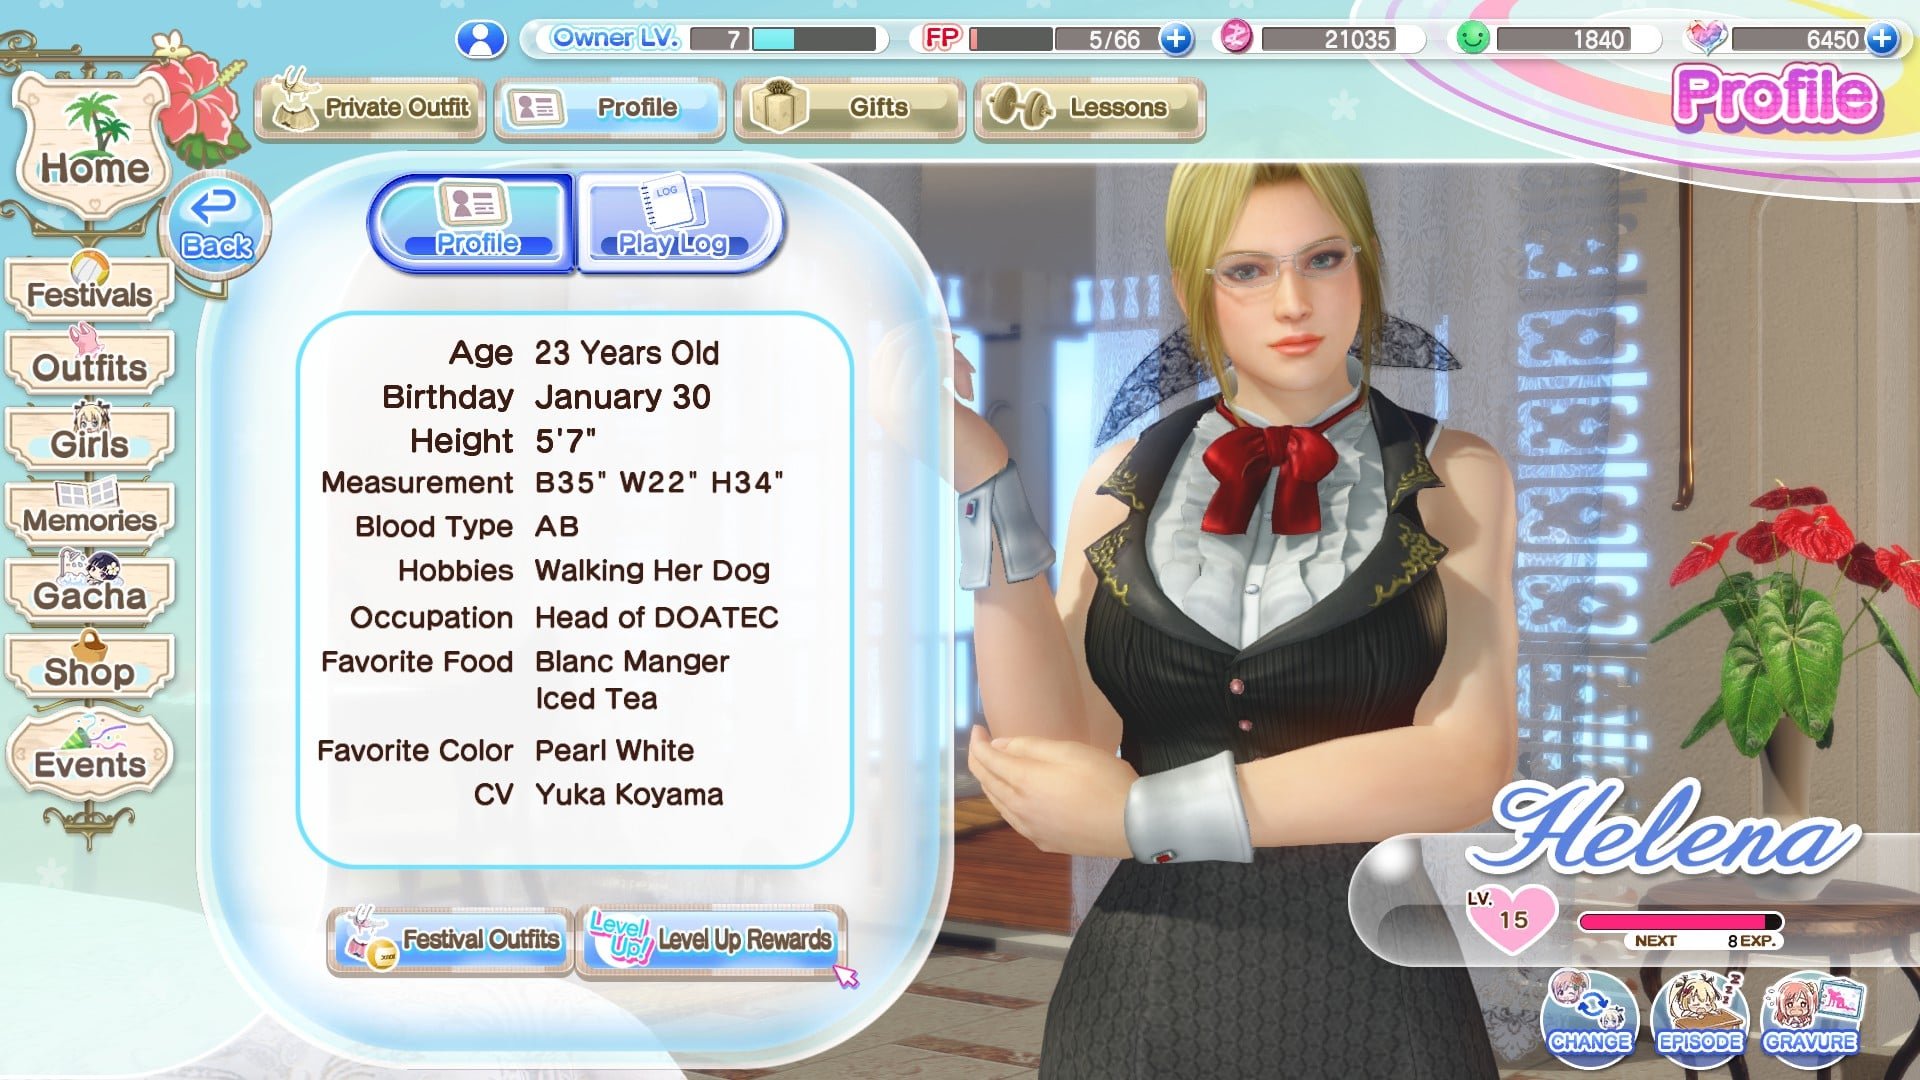
Profile is mainly just some interesting facts about the girls. What you are likely to be interested in is the ‘Level Up Rewards’ tab which details exactly what you receive when a girl reaches a certain level.
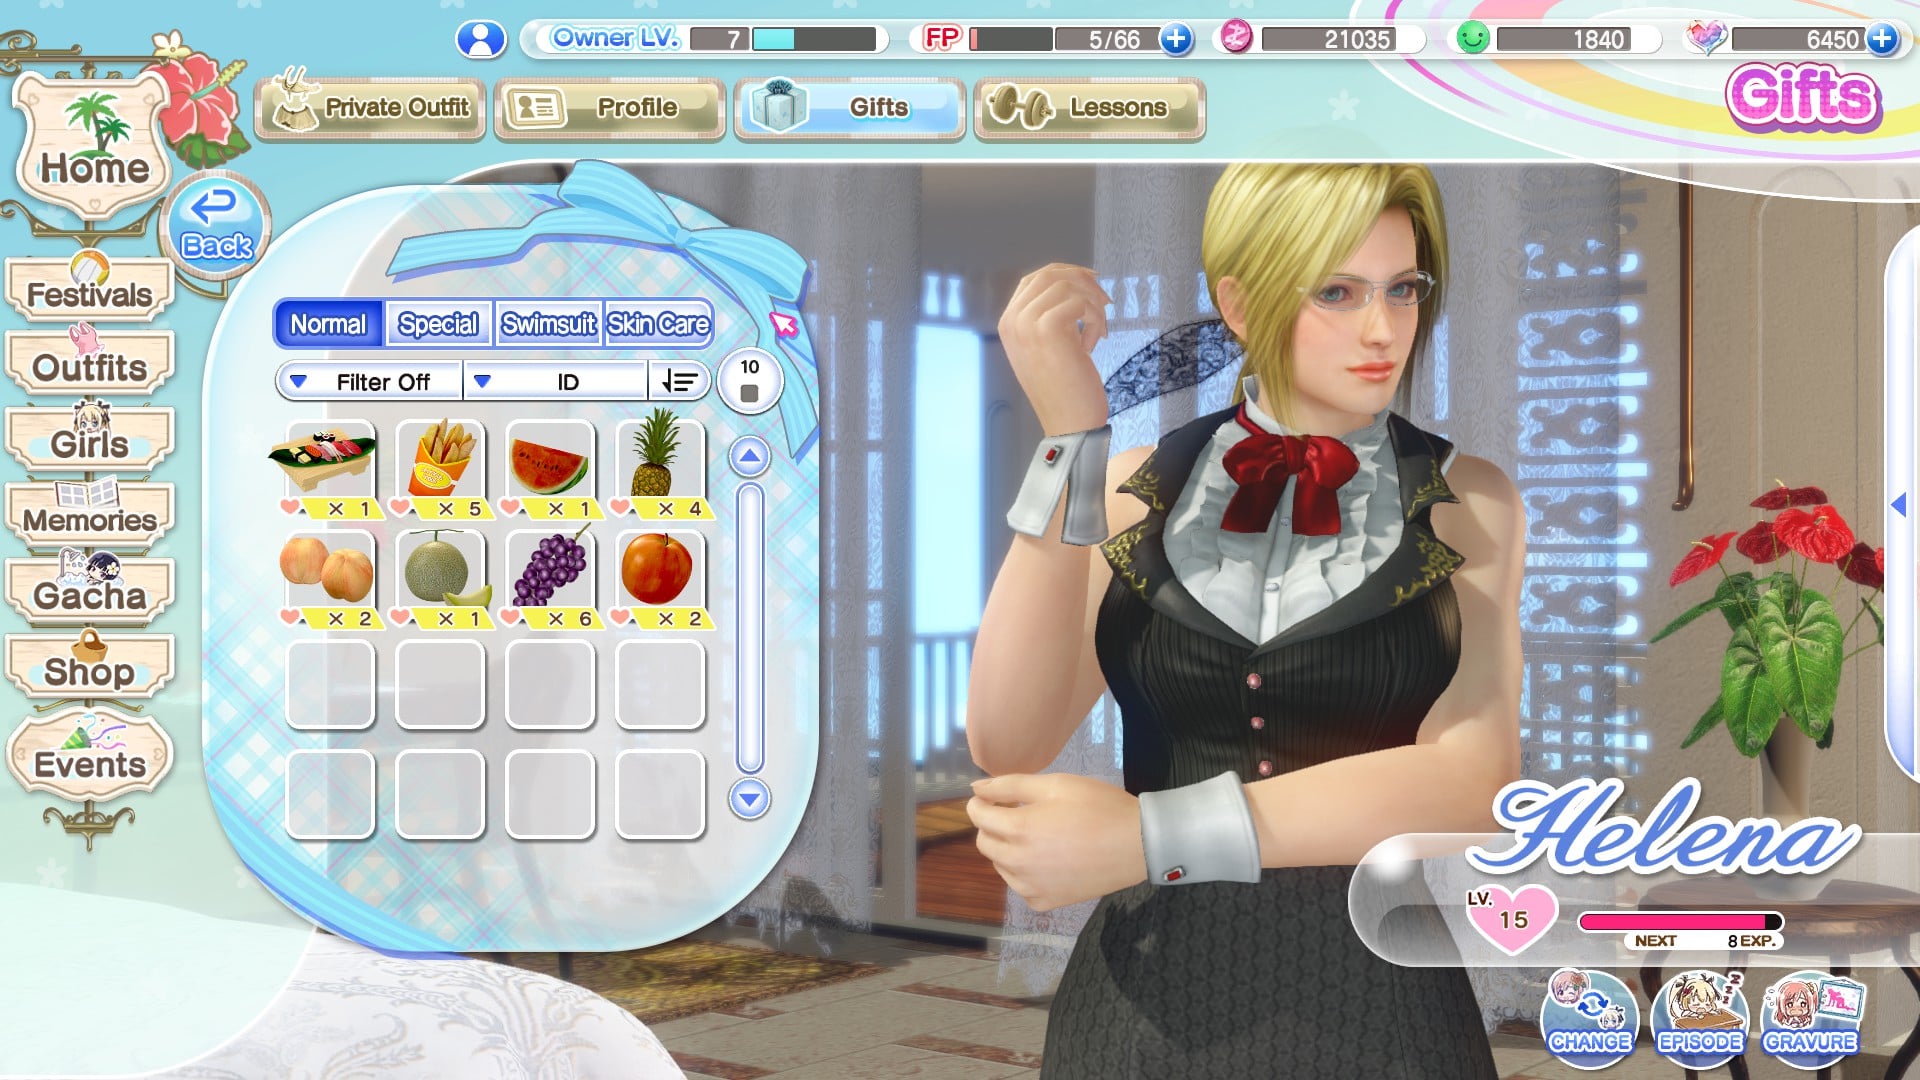
Gifts is where you can give stuff to the girls.
The stuff you find in the Normal tab gives xp when gifted, so save them for every time you unlock a new girl for that sweet Owner xp boost. Some girls like certain gifts more, and you can get up to 3x xp for giving them their favourite food/drink. A full list is available over at /r/DOAXVenusVacation.
Special is mainly posecards. You can unlock posecards in the event store, and each card teaches the girls a certain pose they can then perform in Shoot mode and the Owner room when that feature shows up. Posecards are one use items, so you need one for each girl. Happy grinding.
Swimsuit adds that swimsuit to the girl’s private collection, which allows them to wear it as a Private Outfit.
Here is a confusing bit that will probably confuse the hell out of you. Whenever you get any swimsuit, you get two versions of it, a ‘match version’ and a ‘cosmetic version’. The match version is the one you see in the Outfit screen, the cosmetic the one you see in the Girl screen. Let’s say you want every girl to have the ‘Popcorn’ swimsuit equipped as their private outfit. To do so, you will need to obtain that many number of ‘Popcorn’ swimsuits and individually gift them to each of the girls. Assuming you have all 10 girls and 10 sets of the swimsuit, by the time you have gifted them all you will have 10 Popcorn swimsuits in the Outfit tab, and 0 in the Girls tab.
Note that most SR and SSR swimsuits are character specific, and are added to their private collection immediately. However, SR swimsuits that you obtained before unlocking the girl for will have to be gifted manually.
Skin Care modifies the jiggle physics. Namely, they make certain body parts softer/harder depending on your preferences.
THE ABILITY TO MAKE STUFF SOFTER/HARDER IS NOT SOMETHING YOU CAN DO ON A WHIM. THE ONLY WAY TO DO SO IS THROUGH AN IN-GAME EVENT THAT HAPPENS EVERY 2-3 MONTHS ON AVERAGE, AND I HAVE NO IDEA WHEN IT WILL HAPPEN. STOP ASKING.
Granted, nobody asked me yet, but that’s an advance notice.

Lessons are unlocked as you get more girls, with 3 being required for the first room. I cannot remember off the top of my head the number you need for the rest, but don’t worry too much about it. There is a max of 3 rooms which cost 5,000, 50,000 and 500,000 Zack coins to unlock respectively.
The main selling point of this is that you can send up to 3 girls to train for a certain duration of time, up to 20 hours. The time continues to count down even when you’re not logged in, and the xp gain is a flat 5xp/10 minutes. Leaving them to train for the max of 20 hours gives you 600xp. It’s not exactly the best way to train, so don’t be in a rush to unlock all the rooms. The type of training you do doesn’t matter, since all it affects is the type of upgrade crystals you get when the timer hits 0. There is also a small chance the girls can return with a FP Refill Bottle, which is pretty great.
Note that no matter the duration, the girls will always either return with 2 or 5 crystals. If you’re looking to maximise gains, set them to train for 10 minutes, which will greatly increase the number of crystals you can get. However, they will only ever bring back small/medium sized crystals, so it is not as efficient nor as sane as it sounds.
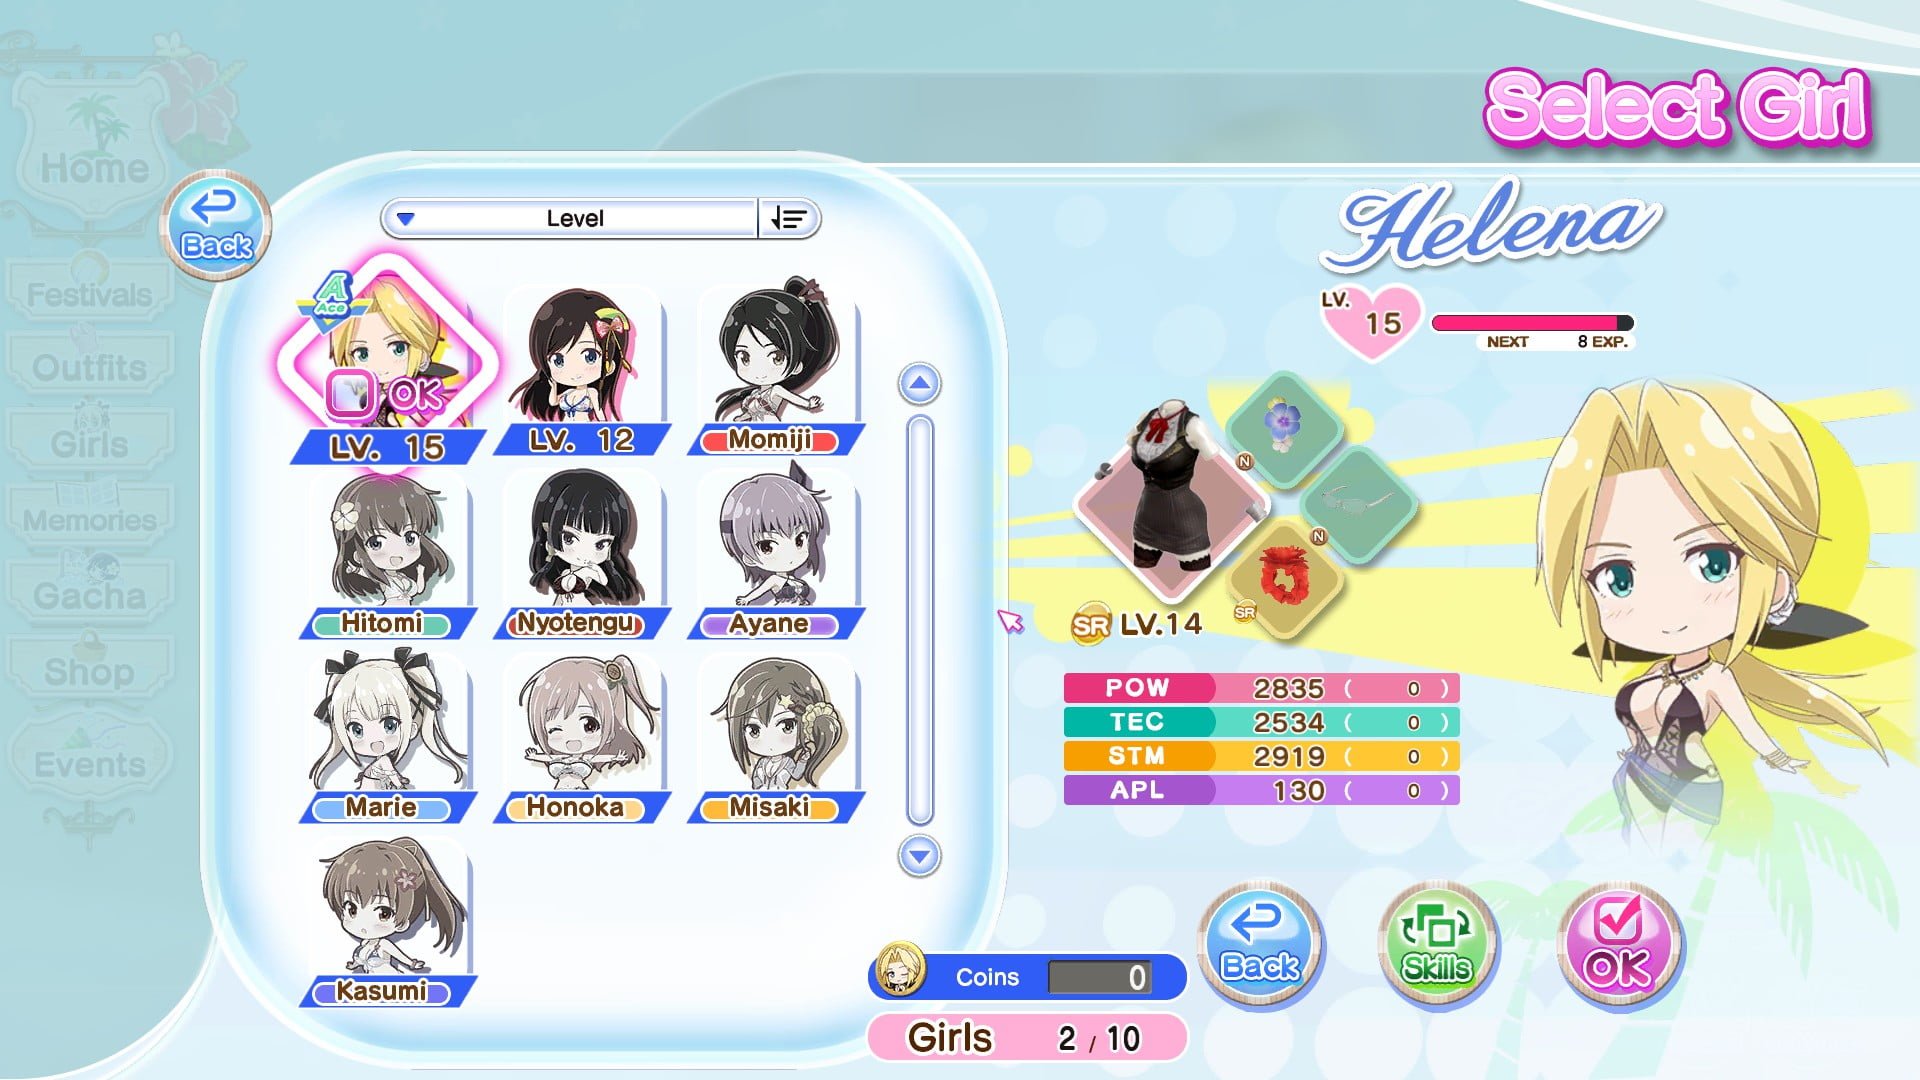
Change Partner changes the girl on the home screen. That’s it.
Memories

This is the primary source of Owner xp in the game. You don’t actually receive Owner xp until you watch the scenes, so you can go ahead and stockpile exp here while you burn through your FP reserves. Skipping the scenes will still award you full xp.
Main Episodes unlock as you go through the campaign.
Gravure Panels unlock as you play the game with the girl in question. Main campaign matches give far more gravure xp than event matches.
Character Episodes unlock at certain Girl levels.
Event Episodes unlock usually by getting a certain score/completing objectives during an event.
Extra Episodes generally unlock during major holidays (Valentine’s, Christmas, etc). Usually tied to an event too.
Bromides is a japanese term. Basically, whenever you get an SSR swimsuit, a glamour shot of the girl wearing it is added to this page. It gives no xp whatsoever.
Leveling up
The quickest way to level up is to unlock more girls, which in turn unlocks their character episodes and gravure panels. Otherwise, you’re stuck with only main episodes and event episodes as your only source of Owner xp.
Lastly, if you’re trying to grind the gravure panels, do the highest ranked campaign mission you can. Daily matches give no xp towards the gravure panel, and event matches only give a token amount for the FP you put into it.
Gacha
OH HELL YEA – AWW HELL NO.

Can’t avoid this. This is where all your hopes and dreams come to die. Here’s how bad it is – the best odds I ever saw for getting an SSR was 3.3% in the Japanese version. Keyword: BEST.
Alright – let me preface this by saying luck cannot be measured, I’ve seen people get 2 SSRs in a single 10x pull. I’ve personally spent 30k stones on an event Gacha without a single SSR to show for it, and there are people who have easily doubled that number.
Anyway, the individual odds for each and every item in the Gacha pull is given at the top right due to certain gambling laws, because that is exactly what this is. Don’t go in expecting a SSR, you’re going to be sorely disappointed.
The Gacha screen will always have the following two available: Venus Gacha and Guest Point Gacha. If there is an event ongoing (which is about 100% of the time), you’ll usually find the Trendy Outfit Gacha sitting at the top like you see in the example above.
Take solace in the fact that you will never get a N rarity swimsuit from the Gacha, with the sole exception of the Guest Point Gacha.
Now, whatever you do, never, ever spend V stones on the Venus Gacha.
The point about the Venus Gacha deserves an explanation. Being a Gacha game, the power creep in this game is insane. The problem is that Venus SSRs are bad in comparison to Trend SSRs, which in turn are often weaker than the next Trend SSR in line.
For reference, the screenshots below are of a level 1 Venus SSR and a lvl 1 Trend SSR released in the Japanese version from about a month ago.
Venus SSR
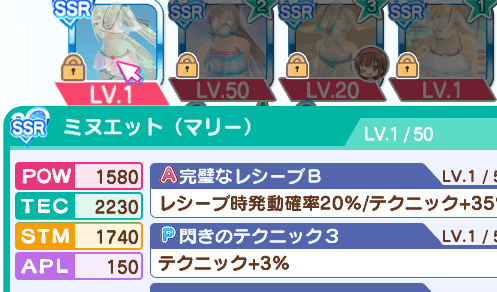
Trend SSR
The difference in stats between the two is absolutely insane, with the Trend SSR outperforming the Venus SSR in every possible way.
I would honestly recommend you save your V stones exclusively for Trend SSRs, or when a really powerful swimsuit becomes available. That, or if a certain swimsuit really catches your eye. It’s your call to make, although another reason I’d recommend skipping Venus Gacha is simply because the Gacha only has a 0.1% chance of getting a SSR for a specific girl as opposed to the 0.78% chance offered by a Trend SSR.
That, and the game showers you with Venus Gacha coupons. However, at the end of the day, it is your decision to make.
Lastly: Spend any and all Guest Points here while you can, because there’s literally no other use for it.
Shop

This is where you go when you’re out of FP.
Owner Shop is the one area I have absolutely no experience in. Go ahead if you must, the currency used for the Steam version is the SGD.
Event Shop is where you trade in event currency for rewards. Priority for unlocking event rewards goes in this order: Trend SR/Accessories > Owner xp > Awakening Stones > XL upgrade stones > anything else. Posecards generally aren’t event exclusive, so you don’t have to unlock them all at one go (good luck with that).
On that note: SSR tickets are formed by trading in 8 SSR coupons. This ticket guarantees one of the 10 Venus SSRs, although you cannot control which you get. Fragments are obtained usually through daily login bonuses, event ranking rewards and occasionally for sale at the event shop. Another reason never to buy Venus pulls.
Venus Shop is where you buy character-exclusive stuff like hairstyles in exchange for character tokens. Oh, you can also unlock girls through this screen in exchange for 1000 character tokens. For reference, you get 20 tokens per Character-specific SR swimsuit you trade in at the Trade Outfit screen. I honestly think nobody in the world has ever unlocked a girl through this method, so feel free to try for it.
Also – as an early bird bonus, you can get a free SR arm accessory for all characters you have unlocked here. Go get it, it’s going to be the best thing you have for a bit. This is available as of 28/03/2019
VIP Shop is pretty bland. VIP coins are incredibly rare coins that only serve one purpose, to buy that oversized gem to awaken your SSRs. Don’t worry, you really don’t need it for 99% of the game.
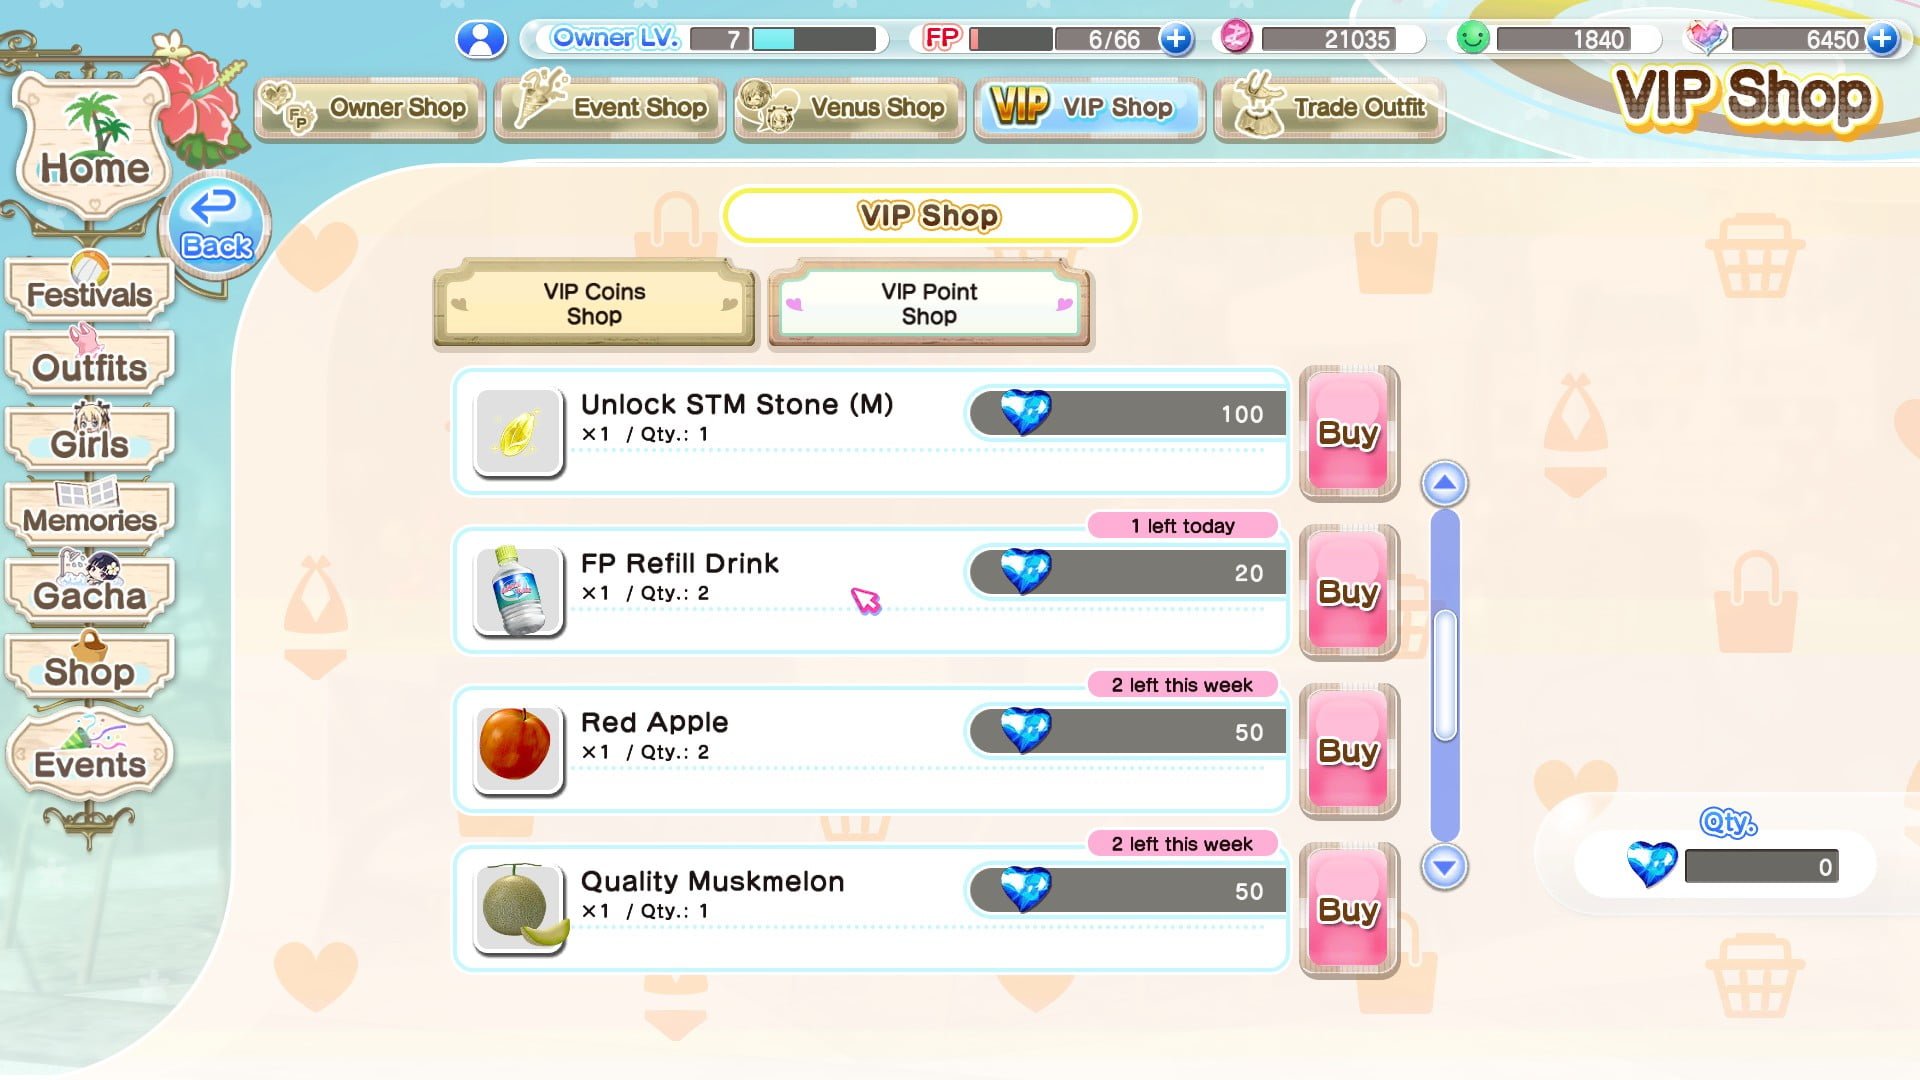
The VIP point shop is a little more helpful. There is only one thing you should ever buy here, which is the FP refill drink. The shop sells one every day, so make sure you get it.
I already know what’s your next question, and I’ll answer that in the next part.
Trade Outfit is where you trade unwanted swimsuits, accessories and awakening stones for VIP points/Character tokens.
The rates are as follows:
N swimsuits and accessories go for 1 VIP point each.
R swimsuits and accessories go for 2 VIP point each.
Character-specific SR go for 20 character tokens each. Note that each girl has their own token, so don’t get your hopes up.
Don’t worry – you’ll be drowning in unwanted stuff soon enough through the Guest Point Gacha. This is also why there is a lock function so you don’t scrap everything by mistake.
You can trade in an SSR in this screen, but I’ve never had a reason to and honestly neither should you unless you managed to get 6 of the same SSR in a row.
Events
The only thing you really need to care about is the ‘Rewards’ option. You can see a breakdown of all score rewards here. 1 million points is a fairly reasonable target to hit even without Trend SSRs, although if you’ve just started just do what you can.
Occasionally, there are event missions which will be explained in detail on this page, Check back whenever there’s a new event.
Due to the nature of the game, I will not be able to update this guide to explain each and every event. You’re going to have to do some research on your own. You’ll be fine.