Table of Contents Show
A brief overview explaining how to build simple, inexpensive, automatic perimeter defenses to protect your territory.
Other Factorio Guides:
Protecting your base without thinking too much about it
Like my other guide, the aim of this one is to introduce a simplified method for accomplishing a task that can be very easily either neglected or hopelessly over-thought. At its core, Factorio is a game about automation, specifically manufacturing automation. Biters present an element of defense that the game has against us, the players, in achieving our ultimate manufacturing goal. With all the options available for bug-smashing, it can be very easy to get side-tracked into cleansing our newly-found planet of unwanted lifeforms, but what we really need to be doing is just brushing them out of our way so that we can focus on getting our rocket built. To that end, we will be going over how to keep the bugs away without pouring so much of our resources into the task that our rocket-building mission becomes an endless pest-control one.
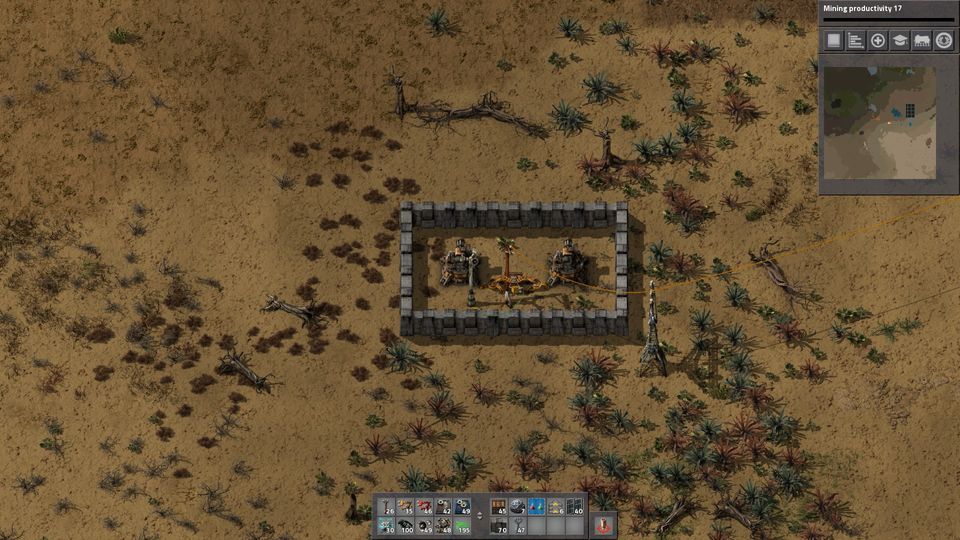
On one end of the problem spectrum, we have neglect. It can be easy to think of things like turret and wall defenses as being an annoying overhead which is preventing us from spending our precious ore on building our factory, but that should not excuse us from defending our perimeter with a setup that is at least capable. A sign of player inexperience in dealing with the biter nuisance can be seen in the small smattering of lone turrets, unprotected by walls and barely able to cover each other with their fields of fire, if they even do this at all.
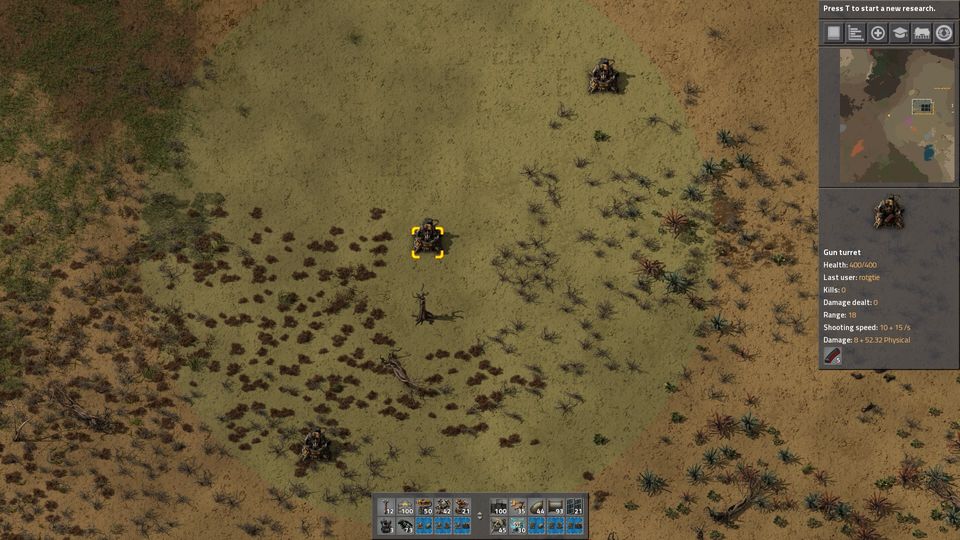
Simply put, this might seem sensible when we have very few materials to work with, but this setup gives us the worst of all worlds. Lone turrets can barely defend themselves from small packs of small biters before being overrun and destroyed, let alone hold the line to protect the rest of our factory or far-flung outpost. Worse, we have to run around manually inserting limited quantities of ammo into each and every turret, tracking the ammo supply individually for every gun along our sparse gunline. Put simply, this just won’t do, and we’re likely to lose more resources in destroyed gun turrets (and the ammo lost that we loaded into them) than we would lose in simply producing defensive emplacements that are sufficient to hold an area against early and mid-game biter assaults.
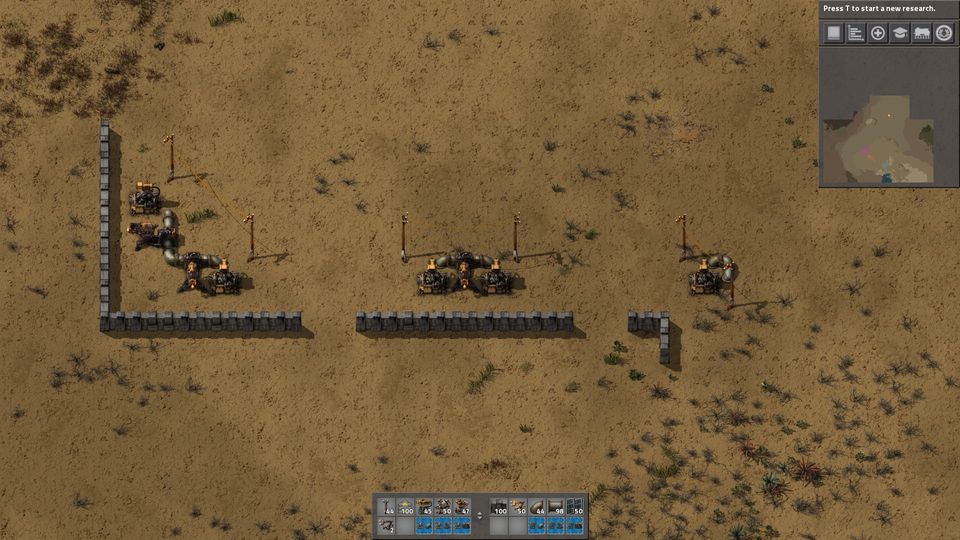
On the other end of bad defensive practices is the massive over-investment, possibly brought about by an overreaction to our earlier negligence. We might see a ridiculous setup that looks something like this:
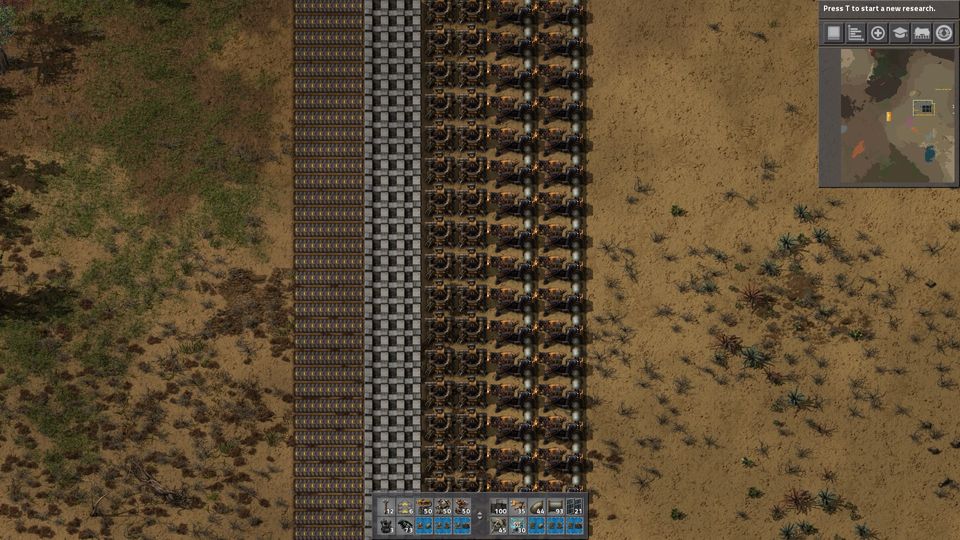
Now, at its most fundamental, there’s not really anything wrong with the way the individual elements of a wall like this are arranged. Short-range turrets with 360-degree traverse are used to protect longer-range turrets with limited arcs of fire, walls are used to create a buffer between biters and turrets, and belts are cleverly used to ruin the otherwise excellent mobility of biters trying to breach our defenses. If we ignore the total lack of logistical support in this setup (because that’s not the purpose of this demonstration), it might just look like a particularly robust defensive area.
However, this is just plain ridiculous – there is no way we are going to need this much firepower and this much of an obstacle in any given area, let alone along an entire perimeter we wish to defend. The sheer amount of metal and stone going into this setup is certainly preventing us from advancing along the tech tree, increasing our manufacturing ability, or expanding into new resource patches. In fact, walling up this hard can cause us to lose a game, simply because we wasted so many resources on biter-stomping and fell behind on other tasks which required our attention, causing us to get out-evolved and eventually overrun by the biters anyway.
We don’t want that, so we’re going to develop some more sensible defenses. We want to be well-protected enough that we don’t have to constantly intervene to keep our territory from being overrun, but not so much that we’re wasting too many resources just holding a line that we’re likely to want to expand on a frequent basis anyway.
Semi-Autonomous Bunker Defenses
If you’ve seen my other guide on early game builds, this will be familiar to you. The first thing we’re going to do is replace those inadequate lone-ranger turret borders with a series of small bunkers which will provide sufficient defenses for us in the early game while not demanding too much of our resource stock.
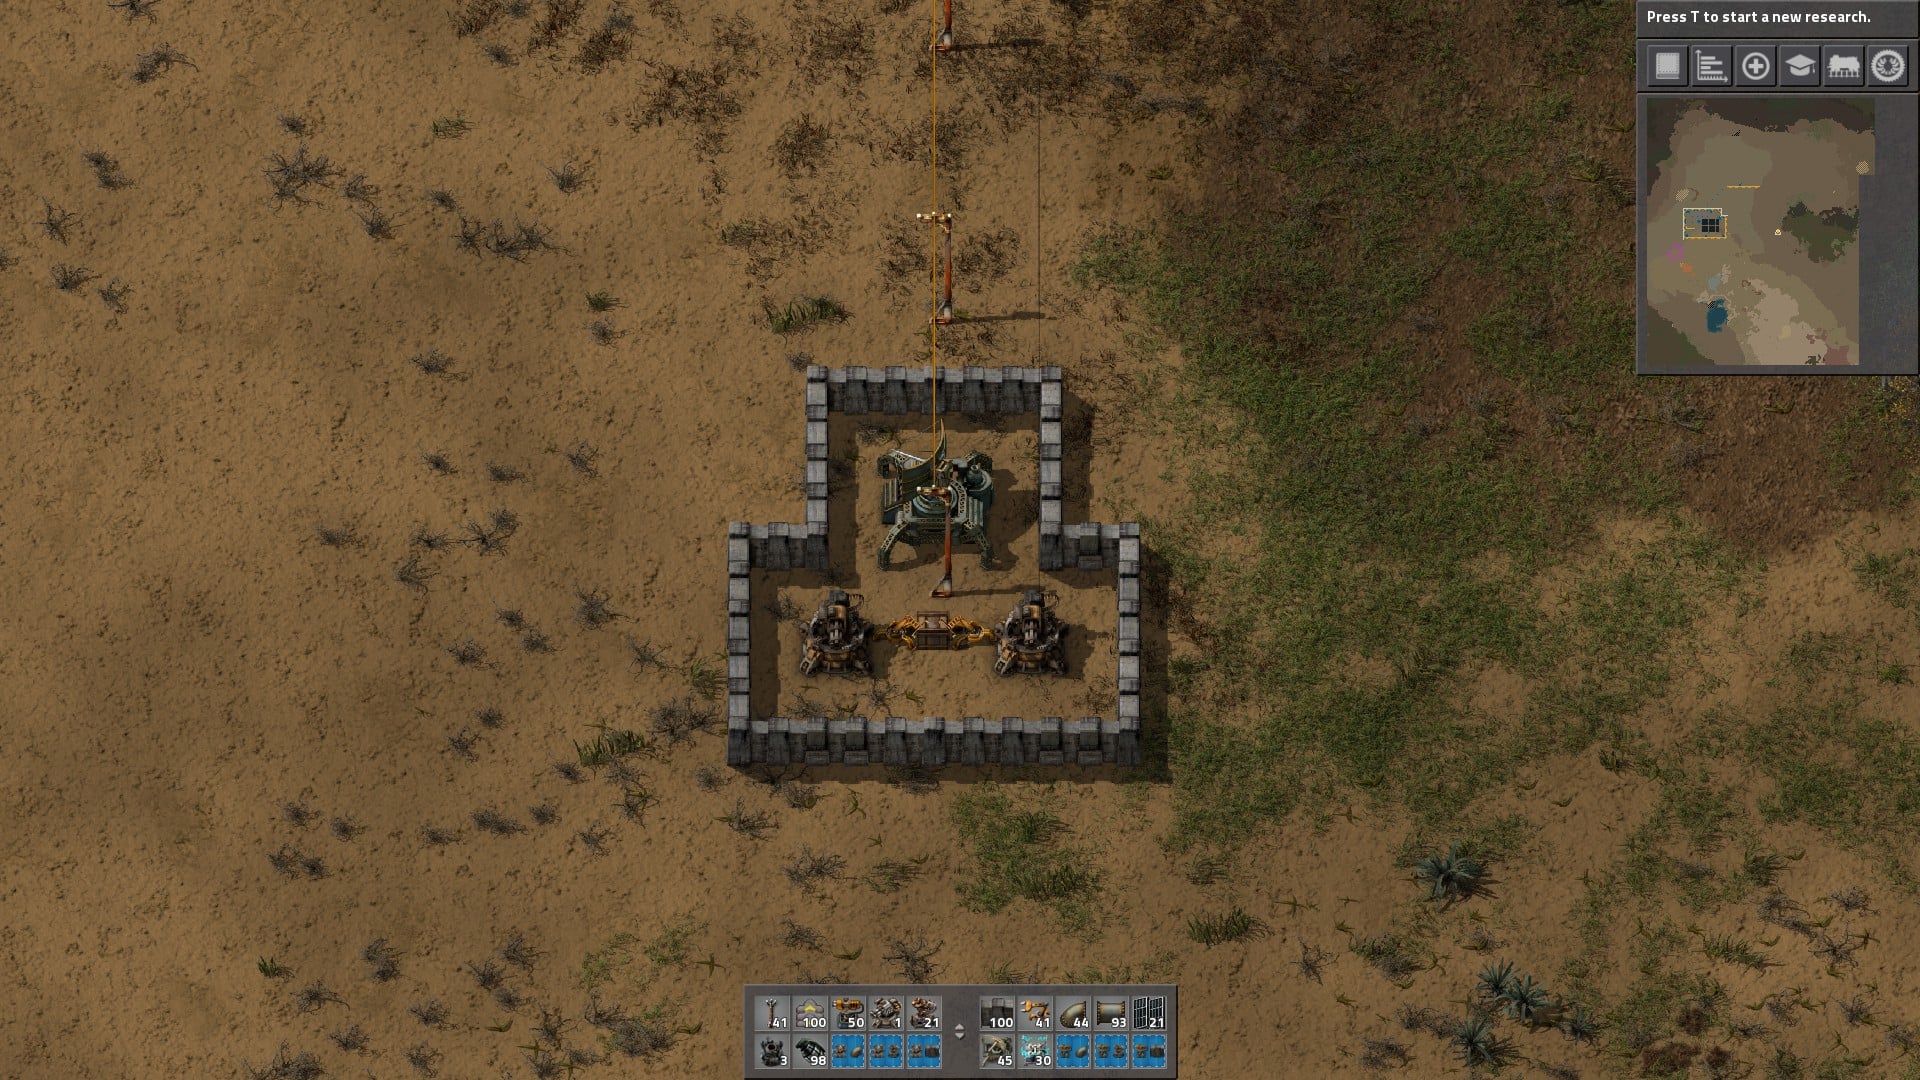
Here is an example of a simple two-turret gun bunker, facing south:
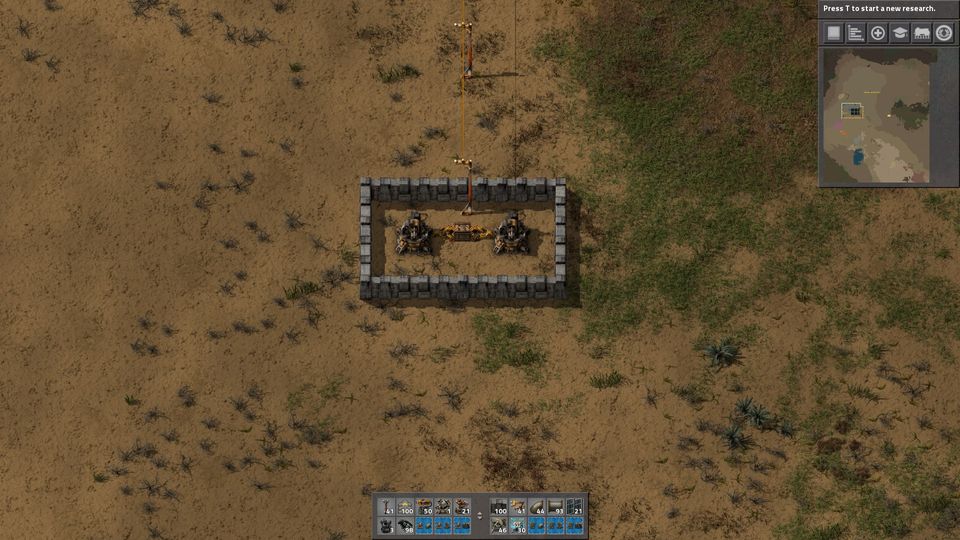
Rather than feeding the turrets, we can simply drop a stack of ammo into the box, connect the power pole to our grid, and leave this defensive emplacement to its task. Throwing ammo into a box is much easier than trying to manage every turret, as inserters will only toss ten magazines of ammo at a time into a turret, so we can just plop our excess ammunition into our bunker boxes and not think too much about managing exactly how much ammo remains in each and every gun turret. It also gets us to think on a larger scale than simply dropping ten or twenty magazines into a turret and then hoping we’ll be attentive enough to keep each one supplied through biter attacks.
Another advantage of using box-fed bunkers is that we can easily set up loudspeakers with red or green wire using very simple circuit conditions. This gives us a much more reliable way of being alerted to attacks than hoping we’ll catch sight of the silent yellow indicator that our turrets are firing at something, or worse, the audible red warning that something of ours has been destroyed.

This way, we can have a much better idea of what areas need attention far sooner than the moment they are overrun because they ran out of ammunition and are consequently being ripped apart by biter attacks. Now we can be warned as to when a bunker’s ammunition drops below a certain threshold – one full stack, in this example. This gives us plenty of time to react so that we can intervene before a minor problem like an ammo shortage becomes a major problem like a perimeter breach.
Further, it’s a simple matter to slightly expand this bunker to also contain a radar station.
Given that our bunkers are guaranteed to sit on our frontier, they are ideal locations to place these observation devices. Not every bunker needs one, of course, but we can usually fit one at every resource outpost or at reasonable intervals along our perimeter should we line it with these bunkers.
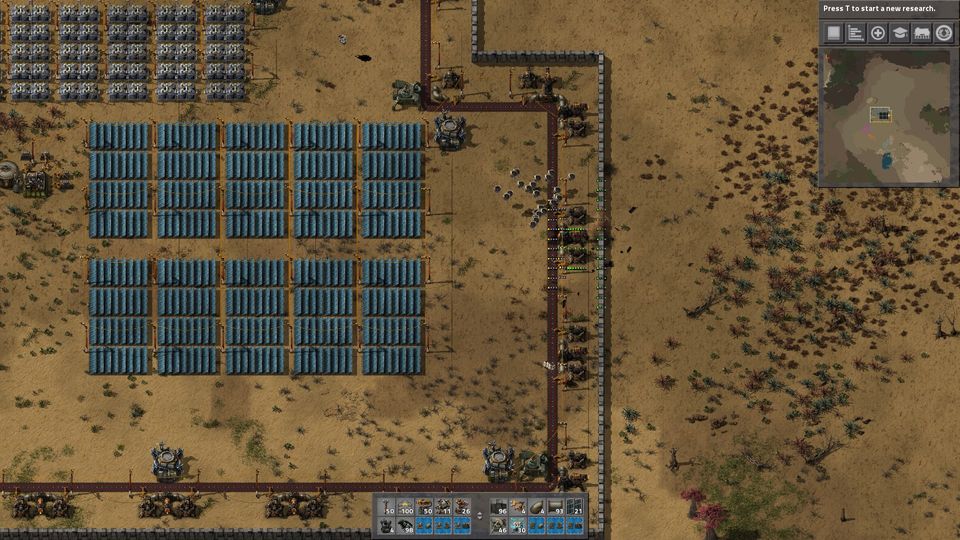
If we do use these bunkers to defend entire resource patches or a perimeter to create a territory for ourselves, we should wind up with something that looks like this:
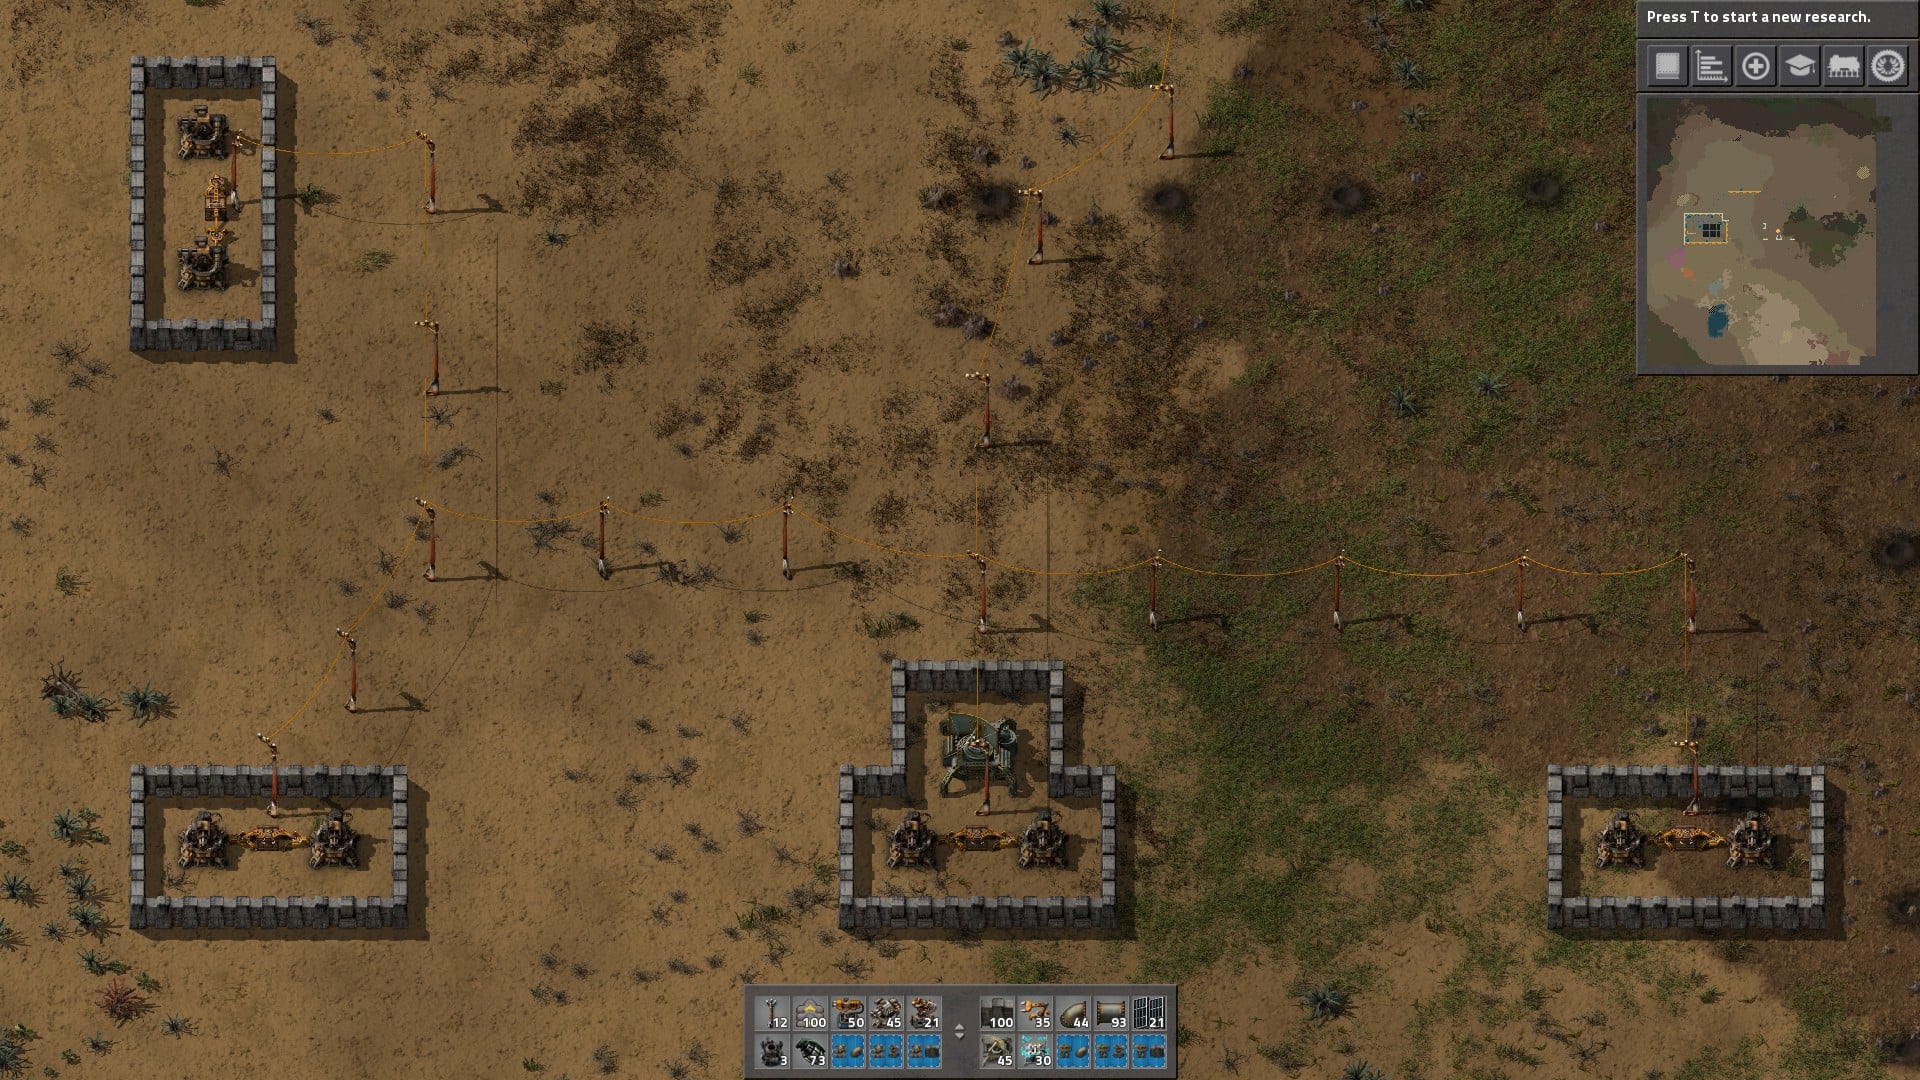
While we still have to check our ammo boxes from time to time, it’s much harder to get caught off-guard with a setup like this. Biters will have to do a lot more work to overrun even a single one of these bunkers, giving us plenty of time to react and save as much as we can, while letting us know where our problem areas are. We can even replace our gun turrets with laser turrets if the bunkers are working well enough on their own.
However, these bunkers are only intended to be a stopgap solution for the early game. Sooner or later, we may want to transition into a fully enclosed perimeter wall, especially when our production and territory expand to such a degree that manually supplying ammo boxes is no longer a practical solution for defending our operation.
Continuous Perimeter Wall
The biggest advantage of a continuous perimeter wall is that it is much easier to supply the entire construct with a single logistical solution, while also ensuring that expanding biters don’t slip between the gaps separating our outposts from one another. Once we have enough resources to wall off an entire area so that we can consider the entire interior of the fence to be “safe,” we can concentrate far more easily on our own production and expansion operations.
The easiest way to plan and build a perimeter wall is to blueprint a few segments.
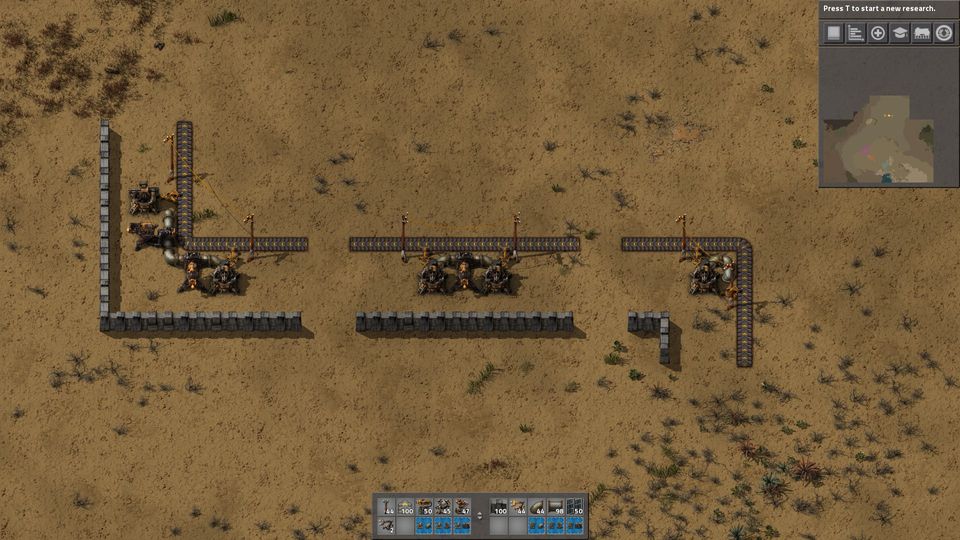
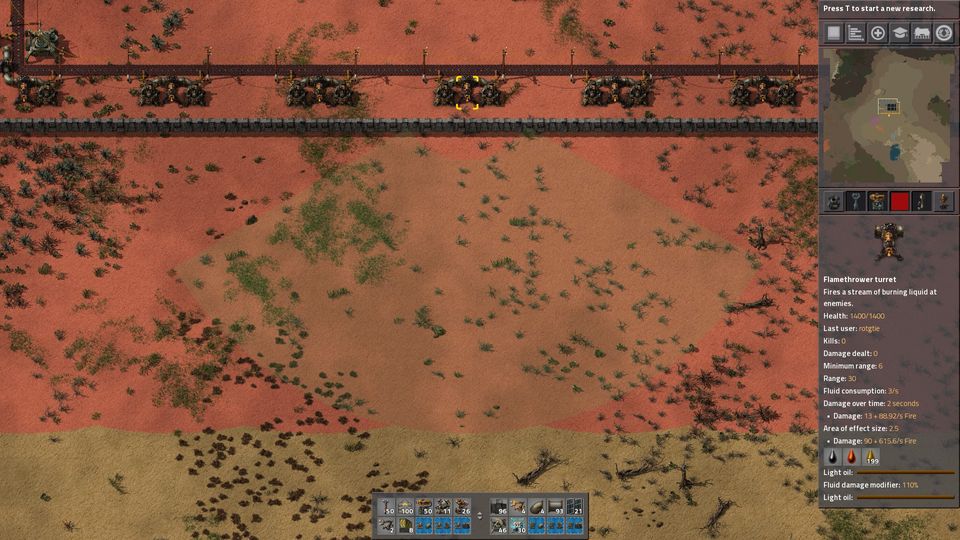
In this example, we have a straight section of south-facing perimeter wall in the center, with a convex corner segment on the left and a concave corner segment on the right. It uses gun turrets with a belt-feeding system, but its primary armament is the extremely powerful and easily-supplied flamethrower turret, which will turn our excess light oil into dead biters of any size in very short order. Linking these segments together is as simple as making sure the underground pipes are close enough to connect to each other when laying down the blueprints – doing this at maximum pipe range will ensure that we have a good balance of weapon concentration to area protected. The flamethrowers will provide our primary source of damage, while the gun turrets help clean up any biters that slip in ahead past the slow-moving flame spout from our main damage dealers.
We can also simplify this arrangement by replacing the gun turrets with laser turrets, potentially relieving us of the need to use belts and inserters in our design:
Although the advantages are obvious, there are a few reasons why we might not want to do this. While lasers are simpler to supply than gun turrets, they do tax our electrical grid quite heavily, and losing a significant element of our perimeter defenses at a bad time due to poor power management or a particularly heavy wave of biter attacks can be a nightmare. Inserter-fed guns won’t consume anywhere near as much power, even when blasting away at the bugs, so gun-defenses can make your perimeter defenses more dependable than power-hungry laser walls. Another advantage of guns is that they can shoot the highly-damaging depleted uranium bullets, which can raise their damage-per-second to ludicrous amounts, well beyond what laser turrets of the same tech-upgrade level could be capable of.
Additionally, we may want to expand our perimeter wall’s capabilities to include self-repairing functions, and if we don’t accomplish that with some other method like a logistics bot network, then we may want a belted system to feed our roboports and construction bots with repair packs anyway. We’ll cover that a bit later in further detail.
For now, a small example of a perimeter wall built in this manner would look something like this:
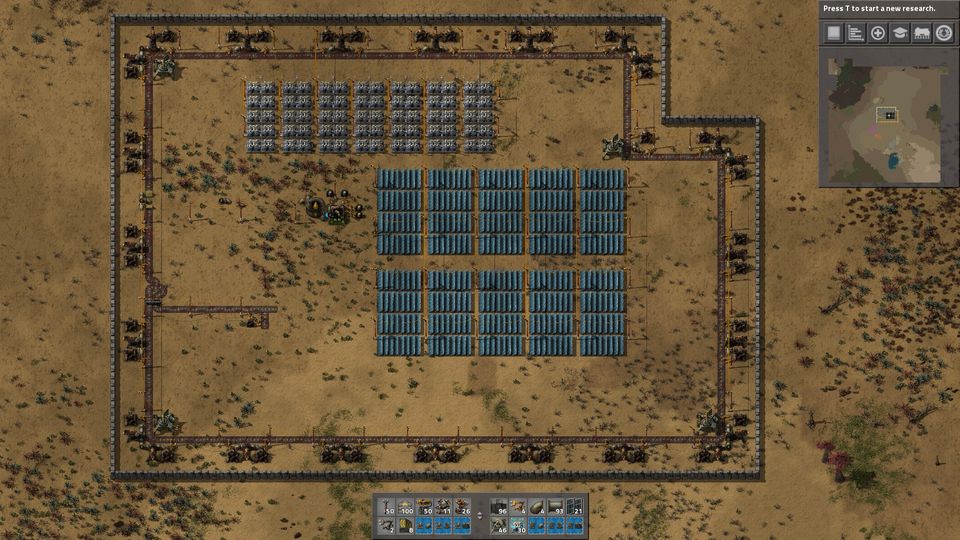
Of course in a real game we would have a much larger area and an actual factory inside our walls to defend, but for demonstration purposes this will just be a wall with a small solar farm and its own light oil and ammo supply. It’s fairly easy to complete a continuous circuit using these segments, though they do not all perfectly align over distance if you’re not careful at the corners.
There may be a corner where we will have to extend the connection slightly with an extra set of underground pipes or condense a connection by placing a segment closer to two others than it normally would go.
This little bit of give-and-take is why we place our turrets only as far apart as underground pipes reach – we benefit from the room-for-error created by the overlapping fields of fire provided by our flame and gun/laser turrets when placing these segments down.
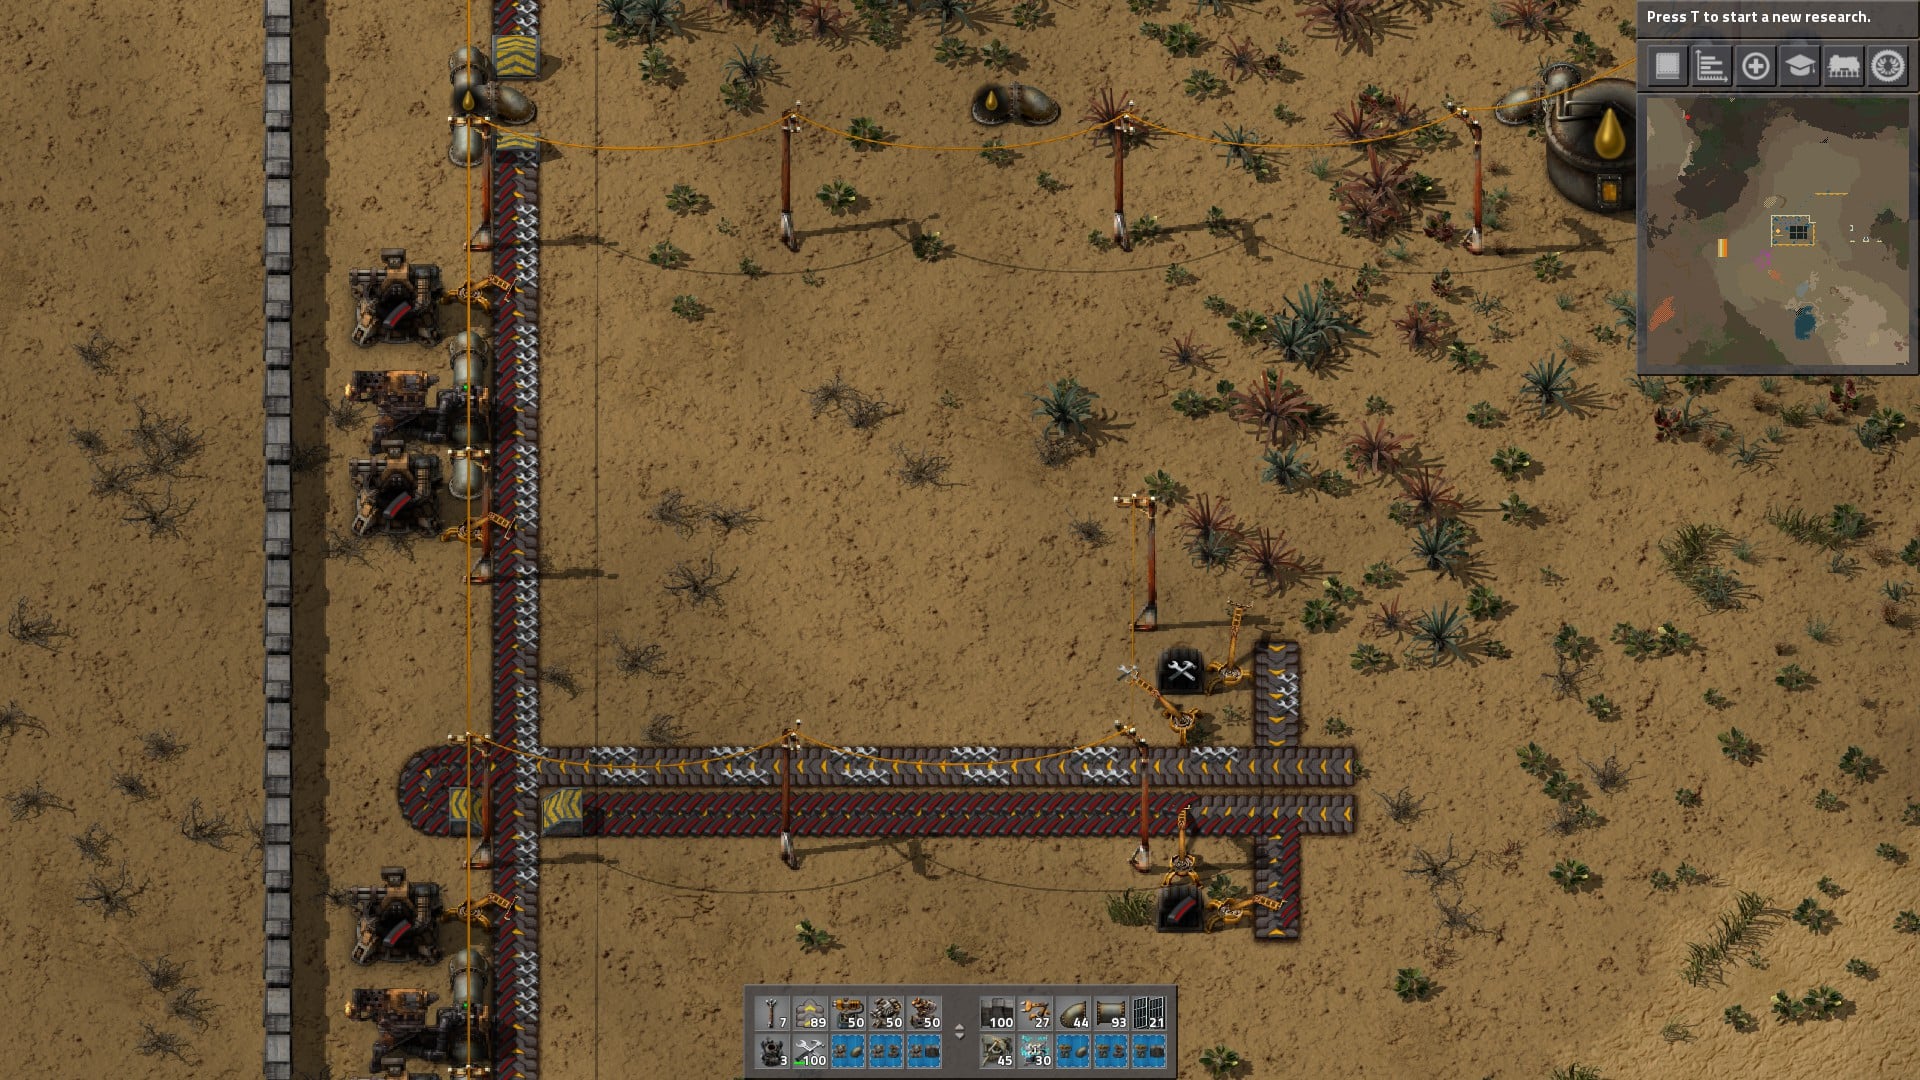
Bringing a supply of ammo and oil into a perimeter wall is simple. Just pipe and belt them in, and use typical methods of splitters and underground belts/pipes to weave them into the gaps between turret emplacements and they will be distributed along the perimeter in no time.

These defenses will be robust enough to defend themselves from biter attacks for quite some time with minimal damage taken even from bigger biter attacks while not allowing the bugs to find any weak spots to exploit. Even the convex corners won’t have gaps in flamethrower coverage at their outermost point.
Still, spitters can and will lob their projectiles over our walls, causing a bit of a problem for us in that we will have to put more effort into ensuring that the active defenses of our perimeter wall remain functional. To this end, we may have to address the issue by adding roboports to our border wall.
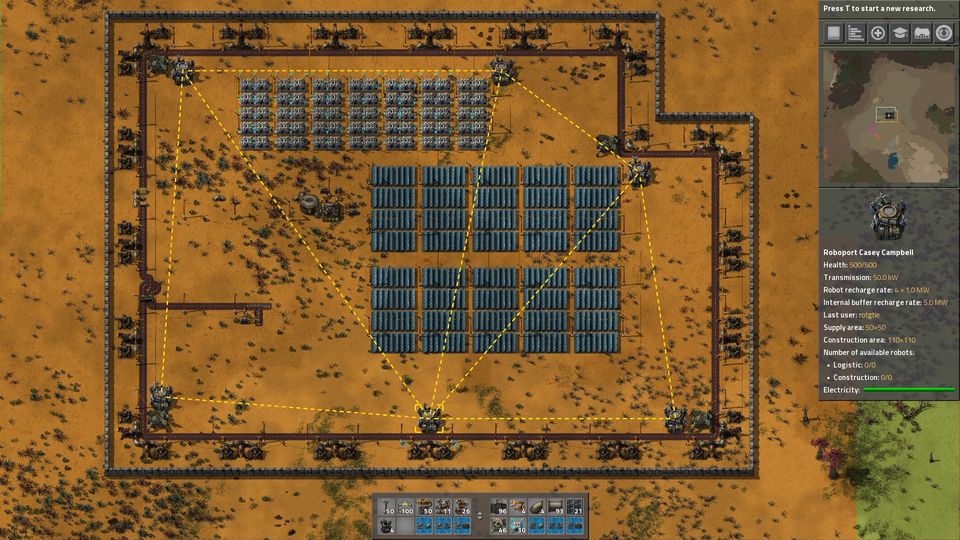
By throwing a few stacks of construction bots and repair packs into these roboports, we can rest relatively assured that any damage sustained by any of our defenses gets automatically repaired, freeing us from the task of having to run around patching up after every attack with our own repair packs by hand.
Like with the early game gun bunkers, we can get by with just plopping down roboports and feeding them with repair packs by hand for a while. However, sooner or later, we will probably want to automate even the process of keeping the roboports supplied with repair packs.
To that end, our ammo belt will come in handy. Rather than filling up the entire belt with ammo, we could instead dedicate one lane to ammo and the other lane to repair packs, giving us a setup like this:

This way, both our gun turrets and our roboports can remain supplied off of the same belt. Now our perimeter wall will truly be completely autonomous, as long as we can keep the belts filled up with ammo and repair packs.
Remember, just because we can build a self-sustaining continuous perimeter wall doesn’t mean we necessarily must have one giant superwall to close in an entire huge area for us to operate in. We can always close off a perimeter here and there to protect a far-flung resource patch or radar outpost, and simply use underground pipes/belts and/or trains to supply the oil, ammo, and repair packs necessary to keep the walls in fighting shape, while using large power poles to hook them up to our power grid over long distances. There’s no reason we can’t have multiple separate perimeter walls as long as we can keep their belts and pipes topped up.
Conclusion
As we can see, setting up autonomous perimeter defenses is not something we have to overthink or overspend on in order to make them effective. We don’t need to neglect our borders in the hopes of saving resources, but we also don’t need to burn all of our materials building 16-tile deep defenses just to keep an area biter-free. Of course, there will always be logistical issues in supplying multiple far-flung perimeter walls of remote outposts and bases across large maps, especially on train worlds, but that lies beyond the scope of this guide.
For now, we at least have a sensible place to start, knowing what a relatively sane border wall should actually look like.
I used to build way too many walls and turrets, while still not getting adequate coverage and ammo supply. This gave me the direction that I needed to keep things both safe and pragmatic. Thanks!