Table of Contents Show
A short compilation of simple builds and tips for the early burner stage of the game, before you have the resources to set up your main bus and factory properly.
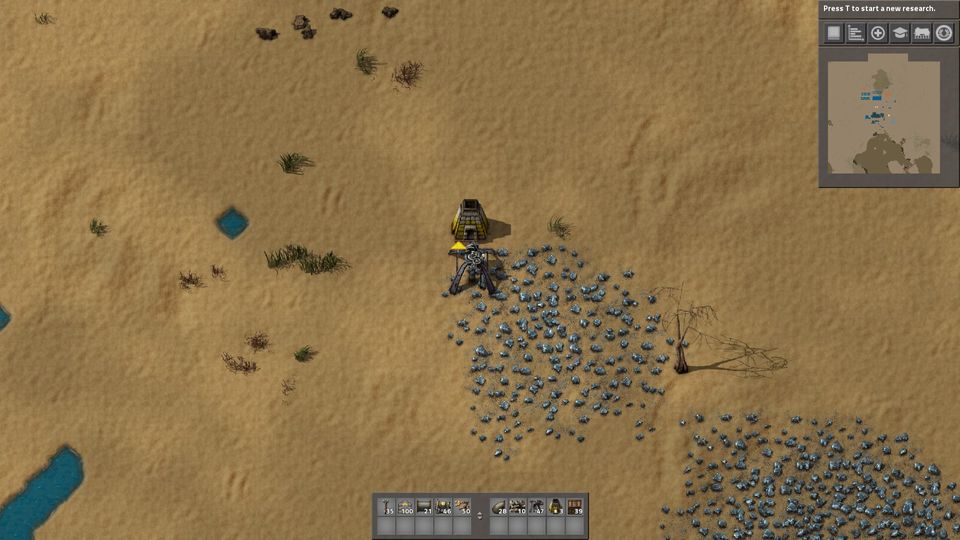
Initial Mining
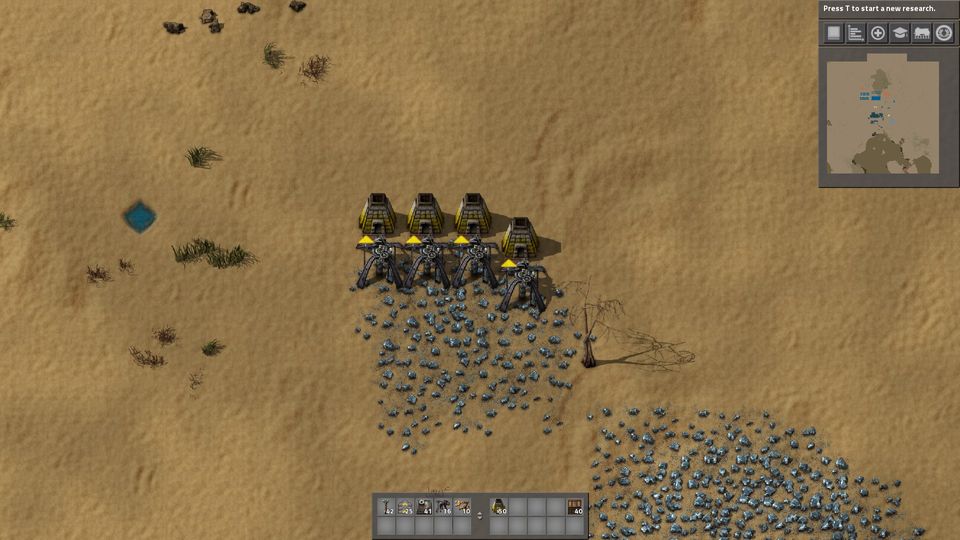
As with all things in Factorio, automation is always the goal. Even at the start, we won’t have to mine ore by hand, as we’re given a burner drill and stone furnace to get off the ground. Our first goal should be to plop those down on the outskirts of an iron ore patch, like so:
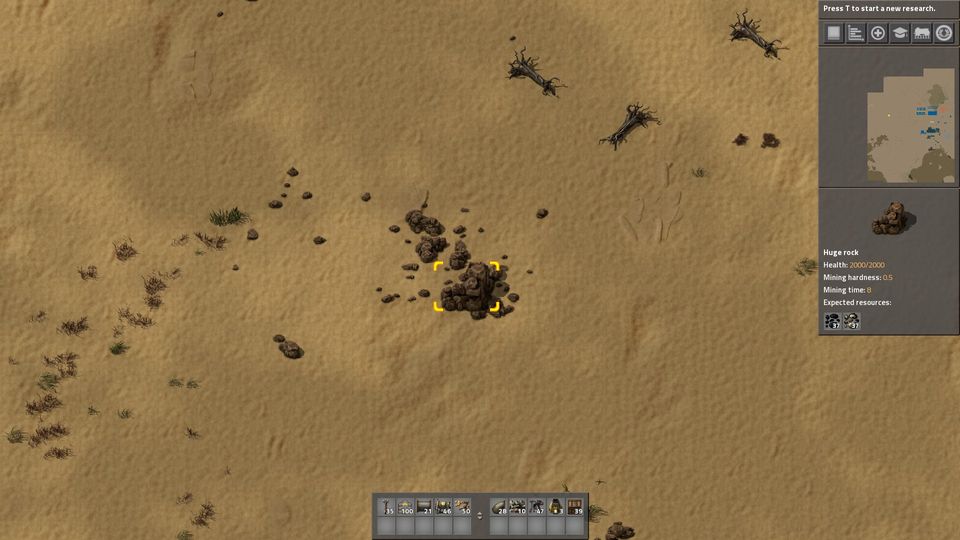
This way, we can get straight to the task of dumping fuel into them so we can get more iron plates to work with. While we can hand-mine coal, it’s better to get fuel from a quicker source. We can always use raw wood chopped from trees, but the best option is to find a huge rock with coal inside it:
Just one of these is more than enough to get you started mining iron and immediately smelting it into iron plates.Those plates can then be used to make more burner drills, but rather than simply expanding the iron mining setup until we run out of initial fuel, we can start harvesting coal automatically to power this process without having to continue hunting for more fuel manually.
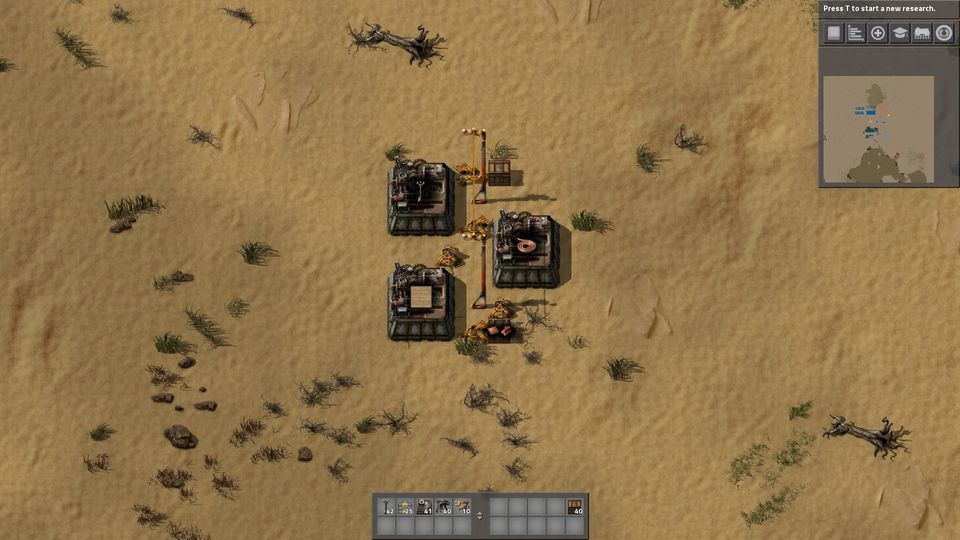
Due to a fun trick that’s possible with burner drills mining coal, we can make them feed into each other like so:
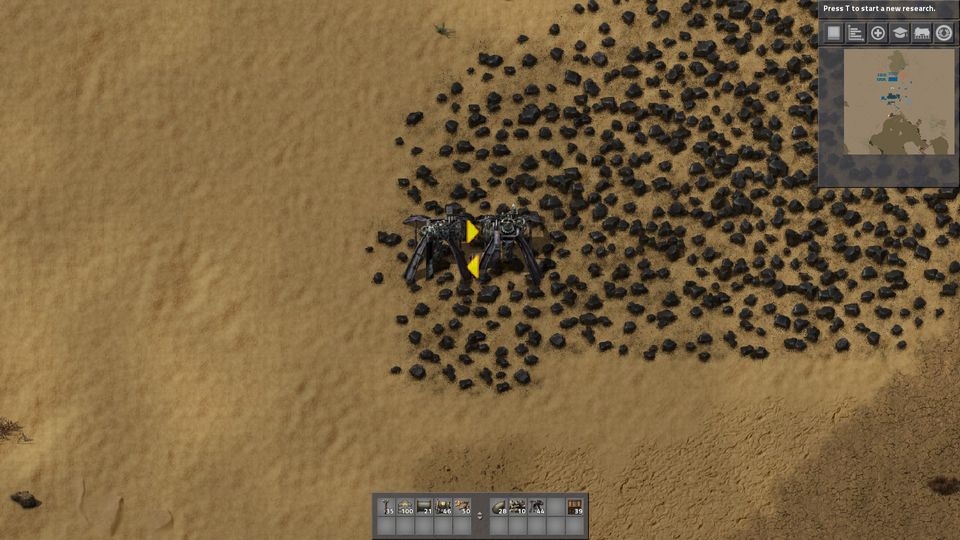
Since the drills dig up coal faster than they burn it, they will build a full stack of coal into each other while working in this way. We can extend this concept to its logical conslusion:

As long as our chain of burner drills forms a loop which feeds into itself, we will have access to as many stacks of coal as we have burner drills. The longer this chain, the more coal we’ll have handy at any time to feed the rest of our mining operations. We can use this to produce more iron plates, and spend the rest of our time breaking surface rocks to quickly obtain more stone. This way, we can expand our mining operation like so:
We can quickly pull items out of a furnace or drill by holding Ctrl and the Left Mouse Button while dragging over them, and we can insert items into objects by clicking them from our inventory to hold them in our hand, and then Ctrl+click to drag them into any objects (furnaces, burner drills, boxes, boilers, assembly machines) to fill them with our stock. By doing this, we can quickly transport items around before it’s feasible to start using large numbers of belts to transport items around.
How many drills and furnaces we need at this stage is a matter of preference. I normally try to build up to ten drills on coal, eight drills/furnaces on iron, and four drills/furnaces on copper before preparing to set up the rest of my burner-stage operations. It just depends on how invested you want to be in burner drills before making the switch to electric, since we can’t reinvest the materials spent in those drills after we’re done using them. Too few of these, however, and we’ll be stuck in the burner stage for way too long trying to harvest the resources we need to get out of the burner stage of the game.
Next is initial power production, research, and some basic assembly setups.
Power Production, Research
Once we have an adequate stock of resources pooled, we can start generating electrical power. This is necessary to make any progress beyond the basic burner stage of the game, as researching new technologies requires the use of labs which run on electricity.
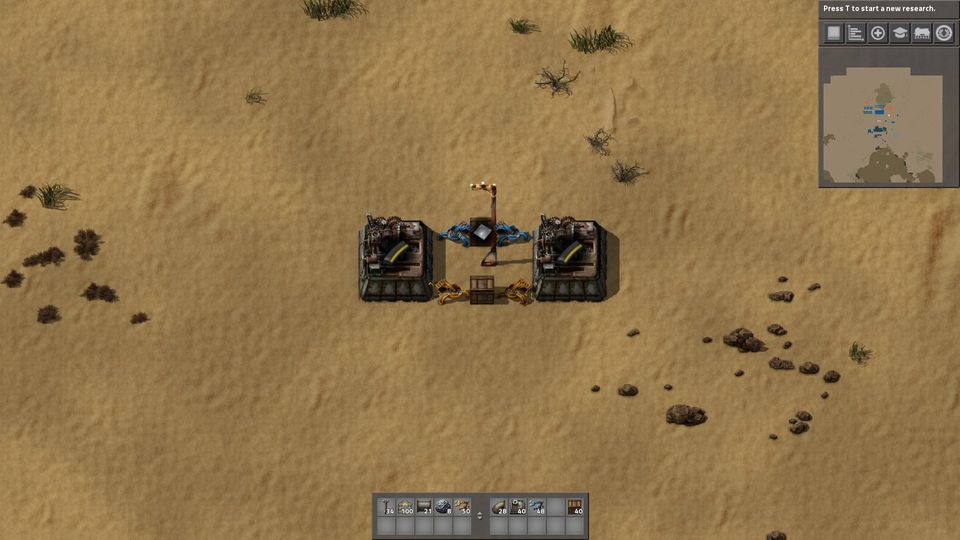
To get started, we’ll need to make an offshore pump and a handful of boilers, steam engines, pipes, and small power poles from our crafting inventory. I recommend placing the initial power generator somewhere out of the way, where we aren’t planning to lay down the main factory. Like the burner miners and furnaces, we’ll probably want to pack them up for replacement or relocation once we’re ready for the long haul. But for now, a setup as simple as this will do:
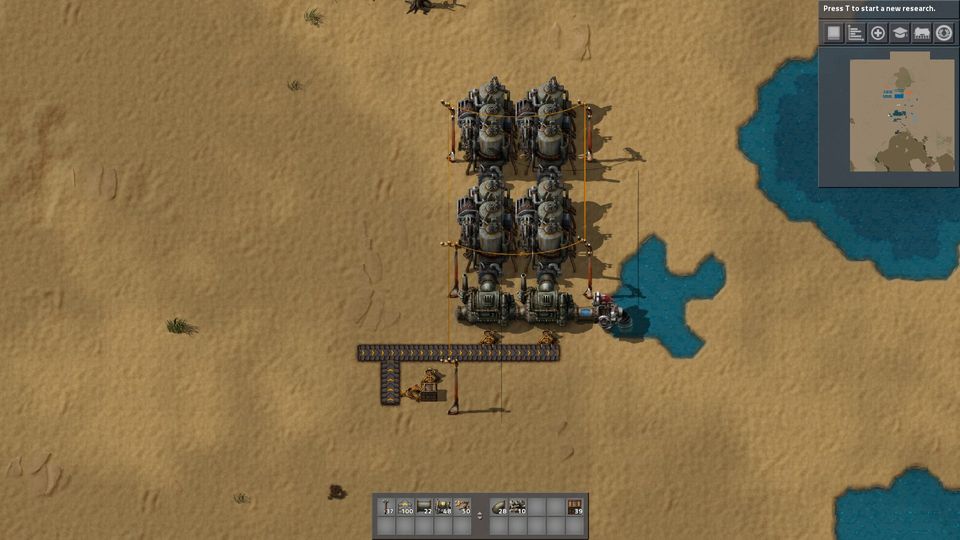
With a box to hold our excess stock of coal, we can start this generator up and leave it alone for a long time before it will need to be replenished. We’ll have to put a stack of coal into one of the boilers ourselves to get the operation started, but after that, the arrangement will continue to feed itself until the coal from the box runs out. If we negligently allow that to happen, we can just fill the box and restart the generators the same way we did the first time, throwing a stack into a boiler by hand.
If more power is needed, we can extend this arrangement to include more boilers and generators:
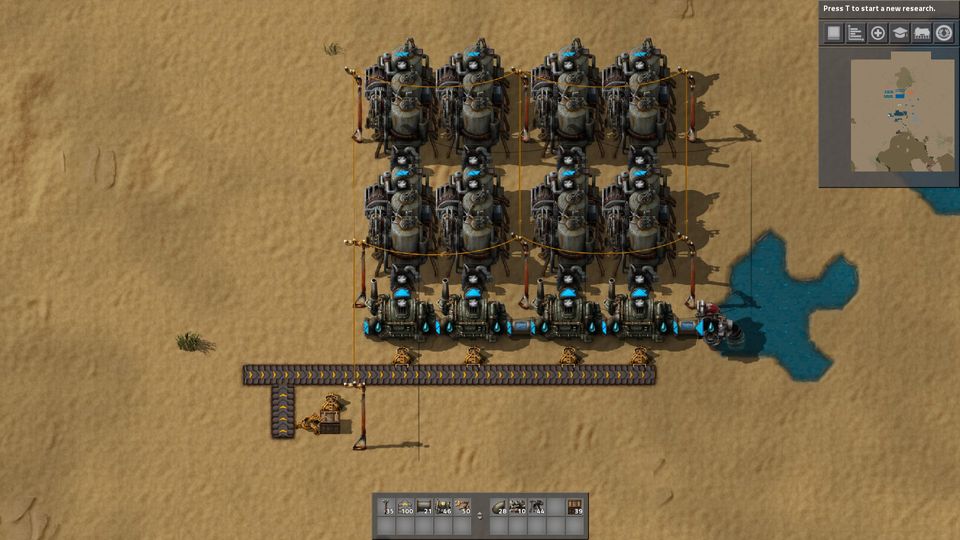
Currently, the optimal ratio is one offshore pump to twenty boilers to forty steam engines. There is no way we’ll be demanding that much power in the burner stage of the game, so this small setup will more than suffice.
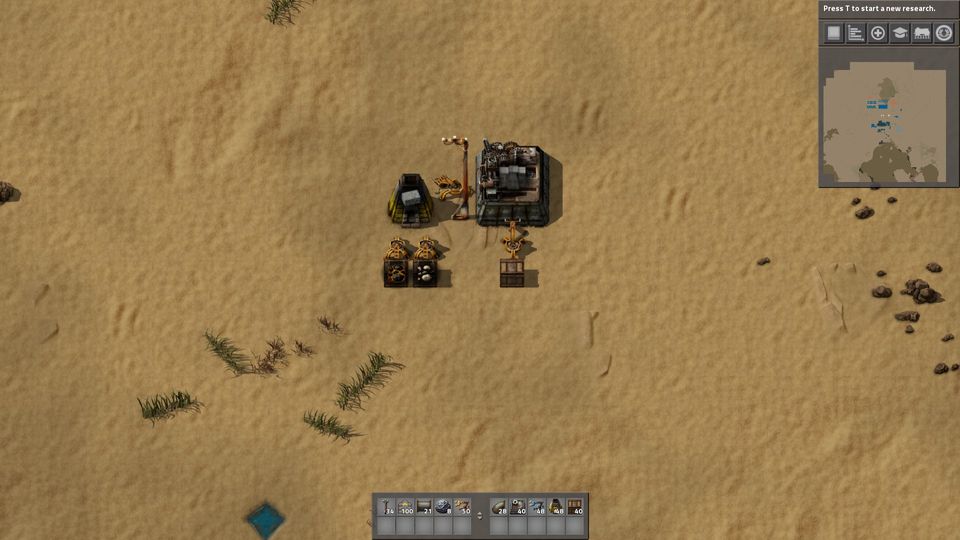
To start working our way up the tech tree, we will need at least one lab building within the coverage area of a power pole. Unfortunately, there is no way to automate research until the first technology, Automation, is completed. We will need to hand-craft ten red science packs and manually place them into our first lab to accomplish this, but then we can automate the rest.
Once we have automation, we can start setting up our semi-autonomous builds, ideal for producing lots of what we need with a minimum of dropoff points.
Semi-Autonomous Assembly Layouts
Now we come to the meat of this guide. With the Assembling Machine available to us, we can begin automating the production of various essential items without having to hand-craft them ourselves. This saves tons of time, as the player can only craft a single object at once. Using assemblers to craft common, high-quantity items frees us up to do other things, which is especially important in the early game when we can’t even be expected to have set up a main bus yet.
Red Science
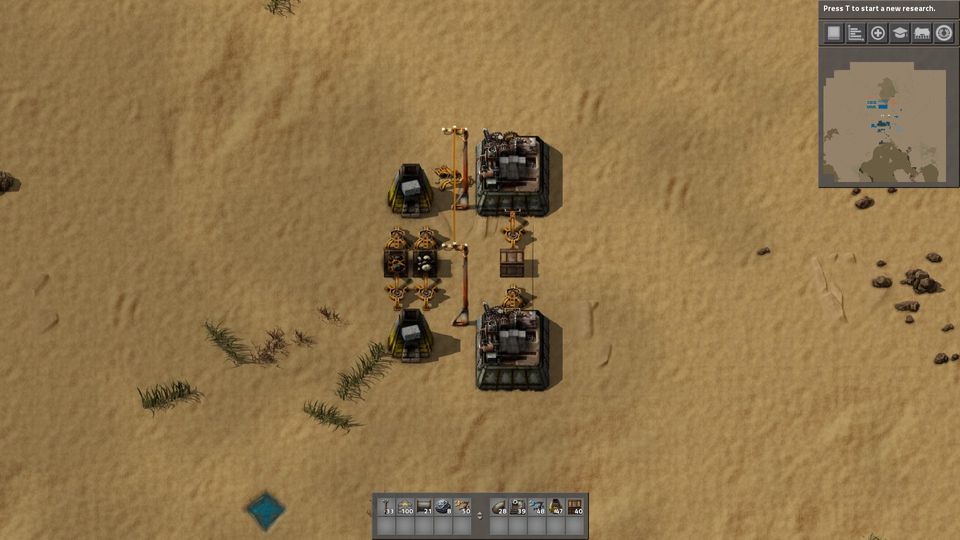
Our first reward for researching automation is the end of having to hand-craft red science to research it. This is where our first build comes in:
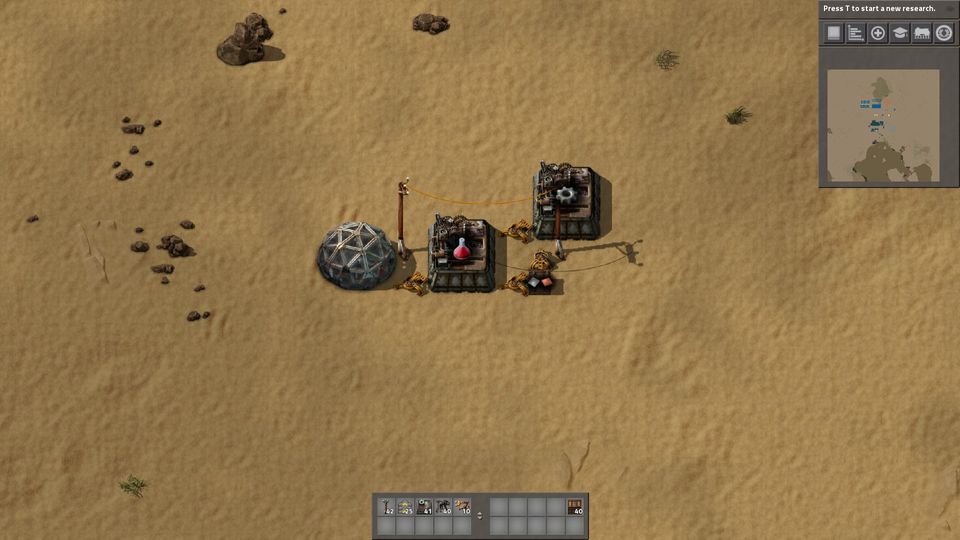
The input box needs both iron and copper plates, but because the recipe calls for gear wheels, it needs twice as many iron plates as copper plates. Since the stack sizes are the same, we can easily just make sure to place two stacks of iron plates for every stack of copper plates we put into the input box. After that, just connect the setup to your power grid and it’ll start producing for you. We can always throw down another pair of assembly machines and a lab mirrored on the other side of the input box if a single lab is too slow.

We could stop there and simply move on to building our main bus and factory from there, but there are a few more things we can do with this kind of simple setup, and it will save us a lot of hand-crafting in building that main factory anyway.
Power Poles
No sense crafting our power poles by hand when we can have it all easily done for us while we do other things. This setup will help clear out any excess raw wood building up in our inventory, too, in case we had to do some deforestation to make space for our factory:
The ratio here is super simple – an equal number of raw wood to copper plates will do just fine. Toss a few stacks in the input box and you’ll have an abundance of power poles before you know it.
Belts and Ammo
Transport Belts and Firearm Ammo are needed in large quantities even from an early point in the game. Fortunately, they can be crafted from nothing but iron plates in one or two steps, making the following assembly setup useful to us:

All we need to do is keep the input box fed with iron plates, and these assemblers will keep us stocked on belts and ammo. Even when we’re making transport belts in our main factory, we can still keep the ammo-producing part of this setup working by tearing down the belt-making machine and converting the gear-maker into another ammo-maker which deposits into the ammo box.
If we don’t need belts but do need ammo, a fast inserter will be needed to keep up with the demands of the bullet-making assembly machine from the input box.
Stone Walls
It might seem too early to worry about stone walls when we’re still in the burner stage, but a small number of these can give our turrets a very long lease on life, making them very useful for keeping our precious early defensive emplacements alive while we’re still running around on foot trying to keep everything supplied and repaired.
While this setup can work just as well by feeding both stone and coal into the furnace from a single input box, one coal will power the furnace through about twenty-five stone, and it’s easy to have an abundance of both, so there’s not much point in carefully measuring them out.
Like some of the others, this layout can be easily mirrored for greater production if needed.
Turret Defenses
While these don’t really generate any products, they do produce security, and players tend to haphazardly place down their early-game turrets in such an unsafe manner that I feel it’s worth having a template available which can secure an area against small biters much more effectively than the poor lone unwalled sentry turret which was only supplied with ten magazines of firearm ammo the first time it was placed. This setup is cheap to build, much easier to supply, and will survive far better than a daisy chain of unprotected lone rangers:
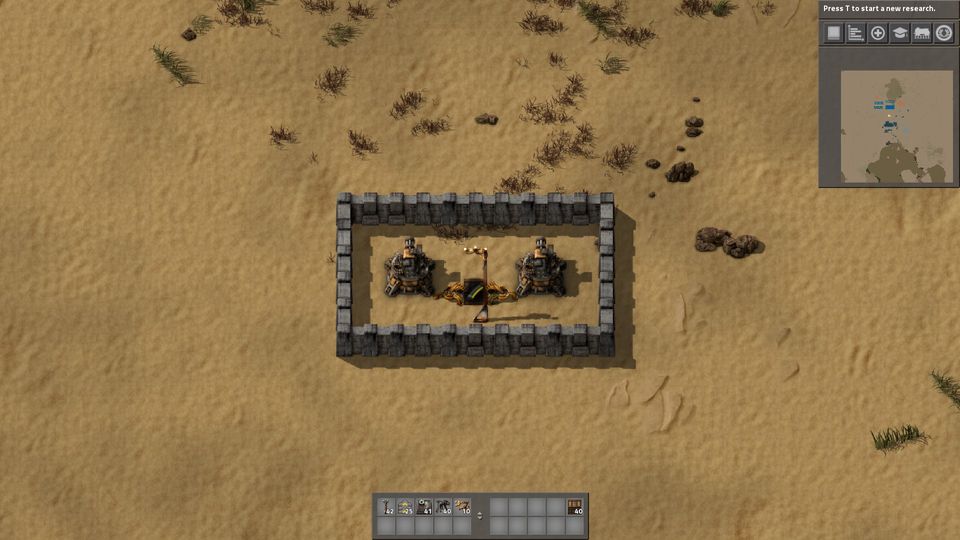
It should go without saying, but the above example is a north-facing simple gun turret nest; the arrangement will need to be rotated when being built to face potential biter attacks from other directions. Because the input box stores the bulk of the ammo, even a destroyed turret won’t be a huge loss. The inserters will keep the guns firing, and for some reason players seem to find it much easier to remember to keep a box properly supplied with ammo than the actual turret that needs to fire it.
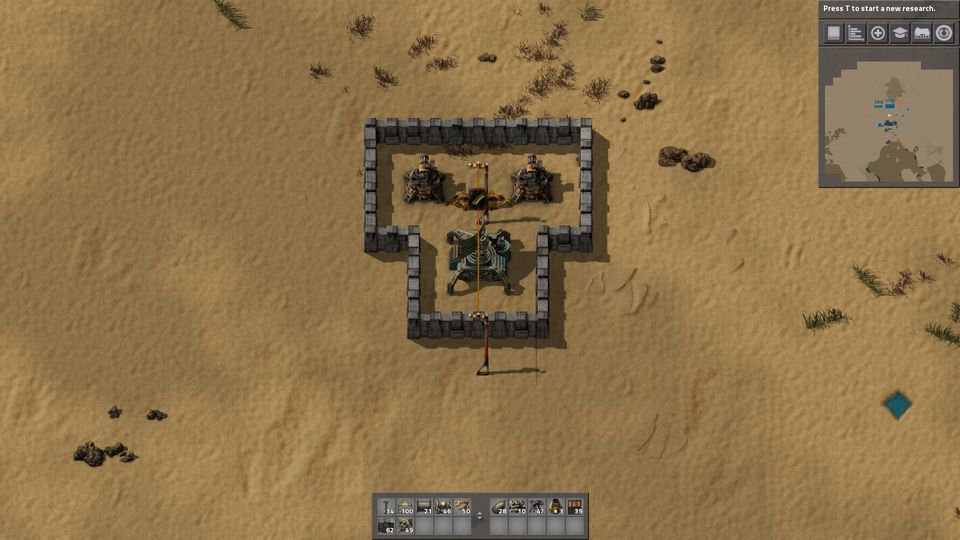
Having a connection to the electrical grid available makes it easy to place radar stations where they are most needed, and it also makes it simple to upgrade this little bunker to take laser turrets instead of gun turrets and ammo.
Conclusion
With the use of these types of early assembler builds, the burner/red science phase of the game can be made much more tolerable, paving the way for a more comfortable transition into electric drilling, mass smelting, and establishing a main bus for the factory.
From here, I recommend checking out other guides on how to build a main bus and high-volume production lines. Those lie outside the scope of this guide, which ends here.