Harvest is not your usual solitaire game, and can be confusing to new players. I’m working on a series of videos with tips and tricks to help others understand the mechanics and get the most out of the gameplay.
Before I get to the videos, here are some gameplay basics:
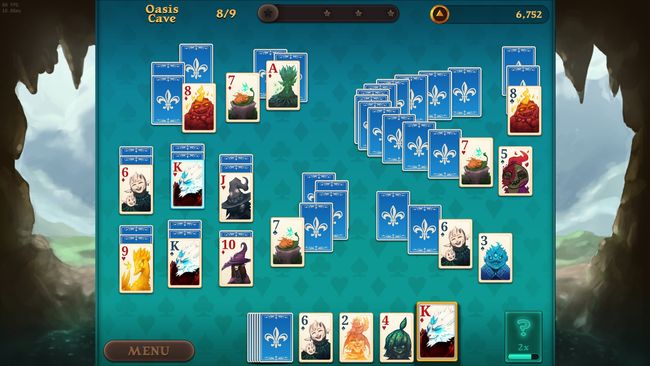
- Match like-numbered cards — regardless of suit — to clear the board
- Match like-numbered cards of the same color to start a combo. Continue the combo for as long as possible (ie. Two black 7’s followed by two red J’s and so on)
- Making a combo of at least 7 will give you a free redeal
- Drawing cards from the deck will break your combo if you have a combo of 7 or more
- The higher your combo, the better your Pure Gold bonus will be at the end of the hand (ka-CHING!)
- Complete all 9 hands of a location to free a faerie (try clicking on the crystal to break it!)
Level 1: Shimmer Frost, Hand 1
I’ve started a brand new profile to show some tactics that will help you get an all-out on every hand without using wilds, and with NO TALENTS.
I’ve clicked through all of the pop-ups that teach you about the game, since you can pause the video to read them.
In this first hand, I got good cards, so I was confident that I would be able to get my 7x combo right off the bat.
Getting a combo of 7 or more matching-color cards will make your redeal FREE, saving you 1000 Pure.
0:37 – Once I got my 7x combo, I still had some matching cards, so I went ahead and extended my combo, but once I ran out of obvious matches, I stop paying attention to color and cleared as many stacks as possible.
Going for an all-out means clearing every single card on the board, and to do that, you need access to every card, so clear those stacks, but leave the bottom card rather than matching it with a FOUNDATION card, as they’re like free wild cards!
01:15 is a good example of ignoring color. I’ve already gotten my 7+ combo for the level, so instead of matching the color for the 8’s (and removing that bottom card from the playing field), I matched from the foundation instead.
Now at 01:42 I’ve (basically) cleared all of the stacks. At this point you need to change your strategy, and do your best to clear your FOUNDATION cards! Save as many board cards as possible – they’re easy matches, and it’s not always easy to match your foundation cards! The reason I’m not following my own advice here is that I want to get another combo going to give me some bonus Pure.
02:22 – Make sure you match your foundation cards FIRST! The hand ends as soon as all of the cards on the board are gone, so if you accidentally match the board cards first, you’ll lose out on your all-out bonus!
Shimmer Frost, Hand 2
Continuing the game with a new profile, I failed my first time around, so this is my re-try. Once again, you can pause the video on the how-to-play pop-ups.
My cards weren’t that great this time around, and there were a lot of cards in the stacks, so I concentrated FIRST one uncovering as many stacks as possible.
0:10 – Even though I have matching-color Queens on the board, I chose to go for the non-matching cards. Why? I hadn’t started a combo yet, and the Queens I used were covering big stacks.
I don’t start my combo until 0:42 seconds. At this point I’ve cleared off enough of the stacks that I feel that I can get a 7+ combo and not end up getting stuck. I missed matching an 8 from my foundation, but I’m not sure now whether that was intentional (since each of the 8’s on the board only covered one card each) or if I just spaced it. lol~
At 01:05 I got my 7x combo, so started ignoring color and just concentrated on clearing stacks.
At 01:58 I ended up matching the 10’s, leaving a single card on the playing field. This was a mistake, but didn’t end up costing me the hand, so I’ll explain why in a future video.
02:04 – You’ll see here that I intentionally left the 7 behind, and dealt some more cards. Sure I could have won the hand at that moment, but I want the all-outs, baby! What I did at this point was memorize where the cards were. J – 6 – 7. When I dealt you can see that I got luck, and was able to clear off some cards to expose the Jack and 7 again.
02:09 – Oh noes! The Jack I need is on top of the other Jack! Never fear, Spare Slot is here!
The first time you use the spare slot on each hand is FREE, so I could move the top Jack over, match it, then match the 7’s to end the round, netting me my second all-out for the location.
Shimmer Frost, Hand 3
Right off the bat you can see that I have 3 Kings available, and although I would normally (at this point) ignore the colors and concentrate on clearing stacks, I decided to take a chance and start a combo, instead.
At 0:12 I went for the two 5’s on the board, saving that foundation card for later. (Clear the stacks before worrying about the foundation, usually.)
0:39 – Got my 7x combo, so concentrated on clearing stacks. I could have (and should have) continued the combo with those 9’s, but didn’t see them. :p
The benefit of going beyond the basic 7-combo is twofold: First, your wild cards charge more quickly when you’re making combos, and second, there are Pure bonuses involved in getting combos, so the higher you go, the better your bonus. Ka-ching! $_$
1:09 – At this point I’m getting nervous, because I’ve cleared so much of the board, and used only a few of my foundation cards. I want that all-out bonus, and it’s hard to do when you have mostly foundation cards left. Clearing stacks is important, but you have to find balance if you want an all-out.
1:21 – All of the stacks have been cleared, so now it’s time to concentrate on clearing the foundation. Since I haven’t reached the redeal point yet, I can do a leisurely pace and just match combos for the moment (I want those extra wild cards, even if I never use them! haha)
At this point I would happily break my combo if I had two matching cards in my foundation, but I’ll come back to the whys of that later.
1:27 – Whoop whoop! Found my first Lore shard! These shards will reveal snippets and stories about the Faeverse, its inhabitants, heroes, tragedies and more! I clicked so that you can see the dev’s description of what Lore is about, but not on the revealed story itself – NO SPOILERS for you!
1:50 – My egg is ready to hatch, and I want it to get experience, so I get you do get a little spoiler – You get to see what was in that egg. If you don’t want to know, skip to 1:54.
At 2:00 I’ve reached the bottom of the deck, so as soon as I make this last combo, it’s time to concentrate on clearing ALL of the cards, with the foundation being the most important. At this point all of the board cards are like wilds to help me clear things off.
… So why did I select that Queen at 2:04 and then unselect it? Tactics! When I redeal, it might give me a free route to a card underneath it. It didn’t happen in this hand, so more on that later.
2:07 – I’m memorizing the cards so that I know how to get back to them… and wouldn’t you know it, every. single. card. from the deal perfectly matches up with the card below it! Noooo! What are the odds?? This is where the Spare Slot Sorrow (my terminology – I just made it up) comes into play – literally!
Watch the spare slot… The cost of using it goes up each time you put a card there, and now I have to use it three times in a row, and it adds up! Still, if I want that all-out, it’s necessary, so off I go!
I got my all-out, and my bottom line? Started with 5,387 Pure and ended with 7,790, so it was absolutely worth using the spare multiple times.