Table of Contents Show
Manage your own farm in the game Farm Manager 2018! To expand your farm business, produce cheap and sell your products in high prices. Control the process of land cultivation, employ the best staff, buy the most appropriate farm equipment, raise livestock and process the harvested crops.
Problems
I tell you some problems that I had so if you experience them you know it’s a game fault and there nothing you can do about it:
• Can’t delete saved games
• Reports lack information
• Insufficient ability to automate
• Sales market is sometimes blank
• Game stutters and slows when building farms beyond the initial 4 hectares in size.
Tips
• Slaughtering cows is a ‘cash cow’ business which can earn millions in profit even in the standard 4 hectares plot.
• Pre-Slaughterhouse, Sheep make easy good profits.
• Livestock is much easier to manage then fields or orchards.
• If you are a livestock farmer, don’t bother growing your own grass etc, buy it.
• Move livestock feed to Silos etc nearer to all livestock (click on product the use SHIFT and click to move)
• Keep staff travelling distances to a minimum
• Relocate staff to suitable Houses to reduce distance to work
• Train staff appropriately
• Always be Training in something
General
• Buying extra land (once you have upgraded your Owners House) costs more each time, e.g. $36k, 58k, 64k etc.
• Buildings are paid for immediately and will be built shortly afterwards.
• Use SHIFT and click when placing to place multiply buildings.
Owners House
You will always need to build an Owners House (30m x 40m). It has three levels:
Level 1 normally costs $80k and once you have it you can access the two upgrades. It gives access to Training (which makes you more efficient and more effective), information and allows automatic selling of goods once every two weeks via Trade. Maximum field and orchard size is 50m x 50x (0.25ha).
Level 2 will cost around $360K to upgrade to. You can now purchase surrounding land and can auto trade once a week. Maximum field and orchard size is now 75m x 75m (0.5ha).
Level 3 will cost around $720K to upgrade to. It allows auto trade twice a week and increases the maximum field and orchard size to 100m x 100m (1ha).
Staff
You hire Permanent or Seasonal Staff from the information screen. You can open the information screen by clicking on an icon at the bottom of the screen, or by clicking on the Owners House.
Permanent Staff: Always needed for all-year work such as livestock and production and useful for other work as they can be trained as a specialist. They will cost you if you Release them (fire them). Houses for Pernament Staff house up to 8, are 10m x 10m and cost 30k.
Seasonal Staff: Will work for a set period and leave automatically with no redundancy payment. They cannot be trained so use them only to help in the fields and orchards during the summer when there is a short spike in the demand for workers. Houses for Seasonal Staff house up to 24, are 20m x 20m and cost 40k.
Staff training: Any staff can be used for any job, but trained staff will be more efficient at the role they are trained in. There are seven roles: field, orchard, production, bee keeping, livestock and strength. Strength represents how long a worker can work without a rest, it is training which can be on its own or can be paired with one of the other specialists. Each staff member can be trained up to five levels which will allow a maximum of 25% more efficient. A 25% increase in production can be very significant and so training is a worthwhile expense.
Machinery
Machinery is much more efficient than staff. Machines can only be used when a field or orchard is at least 30m in length. There are three types of tractor, only Orchard Tractors can be used in orchards once they have been planted. The blue tractor is more expensive but has 20% more power.
Use will wear the machine out until it breaks and cannot be used. Click on Renovate when it is available to regain some of the machines health. If a machine breaks completely the Repair button will become available. While Renovating or Repairing a machine it cannot be used, so check them when not in use such as during the winter.
Each machine is given a size: XL, L, M, S. The machine will need a corresponding place to park it before it can be purchased. Machines can be Reparked, use this to be efficient as larger parking spaces will cost more.
Small Garage: 11k, 9pcm, 10m x 25m, 6 small machines.
Medium Garage: 28k, 27pcm, 20m x 15m, 3 medium machines.
Carport: 45k, 46pcm, 25m x 15m, 3 large machines.
Parkiing: 50k, 9pcm, 30m x 15m, 4 large machines.
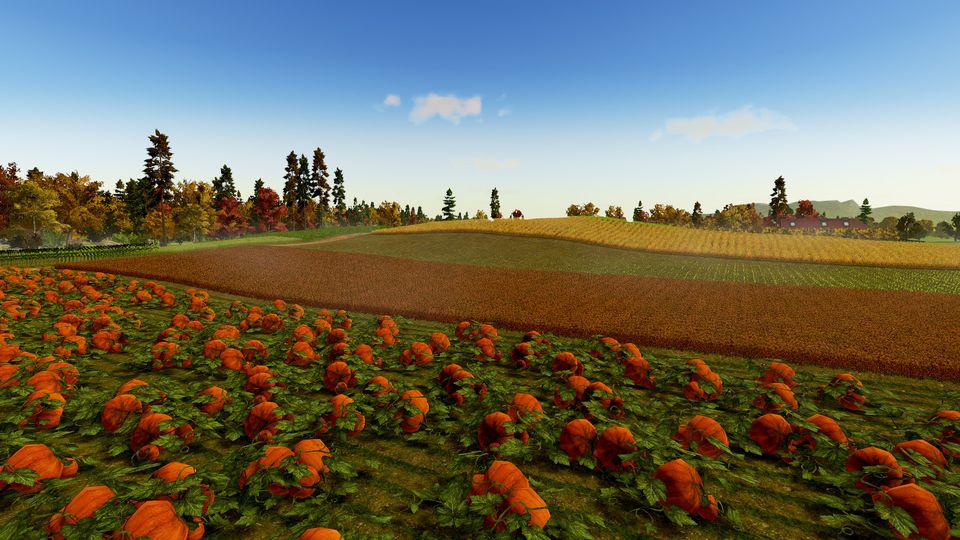
Fields and Orchards
An orchards and fields are set up the same. Build it using the Field icon, Plough it and Cultivate it, these both improve Crop Quality (harvest production). You can add fertilizer, but this does not seem to improve the Crop Quality.
To work on a field, click on it and choose the task, then select the machines or staff, then click Accept (bottom right).
Choose which crop to plant. The most profitable orchard crop is apples, with fields it depends, sunflowers, cucumbers etc are good but if you have frozen food production then strawberries and raspberries are most profitable, they can also be harvested a few times a year.
Most crops can only be harvested once, you will then need to re-cultivate and re-sow.
Your aim should be to have maximum Crop Quality at the time of harvest.
You harvest large quantities so ensure to have the warehouse space or you will be forced to sell the product immediately at half the price. You don’t have to wait until the harvesting is complete, as soon as any is in the warehouse sell it to make space.
All crops will need watering, you can wait until the Soil Moisture indicator is half way to see if it rains to save you the effort of watering. You will need a Well nearby for staff to do the watering manually.
Fields and orchards can be affected by Fungus, Insects and Weeds. You can buy and use chemicals to combat these. Use will last all year and you can either spray straight after sowing or wait to see you get a problem.
Watering and spaying are much quicker than other tasks. It may take a which can take a long time and many staff. Once a field or orchard is large enough to use a tractor do so!
Warehouse: 20x15m, 10.5k, 46pcm, stores seeds/seedlings and products.
Barn: 25x25m, 20k, 73pcm, stores Grass, Crops, Silage, Straw.
Silo: S, 5x5m, 0.4k, 5pcm, holds 60k grain. Silos hold muliple grains at the same time. M, 5x5m, 2k, 9pcm, capacity 200k. L, 10x10m, 9k, 33pcm, capacity 500k.
Silage Production: 20x10m, produces Silage from Grass, 1 staff.
Greenhouses
Greenhouses are like small fields except they are productive all year round and you can’t grow grain. 5k, 46pcm, 25m x 10m.
Livestock
There are Bees, Rabbits, Chickens, Ducks, Geese, Turkeys, Pigs, Goats, Sheep and Cows available. The smaller the animal the less they cost, the less space they need, the less profit they make.
Bees will make honey even if you have not planted any crops, but they can produce specialist honey from certain crops, which will make a higher profit.
Rabbits are housed in Warrens and breed at 2 at a time. They do not produce anything and can only be sold or slaughtered.
Birds are housed in the Chicken Coop and breed 2 to 4 at a time. (To set what animal you want in the house select it from the picture at the top left of the screen with the animal house selected.). Chickens produce Eggs, and can be sold and slaughtred. Other birds do not produce anything, they can only be sold or slaughtered.
Pigs are housed in a Pigsty, breed one at a time and can only be sold or slaughtered.
Goats and Sheep are housed in a Shed, select which you want. They breed two at a time, produce milk and can be sold or slaughtered. Sheep also produce wool.
Cows are housed in a Cowshed and breed slowly and one at a time. They produce milk and can be sold or slaughtered.
Build the animal house with easy access to staff, food, production etc. Once built click on it to be able to buy animals (they will be delivered shortly) and allocate staff (ideally with animal training).
All animals need food to survive more than a few days. Grain is stored in Silos, Grass, Crops and Silage is stored in a Barn and other Foliage such as apples are stored in a Warehouse (does not need to be Cooled). There also need a place to dump the manure.
A Vet (to cure sickness) or Inseminator (to breed) icon will appear in the animal house screen when appropriate, both these actions cost money but are worth it.
Animals can be replaced by Buying or calling the Inseminator. If you are slaughtering animals for meat you will need to keep on top of buying replacements as they are only around for a short time!
Before Slaughterhouses are used, Sheep are the most profitable animal making about $7k per shed per month.
Beekeeper Building: 5x5m, 2k, 18pcm, 1 staff.
Rabbit Warren: S, 10x10m, 0.5k, 5pcm, 1 staff.
Chicken Coop: S, 25x25m, 3.5k, 26pcm, 30 birds, 1 staff.
Pigsty: S, 15x15m, 12k, 30pcm, 6 Pigs, 1 staff.
Shed: S, 25x25m, 18k, 18pcm, 15 Sheep or Goats, 1 staff.
Cowshed: S, 40x25m, 10k, 46pcm, 6 Cows, 1 staff.
Manure Storage: 20x10m, 2k, 9pcm, capacity 8k natural fertiliser. No staff required.
Production
Production is where the big money is. You can make $500k profit pcm with one Cowshed and one Slaughterhouse!
You will need a Warehouse with Cooling, a production facility and Permanent Staff (ideally with production specialist). You can make seeds, flour, cheese, fruit juice, frozen fruit or meat.
You can set up a production chain from field to product (e.g. Apples to Apple Juice) or with some goods, such as Apple Juice, you can produce without growing any Apples as you can buy them from the Market.
With animal production, i.e. Milk Production and Slaughterhouse, you will need the appropriate animal house for animals to be bred or delivered to before they are taken to production.
Fully staff the production facility and make sure there is a continuous supply of raw material.
In the production facility you can select which products to make. You can also select a “Take above”, below that figure will not be taken from the animal house / warehouse etc. Normally you would keep this at 0 as you can easily replace the raw material and you want to keep the profitable production facility working continuously.
Frozen Fruit: from strawberries, raspberries and cherries. S, 45x25m, 42k, 346pcm.
Milk Processing: Makes different cheeses from cows milk, sheeps milk and goats milk. S, 50x40m, 62k, 273pcm, 3 staff.
Slaughterhouse: Makes meat from any livestock. The larger the animal the larger the profit! One animal house per slaughterhouse should be about right. S, 30x15m, 80k, 91pcm, 3 staff.
Mill: Makes different flour from Corn, Wheat and Rye. 25x25m, 120k, 137pcm, 2 staff.
Juice Factory: Makes juice drink from Tomatos, Apples and Cherries. S, 45x30m, 100k, 182pcm.
Seed and Seedling Factory: Makes bags of seed, 25x25m, 120k, 180pcm, 2 staff.
Warehouse with Cooling: 50x25m, 190k, 273pcm. No staff required.
Silage Production: 20x10m, produces Silage from Grass, 1 staff.
Wind Turbine
They are small, are not staffed and make about $4k pcm (about 15 months to get the initial building cost back).
Because they are expensive it will take a long time to create a sizable farm, but if you then want to leave the game running to make profit without any actions you can! 20x10m, 60k, 9pcm.
Buying and Selling
Buy and Sell on the Market screen. Money will move immediately; the goods will be picked up or dropped off shortly afterwards. You can set up automatic selling by using the Trade screen.
The use-by dates don’t seem to have any affect. I have experienced occasional glitches with the Sell screen such as it being blank after Scenarios goals being achieved.