Table of Contents Show
Some starting tips for beginners.
Tips & Tricks for Beginners
General Tips
This is a zombie survival/base building game. You adventure through the plot, build your party and base along the way. However, the way the game is currently designed in EA (version 0.4.0) is a bit quirky.
After playing for 25+ hours on Normal mode over 6 runs, I have found it to be a fun, but somewhat frustrating game in its current state.
As it is still early in development, there are plenty of room for improvement. Hopefully it will mature into a great indy game.
Below are some tips I would like to share with new players:
1. Combat:
This forum thread started by Harris has very good tips on current state of combat in version 0.4.0 and optimized build. As I don’t want to be accused of plagiarizing, just read it and you’ll know what to do.
One thing I would add is that the pistol skill “Head Shot” and shotgun combat skill “Burst” are awesome. For your range characters, those two skills are are ASAP must gets to take out pesky range mobs in the enemy back row. The skills on the pistol and shotgun trees after those two are currently meh and you don’t need to rush for it.
2. Adventuring & Day/Night Cycle:
On the map adventuring is necessary for the party to earn exp and gather resources. The game is divided into Day/Night cycles. The tutorial makes it sound like you should spend the evening building stuff in base, but that’s not the optimal way to go. Because the game has a timed event on Day 27 that will could result in a bad end, maximizing resources, party level, and faction favor during this time window is essential. Thus, plan on having a party out there adventuring Day and Night to the maximum extent possible (subject to members’ health and base building needs).
3. Party members:
Party members in the first part of game (up to Day 27) appears to be limited to 4 NPCs (Lance, Fernando, Sarah, Tessa). A forum post indicated that Issa, who was at Smuggler’s camp, can also join the survivor’s group if you get Smuggler’s factional standing high enough (over 60) and explore the area near Smuggler’s HQ.
However, I had poor standing with the Smugglers during my runs (now I know better), so I didn’t get the chance to recruit her.
But even with Issa, you don’t have a lot of recruitible NPCs available. So keep your party members alive!
This game on normal mode is barely doable with the PC and other 4 NPCs (3 adventuring and 2 manning the camp). So if any of your part members die early on, just kill your PC and start a new run because once you lose a character in early game, things will quickly spiral downwards.
2 of your NPCs should be leveled as adventurers who will accompany the main PC on the road most of the time. The other two should be leveled as base support NPCs who stay at behind guarding base and crafting things.
4. Non-Combat Skills:
There are 4 non-combat skills for map events/camp activities and crafting: Survival, Handywork, Biology, and Alertness.
Survival is used for sneaking events, hunting event on food spots and camp hunting stand. One party member should have it maxed out and that’s should be enough. You can also have other party member to have a point in it so you have someone who can make ammo in camp when the main survival character is busy with other things.
Handywork is used for crafting weapons and armor in camp. One base support NPC with maxed out skill is enough.
Biology is used for crafting medical supplies, gardening, etc. One of your base support NPCs should have it high for gardening.
Alertness is probably the most necessary skill out of the four. It’s needed for lockpicking events on the adventuring map, which give out some really good loots. It’s also critical for guarding the base, because otherwise looters will start showing up after Day 8 or so and steal your hard earned supplies. Moreover, after day 20 or so, if you don’t have a Rank 3 guard (Alertness level 9) posted at your camp in the evenings, the punk will still steal 10% of your supplies on a regular basis even if you have a Rank 2 guard posted. So you need 2 characters with very high (level 9) Alertness skills. The main character to go adventuring, and a NPC to stay at base and guard it 24/7.
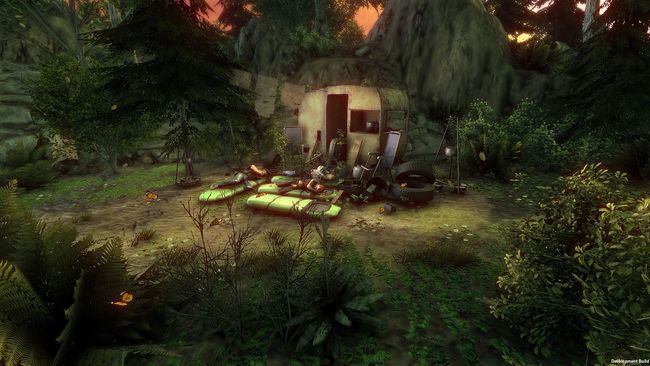
5. Camp Building:
The game will have quests for you to build up your camp facilities. Once you have survived past Day 8 event, try to upgrade Outfitter to level 2 and one of your base support NPCs’ Handywork skill to lvl 10 then start upgrading your adventuring party’s armors. The Tier 2/level 4 armor pieces make a huge difference in combat survival (dont worry about Tier 3 since you won’t have enough materials to build them yet). Forge is a close second for upgrade to get better weapons.
Rest of the facilities seem to be so-so in the current version, so upgrade them as you see fit.
6. Factional Standing and Plot Advancement
The game has 3 survivor factions: Independents, U.S. Army, and Smugglers. You start the game at 30 points with each faction (with 100 being the max and 60 being what’s necessary to earn the basic trust of each faction). Each faction has some hostility with the other factions, so the quest you do for one faction may result in negative points to another faction.
The problem is that in order to advance the storyline and not get a bad end on Day 27 in the current version, you need to have a Factional Standing of 70+ with 2 out of 3 factions. Additionally, you still need to have a high enough factional standing with the 3rd party to be able to visit their HQ for plot discussions.
This is how I ended my most recent run at Day 27. While I had a well upgraded base and a party of combat machines in rank 4 armor pieces, I couldn’t get my factional standings high enough to satisfy the plot device. So I got the Bad End 1 accomplishment and decided to write this guide for everyone else.
Based on what I have seen of the game so far, I doubt anyone is able to get past Day 27 on their first couple runs without reading a strategy guide or an online walkthrough.
7. Medals and Subsequent runs:
Rougelike element of this game. You earn Medals from game accomplishments, so once your PC dies this run, you can use the medals to upgrade your PC for subsequent runs. These career upgrades carry over run after run, so the game will gradually get earlier as you unlock more and more of them.
One of the most important career upgrades is the enhanced factional standing and free faction armor at the beginning of the game, which requires maxing out a particular upgrade branch AND achieve factional standing of 60 during a run. So tool tip over the upgrade screen’s level 10 box and make sure you know which faction’s favor you need to curry to max out the skill branch you’re interested in.
Once you max out a particular skill tree (I recommend either melee or ranged first) and get the enhanced faction favor and armor at the beginning of the game, things get much easier. However, that’s a bit of a cold comfort when it took 20+ hours and 6 runs to figure it out.
Conclusion
But overall, this has been a fun game and I enjoyed the time I spent playing it. So even with all these frustrations, I can recommend this game to the fans of the genre. Hopefully this guide has been helpful and will reduce your frustration level.
As for me, I’m going to chill for a bit and start another run after the next patch. Happy surviving!
I hate RNG Tip for Version 0.4.2
This is a tip for folks who hate RNG/Permadeath/Ironman Mode. Ignore it if you hate save scumming behavior for this type of games.
In current vesrion 0.4.2, the results of a map site visit does not appear to be saved until you exit from the site. So if you enter a site and get into a really bad fight, just ESC, exit to Main Menu, and reload the game. You’ll be back at the location right before you visited the site. Best part is the RNG seed is reset for the site you just left, so you will get to reroll encounters if you decide to go back there.
Survival and Combat Tips
General Tips
- Time management is of the greatest importance. You have a week until the first zombie attack, then another event which results in game over on day 27. Plan ahead and make sure to spend nights doing quests and scavenging resources as well.
- Don’t take on too many timed quests at the same time as the map is very big.
- Save money. Don’t buy weapons. You can find or craft better ones. Only buy the specialized armor when you can afford it and still have about 50-100 dollars. Money can be used to fast travel the map through the subway or ferry. It is also useful to bribe people with if you need it.
- Complete the initial story missions they give you. Build the garden, outfitter, hunting post, and whatever else Trish and Jack tell you to do. This will usually give a small exp boost and some money.
- Get good armor before you get good weapons.
- If you lose a party member (permadeath) you might as well start over. It’s a slippery slope and the game is unforgiving. You can’t catch up when you fall behind.
- Don’t kill members of other factions without a very good reason. Reputation is important for a successful playthrough.
Character Generation and Leveling
- Go either shotgun or pistol for ranged skills. Work your way up to either the burst skill (shotgun) or headshot skill (pistol).
- Also make sure you have 1 melee skill as backup. Nerve strike for bludgeon weapons is a very effective.
- Hunting and engineer skills are useful but your companions can cover these.
- Alertness or survival are very useful for traversing the map. Make sure to level up one of these and have another party member cover the other.
Party Members
Make sure you choose early on who you want as base builders and who you want to accompany you on quests.
- Tessa starts out with hunting and rifle skills. The small dog is useful for tanking and I recommend that you continue to level her hunting skills until she unlocks the tiger. In a long battle she can then summon two animals to tank for you. Also give her a backup melee skill.
- Lance is a party member I only used in the beginning because I needed him to guard the base. He has a nice skill set which offers you engineering, bludgeon, and shotguns. Keep him in the party until you get Isa or Fernando.
- Sarah is the stay at home base maintainer. Level up her biology and handiness.
- Fernando is proficient with pistols and blades and will be descent throughout the game. I made him my survival specialist which helps in the intimidation and hunting events.
- Isa replaced Lance as she has engineer skills and pistols which for me was more cost efficient. She comes later in the game and already has some good armor.
Combat Tips
- Take your time in the beginning of the encounter to read through the enemy skill set. Some have annoying abilities which stun or summon more enemies. Prioritize targets.
- Focus fire the enemy types that will either die quickly or deal a lot of dmg. For human enemies that is usually a grenadier or gunman, and for zombies you should try to take out the weaker ones first.
- You need a frontliner. Either an animal or a party member.
- When you have one enemy left it might be worth to just melee him. Conserve ammo for the big battles.
- Don’t use the assault rifle. The ammo is rare and expensive and quite honestly it’s quite weak. In my experience the enemy tend to deflect a lot of the dmg.
Event Tips
- Don’t help civilians that are sick or have been kidnapped unless it is a quest. This will usually lead to an ambush or a reputation drop with one the factions.
- In my experience the RNG seems to be pretty forgiving if you have over 75% chance to succeed. Don’t unlock cars or threaten if you don’t think you can handle a fight.
- Mining can be very dangerous early game with little reward. The metal is only used for late game anyway.
- Make sure to have a party member with high alertness and one with high survival as you travel. This will help with the skill checks.
Base Tips
- Get the garden fast. Upgrade it and it will solve your water problems for the rest of your game.
- Make sure to continue to upgrade your defenses. The game will let you know when you need to start posting guards.
- The forge, smith, outfitter, and doctor are all useful. If you’re in abundance of resources try to rank the forge and outfitter up to rank 2. This will allow creation of better weapons and armor which you will need for the mid game. By the end of the early access you won’t need tier 3 weapons or armor yet.
- Don’t upgrade the beds or the radio station. Waste of materials.
- Keep an eye on your ammo usage. If you need ammo, have your best survivalist make some. Focus on shotgun or pistol ammo.
Day 1-3
- Tutorial. Don’t pay the smugglers.
Day 4
- Go to Freedom City East (independent outpost) on the first day. It’s not far and no matter which characters you start off with, this should be doable. This will allow you to complete a quest quickly and get you some other quests lines. (Mary’s and Bill’s quest)
- If you can, explore the vicinity of the independent outpost for resources and exp.
- If you started with Tessa, she wants you to go to the military outpost in Freedom City West which is a good idea if you have the time and strength to do so.
- At night build the garden and if you have the materials, the outfitter as well.
Day 5
- You should make way to the smuggler outpost. If the rng is merciful you can pick up Steven’s stash on your way. Make sure to scavenge resources on the way. You might also be able to do Sarah’s quest as well.
- Once there do what the quests require and do the first arena match.
- Night: Try to do either Mary’s or Lance’s quest.
Keep doing the main quests as they pop up and don’t forget to upgrade your defenses. Make sure that you’re able to have two guards when the horde arrives. It also helps to thin it out if you’re able. Jack will help you with the first horde.
After that you need to build your reputation with the different factions. Do side missions and make sure to spend your time well. The subway will open up which allows you to save a considerable amount of time so use it well.
At one point in the game you are required to go to the Military HQ. Before you do this, make sure you have completed the prison and mine quest.