Table of Contents Show
Ant colony management game, in a fast-paced real-time strategy style. The player excavates their nest underground, constructing tunnels and chambers to store food and raise brood. On the surface, the ants claim territory, gather resources, overwhelm fearsome arachnids and clash with other colonies.
Starting Guide
A beginners Guide to Empire’s of the Undergrowth. A bit of this is covered by tool-tips in game, but it never hurts to repeat it here as well.
General Tips
Useful key commands:
- Left CTRL displays food values while held
- I activates food values until pressed again
- Left Alt displays unit information while held
- C activates unit information until pressed again
Useful things to know:
- Tile upgrades take place immediately
- Having more workers in the Queen’s group (first column in the Pheromone group), will let nest jobs get done faster like replacing eggs as they hatch. Having NONE here means those jobs do not get done.
The Formicarium
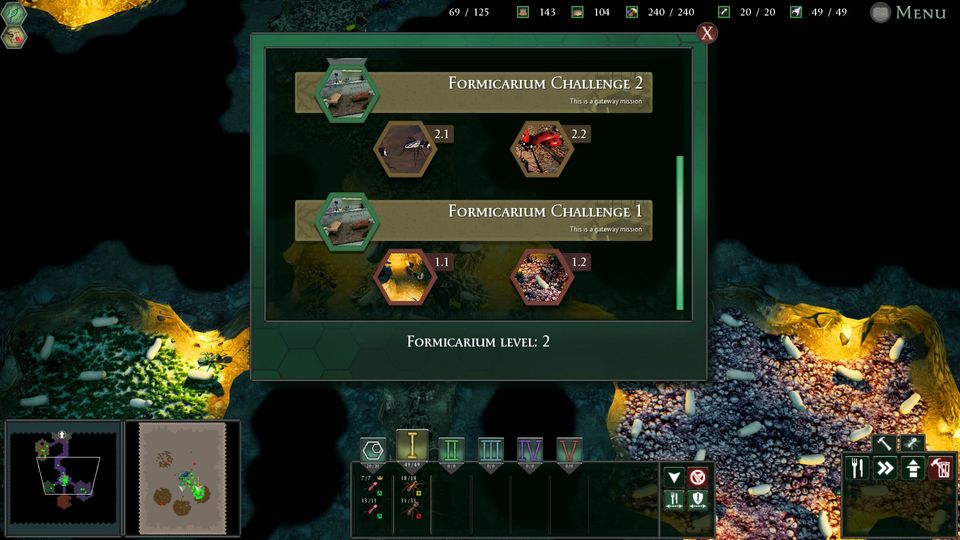
This is where you begin missions, and do the Campaign story mode of the game. You get limited Territory to build with, as well as being able to create other species of ants and upgrade them with Royal Jelly (See Units section)
There are other guides out there for the challenges, but i can give some general tips for them too:
Challenge 1:
- The Scientist will send increasing numbers of Black ants and Gene-thief ants at you, eventually simultaneously
- You will also face Devil’s Coach-Horse beetles and larvae
- It is easiest to bottle-neck the enemy at the cave entrance underground
- Have a surplus of food. If you run out, set workers into their own group with battle turned off and use them to collect Devil’s Coach-Horse larvae from the battle location. Also gather seeds when he provides them. Extra workers in the Queen’s group will make respawning go faster.
Challenge 2:
- The Scientist will send increasing numbers of Black, Gene-thief, and Wood-ants at you.
- He will also drop Tiger Beetles and Wolf Spiders
- Again, it is easiest to bottle-neck the enemy underground at the nest entrance
- Have a second group of fighters on your Queen for when he releases the wolf spiders, as they will run past your fighting army at the front of the nest and go straight to her
- Have a surplus of food to cover respawns. Extra workers in the Queen’s group will make respawning go faster.
Colony Layout and Tips
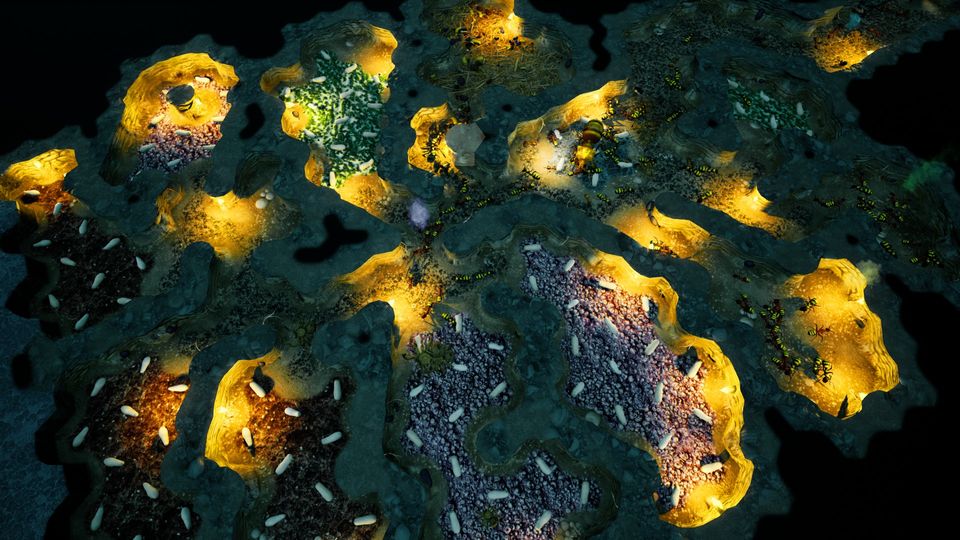
The layout of your colony will affect how efficiently your ants get their jobs done. Having your food far away from the entrance to the surface will mean a lot of extra walking time, and that is time wasted that they could have gone and gotten more food.
Basic helpful tips:
- Speed Up tiles will give your ants a speed boost when they walk on them, letting them complete jobs faster or return to battle quicker. These are useful leading to the exit and between nurseries
- Narrow, winding tunnels are good for defense. You can bottle neck an enemyand swarm them.
Colony Buildings
Nurseries:
- Ants move slower over Nursery tiles, so build them in dead-end rooms off the path
- Upgrading a tile requires it to be surrounded by 6 tiles of the same kind, or walls. Keeping Nursery burrows to a specific type will let you upgrade faster. Building on a hexagon shape will allow maximum upgrading with fewer number of tiles
- Ants of the same type in a connected chain will fall into the same group and cannot be separated. If you want multiple groups of the same kind of Ant, build multiple Nurseries
Food Storage:
- Food tiles can hold 10 / 30 / 60 food at the different upgrades
- Food storage is most efficient near the nest entrance, requiring ants to go the least amount of distance before returning to the surface
- For Leaf cutter ants, having a entrance to the food storage near the Nurseries will speed up the delivery of leaves to the fungus
Waste Disposal (Leaf-Cutter Ants only)
- Have it away from Nurseries and paths for normal ants, as it poisons them. Don’t want it too far from the hub of your nest or there will be a lot of wasted time running back and forth. I find success by building a winding path near the Nurseries branching out to the refuse heaps
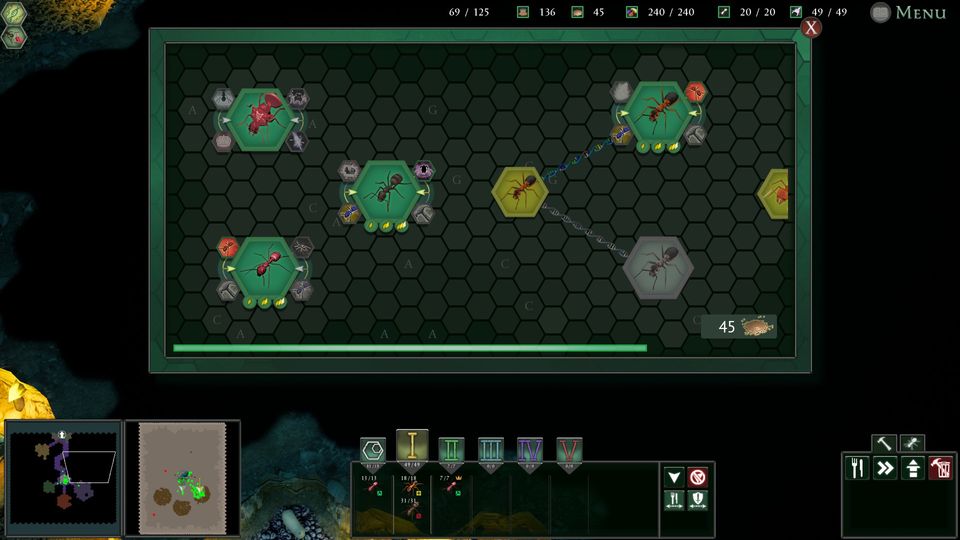
Pheromone Groups
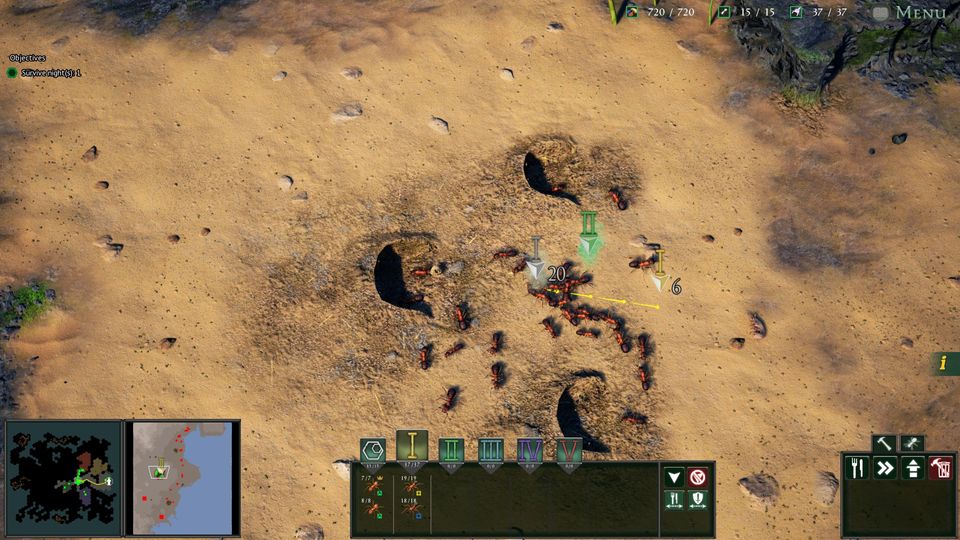
In the center of your screen is the Pheromone groups, numbering from 1 to 5 and including a ‘Queen’s Group’ at the far left by Group 1, which cannot be commanded.
The Queen’s Group takes care of nest duties like replacing eggs as they hatch, and burrowing. It is a good idea to always have some Workers in this group, and the more Workers you have, the faster things will get done.
Pheromone group are the way to organize your ants and multitask your strategy, commanding multiple groups of soldiers and workers to different locations.
Some things to know:
- When putting down a new marker, it will take a moment for Ants to switch over to the new location. You can see this by the grey number on the old marker (Pictured above)
- You can turn off a group’s ability to gather food or defend using the Knife/Fork or Shield icons, clicking on them will disable them, clicking again will turn them back on. This can be a way to stop soldiers from leaving a battle with food, or get a group to stop fighting something you don’t want them to.
Troops and Units
You can have a variety of ant species in your Formicarium, and you can spend Royal Jelly to purchase skills and upgrade levels for their Nursery Tiles. You can only pick one of the two options for each skill set.
Worker Ants:
- Worker ants do the nest work, having more of them in the nest means respawning your army goes faster.
- Upgrading improves Health, Speed and Job Completion speed, at lvl 3 they get a damage increase
- Skill Set 1: Aggressive Brood (Attack Damage x3) or Efficient Brood (No slow in nurseries, higher movement speed, increased food harvested, job completion x2)
- Skill set 2: Evasive (95% chance of no damage if hit out of combat) or Defensive (No more than 20 damage in a single hit from an enemy, and reduce incoming damage by 20%)
Black Ant Soldiers:
- Melee battlers, upgrading them improves Health and Damage, and at level 3 they get increased attack speed.
- You don’t want to skimp on these, since they can hold an enemy at bay while your Range attackers do their work
- Skill Set 1: Dangerous (20% attack speed) or Meat Wall (Reduced Incoming Physical damage by 50%)
- Skill Set 2: Self Preservation (Retreat from battle for 0.5s after 40% health) or Self Repair (Heal 4 Extra health per second out of combat)
Wood Ant Mortar:
- Mortar ants fire slower for more damage and does a AOE at level 3
- Skill Set 1: Corrosive (Additional 6 venom damage over 0.5s) or High Pressure (Additional 4.5 Damage immediately)
- Skill Set 2: Crippling (Target takes an additional 40% physical damage for 1.5s) or Weakening (Target takes 40% extra damage from venom for 1.5s)
Wood Ant Rapid Fire:
- Rapid Fire Ants Fire faster for less damage, and Slows at level 3
- Skill Set 1: Coming Soon
- Skill Set 2: Coming Soon
Leaf Cutter Majors:
- Can either Taunt or Stun at level 3
- Skill Set 1: Coming Soon
- Skill Set 2: Coming Soon
Food
Woodworms
Does not fight back, found underground
25 Food, 1 Ant can harvest at a time
Woodlice
High armor, does not fight back
40 Food, 1 Ant can harvest at a time
Seeds
Found underground or on the surface
5 – 15 Food, 1 Ant can harvest at a time
Honey-dew Nectar
Produced by Aphids over time
10 Food, 1 Ant can harvest at a time
Food Chunks
Found in spider lairs or dropped by defeated Tiger Beetle Larvae
5 – 15 Food, 1 Ant can harvest at a time
Shrimp
Found underground or on the surface
5 – 27 Food, 1 Ant can harvest at a time
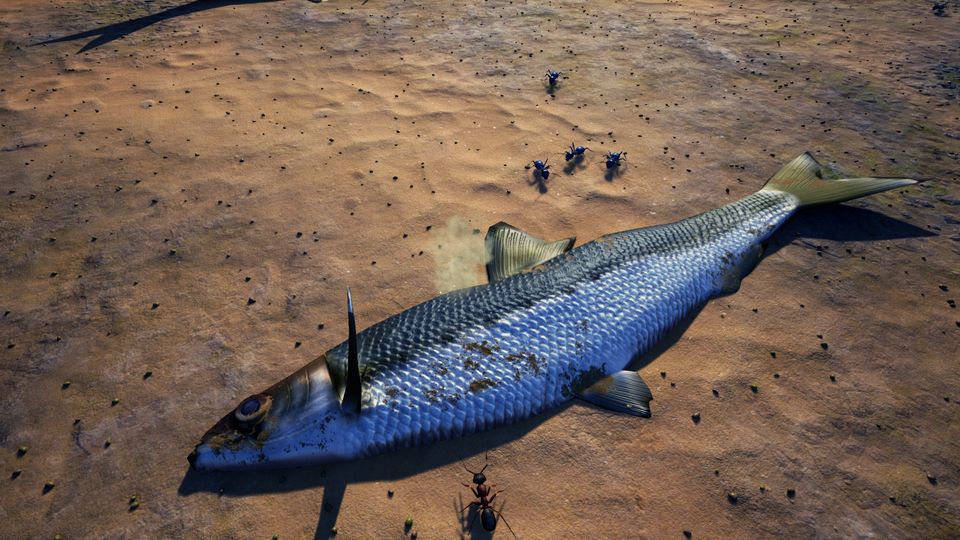
Fish
Found on the surface
1260 Food, 8 Ant can harvest at a time
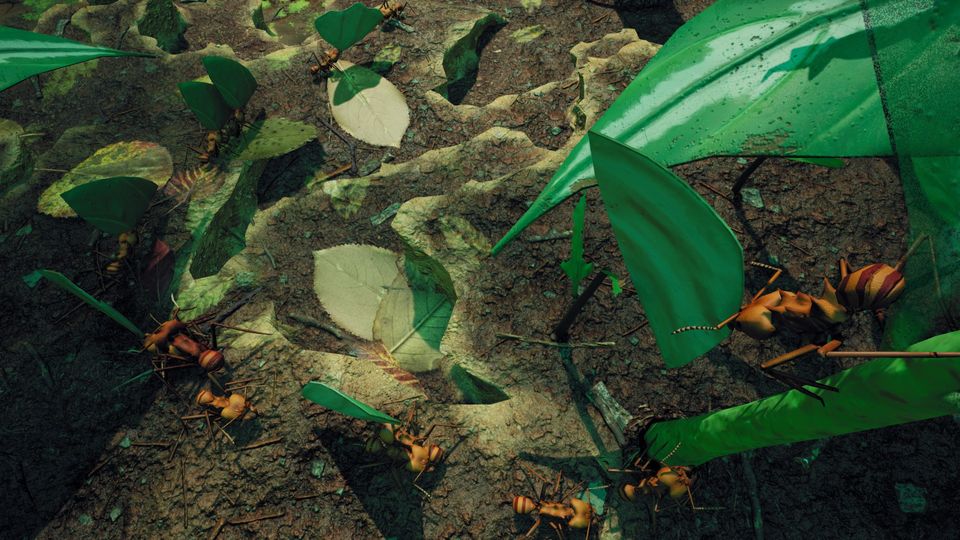
Leaves
Found on the surface
Food values and ant harvesting numbers varies by plant size (coming soon)
Enemies
Devil’s Coach-Horse Larvae
- Fairly easy fight, 3 or 4 ants can defeat a pair as long as you have food to respawn with
- 15 Food, 1 Ants can harvest at a time
Devil’s Coach-Horse Beetle
- A tough fight, use a large number of ants to swarm it, having upgraded Soldiers helps a lot
- Have extra food to cover respawns
- 100 Food, 2 Ants can harvest at a time
European Mole-Cricket
- Periodically burrows into the nest on Challenge Mode
- Use greater numbers to kill it, they have a lot of health
- Several can burrow in at once, be ready to divide your forces, even if you have to use Workers
- 30 Food, 2 Ants can harvest at a time
Funnel Web Spider
- Will attack and insta-kill anything that walks on its web
- Use greater numbers to swarm it, with enough ants it will be easy to kill
- 60 Food, 1 Ant can harvest at a time
Slave Maker Ants
- Will periodically storm the nest to try and steal larvae
- Use greater numbers to swarm them and kill them before they escape.
Enemies #2
Tiger Beetle
- A very tough fight, you want a large swarm with upgraded ants to fight the biggest ones, but it CAN be done with 20 non-upgraded Ants on Easy mode (7 melee, 7 workers, 6 mortar range)
- 100 / 200 Food value, 3 Ants can harvest at a time
Hermit Crab
- Appears at Night
- Heavy armor, takes a while to kill, but does not deal a lot of damage
- 110 / 180 Food value, 2 Ants can harvest at a time
Wolf Spider
- Appears at Night
- Very fast, will enter your nest and run past your defenders straight to the Nurseries, best to have your defenders on your Queen
- 110 / 180 / 260 Food value, 2 Ants can harvest at a time
Tiger Beetle Larvae
- Appear on Challenge mode, the higher the difficulty the more there are
- Remain hidden underground until a single ant goes by, will not attack if there is a large group
- Bait it out with an ant and attack, they die fast to a big swarm
- Drops 1 food chunk, 1 Ant can harvest at a time
Enemy Black Ant
- Melee attackers
- Once you have more numbers and upgraded ants, easy to kill
Enemy Wood Ant
- Melee and Range attackers
- AI uses Rapid Fire Wood ants
- Mortar Ant unit is very effective
Lady-Birds
- Will land and try to eat Aphids
- When they take 20% of their health in damage, they will flee
- more appear at night, in larger groups
- 15 Food value, 2 Ants can harvest at a time
Enemies #3
Jumping Spider
- Will try to attack solo ants. Can be killed relatively easily
- ?? Food Value, 1 Ant can harvest
Praying Mantis
- Does not show up on the mini map
- Once you start making Major ants, the smaller ones are easy to kill
- Large Mantis can consume ants in one attack to regen health, except Major ants. Use Major ants to counter them.
- / / Food Value, ? Ant can harvest
Rove Beetle
- Appears at night
- / / Food Value, ? Ant can harvest
Harvestman
- Will run if it gets too low on health, can be dangerous to small groups of ants
- / / Food Value, ? Ant can harvest
Spiny Devil
- / / Food Value, ? Ant can harvest
Whip Spider
- / / Food Value, ? Ant can harvest
Enemy Leaf-Cutter Ants
If attacked enough, will send out Majors of their own to attack you
Trapjaw Ant
Ants that roam the map in small to medium groups, use superior numbers or upgraded ants to kill them
Great work Jynn. I got lots of information from reading from it. Now I know what to do!