Table of Contents Show
This is a quick guide on how to beat the level with a map to help find your way around.
Inside the Backrooms Grassrooms Progression Guide & Map
This is a quick guide I made after beating the level 4 times to help those who need it.
There are a few moments where you can get stuck if you didn’t notice some details and it can cost you a lot of time backtracking everywhere.
The map isn’t up to scale / precise, but the relative positions of the rooms are correct.
Map

- Orange gate: Clover gate
- Purple doors: Doors covered with roots
- Yellow door: Electrical door controlled with the computer
- Yellow dots: Chalice locations
General tips
Here are a few tips to help you survive the level.
Enemies:
It is easy to sneak around the grass people, but if you alert them, you’re going to have a hard time getting rid of them.
There are some lockers near Sector 5 where you can hide. But in most of the map, the only hiding spot available are the tall grasses where they can lose sight of you.
When you run near them, they first enter alert mode where they try to find you. You can still sneak away when they are like this. If they find you, you need to either hide or run away the farthest you can. A Moth jelly or a full sprint bar can lose them, but they can be very persistant so beware.
Getting around:
There are a lot of Moth jelly around so you don’t need to be conservative with them. You can also unlock shortcuts to different areas so try to pay attention to your surroundings before going back.
Traps:
You should use the herbicite on the bad weed traps as much as possible. It’s so easy to run into them full force and losing most of your life points (or even die).
They spawn more and more as time goes on and if you don’t get rid of them you may regret it later when you’re getting chased around and you catch your feets in one.
Progression part 1 – Things you should do before the maze
At the start, there are 2 essential tools you need to collect to get around: The herbicite, and the cutters.
Herbicite
To get to the storeroom on the map, you’ll need to solve a puzzle similar to the one on the entrance of the level. Once you get in, you got yourself the Herbicite.
Cutters
Next you should get the cutters, they are hidden in the briefcase in the Sideroom on the map. You’ll find the first three numbers in the location specified on the paper next to it. There should be a number in 3 out of these 5 locations:
- Sector 3
- Sector 5
- Storeroom
- Sideroom (marked as “This room” on the note)
- Maze entrance
The note gives the correct location for the first 2 numbers, and gives 2 rooms where the 3rd number could be located. The 4th number can be guessed when the first 3 are correct.
Computer instructions
Before going to the maze, you can save yourself some backtracking if you note the instructions in the computer room next to Sector 5. With the cutters on the door, and the Herbicite on the weed. You can get in and read the instructions for backup. This was the same for all of my playthroughs:
- login <username>
- cd disk01
- -start backup
You’ll need those later.
Progression part 2 – Maze + Computer puzzles
With our tools and hints, we are ready for the maze!
Chalice of Wind
On the first bifurcation, go straight ahead and in one of the dead ends, you’ll find a round structure. Go all the way inside and you’ll find the Chalice of Wind.
Getting to Sector 12
Go back to the first bifurcation, this time head in the other way. at the end of the path, you’ll find a few long hallways with a few blocked doors. You can unlock the first 2 you find with your Herbicite and your Cutters.
The double door leading to Sector 12 is our goal this time.
Chalice of Water
When you get deeper in Sector 12, you’ll find a fountain with the Chalice of Water on top.
Getting the computer backup
When you get past the fountain, you’ll find a creepy room with corpses hanged by vines. You’ll find 2 hints there: The password hint for each ID, and the color of our ID of interest.
You can use your herbicite on the vines to make each corpse fall with their ID, and when you find the one with the correct color, you can check their name and their ID.
Let’s say for example the name is Zombie and the ID is AB-059977-CD
The password generation works like this:
- Get all letters of the ID: “ABCD“
- Pair up every numbers and add each pair’s digit together: “0+5=5 9+9=18 7+7=14” -> “51814“
- If there is a – after the numbers add it with the rest at the end “-CD“
This makes the password for this ID: “ABCD51814-CD”
On the computer in the room you can now generate the backup by typing the instructions that were in the previous computer room.
In the scenario above this would be:
- LOGIN ZOMBIE
- ABCD51814-CD
- CD DISK01
- -START BACKUP
Now you can pickup the backup disk from the computer.
Chalice of Fire
There is a side passage between the fountain and the vine room. If you go through it you can unlock a very practical shortcut and in the back, there is a small room you can get to by using your Herbicite. Inside this room there is the Chalice of Fire on a stand.
Unlocking the electrical door
With the shortcut, you should get back into the first computer room, now you can insert the backup disk in the computer. During the loading time, there is an enemy that will pop up behind you, so you should either run out and crouch or just hide in the locker.
When the threat goes away, you can get back to the computer. You should first print the instructions if you want to know how the puzzle works. Then you can try and open the “Main door”.
In this puzzle you need to power up the gray bars. the yellow bars indicate an exess of energy and the red bars indicates missing energy. You can activate or deactivate some lines below that will add or remove energy to the bars.
To solve this puzzle you should try and identify gray bars with only 1 or 2 possible green power up. If you find the correct first part of the combination, you can complement it by removing excess energy and adding it up on the lower parts.
Once you solve this, the electric door will open.
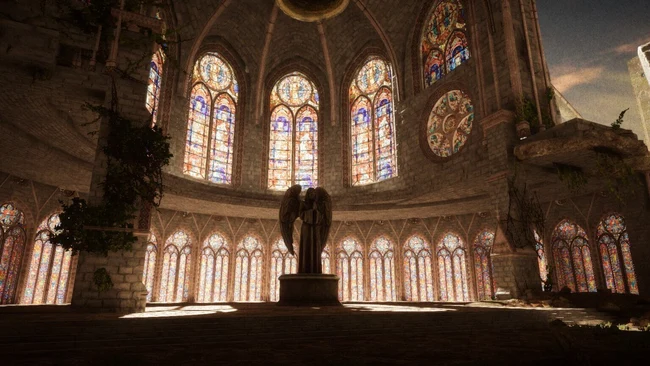
Progression part 3 – Cathedral
The electric door’s path leads you to a Cathedral. This is where you solve the most important puzzle of the map.
Chalice of Earth
The intended way to solve this is by using the metal detector you can find *somewhere* to scan the Cathedral’s floor, I don’t know where since I never managed to find it during my 4 playthroughs (If you know the location please let me know in the comments).
Without the metal detector, you can only rely on your eyes and carefully investigate the ground to find it.
The Chalice of Earth is hidden in one of the grass piles or in the rubble in the ground floor.
I have seen 3 locations in my 4 playthroughs:
- In the pile of grass near the fallen pillar in the back to the right from the entrance.
- In a pile of rubble near the shortcut that leads back to the maze.
- In a pile of grass near the stairs going up on the right from the entrance.
And even though I didn’t find one there, you should probably investigate the piles of grass near the stairs going up on the left from the entrance.
If you have the metal detector, it’s going to be easier to find it.
Cardinal elements / Statues puzzle
Sitting in one of the seats on the right of the entrance, you have a hint next to the sitting dead body indicating where each elements should be placed in the center of the chapel.
You can place each Chalice in the correct pedestals by reffering to the compass drawing on the floor.
Doing so will lower the statues upstairs.
Up the stairs on the right from the entrance, there is a body with the hint indicating each statue’s element. It should be:
- Wind for Pegasus
- Fire for the Demon
- Earth for the Lion
- Water for the Siren
By using the lever next to each statues, you can orient them to face the same direction as their element downstairs.
When all statues are correctly oriented, the bell will ring and fall on the big statue. In the rubbles of the statue, there is the clover key.
(Beware, making the bell fall will spawn a bunch of enemies on the ground floor.)
Opening the Clover gate
You can use the Cathedral shortcut to quickly get back to the maze.
Back near the place where you got the Chalice of Wind. In another dead end there is a Clover gate that will open with the key you just picked up. Going through will lead you to the final area.
Progression part 4 – Library
You opened the clover gate and now you find yourself in a library. This is by far the hardest area to explore and get around. Getting chased often means death, and monsters run into you way easier than earlier when the map was more open.
The bookshelf puzzle
At the entrance of the library, there is a hint indicating values for different book colors:
- Blue books have a value of 1
- Red books have a value of 3
- Green books have a value of 5
You can find these colored books in the library, there are at least 2 of each color present. You should explore with your flashlight on to help you find the colored books you want. You can only take one of each at a time, and your goal is to collect enough to add up to the value shown on the back wall.
You can put the books you want to add in the empty bookshelf and try to find the books that will add up to the correct value. The lowest I’ve seen this value at is 6, and the highest I’ve seen it at is 19.
Often time there are several ways to solve the puzzle:
For example if you need to get 11, it can be done with 5 + 5 + 1, or with 5 + 3 + 3. Since it isn’t easy to move around and explore, you should try and make it with what you find.
Once the book you put in the bookshelf add up to the correct value, the door opens to the last hallway before the exit.
This is it, with this knowledge you should be able to complete the level.
Metal detector in same room as energy puzzle by Sector 5. It’s on the far back wall on the shelf third up.