Table of Contents Show
A beginner’s guide to Last Tide. This guide will provide you with the basics of gameplay and some tips about the game mechanics.
Introduction & Contents
Like any other battle royale game, the aim is to survive for as long as possible, finding loot and equipment along the way and eventually win the game being the last man / squad swimming.
I’ll split this guide into a few parts, with different focuses on the different aspects of the game.
- Gameplay – A bit of detail of the flow of the game from early to mid and end game
- Diver equipment – Essentials you can’t live without
- Weapon & accessories/attachments – Here we dive into weapon mechanics, what each tier of weapon offers as well as how to best utilise them.
- Map details – What each section of the map looks like and other minor details.
- FAQ – Frequently Asked Questions
Preface
This section is a rough guide on what you should be doing in each part of the game, from launching in your dive pod to the end where you (hopefully) are the
last squad swimming. Everyone has their own playstyle so there’s no need to follow this guide to the letter. Use it more like…guidelines if you will.
As a battle royale game, the goal is to be king of the hill. Swim, stab and shoot your way to victory. Most of you familiar with the BR
genre will be accustomed to the early game, where you drop into a part of the map and try to find the best loot possible. You’ll find more details about game mechanics
in the later sections.
Before you queue
Before jumping straight into the game, open up the options and check out the key bindings. Knowing what each key does will help you understand what you are doing and how to interact with objects in game.
For example, when you have the grenade launcher equipped, most newbies won’t know that pressing the V key will allow switching of ammo, from flare to ink to chum.
Take some time to go through the keys and change them to your liking.
Note that at the time of writing this guide, the game does not have in game voice chat or text communication yet. If you’re playing with friends I recommend using an external program for voice communications.
There are currently 3 regions available for queuing – North America, Europe and East Asia.
Before queuing please open up the queue settings and choose the server that’s best for you
If you’re solo queuing there is a checkbox you can check so that you don’t get put in a squad with randoms. Queuing with a smaller number of people will award
you bonus clams, which is in game currency for use at a later date.
If you are queuing without a full squad but want to find others to squad with, visit the official Last Tide discord and find squadmates to queue with!
1. Gameplay
Early Game
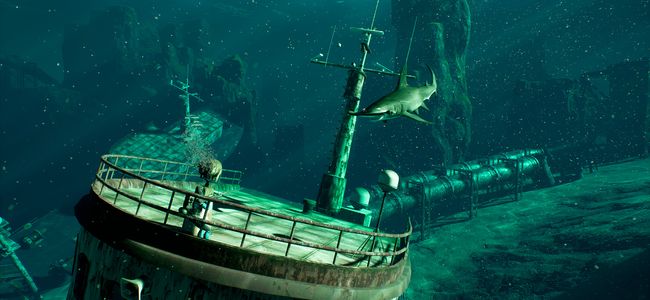
From the get go you’re in a huge warship that contains hundreds of dive pods with divers in them. Eventually after about 10-20 seconds you’ll be able to launch from the ship.
Before you launch randomly with a ton of other players, I suggest taking a look at the map and putting down a marker on where you want to go.
Each named section of the map will usually contained more loot than the other parts, which are usually just spans of rocks and seabed.
I won’t suggest where to go, it’ll be more fun for players to figure out which part of the map they like best. After all where’s the fun if you don’t explore such a big map?
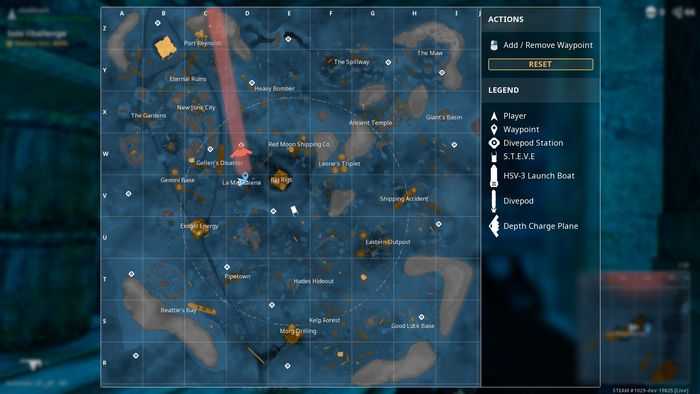
BR vets will be familiar with the presence of the circle. Which is an invisible circle that is commonly referred to as the “safe zone”. When you open the map, the safe zone
will be in white while everything else outside the circle will be red.
While in the safe zone, you’re free to explore and loot without harassment from the sharks that are circling outside. The first wall collapse will take place after 240 seconds,
after which the circle will continuously contract at regular intervals. There will be an announcement and a horn before the shield collapses so take note of them.
If you’re caught outside the safe zone, sharks will spawn in regular intervals to try and eat you. Take note of the heartbeat. It gets more intense the closer the sharks are to you.
You’ll have to get into the safe zone to stop sharks from spawning. Do note that if you already have a shark chasing you, getting into the safe zone will not stop them from grabbing you and swimming away. Best to kill them before they reach you.
Every so often you’ll hear a bomber fly past followed by some loud explosions. This is commonly referred to as the bombing run. When you open up your map you’ll see a
red line over it, and the position of the bomber. Do not get caught in that zone when the bomber flies past. Getting hit by the bomb will kill you unless you’re under cover.
Mid Game
By now you’ll hopefully be equipped with level 2 equipment and weapons and be familiar with the flow of the game. The red zone should cover half the map by now, and you should
have some encounters with other divers. Your positions as well as Steve’s. You don’t wanna be caught by a shark with enemy divers nearby. There will be loot crates dropped by
planes. Take note of where they land because the loot they contain are often strong weapons and equipment.
Not much to cover about this section. Survive for as long as possible, score a couple kills, upgrade your weapons whenever possible and before you know it you’re in the end game.
Half the population should’ve been killed by now. Stay sharp!
End Game
By now the circle around Steve would be covering only a small area, and there would be around less than 30 divers left alive. Stay focused, listen for nearby divers and communicate.
Well with your team if you want to win. Call out enemy positions, use your grenades well and exploit all your resources to stay alive and win the game.
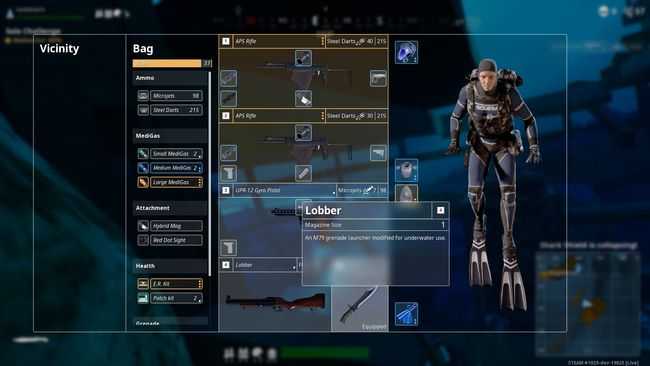
2. Diver equipment & Inventory
Divers can equip 4 types of equipment on themselves.
- Helmet
- Vest
- Bag
- Flippers
The helmet and vest will protect you from otherwise fatal shots, although if you take enough damage you’ll still be downed and in need of rescue.
A bag grants more inventory space, allowing you to carry more ammo, grenades and other weapon attachments. Do note that attachments attached to your weapons do not affect weight. Flippers allow you to swim faster.
Equipments are sorted into tiers, identified by the state of the equipment themselves and the tooltip on them.
- Level 1 equips and weapons have white names and a single grey dot on their tooltip.
- Level 2 will be blue
- Level 3 will be orange.
Usage of the inventory’s pretty easy. Drag items from your bag to your equipment slots to equip them. Drag items out into the vicinity slot to throw them out. Dropped items will be visible so other players will be able to pick up what you dropped.
Right clicking an item (medi gas or medkits) will use them. In the vicinity slot you’ll see nearby items that you can grab. Dragging a weapon from the vicinity to your weapon slot will swap the weapons. Be careful when doing so, your weapon attachments do not detach automatically. Your bag has a weight limit. Finding bigger bags will allow for more weight to be carried.
Some screenshots of the inventory:

3. Weapons & Accessories / Attachments
- Primary weapons [1] / [2] – rifles and spearguns
- Sidearms [3] – Pistols and grappling hook
- Lobber [4] – Grenade launcher
- Combat Knife [5] – Your basic combat knife. Pull it out while swimming to move faster.
Rapid fire guns
Ammo type : Steel dart
- SPP-1 pistol – 4 shots per clip
- P11 pistol – 5 shots per clip
- APS rifle – Slower fire rate and lesser damage per bullet, but with better recoil handling
- ADS rifle – Higher rate of fire and bullet damage
Spear guns
Ammo type : Spear
- Spear pistol – single shot high damage pistol
- Volleyjet – The underwater shotgun. Uses 5 spears per shot, you’ll need to reload after 2 shots. Higher reload speeds on higher levels.
- Spear Gun – Your replacement for the sniper rifle. This gun is able to deal high (lethal if headshot with no helmet) damage over long distances. Pair it with a scope and cheek pad for best results. Like the spear pistol, you’ll reload after every shot. Faster reload speeds on the higher levels.
Gyro guns
Ammo type : Gyrojet
- Gyrojet pistol – 7 shots rapid fire pistol.
- Gyro rifle – A semi auto rifle that is able to deal higher damage on targets further away. Difficult to use, but powerful certain situations.
Grappling hook
Ammo type : Hook ammo
- An alternative for the sidearm slot, this gun allows you to hook to any surface and pulls you towards it. Other uses include hooking divers to you. Can be used on friendly and enemy targets.
Lobber
A grenade launcher with 3 types of ammo
- Flare – Fire a flare in an arc. It will light up any divers or sharks nearby
- Ink nade – Fires a grenade that explodes into a cloud of black ink, basically creating a smokescreen that hides anything inside it.
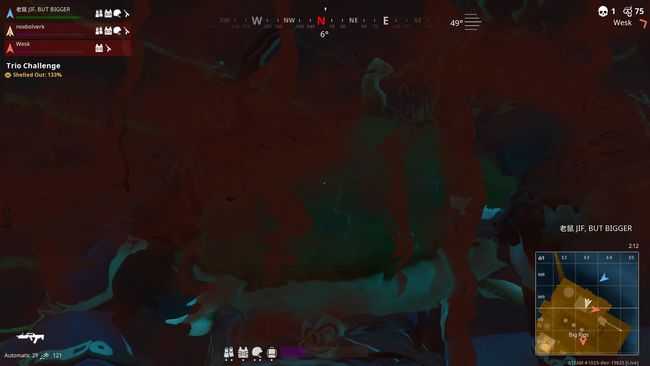
- Chum nade – Fire a grenade in an arc that will explode into a cloud of chum upon impact. Any diver hit by it will have their vision obscured and a shark will spawn nearby and head for the diver, dealing damage and pulling him out of position.
Example of the chum nade effect. With bonus shark biting on me.
Weapon attachments
Sights
- Holographic sight
- Red dot sight
- No difference in zoom between those two. Only different crosshair sights
Scopes (numbers are not confirmed)
- Compact 2x zoom
- Tactical 4x zoom
- Sniper 6x zoom
- Tactical Grip – Reduces recoil
- Tactical Stock – Reduces recoil
- Flashlight – A powerful flashlight that can blind enemies looking directly at you.
- Tracker barrel – Lights up a diver for a short amount of time after hitting them
- Trail hider – Hides your bullet streams, allowing you to snipe without exposing your position.
- Cheek pad – Reduces sway. Useful for sniper weapons.
Certain weapons are unable to equip some attachments. Experiment with each weapon to find your favourite!
Consumables
There are 2 types of consumables for use, both being health regeneration items.
- Healing kits that heal instantly (Lv 1 /2 / 3 – Patch kit / Medkit / E.R Kit)
- Medigas that heals over time (Small / Medium / Large medigas)
4. Map details
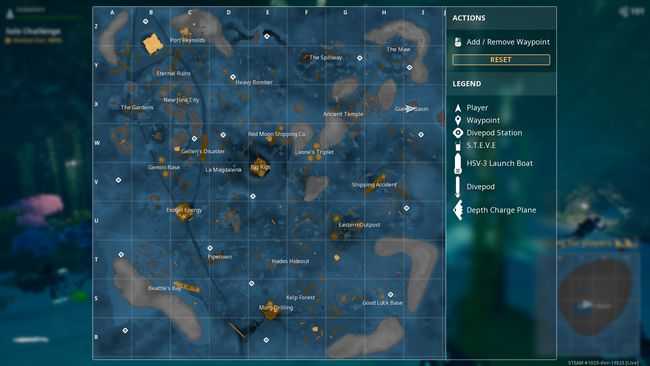
Press M (default binding) to pull up your map. Refer to the legend. You’re able to zoom in and out of the map with your mouse wheel.
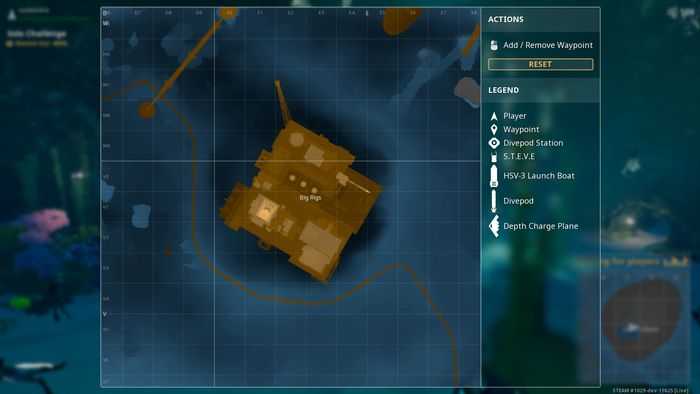
Zoomed in.
Bombing run example. White circle safe zone.
More details will be added on to this section over time.
5. FAQ
Frequently Asked Questions
Q. What are the shells / clams used for?
A. As of the moment, nothing. They are in-game currency that will be used to buy cosmestics at a later date once they are released.
Q. Why is there no solo / duo queue?
A. The game is relatively new so for now its squad based only. You can still choose to solo queue and there will be a 400% bonus shells reward for you.
Q. When is the next update?
A. No idea. The devs are pretty active in the discord channel so they’ll let us know when there’s an upcoming update.
Other
A win! The golden crown is a replacement for the helmet that will double your points if you are able to win the game wearing it. Be careful though, it affords 0 protection so it leaves you pretty vulnerable.
Updated: 10.9.2018