Table of Contents Show
This will detail the specifics about how to change the default image background to a map filled with bots fighting each other to the death!
Changing your main menu to fighting bots
Introduction
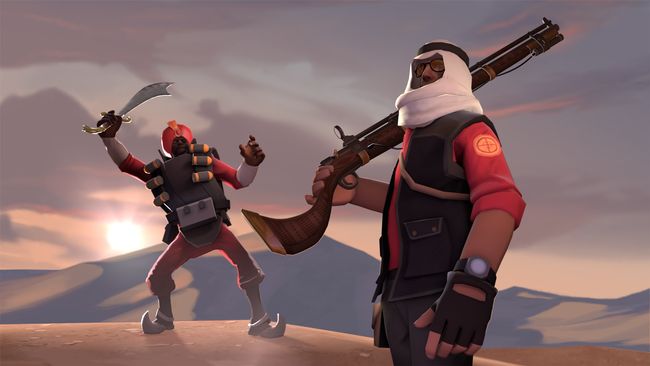
You know that pesky image you see every single time you boot up Team Fortress 2? Perhaps it’s an engineer, maybe demoman, maybe heavy. Oh, and maybe the background is a picture of upward!… But, you know, it’s not really that interesting. It gets the job done, but there’s nothing about it that catches your eye. That’s what we’re here to fix!
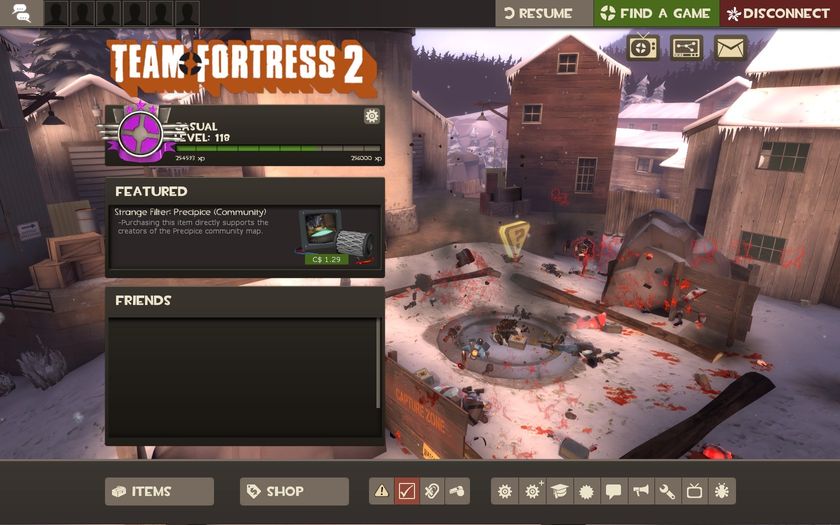
Soon, we’ll be having your game look just like this!
Commands (+explanation)
These are the commands that we’ll be using today, and I’ll give a brief overview of what they do so you know what you’re going to be using and modify it in any way that you need.
- map_background (map)
This command is different than the “map” command, as it specifically makes the menu screen’s background as the map of whichever map you choose. By default, the map has no players, and many features are disabled, such as capping (though flag capturing is doable).
Interestingly, loading a background map counts as running a server, allowing someone on your LAN to be able to join using your local IP address.
- tf_bot_add (number)
If you’ve dealt with TF2 bots before, you’ve likely seen this command before. However, if you haven’t, it essentially creates working AI bots for the map. Generally, the limit of bots you can have per server is 31.
- tf_bot_difficulty (0-3)
This command functions along with “tf_bot_add”, as it affects any bots added After this command is used. The command itself changes the difficulty level of the bots, making them smarter and have a slightly wider range of classes to choose from.
- wait (# of frames)
When used, this command will wait to do the next command until the amount of frames has passed. Therefore, it’s not unusual to set this number to something high, such as 500 or higher.
OPTIONAL COMMANDS
- nav_generate
When used, this command will create navigation mesh, essentially a connection of points together to form a path for bots to walk along. Basically, it allows bots to work on maps that don’t already have navigation mesh on it. If you’re unsure if a map needs it, try adding bots on that map using the “tf_bot_add” command. If the bots move, the map has nav mesh, if not, it will require the nav_generate command.
- tf_flag_caps_per_round
When used with a number, it will set the amount of flags that must be captured in a CTF map to the number set.
Setup
Console Method
If you wish to bind this command to a key or simply test it out, you can use this example below:
For King of the Hill Maps
- map_background koth_viaduct; wait 750; tf_bot_difficulty 3; wait 500; tf_bot_add 12
This will load koth_viaduct as the background map with 12 expert bots.
For Capture the Flag Maps
- map_background ctf_doublecross; wait 750; tf_bot_difficulty 3; wait 500; tf_bot_add 12; tf_flag_caps_per_round 1000
This will load ctf_doublecross as the background map with 12 expert bots.
Launch Option Method
If you’d like for your game to start with the command every time, you can add this to your launch options. To access your launch options, right click Team Fortress 2 in your library and click Properties. Then, click “SET LAUNCH OPTIONS…” and add the following example:
For King of the Hill Maps
- +map_background koth_viaduct +wait 750 +tf_bot_difficulty 3 +wait 500 +tf_bot_add 12
On startup, this will load koth_viaduct as the background map with 12 expert bots.
For Capture the Flag Maps
- +map_background ctf_doublecross +wait 750 +tf_bot_difficulty 3 +wait 500 +tf_bot_add 12 +tf_flag_caps_per_round 1000
On startup, this will load ctf_doublecross as the background map with 12 expert bots.
Map Options
I’ve currently found that only two gamemodes work for bots in map_background maps, those being KOTH and CTF. I’ve compiled a list of maps I’ve tried and rated them according to how they look based on visibility.
Official (w/ Nav Mesh)
These are maps that have Navigation Mesh pre-made.
- koth_viaduct (9/10)
- koth_sawmill (8/10)
- koth_badlands (7/10)
- koth_lakeside_final (6/10)
Unofficial (w/o Nav Mesh)
These are maps that don’t have Navigation Mesh and require the nav_generate command.
- ctf_doublecross (9/10)
- ctf_turbine (7/10)
- ctf_sawmill (7/10)
- ctf_well (7/10)
- ctf_2fort_invasion (3/10)
- ctf_2fort (3/10)
Customization
If you wish to customize any of your settings, you can refer to this section for help.
Changing background map
For reference, a list of map names can be found in the “Map Options” section. If you wish to change the map that gets set as the background, simply change the map listed after “map_background”.
For example, if you wished to change your map from Viaduct to Double Cross, you would change the command.
from
- map_background koth_viaduct
to
- map_background ctf_doublecross
Changing bot amount
Changing the amount of bots that spawn is quite simple. To do so, simply change the number at the end of “tf_bot_add” to a number below 32.
For example, if you wish to change the number of bots from 12 to 31, you would change the command
from
- tf_bot_add 12
to
- tf_bot_add 31
Changing bot difficulty
To change the difficulty of the bots that spawn, you will need to edit the number beside the command “tf_bot_difficulty”. Each number, 0-3 represents a difficulty that gets higher as the number does.
- 0 = easy
- 1 = normal
- 2 = hard
- 3 = expert
For example, if you wish to change the difficulty of your bots from expert to easy, you would change the command
from
- tf_bot_difficulty 3
to
- tf_bot_difficulty 1
Ending
Thanks for reading this guide!