Table of Contents Show
This guide outlines an easy to follow strategy to employ for those players who are struggling to weather the final horde at 100% difficulty. I hope you find it informative and enjoyable. Remember to use that pause button and consult this guide if you are unsure about what you should be doing next!
Strategy Guide
Hey there, survivor. Glad you could join us.
This guide is mainly for those who understand the basics behind playing a game of They Are Billions, but haven’t yet been able to repel the final horde and complete that 100% game. The eight points below represent a general overarching strategy which has served me well in defeating the final horde with great consistency, both in weekly challenges and in my own personal games.
This is undoubtedly not the only strategy, of course; but it’s the method that has worked best for me, and one which gives you a good foundation to work with when facing even tougher difficulty levels. Of course, with certain games and certain maps it won’t always be possible to perfectly follow these guidelines, but the closer you stick to what’s written below, the higher chance you’ll stand of meeting and defeating the multitudes of the final horde. So let’s get started!
Balance and Proactivity
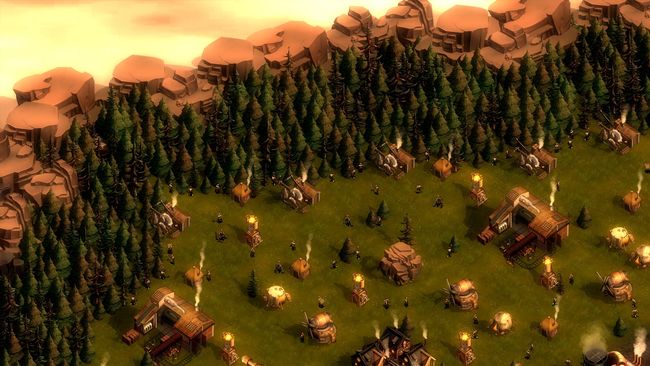
Billions, as with almost any RTS game, is a resource balancing simulation, and the better you are at balancing the resources at your disposal, the stronger your colony will be. What this boils down to is not focusing too much on any single resource, or area of your colony, at the expense of the others. Instead, you need to be steadily expanding in every facet of your colony, and proactively searching for and eliminating every bottleneck in your economy and resource generation throughout your game. The most common bottleneck is usually your Food, followed by Gold, and then either Wood in the early game or Stone in the late game. But bottlenecks can spring up anywhere at any moment, and if you aren’t finding them, then it generally means you aren’t spending your resources quickly enough.

In order to survive the final horde at 100% or higher difficulty, you need to do EVERYTHING very well – not just one or two things. Defence is what you might call the “final product” – you’ll spend the game translating food into workers, gold into wood, wood into energy, and so on, but when all is said and done, defence is the ultimate aim of the game in terms of not getting slaughtered by the infected. But behind this, you must have a powerful, efficient, and interdependent factory combining and interweaving each of the ten resources at your disposal (Space, Workers, Food, Energy, Population, Gold, Wood, Stone, Iron, and Oil). Only with all of these resources feeding into and supporting one another will you be able to create strong enough layers of protection to reach Day 100.
But how do you actually enforce this? Well, an excellent place to start is your housing. Throughout the entire game, from Day 1 to Day 90, you should never stop improving your gold income. Gold is the resource you will most sorely need in order to weather the later hordes. That means the second most vital piece of your colony, besides your defences, is your housing.
At any given moment you should be building or upgrading more dwellings – and if you cannot do so, then you must be asking yourself why you cannot. Which of your resources are preventing you from upgrading these tents into cottages? If it’s wood, build more sawmills. If it’s food, build more huts and farms. If it’s energy, build more mills. If it’s gold, then that problem will sort itself out, but in the meantime, maybe you should cut back on your Ranger production or your static defences so as to more quickly gain the gold you need. Focusing on improving your gold income FORCES YOU to look at every other part of your colony.
The bottom line is to be proactive in your resource management. There’s always going to be a spanner in the works clogging up your resource-churning factory, and the faster you find and dislodge each spanner the more powerful your colony will become. If you keep running out of a certain resource and it’s impeding your progress, don’t just wait until it’s replenished; do something about it. In order to be successful, you cannot afford to waste time doing nothing. Pause the game constantly, think about which of your resources is bottlenecking the system, and do something about it the very moment you are able. Rinse, repeat. When the game is unpaused, always be doing something. Never be doing nothing.
Be Your Own Warehouse
If you’re unfamiliar with what a Warehouse does in Billions, one of its functions is to increase the maximum storage of your gold, wood, stone, iron, and oil. The reason behind this is that once you hit the maximum amount of a certain resource that you can store, then whatever more of that resource your colony generates is wasted. This makes for an inefficient colony.

Building a Market mitigates this issue by selling the excess resources you generate, but it’s still far from ideal. You need to be USING these resources. If one of your resources hits its maximum, then you know that you need to be doing more to use it up. You need to spend your resources as fast as you gain them, in order to expand your colony, improve your resource generation, and build up your military and static defences.
Which brings me to my point: building more Warehouses DOES NOT SOLVE THIS PROBLEM. Warehouses provide an extra layer of comfort, because they make you feel like you’re not making that mistake by pushing the maximum further away. But this doesn’t mean the problem has gone away. You still need to be using your resources as quickly as you gain them. Content yourself with emptying your reserves as quickly as possible, and only build a Warehouse once you are gaining resources at such a rate that you cannot hope to expend it all in time (we’re talking from zero to full in eight game-hours)
Counting In Ones
If you only read one section of this guide, make it this one.
At first glance, Billions seems like a game where the best strategy is to turtle, and turtle hard. Build an alarming number of static defences, and spend the rest of the game tending to and making small improvements to your colony’s armour.
Well, that’s not actually true. Defence may be the final outcome of your resource-generating machine, but for a large portion of the game, the meat of your defence should come from your military.
I’ve found there is a rather neat and easy to follow tactic for ensuring your military is always up to scratch. Are you ready? Here it is:
- Always be building one unit.
- And that’s really all there is to it.
You should generally be aiming to get your Soldier’s Centre set up sometime between Day 3 and Day 6 (which often means remembering to build that Stone Quarry early on, I might add) – and the moment the Soldier’s Centre is built, start training a Ranger. As that Ranger is finishing, queue up another one. When that one is about to complete, queue up another one. And as much as you can, try to keep this up. Rangers in particular are very cheap units, and surprisingly effective in large enough numbers. You’d be surprised how strong your military will become with a slow burn such as this over a long period of time.

The only hard part is remembering to check up on your Soldier’s Centre and make sure there is always one unit being trained. The best thing to help with this is to listen out for the audio cue of a unit completing their training. It’s another thing to be constantly reminding yourself of, but you will not regret it.
The Indefatigable Power of Sniper Balls
If your colony has been progressing apace, you should have several of your Wood Workshop technologies researched by the time the second horde arrives. One of these technologies (perhaps the fifth or sixth – more on this in the next section) should be the Sniper. At this point, you should have churned out perhaps 18-25 Rangers using your one-at-a-time strategy. Now is the time to switch. From now on, you only build Snipers.
Employ exactly the same strategy as before: have one Sniper being trained at any given time, and keep this up to the very best of your abilities. No, seriously – keep this up all the way to the very end of the game. Yes, Snipers are more expensive than Rangers, but by this time your economy should be stronger too, and it shouldn’t be too out of the realms of possibility to keep this going. If you are unable to keep this up, then you may wish to cut back on your spending elsewhere, because building these Snipers is one of your most essential tasks.
Now, the temptation is to place your first few Snipers in towers or behind your walls or on the edges of clouds of infected so that they can start to do their work. But honestly, I’d advise you refrain from doing this. Why? Because Snipers only become truly useful once you have enough of them. Sure, they have a good range and can take a few solitary shots at a few solitary, unimportant infected. But unless it’s an emergency, your time is better spent elsewhere in your colony.
So what’s the magic number when Snipers become truly useful? Somewhere around 20 Snipers is where they start to become truly effective. With 20 Snipers moving together, there are enough of them to overcome the unit’s one, crippling weakness – a horrifically low rate of fire. Any fewer than 20 Snipers, and they are still too vulnerable to do proper work, simply because they cannot shoot quickly enough to kill everything they need to. But with 20, you can start to do some real damage.
What do you do with 20 Snipers? You start tearing through the map. The earlier you start to clear the map of infected, the better. You still have to be careful with a group of 20 Snipers, because they will have trouble dealing with large groups of the stronger infected (Harpies and Spitters, mainly), and you should still be a little wary taking on the Villages of Doom. But keep them moving, and keep them killing, and keep training more Snipers, until you have about 30 of them. 30 Snipers is what I call a fully-fledged “ball of Snipers”, because with 30 moving and shooting together (particularly once they’re Veteran Snipers), there is pretty much nothing on the map that can harm them.

With 30 Snipers, you can literally tell them to attack-move through a Village of Doom, and they won’t have any trouble destroying it in its entirety. With such a force at your disposal (possibly backed up as you see fit by your earlier and smaller ball of Rangers), you should be aiming to completely clear the map by around day 60, giving you a full month of relative safety – minus the hordes – to prepare for the end-game.
But don’t stop there – keep creating Snipers! Once you have a ball of about 30 Snipers, start a new ball. Once you have two balls (ha, ha, ha) you should start another. And then another. And another. If all goes well, by Day 90 you should have at least 100 Snipers ready to support your static defences in repelling the final horde. If that number sounds ludicrous, just remember that it’s the result of a slow burn over a long period of time. One at a time, all the time, and you will soon be unstoppable.
Oh, and don’t worry too much about the Infected Giants that were added in the recent update. They talk big, but just leave it ‘til last, catch it unawares with a ball of veteran snipers, and watch its health melt away. If you’re nervous, you can use more than one sniper-ball to defeat the Giant, but it’s not a necessity as long as you’re careful.
Carving A Path Through The Tech Tree
After your Soldier’s Centre, your next major investment should be the Wood Workshop (remember, Warehouses aren’t all that useful yet). Once the Wood Workshop is complete, the number one technology to research is the Farm. Farms are the single most important early technology in the game, because the amount of Food that Fishing and Hunting Cottages provide is not even close to what you need to support your dwellings beyond your first week. Remember, Food is always going to be your greatest weakness in terms of bottlenecking your resource generation. So get Farms up and running as soon as possible to mitigate this issue.
After the Farm, you should ideally be going for the Cottage, to help propel your gold income to the next level; followed by Market, then Ballista, then Sniper, then Stone Workshop. However, if you really feel you need the extra security (if, for example, you spawned right next to a Village of Doom), then you can research the Ballista Tower as your second (or, if absolutely necessary, first) tech.
The other Wood Workshop technologies (Stakes Trap and Lookout Tower) are comparatively useless, and you should not wait to research them before you move onto Stone technologies. Build a Stone Workshop as soon as you are able, and then your main priorities should be researching the Bank and Stone House (both are monumentally powerful buildings for boosting your gold income), followed by Stone Walls and Gates, Power Plant, Foundry, and Shocking Tower. If you are getting through these technologies quickly enough, you should have no need for the Shocking Tower until this point – however if you have fallen behind slightly and the hordes are getting more powerful, you can bump the Shocking Tower up a couple of places, again for that extra piece of security. But if you can make do without it, then spend your gold elsewhere.

Once your Foundry is up and running, you should prioritise the Executor Tower technology, because the key to a late-game defence is, simply put, a♥♥♥♥♥♥load of Executor Towers and Shocking Towers. After this, you should research all of the “Advanced” techs – the Advanced Farm, Advanced Quarry, and Advanced Mill (generally in that order). Clearing the map and destroying Villages of Doom with your Sniper Ball, you should hopefully have picked up two or three canisters of oil, and therefore you don’t need to research and build the Oil Platform immediately – however if this is not the case, or if you run out of oil, you should prioritise the Oil Platform technology.
Once this is done, research and build an Engineering Centre, and then research the Thanatos unit. Lucifers are simply not useful enough to be bothered with, and the Titan, while powerful, is such a drain on your resources that I prefer to use Thanatos. Once Thanatos is researched, try to build one whenever you can. If you can reach 16-20 Thanatos units by the time the final horde arrives, you will find yourself in a far better position than if you had not built any.
As for the remaining technologies – Stone Towers are expensive, and comparatively useless against later hordes, so it’s fine to go the entire game without researching them. Radar Towers are useless when you’ve already cleared the map, so the only reason you’d ever research this tech is if you have gold to throw away. The same goes for Wire Fence Traps – they’re great on paper, but with each tile you place costing 100 gold, they are just too expensive to use on a scale that would really matter. Content yourself with the Stakes Trap instead, at less than a third of the price.
An Impenetrable Defence
As I said above, the end-game, the final product of the resource-churning factory you have been creating, is your protection against the infected. The first horde can be reliably defeated with one of three different strategies: either a single Ballista Tower behind some Wooden Walls, or a group of 10-12 Rangers behind some Wooden Walls, or that same group of 10-12 Rangers out in the open somewhere, with 1 Ranger kiting slightly further ahead. Kiting, if you are unfamiliar with the term, here means using a single unit to continually move around and get all the infected to follow it (while avoiding being hit). This way, you keep the horde distracted so that it doesn’t interfere with your other Rangers picking them all off with ease.
The Ranger kiting strategy will work well for the first horde, and it can also get you through the second horde easily enough as long as you don’t let any infected slip past. With subsequent hordes, however, you are far better off building up some static defences, with Wooden Walls and Ballista Towers (I never even bother with the Wooden Towers, they’re far more expensive than Walls and you don’t need them anyway).
A Ballista at every entrance or chokepoint will serve you just fine for the first 30-40 or even 50 days, as long as you fulfil two conditions:
- A) Every possible way into your base is covered by at least one Ballista Tower radius
- B) You protect your Ballista Towers with 1-2 layers of Walls

If the infected start to put more pressure on a certain area than you’d like, then reinforce that section with another Ballista Tower, or an additional layer of walls (though I would refrain from adding too many Wooden Walls, as you’ll be upgrading them to Stone Walls anyway soon enough).
Once the hordes start arriving in more impressive numbers from Day 50+ (we’re looking at a few hundred “Runners” at least, plus Executives and the occasional Chubby), you may wish to consider adding a Shocking Tower or two. Make sure you get the placement of these Shocking Towers correct, as you will have them there for the rest of the game; the Shocking Towers should be your first line of defence in an area, the very first point which the infected hordes will attack. Again, make sure you defend them with at least two layers of Stone Walls. And make sure you have the Energy to support them, because nothing drains your Energy like Shocking Towers. This is the point where you may want to have 1-2 Power Plants up and running to provide for your colony, otherwise you will find yourself Energy-starved very quickly with just a couple of Shocking Towers placed.
By around Day 60, you should have more or less cleared the map, and should now be focusing heavily on creating your end-game defences. What this means, essentially, is that by Day 90 you need to have each point where the infected can arrive defended by ideally two Shocking Towers (with overlapping radii, so that they support each other), and, just behind them, at least 4-5 Executor Towers PER CHOKEPOINT. You must do this for EVERY area which can be hit by the infected. If a chokepoint is too small and there is not enough space for this many towers, then push out further, and find a better point to defend.
As you can imagine, a defence of this magnitude is a phenomenal drain on your resources, particularly when you are also supporting a military of 100+ Snipers, 20 Thanatos, and an entire colony besides that. This is why you need to have spent the entire rest of the game creating a fantastic gold-generating, resource-gathering, energy-sucking behemoth. Strategically place your dwellings from Day 1 so that you can make best use of your Banks and Markets. If you are unsure what I mean, the general principle is to find as open an area as you can, designate two 3×3 squares for your Bank and your Market, leave a 1-tile gap around each, and then fill the surrounding 25×25 area with houses as closely packed as you possibly can.
You should be aiming to have a Gold income of over 1000 every 8 hours by Day 30 in order to have the proper momentum to finish a 100% game. By Day 60, your gold income should be absolutely magnificent (2000+, even with everything you’ve been building). After Day 60, you are going to spend every bit of this income on your defences, so it is imperative that you start this snowball effect as early as possible. If you build an economy as strong as this, then you will be able to build a defence so powerful and watertight that even the final horde may not be able to make a dent.
Using The Tools At Your Disposal
Billions supplies you with a number of tools and hotkeys which everyone should be aware of, because most of them are very useful and should be used on a regular basis throughout your games.
Easily the most useful hotkey in the game, which everyone should be using, is Space Bar, which pauses and unpauses your game. Use this hotkey zealously.
Some other useful keys are:
- Enter – Selects your Command Centre.
- Alt – shows the health bars of everything on the screen (units, buildings, and infected).
- Tab – hides/displays the user interface. This is useful when you are clearing out the bottom of the map and can’t see the very bottom because the UI is hiding it.
- E – Highlights your colony’s Energy Grid.
- WASD/Arrow Keys (depending on your control scheme) – Pans the camera up/left/down/right.
- P – Patrol. Use this to set up patrols or your units. This is essential early on when you need to defend your base from random infected that get too close.
- Z/S (depending on your control scheme) – cancel a unit’s orders. This is useful for any situation where you want to quickly cancel or halt a unit or group of units, particularly to avoid moving your units into trouble.
- F4 – Toggle “Flat Mode” on/off. With Flat Mode enabled, you can see the grid more clearly, and (more importantly) any areas of mountain, cliffs or trees are flattened, which makes it easier to see things (such as infected) which would otherwise be obscured. Go ahead and try it out, and you’ll see how it can be useful.
I’d also strongly urge you to use the Attack command liberally if you are not doing so already. Depending on your control scheme, the hotkey for this is either Q or A, an can be used in two ways. The first is to attack a specific unit or object. To do this, you select your unit(s), hit the Attack command, and then left-click on what you want them to attack. This could be a specific infected, an explosive barrel, or even one of your own units (don’t do this).
The second method is FAR more useful, and you should be doing this constantly. With your unit(s) selected, hit the Attack command, and then left-click on an area of terrain to tell your unit(s) to “Attack-Move” to that location. What this means is the unit(s) will make their way to that point on the map, and if any infected come into range, your unit(s) will stop and attack them. Once the coast is clear, they will continue moving towards the point you specified.
This is by far the safest and most effective manner of controlling your units and getting them to attack areas of infected. The alternative would be either to click on each infected one at a time to have your units attack them (such a waste of your energy and focus), or to have them move to a location, after which they will start attacking (this is bad because your units will keep moving even if infected are in range, and will only start attacking once they have reached their position). Attack-Moving your units is a vital skill, and will undoubtedly help you to better control and manoeuvre your units.
One final useful little tip – when a notification pops up in the top-left of your screen (such as when a building or unit is under attack elsewhere in your colony), you can click on the icon and the camera will zoom to that location, saving you time you would have spent looking for the cause of the commotion.
If You Are Struggling, Give Yourself More Time To Prepare
I’ll leave you with this final point: if you are really struggling to build up your colony as quickly as you need to, then there is nothing wrong with starting a game with 120 or 150 Days to prepare instead of 100 – the number and power of the infected remains unchanged, so all you are doing is giving yourself a couple of days more breathing room between hordes to regroup and build and expand and prepare. You can use this attempt to figure out exactly what it will take to repel the final horde at 100% difficulty, and if you can complete it in 120 Days then you won’t really need to be much quicker in order to do it in 100.
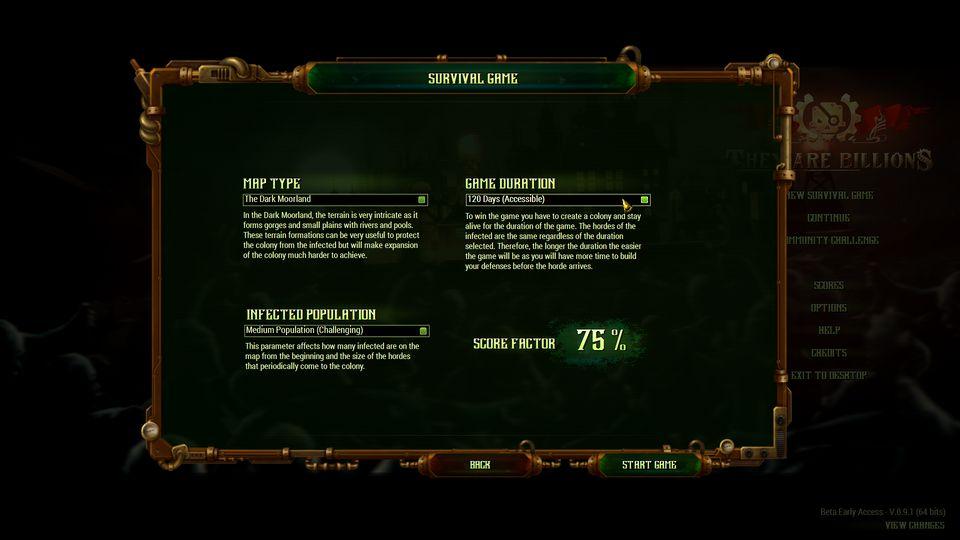
So give yourself more time if you need to, because it’s not admitting defeat to tone down the difficulty of a game so that you can ramp it back up later on.