Table of Contents Show
Hi-Fi RUSH: Guide to Jam Combos, Overkills and S Ranks. An in-depth guide on how Jam Combos work exactly, what Overkills are, and how to use the info to hit consistent S rank scores.
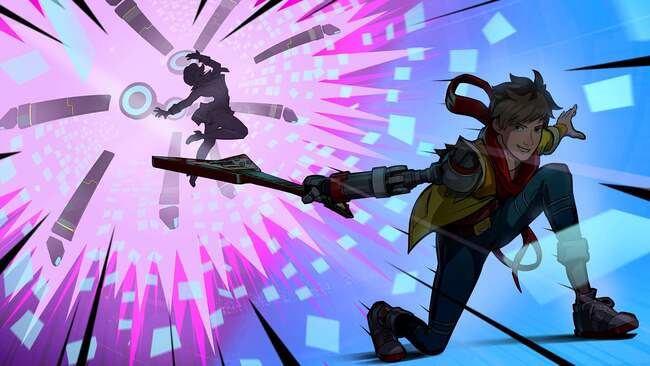
Hi-Fi RUSH Jam Combos, Overkills and S Ranks
Now that I’ve finished 100%ing the game, I feel I have enough knowledge to talk about the most time-consuming challenges on the mural: S Ranking each mode. Damageless boss challenges are pretty simple to do on Easy Mode. Just spam your summons on them, parry when necessary, and you can just return to hideout if you get hit once.
Do note that this guide is for those who have finished the game and have all companion Jam Combos unlocked. It will also assume Xbox controls.
Quick Glossary (because the terms in this game get a little dumb):
- Combo: Chai’s XY chains.
- Beat Hit: Hitting X or Y at the end of a combo.
- Jam Combo: Hitting RT at the end of a combo.
- Summon: Hitting RT outside of a beat hit.
How Scoring and S Ranks work
At the end of every fight, you get scored on three different things: combat score, just beats, and kill speed. If you get at least 2 S and 1 A, you’ll get an S rank for that fight. If you get all S ranks in a chapter, you’ll get an S Crown chapter rank.
If you didn’t get hit during a battle, you’ll get a star next to your final rank. If you get a star in all the battles, you’ll also get a star next to your chapter rank. Mechanically speaking, the star doesn’t do anything. It’s just a badge of pride.
Every time you die, your rank will go down once. If you get an S Crown rank, you can die once in the chapter and still get an S rank. If you’ve died and got an A rank on any of the fights, you’ll be kicked out of S rank. If you’re about to die, you can return to hideout or toggle streamer mode to restart from the last checkpoint.
While you’re being scored after a battle, you can return to the last checkpoint quickly if you aren’t happy with the rank you got. This will allow you to retry the fight. There is only a single fight in the game outside of boss fights that circumvents this, and it’s the first fight in the escape sequence of Track 4. A cutscene starts directly after the battle is finished, meaning you won’t get to retry this fight. Getting a B rank here will ruin your chapter S rank, so be careful.
Let’s take a closer look at each of the three categories you’re graded on.
Just Beats will come naturally the longer you play the game, and you can always practice in the training room to get the timings down.
Assuming you’re playing somewhat well, I found it very rare to not get an S rank in kill speed. The only times it happened were either in Track 1 and 2, where the game assumes you’re playing without many of the tools at your disposal and adjusts kill speed/combat score requirements accordingly, or when I went insane and chained a combo five times longer than necessary.
That means that for the majority of your S rank hunts, the difference maker will be if you can get a high combat score. How high it needs to be varies from each encounter, but they generally scale with the amount of enemies they throw at you. If you’re ever over 120k points, you’re safe to just end it ASAP. The key to getting a high combat score is…using your reverb gauge. That might sound obvious, but let me break it down a little more.
You can obviously use it for Special Attacks, and many times, just getting a decent AOE special attack in a large enough group of enemies is enough to get an S rank, but that’s not always an option. Sometimes, the game will simply not throw enough enemies at you for you to build up the reverb needed for a big Special Attack.
That’s when Jam Combos come in, and it’s generally far better for scoring with the tradeoff of taking way longer. Using the same amount of reverb for Jam Combos vs Special Attacks will usually favor the Jam Combos, unless you hit a truly massive group or somehow manage to hit multiple people with the postgame special attack. However, the game really doesn’t do a good job explaining exactly how Jam Combos work or how to maximize them, so I’m going to dedicate an entire section to it.
Understanding Jam Combos
Jam Combos are simple to execute. You just need to buy the skill for your companions, and then summon your companions on a Beat Hit with one bar of reverb. If you have one bar of reverb and the companion isn’t currently on the field, you will always be able to Jam Combo. Yes, even if they’re on cooldown.
This will start an attack animation during which you’re invincible. After the animation, you can grapple to the enemy you just Jam Comboed and hit them with another full combo, at the end of which you can choose to spend another reverb to Jam Combo again or to end the combo with a Beat Hit.
Do note that Chai’s normal combo finisher will still apply damage right before the Jam Combo animation. This means you can accidentally kill them, and then jam combo nothing, wasting it. On lower difficulties, even XXXX is enough to kill the low tier enemies. In those cases, I recommend XYY instead, as it has low single-target damage.
If the enemy dies during the Jam Combo or the combo directly after, they will be put into an Overkill state that will prevent them from fully exploding long enough for you to grapple to them and combo them again. The only way they’ll die is if you hit them with a beat hit, drop a combo, or ignore them for too long. Putting them into an Overkill state by itself gives way more points than simply destroying them. For instance, the basic ranged enemy from Track 1 will give 280 points when destroyed, and 1600 when Overkilled.
However, since they will stay on the field for as long as you Jam Combo them, this is also the main source of racking up the combo count. Every time you hit a combo count in multiples of 10 (might stop after 100 but I never paid enough attention), you get a big influx of points. Since the enemy is practically guaranteed to be in an Overkill state from the sheer amount of hits you’re raining down on them, damage takes a backseat. Multihits are generally far better for your points.
Keep in mind that you probably have a 1.4x point multiplier from aerial rave and magnet bonus most of the time, as well as the fact that just using Jam Combos give a decent chunk of points on its own. These little bonuses are what makes Jam Combos better at earning points in general than the specials.
What Each Companion Jam Combo Does
All your companions have a ground Jam Combo and an aerial Jam Combo. Which one is used is based on where Chai is during a beat hit, not where the combo started. A grounded XYXXX combo will activate an aerial Jam Combo and an aerial XYXY combo will activate a grounded Jam Combo. Your companions can also knock an enemy into the air or into the ground with their Jam Combos. This is important for planning which combos you’re going to use, as you want to be doing air combos as much as possible for the point multiplier. Here’s a reference:
| Companion | Version | State Change |
| Peppermint | Ground | Ground -> Air |
| Peppermint | Air | Air -> Air |
| Macaron | Ground | Ground-> Air |
| Macaron | Air | Air -> Ground |
| Korsica | Ground | Ground -> Ground |
| Korsica | Air | Air -> Air |
Do note that after two air combos, gravity will increase for you and the enemy to prevent infinite juggling. You can still just barely manage to squeak a third in if you’re fast, but never a fourth.
If I’m being honest, I find that two seem to be disproportionately better – Ground Macaron and Air Korsica. They both hit a ton of times and keep you in the air where you should try to be for as long as possible.
For reference, I’ve done a basic XXXX combo for ground Peppermint and ground Macaron. The combo hit meter for Peppermint went to 9, while Macaron’s went to 21. I did a similar basic air combo with air Peppermint and air Korsica. Peppermint’s went to 13, Korsica’s went to 18. And keep in mind, both ground Macaron and air Korsica have big AOEs that gives them both a ton more hits if used inside groups, while Peppermint’s ground jam has a tiny AOE and her air jam only hits people roughly on the same horizontal plane.
But while Peppermint’s jam comboes are meh, her regular summon is easily the best for building up combo count. You can summon her during Chai’s normal combo for 10+ hits, then swap back to one of the other two for their jam combo. She will come off cooldown as the Jam Combo animation ends, and you can do it again. This is one of the most mechanical things you can do in this game and not even necessary, but it is how you optimize your combo (and involve Peppermint a little).
So putting it all together, an optimal combo route would look like something close to this:
Either ground combo with Ground Macaron or a launcher (like Dodge-Y, XXY or X-delay-XX), into two air combos (excluding XYXY) with Air Korsica, into an XYXY air combo with Ground Macaron, and repeat until you’re out of gauge, all while summoning Peppermint during Chai’s combos.
What to do about those annoying rage states
There’s another thing that can stop your combo and this is way more annoying. Once you’ve hurt elite enemies enough, they will instantly gain full stun gauge and stop taking any kind of damage so they can throw their special standoff attack at you. The Samurai can do this twice – once to do his non-standoff rage attack and a second time to do his standard standoff. On top of breaking your combo counter, the problem with their standoff attack is it’s crap for points. Doing the cool oneshot slice move only gives you the points for destroying them and nothing else. That means you’re barely getting a fraction of the potential points you could have gotten.
In my experience, there’s only one way to fully prevent this from happening – killing them with a special attack before the rage state ever triggers. Otherwise, you’ll kinda just have to deal with it. You need the rage state to end to actually get points from them, and the only way their rage state will end is if you avoid/parry their standoff initiation (the AOE shout) twice or if you full parry the standoff but elect not to instakill them. The problem with both is that they will have a full stun gauge, so you’ll have to use Korsica’s normal summon to apply her stun buff so your jam combos will actually break and hitstun them.
Chip Recommendations
Now that we know how important the reverb gauge is for point building, I can’t recommend the Level 3 Battery Magnet chip enough. I only started using it towards the end of my playtime, but the difference was astronomical. It felt way stronger than the 30% it says it is. For the other two slots, you can pretty much do whatever you want. Personally, I either run rhythm meter+, Macaron cooldown, or Parry Battery.
If you’re fighting bosses, the reverb gauge becomes much less useful as just not dying and spamming them with normal summons is more than enough to S rank. I would recommend something like High Risk, High return level 3 (you unlock this after finishing all the Spectra challenges) and Korsica stun+.
Rhythm Tower Itemless S Rank
S-Ranking Rhythm Tower requires a different mindset. Your focus isn’t on accumulating as many points as possible, and gauge generation isn’t as important because it’s persistent. Instead, you want to kill each room as fast as possible, but simply getting to the end while playing alright is enough to get an S rank.
Here’s a list of tips/strategies I used to finish the Rhythm Tower challenges.
- The biggest tip possible is to spam your summons. Just spamming your triggers like crazy while doing some braindead combo like YYY is one of the highest single target damage options you have.
- In my opinion, the best chip options are High Risk, High Reward lvl 3 and either Battery Master lvl 2 or Macaron CDR. However, if you want comfort instead, then Parry HP is also a good option. Chip optimization is only important for speedruns.
- Take Pick-Me-Up for safety and your preferred strong AOE special attack. I personally used Overdrive Slash. Only use Pick-Me-Up when you hit half hp, and unless you’re in an absolute emergency, only use it in between floors.
- Try to hold 4 reverb gauges at all time. If you load into a stage and see a bunch of shielded enemies, then just using your AOE special immediately can save you a ton of time.
- Practice parry timings because you get 1.5s with each perfect parry. The Samurai in particular is worth practicing because his non-standoff attack will give you 13.5s on its own.
- Following that, let every elite unit catch you in their standoff attack because it freezes time, and every perfect parry is free time.
- Try to avoid Jam Combos. They’re long animations that do low damage and put enemies into Overkill instead of just killing them outright, which are both time wasters.
If, for whatever reason, you want an example run that puts these tips into action, then I have an old recording here. It has a lot of sloppy play and the chip set is outdated, but you can see I still had just over 19 minutes left regardless:
Misc. Tips
- For short encounters where they barely give you enough enemies to build up reverb, using Macaron’s hold summon to stun a group of enemies and using your X+mash Y combo will give you enough batteries to get started. If you have to, use it at a distance so you only hit enemies with the beat hit that generates all the batteries, but not hurt them so badly that you can’t jam combo them.
- You can also alternatively use the Y+B counter to steal batteries, but keep in mind it does high single target damage.
- Some multi-stage fights will have enemies with full shielding in the latter stages. Saving reverb for an AOE special attack would be better than Jam Comboing in those cases.
- Jam Combos aren’t all that efficient in boss fights. Spamming summons will do more DPS.
- If you’re having issues with air combos, make sure you’re not holding a direction. It’s a setting in the menu where if you hold a direction while pressing Y, you will always come back down. I recommend you don’t turn it off and just deal with it, as there are times where you’ll want to quickly land.
- There are some sections in Rhythm Master where you won’t have enough time to survive until enemies come. You need to swing and dodge on beat to maintain your meter in those cases.