
Table of Contents Show
Various bits of information that will get you through certain bosses, or are just neat to know.
Useful tips
While in town, you can open the menu to change your equipment, use items or save by right-clicking.
To set your passive skill, click on the field in the status menu.
Casting a Thunderbolt during the same or next turn after casting Fayadaan (Luna’s water spell) will cause additional damage to all enemies.
Nonne Cura (doubled healing) also works on items, though not (AFAIK) on Ceremonial Spear.
The Feather Anklet prevents you from activating floor portals, which can help you access certain chests. If you’re trying to use a portal and can’t, take it off.
Octuple Assault requires some combination of MP buffs, a teammate feeding Luna with Mana Drops, and/or Spirit Pill (zero MP consumption) to be effective. It does incredible damage near the end of the chain, though; at level 25 the eighth hit can do over 2k damage.
Harbor stall
To access the Street Stall at the Harbor, you need the Hunter’s Mark. Go to the Balsa Wilds and collect 10 Black Furs by farming the wolves (use the random encounter area in the bottom-left of the first level), then give them to the hunter in the area. He’ll give you the Hunter’s Mark accessory in return. (Remember that you can only carry 5 of any item at a time, so drop the furs off once you have the first 5).
Once you have the Hunter’s Mark, equip it to shop at the store. He’ll sell some stuff you can’t get anywhere else, including a few handy accessories, the Gunpowder Bomb and Lucky Coin. (You need to have the Hunter’s Mark equipped, even if you’ve already shopped there before)
Rescuing Jill: Race against time
You need to enter the Underground Slave Market by day 8, otherwise you get a game over.
If this happens, go to the Crossroads and the fortune teller will offer to send you back in time: 1, 3, or 7 days. You retain your money, stats and progression towards completing the quest.
Prostitution
If Luna is a virgin, you can get the full 200,000 dinars for the slave broker by accepting the pimp’s “special offer”.
During street prostitution, if the client accepts your price, you should Renegotiate to raise it. Try to get the “correct price” for 2,000 bonus dinars.
Boss tactics
Prologue: Ambush
To survive the needed 15 turns: Switch to the Ceremonial Spear, which heals its target. Attack yourself or your buddies when you run low on HP; otherwise let their attacks and Ray Pentagram wear them down.
There isn’t any reward for killing any number of the infinitely respawning enemies (AFAIK). But you may as well make them pay for their crimes.
Rahad
- Pick up the healing items from the chest in the lower-right area of the map before coming to the battle.
- The key part of this strategy: Rahad is susceptible to poisoning, which makes his speed work against him.
- Equip Scorpion’s Tail, with Quick Cast as your passive and Counter as your first skill in quick skill bar. Suggested accessories: Gauntlet, Lucky Ring, Red Cloth.
- Every turn, use a Heal Bottle if your HP drops under 100, else Counter (or use a Heal Drop, if you don’t have enough mana).
Orman the Thunderclap
You’ll want to be at least level 23 for this, and even then it’s a matter of luck; level 24 or higher is recommended. Farm enemies on floor 7 a bit if needed. You can steal Life Elixirs from Murtaziqs, too.
The required builds are shown below:
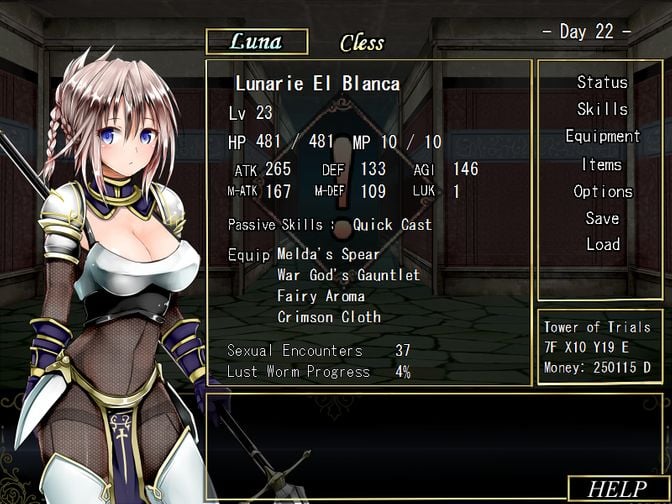
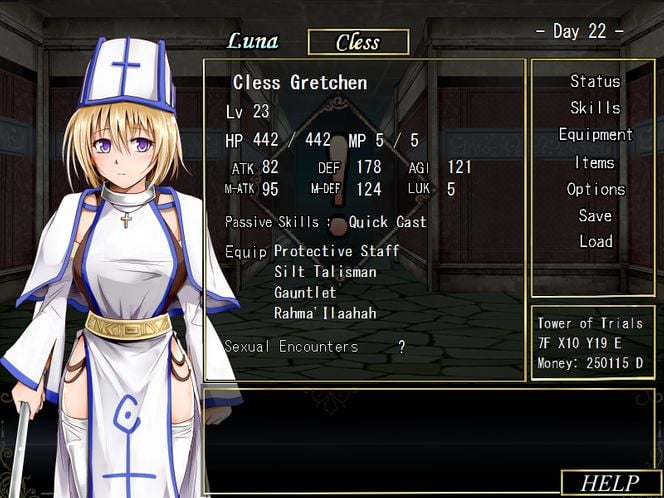
First skill (in your quick skill bar) must be Counter for Luna, and Bless for Cless.
Go into battle. Luna will quick-cast Counter, then every time Orman hits her, she’ll hit him back. Eventually you should kill him without ever getting an actual action. (Hold down Ctrl to make it go faster)
Shandora Ruins: Vampire (postgame)
During the first phase, throw Gunpowder Bombs at him. Seriously, just do it.
(Or steal his Inferno Blade, equip it along with bonus-damage items, and spam Dagger Dance. But this may require a high level to work.)
Note on late arena bosses
You need a really strong character to even stand a chance. I recommend beating the Tower of Trials first.
Arena: Puppeteer
- You can break the puppet strings by casting Thunderbolt on yourself. Make sure to have enough HP and MP for this at all times.
- Don’t use anything that can cause magic reflection (Reflect Ring, Fairy Aroma and possibly luck items). You don’t want to reflect your self-Thunderbolt!
- Puppet B will tank any single-target damage aimed at the Puppetteer. AOE attacks and counters will still hit him.
- The puppets are functionally immortal, don’t bother trying to kill them.
- The slow but sure way to beat him at low levels: cast Ray Pentagram and let it wear him down slooowly while healing yourself with the Ceremonial Spear.
- String Pierce still applies its trap effect even if it misses. WTF.
Arena: Cless
- Consider equipping Fairy Aroma and/or Reflect Ring before the battle.
- Cless starts by using Healing God’s Judgment, disabling your healing abilities. This includes Ceremonial Spear. Eventually it’ll wear off and you can heal normally; defend until then if you need to.
- Frozen Augite item (won from completing the Tower of Trials) dispels Healing God’s Judgment and Healing God’s Judgment++. It will not dispel Divine Protection.
- Hit her with your usual stuff, but keep an eye on her HP with the Analyzer. When it drops to around 800, pour all the dakka on her before she can use Divine Protection.
- If she does use Divine Protection, equip Ghostly Spear (Dark element), that’s the only thing that’ll do any damage to her.
Arena: Airi
- You need to have at least 176 Agility going into the battle; equip Squall Anklet and/or Travel Boots as needed. Also use Nimble (learned from an item in the Tower of Trials) as your passive skill.
- Airi opens the battle with Disrobe, which removes all your accessories. Re-equip stuff; you need an accessory that prevents sleep. For the other slots, you don’t need Agility any more so just put whatever offensive/defensive items you want.
- When she says she’s going to use her special attack, equip Ceremonial Spear and put your agility items back on. She’ll apply an unblockable Charm status on you, but this means you’ll just heal yourself until the effect wears off.
- After her special attack, Airi can use Disrobe again. And after that, she can use her special again. So just repeat the above steps.
Arena: Beast Tamer/Beast Goregon
- The boss won’t move until he takes any damage. So you have all the time you want to prepare. But when he does attack, he’ll almost inevitably kill you in one hit if you aren’t defending.
- Before starting the battle, set your passive skill to Dancer’s Footwork, and buy 5 Lucky Coins from the Harbor stall. Equip your strongest weapon, Imperial Tactics, Lucky Bracelet and Fairy Aroma/Lucky Ring.
- In the battle, use all the coins and cast Ghost Lance.
- Cast Ray Pentagram (or if you get the last move in a turn, just attack) to provoke him into attacking.
- Now spam Defend. The boss will attack you, (usually) miss and get countered. Repeat until he dies.
Item notes
Gunpowder Bomb
Bought from the Harbor Stall, good for killing bosses you can’t be bothered to beat properly. The basic version costs 10000 dinars and does 800 damage to a single target. Later in the game you get the Gunpowder Bomb 2, which cost 20000 dinars and does 500 damage to all targets.
Gunpowder bombs have no effect in the Tower of Trials or on the postgame Arena enemies.
Pentagram
This accessory upgrades Ray Pentagram. In addition to the arrows every turn doing more damage, it adds the Gamma Ray effect which causes massive all-target damage to the enemy.
Note: Gamma Ray will only be cast if the damage-over-time effect is not currently active (not yet cast, expired, or dispelled).
Found on Tower of Trials floor 8.
Frozen Augite
This item removes all buffs and debuffs from everyone in the battle, friendly or enemy. Obtained by completing the Tower of Trials.
Luna’s cooking
Luna’s Cookie (Recipe 1)
Effects: KOs a party member instantly (or drops them to 1 HP if on campaign map). Not much point to this unless you want to see a defeat scene.
How to obtain: Available at start
Luna’s Candy (Recipe 2)
Effects:
In combat, lowers a party member to 1 HP instantly.
On field, raises lust worm level by 3 when used on Luna. Use on Cless or Airi for a small bit of fanservice.
How to obtain: Purchase from Item Shop in the second half of the game (after the dungeon raid).
Luna’s Waffle (Recipe 3)
Effects: In combat, inflicts Berserk on a party member (no effect on Airi). On field, lowers a party member to 1 HP instantly.
How to obtain: Talk to the Man who Lost a Bet at the Dawn Shepard Bar. He’ll ask for 50 denars, which he uses to gamble again. If he wins, he gives you an item; the fourth time in the game this happens, it’ll be Recipe 3.
Luna’s Pie (Recipe 4)
Effects: In combat, lowers ATK, DEF, M-ATK and M-DEF. On field, lowers a party member to 1 HP instantly.
How to obtain: Tower of Trials 1F boss
Easter eggs and other hidden content
Post-endgame content
Take Airi down to the bottom of the Shandora Ruins for a hidden boss. Beating this will get you Airi’s final weapon.
Take Cless and talk to the Antiques Dealer in the church for a sidequest.
Other stuff
Using Analyzer on a party member gives some “information” on her, including her physical measurements, hobby and “weakness”. Oh, Japan.
In the Qanat, you can use the Feather Anklet to walk through the water areas. Some of the channels lead outside the map and can lead to unusual items.
- B2 mid-left edge: Mole (dev message)
- B2 middle of map: Magic Ward accessory
- B3 top-right edge: Hamama (very hard boss)
During the final battle against the parasite, Jill will stop you if you try to eat any of Luna’s cooking.