Table of Contents Show
This guide provides you with a basic gameplay rundown and information on all weapons, attachments and other items in the game. Also it compares the different vehicles and shows you some tips and tricks to win a Mini Battleground game.
Basic Gameplay
Press [Alt] + [Enter] to acess or leave the Fullscreenmode.
Choose Solo or Duo Mode on the buttom right of your screen and press “Game Start”.
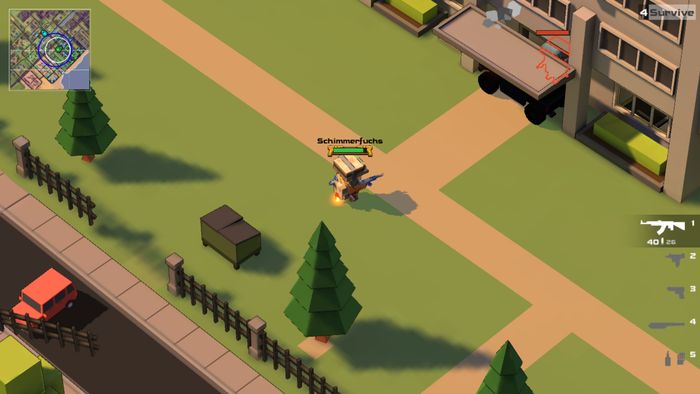
After the loadingscreen your character spawns in a random location on the map. The zone randomly appears as blue circle on the minimap and will start moving to the white circle in 2 minutes from now. Time to get moving.
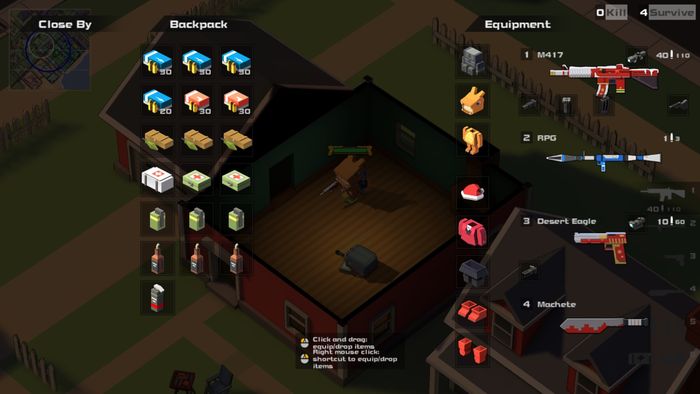
You control your character with the keys [W][A][S][D] and shoot/hit with the left mouse button [M1]. Use the [F] key to open/close doors, access cars, revive teammates and pick up items. You can also pickup items by pressing [TAB] to open your inventory and drag them in the desired slot with your mouse.
While your inventory is open, you see nearby items on the left side of your screen. You can drag and drop items there you no longer want or drop the gun you’re holding with the [G] key. By rightclicking items or weapons with [M2] they will be equipped, dropped or put in an attachmentslot. Try what works best for you.
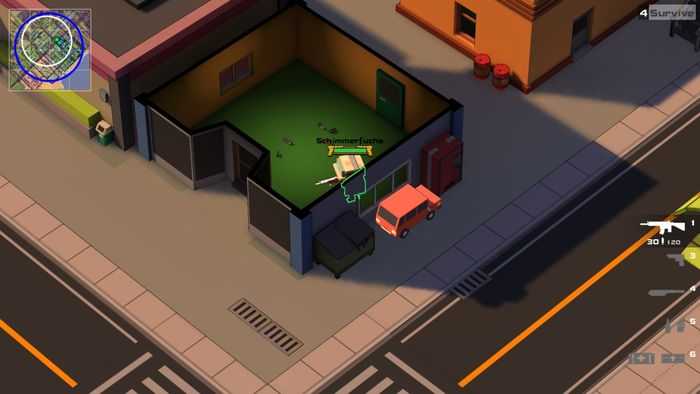
Getting a hold on a car early makes it easier to get around and loot the good spots. As the zone starts to move you should also make your way to the white circle. Be attentive to footsteps of other players. If necessary stop moving for a little bit and listen.
Try getting tier 3 gear. The higher the tier, the better the stats. A tier 3 backpack let’s you carry 9 additional items while a tier 1 lets you only carry 3 more. Skins that you get from buying crates and you have equiped give you some additional backpack space and a little extra income at the end of each game.
You switch between weapon and item slots with [1] to [6]. You can press [5] and [6] again to switch between different types of this item. If you equip an “Extended Magazine” be sure to reload the weapon to have 10 more rounds with the [R] key right away.
Be careful not to be hit by a car while moving from building to building since they deal a lot of damage and keep in mind that grenades and RPGs also can injure the user. If you need to heal, use a “First Aid Kit” or “Medi Kit” by pressing [6] and holding down [M1].
If you make it among the last survivers, try figuring out where you want to fight to have an advantage with the equipment you gathered. Make sure to move in time since the zone becomes faster and does more damage each time it gets smaller.
Now let’s get into more detail.
Loadout
You have 6 Slots for guns, melee weapons, grenades and healing items:
- Slot 1 and 2 are for your mainweapons. You can choose between SMGs, Shotguns, Rifles and a RPG.
- Slot 3 and 4 are for your secondary weapons. You can choose one of two pistoles for slot 3 and a melee weapon for slot 4.
- Slot 5 is for grenades. You can pick up 3 differen kinds of grenades. Each grenade needs one slot of your backpack.
- Last but not least, slot 6 is for your healing items. There are two different ones available.
A quick rundown of the different types:
- RPG: It has long range and big damage but is hard to hit. Best fired onto objects near enemies since rockets deal splash damage. Also works on vehicles.
- Rifles: Your bread and butter in open field and long range fights. Always have one with you.
- Shotguns: Good for ambushing within buildings and close quarter fights. Useless on medium or long distances.
- SMGs: Its high rate of fire shredds people in close to medium distance.
- Pistoles: Rather strong early on, but only useful to finish off enemies with low life later on.
- Melee: Deals quite some damage but you got to get really close.
I’ve broke down the different weapons in the next section. Keep in mind some that you may prefer different weapons since these are my personal preferences.
My prefered loadout:
- SCAR-H or M417
- S1897 or UMP9
- Desert Eagle
- Machete
- Explosives and Molotov
- At least 1 Medi Kit and 2 First Aid Kits
Sometimes I also use RPGs besides my Rifles instead of UMP or Shotguns. My armor looks different since I use a skin on my tier 3 armor.
Weapons
Mainweapons
You have quite some choice for mainweapons. Pick 2, but one should be a Rifle.
RPG
Type: Rocketlauncher
Ammo: Rockets
Attachments: 0
Effective from a distance but dangerous in cramped locations.
Hard to hit, except if enemy is near to a object. Use the splashdamage!
Takes a lot of space in your backpack for only a few shots.
High reloadtime and you sacrifice your second weaponslot.
SCAR-H
Type: Rifle
Ammo: 7.62mm (green)
Attachments: 5
Effective from a distance.
More acurate that the AKM with it’s 5 attachments.
Slower rate of fire than the M417 and M16A5 but more damage per hit.
AKM
Type: Rifle
Ammo: 7.62mm (green)
Attachments: 3
Effective from a distance.
Slower rate of fire than the M417 and M16A5 but more damage per hit.
Sprays but hits hard.
M417
Type: Rifle
Ammo: 5.56mm (blue)
Attachments: 5
Effective from a distance.
Good firerate and medium damage per hit.
Precise with up to 5 attachments. One of my favorites.
M16A5
Type: Rifle
Ammo: 5.56mm (blue)
Attachments: 3
Effective from a distance.
Good firerate and medium damage per hit.
S686
Type: Shotgun
Ammo: shotgun shells (yellow)
Attachments: 3
Effective on short range.
Can only hold 2 shots but those can be fired at once.
I recommand only using this to camp inside houses.
S1897
Type: Shotgun
Ammo: shotgun shells (yellow)
Attachments: 3
Effective on short range.
Takes a little between shots but hits really hard.
Combine with Desert Eagle or Machete to oneshot people.
UMP9
Type: SMG
Ammo: 9mm (red)
Attachments: 5
Effective from short range to medium range.
Small 25 round magazine but high firerate.
Shredds people with the right attachments quickly.
Can hold up to 5 attachments, making it one of my prefered weapons.
Micro UZI
Type: SMG
Ammo: 9mm (red)
Attachments: 3
Effective from short range to medium range.
Small 25 round magazine but high firerate.
Shredds people with the right attachments quickly.
Secondary Weapons
Choose one pistole as your secondary Weapon and pray for a melee weapon skin from the crates.
P92
Type: Pistole
Ammo: 9mm
Attachments: 2
15 rounds at medium fire rate.
Can be quite effective early on, but is outperformed by SMGs by far.
Desert Eagle
Type: Pistole
Ammo: 9mm
Attachments: 2
10 rounds at slow fire rate.
Does good damage per hit.
Use it to shoot someone out of cover or to finish someoen off.
Machete
Type: Melee
Ammo: none
Attachments: 0
Deals good damager per hit but the attack rate is rather slow.
Use when out of ammo or together with a shotgun for ambushing people.
Attachments
Depending on what ammunition a weapon uses it needs different attachments for it’s slots. The only attachments that are the same for each type are scopes, vertical grips and bullet loops. The more attachments a gun can have, the better.
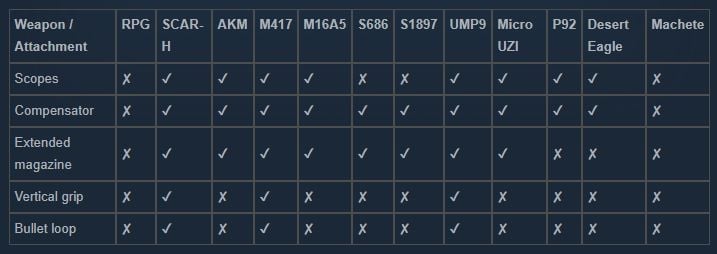
Some additional information:
- Scopes add from 0.15 to 0.35 critical hit chance to the weapons they’re equiped to.
- Extended magazines for SMGs and Rifles add 10 rounds to their 25/30 round magazines.
- Extended magazines for shotguns don’t add rounds to the magazine but shorten reload time.
- All firearms except the RPG can be equiped with a front attachment that either grants the weapon 0.1 Penetration or 6 additional range.
Grenades and Healing
Grenades
There are 3 types of grenades:
HE grenade
Damage: 700
Duration: 0s
Use when fighting in close quarter combat, trying to defend or assaulting a house.
Molotov cocktail
Damage: 100/s
Duration: 10s
Use when trying to block someone, kill someone stuck or buy time.
Smoke grenade
Damage: 0
Duration: 8s
Hides whoever is inside of the smoke from enemies, but can still take damage. Pretty situational.
Since you can shoot through windows, grenades can also be thrown through some of the windows.
Healing
There are 2 types of healing:
Medi kit
Heal: 800
Duration: 7s
Use when badly injured and got time to stay still for this amount of time.
First aid kit
Heal: 400
Duration: 4s
Use when slightly injured or don’t got more time on your hands.
You can’t walk while healing so search cover. Houses are excellent since enemies can’t see you from outside. You can also use Molotov cocktails to stop enemies from charging at you while healing.
When healing, stop holding [M1] at 0.1s. Healing will be applied but it will stop you from accidentally shooting when finished healing.
You can’t heal while looting but you can reload. Use your time effective!
Vehicles
There are 3 different useable vehicles in this game.
Red car
Size: small
Speed: fast
Health: low
Use this one to get around quickly and loot in early minutes of the game.
Be careful with good equiped players because of the cars low health.
Get a more defensive one or leave the car in time when getting close to enemies.
Black van
Size: medium
Speed: medium
Health: medium
Better defensive stats but slower speed than the red car.
Less maneuverable and less acceleration make it feel a little sluggish.
The bigger size makes it easier to hit people in open area.
It’s a all-rounder but can’t do anything specifically good.
Blue truck
Size: huge
Speed: slow
Health: huge
Slow and nearly no acceleration.
It’s heavily armored and can tank quite some damage.
This huge car is quite hard to dodge without cover.
My favorite way getting into combat late into the game
Things to keep in mind when playing with/against vehicles:
- You can get damaged in cars by RPGs, grenades and other cars exploding.
- You only see the cars healthbar while in it.
- If you get out of a vehicle while driving you’ll take notable damage.
- Cars exploding deal 1000 splashdamage, oneshotting everyone in or close to them.
- Cars getting stuck need time to regain speed and are an easy target.
- Cars can be used to run people over, but they won’t get onehitted.
- The driverseat is on the left side for all vehicles.
- Vehicles don’t take damage from hitting anything except other cars.
- The red car can enter all buildings. The black van and blue truck can enter some of them.
Trap someone inside a building
Some buildings have only one door. If you drive your car with the drivers seat facing outside into a door, you can leave your car and trap the person inside it. Be careful to not get stuck with him too or blown up with the car while doing.
You can also do this with buildings that have two entrances in duo pretty easily. Blow up the car in duo to assure his teammate doesn’t free him.
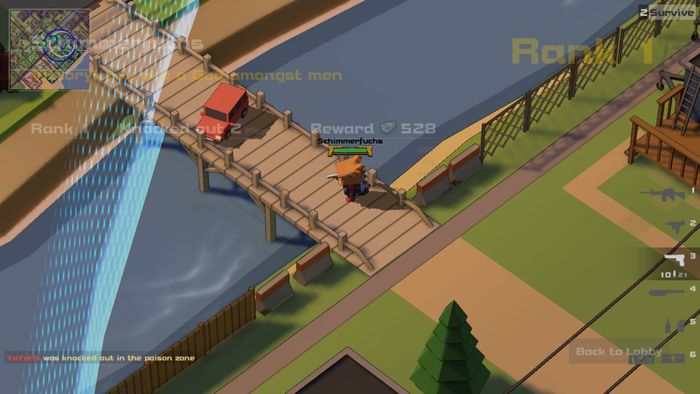
Trap someone outside the zone
Cars can also be used to block smaller bridges similar to the way used when imprisoning players. If the zone is close and you notice a player on the wrong side of the river just get him stuck there and continue with looting. The zone will do the rest.

Getting into a building
If you want to storm a building with enemies inside but they’re watching the doors try this. Park your vehicle right next to a wall of your choice. You have to sit on the side of the vehicle facing the wall. Press [F] to leave the vehicle and use [W][A][S][D] to move your character into the building. You will just clip through the wall and be inside the building behind your enemy. And yes this isn’t bug abusing, it’s allowed, but your car will be stuck afterwards since you can’t acces the driverseat anymore. Same if you park it with the driverside to close to a door.