Table of Contents Show
Armag’s Tomb Part #1 Walkthrough
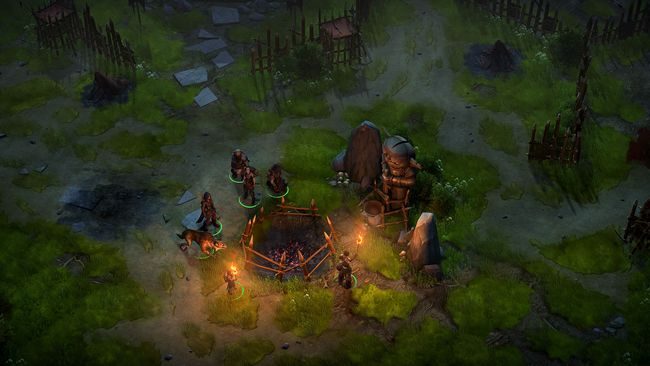
Armag’s Tomb, Exterior
When you arrive, make your way forward to start a conversation with a camp of barbarians, who will inquire about the outcome of the battle. Say what you will, and provided you don’t attack them outright, you’ll be able to question them further. Pick the dialogue option “I’m going into the tomb.” and you’ll be able to follow up with a [Diplomacy 36] check to score a hefty load of experience and convince the barbarians to turn on the Defaced Sisters standing outside the tomb. If you fail to convince them, then you’ll just have to fight them alone, which shouldn’t to too challenging of a task.
Make your way northeast, then northwest through the small barbarian camp to find the entrance to the tomb, where, sure enough, two Defaced Sisters await. They’re fond of starting out the fight with Agonized Wail (Will DC 20) which will drain a number of attributes to anybody who fails. Given this, you may want to approach with a character who has a high Will Save and let them absorb the attack, then bring up your warriors later. After that they’ll resort to more conventional spells, like Flamestrike. They can also use Baleful Gaze in combat, which also reduces ability scores, but allowing for a Fortitude (DC 20) save. Go-to spellbuffs here include anything that boosts your saves and offensive output, so use Bull’s Strength, Prayer and Haste to help win this fight.
Once you emerge victorious, it’s time to loot the camp around you. A pile of rocks to the southwest of the stairs leading to the tomb contain a Kellid Tribal Fetish, as does a small stone wall [Perception 9] near the tent just north of the area transition. A third Kellid Tribal Fetish can be found in some rubble just south of a tent that’s southeast of the tomb’s stairs.
When those items have been secured, head to the stairs the the Defaced Sisters guarded and enter Armag’s Tomb.
Smite the Spectres
From the entrance head southwest through the first room, stopping when you spot [Perception 9] a tile in the western corner you can search to find a fourth Kellid Tribal Fetish. You can also investigate some footprints to confirm that you’re not the first beings to disturb this tomb recently. Make sure you have Death Ward cast on your warriors before you advance – being in a tomb, it should be little surprise that you’ll encounter creatures that can inflict Energy Drain.
Sure enough, in the hallway ahead you’ll find two Spectres waiting for you, which were obnoxious enough foes the first time you faced them. As incorporeal beings, they’re immune to critical hits, precision damage (sneak attacks) and will take half damage from physical attacks… unless you have some weapon with the “Ghost Touch” property lying around, which is doubtful. Their Armor Class is laughable, but they only need a touch attack to harm your warriors, too. Smite them and continue on to the southwest, where you’ll reach a large chamber… and an Illustrated Book Episode.
Trial of Strength
This Illustrated Book Episode isn’t very complicated. The inscription “TRIAL OF STRENGTH” should give the game away, especially since Athletics is the only Strength-based skill check you have available. Either complete the higher [Athletics 35] check, the [Perception 35] check (if you don’t mind some pain) or the [Intelligence 18] check followed by numerous lower [Athletics 25] checks. If you want to fish for some generous experience rewards, however, things are a little more complicated…
1a. [Perception 35] …tried to cheat by standing on the pressure plate ourselves.
If you pass this, you’ll get a huge experience reward, and since you’ve been boosting Perception to spot hidden treasure and whatnot, this shouldn’t even be a particularly hard check… especially not if you have Jaethal in your party. Afterwards you can pick the option …ignored the potential danger and stood on the pressure plate. to end the Illustrated Book Episode at the cost of taking some hefty damage. Failing that you can – and probably should – fish for more experience by picking …decided to find another solution rather than take any chances. which will let you select other options.
1b. [Athletics 35] …started breaking through the walls to make a straight path to the center of the room.
Okay, so the odds of you passing this might not be great, depending on how you’ve built your party, but if you have any character with a +15 Athletics, take off their armor, cast Bull’s Strength on them and give it a try. If you pass, that’s the only check you’ll need to make for this Illustrated Book Episode and you’ll get a huge chunk of experience. If you fail… well, you can always try the other options.
1c. [Intelligence 18] …explored the labyrinth in search of the right path to the center.
Despite being call the “Trial of Strength”, you’ll need to use some smarts to figure things out. Pass this before attempting the [Athletics 25] checks so your later efforts are fruitful. If you want to squeeze every bit of experience out of this encounter possible, pick the [Athletics 25] …started pushing the statue in random directions without wasting time exploring the labyrinth.” option first. You’ll still get experience for passing the check, even though it won’t help you solve the puzzle.
2c. [Athletics 25] …started pushing the statue along the marked path.
If you want maximal experience, only pick this option after attempting the [Perception] check above, and perhaps the [Trickery] check. The former gets you a huge influx of experience and a painful alternative way of finishing this Illustrated Book Episode, while the latter gets you a pittance of experience, but no closer to solving the puzzle. If you succeeded at the higher [Athletics] check you can bypass this step entirely, and it’s worth more experience if you do.
All that being the case, this is the option that solves the puzzle painlessly and requires the least luck, given the lower [Athletics] check involved. Unfortunately, you’ll need to pass three [Athletics 25] checks in a row, so it’s not entirely risk-free.
3c. [Athletics 25] …kept pushing the statue along the marked path.
You’ll need to select this option twice in a row.
Note: If you stop pushing the statue and pick the option …exited the room to warm up a bit. the puzzle will reset. You have to finish the entire event in one go, meaning either the [Perception 35] check, the [Athletics 35] check or the [Intelligence 18] followed by three consecutive [Athletics 25] checks.
To summarize, if you just want to get through this Illustrated Book Episode, you’ll need to pass the [Athletics 35] check, the [Perception 35] check (which results in some damage) or the [Intelligence 18] and three [Athletics 25] checks in a row.
If you want the most experience (ignoring any possible infinite experience exploits should you abandon the puzzle and, say, keep farming the [Perception] check), pick the [Trickery 25] check, the [Perception 35] check (without its follow-up option that finishes the puzzle), an [Athletics 25] check, the [Intelligence 18] check, two of the [Athletics 25] checks, and finally the [Athletics 35] check. Doing this can earn you over 8,000 experience, which is no mean sum.
When you’re done, notice two hallways you can explore to reach the depths of the tomb: one to the southwest and one to the southeast. It turns out it doesn’t matter, as they both join together later on. Before you pick either of them, search the western corner of the room to find [Perception 35] a chest you can loot.
Defeat the Devourer
From the frozen puzzle (Illustrated Book Episode) room head southwest and the passage will turn southeast. Disarm a trap and loot a corpse [Perception 9] to find an Ancient Kellid Adornment Piece. Continue southeast until you find a door to the northeast, near which another trap to the southeast lies.
Through the door to the northeast you’ll find a terrible foe – a Ferocious Devourer. This beast can inflict Negative Energy Levels, but for once, this ability is less fearsome than its raw, physical prowess. Its Armor Class is high to the point of being nigh untouchable for all but the mightiest of warriors. It also has a high enough Attack Bonus to strike even your tanks with frightening regularity. It’s Spell Resistance is also high enough to thwart all but the most potent spellcasters, so you’re probably better off sticking to summons and buffs, unless of course you manage to get extremely lucky by casting a Heal spell on it. The odds of such a spell affecting this creature given its Armor Class, Saving Throws and Spell Resistance are marginal, at best, but the damage might be worth the Hail Mary attempt.
To even stand a chance you’ll need to ensure you have Death Ward active and spellbuff to the max – Bless, Prayer, Stoneskin, Haste, Burst of Glory, Greater Invisibility and the like. Fortunately it doesn’t have concealment or Damage Reduction, so any hits you do land will be felt, but it’s got a silly amount of Hit Points. Summons will also help if you need to withdraw a warrior and heal, and for the incidental damage they deal.
Spellbuff, save your game, go through the door and lure the Devourer out, as there’s a trap between it and you that you’d be better off avoiding. With more than a bit of luck you should emerge victorious… eventually. If you do, you’ll be richly reward, as it’ll drop a Belt of Giant Strength +4, an Amulet of Natural Armor +3, a Ring of Protection +2 and a Cloak of Resistance +2. If you can’t best this foe yet, remember it for later and return when you’ve leveled up a few times.
If you defeat it, you can also loot its lair. Disarm the trap near the entrance, then loot a pile of skulls to the northeast to find a Piece of Skymetal, a chest near the bone pile containing a suit of Ghost Armor, a chest near a sarcophagus in the eastern corner containing a variety of mundane treasure. Finally, search the western corner to find a floor grate [Perception 23] within which you’ll find a Kellid Tribal Fetish.
Defenders of the Depths
Whether you defeat the Devourer or not, continue down the hallway to the southeast and at the corner turn northeast to find a fork, where a trapped can be found. If you want to score some extra experience and loot, continue northeast then northwest, disarming traps as you go and looting some dead barbarians for a Leather Scrap Covered in Ancient Runes, among other, less noteworthy treasure.
When you’re done gathering loot, return to the fork and head down the unexplored route to the southeast to find a chamber occupied by several Greater Skeletal Champions. The Greater Skeletal Champions have an Attack Bonus more or less in-line with the barbarians you’ve been fighting, but sport a much higher Armor Class… although nowhere near as hard to hit as the Devourer was. They mostly exist to distract you while the Clerics of Gorum behind them cast spells, which involves summoning critters and buffing them.
You can lure the Greater Skeleton Warriors to the northwest and engage them there while your mage(s) cast a Web spell behind them, hopefully to hold up the clerics and their pets, which you can then dispatch at a more agreeable rate. Failing that, just rush the Clerics and cut them down and save the skeletons for later.
However you win, loot a chest in the western corner of the room, then search a grate to the northeast to score a Leather Scrap Covered in Ancient Runes. A third chest [Perception 35] can be found in the eastern corner of the room, near some stairs. Speaking of which, you’re going to want to head downstairs after you’re done looting… although you may want to spend some time preparing spells before you go. Namely, you’ll want plenty of Death Ward spells ready to go, as well as Resist Energy and Protection from Evil. You don’t need the Communal versions, but you do need at least three copies of each spell. Unlike Vordakai’s Tomb, you can leave this one at any time, so don’t fret if you need to retreat, rest, and reprepare spells.
With those preparations in mind, head downstairs to the next level.