Table of Contents Show
City of Hollow Eyes Walkthrough
To reach this location from the Kellid Barbarian Camp, use the following directions:
- West
- North
- Northwest
- East
Helping Hilla
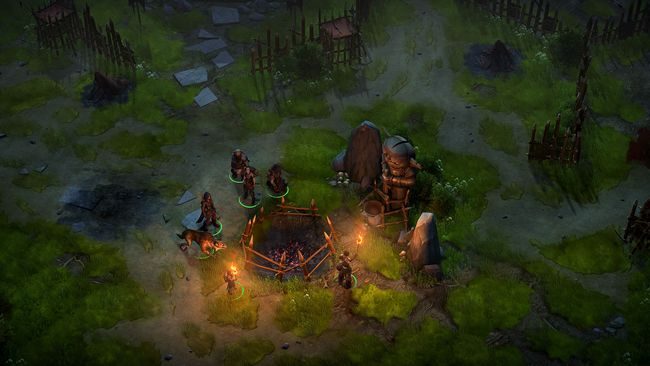
When you arrive, make your way northwest to find a barbarian camp – more humble than the one where Dugath resides, but still occupied. Before you can make contact with the barbarians, they’ll be attacked by several Dread Zombie Cyclops. Unlike the one you may have fought near Lake Silverstep Village, these ones have no spells to thwart your battle line with, but there are a number of them. That said, their Attack Bonus isn’t high enough to be worrisome, and they’re not terribly well-armored nor do they have the Hit Points to have significant staying power. Plus, the barbarians fighting them should provide a useful distraction.
Insist the undead return to an inanimate state, then return back to the bandit camp and talk to Hilla. Be sure to say “What are you doing here?”, then respond however you wish, as she’ll enlist your aid no matter who you say sent you, if you even say that much. She’ll tell you what happened – ruins best left untouched, followed by zombies attacking, the usual – then agree to help.
Before you run off in search of some grave-disturbing barbarian witches, loot the barbarian camp. In a wagon near a tent northwest of the spit roast you’ll find a Scroll of Raise Dead. East of this meal you’ll find a crate containing some masterwork bows, 112 GP and the Kameberry Pie recipe. You can find more treasure north of the tent this crate is near, although you’ll need to pass a [Perception 29] check to locate the crate it’s in. Find and loot the aforementioned crate to score 456 GP, two masterwork melee weapons, two potions and some food.
Finally search in front of a tent to the southeast of the cooking deer to find [Perception 28] a chest, which is trapped [Perception 28] [Trickery 28]. For good reason, too, as the chest contains Nobleman’s Amusement, a Longbow +1 that gives its wielder the “Elite Expertise” property – effectively allowing them to act as if they had the Point-Blank Shot and Precise Shot feats. The perfect bow for the part-time archer who doesn’t want to invest feats into the vocation!
The Cyclopes Pit
Leave the barbarian camp behind and loot the corpses of the zombie cyclopes you helped send back to the grave. Most wear hide armor and bear masterwork weapons – worth some gold, if you can carry them. One also has an Ancient Cyclops Coin. While your goal lies beyond the river, to the northwest of the barbarian camp, there’s plenty of things to kill and loot in this area.
That being the case, make your way northeast along the southeastern edge of the area until you find some Dread Zombie Cyclopes – three in total. Engage the two which are readily apparent, but beware of a third which will rise from the northwest.
When they’re even deader than they were before, search the pit they occupied to find a crate [Trickery 29] inside of which you’ll find 368 GP, some masterwork weapons, a potion, and some food. For more loot, leave the pit and head north to find [Perception 28] a collapsed tent [Trickery 34] inside of which you can find 226 GP and a variety of gems.
Bandits Ambushed by Worgs
Now make your way northwest along the northeastern end of the area until you find an ambush in progress. Eight Worgs (seven Ferocious Worgs and one Greater Worg) have surrounded some bandits; a predicament you can certainly sympathize with. The bandits can’t escape their fate, but you shouldn’t waste time worrying about them – once the worgs are done with the bandits, they’ll be after you, and there’s too many of them to take lightly.
Cast a Web spell or two, one in the center of the combatants, and another between you and the worgs, then wait for the bandits to die. When the worgs turn their attention to you, hopefully most will get caught in the Web(s), and arrive in more manageable numbers. Cut them down a few at a time to score another victory, then loot the bodies of both bandit and worg alike.
Northern Cyclops Ruins
Continue northwest along the northeastern edge of the map until you reach the area’s northern corner, where you’ll find some ruins guarded by no fewer than five Dread Zombie Cyclopes. The one furthest to the west happens to be capable of casting divine magics, starting out with Prayer before dabbling with Hold Person and finally using its ability to channel negative energy to hurt your living party members.
Given this complication, you may want to spellbuff with Haste to make shorter work of the melee Cyclopes, who aren’t slouches in those numbers. Adding other buffs to the mix will, of course, help immensely, and you can also target the ruins with Web to slow down a few of the melee cyclops, perhaps allowing you to deal with only one melee cyclops and the Cleric cyclops for a period of time. If that’s the case, you may want to just rush the Cleric cyclops and cut it down before it can cause too much trouble. Even if that’s not your goal, Web will hopefully reduce the number of cyclopes attacking you at once, making it well worth a cast.
Secure victory, then loot the undead giants you just smote. Most have the typical equipment of hide armor and masterwork weapons, but the spellcaster will leave behind a Greataxe +1, a Breastplate +1, a Ring of Protection +1 and a Cloak of Resistance +1. Probably not anything you’ll want to wear, but it’ll fetch a pretty penny when you pawn it.
With that bit of business out of the way, loot a branch to the north of the ruins to find a Fallen Warrior’s Sheath and a Headband of Vast Intelligence +4. Search the ruins the undead guarded so fiercely to locate some stonework on the southeastern edge of the ruins to obtain an Ancient Cyclops Coin. More lucratively still is a stone container near a large obelisk which you can spot with a [Perception 31] check. If you do, loot it to score an Amulet of Natural Armor +2.
Bandits versus Zombie Cyclopes
From these ruins head due south until you find some Dread Zombie Cyclops attacking some Bandits. These bandits just can’t catch a break, can they? Don’t feel too bad for these bandits, as they outnumber their opponents for once, and include an Alchemist, which should be made a prime target of yours, should you need to engage them. When they’re dead, loot the zombies for the typical fare, while the dagger-bearing bandit will drop two Daggers +1 and a Ring of Protection +1. In addition, you can find a chest just off the path to the north, northwest of where you encountered these zombies and bandits, inside of which awaits 126 GP and a variety of gems.
Continue southeast from these bandits to find some more ruins, in the midst of which is a fallen Dread Zombie Cyclops which possesses a Greataxe +1. What kind of bandit leaves behind an enchanted weapon? Oh well, their loss, your gain. From these ruins head east to find the incompetent bandits, which include a Bandit Transmuter, a sword-and-board bandit and two archers. Chop them all down, then note that to the south of the ruins is a fordable part of the river near the barbarian camp.
Worgs and Ruins
Follow the river near the barbarian camp until you find a fordable section of the river to the northwest. Cross the river, then follow the far side of the river to the southwest until you find nature playing out in the form of four worgs (three Ferocious Worgs and an Alpha Worg) attacking two Bandits. The Bandits don’t have much of a chance here, but they can distract the worgs while you buff up and attack. Focus on the worgs first and hopefully you’ll cut down at least one before the Bandits expire, after which it should become a fairly simple fight against three weakened foes you severely outclass.
When your foes lie defeated, loot the Bandits for some weapons you can sell and a Ring of Protection +1, then skin the worgs.
If you’re not sick of worgs yet, good news! There’s more waiting for you. Continue following the river southwest until you reach the edge of the area, then turn northwest along the area’s boundary until you reach the northwestern corner, where another pack of worgs await. At first you’ll only spot two (an Alpha Worg and a Ferocious Worg), but further back are two more Alpha Worgs and three more Ferocious Worgs fighting a Dread Zombie Cyclops.
Again, the worgs are clearly superior here, and it won’t be long before they’ve dealt with their prey, and this time there are enough mutts to be worrisome. Cast two Web spells near the engaged worgs, kill the two closest to you, then eliminate the rest as they escape your Web spells, using missile fire to… encourage them.
Defeat your foes, take any valuables you can find (or skin) off them, including the Greataxe +1 from the zombie cyclops, then search the ruins north of where they fought. Search a container [Trickery 30] along the southern end of the ruins to find 403 GP and some masterwork weapons, then continue northwest along the southern end of the ruins to find [Perception 30] a collapsed tent. In this tent (which is also somehow locked [Trickery 29]) you’ll find Rageclaw, a Longsword +2 with the “Furious” property, which acts as a +4 weapon if the wielder is raging.
The Greedy Cyclopes
While skirting around the edge of the ruins has been safe – and lucrative! – enough, stiffer challenges await you amidst the ruins itself. Make your way northeast along the eastern edge of the ruins but avoid actually running on these stairs. You can deal with what dwells there shortly, but first, a more challenging encounter awaits.
As you move along the ruins, notice a stonework circle to the east of ruins, where two Greater Cyclops argue with each other. Unlike the other cyclops you’ve encountered thus far, these ones are very much alive… and barring any unfortunate random encounters, they’re the strongest foes you’ve met this chapter thus far. Before you draw too near, buff up with Haste, Prayer, Stoneskin, and whatever buffs you may find useful.
When you’re ready, approach the cyclopes and pass a [Knowledge (World) 30] to understand what’s going on. While it’s not important to understand, if you succeed you’ll interpret that they’re arguing over some artifact. When prompted, choose to [Move forward], at which you’ll be noticed. This prompts two more under-the-hood skill checks: [Perception 26], which will allow you to spot some recently gnawed cyclops bones near an obelisk and a [Knowledge (Arcana) 30] check, which will reveal the trap that caused those bones to be deposited there.
Pass those checks to get an understand about what’s going on, then pick the dialogue option “What are you arguing about?” followed by “What makes this ‘treasure’ so valuable?”. This will unlock more options, including a [Chaotic Good] [Diplomacy 30] option and a [Chaotic Neutral] [Diplomacy 25] check. The first will see the cyclopes fruitlessly cooperate, while the latter will see them fight for possession of the artifact. You can only choose one, however, so pick wisely. Failing either of those two options you can pick the [Use Dispel Magic] option, which will free the cyclopes from their predicament… but far from being grateful, their hunger gets the best of them.
While complicated, the encounter boils down into a fight against one or two cyclopes. Either that, or useless abdication. If you let the cyclopes fight, you won’t gain any experience for the kill – and they’re worth enough to make this a significant loss. The two of them are fairly powerful, however, having a huge store of Hit Points and a high enough Attack Bonus to worry even a well-armored tank. On top of that they can perform sweep attacks, hitting multiple characters at once, and they’re not above using Cleave, as well.
With spellbuffs, however, they should be easy enough to dispatch… with a bit of luck. The buffs have already been mentioned, but as for debuffs, Slow will do much to secure you a victory. After you’re victorious, loot the dead cyclopes for a variety of trinkets and masterwork weapons. If that’s not quite enough for you, search to the south of the cyclopes you killed to find the bodies of three bandits and a another zombie cyclops, which you can loot to find a Greataxe +1, two Daggers +1 and a Ring of Protection +1.
Exploring the Ruins
Return to where the the two cyclopes argued over their insidiously-enchanted artifact, and from there continue north to return to the ruins you skirted twice previously. You’ll want to use the stairs along the northern end of the ruins, as you’ll find two Dread Zombie Cyclopes here, which will be joined by a third during the fight. If you would have engaged these foes along the southern end of the ruins, two of the cyclopes would have arrived from the north and complicated matters.
Defeat these zombie cyclopes, then continue northwest and head through some pillars. Disarm a trap [Perception 28] [Trickery 28], then loot two stone containers, one of which contains some gems and the second [Trickery 30] holds a variety of scrolls and gems.
Leave the pillar-enclosed chamber and turn northeast, venturing off the northern side of the ruins to find another group of bandits. These bandits are perilously close to the ruins, and frankly, bandits have not fared too well in this area. No reason to let this group have any different fate, eh?
You’ll find yourself fighting a Bandit Chastener, a Bandit Bard, and three less important bandits – one with dual daggers and the others with bows. The Bandit Bard should be your chief concern, as he won’t be shy about casting nasty spells, like Slow. You know from experience how that spell can swing a fight, and you’re just are harmed by its effects as the enemy is.
Once the bandits are dead, loot them for a variety of goodies, including the typical Daggers +1 and Ring of Protection +1 from the dagger-wielding bandit, a Chainshirt +1 and a Ring of Protection +1 from the Bandit Bard and an Ancient Scrap of Script-Covered Leather, 177 GP and a variety of lesser trinkets. Finally, loot a nearby chest to score a suit of Leather Armor +2.
Now that the bandits are smote, return to and continue southwest across the center of the ruins, stopping to loot another cylindrical stone container for a variety of potions, a masterwork weapon and 157 GP. Further southwest you’ll find two dead barbarians near a circular stone door. Ignore the door for now and continue southwest to the edge of the ruins, where you’ll find more barbarians to loot, and another trap [Perception 28] [Trickery 28] behind some columns to the northwest.
The Cyclopean Tomb
With that, you’ve explored these ruins thoroughly, and since they’re the last area of interest in this area, it’s time to head on into these ruins. Head to the center of the ruins and interact with the circular stone door. You can, with a successful [Knowledge (World) 30] check, examine some of the inscriptions on the door, but it doesn’t get you any closer to opening it, and neither will any amount of force you can must. Instead, pick the option [Speak the word “kheb”] and it’ll open up. Seems the words of the Defaced Sister proved useful, and it’s not the last time, as a voice from within the tomb will warn you to block the door so it can’t seal itself shut behind you.
With that matter resolved, enter the tomb, where you’ll immediately be pestered by a Defaced Sister. Exhaust her dialogue options then – assuming you’re not going to wantonly act contrary to your own goals by attacking her – tell her to head back to camp.
Before you depart, however, head down some stairs to reach a large chamber dominated by a gigantic sarcophagus… appropriate, considering the corpse it holds. Loot a container along the northeastern wall to score some gems, an Ancient Cyclops Coin and two potions. If your greed hasn’t be sated yet, continue northwest to reach the end of the tomb, where you’ll find a false door. More importantly is the trap [Perception 28] [Trickery 28] in front of this false door, and the various containers along this end of the tomb. If you disturb the trap or the treasure, a Dread Zombie Cyclops will rise from the sarcophagus to attack you – and its Greataxe +1 will only add to the treasure you’ll gain from this looting spree. Put it down, disarm the trap, then loot the containers for a variety of gems, potions, scrolls and another Ancient Cyclops Coin.
When you’re done in the tomb, leave and you’ll find yourself pestered by your dark bird pal, who accuses you based on what your did in the tomb. There’s guilt to go around no matter what you did, and since it’s damned if you do, damned if you don’t, ignore the bird and carry on. When you arrive back at the barbarian camp, Hilla will thank you and leave. One witch saved, two to go.
- Reward: For saving the Defaced Sister
300 XP / 1,220 GP
If, on the other hand, you killed the Defaced Sister in the tomb – a surprisingly difficult fight, given the witch’s high Armor Class and Damage Reduction – she’ll leave behind some potions and a Cyclops Incense Burner. When you return back to the barbarian camp, however, Hilla will have some questions for you. You can outright lie [Bluff 30] and claim the cyclopes kill everybody… which honestly shouldn’t be that hard of a lie to sell. If you succeed at the Bluff check, you’ll get the reward listed above, if not, you’ll have a fight on your hands.
Alternatively you can admit to the murder outright, which will allow you to attempt a [Diplomacy 33] check to convince Hilla that the witch betrayed her, or you can say that Dugath ordered the Defaced Sister’s execution. In the latter case, she’ll be less than friendly, but not quite hostile, while if you succeed at the Diplomacy check she’ll be fairly nonchalant. Either way, you’ll gain the aforementioned experience reward, but no monetary reward.