Table of Contents Show
First Day on the Job Walkthrough
A Baron’s Duties
After the banquet ends you’ll find yourself in your infant capital city, which stands on the site of the Stag Lord’s old fortress. They sure got to building fast, eh? Kesten Garess will be there to greet you, answer some initial quests you may have, and finally take you on a tour of the place. If you ask him about what peculiar citizens are about, he’ll inform you that Jhod and whatever emissary you chose are in the capital, as well as a blind elf named Desna. You’ll have to introduce yourself, but first, allow Kesten to guide you about the city, such as it is, after which you’ll enter your residence.
In your throne room you’ll be introduced to a new feature – the kingdom map. Your emissary will tell you – sparing every possible detail – what you can expect to find on this map before urging you to appoint capable ministers from your pool of companions and followers. Last but not least, you’ll be reminded to return to your capital regularly to deal with official business. Petitioners expect to be able to meet with the baron, and it’s a tradition you’d do well to maintain, for the sake of your realm’s stability.
After the chatter is over you’ll be dropped onto the unfamiliar kingdom map, the basics of which are fairly well-covered by the in-game tutorials. For now, however, you need only appoint some Leaders, as it’ll take a while for kingdom events, projects and claims to appear regularly.
This isn’t to say you should ignore this aspect of the game – you’ll need to balance kingdom management with proper adventuring. Not only is raising your kingdom stats (typically done through building or completing events) essential to maintaining your realm, but many quests will also be introduced via Event Cards on your kingdom map.
While exploring, get in the habit of checking your kingdom map (click the castle icon on the bottom right of the screen while on the overworld map) every day for new event cards that may have popped up. Most events can be resolved while you’re exploring, but some will require you to return to your capital city, and others may require you to invest some time into them, during which no other actions can be taken. You’ll have to be savvy with managing your time, and explore during the down time between major kingdom events.
Note: You can check the progress of kingdom events while exploring. To do so, when you’re on the world map just click the castle icon on the lower right corner of the screen. You can even assign characters to handle events and build structures in your settlements. Some events will require your physical presence, however, so it’s a good idea to return regularly and not over-extend yourself.
The Emissary and Antiquarian
Now that you’re done – for a short while at least – with all this busy baronial business, it’s time to have a look around your throne room. First, direct your attention to that most wonderful of features to the northwest of your throne: a stash! Honest to goodness, you can store all the junk you’d rather not carry around in here, be it magical items you can’t bring yourself to sell yet, excess potions and scrolls, food, or other junk that you’re not willing to sell and would rather not carry around. Because what kind of baron doesn’t have their own stash of treasure?
After that, you should notice plenty of people to chat with. You can talk to Jhod and Kesten to learn a little (very little) more about them, but the rest of your companions have nothing new to say, so turn your attention to your emissary. Whomever you chose, they can certainly tell you more about the relationship between the Surtovas and the Aldori, just don’t necessarily expect an unbiased account.
Exhaust their dialogue options, then turn your attention to the Storyteller, who can be found near the doors to the southwest. This is the blind elf Kesten told you about earlier, a collector of stories and a preserver of history, he’s keenly interested in such artifacts. Simply put, he’s the antiquarian whose services you’ve been in need of since Chapter 1, and he’s all too eager to buy up any Ancient Rostland Coins (200 GP each), Tokens of the Dryad (300 GP each), Ancient Cyclops Coins (400 GP each) and Taldan Warrior’s Dog Tags (300 GP each) you may possess. If you were diligent about hunting them down in Chapter 1, you every well see yourself become 7,800 GP richer by such an exchange. Alas, you currently don’t possess enough Scorched Fragments of a Necklace to turn in.
You very may well have enough Restovic artifacts to turn, however, and doing so will earn you a story – and a hefty monetary and experience reward, as well! Hand over the Restovic Sorceress’s Discharged Staff (found in the Oak-That-Strayed area), the Restovic Ranger’s Broken Arrow (found in the Old Sycamore area, on a corpse near some Tatzlwyrms), the Restovic Swordlord’s Empty Sheath (found near some Giant Spiders in the Old Sycamore Depths area), the Restovic Paladin’s Crumpled Helmet (found near the Tremendous Centipede in the Old Sycamore Depths area) and the Restovic Inquisitor’s Broken Crossbow (donated to you by Tartuccio in the Old Sycamore Caves area) for the aforementioned tale and reward.
Trade and Talk in Tuskdale
Complete your business in the throne room then leave the building. Once outside note the variety of buildings you can enter, all of which have nothing of interest in them. If you exit the screen via the area transition at the southern end of the map and return you’ll get a choice to travel to the tavern, the main square and the throne room. You need not bother with the tavern just yet, however, as there’s little of interest there right now.
That being the case, venture southwest from your throne room to encounter a pair of merchants. To the west is Hassuf from Absalom (simply known as “Merchant” outside of dialogue) and to the east is Verdel. Hassuf sells a stunning display of tantalizing equipment, including standouts like Trapspringer’s Gloves (+5 Trickery – succeed at unlocking objects and disarming traps more easily), Eyes of the Eagle (+5 Perception checks – spot traps and hidden items more regularly), Necklace of the Eternal Hunter (+2 attack and +4 damage vs. Magical Beasts – there are quite a few owlbears and manticores out there, especially later in the chapter), Cloak of Shadows (+10 Stealth, immunity to Blindness and Daze – huge buff for sneaky characters) and Flameguard (a potent Tower Shield that protects the wielder from fire – useful for mitigating your tank’s damage from, say, alchemists).
Note: Grab the Eyes of the Eagle. For 2,500 GP it’s a steal, considering how much of a bother failing Perception checks can make things. Have Jaethal wear these and she should have a great chance at spotting everything and anything for the rest of the chapter, provided you keep boosting her Perception skill every time she levels up, of course.
Much, if not all of this gear will prove quite useful in your future adventures. As for scrolls, consider picking up the Scroll of Fireball and Scroll of Haste. Keep them handy for when Octavia hits 5th level as a Wizard (or better yet, your protagonist does), as these are two keystone Wizard spells, and for 375 GP each, they’re a steal. Of course, you can find both of these in the wilderness if you’re willing to wait, and if Octavia is your primary Wizard, you might as well, as she won’t be hitting sixth level (hence fifth level as a Wizard) for quite a while yet.
Verdel’s wares are more catered to the stouter sort of warriors, and it includes Adamantine Full Plate Mail +1 (heavy armor with Damage Reduction 3/-), Mithral Full Plate +1 (medium armor – thanks to being made of mithral – with the protection of heavy armor). These two suits of armor are some of the most expensive items you can potentially buy right now, but it is the sort of armor that’s fit for a baron…
Peruse their wares as you wish (at the very least it’ll give you some financial goals to work towards) then head south to meet another familiar face – the Guardian of the Bloom. She’ll initiate conversation with you when you approach, suggesting that the lord of the realm should become more familiar with her, the living embodiment of the land. Deep in the woods you’ll find a crumbling fortress, and in that fortress’s courtyard you’ll find a tree, in the shadow of which the nymph will be waiting. This starts the quest A Just Reward.
The promises of greater rewards, meeting in the flesh, and seeing her as she truly is are lurid enough, but her request that you come alone should inspire caution. At the very least trekking through the wilderness alone will be dangerous, but on the plus side this gives you an excuse to explore the wilderness to the west of your capital.
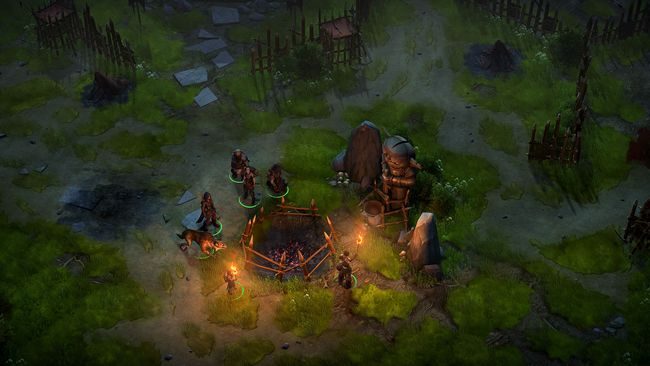
Despite the fact that the nymph requested that you travel alone, your first expedition should be more concerned with finding a route there and clearing other map areas along the way. That being the case, hit the area transition along the southern end of your city and assemble your team. The first area of this expedition will be covered below, in the “A Ford Across the Skunk River” section of the guide. Before that, however, some pertinent notes…
Note: There’s often a good deal of down-time between important, kingdom-related activities, and you’ll frequently find yourself waiting for new quests to start, for events to appear and to be resolved by your leaders, and for buildings to finish being constructed. Instead of skipping this time, you should consider exploring so as to earn experience, gold and items. This was mentioned earlier, but it’s worth repeating, as taking advantage of lapses in kingdom business and filling this free time with opportunistic adventuring during free time will be a key aspect of the game from now on.
The exact time you’ll have (and hence the areas you can explore) will vary depending on how efficient you are, and the difficulty level you’re playing at, your party make-up, and even something as unpredictable as dice rolls can skew time-tables between various playthroughs. Since a bad critical hit could force one party to rest while the absence of such a setback might allow you to continue without resting, this isn’t going to be an exact science. That being the case, you may not be able to accomplish everything listed during a particular exploration section, and you shouldn’t fret over it much. Alternative opportunities to explore will be pointed out to you as they arise.
Note: After defeating the Stag Lord and claiming the lovely experience rewards at the end of Chapter 1, there’s a good chance your party will ascend to level five. If so, and you have a Wizard protagonist, they’ll have access to third level spells, although Octavia will take a bit longer. Still, now is a fine time to discuss third level arcane spells so you know what to pick.
Third level spells are where arcane magics start to get really interesting, although you’ve doubtlessly noticed how much better things go when you employ spells like Web and Blur wisely. Haste and Slow are fantastic party buffs and debuffs: the former will drastically increase your party’s offensive output and the latter will significantly hinder enemy combatants. Fireball is a tempting damage-dealer, but you’ll likely find the former two spells to be far superior. Dispel Magic is always useful, but you can delegate that responsibility to your Clerics, whose third level spells aren’t quite as good.
Since you can simply buy or find scrolls of Fireball and Haste, you need not use your level-up picks on them. In that case, pick Slow and Displacement, instead. Sorcerers should pick Haste and Slow. These suggestions, of course, assume Transmutation isn’t one of your prohibited schools, in which case, ouch; pick Displacement and either Deep Slumber (like Sleep, but 10 HD instead) or Stinking Cloud, instead.
Warning!: This and upcoming expeditions will be undertaken under the assumption you have some free time before more pressing matters arise. In this case, you should have the entry Troll Trouble in your journal, but this quest won’t really get started until the event card “Troll Invasion” appears. The time this takes to appear seems to be around a month after finishing Chapter 1, but whenever it appears, that’s a sign that you should start wrapping up whatever adventure you’re on and return to Tuskdale.
This main quest will take you to a lot of the same areas you’ll be dealing with in expeditions covered below, and you’ll also get more free time during the main quest, as you have to neglect the main quest an awfully long time for the effects to become serious. That being the case, don’t worry if you can’t get around to everything, and be willing to skip around the walkthrough as necessary so you can complete areas when you get the opportunity. You’ll be reminded of this later.