Table of Contents Show
Troll Trouble Walkthrough
The quest will begin after you have your share of fun ruling the Kingdom a bit. Visit the throne room and learn from Kesten about the unusually high troll activity in the region. By the way, do not forget to add the nearest region to your kingdom.
To advance the quest, read the walkthrough of The Nature of the Beast main quest. You will find out why trolls are not afraid of fire. Soon after this, you will need to meet Ekundayo (refer to the quest A Score to Settle) and Jubilost (Renowned Explorer quest).
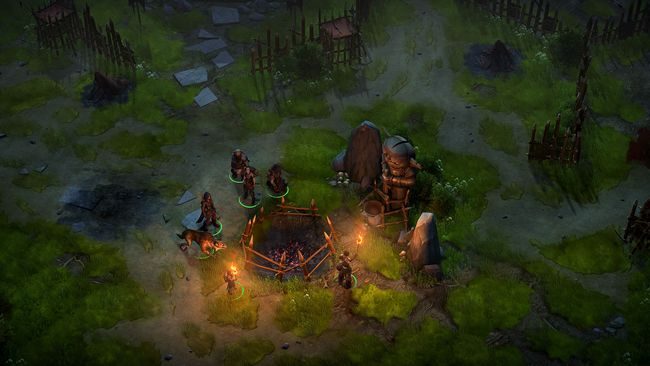
Next, you will have to return to Bartholomew to help him in the battle against trolls (go to the Lone House location). You learned everything you could about trolls.Their lair is located at the Dwarven Ruins location. It will be called Troll Lair afterwards. The most interesting thing here is that you can complete several quests at the same time: take Harrim (companion quest called Unwanted Legacy), Ekundayo (A Score to Settle quest) and Jubilost (Renowned Explorer quest) with you and go there.
Head inside the fortress, follow the trolls’ leader, descending to the lower floor. Search chests to collect keys and open doors If you can’t picklock them. Defeat the leader and decide what do you want to do — kill him or spare him. Regardless, the quest will be completed, and you will be ordered to return to the baron’s castle.
Here is a secret: On the upper level, you can find two plates with images of the Sun and the Moon. Now, if you look at the map, there will be two red flags indicating their location. You can rotate the plates and select certain symbols. But which ones? Go down to the lower level again and look for the Sun and the Moon statues in the central chamber — they will have the right symbols. Memorize them, set the plates right on the upper level, then go back and enjoy your chest with some gold and excellent armor.
A Just Reward
Exit the throne room (when interacting with the map inside, you return to the kingdom management screen) and walk around the city until you see the Guardian of the Bloom. She will thank you for killing the Stag Lord and will promise a valuable reward. And so the quest begins.
You need a location called Verdant Chambers. It is located in the west of the region. You must go there alone! At the destination, go forward and look around the big tree on the right. A nymph will appear and then sic the monster on the main character. You can either escape or kill them. Look for another way out — you can climb the wall to the right of the tree, but only if you pass the athletics test. You will finish the quest by leaving the location.
Lost Child
The quest will begin after you meet Jenna in the throne room (you will have to receive some visitors). Talk to her and learn about the missing son. The woman claims that the witch from Narlmaches is to blame. Head to the Swamp Witch’s Hut location. Details about it are described in the Swamp Bouquet and Mushrooms from the Mud Bowl errands.
Talk to the witch Old Beldame and learn that, apparently, she did not do anything wrong. It means that Jenna slandered her. Go back to your fortress and enter the tavern (either select it when you go to the fortress or exit the throne room and go all the way to the right to see the marker leading to it). Talk to Jenna in the upper left corner. She will say that her son could have gone to the Lake Candlemere.
What you are looking for is a Lizardfolk Village — it is also highlighted by a unique marker (to the left of the lake). The Candlemere itself is located to the bottom left of the capital. Head there and speak to the exiled lizardfolk Kagar. Head to the village’s entrance and tell the guard you want to talk to the leader. Chat with Vesket, then go outside and walk into the building on the right. Save your game before talking to Jenna’s son, Tig. The thing is that you will have to lure an evil spirit out of him and attack it. If you will not kill the spirit in time, he can finish off the boy. This is why a separate savegame is advised.
Defeat all enemies, and if Tig is saved, speak to him. Get out of the village, killing the rest of the lizards, and then leave the location and go back to the capital, where you need to talk with Jenna in the tavern. The quest will be completed. By the way, even if you don’t save the boy, you will still need to talk to her and tell her about the tragedy.
You will increase loyalty by three points and get 600 XP.
Nature of the Beast
When traveling to the left of the fortress, you will meet some trolls attacking merchants. Help them and find out about a mage living nearby. He should know how to end these scoundrels. At the same time, you will learn about the existence of Hodag — a monster that Amiri requires in her personal quest.
Go the nearby Lone House location, finish off some enemies and find Bartholomew in the upper right corner of the map. He will ask for help in the battle against the troll. Honor his request and select the first option to instantly go to the enemy. You can also have some preparation time and go to the place by yourself (left part of the map).
After your victory, talk to Bartholomew, go to his laboratory and head down. Examine the troll behind the bars, talk to the scientist and complete the quest. This will advance you through the Troll Trouble storyline. In the end, you can order Bartholomew to release the captive troll or leave him as is.
A Score to Settle
You have to find the Ruined Watchtower to the left of the fortress and go there.
Head down the path and meet a dog. Follow the dog until you find a man called Ekundayo. Talk to him to begin this quest. The ranger will join your group.
Go to the place where trolls’ lair is located, enter the fortress and turn left from the first room to find the one who killed Ekundayo’s family. On your way to the leader you will be able to decide what to do with the trolls’ kids — kill them or let them be. The quest will be completed.
Gnarled Branches
To the bottom left of your fortress, there is a special mark shaped like a house — Swamp Witch’s Hut. Head there, in the upper right corner you will meet two fairies — Falchos and Tiressia. Talk to them, they will ask you to kill the Scythe-Tree, who destroyed the village. The monster is in the lower right corner of the location. After killing it, go back and report on completing your task. You get 450 experience points as a reward.
Coins for a Dead Man’s Eyes
In the Swamp Witch’s Hut location, which we have already encountered in the Lost Child and Gnarled Branches quests, look for the village in the lower part of the map. There is a ghost near one of the houses — talk to it to start the quest. The ghost will say that it can’t fall asleep because of the lights visible in the well.
The well is to the left of his house. Go there and interact with it. Defeat the sinister lights (skulls), search them and find some coins. Take the coins and show them to the ghost. Put them on the altar to complete the quest and allow the ghost to finally rest in peace. This will net you 450 XP.
Renowned Explorer
To the left of your fortress, there is a Ford Across the Skunk River location. Go there, explore the area and help the gnomes, who were attacked by kobolds led by Tartuccio. After this, deal with the stuck cart, and then talk to Jubilost. He will join your squad, and you will need to continue the quest by finding the old fortress. As soon as you are on the spot, the quest will be completed. As a reward, you will be given 1800 experience points. You will visit the place anyway during the main campaign, but there is also a marker clearly indicating where you need to go.
Guiding Beacon
You can pick up this quest after you visit Bartholomew during the Nature of the Beast quest. Return to the Lone House location, head down to the lab and save a man from the trolls. Loot their bodies to find a silver thingy and begin the quest. Either keep the whip to yourself by telling Bartholomew about it (or lying about not finding the item) or return the item to its owner, who will reward you with 1500 coins and 375 experience. The quest is completed.
The Curse of Candlemere
To the bottom left of your capital is the Lake Candlemere — there is also a small island with a tower in the middle of it. Proceed to the location. Take a look at the booty near the boat to learn about the adventure seekers who went here before. It will trigger the quest. To complete it, go to the top of the location and proceed to the hill. Among the ruins of the fortress you will find the portal and Rismel in front of it. Talk to the man and help him destroy the creature. The quest will be over, and you can either leave the man alone or finish him off.