Table of Contents Show
Womb of Lamashtu Walkthrough
Travel: Womb of Lamashtu
While a responsible ruler would head back to Tuskdale first to deal with the monsters that may well be savaging their populace (hence why it’s listed first in the guide) if you want to save both Kesten and Jhod, you’ll want to head to the Womb of Lamashtu, first. To get there from the Goblin Fort area, follow these directions:
- North
- East (along the Gudrin River)
- East
- North
- Northeast to landmark: Lake Silverstep Village (across Lake Silverstep)
- East
- East
- East
- Southwest
Rescue Kesten
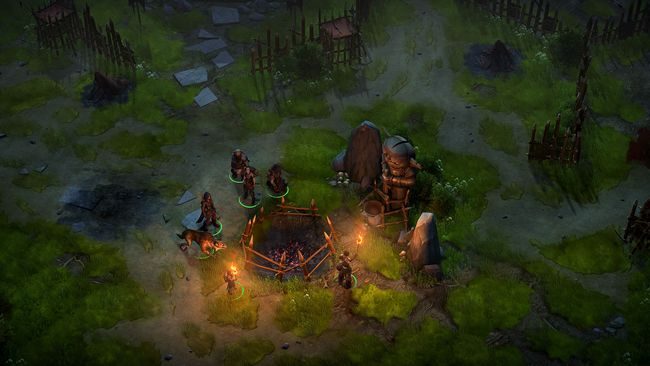
When you arrive, make your way down a passage to the east, where you’ll find Kesten. If you arrived in time to save him, some of his fellow guards will be alive, and they’ll be fighting a group of goblins, with melee combatants in the front and archers in the back (to the east). They shouldn’t present any trouble to cut down, especially with Kesten and his guards, but the Greater Enraged Owlbear that shows up after the goblins are smote may present a stiffer challenge. Kill the beast, then talk to Kesten to learn what little he discovered about this place, which he’ll implore you to explore more thoroughly. We can do.
If you arrived too late to save Kesten (you basically did anything but come straight here after leaving the Goblin Fort) you’ll find Kesten facing off against the Greater Enraged Owlbear alone, the rest of his companions long since fallen. It doesn’t matter if you stop the Owlbear from actually defeating an artificially weakened Kesten (say, with a spell like Hold Monster), Kesten’s already too wounded to survive, and will manage little more than to weakly inquire about the fate of the capital before expiring. At least he died a warrior.
Tip: If you’re trying to save both Jhod and Kesten, now is the ideal time to return to Tuskdale and save Jhod.
The Southern Passage
When you’re ready to move deeper into the cavern complex, note that there are several passages you can explore, one to the south, one to the east and one to the northeast.
Go south first and halfway down the tunnel loot a chest to score 193 GP and some potions. At the end of the tunnel you’ll find another lootable object containing a Taldan Warrior’s Dog Tag.
The Eastern Passage
Return to the chamber where you met Kesten, then head down the eastern passage to reach another chamber, inside of which are several Primal Giant Spiders. You’ve fought a few of these before, but now they’re in numbers. They have moderate HP and Armor Class, and a decent Attack Bonus – enough that they should miss your tanks more often than not, but they do a fair amount of damage when they do hit.
All in all, they’re weaker than the owlbears you’ve been fighting for a while now, but they do come in greater numbers and have enough damage potential and staying power to be a nuisance, especially if you can’t keep them focused on your tanks. You also need to be wary of their poison, which most of your warriors will easily resist, but multiple hits and bad rolls can be a compounding nuisance.
Use a tank to lure them to the mouth of the passage where you can bottleneck them, then kill them with those favorable odds. You’ll be repeating this trick regularly in this dungeon. Stoneskin will reduce most of the damage they deal each attack, and spells that boost the Armor Class of your tanks even a few points will drastically reduce their offensive output, making Shield of Faith a great cast for this place. Haste, of course, will work wonders, but it’s best saved for situations where you can’t bottleneck the spiders easily. They tend to be somewhat… ambushy…
Eradicate these pests, then note three chests that lie around this chamber: one to the north, one to the east [Perception 30] and one to the south. Also note the rock you can loot to the west [Perception 7]. The rock yields a Taldan Warrior’s Dog Tag, the northern chest [Trickery 27] will leave you richer by 197 GP and a variety of gems. The southern chest contains 166 GP, a Taldan Warrior’s Dog Tag, some gems and a Masterwork Javelin. Finally, the eastern chest [Trickery 30], which was so well-hidden, justifies the skill checks by bestowing upon you a whopping 1,111 GP and a Headband of Inspired Wisdom +4.
Before you leave, note the vine-covered ledge to the southeast – your destination. Well, a step on the way to your destination, at least. Shame you don’t have any flight or levitate spells…
The Northeastern Passage
Return, once again, to the chamber where you found Kesten, then head northeast into a surprisingly large cavern. Kill several more Primal Giant Spiders, which are just an appetizer for the fights that lie ahead. In the back of this cavern you’ll find more foes, including an old friend, the Giant Slug, which is accompanied by more Primal Giant Spiders. Focus on the Giant Slug first, as it has a higher Attack bonus and deal much, much more damage than the Primal Giant Spiders. Fortunately the Giant Slug doesn’t have terribly much staying power, so cut it down and mop up the spiders. When the invertebrates are all dead, loot a chest to the southeast to find 294 GP and two potions.
There are three passages branching off this second, spider-infested chamber: one to the north, one to the northwest and one to the south. Go northwest first and you’ll spot a Redcap, which will quickly run deeper into the chamber. Suspicious? You’re right, as, if you chase the Redcap, several Primal Giant Spiders will appear and attack. Head forward with just your tank(s) and when you provoke the Redcap, retreat southeast to narrower terrain and dispatch the Redcap, even if it provokes an Attack of Opportunity. If you don’t lure the spiders, great – kill the Redcap then lure the spiders to you and give them the same treatment. Fighting them three at a time while keeping your squishy characters safe is a far better tactic than rushing on in.
More carnage awaits, and this time you can’t do as much to avoid it. That said, you can – and should – spell buff, with your longer-lasting buffs, then wait in the middle of the chamber until a Giant Slug wanders in from a passage to the northeast. Show restraint and let it come fully into the chamber where you encountered the Redcap and slay it, as you don’t need it slithering its way in during the next encounter. If you approach the treasure in this area, more spiders will spawn and attack, including spiders to the south and in the northeastern passage the Giant Slug emerged from.
To counter this threat, send your more reliable warrior (buffed with spells like Blur/Displacement/Greater Invisibility) south so they can single-handedly intercept the spiders there. Keep the rest of your fighters north, and your weaker characters in between the two. Be sure to cast Haste before moving everybody into position, and provoke the spiders by heading over to the northernmost chest in this chamber. Be aggressive and force engagements when they arrive so they leave your weak characters alone (whom you should promptly move to a safer spot – like to the northwest, near the aforementioned treasure chest). Keep an eye on the multiple conflicts and be ready to move characters around as needed, as the spiders aren’t above breaking off from your warriors to seek out softer prey.
When you emerge victorious, note the two chests in the chamber: one to the southwest and another to the northwest, in between which is a rock [Perception 7]. The southernmost chest contains numerous scrolls, while the northern one [Trickery 28] will yield the Decapitator, a Falcata +2 with the “Keen” property – a good weapon, should you have a character who can wield it. Finally, loot the rock to obtain a Shard of Knight’s Bracers.
Loot the spider-crammed chamber, then head up the northeastern passage the Giant Slug used, being wary of a trap [Perception 24] [Trickery 24] at the end of it. This passage opens up into another chamber, which at first glance appears thankfully vacant. Along the northern end of the chamber you’ll find some Edible Moss, and east of that sits a pair of chests. Treasure in monster-infested caverns rarely comes free, you know, save for that treasure you found unguarded earlier. In any case, caution is always warranted, and this case is no exception, as the ground in front of the chests is trapped [Perception 20] [Trickery 20]. With the trap disarmed, loot these chests for a Longsword +1 in the western chest, and 182 GP, a Masterwork Greataxe and a Scroll of Haste in the other. There’s also another rock [Perception 7] you can loot for a Taldan Warrior’s Dog Tag.
This chamber also has three passages leading out, but since the western one leads back to the spider chamber, the southern one back to the, well, the first spider chamber (lots of spiders in this place) that leaves only the southeastern passage. Head over there and, of course, it’s trapped [Perception 24] [Trickery 24] at both its northern and southern ends. Disarm both traps and note the four Primal Giant Spiders waiting for you in the cavern beyond. The strategy here should be obvious enough: lure them into the passage you traveled through to bottleneck them, using their size against them to enjoy two-to-one or three-to-one melee odds.
Smash the arachnids, then spellbuff and move south into the chamber they occupied, leading with your tanks, leaving your squishy characters behind. As you approach the center of the small chamber you’ll predictably enough be ambushed by another batch of Primal Spiders (who are quite spread out, but do not spawn behind you this time) and two Redcaps, including a Redcap Trickster. This new Redcap’s damage potential is significantly higher than his more common counterpart’s, as he can deal hefty sneak attack damage, so make him a priority, if possible. When they’re dead, loot a well-hidden, locked [Trickery 29] chest to the east to score four Scrolls of Cure Critical Wounds.
Twisty Little Passages
When you’re done looting, turn your attention to a passage to the south, marked on your map as a “Twisty Little Passage”. Enter it and you’ll find yourself in a vine-covered chamber to the southeast, wherein rest two chests. One can be found to the east of where you appeared, and it contains a Composite Longbow +1. Another, sneakier chest [Perception 29] can be found to the southwest, and it’ll leave you richer to the tune of 377 GP and several potions.
There are now two area transitions in this vine-covered chamber: one to the southeast and one to the southwest. Head through the southeastern area transition and you’ll find yourself in another, larger chamber that’s as blessed with foliage as the previous one. Unfortunately, it also has some other residents… of the eight-legged variety. These mostly include Primal Spiders, this time led by a Primal Spider Matriarch, who has much more HP and a higher attack bonus, as well as 25% concealment, making her a far more potent foe than the lesser spiders.
Spell buffs will be helpful here, but may not strictly be necessary. Just be sure to keep your position along the northern end of the chamber to protect your weaker characters and keep an eye on the crafty spiders, lest they find themselves an avenue to attack your weaker characters.
When the spiders are smote, continue south and loot a chest to the east to find a Wand of Lightning Bolt. Other than that, continue west to find another chest (which contains some gems and a potion) near an area transition overlooking a cliff.
Use this western area transition to enter another small, vine-covered chamber, which is nothing more than a hub area. If you use the northern area transition here you’ll return to the first vine-covered room you entered into, rendering moot the need to explore the southwestern area transition in that chamber. You can no longer reach the area transition you used to come here, which leaves only two area transitions to the west.
Through the northern of these two western passages is a hellacious fight that’s going to require you to spell buff to the max – and perhaps a bit of good judgment and luck – to win. Start with the longer-lasting buffs like Bless, Blur, Shield of Faith, Bull’s Strength and Stoneskin, and work your way through the rest, ending with Haste and Burst of Glory. If you have the ability, protecting your warriors with Delay Poison won’t hurt, either.
When you’re ready, save your game and use the area transition to reach a rather unassuming-looking chamber. While it may look innocent enough, should you venture forward (do so only with your strongest tank) Primal Giant Spiders will emerge and attack. Four at first, no big deal, but when their numbers are reduced, another group will spawn – possibly in an inconvenient place for your weaker characters. This will happen repeatedly until a dozen Primal Giant Spiders have appeared (including another Primal Giant Spider Matriarch). While you shouldn’t have to fight too many at once, they’re sturdy bugs, and it’s nigh impossible to keep them focused on your tanks. Summoning monsters may help to throw enough bodies in their way to allow you to coordinate your party members, but you’ll almost certainly have to scramble your weaker characters at some point to keep them out of trouble, so simply turtling up along a wall probably won’t work.
Kill the dozen or so bugs that threaten you, then loot a chest [Trickery 28] to the north to gather 322 GP, some gems, scrolls, and… Silver Eels? Who keeps seafood in a chest?! Animals. Another chest to the west will yield an Amulet of Natural Armor +2, which you can certainly find a home for somewhere.
Whew. Nobody will blame you for resting after that one. When you’re ready to go, use the area transition to the south, which takes you to a chamber to the southeast, the same chamber that the southern of the two western passages in the hub chamber would have taken you to. Another needless travel option removed!
When you arrive you’ll hopefully pass two Perception checks to note a rock [Perception 19] and a chest [Perception 30] to the west. Before you get too loot-happy, though, scout out a trap [Perception 24] [Trickery 24] in front of the chest and remove it. The chest in question holds 366 GP, some rings, a potion and a Masterwork Estoc, while the rock offers up a Taldan Warrior’s Dog Tag. Another, less secretive chest can be found to the east, but be wary of another trap (same checks as before). Unlock [Trickery 31] the chest to get at the masterwork weapons and potions within.
With this last bit of treasure looted, make use of another area transition to the southwest (save your game, first!) which leads to a Illustrated Book Episode! Don’t fret over this one too much, as it’s just a transitional device. There are no wrong answers and no checks to master, but getting out won’t be as easy as getting in was, so, again, save your game.
Warning!: Make a hard save before leaving the Womb of Lamashtu. You won’t be coming back until you resolve the following area.
Your directions to the Womb are slightly incorrect. It was two steps east of Silverstep. Going one more step ran me into the Varnhold guards.
Though I suspect I may have an unrevealed location on the path that throws off the count.
That’s where the walkthrough ends? WTF? Where’s the rest of the Womb?
Didn’t save Jhod, he still died even doing the womb first. So that part of the guide is inaccurate.
I was able to save both Jhod, and Kesten, using this walk through. thanks
pro tip: rest after clearing the Goblin Fort, and the prisoners who ‘bloom’ into monsters…BEFORE talking to Kesten which initiates (flags) the next part of the quest.
also load up your cleric with Lesser restorations. then go straight tot he Womb, save Kesten, do not waste resources ( especially not your Lesser Restores). then march straight tot he capital, THEN cast lesser restore ( or drink pots/use scrolls) on all your exhausted team, and march straight up the middle to initiate the BIg Boss Bear fight, Jhod will be there with you…Octavia kicked its arse with Scorching Rays while my tanks and the guards held it still…
You can also save both of them with a Lawful check by having Kesten take his troops to defend the capital, then returning there immediately after the gob fort.