Table of Contents Show
A Strike from the Sky Walkthrough
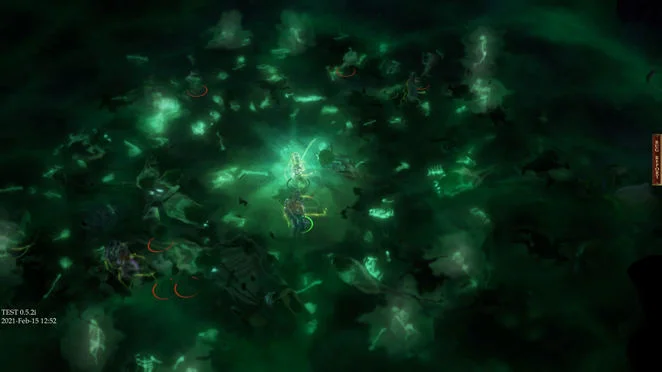
- When your army approaches Drezen, a random encounter may occur when you enter the war camp
- The camp is under attack by Gargoyles, you need to wipe them out while finding your other teammates. Lann will join you in the commander’s tent, Camellia and Seelah can be found at the war camp. (With high perception skill, you can catch Nurah involved in some suspicious activity.)
- Woljif will temporarily leave the party, you may later find him in the quest Crescent of the Abyss.
- The crusaders can help you a lot when fighting Gargoyles, if your character is a caster with low HP. Use these crusaders to tank the Gargoyles, while youn use spells from a safe distance.
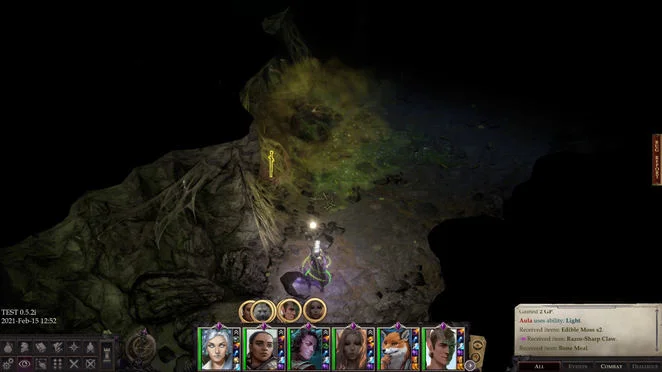
- The leader of the Gargoyles will take Irabeth and your other companions as prisoners at Lost Chapel
- A little north from the crusader’s camp at Lost Chapel, you can find Ember and Daeran, who just managed to escape from their captors.
- If you spared Yaker at Reliable Redoubt, and let Hell Knights join the crusader. You will meet him at the top side of this map, helping crusaders to escape.
- Sosiel is at the top right of the map, finding him progress his personal quest A Veil of Silence.
- Not far from Sosiel, you will meet a wounded crusader and some ghouls pretending to be corpses trying to ambush you. Prepare to attack, not warn them, so you can save that crusader.
- Further down the road, Regill is fighting some gargoyles with his units. You can let him join your team or send him to the foot of the mountain.
- Keep moving forward, you can save a crusader from the pile of bodies if you passed the mobility check.
- The gate of the lost chapel is guarded by ghouls, cultists, and succubus. Inside, you will find the ghouls are trying to execute the prisoners. Defeat them and loot for Amulet of Mighty Fist +2 and a Light Shield +2. (if you pass the Intimidation or Diplomacy check, you can prevent one prisoner from converting)
- In the basement of the Lost Chapel, you will meet Zacharius, a legendary hero of the crusade. However, he turns out to be a lich forced into the crusade, if you refuse to return his wand to him, you will need to fight him. (It’s a very difficult battle. However, as a Lich, he is vulnerable to positive energy. Use protection from evil and protection from chaos on your team, and use the summoned creatures to tank for you.
- Once defeated, Zacharius drops Dried hand of Martyr, CHA+2 headband, Natural Armor +1, Amulet of Protection +1, Ring of Protection +1, and a Cloak of Resistance +1)
- If you give back the wand to him, he will be freed with the promise to meet you again in the future. Note that this is an Evil action. (This is required for the Lich Mythic Path)
- Captured crusaders can be found across the Lost Chapel, if you managed to pass the Stealth check and kill the ghoul tormentors you can free them. In case you don’t manage to pass the check, the crusaders will be killed.
- Irabeth is in one of the rooms in the chapel, free her to progress the quest. (If Queen Galfrey joined the crusade, she can also be found in the chapel, and can help you clear Enemies.)
- Prepare your team before venturing forth, Nulkineth waits right next to Irabeth’s cell. Once you take down this enemy (loot: Flail of False Hope, Belt of Mighty Constitution, Cloak of Resistance +2), you will unlock the second level of Mythic Hero class.
- Once you have cleared the enemies inside the chapel, you can descend to the mountain foot using the path through the graveyard. There are lots of ghouls and Gargoyles wandering in this area, but you will also find lots of valuable loot, namely a +2 DR3/pierce chain shirt in a cave.
- Return to the Crusader’s camp and talk to Anevia to complete the quest.
- If you found suspicious perfume in Nurah’s tent, and caught her set fire, you can challenge her now. She will be revealed as a spy of demonic army, however, if you pick trickster Mythic Path, you can try to recruit her.
Banner over the Citadel Walkthrough
- After you clear the demons in Lost Chapel, it is time to retake the Drezen. If Queen Galfrey joined the crusader, she will lead the charge.
- The Hell Knights, eagle watch, and Nurah all propose a plan to the commander. However, Nurah’s plan turns out to be a trap. If you follow her advice, you will found yourself in the Drezen prison with lots of cultists and Minotaurs.
- If you agreed Hell Knight’s plan, you will appear at the west corner of the map. You also lose 10 morale. Regil needs to be in your party if you choose this route.
- In case you kept a sample of the slime that attracted the vescvaor swarm you can choose to do it now. You will lose 5% of one of your army units nearest to Drezen and 10 morale.
- The Hell Knights, eagle watch, and Nurah all propose a plan to the commander. However, Nurah’s plan turns out to be a trap. If you follow her advice, you will found yourself in the Drezen prison with lots of cultists and Minotaurs.
- You can take rests while sieging the fort, however, this may corrupt your characters. (Debuff, 15 spell fail chance, -2 Wis and Int, -3 CMD/CMB)
- There are three hidden key holes (on top right of inner wall) to unlock the last gate before the balor and avoid having to fight the waves that come when you batter it down. The keys can be found on enemies in Prison, in tarven, and in temple.
- While inside the fort, you are also affected by Demonic Murmurs. (Every ten minutes you need to succeed a 14 Will check or suffer Charisma damage.) In order to remove the debuff, you need to find the torture chamber on the right side of the fort, then activate murals on the wall. (Need to pass Knowledge World 20, Knowledge Arcane 25, Lore Religion 30. Fail the checks will summon a group of enemies.)
- To the south of murals room, there are several undead enemies. Once you defeat them you can pass a Athletic check to reveal a hidden room, there’s a vampire sleep in a coffin, kill it to get a +2 rapier.
- If you have radiance (the long sword you found in Shield Maze.), the dwarf blacksmith Vhane at the furnace will upgrade it to a +2 cold iron long sword.
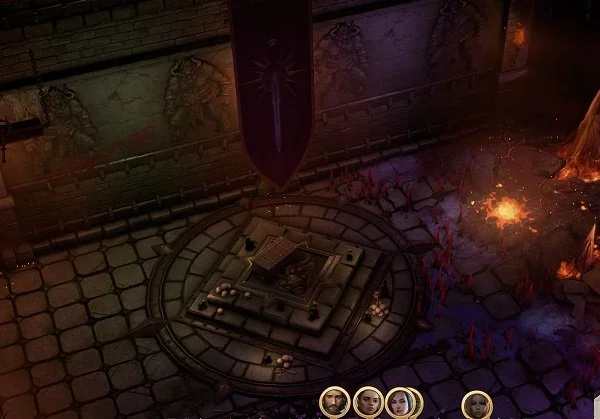
- There are two Sword of Valor banners in the Drezen fort, the real one and a fake one. The one in the west hall is the fake one, touch it will only trigger the trap, and summons fireballs and a large group of demons.
- The real banner is hidden in a room in the south. To reach there you need to fight your way through a large pool of corpses, and use the secret passage revealed by “Yaniel”.
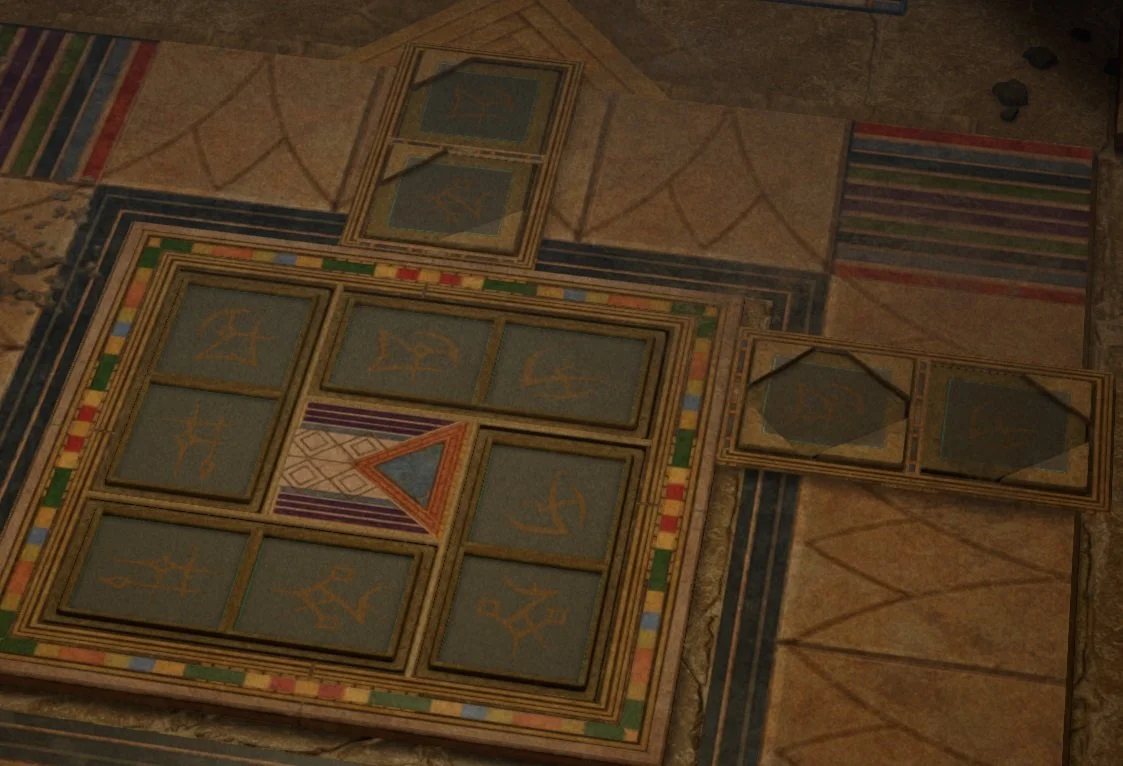
One of the solutions to Drezen Fortress puzzle:
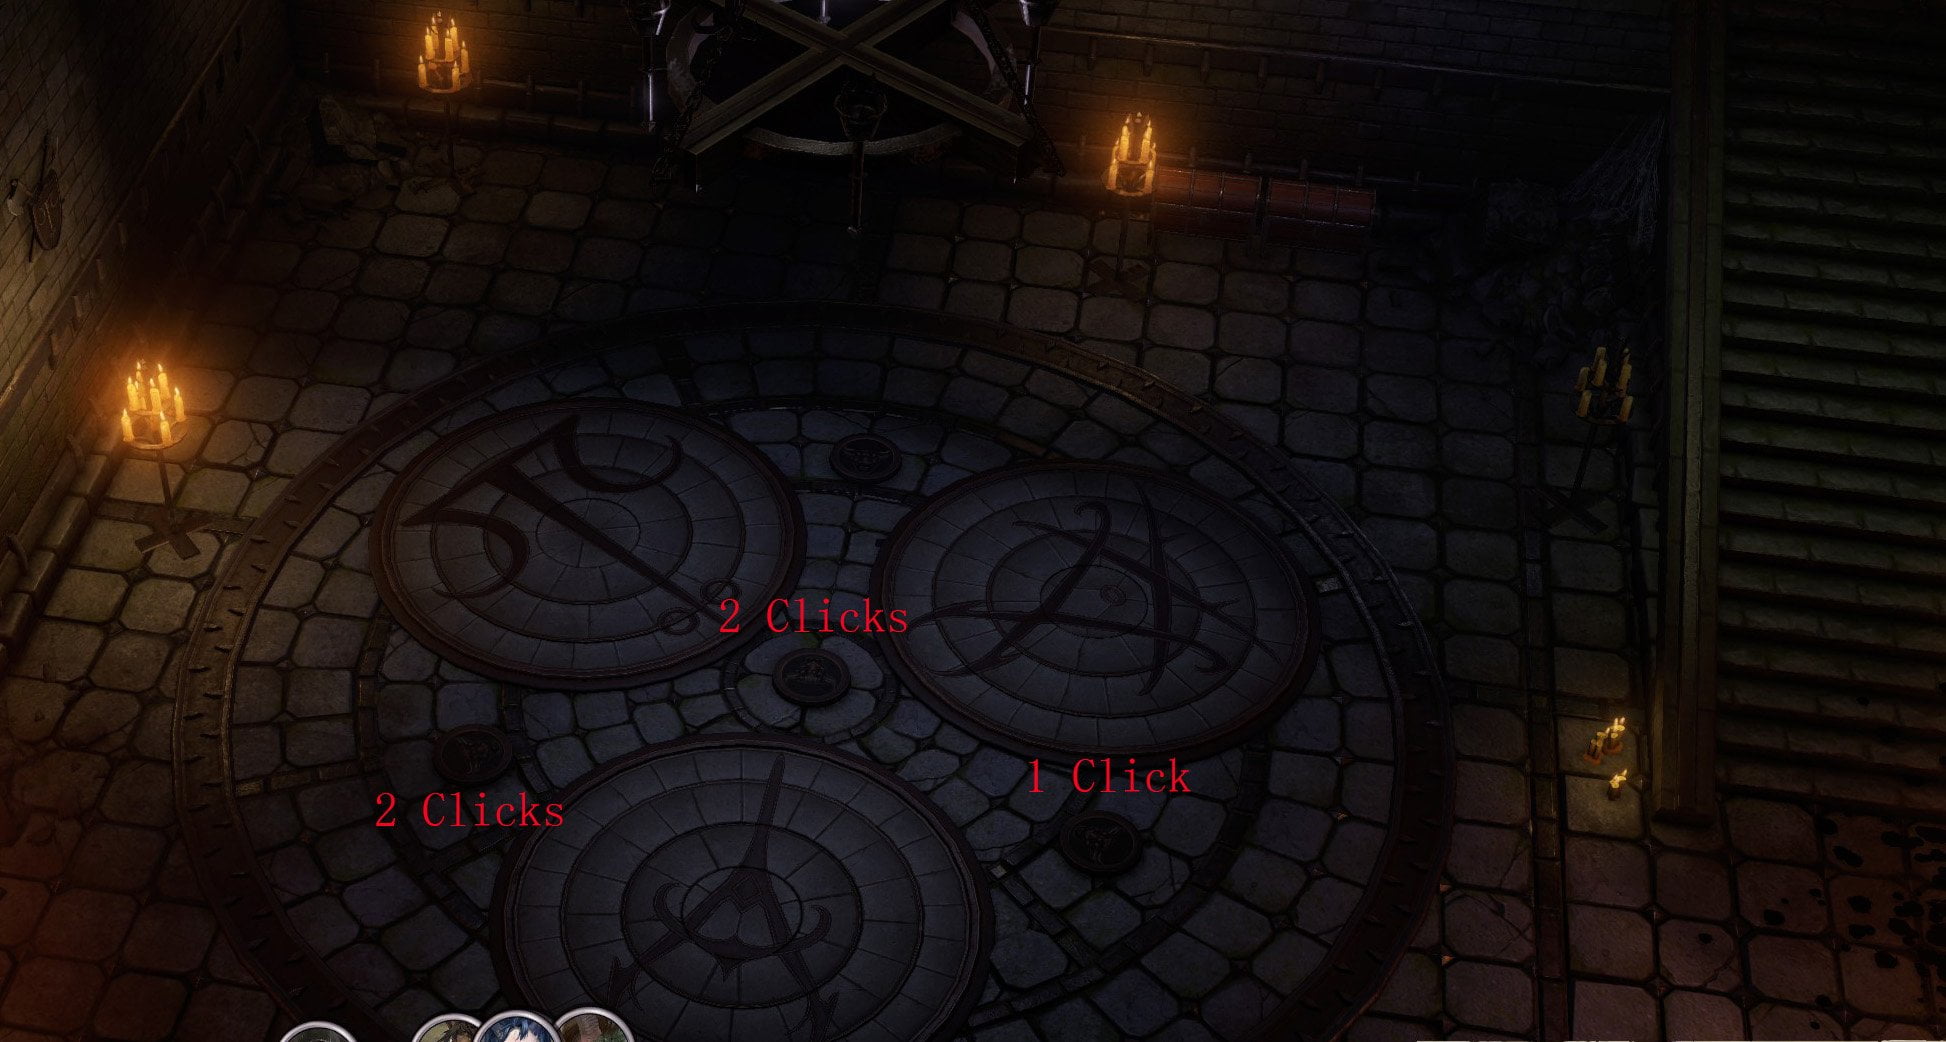
(You need to rotate the sigils to deactivate the traps, be careful once traps are deactivated three demons will appear to attack you.)
- Once you put the Valor of Sword Banner on the wall, you will unlock the third Mythic Level. This time, you need to decide which Mythic Path you set foot on. (Advanced paths, like Swarm-that-walks, Gold Dragon, Legendary and Devil can only be unlocked later.)
- If you pick Trickster path, and found her betray before attack Drezen. You can ask her to side with you during the siege, as a mockery to her former master. You may later set her free (Recruit?).
By Hell’s Ordinance Walkthrough
- In order to reach Reliable Redoubt, first, you need to defeat the gargoyle fort blocking the path. (Be sure you have an army with a strength of 4 or higher. Gargoyles have damage reduction.)
- The map is filled with Gargoyles, they can drop from skies to attack your casters and can cast smite good, so try pushing slowly while protecting your casters. At the center of this map, you can help a wounded crusader and gets Bastard Sword of Hope.
- Look for the cave located on the east side of the camp. Inside the cave, you can work with hell knights to deal with incoming gargoyles, or you can fight them alone.
- After the battle, you can decide to transfer the command of Sunrise Sword order to Hell knights or to yourself. You can also recruit Regill afterward.
- If you pass the mobility check, you can reach another part of the cave and find a ring called Demonic Heart.
- If you let Hell Knights join your crusade, you can recruit Hell Knights for your army. They cost 150 finances and 8 resources each.
- If you helped the Hell Knights, they can provide an additional route to storm Drezen later.
The Beginning of a Long Road Walkthrough
- Examine the camp site with Irabeth, you need visit the site of Eagle Watch, recruits from Nerosyan, Kenabres knight and army quartermaster.
- Go to commender’s tent and talk to the queen.
- Note: If you want to romance Queen Galfrey, ask her to join the crusade. If you want to pick the Swarm-that-walks mythic path, do not take her.
The Music of the Abyss Walkthrough
Travel slightly northeast of Nameless Ruins to Leper’s Smile to trigger this quest. After choosing who to sacrifice to the vescavors (you can go with various party members if you “look into the faces of your companions”), decide whether to fight or scatter. The former option will see whoever you chose to sacrifice die (well, most of them)
Buff your party (particularly anything that helps Fortitude) and equip non-piercing/slashing weapons if possible, then press forward as you fight your way through the swarms.
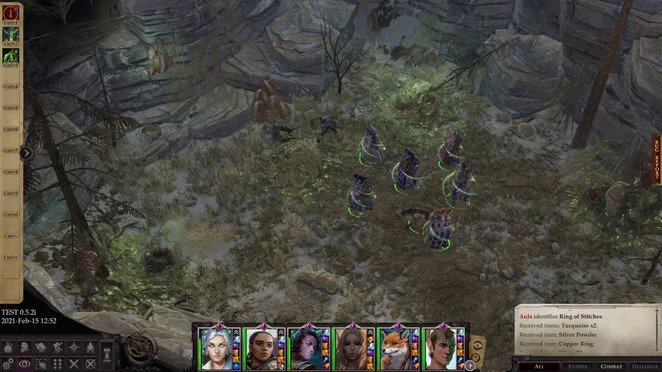
Take your first left and loot the camp to acquire Silky Veilds (robe). In the southwest corner with the two swarms you’ll find Ring of Stitches. Slightly north of that you’ll encounter Vescavor Royal Guard and find Keen Shortspear +2.
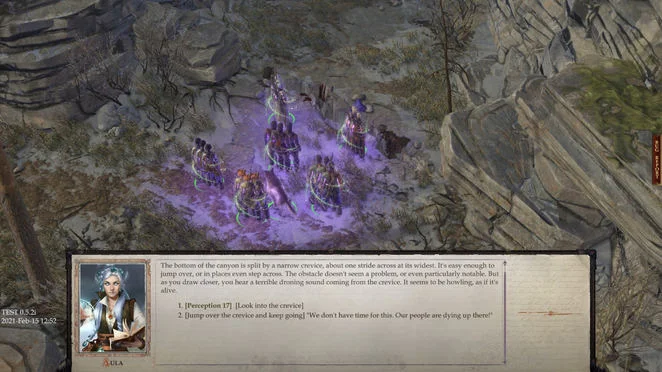
In the center of the map you’ll find a narrow crevice, from which a strange noise emanates. Passing the Perception check will reveal a person of small stature at the bottom; failing the Athletics check will see the vescavors eat him alive.
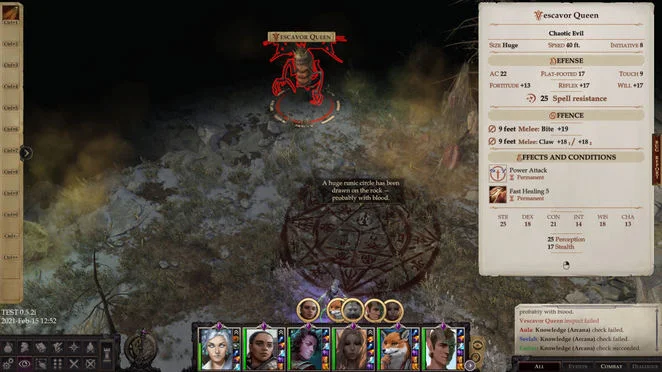
Further north you’ll find the Vescavor Queen at last. Buff up then target her with Fortitude spells like Ray of Sickening (after using Vulnerability Curse for her high spell resistance). Keep a close eye on your tank too, as they’ll take big damage here.
After the fight, you’ll discover a handkerchief was planted on you to attract the vescavors. Gather up the queen’s goop if you want to use her swarms in the fight to come.
Nurah will show up next and ascertain someone recently summoned the Vescavor Queen. Loot the body in the corner afterward to acquire Hunter’s Assurance (shortbow).
Wight cave
Take the exit into the cave, where you’ll fight Wights. Northwest, along the water you’ll find a skeleton holding Belt of Incredible Dexterity +4.
Further along you’ll encounter Garkel and his Wight minions. All of them will continue to rise after being “killed” unless you use the Wand of Zacharius in the box along the shoreline. If you go with the evil option, the corpses will be sent into oblivion and you will earn 54XP; the good option will force you to fight and kill them. Loot the area afterward to acquire Curse Pilaff (recipe).
Back at the entrance, take the northeast path now to find Longsword +2 along the left wall with the larvae. Continue on north to fight two Vrocks, which should drop easily. Loot the humans afterward to find Radiant Kukri +1.
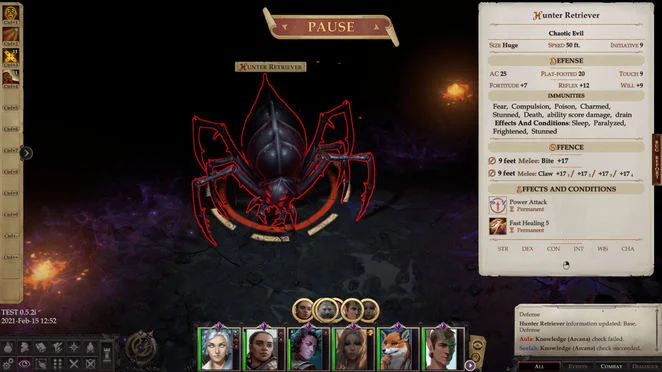
Backtrack a bit, going south then east to battle a couple Derakni. Post-fight, look for the Athletics check on the northwest side. Pass it to fight Hunter Retriever, the boss. Haste + Ray of Exhaustion will work wonders here. After the battle, loot Retriever’s Claw (dagger) from the body as well as Amulet of Apothecary from the human body to the right.
Loot Voice of Hollow (1H mace) in the rear corner (east side of the map) near where you fought the Derakni, then exit the cave, making sure to take Vermin Bane Elven Curved Blade +2 with you.
Take the ladder above the ritual symbol out to the world map.
The Secrets of Creation Walkthrough
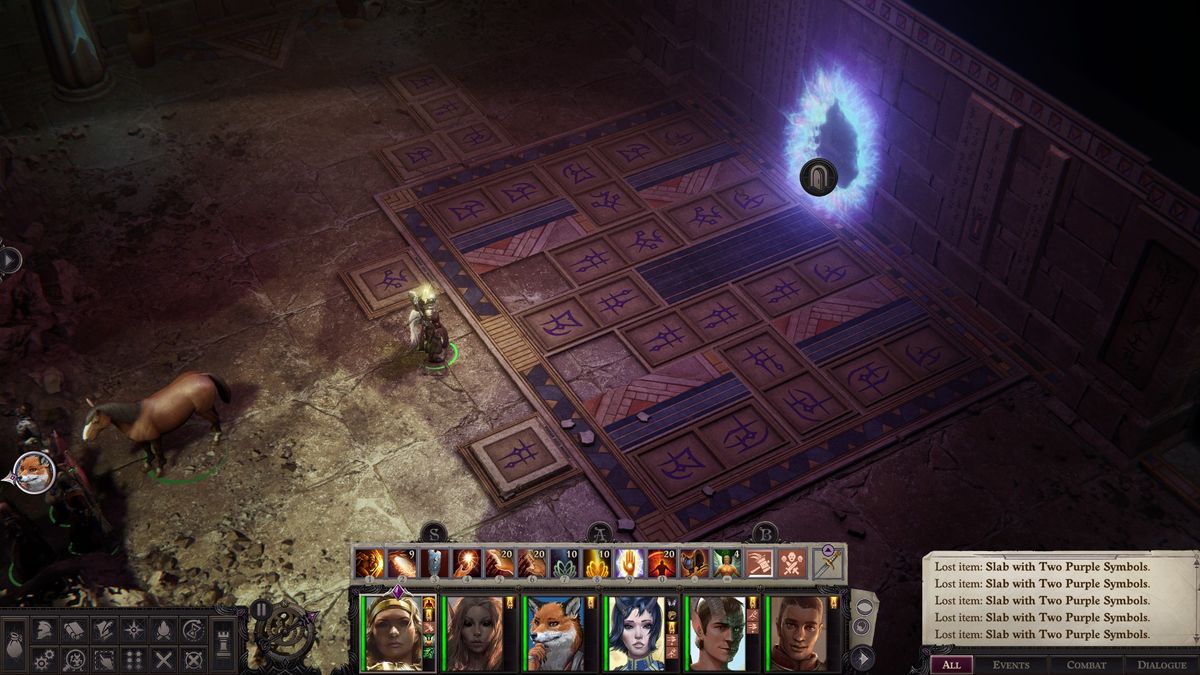
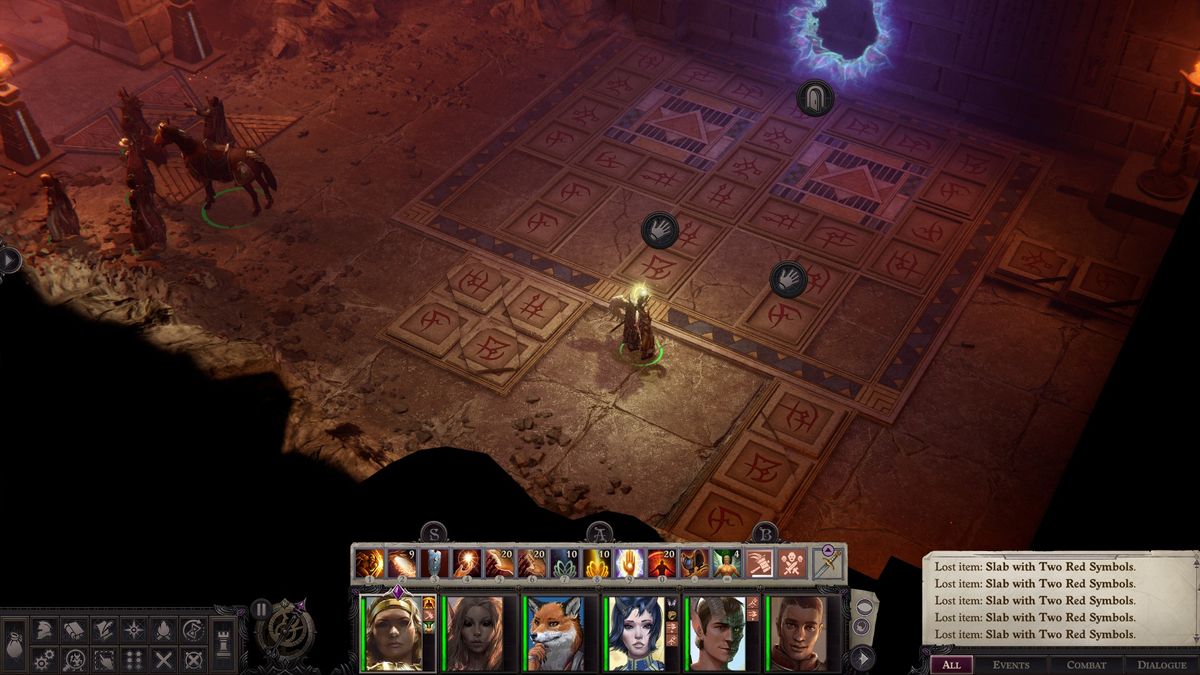
This quest is unlocked after you solved the puzzle at Conundrum Unsolved. The solution is pictured below.
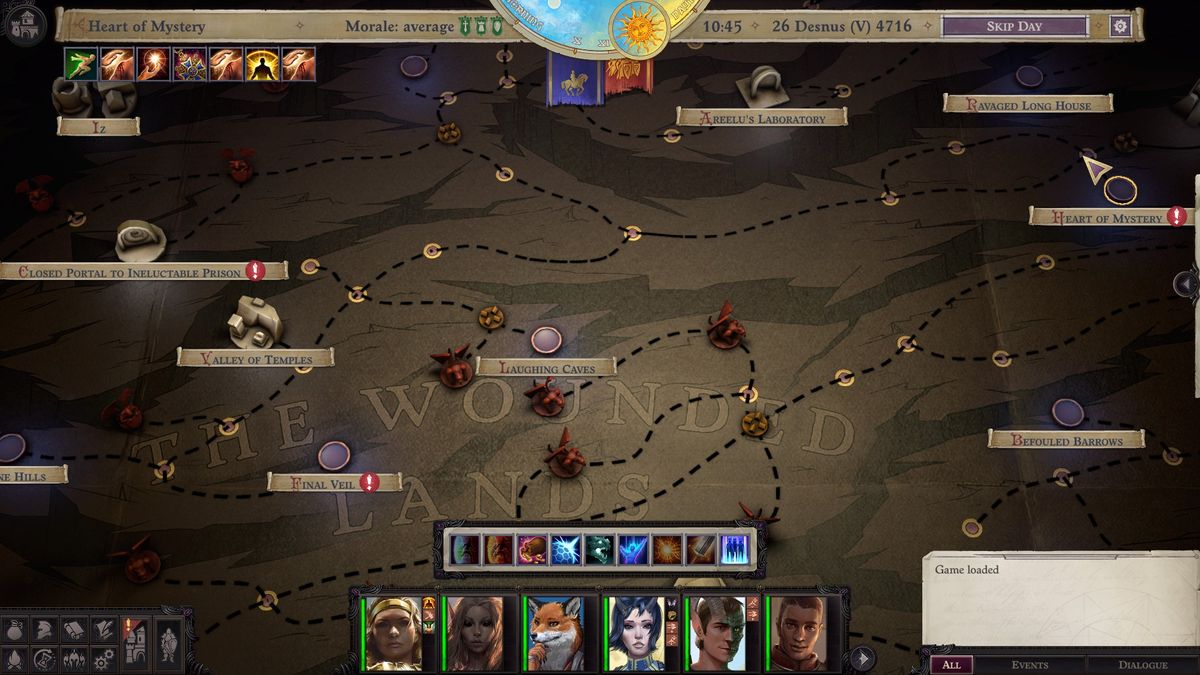
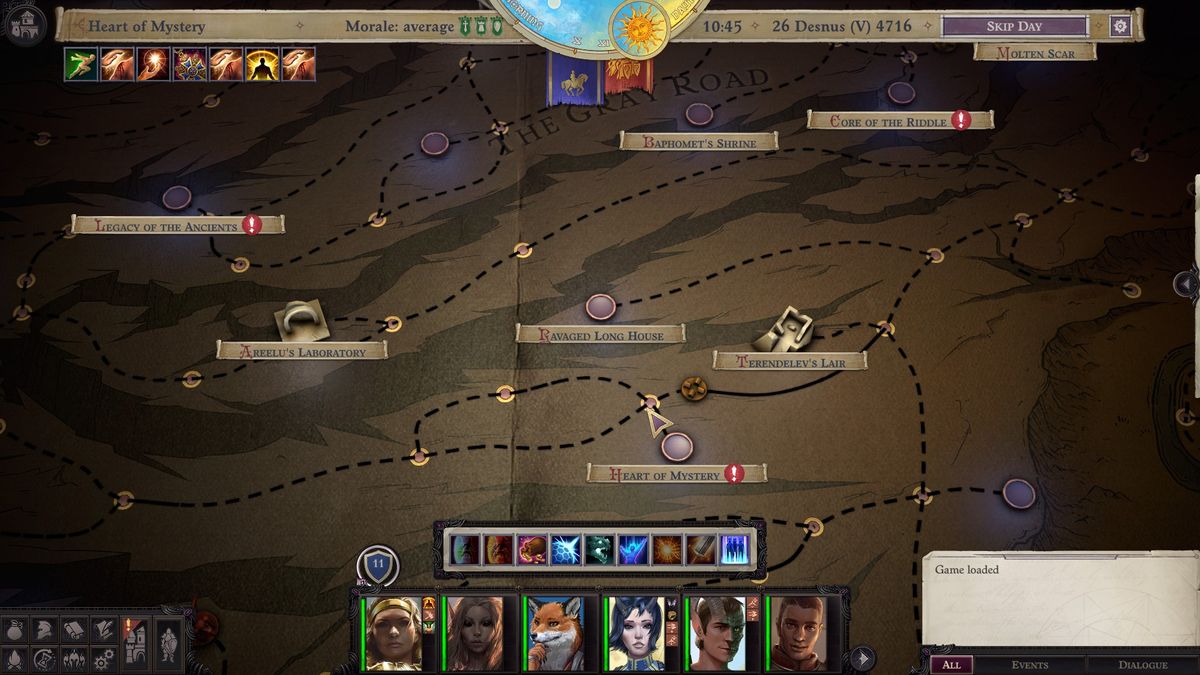
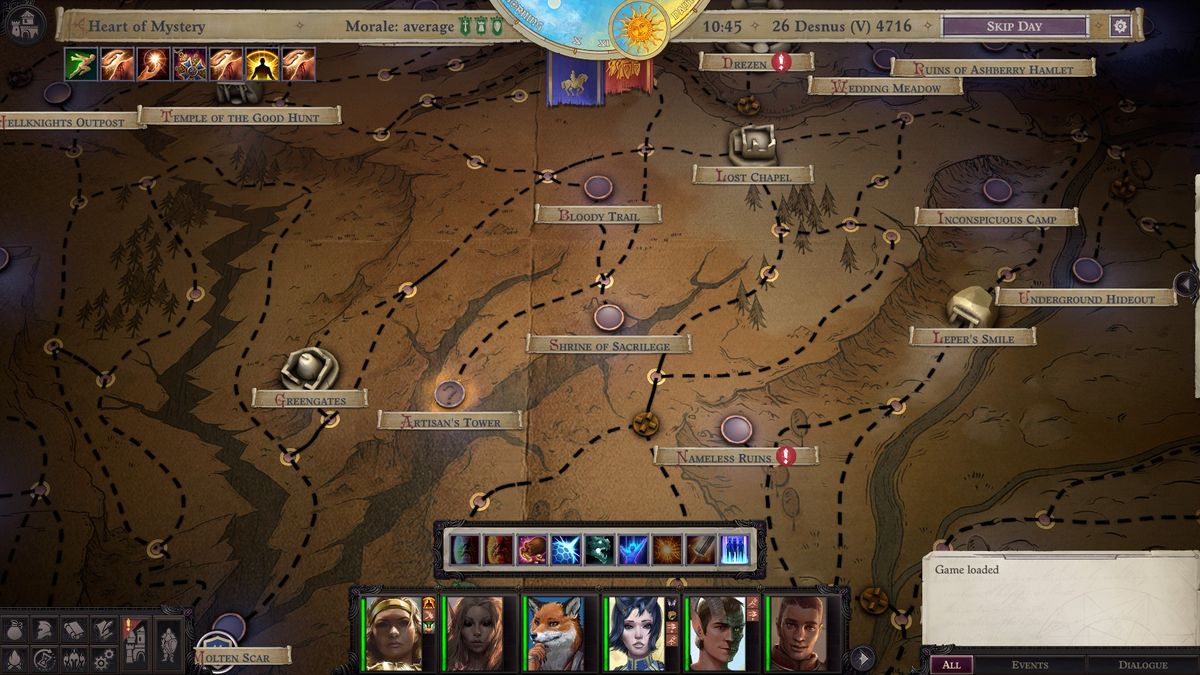
In a random encounter, you will meet an ancient spirit, answer his question (Lore: Nature checks) and he will reward you the key to Legacy of the Ancients. Later, you can meet that spirit again in various different random encounters, each time you answered his question correctly, you will get some high-level scrolls, and he will reveal one of the locations (Forgotten Secrets, Final Veil, Core of Riddle) related to the quest.
You can find slabs in Ravaged Long House, Shrine of Sacrilege, Bone Hills, and Place of Execution.
Solutions to puzzles can be deduced from the tiles places around the outside. They indicated which symbols must be used in the corresponding row, but not how many. One symbol means only that symbol in that row. You can work out the pattern from there, using the outer tiles to help you build the final picture. (Solutions can be found on the location pages).
Once you finished puzzles at Forgotten Secrets (slabs at Shrine of Sacrilege), Final Veil (slabs at Bone Hills), Core of Riddle (slabs at Ravaged Long House) and Legacy of the Ancients (slabs at Place of Execution), return to Heart of Mystery (slabs at Laughing Caverns) and enter the Enigma.
Secrets of Creation Puzzle Solutions
Solutions for the slab puzzles in Core of the Riddle, Forgotten Secrets, Legacy of the Ancients, Final Veil, and Heart of Mystery during the quest “Secrets of Creation”
Core of the Riddle

Slabs are found at the Ravaged Long House.
Forgotten Secrets

Slabs are found at the Shrine of Sacrilege.
Legacy of the Ancients
Slabs are found at the Place of Execution.

Final Veil
Slabs are found in the Bone Hills.
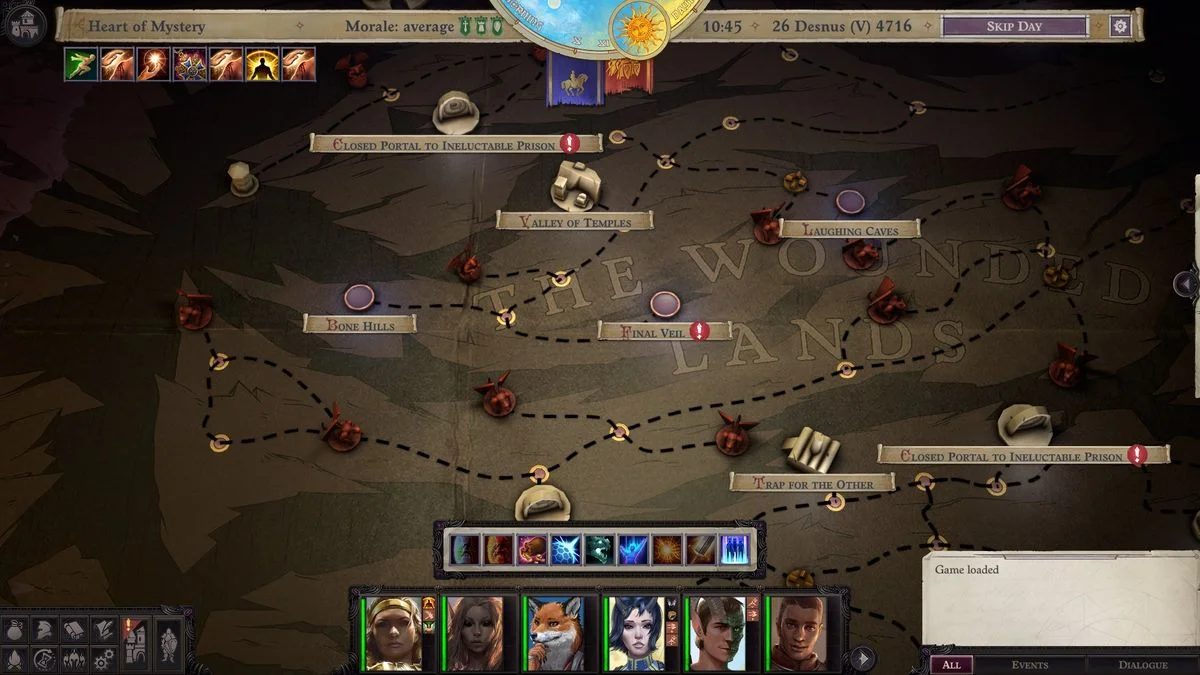
Heart of Mystery
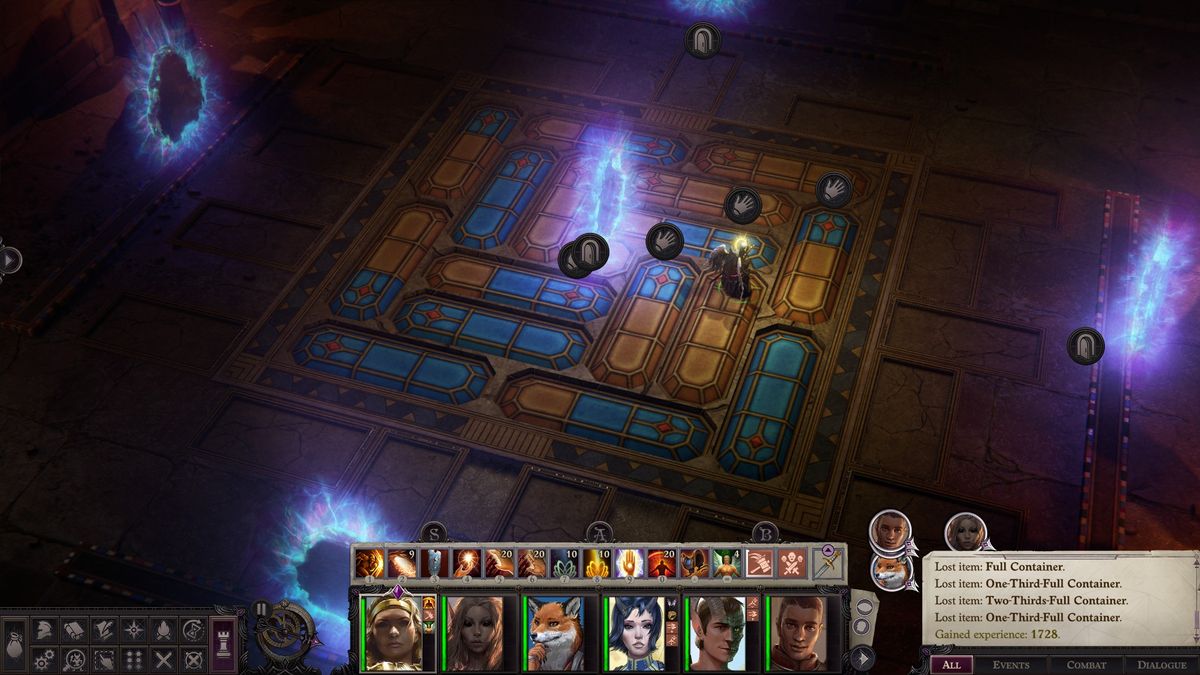
The containers are found in the Laughing Caves.