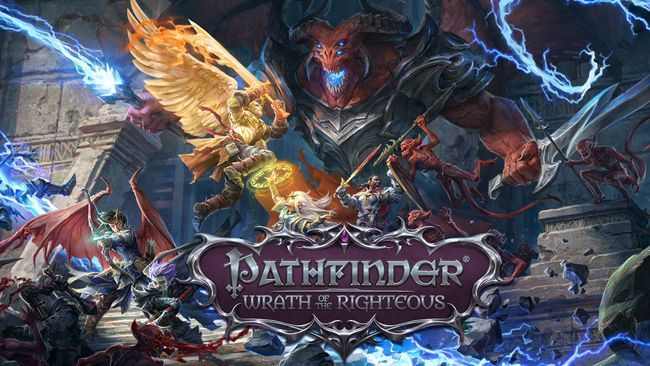
Table of Contents Show
Trapped in the Darkness Guide
Day of the City Walkthrough
Once the game starts, you are treated to a cutscene during a festival. Your character is brought along wounded to the festival. You learn that you were found barely alive outside the walls of Kenabres. Hulrum orders the guards to take your Weapons away, because they are not permitted during the festival. After that, he attempts to heal you, but realizes that his powers aren’t enough and ask for Terendelev.
Other Pathfinder Wrath of the Righteous Guides:
Hulrum proceeds to interrogate you about your origins. Terendelev shows up and interrupts Hulrum’s interrogation, before she heals you and talks to you about your situation and her status as a Dragon. She will ask you to meet her at the Cathedral tomorrow, to find a way to fully cure you.
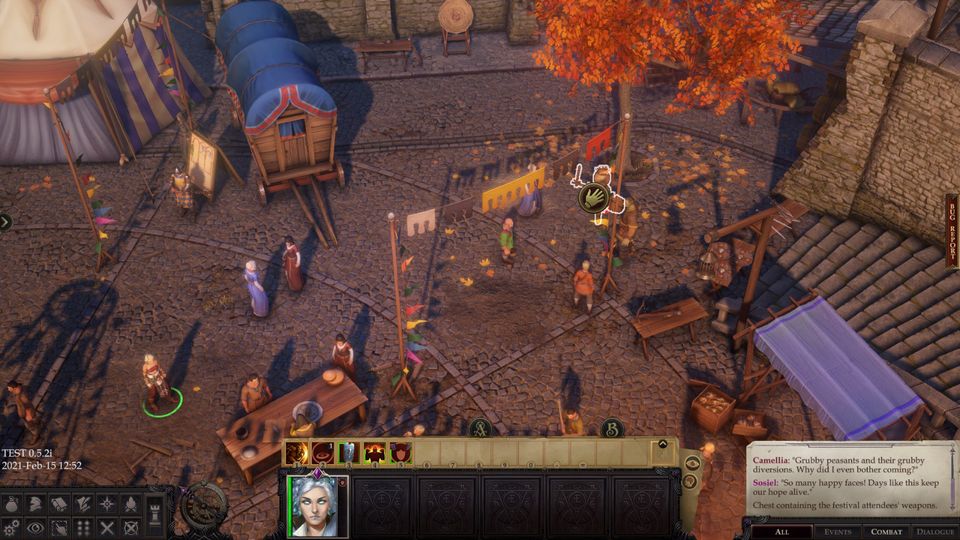
The dart stand can be found at the left of the big tent. Interact to start the game. To complete the Throw a dart at the target objective.
You will find a small drinking stand on the right side of the big tent. It has a few bar stools, interact with the bartender to try the special drink.
Once you finished 2 of the available activities, the demon army will appear and slaughter the defenders. Terendelev will transform into her Dragon form as Deskari, the Lord of Locusts jumps into the festival. The demon will cut off the dragon’s head using his giant scythe.
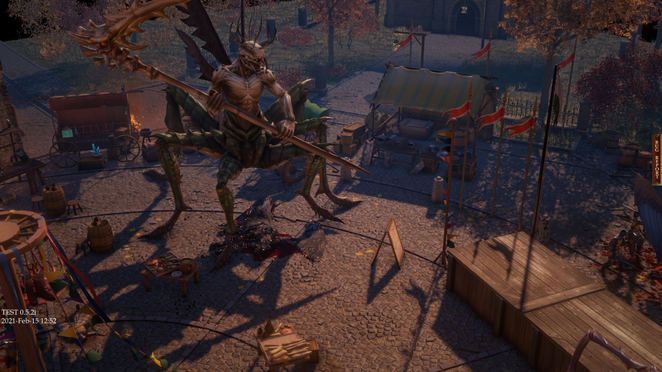
After that scene, you will be hiding behind a broken table. A guard will approach you, prompting you to choose between fleeing or staying to fight. Whatever you choose, Deskari will swing his scythe to the ground, causing you to fall into it and start the next quest Devoured by Darkness.
The festival organized to raise the spirits of the city has ended in death and destruction. Those lucky enough to survive ended up in the ancient catacombs beneath Kenabres, catacombs in which, so the rumors say, live a brood of bloodthirsty humanoid creatures.
Devoured by Darkness Walkthrough
You’re one of the lucky few that survived Deskari’s attack, so now you’re to track down the remaining survivors. After finishing Day of the City, you will fall into the hole created by Deskari. Once you wake up in the underground, you regain control.
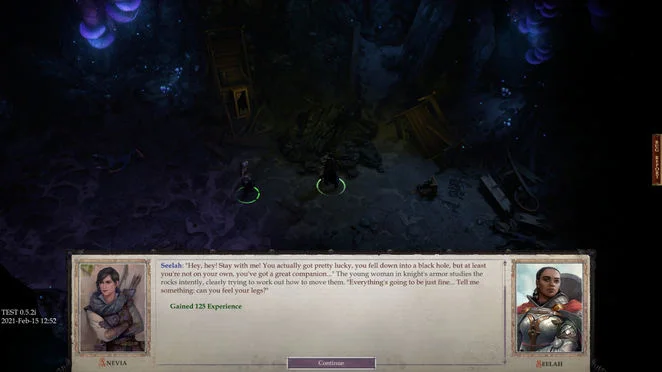
Up ahead you’ll run into Anevia and Seelah. Rescue her to avoid her becoming fatigued and incurring ability penalties (she’ll join your party shortly). If you go with the evil option, succeeding the check will net you 9 XP and 200G (Anevia won’t protest much).
Loot the chest ahead to acquire supplies, including torches and Cloak of Resistance +1. Equip both (the torch should go in your second hand if you don’t use a shield or two-hander). Continue forward to find Terendelev’s Scale on the ground and to meet Camellia, who will join your party without a fuss.
Swap off the torch now and instead use the Light spell (click the “S” on your hotbar).
Ahead, take out the enemies. Loot the body at the far east end of the map to acquire Bracers of Armor +1 and equip them to your party member of choice.
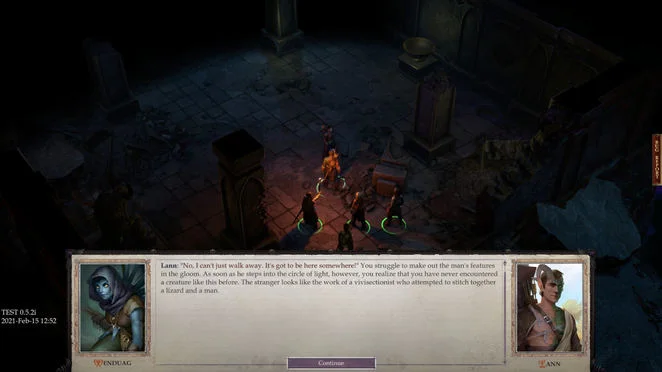
Take the west path now to meet up with Lann and Wenduag, who are looking for a holy sword. They won’t pay you to help if you ask, so offer for free.
Look to the north to find the sword among some rubble in the corner (adjacent to to the Mobility check north). Your choices here don’t matter as you’ll receive 125 XP and the “Angel Mythic Path” option either way. (Note: this is not the point at which you get to choose your Mythic Path – that comes later.)
Pass the aforementioned Mobility check to jump across the way. Up ahead (past the spiders and flies) you’ll find a second Mobility check. Pass that too then loot the skeleton at the end of the tunnel to find Wand of Cure Light Wounds.
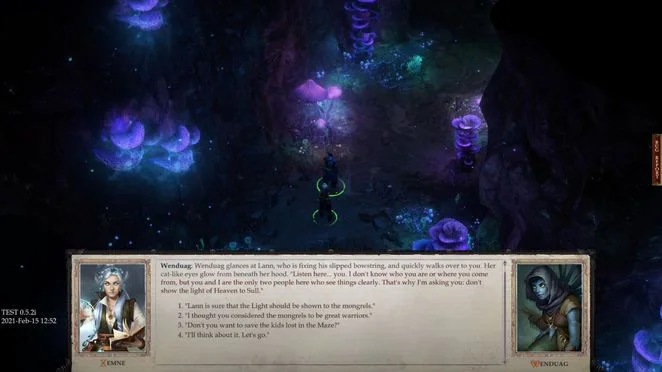
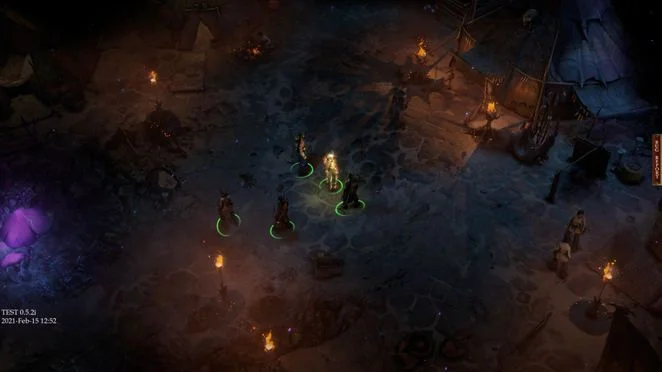
Return to the previous area and go east until Wenduag will ask you not to show the light of Heaven to Sull. Take the exit to Neathholm.
Straight ahead you’ll meet with Chief Sull, who will ask you to show the light (a Lawful action). If you do, Wenduag will be furious but Lann grateful, and the opposite if you lie.

Meet with Horgus to the southeast to initiate Gwerm Family Secrets. Horgus wants a way to the surface and is willing to pay you handsomely for it (1000-2000G, depending on whether you pass the Diplomacy check). Unfortunately he has nothing on him, so he won’t pay you upfront. Speak to Dyra to the east as well to buy and sell items (Potions of Cure Light Wounds and/or Bracers are recommended).
Rest up at the hut, then go slightly north to Lake at the Shield Maze (as marked on your map) and cross.
Find the way through the Shield Maze
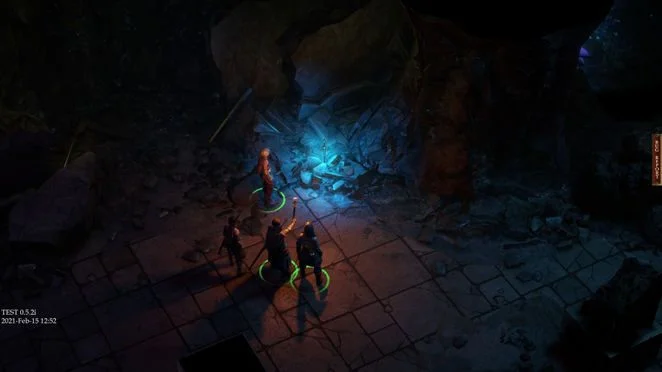
Run east until you reach the doorway and squeeze through. Open the next door, loot the two chests, then buff your party to fight the Baphomet Cultists and Neophyte Wizards.
Take a right into the hallway featuring a trap. Disarm it and take a right into a room with a Lore: Religion check, then go north into the larger room with the dining table in the center. Explore the surrounding rooms before going east into the flooded basement.
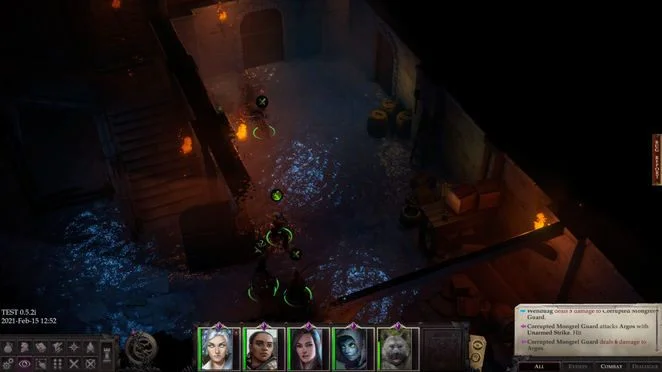
Go north and take out Hand of Hosilla and Neophyte Fighter. On the former you’ll find Hosilla’s Orders, which will provide you a tip on the maze (i.e. a locked door can be opened by using a torch as a lever). In the back room, loot Crypt Raider’s Armour.
You must put Hosilla’s Orders in your inventory in order for the lever to appear later on. If you don’t, your progress will be blocked.
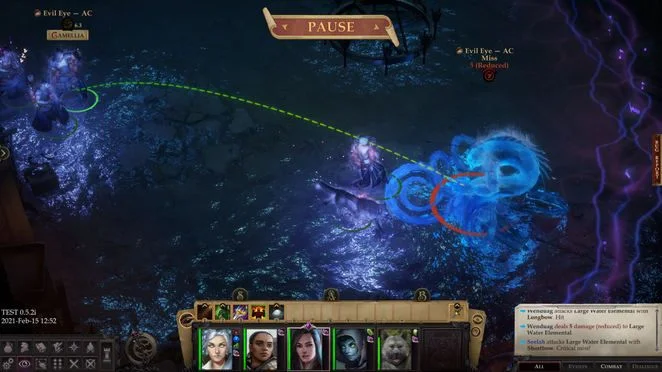
Go south and east (still in the basement) and buff your party before entering the room with the Large Water Elemental. It hits like a truck, so make sure you’re buffed as much as possible beforehand (e.g. potions, scrolls, spells, and abilities), and have at least two characters in melee to engage him (three might be necessary). When the elemental raises itself for its slam attack, have your melee characters use Acrobatics to move out of the way, prompting it to cancel the attack. Demoralize, Evil Eye (Saving Throws/Armour Class), Scapegoat, and of course Inspire Courage can help a great deal as well. If it’s still too hard, you can cheese it by running around with an archer and luring it to the mongrels after beating Hosilla. If the guards outside are invisible to you when they aggro onto it, they will be invincible and you can safely go AFK and kill it with an archer.
dIn the west corner is a crate (Perception 10 check required), inside which you’ll find Flow of Water (ring) and Amulet of Natural Armour +1. Rest up now.
Southwest (in this room), kill Corrupted Mongrel Brute and loot him for Ring of Protection +1.
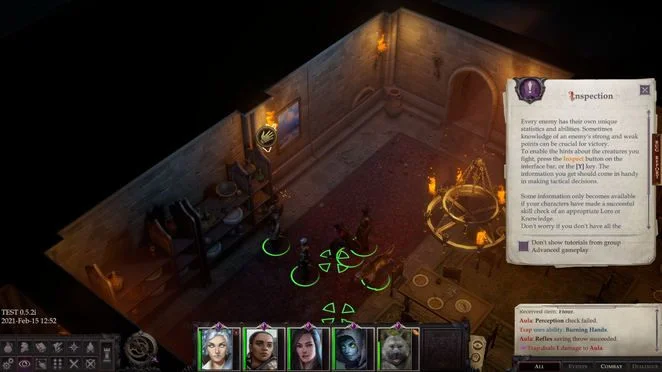
In the northwest room with the dining tables, an Inspection check will reveal the aforementioned torch/switch. Hit it and take the loot in the back room, then go west into the long hall (from the north side, past the rubble in the long hall separating the upper part from the lower). After finding the cultists, open the door in the corner with another torch lever.
In the next room, take out another Hand of Hosilla and loot them to acquire Hosilla’s Key. Go east and buff up before fighting Medium Earth Elemental (much easier than Water, so don’t worry about buffing much, if at all).
In the room with the horned demon statue (Baphomet), hit the torch lever to find Half-Plate.
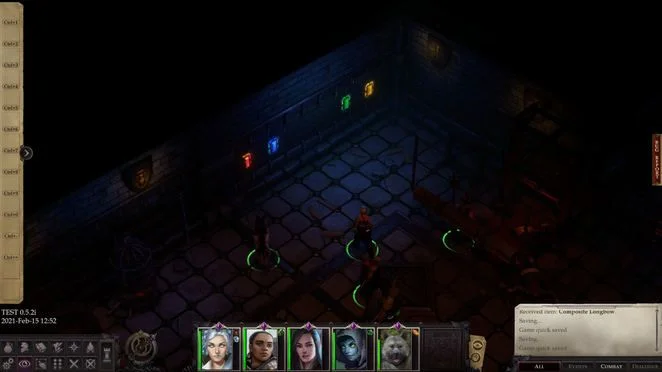
Enter the west room now. Defeat the Cambions then access the colour puzzle in the corner. Hit the buttons as follows: Yellow, Blue, Red, Yellow. Doing so will open a secret passage containing Radiance.
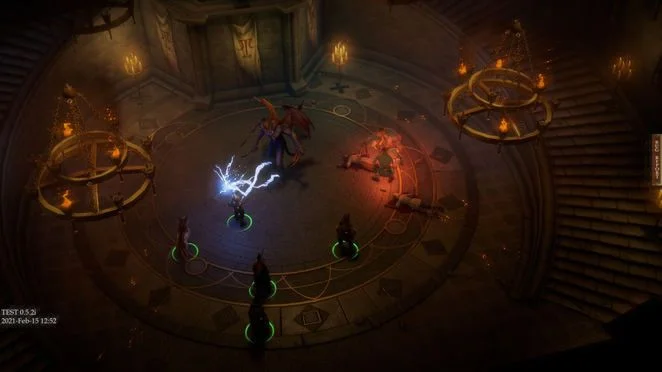
Make your way northeast, past the room with the pentagram in the center. Unlock the door in the large room (north of the room with the beds) and continue up the stairs. Buff up then head through to encounter the demon Savamelekh and his followers. Choose Angel or Demon Mythic Path now. It doesn’t matter which – at least not in the short term – as either way you’ll harm the demon and he’ll portal out, but not before commanding Hosilla to attack you. If you sided with Wenduag, Lann will show up now to help out (but won’t join your party per se); if you sided with Lann, you’ll take down Wenduag. Go with the usual Evil Eye (Armour Class), Inspire Courage, etc. and take Hosilla and the Quasits down.
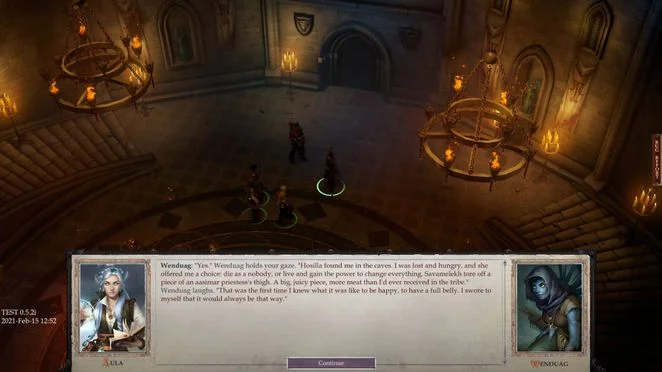
Post-combat, Lann and Wenduag (the latter apparently a servant of Savamelekh) will fight it out. Make your choice on which you want to take with you (Seelah won’t approve of Wenduag of course, while Camellia will). If you go with Lann (recommended if you’re only concerned with combat efficiency, and even if you’re not, it’s a smoother ride in Act 1), you’ll have an opportunity to attack Wenduag, though you’ll always miss. Also, regardless of what you choose, you’ll have the option to pick up Wenduag later
Horgus (from Gwerm Family Secrets) and Anevia will show up now. The latter will give you Cultist’s Dispatch, providing you with all kinds of information on the cultists and how to track them (thus triggering Spies Amidst Our Ranks).
Loot the bodies to acquire Marching Terror (glaive).