Table of Contents Show
Combat is the bread and butter of Phantom Brigade. It’s half the reason you play the game: to watch giant stompy robots shoot up and beat up other giant stompy robots, and occasionally free the oppressed or something like that.
Also check: Phantom Brigade General FAQ
Phantom Brigade Combat Guide

In most engagements, you will be at a matériel disadvantage. The enemy may have more machines, more tanks, higher-level equipment, and they will always have excellent accuracy at long range.
And what’s more, the enemy just has to survive. You have to think about the future. Losing a powerful part could be permanent. Not having enough Liquid Fix to repair your machines after the battle could ruin a campaign to contest a province. Even coming out of a battle with too much damage might leave you vulnerable to the next patrol if you can’t get your machines repaired in time.
Some general trends emerge. The most effective way to play is to avoid as much damage as possible, sometimes at the cost of opportunities to attack.
Note that that does not mean you always play defensively. Sometimes the best defense is in fact a good offense. Take out priority targets, push aggressively forwards into cover, and force enemies to shoot through each other. There’s a lot of ways to remain effective while minimizing damage.
Briefing

On the briefing screen, you get to set up your deployment and review the mission objectives and restrictions. Don’t ignore the map in the background though, it is actually accurate– it shows you where you will deploy, your retreat zone, where enemies are deployed, and the layout and height of terrain and buildings.
Remember that you can still customize your units right before the battle. The tabs at the top of the screen still work, and you can jump into the units tab to swap out parts. This lets you plan ahead for the terrain you expect.
UI

1. Mission Status
This panel shows you what your objectives are, as well as any side objectives, optional objectives, and incoming enemy reinforcements, their number, and their ETA, and finally, if you are allowed to retreat.
Side objectives include destroying sensor towers / alarms to prevent additional reinforcements, or capturing enemy supplies during convoy raids.
Note that if you kill all the convoy guards, the supplies are automatically captured. Also, you can’t damage supplies, so go as loud as you need to.
2. Prediction and Line of Sight (LOS)

The main screen shows you the predicted state of the battlefield at the particular moment in time on the timeline represented by the vertical line. By moving your cursor over the timeline, all the pieces on the battlefield will also shift accordingly. You can predict and give orders up to 5 seconds ahead.
Dotted lines on the ground represent predicted movement paths, red for the enemy and blue for your units. The coloured silhouettes and bright lines on the ground represent the unit’s current movement direction and speed.
Collisions and crashes that occur during the turn are not simulated. The possibility of a collision is simulated (and shows up as a yellow dome), but even if a unit crashes and stops moving in the middle of the actual turn, its full movement path will still show up in planning mode.
Direct LOS is shown as a solid line, blocked LOS as a dotted line. Enemy LOS blocked by other units will also appear as a dotted line.
Weapons that penetrate units and cover (like railguns) do not appear with a dotted line even if they are shooting through other things. Be very careful with friendly fire when using them.

The line simply represents a direct LOS. It does not take into account weapon scatter cones or ricochets, so you can still get hit while behind cover if a part of your machine is poking out and the enemy is firing, say, a shotgun or a machine gun.
In the image to the left, the enemy tank’s direct LOS is blocked, but just barely. There is a decent chance that the friendly unit will still be hit, which is represented by the part of the red cone that continues on from where the LOS hit the hill.
Selected Unit

The panel in the bottom left shows you information about the currently selected unit: its level, equipped weapons, unit type, walk speed and weight class, the health of all its parts, and how much Liquid Fix it has.
The camera button centers the camera on the currently selected unit.
Below the camera button are the unit’s walking speed and its weight class. Faster units have more vertical lines, heavier units have more horizontal lines.
Below that is the unit’s level, which is the average of the levels of all its individual parts (including weapons). Apparently a stealth buff is applied to higher level units shooting at lower level ones, but I haven’t checked it myself.
The bar next to the pilot’s portrait shows their remaining concussion resistance. Dealing more than that amount of concussion damage to a pilot instantly disables its unit until the fight is over.
The bottom part of the panel shows the unit’s current health. The rightmost vertical bar is always its right arm. If it carries a shield, the leftmost bar is the shield’s health, and the second vertical bar from the left is its left arm. Barrier health is represented in green stripes, integrity with grey.
The bar at the very bottom with a percentage shows how much Liquid Fix the unit is still carrying. Liquid Fix is used to regenerate barrier health.
Targeted Unit

Whenever your unit is targeted by an enemy attack, a ring will appear around its base on the UI. One ring per attack. This unit is being attacked by 3 enemies.
When you are attacking enemy units, blue rings appear underneath them as well.
Actions

Delete actions by double-right clicking them.
Move and dash commands will be placed at the earliest possible point in the timeline; you cannot click and drag them to move them around. If you want to change a move location or change its start time, you will have to delete the action and set it up again.
The actions you can command a unit to do are:
- Wait. Draw a longer line to order your unit to wait longer. Currently, the minimum wait time is 0.5 seconds.
- Run. Your unit will run at its top speed. Movement time includes time needed to accelerate and turn around.
- Dash. Remember that you can dash onto roofs and hills, down railings, through other units, and so on. Units cannot shoot or shield during a dash and still take full damage, but have a decent chance of avoiding most damage when moving perpendicular to the line of fire, and dashing at the right time will break missile lock.
- Attack. Explained in more detail later.
- Shield / Secondary attack. Shields must be pointed at a target, either a unit or a location by holding down CTRL.
- Eject pilot.
Units
Clicking on a unit will select it. A “!0” icon means that the unit has not yet been assigned any actions for the next 5 seconds. You’ll get another warning if you try to execute a plan with idle units.
When you select a unit, all of its queued actions appear on the timeline.
Enemy units can also be selected, and their actions will appear on the timeline as expected.
Timeline
The timeline shows all the actions the currently selected unit has queued up, including for enemy units. You can freely scroll around the timeline except when picking targets for certain actions.
Heat
The heat bar shows the unit’s heat at that current moment in time. Overheating directly causes damage to your unit, and shows up on the timeline.
It is possible to overheat slightly even when the timeline does not show the warning due to the granularity of the time calculation.
Actions
Wait
To wait, you need to click on a “target”. The farther away it is, the longer your unit will wait. Currently the minimum wait time is 0.5 seconds. Waiting cannot be dragged on the timeline and must be deleted / re-added to modify it.
Run
Movement is relatively straightforward. Firing on the move may incur a significant accuracy penalty– you can check that in your weapon stats (idle vs moving). Running cannot be dragged on the timeline and must be deleted / re-added to modify it.
Eject
Save the meat, ditch the metal.
Dash

Dashing is an action that generates a fair amount of heat to move a unit a fair distance, potentially over gaps, over railings, and even onto buildings.
Dashing always takes 1 second.
A unit’s movement and collision are simulated when planning a dash. Always check that you are not going to unintentionally collide into anything or run into a line of fire.
Unlike attacking and shielding, a unit cannot run while dashing.

In addition to positioning your units, dashes can be used to evade enemy fire when no cover is nearby. Dashing to evade fire is most effective when done at a great distance and perpendicular to the line of fire.
Dashing is also the best way to dodge missiles. The exact timing varies from launcher to launcher and especially with distance, but I give around a 1 second wait time per 30 meters of distance before dashing, and adjust according to what I observe.
Remember that you can measure distances by holding CTRL and also that the exact time is displayed on the timeline.
Dashing cannot be dragged on the timeline and must be deleted / re-added to modify it.
Shield

A shield action is like an attack action in that it lasts a certain amount of time (determined by your shield), must take a target (either a unit or a location), and a unit can run while shielding.
I haven’t tested how far hits on the shield are simulated. That is, whether a shield automatically absorbs everything in front of it, or whether the unit just brings the shield up so that projectiles are more likely to hit it.
Shielding can be dragged on the timeline, which makes it easier to synchronize it with an enemy’s attack.
Attack


An attack lasts a specific amount of time and is made of three distinct phases: wind-up, shot, and wind-down. A unit can run while attacking, which may incur an accuracy penalty.
Wind-up and wind-down are a short periods of time when the unit readies its weapon and prepares to fire, and when it lowers its weapon.
Shot is the period of time when the unit fires the weapon. Different weapons may fire multiple times within the same attack action; this is represented in the weapon’s stats. The RA1 Thermite in the screenshot to the left fires three times per action, reflected in “Shots”.
You cannot change targets in the middle of an attack. This also means that the sweet beam drag in the intro cinematic is impossible to execute in-game.
When choosing the attack action, click on the timeline to set a start time, then click on a target, or hold CTRL to target a piece of terrain. Once you have selected a target, you can click and drag the action around. This is very useful to precisely time an attack to hit an enemy between cover, to manage heat buildup, and so on.
Holding CTRL also shows you the additional details in the above screenshot. This information is key to understanding the calculation behind the optimal range.
The grey ring represents your “optimal” range, but that is just a weighted calculation of your weapon’s damage and scatter at that distance. Your weapon may do 100% damage at a greater range than optimal, but because of scatter, fewer rounds may hit the target.
Machines and pilots are perfectly accurate. The only factor influencing what actually hits the target is the weapon’s scatter value and the distance to the target. This creates a cone that can be seen on the UI when planning an attack.
Hit and Simulation
Whether an attack hits in Phantom Brigade is determined by physics simulation. Every projectile’s path, every piece of terrain, even the position of the target’s parts when the projectile impacts, all determine if and where a unit gets hit.
Damage Types
- Kinetic: damage done to barrier and integrity.
- Concussion: damage directly dealt to a pilot’s concussion resistance.
- Impact: damage to destructible structures.
- Stagger: reduces a unit’s effective weight class and makes it more vulnerable to crashing.
- Heat: directly applied to a unit.
Scatter and Damage Falloff

The height of the vertical bars represent damage falloff. The RF1 Thermite does relatively little damage at close range, which sharply increases around the 40m mark to 100%, then falls off again after about 80m.
Scatter and damage falloff combine to determine a weapon’s optimal range. For a weapon with excellent scatter, like the RA1 Thermite, the entire graph is in light grey, meaning that its damage at any distance is only limited by damage falloff.
For a weapon like the RF Flux, however, its scatter is significant enough that, at the ranges where it does maximum damage, there is enough scatter such that not all of the shots fired will hit the target. At closer ranges, damage falloff limits its effectiveness, while at longer ranges, the issue is scatter.
Note that for the RF Flux, a significant part of the range graph is in a darker grey. This represents the portion of the damage potential that is wasted because of shots potentially missing their target.

For weapons like the RA2 Lancer, even at point-blank range it will deal 50% damage. This means that its useful radius is much larger than just what is shown on the UI, and you can fire (with pinpoint accuracy) at units within that distance, dealing at the very least 50% damage. This may mean that a backup weapon isn’t necessary for your snipers.
Some weapons have a penalty to scatter while moving. But as always, since scatter is random and every individual projectile’s path is simulated, a high scatter value may not end up being a problem. The “optimal range” calculation is just a weighted calculation of damage falloff and range; what actually works in combat will depend on the target, terrain, and other factors.
Heat

The formula is very simple: your unit’s heat dissipation rating is how much heat it dissipates per second. Its heat capacity determines how much heat it can safely tolerate. A weapon’s heat generated rating is how much heat it generates per action, split over its action duration.
For example a weapon that generates 90 heat per 0.5 second action actually generates 180 heat per second in that short timeframe. A weapon that generates 180 heat over 5 seconds is only generating 36 heat per second, and so a unit with as low as 20 heat dissipation and a base 100 heat capacity can fire it without worrying, since it will build up an excess of 16 heat per second for a total of 80 excess heat at the end of the firing action.
Attacking, dashing, and taking damage from heat-generating weapons all cause your units’ heat to rise. Hovering over a point on the timeline will show you how much heat per second it is generating or dissipating at that exact moment. Attacks and dashing do not generate all their heat at once, but rather generate their heat over the course of the action.
Heat management is key to maximizing your damage output. Since heat continually goes down at a fixed rate, every moment that a unit spends at 0 heat is a moment of cooling wasted. Conversely as long as your unit is constantly above 0 heat, it is being maximally efficient, since being hotter or cooler does not affect its cooling rate.
Tactics
Asymmetry

The main consideration in your engagements is asymmetry. You will generally be outnumbered and outgunned. You neutralize those advantages by abusing your own– the ability to predict your enemy’s movements.
You cannot put out more damage quicker than them, nor can you stand still and trade blows. Therefore your most useful tactic will be to negate incoming damage, either by taking hard cover, killing priority targets to create safe zones, shielding, or even just dashing in the middle of an incoming burst.
Defensive
Playing defensively is a good idea when you’re still not confident in the combat mechanics. Instead of taking risky maneuvers like popping out for quick shots, hide in cover for the full duration of an enemy’s attack. Instead of betting that you can kill them before they kill you, leave the gambling to someone else and stand behind a hill.
Generally, keeping your units close to cover and maneuvering cautiously will work decently. But, eventually, you might want to get a little more…
Aggressively Defensive
Cover is a wonderful thing. Because of how line of sight works (in real life as well, not just in-game) a closer piece of cover blocks more than one farther away even though getting closer exposes you to more and more accurate fire.
This means you might dash towards an enemy to avoid damage. Instead of running away as a group, you might run to the sides, split up your squad, get them into good positions to shoot at enemies while they’re in cover from the ones shooting at them.
That’s the aggressive part. Avoiding damage is only half of the mission; you must also eliminate all enemies. Eliminating them quicker means that they have less time to shoot at you, and so maximizing your damage output while remaining safe is the best way to play the game.
Mobility
Mobility is the key to all the above. Remember that Phantom Brigade is a fully 3D game, so use those thrusters to their maximum potential. Dash on top of buildings and off the sides of bridges. Jump off cliffs to break line of sight suddenly. If you’re feeling cheeky, run in front of another enemy to make them take friendly fire in the rear.
Time is your main currency, and being able to move quickly lets you make more efficient use of your time. Increasing your run speed is always good, but not at the expense of other capabilities, and besides, eventually you will want thrusters on every machine to dodge missiles and jump off cliffs.
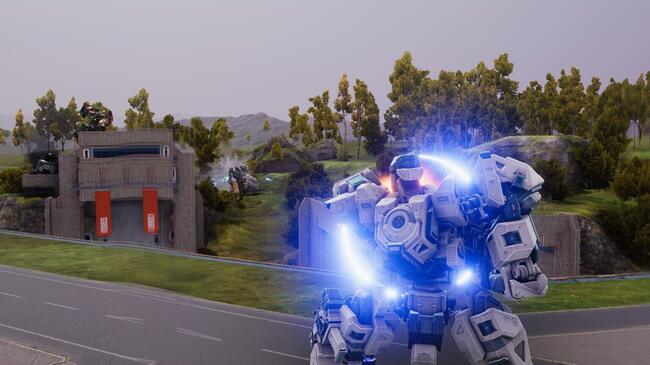
Cover

The difference between cover and concealment is subtle but important: cover will stop a projectile. Hills offer excellent cover, as do buildings, but the latter can be destroyed and eventually shot through, as seen on the building to the left.
Keep this in mind when ordering a unit behind cover when under heavy fire– they may not be able to stay there for very long, especially when fired upon by weapons that do high impact damage.
Remember that a unit only needs to be in cover from the enemies currently attacking it. If possible, stand where you are protected from attacks but where you can also shoot at other enemies. Use any lull periods to fire back or reposition to better cover for the next incoming attack, and frequently check the timeline to figure out when and where to move.
Cover angles
The LOS line is drawn straight and true from shooter to target. It does not take into account scatter and the size of the target, so if your head is peeking out from behind a hill and your enemy is firing a machine gun at you from a long distance, there’s a good chance you’ll still take damage.
Watch out for a red cone appearing even if you’re getting the dotted red line. That means you still have a chance of getting hit.
Even if the red cone does not appear, it’s a good idea to visually check your cover to make sure that it can, in fact, shield you from whatever’s shooting at you.
Priority targets
In more than one way. Kill priority targets first– targets which pose the greatest threat. These are usually enemies with missile weapons, plasma weapons, then those with railguns, machine guns, sniper rifles, and anything that does concussive damage.
Why? Those weapons negate your greatest advantages– prediction and cover.
Missiles fly above cover, are slow compared to projectile weapons, and are not predicted on the graph, making them very difficult to dodge without practice while also forcing you to spend more of your precious time evading. Plasma weapons move slowly but track, and one of them can be lobbed as well, making them difficult to evade.
Railguns go through cover. Machineguns have a long burst time, forcing you to stay in cover and waste time, and also deal enough damage to destroy whatever you’re standing behind. Sniper rifles do a lot of damage from a distance. Concussive damage is dealt separately from barrier / integrity damage, making it potentially extremely lethal.
But, on top of that: kill one target at a time. Splitting your fire runs the risk of not disabling an enemy unit, making subsequent turns harder. Say you’re in a 4v8; on your first turn, if you split fire and disable 0 enemies, you still have to dodge 8 enemies’ worth of fire on turn 2. If you focus your fire and disable even 1 enemy, then on the next turn you only have to deal with 7, making it easier to press your advantage.
Sure, you’re going to overkill a lot of enemies while you’re getting used to combat, but that is still better than underkilling and compromising your position.
Facing
Since hits are simulated with physics, the facing of a unit matters a huge deal. Primary weapons are always held in the right hand and an enemy unit without any weapons will eject; this instantly suggests a tactic: shoot all enemies from their right to disable their arms and potentially force them to eject.
Getting hit in the rear doubles concussive damage. This is because the pilot capsule is in the rear! This is especially dangerous when retreating down kill funnels like city streets, since even if you dash, you can still be hit by projectiles. If you will be under extremely heavy fire, it might be worth shielding up and walking backwards instead of dashing if you’re caught like that.
Forced Ejects

An enemy unit with no remaining weapons will eject. A specific icon will appear over its tab, but note that if it is also crashing within the same turn, the crash icon will take priority over the eject icon. It’s always worth clicking on the unit to check.
An ejecting enemy will not take any other actions that turn, so ignore it and shoot at other things. You still need to be careful of colliding with it.
Forcing enemies to eject is a great way to get rid of them quicker as well as getting easier salvage, since intact parts cost 10 points less to either salvage or scrap than if the part were destroyed.
Evasion in the Open
Your main options in the open are to make a mad dash for cover or shield and walk. This is actually a tougher decision to make than it sounds.
If you choose to dash, dash perpendicular to the direction of fire. This forces the enemy to rotate to track you, and so any rounds they fired at your previous location will miss. Never dash straight towards anyone shooting at you, for obvious reasons, and avoid dashing in a straight line away as well.
At close ranges, projectiles may travel quickly enough to hit you anyway. The advantage of the shield is that you know it will protect your unit. The downside is that it has a limited durability.
Missiles still can track you if you dash too early. You’ll have to learn the timing yourself, but I generally wait 1 second per 20-30m between my unit and the enemy.
Weapon Tactics
Assault Rifles, SMGs, Shotguns
These weapons (except the SG1 Auto) have zero scatter penalty while moving, so they are invaluable for flankers who can fire without having to stop. Their medium-short action durations start to limit their usefulness as your units get faster, since you have a shorter window while moving between cover, so don’t discount the usefulness of modules that reduce attack duration. Average heat, excellent damage, and low-ish to average range make them good weapons for when you want a general-purpose machine.
Sniper Rifles and Marksman Rifles
Apart from being built for longer-range engagements, sniper rifles also boast high single shot damage, and the SR3 literally has a single shot firing action.
Don’t discount its lower average DPS. If its single-hit damage is high enough, that can guarantee a part destruction on a hit, which will either instantly disable an attack (left or right arm), force an eject (right arm with no secondary weapon), force a crash (legs), or even just kill the target outright (upper body).
Marksman rifles straddle the boundary between assault rifles and sniper rifles. Their main drawback is having a penalty to scatter while on the move.
Railguns
Railguns generally have lower numerical stats than their counterparts, but gain the incredible ability to shoot through cover, as well as immense projectile speed. This makes it more likely that their shots will land on target, while also allowing you to poke at targets from behind your own cover.
Their usefulness can’t be overstated.
Machine Guns
Machine guns generally have huge accuracy penalties while moving as well as long action durations. Put a unit down,
Missiles
Missiles follow an arc and take a relatively long time to reach their target. Nominally their speed is displayed in meters per second, but since they follow an arc, the distance they travel isn’t straightforward to determine. You’ll have to get a feel for it yourself.
Their ability to deal splash concussive damage, follow a trajectory over cover, and track their targets make them extremely busted, and they amplify one of your greatest advantages by letting you return fire from behind cover.
Remember that you can fire them at any time from any where and still have a good chance of hitting your target, so don’t even walk into the open unless you have to.
Beams
TODO
Incendiary weapons
TODO
Not much experience with them.
Looking at the stats, generally decent kinetic damage and excellent heat characteristics. May be a good choice for disabling and bullying enemy units at range. Note that heat damage does not scale with level.
Plasma weapons
Plasma weapons are rather unconventional. Their projectiles travel relatively slowly (roughly 3x as fast as missiles). The repeater and seeker are the only ranged weapons capable of dealing stagger damage. All three plasma weapons are very capable concussion damage dealers.
Used properly, the plasma launcher is a terrifying tool, capable of concussing any unit from the safety of cover. Just beware of its large blast radius and the corresponding capacity for friendly fire.
The plasma repeater is more situational, but it lets you bully an individual target by staggering and then crashing it. Excellent when paired with a shield to give a light, mobile machine the ability to absolutely bully any target it encounters.
No experience with the seeker. I have heard that its tracking… leaves much to be desired.
Concussion
Concussive damage is tracked separately from barrier / integrity damage, and represents the pilot’s ability to fight through injury and remain functional. Concussive damage is doubled from the rear, since that’s where the dummy plug pilot module is located.
Since kinetic and concussive damage are completely separate, there’s not much point in optimizing for both on the same team. Stick with one and build your whole team to put out that type of damage. Usually a given weapon type will have at least one model that does concussive damage.
Concussive damage and resistance does not scale with level. This means that a lower-level concussive weapon can remain useful for much longer, at least until the hidden buffs / debuffs to damage based on level difference kick in.
Melee
TODO
I don’t play melee much, and I’ve heard that it takes a lot to get used to, so I’ll save this section for later.
Hold CTRL while picking a target to switch sides for the weapon swing.
What I’ve heard is that the simulation silhouette is inaccurate. What actually happens is that in the middle of the melee action, your unit takes a swing, and damages anything in the path of the melee weapon’s hitbox. The simulation silhouette is just a rough guess as to where the weapon will actually travel through.
Keep In Mind
Action Duration
Especially important for firing on the move. Your window to shoot an enemy can be very small, so if you have a long action duration, your target may move out of your line of fire in the middle of your action. Keep an eye on the timeline and scroll through it to get a feel of how your attack will hit.
Collision
When two units get too close to each other, they may collide. This is distinct from crashing and from melee attacks; this is a good old-fashioned fender bender.
In a collision, a heavier unit will knock down a lighter unit and put it into a crashed state, while the heavier unit continues on unimpeded. Raising a shield raises your weight class for the purposes of calculating collision.
Dashing increases the force behind collision, but does not increase your weight class, so dash into your foes at your own peril.
Crash
Crash is just another fancy name for stun. A crashed unit cannot act, whether because its legs were destroyed, or it got rammed by something heavier than it. The stun duration can be seen on its timeline.
If you’re really close to an enemy unit and you have a shield or are heavier than it, consider crashing it instead of (or after) shooting. Especially if it was going to subsequently attack you, this is a great way to disable it for the current turn.
Reinforcements

You CAN kill airdropped reinforcements on the turn they arrive, even if they can’t be targeted. Hold down CTRL and target the terrain. This works better with moderate scatter.
Friendly Fire
Friendly fire is not very friendly. Be very careful when ordering your units to shoot past each other, especially while moving and dashing. After you’ve given all your orders for the turn, slowly scroll through the timeline again and watch for any inadvertent crossing lines of fire.
You take full damage from friendly fire, so avoid it at all costs. On the flip side you can absolutely make enemies shoot each other.
Cover angles
Always be sure that your cover actually covers you. Railguns penetrate cover, missiles arc over, and machine guns spray enough lead to have a decent chance of hitting any part sticking out from behind cover. Machines are taller than the LOS line indicates because it is drawn to center mass.
Concussion
Concussion damage is tracked entirely separately from kinetic damage. A high-integrity tank can still be disabled by knocking its pilot senseless, leaving the metal mostly intact, but the same applies to you as well.
It’s generally more effective to specialize your entire team in concussive damage if you’re planning to concuss enemies. The “Concussive Payload” weapon module boosts concussive damage and can be hideously effective against tankier and tougher enemies.
Remember that concussive damage is doubled from the rear. Great news for extremely speedy flankers! Also remember that you can “force” an enemy to turn around by moving their target, but just be careful of friendly fire when doing that.
Combat Resolution
At the end of combat, you get to pick up the pieces… literally. Destroyed enemies leave behind parts that can be salvaged and repaired, or scrapped for supplies and components. Convoys have a good chance of carrying additional supplies, parts, and blueprints for your workshop.
Any damage sustained in combat is not immediately repaired. Repairs happen over time in cruise mode consuming Liquid Fix. Alternately, all your machines will be fully repaired and your Liquid Fix restocked whenever you resupply.
Parts are self-explanatory. You pick up parts from destroyed / disabled enemies or from a convoy’s cargo.
Resources can be found as loot, very commonly batteries to recharge your stealth / overdrive, but also supplies and, if you raid repair convoys, liquid fix.
Blueprints are labeled as “Workshop charge” but are arguably the most important thing you can loot. These unlock new projects for you to build and are key to progressing and upgrading your squad.
UI

Clicking the diamonds to the right of a unit’s name quick selects an action for all of its parts. This lets you conveniently dismantle a batch of parts all at once.
Salvage
Each part can be either recovered, dismantled, or abandoned. Parts can also either be intact or destroyed.
Usually you will get a small amount of stuff for free. These appear at the very top of the salvage list and are automatically recovered, though you may want to dismantle them if you don’t need the parts and want the resources.
Uncommon (green) parts get a 15% bonus to certain stats, rare (blue) parts get a 30% bonus. For weapons, this is damage; for body parts, only integrity and barrier get the bonus.
Intact parts have a solid coloured background, while destroyed parts have a grey top-left corner and stripes.

Recovering an intact part puts it into your inventory sand costs 15 salvage points.
Dismantling an intact part scraps it (and its modules) for supplies and components and costs 5 salvage points. The supplies you get from its modules are included in the UI display.
Abandoning an intact part costs nothing but gets you nothing either.
Recovering a destroyed part costs 25 salvage points, dismantling it costs 10.
Note that scrapping an item also scraps its modules, so if a part has a module you want, you will have to fully salvage it and then remove the module in the inventory or in the units screen.
Salvage frames

If the option is turned on, sometimes you can salvage a frame from an intact enemy machine. The option appears as a grey diamond to the right of the unit’s name. Salvaging a frame costs 80 supply budget and prevents you from salvaging or dismantling any of the unit’s other parts. You do not get those parts. Frames are placed into your inventory completely unequipped.
Destroyed Squad Mech Parts

Parts that your squad lost in battle can be recovered or dismantled, costing 25 or 10 salvage points as per normal.
Keep In Mind
It’s generally a good idea to prioritize salvaging any parts you lost in battle unless the other options are truly exceptionally good.
Every part costs the same amount to salvage, but gives you different amounts of resources. Hence, prioritize recovering or dismantling rare and uncommon (blue and green) parts, then torsos, weapons and legs, and last of all, arms give you the least amount of supplies. Go for intact ones first.