Table of Contents Show
A complete walkthrough of Episode 2: Soulless Asylum with all secrets and poster unlocks. Original guides made by AZRA3L.
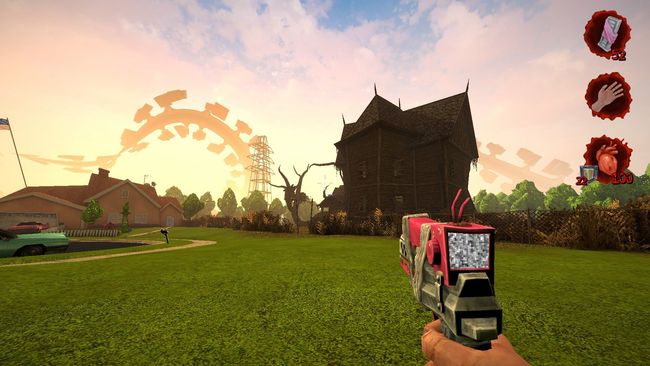
All Are Mad Here, Dude
Secret #1: Statue
In the beginning of the level, you will start the game unarmed.
There are enemies and Steroid Pills, go crazy with the steroids to clear out the enemies.
As you walk around the room, you will see a big stone statue on the other side of the room.
It will be guarded by those leg creatures, so kill them and closely examine the statue.
One of the sides will have a misaligned leg that you will need to interact with in order to unlock the back of the statue.
There will be a Double Akimbo powerup waiting behind the statue for you.
Poster #1: The Vaccinated
After you switch some levers to unlock the door, go into it to find a new item called Suspicious Moonshine. Go into the room on the right to get your pistol back.
Go towards the door with the shovel behind it and look up to shoot at the target.
Continue to move through the hallway as you please until you stumble upon a blue door.
Turn right to see a button that unlocks this blue door.
Once you enter the blue door, there will be a room on the left that has this poster.
Poster #2: All Are Mad Here, Dude
Continue up the stairs to find a new type of enemy, Floating Clown Head, and a group of zombies.
The poster is on the right on a board.
Poster #3: Asylum Victim
Soon you will be prompted to enter the contorted hallway to retrieve a Red Key.
Once you get the Red Key, you will be able to enter a Red Door which houses another new enemy, The Nurse. Be mindful that this enemy is rather tanky and can revive some enemies.
Anyway the poster will be in this room.
Secret #2: Bookshelf
After you have dealt with the red room, you should have activated these bed platforms.
Jump on them to get to the other side.
There will be a bookshelf on the left.
Go close to this book and there will be an option to interact with it.
Once you activated the book, you will unlock the secret wall next to the shelf.
There will be an Ammo powerup for you.
THANK YOU Matyas96!
Poster #4: Farty Pants
Eventually you will make it into a clown room with a bigger clown door.
You will need to enter the two hallways on the sides to pull a lever each in order to unlock the door.
The hallway on the left that has the floating beds and the poster should be right above the door.
Poster #5: Cheer Killer
Next, you will be in this room where floating Clown Heads will spawn.
Take the launch pads to go higher through the level.
The poster will be on the right side if you take the last launch pad aiming for the right.
Poster #6: Lobotomized Creep
Progress through the game as usual until you get to this section where there will be cardboard jumpscares.
You will get to this hallway where a Cage Monster cutout tries to jump you.
The poster will be at the end, but watch out because there’s an actual Cage Monster waiting for you at the right.
Secret #3: Minigun
After you deal with the cage monster, you will enter another hallway with numbered signs that count down from 5.
Once you see the sign numbered 2, STOP.
I HIGHLY ADVISE YOU SAVE HERE. Once you step too far in, you will be dropped down into a point of no return.
Your goal is to slide jump onto that white desk on the right. This may take a few tries, so once again you should really save here.
Once you get on the white desk, jump onto the other side and you will be awarded with a minigun.
Definitions Of Insanity
Poster #1: Lost Clown
You will start off in the courtyard of the sanitarium.
There will be stairs leading up to this building that cannot be entered.
Two Lobotmized Creeps will be waiting in ambush.
Take care of them and the poster should be on the left wall.
Poster #2: Nurse Joy
I will assume you pissed on all the circuits, entered another garden area with branches, proceeded to find a Red Key and flip a lever to access the Red Door.
There will be a poster in the area you just entered with a few zombies, Lobotomized Creeps, and a Farty Pants.
Secret #1: Bat Wall
Soon you will enter an area with two grapple rings, be prepared for a fight once you use the blue key then activate the Hot Sauce fountain.
Once you dealt with the enemies and pissed on the Ferris Wheel, you’ll go into it and press the button to go to the rooftop area.
Go into the center room of the rooftop that has this bat on the wall.
Interact with it and a room will open inside the wall opposite this bat.
You will be awarded with a Double Akimbo powerup.
Poster #3: Definitions of Insanity
Once you retrieved the yellow key, you will be able to unlock the yellow gate.
Across from you, there will be two small raptors that have machine guns.
Deal with them from afar because they can melt you quick.
Once you’re done, turn around and you should see this poster.
Secret #2: Werewolf Garden
Jump down into the next area.
There will be a tuba man guarding the wheel that activates the Hot Sauce fountain.
You will notice that there is an opening in the hedges next to the wheel.
Enter it and you should see a dead werewolf corpse in the floor and some ammo.
Secret #3: Ferris Wheel
Remember that Ferris Wheel you took to get up to the rooftops?
Loop all the way back to the area to find another Ferris Wheel cage with a button.
Press the button to activate the portal then enter it for the secret.
BUT I highly recommend you drink the Hot Sauce Fountain before entering it for the next secret.
Secret #4 / Poster #4: Lizard-Dude
Once you return back to the rooftop area after drinking Hot Sauce, go back to the dropoff point.
Look to the right and you should see a flammable plant, pee on it.
After you have successfully burned the plant, you want to slidejump onto that area.
You will unlock the secret and the poster will be there too.
Thanks itchy ivan for helping!
Search For The Cure
Secret #1: Crack Pipe
Progress through the level as normal, there’s not much in terms of secrets and posters here.
Eventually you will need to do a Hot Sauce fountain puzzle again and be led into an area of zombies and grapple rings.
Once you see this item named Quick Pillz, pay attention to the right of it and try not to fall off the edge unless you want to fight some enemies.
Edit: Thanks to Franuky for providing this much clearer image of where to go!
This is the pathway to the secret if you fall off, you can always climb the ladder back up. You should see an opening, so walk on through until you see a delicious pipe of Crack.
Congrats, you got the first secret!
Secret #2 / Poster #1: 5G Tower
Progress the game until you reach a bridge.
Once you walk far enough, the bridge will collapse and you will be dropped into a river.
Fight against the current or move around it to reach this waterfall.
Enter it to unlock the secret as well as getting the first poster.
Poster #2: Clown Elemental
Move your way through the river and onto land. Eventually you will get to the high ground and be facing many enemies.
There is a specific group of enemies and civilians surrounding a roasted pig.
The poster should be near on a wall.
Secret #3: Under the Bridge
Navigate your way up until you reach the other side of the bridge that collapsed on you.
Try to drop down on a ledge that is to the right of the bridge. You should see a small cave here.
Crouch to enter this cave to find a Crack Pipe and rocket ammo.
Poster #3: Search for the Cure
Continue onwards until you see an Illuminati circle.
Behind one of the pyramid rocks will be a poster.
Secret #4 / Poster #4: Zeta Reticuli Gray Trash
Starting from the Illuminati circle, take the path on the right.
You will need to use the Shovel to cut down the tree for a path.
Grapple and fight your way through the aliens until you see this UFO.
Grapple onto the UFO and jump on the roof of it. There will be protruding red branches.
Walk on the longer red branch then slide jump off of it onto a ledge.
From there, you should see this cave to unlock the secret as well as get the poster here.
(I wish you could take the purple one too, but whatever)
Secret #5: UFO Tunnel
Continue to play through the UFO section where you will be killing a lot of aliens.
Eventually you will be in a duct and will need to drop down to use a grapple.
Once you grappled onto land, turn around and use the shotgun’s grapple again to reach the hidden ledge.
You will unlock the secret and be able to collect some loot. You will be led back into the UFO if you continue to go through the path.
Area 69
Secret #1: Liquid Nitrogen
You will start off in the pipe while carts are passing by on an electrified rail.
Grapple onto it, but be prepared to shoot targets on both the left and right to disarm the electric gate.
Eventually you’ll make it into a room with UFOs, deal with the enemies as you see fit. There will be a piss toll near the elevator that takes you down into a conveyor belt area.
Your goal in this area is to reach and press this button which activates a conveyor belt of people above you, but don’t do grapple onto it just yet. Look down to your left to see this conveyor belt.
Jump down and you should see this opening with a floating bottle of Liquid Nitrogen.
Entering this small box will count as your first secret for this level.
Poster #1: Gray Trash Disguised
After you grapple into the duct, you will get one of the most overpowered weapons in the game: The ♥♥♥♥♥ Blower. You will make your way towards a yellow ladder to get up onto a new floor.
The poster will be behind a pipe near the ladder you just climbed.
Secret #2: Wash Your Hands
Eventually you will drop down into a bathroom in which you see a couple of enemies waiting to use a stall. Deal with them first then turn your attention to the sinks.
You will notice a sign that says “Please save the water, you little ♥♥♥♥♥♥♥♥♥♥♥♥♥”.
Because this is a Postal game, we’ll do the exact opposite to spite the penile mascot.
TURN ON ALL THE SINKS!!!
The secret should be unlocked once you did the task.
Go into the opened mirror to get some goodies.
Poster #2: Area 69
Next, you will see quite a few cell rooms that houses some enemies.
Especially this incredibly ominous room that belongs to “Daddy”.
Open this room to see a foreboding message and a poster on your left.
My advice is to have your shotgun out when you turn around.
Poster #3: Tin-Foiled
You will make it into a large room with a central large tube transporting civilians down it while enemies surround the area. Prepare yourself for a battle.
Once you killed the enemies, collected both yellow wheels, and unlocked the door.
You will ride an elevator that takes you to a room at the top of the tube with a single Illuminati man.
This poster will be on one of the walls of this room.
Secret #3: Under the Stairs
You will be transported into a rather familiar place.
Make your way out of the room and you should see a closet.
Open it and a pink lever will be there.
Next, pull it and a secret door will open under the stairs.
You can crouch and loot some goodies before you engage the hostiles upstairs.
Poster #4: Crawler
Fight your way through the stage and up into the rafters.
You will make it to a room that has two Prison Guards.
The poster will be near the door that you just entered from.
Poster #5: Lil’ Ronnie
You’ll soon enter this red Illuminati room, press the button in front of the statue to unlock an underground entrance behind you.
As you walk through the underground hallway, the poster will be right in front of you.
S.I.P.
Poster #1: Big bad Rona / Poster #2: S.I.P.
As soon as you beat the boss, you will be dropped down onto its spawn room.
There will be a bed waiting for you, but do not interact with it just yet.
The two posters will be on the walls surrounding the bed.
S.I.P. Boss Guide
Beginning The Fight
You will start off in this area where you see an ominous red screen on the other side.
Walk around to that area to see two ammo refill machines, portal armor, and a health pipe.
Right underneath the red screen is a pink level.
Pulling this will activate the air vents that will levitate you as well as the numerous grapple points.
Your next objective is to go into the center of the room using either the grapple points or float over there.
There will be a command console with a glowing button. Be aware that pressing this button will initiate the boss fight.
How The Boss Fight Usually Goes
Well curiosity got the best of you when you decided to press the red button.
Now an absolutely hideous abomination will appear underneath your feet.
This is probably the best time for you to start ascending because as the boss rises,
there will be a pool of sickly water that rises too and will drain your health fast if you stay in it too long.
Eventually you will see this targets throughout the fight.
If you choose to shoot these, a trap will be activated that vaccinates the creature.
This is effectively hold the creature in place while exposing its weak eyes for critical damage.
There are some attacks that this boss will do that you should keep in mind:
Tentacle Attack
The boss will have some protruding barbs within its body. They will try to strike you with pretty close accuracy. These attacks do a bit of damage and have considerable knockback, so keep on the move.
Lil’ Ronnie Spawns
This seems to only happen when the boss gets trapped by the vaccine switches that you activated.
A few Lil’ Ronnies will spawn while the boss is stuck. Watch out for these guys because they can deal a lot of damage. They will follow you then explode itself to leave a lingering gas that drains your health. Just remember to aim for the eyes to dispose of them fast.
Rising Virus Pool
This one isn’t exactly an attack from the boss itself, but it is something that you need to try to stay out.
If you don’t keep up with the boss, you will eventually be swallowed by this pool. it’s not an instant death, but it will quickly drain your health and armor if you don’t get out of it.
So try to keep your Super Hooker Shotgun on you to grapple onto the boss and grapple rings to stay on pace.
What You Can Do
First of all, you pretty much need to use the Super Hooker Shotgun as there are multiple grapple rings throughout the boss fight that you must use to stay with the boss.
Perhaps the most important thing to know is: SHOOT THE EYES
Shooting the eyes will deal much more damage than simply shooting the main body, but if an eye takes damage, it will retreat back into the body. So make sure to use burst damage on the eyes or any automatic weapons on the body itself.
Another key feature you can use to your advantage is to keep a lookout for these targets.
There is an achievement tied to not using these targets, but if you want to kill the boss ASAP then use these.
If you shoot it in time then as soon as the boss passes through, it will be stabbed with vaccines that cause it to expose its own eyes and stand still. Use this time to unload your guns onto the eyes!
How to Get a “Speedrun”
There are those of you who want to get the speedrun achievement that requires you to complete a level under its speedrun threshold.
Botul recommends doing it on this level since all you really need to do is rush down the boss’s health then drop down fast to the bed. You wouldn’t need to worry about solving puzzles nor any secrets.
He also recommends walking on top of the Big Bad Rona then using the Double Akimbo powerup with the miniguns to easily dispatch the boss. I agree that this is one of the better ways to deal with it, but what if you don’t have the Double Akimbo powerup?
Well, I can safely say that you can still easily accomplish this without the power up. All you really need is the Super Hooker Shotgun.
Simply walk on top of the boss.
Walk up close and personal to any of the eyes.
Shoot it pointblank to deal a big chunk of health.
If you fall off or want to shoot the other eyes then grapple onto them to hit them pointblank again.
This strategy works even better if you manage to activate the first vaccine switch to reopen some weak spots.
Here’s a lazy video showing you that it “just works” in the words of Todd Howard.
Final Comments
All the work done in this guide was done by AZRA3L. Good luck getting 100%!