Table of Contents Show
Remnant From the Ashes Jungle
Note: The game features procedurally generated levels, which means that you probably won’t find all the items that we’ve located in the same place. Instead, this item could be somewhere else, or you’ll pick another thing. This mostly concerns intermediate dungeons. Besides, you could meet other bosses in these dungeons. However, the other part of the game, including main bosses, is not procedurally generated.
Other Remnant From the Ashes Guides:
- Remnant From the Ashes Ring List
- Remnant From the Ashes Amulet List
- Remnant From the Ashes Weapon List
- Remnant From the Ashes Armor List
- Remnant From the Ashes Key Items
- Remnant From the Ashes Traits Guide
- Remnant From the Ashes Character Stats
- Remnant From the Ashes Boss Guide
Jungle Walkthrough
Go to a large The Verdant Strand crystal and activate it. In the middle of the location, there will be another large crystal – Ruins. You need to get to the lower right corner of the map to get in the Shrine of The Immortals dungeon. In fact, it will be just another part of the jungle. Walk forward and find yourself in a closed area under rebels’ attack. Kill all enemies in the location. Among them will be several powerful opponents. After the victory, you can talk to the immortals and find out that Ford is held captive by the queen.
Exit through another passage and activate a large Scalding Glade crystal. Fight your way through the jungle until you discover a transition to another dungeon. Go there and activate a small crystal. Proceed between tree houses and kill enemies. Use rolls to dodge explosive bullets fired by gnomes. Enter a building and activate another small crystal.
How to Beat Scald and Sear
In Warden’s Pit on Yaesha, you will be facing two lethal enemies, one a flaming dragon that shoots horizontal projectiles (Sear) and the other a crossbow wielder (Scald). Attacks from both of these inflict Burn damage so it’s good to come prepared with fire-resistant armour.
Even though this is a duo, you don’t have to face both Scald and Sear at the same time. Once you traverse the fog, you can take on Sear and bring down it’s full health while dodging the projectiles and focusing fire on it. Then you can go onto fight Scald. This is when you’re greeted by hostile reptile-like creatures. These can be brought down by some few rounds of your firearm.
Since it’s a large arena with lots of narrow areas, you risk of coming directly in contact with Scald so stick to the high ground and let him approach you. You won’t see the sight of Scald much so whenever you do, inflict a status effect on him like Poison. Otherwise, you’ll need to prepare for rather a long fight.
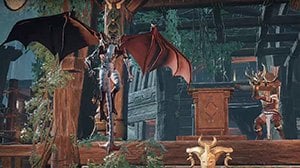
How to Beat Onslaught
This is more of a mini-boss than an actual one and is encountered in Noble’s Rest on Yaesha. He’s not alone as his flying companions swarm in on you from all directions. Onslaught himself can use his teleportation ability to move in close.
He can then shoot projectiles or perform melee attacks, depending on the distance he is from you. The melee attack is a swing of the weapon which deals decent damage. One of the attacks is a powerful blast which has a good knockback effect on hit. Thankfully, the arena you fight him in is huge so you can continue to move around rendering his teleportation ability less-effective. Continue to dish damage as he walks towards you without teleporting, this is your best moment to take chunks of its health out.
By defeating the enemy, you will receive a Blink Spear Shard used to create a powerful modifier.
Secret: Go to the exit, and then activate a large crystal Pan Flautist. Ahead will be a flute player and 5 bells. Listen carefully to the melody that he constantly plays. You have to shoot the bells so that their sounds match the flutist’s melody. Number the bells from left to right. Now shoot them in the following order: 3 / 4 / 5 / 4 (short pause) / 2 / 1. You will open a secret passage with the Heart of the Wolf ring.
There is a door which can be opened from this side. Do it, but then turn around and go right. Proceed forward, killing enemies, and go through a large gate. Activate a small crystal The Ravager’s Haunt and go through the gray haze to a boss.
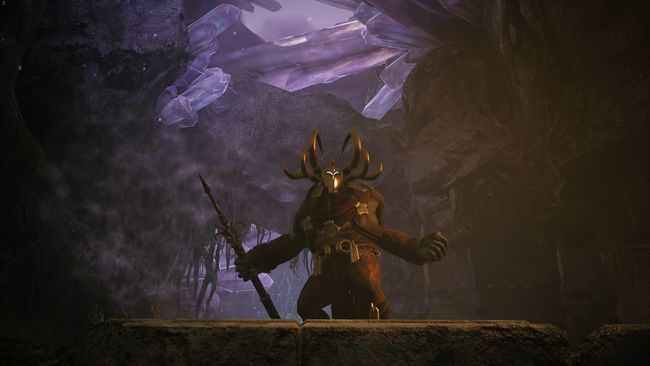
How to Beat The Ravager

The wolf-like boss isn’t encountered straightaway. Once you enter The Ravager’s Haunt, move to the west region of the arena and look for a dark cave. Guarding the entrance would be The Ravager itself. Shoot it to trigger the start of the boss fight.
The Ravager will charge at you with its claw attacks and ram you with its head. While it rushes, The Ravager will crash down pillars and walls in its wake. Wait for it to pace patiently while you shoot at it, then when you see a start-up of an attack, dodge to the side to avoid getting hit.
Smaller enemies from high above will shoot arrows at you so use a ranged firearm to take them out quickly. Some will occasionally mount The Ravager and shoot from there, so eliminate such foes at the earliest.
At roughly half its health, The Ravager will be electrically powered so it can produce shockwaves with its ground pound attack. Keep moving and avoid hiding in cover, since everything around you will be destructible and it’ll be useless against The Ravager. Keep firing at the head of The Ravager to eliminate it.
The Ravager Alternative Kill Method
Play the lullaby to cause the boss to fall asleep.
After the victory, you will receive a new trait Arcane Strike and a Tentacle Pod used to craft powerful weapons.
Go to the exit and activate a large crystal Founder’s Prison. Go down, shoot a lock and talk with the founder Ford. He will give you a key to the computer.