Table of Contents Show
Looking to speed through the game? Or just interested in what’s changed from one difficulty to another? Look no further: this guide is gonna put you on the fast track to the end of the game. (Unmarked spoilers inside.)
General speed tips
- Double click to move. In general. It puts you into a run, so it’s faster.
- Similarly, mash period to skip through dialogue.
- Any cutscene that takes place between can be skipped by pressing esc.
- Press i to open your inventory when possible.
- You can press m to open your map. However, sometimes the map that opens is one to your objective instead of the sea chart. Don’t use this on chapters 2 or 5: You’re locked in a single location in both.
- Do a playthrough once, to get familiar. I didn’t list all the puzzles here.
- Finally try to stick to casual mode on your speedrunner playthrough. It makes puzzles easier, and makes getting that achievement faster.
Don’t worry if you’re not completely accurate on all of this: I messed up a couple of times and still got the achievement.
Got all that? Good. Now for a chapter by chapter listing.
Prelude
Nothing’s changed here. Just skip ahead to the gate, open it, and head to the figure on the bench.
Chapter 1
- Carla will accept the frog without edits. In Hard Mode, you need to write a whole apology message on it first, which revolves around two parts of information that change at random.
- Really minute change: wally will have both monocles out in casual mode. In Hard, you have to get them after entering the store twice.
- The map through the forest corresponds to directions. In Hard Mode you have to note which plants you’re following instead.
- Similarly, you do not need to collect the “bite of a thousand needles” in casual mode.
- You will not be able to collect Promise keeper on Casual. The museum will close after the first theft. Similarly, Flag Facsimile is also not available.
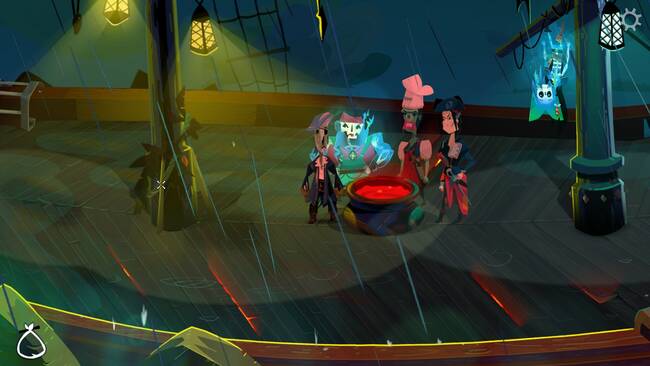
Chapter 2
- The porthole just needs to be greased in Casual. In Hard, it’s also screwed shut.
- The laundry machine will break before you use it on Hard. It’s intact on Casual.
- The Ship’s Chef will bake Scorched Alaska in Casual. In Hard, she leaves it mild.
Not too simple, this one. But still, try to optimize your movements.
Chapter 3
- You only need to get gullet’s poems by helping him finish them on casual. On Hard, you need to prove you’re linked to someone who can get them out there.
- A patch of daises grows near the monkey head in causal. In Hard Mode, a squid is present. Both relate to an objective of this chapter. You can pick the dasies ahead of time, however.
- No matter what game you’re playing, Lechuck’s catchphrase is randomized each playthrough. The page it’s on remains the same, though.
- In casual, the score’s just lying about. In Hard, you have to get the crewmate distracted. Note: You can use your knowledge from a previous playthrough, if you remember the score.
If you’re looking to get out of this quick, don’t pick up the skull on the first beach or under lechuck’s ship.
Chapter 4
- You can reclaim the cookbook from the chef on casual, no extra steps. On Hard mode, you need to give him some aid first.
- Locke Smith’s Key can be claimed from her directly on casual: On Hard, you need some extra steps.
- You do not need to become a Prize Chum on Casual. However, kiskil-lilla tells me you can still get the achievement. I don’t reccomend it for speedrunning, but.. that’s still a thing you can do.
- Casual players will not need to win a burping contest to proceed. This is needed on Hard..
- Here we go again: Elaine is in a random location each playthrough. Get and read the note.
- The seagull guarding guybrush’s picture is not there on casual. On Hard Mode, you need to deal with it.
- You don’t get or need Ned’s licence to extend stan’s sentence on casual. On Hard Mode, you need it.
- The quarantined pirates have the only flag needed for belle fisher’s diving spot. On Hard Mode, you need to get two more: from the museum, and from the Fish shop.
- A box of matches is in the intelligence chamber on casual, hinting at the solution. No such hint in Hard Mode, and the matches are hidden.
- The extra key is in a different location: lying out in Casual, and inside a ghost chicken on Hard Mode.
- The cave on Terror Island can be braved with any fire on casual, and is more clearly marked for passages. In Hard Mode, you need a specific fire, and to gather papers for a riddle.
In every difficulty, I suggest making use of the escape tunnel after entering the ice quarry, and starting the challenge of heartiness in the Ice castle. Also, on the custom form, just scroll to the bottom and click the understanding detail. Freeing stan should be your last act on Burr Muda, since it gets you over to the other islands quicker. Also: you can click your new map from wally to speed to your ship faster. Definitely do this when you have all keys, it saves quite some time.
Chapter 5
All changes relate to the puzzles before heading through the door.
- The first chamber has stone props on casual. On Hard Mode, you need to provide your own.
- Enough pebbles exist to fill up two monkeys on casual. On Hard Mode, you need to fill all chests: think outside the box here.
- In all three chambers, an addition is made on Hard Mode: The two face parts and date. You need to mark these, then adjust them according to a rhyme. On casual, everything can be adjusted from the stone slab.
Walking through the ending normally worked for the achievement. I don’t know if it works if you try to get I don’t believe in the same run. Comment if it does for you, I’ll update the guide.