Table of Contents Show
This guide will cover everything from the basics to helping you understand how strategy and counters work.
Introduction to Rise of Legions
Welcome to a comprehensive guide for beginners and experts alike!
This guide will cover nearly every aspect of the game. If you are an expert at making guides, and plan on playing this game for a long time to come, add me and shoot me a message since I will need help maintaining this guide! If a section makes absolutely no sense to you, just assume it’s meant for the experts and not beginners.
By reading this guide you will learn various aspects of the game itself and also become a better RTS player. You may easily adapt to or change any of the basic builds we present you with and further improve on them making it your own unique build. As more and more legions get added later on, or even more units, there will be more complex builds!
Here’s a step by step of what you should do when you first download the game:
Play the tutorial
Only play this if you’re brand new to RTS games. The game is pretty self explanatory if you played many RTS games before.
Look at all the units in the game via shop
Don’t worry about memorizing everything that comes with time. Just like back in school when your teachers made you read something incredibly boring and you had zero idea what any of it means. Well, doing this now just like back in school, you’ll pick up the little things and start to notice it in-game. What counters what and why, what works well with what (synergy), etc.
Decide on your first Legion to play
You can always change them, but at the start being basic and focusing on one is key. It takes significantly more time for a player to get used to the game when they focus on too much. So as I said, start small, and pick one. Don’t worry about a hybrid build till Bronze/Silver.
Practice
I highly suggest practicing on A.I. (currently called Golem Challenge) and playing on your decks level (most likely it’s below bronze, no color). You get a nice amount of credits in the process, EXP, and you can get the feel of your deck.
Quests, Legions and Quick Matches
When you think you have a feel for the deck you chose it’s time to look at quests, legions and quick matches. If you did what I said and practiced, various quests and challenges should have been completed. The only quests I don’t recommend accepting the reward from are the ones that give cards. Mostly since you may not take a card that you may want, if the challenge is not complete. By challenges I mean small tasks with each legion to unlock a specific card. Play only Quick Matches from here on out as well.
Not a big list to start getting on. Will at most take an hour or two, some people may take longer or shorter than others.
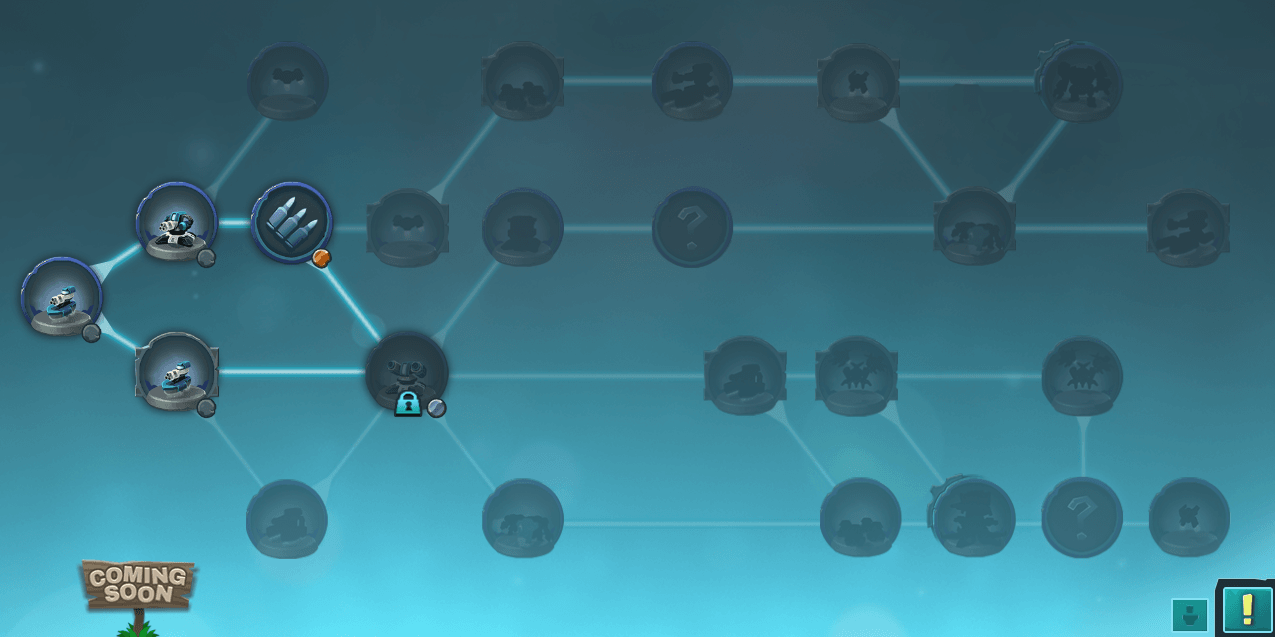
List of Available Legions
Currently there are only 4 available Legions, while one is a work in progress. As stated above, you must play each Legion and complete specific challenges to unlock the card from the shop permanently.
White
The White Legion is more around Zerg play style and defensive buffs. Zerging is basically spam sending units to overwhelm your enemy. A lot of White Legion players use this play style from what I have encountered so far.

Black
The Black Legion is more about self-sustain and tanking. From what I have been against this is pretty accurate. Black Legion players tend to mix with another legion that has more damage based units to not only have that self sustain and tankiness but damage as well.

Green
The Green Legion is all about numbers and buffs. Majority of the units in the Green Legion are incredibly weak and die relatively fast. When they get buffed they gain a huge amount of, well, everything. Making them the strongest Late Game Legion at the moment. I have yet to lose a match with Green where it lasted till Tower Level 2 or Towers attacking the base phases.

Blue
The Blue Legion is still a work in progress. However, from messing with it in builds and using what little you have, it is VERY good at not letting anything past a tower if you position everything right. Only issue is, ranged units have more range and can kill your turrets. The basic unit (only one that actually moves) is so incredibly weak when being hit, that you actually have to mix Legions right now this Legion even remotely viable. The turrets have so much health and damage this will most likely be the best Legion to use as a mix especially with White or Black Legion.
Now that you got a short explanation on the Legions, time to move onto the next section.
Tiers and Leagues
Summons, Spawns, and Spells Tiers
This game has 3 types of cards:
- Summons (uses Gold)
- Spells (uses Gold)
- Spawners (uses Souls which are gained from Gold Usage)
The cards have various Tiers as well which calculate in-match cost or time needed before it can be used. So what needs to be taken into consideration is: Time, Cost, Tier.
Summons, Spells, and Spawners all have different rules and costs set to them which increases the complexity of the build and limits builds that can be too overpowered. As long as you followed the Time, Cost, and Tier you may make a proper, efficient build. Let’s take a look at what is required for each Tier:
Tier 1
- Summons x100
- Spells x80
- Spawners x800
Tier 2
- Summons x150
- Spells x130
- Spawners x1500
Tier 3
- Summons x200
- Spells x180
- Spawners x2400
Legendary
- Summons x300
- Spells x280
- Spawners x?
Keep in mind that:
- Tier 1 Summons/Spells can be played once the games starts.
- Tier 2 Summons/Spells can be played once 4 minutes have passed in the match.
- Tier 3 Summons/Spells can be played once 8 minutes have passed in the match.
- Tier 1 to 3 Spawners can be played as long as you have the required Souls for it.
- Summons/Spells cost gold, and Spawners cost Souls make sure to remember that when looking at the costs on the table.
- Only 1 legendary card may be active at a time per player. If you want a legend in your deck, only select one. Anymore is a waste.
Some people don’t know this, but there are actually 2 types of summons currently: Buildings and units. The only difference is buildings don’t have legs. So I would strategically place them to where they don’t get hit or where they maximize damage output.
Inside the Building category there are another 3 types:
- Summon
- Turret / Damage
- Support
Summon Building:

A summon building is a unit that spawns additional units, think of them as additional Spawners that cost gold. Their lifetime is limited however to not break the game as well as summon based builds.
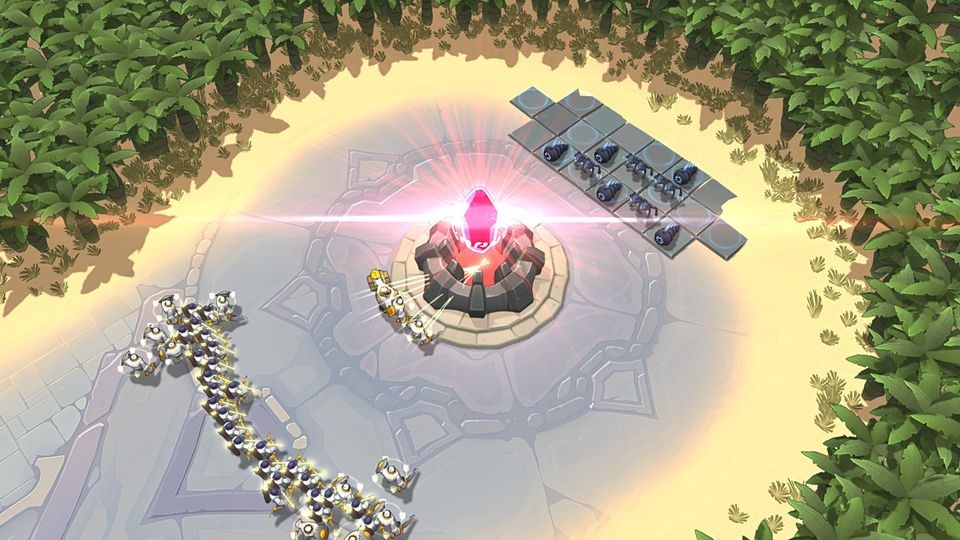
Turret / Damage Building:

A turret or damage based building is one that only inflicts damage and acts as a meat shield to stop enemy units from advancing on you. They are not the perfect defense! You must have active units as well.
Support Building:

A support tower just provides basic assistance, and they last until killed. Think of it as the Priests of towers. They provide Energy, buffs, heals, anything support like. These towers also have low life to avoid abuse of them and make them easy to kill.
Spawning And How It Works:
Spawning is basically a small area in your base that when your Spawn card is placed, it will spawn what ever you place. This is partly luck, and strategy. Don’t spend too much time looking over here. Just place a spawn on the blue circle and immediately go back to focusing on the battle.
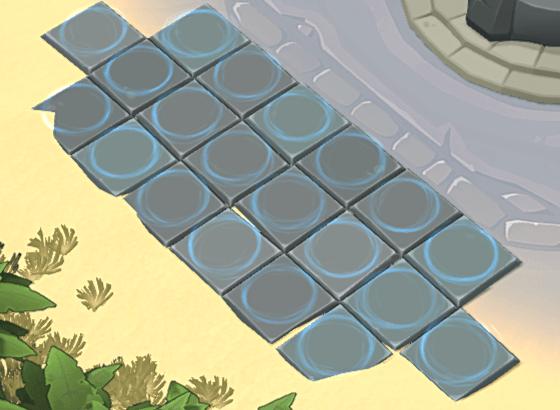
There are 20 tiles in total. It takes 2 seconds per random tile for the blue circle to disappear. When the circle disappears, that means the unit (if placed on it) will be spawned. The entire process will take about 40 seconds, and each tile chosen to “spawn” is completely random.
It’s highly recommended to place your Spawns ONLY on a tile with a blue circle still on it. The reasoning behind this is because it will have the initial spawn when you place it, and will spawn again when the circle disappears.
Leagues
There are currently only 5 leagues:
- Stone
- Bronze
- Silver
- Gold
- Crystal
Each league is decided by the highest card you have
Meaning the card with the highest league. I don’t recommend going to a higher league with only 1 card that can survive in that league. It would be much better to sit on your current league, all cards still maxed, and ascend them all at the same time to move on to the next league.
To ascend a card, you must have that card at Level 5. Inside the small icon you see above, it will have a number ranging from 1-5. That’s how experienced the card is.

You can sacrifice random cards you’ll never use to level them, or you can just play the game and gather experience (not just card and level experience, but personal player experience). I highly recommend not throwing away your extra cards. As far as I can tell there is no limit to how many cards you can own. I suggest saving them in case new features may get added to where you can put them to better use. Sacrificing doesn’t give much EXP unless you level them as well.
Abilities and Legion Synergy
Cards and Their Abilities
There are a huge number of abilities in this game despite what few cards there are. Each ability can synergize well with other abilities. This is where card synergy comes into play. Without these abilities none of these cards would have good synergy. You don’t need to memorize all of these abilities. These abilities will just help you keep note about what works best with what.
Legion Synergy
Legion synergy is what Legions work best together in a single deck. Of course the limit is 2 Legions per deck, but you can find many good combinations that can not only work best for you, but can end up being some of the strongest.
Some Synergies I Found Work Best Together:
- Green (Primary) = White (Secondary – Buffs/Spells Only)
- Green (Primary) = Blue (Secondary – Buildings Only)
- White (Primary) = Blue (Secondary – Buildings Only)
- White (Primary) = Green (Secondary – Buffs/Spells Only)
- White (Half) / Black (Half)
- Blue (Primary) = White/Black/Green (Secondary – Anything that can push)
- Black (Primary) = White (Secondary – Spells/Ranged)
- Black (Primary) = Green (Secondary – Spells/Ranged)
Those are just some of the synergies that work well together. I am quite positive you can find more on your own!