Table of Contents Show
The classic multiplayer roguelike, Risk of Rain, returns with an extra dimension and more challenging action. No run will ever be the same with randomized stages, enemies, bosses, and items. Play solo, or team up with up to four friends to fight your way through hordes of monsters, unlock new loot, and find a way to escape the planet.
Other Risk of Rain 2 Guides:
- Risk of Rain 2: Console Commands & Cheats
- Risk of Rain 2: Classes Tier List
- Risk of Rain 2: Mercenary Guide
- Risk of Rain 2: Artificer Guide
- Risk of Rain 2: Huntress Guide
- Risk of Rain 2: How to Unlock All Characters
- Risk of Rain 2: What Is The Blue Orb?
- Risk of Rain 2: Lunar Coins & Gold Farming
- Risk of Rain 2: Interactable Objects Guide
- Risk of Rain 2: Newt Alter Locations
With each run, you’ll learn the patterns of your foes, and even the longest odds can be overcome with enough skill. A unique scaling system means both you and your foes limitlessly increase in power over the course of a game–what once was a bossfight will in time become a common enemy.
Classes
Introduction
As of right now, a week from the launch of Risk of Rain 2, six classes are available for non-modded clients to play. These classes include:
- Commando
- MUL-T
- Huntress
- Engineer
- Artificer
- Mercenary
Although each class may have its own unique strengths and weaknesses, I will be ranking each class based on how strong they are relative to “completing” rainstorm and monsoon difficulty runs.
Most would consider the celestial portal as a completed run, but my definition of a completed run is one where the player survives to the point where bosses stop spawning. According to Hopoo, this occurs because “the game skips spawns that it deems is too easy for the number of ‘spawn credits’ it has. If you’ve gotten to that point congrats, the game thinks Overloading Worms are a bit too easy for you. This will naturally be fixed once higher tier monsters and affixes are added to the game. For now… it means that you terrified the whole planet.”
I would also like to make it clear that each of these classes is rated in their performance in single-player as I do not have anywhere near enough time in multiplayer to make a sound judgement on all characters.
Ranking
Every character is powerful in their own unique aspect and none are necessarily “stronger” than the other. But reaching the end-game is often more challenging (requires more knowledge or skill) for some characters than others. Therefore I will be categorizing characters by this system:
Classes: S Tier
Engineer
Although dashing and kiting around hordes of enemies can be fun, the safest strategy is just to stay put and utilize the shield to block deadly attacks. Because Engineer has access to turrets that effectively triple the effectiveness of his stacked items, this makes him an absolute threat to bosses. He does suffer in terms of a lack of mobility, but movement items can quickly overcome this loss. Despite this rank, Engineer is not a completely foolproof option as sitting still and not being careful is a one way ticket to a quick death.
Engineer deserves S Tier because:
- He has access to a shield which he can use to block game ending hits from blazing bosses.
- Mines provide big bursts of DPS when necessary; they are perfect for quickly getting rid of the monsters that get under your shield.
- Having 2 turrets can split aggro between mob and boss spawns resulting in less pressure overall.
- 2 turrets will amplify the strengths of Engineer’s buffs for extreme dps output lategame.
- He has the most consistent healing out of any class due to his natural synergy with Bustling Fungus.
Classes: A Tier
MUL-T
MUL-T sits at the pinnacle of A Tier for a good reason. His amazing utility, high damage output, and tankiness makes him an excellent all-rounder class. Because of this, MUL-T would be the class I would recommend to new players looking to complete the long road challenge.
MUL-T deserves A Tier because:
- His natural tankiness allows him to take hits that would normally leave others dead (It also allows for the safe inclusion of shaped glass in a build)
- The ability to hold two items is extremely powerful. Why choose between a nuke and a healing item when you can have both.
- His transport mode is possibly the best all encompassing utility. It can be used to escape, stun enemies, and supplement DPS.
- Blast canister and its bomblets can provide amazing AOE and boss damage at every stage in the game.
- His nailgun is extremely powerful in terms of DPS, but has a lower proc coefficient compared to other classes. This makes healing items such as Leeching Seed and Harvester’s Scythe harder to stack effectively. This issue is compensated by the existence of Foreign Fruit and Gnarled Woodsprite, but blazing bosses still can make MUL-T runs difficult.
- The fact that MUL-T needs to get up close to the boss to use his nailgun effectively means the player has to play carefully. Done right, his DPS will easily melt a majority of bosses.
Classes: B Tier
Commando
Commando sits at the top out of all classes in B tier because of his ability to scale with on-hit items. Because of his naturally high attack rate and good overall proc chance, Commando can output a significant amount of DPS to any boss at a safe range. Although his utility skill does not give iframes, it still is serviceable as it can be used to dodge most attacks. Commando’s DPS can get pretty crazy late game, but he falls behind MUL-T and Engineer as he doesn’t have a lot of the advantages they have at bossing. One example would be in clearing adds. While Engineer has mines and MUL-T has his blast canister, Commando’s phase round doesn’t quite do enough during a hectic bossfight.
Commando deserves B Tier because:
- His ability to create crazy on-hit builds leads to an immensely powerful late game damage dealer who obliterates bosses from a safe distance.
- The tactical dive utility skill has a short cooldown and is excellent for mobility and positioning. It what make Commando a safer pick in the late game when dodging game ending hits is key.
- Suppressive fire is quite impressive for supplementing DPS and can be used to stun in a pinch.
- Phase round is great for cleaning up adds when lined up correctly but late game AOE items will most likely take over leaving this skill as a DPS supplement against bosses.
- Commando is relatively mediocre in his ability to deal with hordes of enemies. Using the phase round and suppressive fire on bosses leaves you vulnerable against the adds spawned while charging the teleporter. This means that not finding any Will o’ the Wisp and Gasoline can quickly end your run.
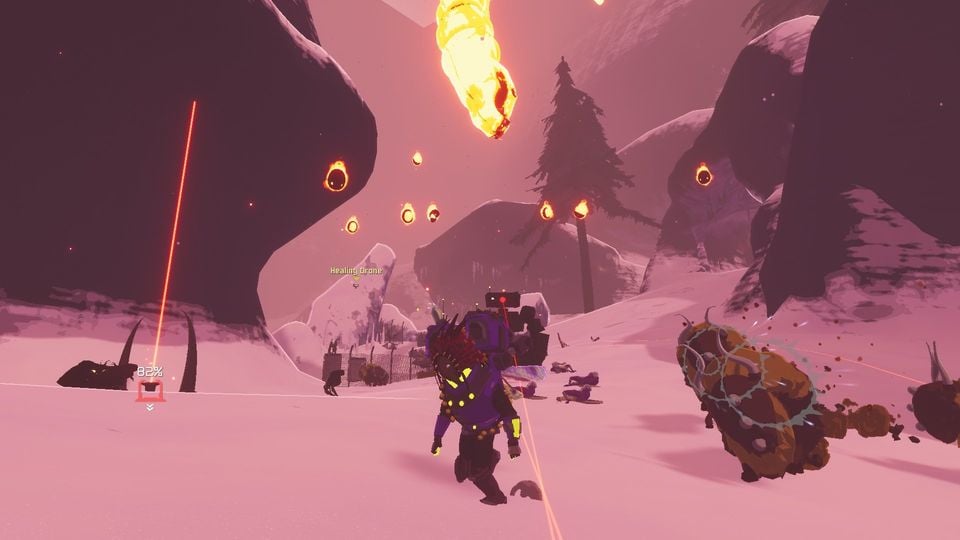
Huntress
Huntress has an impressive arsenal of AOE options and can do a significant amount of damage quickly to a boss if played right. Nevertheless, her placement in B tier is due to a variety of factors that huntress players need to pay attention to (especially during mid/late game). Her homing gimmick can seem useful at first, but this can impede her ability to deal damage to bosses when enough adds spawn. Additionally, her base HP is also lower than all other classes. With such a low hp pool, one shots from late game bosses (and even early/midgame bosses) are extremely common. Tread carefully as a huntress.
Huntress deserves B Tier because:
- Her low base hp means that she can quickly be taken down from one mistake.
- Blink is an extremely powerful mobility and repositioning tool but it has a relatively long cooldown for what it does. One bad blink can spell disaster.
- Her ability to sprint while firing means that Huntress begins with an edge in mobility over other classes during combat. Unfortunately, her homing targeting means that she has to get exceptionally close to the boss in order to target said boss. Doing this without practice in a actual game would be suicide. Thus, Huntress tends to draw out boss fights by focusing adds first. This can be worse for the late-game as drawing out fights will give blazing bosses more opportunities to one-shot.
- Laser Glaive and Arrow Rain are great for general AOE DPS, but it becomes clear that Huntress lacks a good single target DPS in the late game. Therefore, her best chance at chunking bosses is through glaive spam. Not only does her glaive have an excellent proc chance (for how much it bounces), but it also deals amazing damage. Unfortunately this means that falling behind on cooldown reduction and backup magazines will result in pitiful mid and late game DPS.
- Arrow Rain is great for its AOE, but late game the damage from this skill can be lackluster. Because it has a abysmal proc for on-hit (0.1 proc coefficient), it scales poorly as the player accrues more and more items. Arrow Rain can also easily get you killed if used in an improper time (Blazing Stone Titan). It should be considered additional utility in the late game for both an area-control slow and the blink dodge.
Artificer
Artificer seems to have everything in her kit, everything but an actual utility skill. Her ability to utilize burst DPS, strong AOE, high damage flamethrower, and even execute enemies is quite amazing in its own right. Unfortunately, the fact that her one and only defensive tool (snapfreeze) cannot block boss projectiles means that she is subject to a quick death in the late game from a blazing boss. Given enough speed boosting items, a good Artificer can avoid deadly situations by carefully kiting and positioning. Thus she deserves to be in B tier as she has excellent bossing and mobbing abilities but can get caught in an unfavorable position if played poorly.
Artificer deserves B Tier because:
- Her kit is extremely powerful for DPS. The Nano-Bomb is Artificer’s bread and butter skill for amazing damage and it is rightfully so. With a charge doing up to 1200% damage, she can obliterate smaller spawns and chunk bosses.
- Her ice wall from snapfreeze can execute enemies and do good damage to bosses. Despite its positives, snapfreeze is terrible for defense as enemies can attack through it. This makes close range encounters and flying enemies difficult to deal with. Artificer must solely rely on sprint for escape and repositioning.
- Flamethrower is an excellent skill to weave in between attacks as you wait for your cooldowns and ability charges. It is a very versatile skill and can be used to take down bosses faster or clear adds. It is also a very dangerous skill to use, and in the late game you often won’t have the time to cast it to completion. According to Xgpmcnp, the 1700% total damage the skill says in the ingame description is actually incorrect.
- Artificer builds will always favor Backup Magazines, Crowbars, and Energy Drinks due to the current nature of the class. Finding none of these top tier items would make playing Artificer significantly harder than many other classes without their top tier items.
- Because of her low mobility, she is often weak during the mid-game where there are not enough items to compensate for difficult teleporter battles.
- Artificer has an abysmal proc coefficient on her Flame Bolt (0.2) which makes it very difficult to proc on-hit items without help of her Flamethrower. This is balanced by her extremely high DPS compared to any other character.
Classes: C Tier
Mercenary
Mercenary is the only melee class in Risk of Rain 2 and quite an flashy one too. With his ability to dash, slash, and eviscerate enemies out of existence, mercenary is quite an amazing class to watch and play as. That being said, mercenary ends up in C Tier as he has the hardest time fighting against end game bosses. Two of the most common bosses late-game include blazing elite bosses and overloading magma worms both of which often is a death sentence for a mercenary player.
Mercenary deserves C Tier because:
- His mobility the best out of any class, but this comes at the cost of being melee. Without range to engage a boss at a safe distance with, Mercenary is put in more dangerous game-ending situations than any other class.
- Blinding assault can be used up to three times if the first two hit. This skill is critical, as it is necessary for staying in the air and interrupting enemies. However, it does not provide good dps on its own and is often followed by a whirlwind for damage. Additionally, the skill can glitch and knock enemies away which can both help and hurt.
- Even with a great build, blazing bosses and overloading magma worms are extremely difficult to fight as mercenary as getting close to these bosses often involve getting hit. These hits late-game are anything but soft and if a tougher times fails to block this can easily mean an instant death.
- Although he gets a significant amount of iframes from a eviscerate, enemies can still lock on to his location. If unlucky, a shot immediately following an eviscerate can end the run. This makes items such as Alien Head, Bandolier, and Brainstalks necessities on mercenary in order to reduce the downtime where he is vulnerable. While a skilled mercenary can time his cooldowns and utilize the zero end-lag skills to their advantage, this requires an extraordinary amount of skill and knowledge against every enemy in the game. Thus, due to his difficulty surviving in the end game compared to other characters, Mercenary is placed in C Tier. He is in no means a bad character.