Table of Contents Show
The classic multiplayer roguelike, Risk of Rain, returns with an extra dimension and more challenging action. No run will ever be the same with randomized stages, enemies, bosses, and items. Play solo, or team up with up to four friends to fight your way through hordes of monsters, unlock new loot, and find a way to escape the planet.
With each run, you’ll learn the patterns of your foes, and even the longest odds can be overcome with enough skill. A unique scaling system means both you and your foes limitlessly increase in power over the course of a game–what once was a bossfight will in time become a common enemy.
Other Risk of Rain 2 Guides:
- Risk of Rain 2: Console Commands & Cheats
- Risk of Rain 2: List of All Items
- Risk of Rain 2: Classes Tier List
- Risk of Rain 2: Mercenary Guide
- Risk of Rain 2: Artificer Guide
- Risk of Rain 2: Huntress Guide
- Risk of Rain 2: How to Unlock All Characters
- Risk of Rain 2: What Is The Blue Orb?
- Risk of Rain 2: Lunar Coins & Gold Farming
- Risk of Rain 2: Interactable Objects Guide
- Risk of Rain 2: Newt Alter Locations
Myriad survivors, items, enemies, and bosses return to Risk 2, and many new ones are joining the fight. Brand new survivors like the Artificer and MUL-T debut alongside classic survivors such as the Engineer, Huntress, and-of course-the Commando. With over 75 items to unlock and exploit, each run will keep you cleverly strategizing your way out of sticky situations.
How to Unlock All Characters
Quick guide to unlocking the first set of locked playable characters.
Artificer
Complete the achievement Pause by spending 10 Lunar Coins at the Bizarre Between Time to release the character from suspension.
Lunar Coins are a persistent (not lost on death) currency dropped at random by enemies and the Bizarre is accessed either by a random blue portal spawn or by spending a Lunar Coin at a Newt Statue. Once inside the Bizarre spend the 10 coins at the crystal beside the Newt that contains the character.
If spawning the blue portal through statue interaction rather than random chance you must have at least 11 Lunar Coins (1 to spawn the portal, and 10 to unlock the character).
Mercenary
Complete the True Respite achievement by obliterating yourself at the Obelisk.
To complete this achievement you must clear stages until you reach your beginning again in order to spawn the celestial portal in a single run. You must effectively beat the game.
To do this simply continue to clear stages without dying until you return to your first map, whereupon celestial portals will begin to spawn. Go through a celestial portal and drop down the jump puzzle until you reach a large obelisk. Interact with the obelisk to eradicate yourself and end your run, “beating” the game and unlocking the character.
If unsure which portal to use, the portal will be announced in the ingame chat as a celestial portal, and looks like a white portal compared to its vibrantly blue portal counterpart which leads to the Bizarre.
Engineer
The Engineer character will unlock for you after you have cleared 30 areas. These do not have to be done in one life. Instead, you will be able to spread it out across multiple games! This is good news, as I cannot fathom being able to last for 30 different areas in Risk of Rain 2!
The good news is, that while it seems like a bit of a grind, areas go by surprisingly fast, especially if you have an efficient team. Just run around the areas killing enemies and getting gold. Open crates that contain new items, then fire up the Teleporter! Fight the boss and use the teleporter and you will be on step closer to the Engineer! You can also unlock other characters along the way, which is nice!
Mage
To get the Mage character, you will need to spawn the Lunar Portal by finding the weird blue rock that will be hidden in the stage. It is important to do this only after you have 11 Lunar Coins. You will need to a bit lucky on that front, as the coins drop randomly from defeated enemies. There seems to be one of these unusual rocks hidden in every stage, so no need to worry too much if you don’t have the coins, but do find one. There will certainly be more of them during your run.
You will need to give one coin to the rock to spawn the Blue Orb, then find the teleporter and beat the boss. Once the boss has been defeated, do not use the teleporter. Instead, use the blue Lunar Portal that spawns to go for a trip to the Bazaar Between Realms. Give the strange blue vendor there 10 Lunar Coins, and you will unlock the Mage character, freeing him from whatever trap he appears to have been snared in.
Huntress
The first character to unlock is the Huntress, and she is quite easy to obtain.
To get her, you need to unlock the achievement “Warrior” which unlocks after reaching and completing the third teleporter event without dying. A hard task, but not an impossible one – just be sure to scavenge for a lot of items, and you should be fine.
Once Huntress is unlocked, you will be able to pick her on your next playthrough. She is an agile fighter that can teleport using her Blink ability and lock onto enemies with her attacks, making her an ideal character for new players.
Her ultimate is also perfect when against hordes of enemies or standstill bosses, as she fires down a hail of arrows in a single spot that can deal a ton of damage.
MUL-T
To get access to his impressive arsenal, you need to go about unlocking the “Verified” achievement that can be found in-game. This will have you beat the first level’s teleport boss five different times in five different games, so prepare to play a lot of matches.
Once you do that, MUL-T will be added to your roster for the next game you play. Be sure to make the most of his two different weapon types and his ability to go around the map in lightning speed to survey the landscape and find those teleporters as quickly as possible.
Tips & Tricks
How To Quickly Earn Gold
Dotted around the map, you should be able to find a Shrine, just like the one shown in the image above. It will have a blood red symbol floating above it, a warning of the danger of using it. If you run up to it, you will be able to offer 50% of something. That something is your health. If you are willing to lose half your health, you can get yourself some gold. The Shrine can be used three times, first for 50%, then 75%, then finally 93% of your health. It will reward a greater amount of gold each time.
Ideally, you want to get to this Shrine early in the level, to take advantage of the gold. There is little point using it when all the crates have already been opened! Be careful though, while your health will slowly heal up over time, you don’t want to be surrounded by enemies when you use this Shrine, as that is a straightforward way to die.
Now, I found one of these Shrines in every level I have played today, so I am going out on a limb and assuming there will always be one somewhere in each stage. It is a great way to earn some gold quickly, but beware the risks involved! It would be a shame to see your run cut short from being a little too greedy!
What Is The Blue Orb?
Now, the reason for the message is that someone on your team found a small blue rock with some light blue spines. If you give this a Lunar Coin, then the blue orb will spawn! Or at least, based on my experience this appears to be what happens.
The Blue Orb seems to cause the Lunar Portal to appear when you defeat the boss. Defeat the boss before the teleporter hits 100%, and you will open up the Blue Portal. You can jump through the portal, and visit the Bazaar Between Realms. In there, you will find a mysterious trader. He wants 10 Lunar coins; an item occasionally earned from defeating enemies. For those 10 Lunar Coins, you can unlock the Artificer character.
There will also be two shrines, where you can trade items in for different items, just in case, your build is not going as you hoped it would. There is also an altar where you can trade Lunar Coins for special items. Make sure you keep your eyes peeled for your chance to visit the Bazaar Between Realms!
How to win
You will appear at a random spot in the level, and your ultimate objective will be to find the teleporter to the next level, which will also appear at a random location. It can be pretty tough to spot, especially if you’re not familiar with how it looks like. Keep your eyes peeled and remember to let other players know if you find it by pointing at it and pressing the Ping button (Mouse 3 by default).
Once you activate the teleporter, you will need to charge it; all you need to do is stay inside the red bubble around the teleporter and hang in there. However, a boss will appear as soon as you activate the teleporter, and you’ll also have to kill them before you can proceed.
Use the teleporter again once you’ve done all this and you’ll shortly be teleported to the next level. There is no ending… yet; you will eventually loop back to the first level. Survive for as long as you can before you get yourself killed.
This game can be pretty hard, especially on your first few tries. Therefore, I recommend trying a couple of runs in singleplayer to get used to the controls and then hop right into multiplayer. This should help ease the burden on yourself and pair you with other people that can show you the ropes.
How to Get Stronger
As you look for the teleporter, enemies will appear all around you. You can kill them to earn money, which is automatically collected and shared with all players.
This money can then be spent to get items, which will be the main way you will power up throughout the game. Each item grants a small effect, but they can also be hoarded infinitely; Survive long enough to get plenty of items and you’ll become a one-man army!
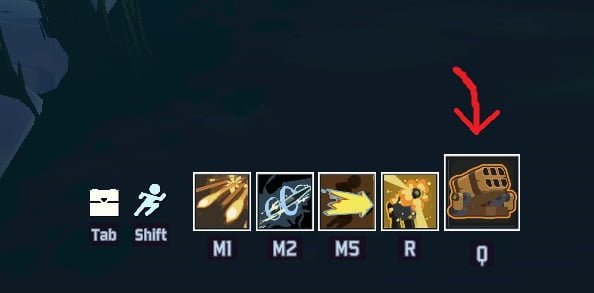
Now, while most items have passive, permanent effects, Equipment Items are a different story. You can only carry one at a time and they won’t do anything until you activate them (Press Q by default). They provide brief and extremely powerful effects and you can use them as many times as you like! However, they also have much longer cooldowns, so make each use count!
Items are color-coded into four groups. Passive items are, ranked from most to least common, white, green and red. The rarer the item, the more powerful they tend to be. Equipment items are all color-coded orange, and can vary in usefulness.
All Item List
There will be spoilers in this guide!
I apologize for missing a few items right now, but I can’t do anything about it until I either get them myself or I receive data from the community. Feel free to leave a comment with item descriptions if you have something I’m missing!
Items are listed in order, left to right, top to bottom, as they appear in the in-game logbook. All items that have unlock requirements have the unlock condition listed beneath them.
For Quick Lookup
Use the keyboard shortcut Ctrl+F and type in the name of the item you are looking for.
Common Items (White)
Soldier’s Syringe
Increases attack speed by 15% (+15% per stack).
Tougher Times
15% (+15% per stack) chance to block incoming damage. Unaffected by luck.
Notes: The stacking for this item appears to be more complex than simply +15% per stack, and I have been given an algorithm for determining the actual effectiveness of the item. It is as follows.
Tougher Times stacking algorithm : (1 – 1 / (0.15 * [ITEMNUMBER] + 1)) * 100)
Notes: Interesting statistics on the stacking algorithm. “As is, you need 16 for 70% reduction, 27 for 80%, 38 for 85%, 60 for 90%, 127 for 95%, over 327 for 98%, over 661 for 99%, and over 6665 sad teddy bears to have a 99.9% chance to block incoming damage.”
Requirements: Die 5 times.
Monster Tooth
Killing an enemy spawns a healing orb that heals for 10 (+5 per stack) health.
Lens-Maker’s Glasses
Your attacks have a 10% (+10% per stack) chance to ‘Critically Strike’, dealing double damage.
Paul’s Goat Hoof
Increases movement speed by 14% (+14% per stack).
Requirements: Fail the Shrine of Chance 3 times in a row.
Notes: Shrines of Chance look like this (below) and can be found on any map. There is no surefire way to guarantee 3 fails in a row, you simply have to get lucky (or rather, unlucky).
Bustling Fungus
After standing still for 2 seconds, create a zone that heals for 4.5% (+2.25% per stack) of your health every second to all allies within 3m (+1.5m per stack).
Crowbar
Deal 150% (+30% per stack) damage to enemies above 90% health.
Requirements: Discover 10 unique white items.
Tri-Tip Dagger
15% (+15% per stack) chance to bleed an enemy for 240% base damage.
Warbanner
On level up drop a banner that strengthens all allies within 16m (+8m per stack). Raise attack and movement speed by 30%.
Cautious Slug
Increases passive health regeneration by 250% (+150% per stack) while outside of combat.
Personal Shield Generator
Gain a 25 (+25 per stack) health shield. Recharges outside of danger.
Medkit
Heal for 10 (+10 per stack) health 1.1 seconds after getting hurt.
Requirements: Defeat an Elite-type monster.
Gasoline
Killing an enemy ignites all enemies within 12m (+4m perstack). Enemies burn for 150% (+75% per stack) base damage.
Stun Grenade
5% (+5% per stack) chance on hit to stun enemies for 2 seconds.
Bundle of Fireworks
Opening a chest launches 8 (+4 per stack) fireworks that deal 300% base damage.
Requirements: Duplicate the same item 7 times in a row with a 3D printer.
Energy Drink
Sprint speed is improved by 30% (+20% per stack).
Backup Magazine
Add +1 (+1 per stack) charge of your Secondary skill.
Requirements: Fully charge a teleporter without getting hit.
Sticky Bomb
5% (+2.5% per stack) chance on hit to attach a bomb to an enemy, detonating for 250% damage (+125% per stack).
Rusted Key
A hidden cache containing an item will appear in a random location in each stage. (Increases rarity of the item per stack.)
Requirements: Defeat the teleporter boss in under 15 seconds.
Armor-Piercing Rounds
Deal an additional 20% damage (+10% per stack) to bosses.
Requirements: Complete a teleporter event.
Uncommon Items (Green)
AtG Missile Mk. 1
10% chance to fire a missile that deals 300% (+300% per stack) damage.
Will-o’-the-wisp
On killing an enemy, spawn a lava pillar in a 12m (+2.4m per stack) radius for 350% (+280% per stack) base damage.
Hopoo Feather
Gain +1 (+1 per stack) maximum jump count.
Ukulele
25% chance to fire chain lightning for 80% damage on up to 3 (+2 per stack) targets within 20m (+2m per stack).
Leeching Seed
Dealing damage heals you for 1 (+1 per stack) health.
Predatory Instincts
Critical strikes increase attack speed by 10%. Maximum cap of 30% (+30% per attack) attack speed.
Requirements: Reach +200% attack speed.
Red Whip
Leaving combat boosts your movement speed by 30% (+30% per stack).
Old War Stealthkit
Chance on taking damage to gain 40% movement speed and invisibility for 3s (+1.5s per stack). Chance increases the more damage you take.
Harvester’s Scythe
Gain 5% critical chance. Critical strikes heal for 8 (+4 per stack) health.
Requirements: Complete a Prismatic Trial.
Fuel Cell
Hold an additional equipment charge (+1 per stack). Reduce equipment cooldown by 15% (+15% per stack).
Requirements: Pick up 5 different types of Equipment (Active Items).
Infusion
Killing an enemy increases your health permanently by 1, up to a maximum of 100 (+100 per stack) health.
Requirements: Defeat 3000 enemies.
Bandolier
18% (+10% per stack) chance on kill to drop an ammo pack that resets all cooldowns.
Berzerker’s Pauldron
Killing 3 enemies within 1 second sends you into a frenzy for 6s (+4s per stack). Increases movement speed by 50% and attack speed by 100% for the duration.
Requirements: Charge the teleporter with less than 10% health.
Rose Buckler
Increase armor by 25 (+25 per stack) while sprinting.
Runald’s Band
8% chance on hit to strike an enemy with a runic ice blast, slowing them by 80% and dealing 250% damage (+125% per stack).
Requirements: Discover the hidden chamber in the Abandoned Aqueduct.
Kjaro’s Band
8% chance on hit to strike an enemy with a runic flame tornado, dealing 500% damage (+250% per stack).
Requirements: Discover the hidden chamber in the Abandoned Aqueduct.
Chronobauble
Slow enemies on hit for -60% movement speed for 1s (+1s per stack).
Wax Quail
Jumping while sprinting boosts you forward by 10m (+10m per stack).
Requirements: Reach +300% movespeed (includes sprinting).
Legendary Items (Red)
Brilliant Behemoth
All of your attacks explode in a 4m (+1.5m per stack) radius for a bonus 60% damage to nearby enemies.
Ceremonial Dagger
Killing an enemy releases homing daggers.
Frost Relic
Killing an enemy surrounds you with 3 icicles that deal 3×33% damage.
Happiest Mask
Killing enemies has a 10% chance to spawn a ghost of the killed enemy with 500% damage. Lasts 30s (+30s per stack).
H3AD-ST v2
Increase jump height. Creates a 10m radius kinetic explosion on hitting the ground, dealing 2300% base damage that scales up with speed. Recharges in 10 (-50% per stack) seconds.
N’Kuhana’s Opinion
Store 100% (+100% per stack) of healing as Soul Energy. After your Soul Energy reaches 10% of your maximum health, fire a skull that deals 250% of your Soul Energy as damage.
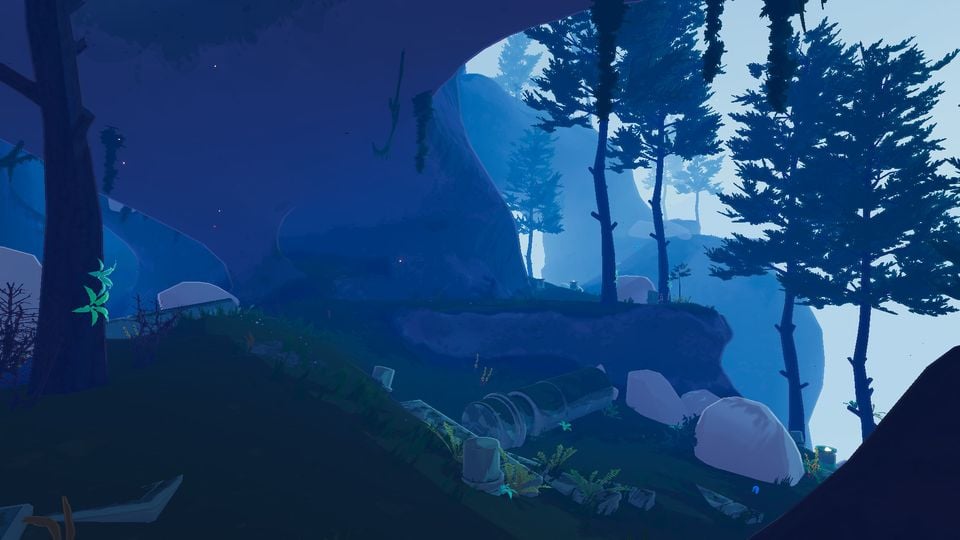
Requirements: Find the Altar to N’Kuhana. (In the swamp map, below the edge of the cliff – Right below the huge carved piece of stone that hangs out over the edge.)
Unstable Tesla Coil
Fire out lightning that hits 3 (+3 per stack) enemies for 200% base damage every 0.5 seconds. The Tesla Coil switches off every 10 seconds.
Requirements: Deal 5000 damage in one shot.
57 Leaf Clover
All random effects are rolled +1 times (+1 per stack) for a more favorable outcome.
Requirements: Complete 20 stages in one run.
Sentient Meat Hook
20% (+20% per stack) chance on hit to fire homing hooks at up to 10 (+5 per stack) enemies for 100% damage.
Requirements: Loop back to the first stage.
Alien Head
Reduce skill cooldowns by 25% (+25% per stack).
Soulbound Catalyst
Kills reduce equipment cooldown by 4s (+2s per stack).
Requirements: Discover and activate 8 unique Newt Altars.
Dio’s Best Friend
Upon death, this item will be consumed and you will return to life with 3 seconds of invulnerability.
Requirements: Stay alive for 30 consecutive minutes.
Hardlight Afterburner
Add +2 (+2 per stack) charges of your Utility skill. Reduces Utility skill cooldown by 33%.
Wake of Vultures
Gain the power of any killed elite monster for 8s (+5s per stack).
Brainstalks
Upon killing an elite monster, enter a frenzy for 3s (+2 per stack) where skills have no cooldowns.
Requirements: Defeat an Elite boss on Monsoon difficulty.
Rejuvenation Rack
Increase all healing received by 100% (+100% per stack).
Requirements: Without healing, reach and complete the 3rd teleporter event.
Boss Items (Yellow)
Titanic Knurl
Increase maximum health by 40 (+40 per stack) and health regeneration by 1.6 (+1.6 per stack) health per second.
Requirements: Kill the Titanic Guardian boss, and get lucky with the drop rate.
Queen’s Gland
Every 30 seconds, summon a Beetle Guard with bonus 300% damage and 100% health. Can have up to 1 (+1 per stack) Guards at a time.
Requirements: Kill the Beetle Queen boss, and get lucky with the drop rate.
Lunar Items (Blue)
Shaped Glass
Increase base damage by 100% (+100% per stack). Reduce maximum health by 50% (50% per stack).
Brittle Crown
30% chance on hit to gain 3 (+3 per stack) gold. Lose gold equal to the amount you are hit for OR lose % gold equal to the % maximum health you lost. Chooses the greater of the two.
Transcendence
Convert all but 1 health into regenerating shields. Gain 50% (+25% per stack) maximum health.
Corpsebloom
Heal +100% (+100% per stack) more. All healing is applied over time. Can heal for a maximum of 10% (reduced by 50% per stack) of your health per second.
Gesture of the Drowned
Reduce Equipment cooldown by 50% (+50% per stack). Forces your Equipment to activate whenever it is off cooldown.
Requirements: Kill 20 hermit crabs by chasing them off the edge of the map.
Notes: For those having trouble finding a map with hermit crabs to chase off of an edge, you must loop once and get back to the Titanic Plains level, the hermit crabs will be spawning there. A telltale sign of when they’re around is that they will start shooting rocks into the sky like a mortar, follow their path to locate the hermit crabs and walk close to them to get them to run away from you. If they do not continue to run, attack them once and they should keep going until they fall off the edge.
Glowing Meteorite
Rain meteors from the sky, damaging ALL characters for 600% damage per blast. Lasts 20 seconds.
Requirements: Carry 5 Lunar items in one run.
Hellfire Tincture
Ignite ALL characters within 8m. Deal 5% of your maximum health per second as burning damage to yourself. The burn is 0.5x stronger on allies, and 24x stronger on enemies.
Note: One of two Active Lunar items.
Effigy of Grief
ALL characters within are slowed by 50% and have their armor reduced by 20.
Note: One of two Active Lunar items.
Active Items (Orange)
Disposable Missile Launcher
Fire a swarm of 12 missiles that each deals 300% damage.
Foreign Fruit
Instantly heal for 50% of your maximum health.
Primordial Cube
Fire a black hole that draws enemies within 30m into its center. Lasts 10 seconds.
Ocular HUD
Gain +100% Critical Strike Chance for 8 seconds.
The Back-Up
Call 4 Strike Drones to fight for you. Lasts 25 seconds.
Requirements: Repair 30 drones or turrets.
Preon Accumulator
Fires preon tendrils, zapping enemies within 35m for up to 600% damage per second. On contact, detonate in an enormous 20m explosion for 4000% damage.
Requirements: Open the Timed Security Chest on Rallypoint Delta.
Notes: Locks after 10 minutes. Gotta go fast!
Milky Chrysalis
Sprout wings and fly for 15 seconds. Gain +20% movement speed for the duration.
Royal Capacitor
Call down a lightning strike on a targeted monster, dealing 3000% damage and stunning nearby monsters.
Requirements: Defeat the teleporter bosses after activating 2 Shrines of the Mountain.
Note: Shrines of the Mountain can be found on any map (excluding hidden levels) and look like this.
The Crowdfunder
Fires a continuous barrage that deals 100% damage per bullet. Costs $1 per bullet. Cost increases over time.
Gnarled Woodsprite
Gain a Woodsprite follower that heals for 1.5% of your maximum health per second. Can be sent to an ally to heal them for 10% of their maximum health.
Requirements: Fully upgrade a Shrine of the Woods.
Notes: Shrines of the Woods appear in the Distant Roost map. They look like this.
Radar Scanner
Reveal all interactables within 500m for 10 seconds.
Requirements: Collect 10 monster or environment logs.