Table of Contents Show
In this guide i willl teach u, how to build good house and difficult to be raided.
Putting Together a Rust Base Design Strategy
Surviving in the game of RUST requires experience in many areas, but arguably, one of the most important areas is RUST base design. There are many dynamic factors that contribute to a player’s success in RUST and this guide will help emphasize the decisions that are made around RUST base designs.
Building strong, defensible and often hidden bases from the start is critical to surviving long term. Whether running solo, with a small group, or as a member of a large clan. No particular design path is right or wrong, but there are some tried and tested techniques that will help increase the survival rate when it comes to being raided.
Here’s the thing though, no matter what stage of the game, all bases are targets. Trying to build a base against all possible raiders generally breeds a poor base design. Build against the most probable scenarios on the server being played.
Let the law of probability be a guiding hand for making RUST base design decisions. And remember to consider specialization for a particular purpose for each build. All base designs have pros and cons, each stronger in some areas, weaker in others, but every base will be a target.
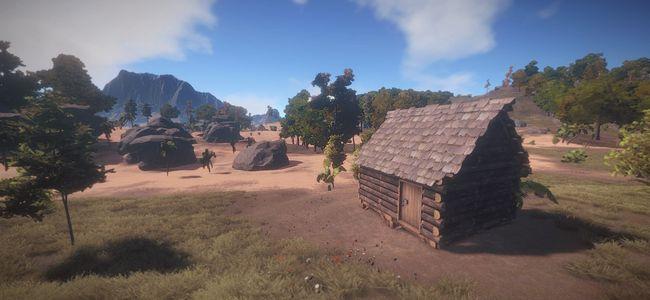
Base Location
Location, location, location! The location of a base will have a substantial impact on its overall security and since bases can’t be picked up and moved, this is the first thing to decide on. If the base is located in a main thorough way of traffic, such as between monuments and other players bases, a base becomes well known and “marked.” Updates, progress and expansion of the base will also be monitored.
It’s usually a safer bet to setup shop in an area on the outer rim of the game map, where the people that will typically be encountered are naked spawns, neighbors, and other people farming or the raid group looking for targets. This dramatically reduces the chances of people interacting with a base overall.
Hints and tips to consider when selecting a base location:
Scout an area out before committing to it. Check for large clan bases in the area.
Avoid building next to rock formations or objects where players can easily get on top of a base.
Keep an eye out for uneven geography that will limit a base’s future growth.
Avoid building near bushes, as other players will use these as ambush points in the future.
When building along a beach cliff, this allows a base to focus it’s defensive posture in areas that will be attacked. Less spend on resources overall.
Consider the biomes that are available in the general location. Building between biomes can provide quicker access to the necessary resources for continued growth.
Desert areas contain easy to spot ore nodes, cactus, and animals. These areas have higher temperatures which can trigger over heating status effects. Woodlands are plentiful with trees and mushrooms, with temperate climates and occasionally foggy settings.
Rivers have fresh water and crops like corn and pumpkins available, and allow for fishing.
Grasslands have an abundance of hemp and other small pick-up nodes.
Mountains often have an abundance of ore nodes along the cliffs. These areas typically have snow, fog, and wind. There are lower temperatures which can trigger freezing status effects.
Beaches are usually sparse, with drift wood in areas. They allow for fishing and nearly perfect escape routes from raiders.
Base Resource Cost
A Base resource cost is the overall cost of the required resources and components necessary to build a base design. This cost can be calculated by adding up the total sum of resources (e.g. wood, stones, metal fragments, high quality metal) and the components (e.g. rope, springs, gears, etc) that will be needed. It can also be used as a measuring device to determine the type of base being built. Furthermore, its used as a factor in determining whether or not a player should attempt building the specific base design or when they should attempt to try and build it.
Base Expansion
Base expansion is the ability for a base design to continue expansion of it’s core foundation in a logical way. Regardless of the direction, the base has been laid out in such a way that it can continue growing from its original purpose. An example would be taking a solo base and expanding into a small group base that allows for multiple people to move in and out without blocking or getting in the way of each other.
If a base is built without this concept in mind, it will be more difficult to continue expansion without having to make inconvenient trade offs and will ultimately require more grinding and farming of resources. While base expansion is important to remember, it’s a dire mistake to build too large at the start. New players are often caught over extended their bases and other roaming groups will take advantage of this.
Place foundations as low as possible
Foundations are critical to a base, as everything is built on top of them. They’re a prime target for base assaults. Destroying foundations as a raider typically provides a larger returns on investment, because it can allow for further entry into other sections of the base than destroying a singular wall and can break open containers set on it. The foundation pieces are also weaker to deflecting damage and having less of them exposed makes for brute force attacks much more difficult.
Multiple entrance and exit points
This will help reduce the effectiveness of door campers and overwatch snipers covering a base’s exits. It also helps in protecting from base griefing, in which other players can block in entry and exit points, confining a base’s occupants. In addition to these, it also reduces the effectiveness of landmines, bear traps, and auto turrets being placed outside a bases door. With more doors, it will require more effort on an enemy’s part, often stopping them from even trying.
Airlocks, airlocks, airlocks
It’s dire that airlocks are setup around all entry points of any RUST base design, with the exception of trap bases. It’s also very advantageous to set up view points from both the ground level and other defensive levels, such as a roof top, that allow for visibility to see the outside area beyond airlocks. Never open the outer airlocks to before checking the area out. There are players with great patience that will sit in place for hours if need be.
Honey Combing alll the thinhs
It’s important to employ a tactic called “honey combing“, when building a defensive base. This effectively sections off the base into small clusters that remember honey combs. By putting up doorway entries with code locks through the entire base, it makes it more difficult for anyone to move through the base.
Honey combing makes it much more difficult for raiders to successfully break into all of the base’s loot rooms. Players that have large, wide open rooms are highly susceptible to low-cost raids taking everything and making the occupants have to restart from scratch.
Tool cupboard placement
The tool cupboard, often referred to in-game as “TC”, provides a radius of building privilege to players who are authorized with it. This is the most important piece of a base to protect, hands down. It is the heart of the base. If it is compromised, the base is all but lost. If it is placed poorly, the base will likely become griefed.
When a player is authorized and is within range of the tool cupboard, they will see a status effect appear in the lower right of the UI that reads “Building Privilege” with a green rectangular background. Players that are within this tool cupboard’s radius will be protected from shotgun traps, and flame throwers that are placed within the radius.
On the flip side, players who are not on the authorization list will see the same status effect appear in the UI, however it will have a red rectangular background. Players with this status will be shot by shotgun traps and flame throwers when they encounter them. Many RUST base designs place the tool cupboard in the center most sanctum, as they’re often the most protected — this is where the law of probability comes back into play.
Placing the tool cupboard in a unconventional location tends to net positive results. Raiders most often are after loot, so they follow paths of least resistance when possible. Many players will place the tool cupboard inside of a sealed triangle honey comb, so that there isn’t even access to it. This is limiting, but often fools raiding groups and others who come in behind those initial raiders.
Do not upgrade the foundation and walls around it unless everything around it will be upgraded. This is too much of a call out. Do put a code lock on the tool cupboard. Remember, don’t lose the tool cupboard.
Defend it at all costs.
Internal defensive positions
An optimal and defensive RUST base design will have a series of layers to it. In each of those layers, consider adding sections that are fortified on the inside and allow the base’s occupants to have an upper hand on a raiding force pushing in from all directions.
Setting up armored windows and obstacles that make it difficult to move around. This makes more sense when imaging a raiding force pushing in from a single direction and the outer most layers being destroyed, leaving no area to put up a real defense. Don’t let this happen.
High ground advantages
Traversing the mountainous terrain in RUST is difficult. Trying to traverse up high while in combat is especially difficult. Make it more difficult by laying more barricades and traps that help funnel them into specific positions.
There will be times where the sun is in favor, as enemies will want to attack from an angle in which the sun is not shining in their eyes, allowing them to see. This gives the ability to apply a specific area of focus, and allows for explosives like F1 grenades and beancans to be used.
The ability to see enemy movement well in advance. When building on the high ground, this allows it so no one can easily sneak into or near the compound without being in plain site.
Transportation methods, such as horses and cars aren’t in the game yet, but imagine trying to utilize them in the mountainous terrain.
Enemy raiders will have to adapt to aiming up hill. This may not sound like a lot, but it’s very difficult to judge angles of rockets for instance, especially when most people are used to firing them on even ground.
Rainy, foggy environments tend to make it very difficult for anyone to communicate locations and movements. Raiders will likely end up shooting each other.
Having multiple access points to a base allows for flanking enemies easily, without them seeing occupants enter or exit the base.
Moving down hill is much faster than moving up hill. This is a clear advantage if a counter assault or chase occurs.
Base Loot Rooms
When designing a RUST base design, where the loot room(s) are laid out is a critical piece of the planned design. There’s many different aspects to consider when focusing on loot rooms in a RUST base design. It’s all to common that loot rooms are found to be wide open and centered in the middle of the base. This might be fine for small bases, but as a RUST base design scales up, this no longer works.
Spreading out the wealth
it’s important to set up multiple loot rooms and access points to those rooms across a base. Different loot rooms will have different purposes. Many players already separate loot into individually locked rooms (honey combed), so that if a raider breaks into a base, they will require more resources to continue. This method, as opposed to having an open floor plan, can be the difference between “winning” and “losing”, if such a thing exists in RUST. While open floor loot rooms may work for clan size bases, they are a dire mistake for smaller bases.
Rocket splash damage deterrents
When enemy raiders are attacking a base, they often use rockets to destroy outer walls, where there’s plentiful room and line of sight. These attacks are typically from an outside position, pointed in a inward direction, meaning they will blow up the outer most walls first.
When placing shelves, crates, and large boxes, it’s important to consider the splash damage that will occur from explosives blowing up the outer walls. All loot containers should be placed on the inner most walls, so that when a wall is blown into, the loot is not destroyed immediately. This is a lesson learned the hard way for most players and can be critical for a RUST base design in the middle of a raid.