Table of Contents Show
I’ve come with a relatively compact and cheap design for automating crafting machines. You select an amout of items to be made and the setup will create exactly that number of items and delivers it in a stack.
Overview
Hello fellow players. I’ve come up with a little something that migh help you with managing your resources and time. It’s lots of reading and little pictures, call me oldchool, my point is to get the idea out and you clever people can figure the rest out.
I’ve created a little setup to help me automate manufactoring of items. If i need let’s say 30 coils of cable, I chose a stack of 30 on the stacker and push the button beneath and the setup will produce exactly 30 coils of wire and deliver then in one stack at my feet.
Construction principle

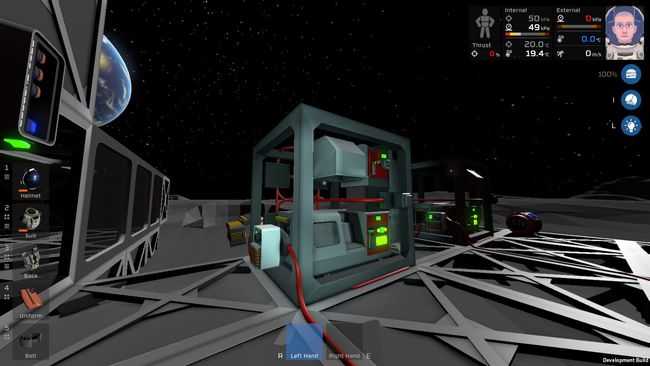
As you can see the whole setup is pretty much hidden inside one steel frame. The frame is there to hold the logic componets.
The power cables are isolated from the rest of my base via a small transformer. Transfomer doesn’t allow data through and makes it easier to set the logic components and as a bonus it allows the whole setup to be turned off to save energy when not used.
The central component of the setup is of course your machine of choice. So far I have tested it on Autolathe, Hydraulic Pipe Bender and Electronic Printer. These are used most often but I would expect it to work with other machines as well.
On top of the Autolathe sits the Stacker, connected to the Autolathe via chutes. Now, I am aware similar setups have been tried before however the Stacker updates too late and if you are creating wire coils with El. Printer it will create another one before the logic can stop it. In my case this does not happen as I take the item number data directly from the Autolathe (or E-Printer or Bender).
After you pick your recipe on the Autolathe and the nuber of items on the Stack you push the logic switch button to start the process.
Logic circuit

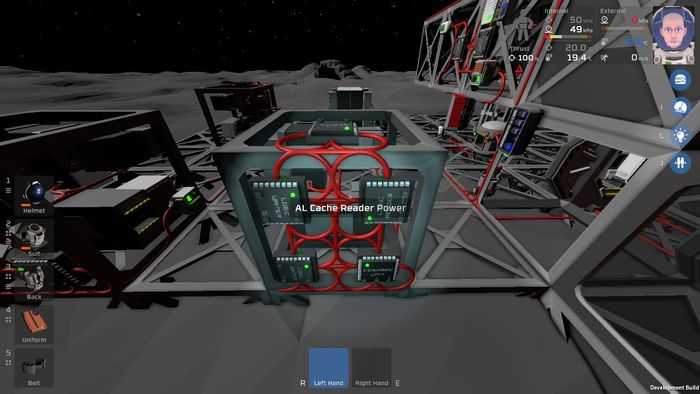
For the logic circuit I used:
- 1 Logic switch (as button)
- 4 Logic IO (2 writers, 2 readers)
- 1 Logic Processor (as compare unit)
The logic units settings:
Connect everything to everything – it’s not the most efficient way, however it is the easiest one.
- Logic Reader 1 – Input: Stacker; Variable: Setting
- Logic Reader 2 – Input: Autolathe; Variable: ExportCount !This is why it works so accurately!
- Logic Compare Unit – Imput 1: Reader 1; Imput 2: Reader 2; Mode: Greater
- Logic Writer 1 – Input: Button; Output: Autolathe; Variable: ClearMemory
- Logic Writer 2 – Input: Logic Compare Unit; Output: Autolathe; Variable: Activate
How it works:
You set the Stacker to a stack of a certain size. The Reader 1 reads that value.
Everytime the Autolathe creates an item, the value of its ExportCount rises by one. Reader 2 reads that value.
The Compare Unit then compares the nuber of items to be made (Reader 1) and nuber of items already made (Reader 2). If the number of items to be made is bigger than the number of items already made the Logic Compare Unit outputs 1. If it made all the required items it outputs 0.
The Writer 2 takes that 1 or 0 from the Compare Unit and controls the activation of the Autolathe. SIgnal 0 deactivates the Autolathe, signal 1 activates it.
After the Autolathe created the desired amount of items it is deactivated by the Writer 2. However the number of created items in its memory stays. We need to reset that memory. Thats what the Button and Writer 1 are for. The button ouputs signal 0. When pushed it outputs signal 1 for a brief moment. The Writer 1 sends that signal 1 to Autolathe and erases it’s memory.
BEWARE! When the memory is erased this setup immediately starts creating new items. The old memory keeps this setup from activating again if the number on stacker is same as before or smaller. So the button work as a Start button for new manufacturing task by erasing the old memory resetting the item count.
Conclusion
This setup is very crude. The fact that the machine is behing held deactivated by old nuber in cache means if you pick a bigger number on the stacker it immediately starts manufacturing. Hovewer as a proof of concept it works.
It can be improved by adding dials, displays and most importantly some kind of latch to keep the setup deactivated until you are done with setting up the stack size.
