Table of Contents Show
There are a few different methods you can use to set up a multiplayer game for Staxel. This guide will walk you trough the options and help you decide which one is best for you.
Multiplayer Guide
There are multiple ways to connect over multiplayer on Staxel. Depending on which version of Staxel you’re using and the quality of your internet connection, you’ll want to choose the method which is more suitable to you. This guide will walk you through the different ways you can connect to your friends.
StaxelNet
StaxelNet is the preferred option to use when connecting to your friends as it uses our own relay network. Most users (depending on location) will benefit from using StaxelNet over regular Steam Networking. It’s only a little more complicated to set up but it’s definitely worth trying if you’re experiencing issues such as server lag or issues connecting to the server.
For Hosting
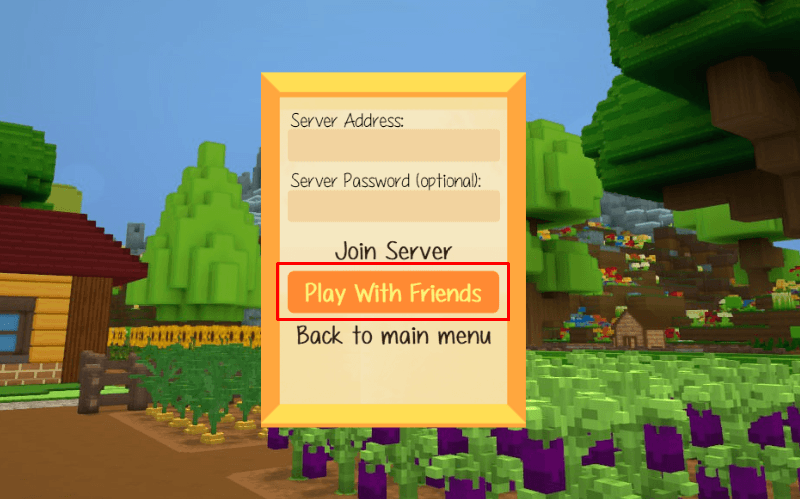
From the Main Menu, start by clicking on the “Multiplayer” option. From there, simply select “Play with Friends”.

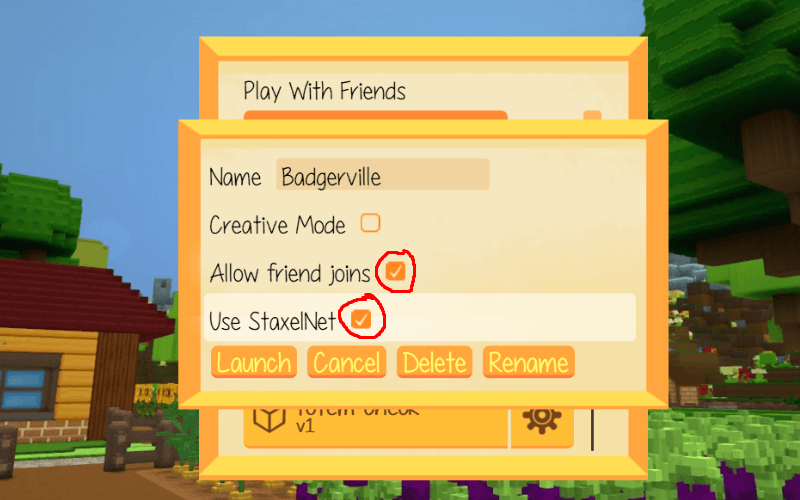
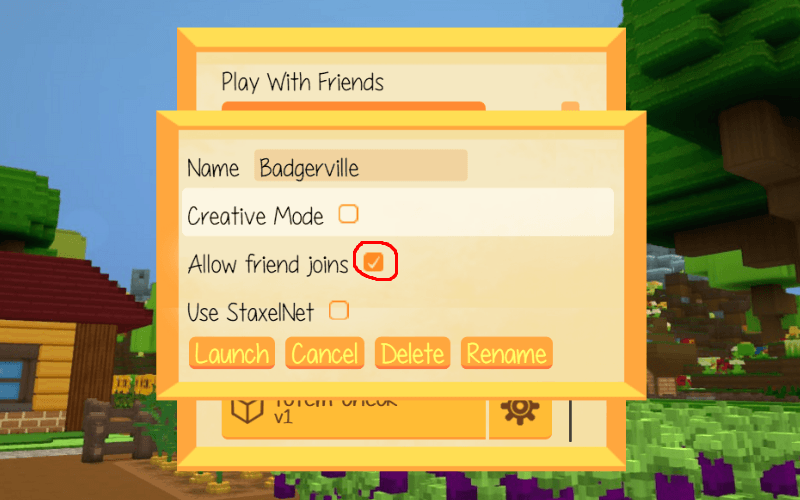
After that, you’ll be able to choose which world you want to play on, but before loading in you’ll need to look at the options by clicking the gear icon next to your preferred world.
In the menu that pops up, you need to make sure that “Use StaxelNet” is enabled. After that you can click “Launch” to load into the world. (You can enable “Allow friend joins” here which will let you invite your friends to the game through the Steam friends list)

Once you’ve loaded into the game, you can find the StaxelNet address by opening the pause menu (press Esc). On the right-hand side you’ll see the StaxelNet info. The address is masked by default but you can reveal it by clicking on the eye icon if necessary.
This is the address your friends will use to connect to your server. You can copy the address by either highlighting it and pressing Ctrl+C, or by clicking on the copy icon next to the eye icon.

For Joining
When connecting to a game over StaxelNet, you’ll first need to get the StaxelNet address from the host. Once you’ve got it, head over to the “Multiplayer” screen on the Main Menu and type/paste the StaxelNet address into the “Server Address” field.
No password or port number is necessary when connecting over StaxelNet.

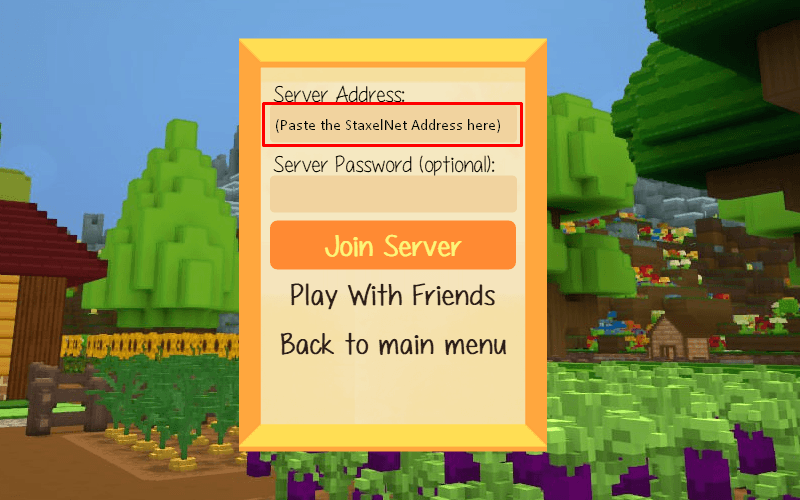
Now just click on “Join Server” and you’ll load into your friend’s game, assuming everything was set up correctly.
Steam Networking
This is the easiest way to start a multiplayer game (assuming you and all of your friends are using the Steam version of Staxel) but some people have reported connectivity issues when using Steam, especially on poor connections or when playing with friends who are more spread out across the world.
If you do experience problems with server lag or failure to connect, it’s recommended that you try one of the other methods for multiplayer.
Hosting a server
Once again, start by clicking the “Multiplayer” option on the Main Menu, and then select “Play with Friends”

Same as before, you’ll be met with the World Selection screen. Find the world you want to play on and open up the settings by clicking on the gear icon on the right-hand side.
In the options menu that pops up, you’ll want to make sure that “Allow friend joins” is enabled.

Once you’ve done that you can click “Launch” and load into your world.
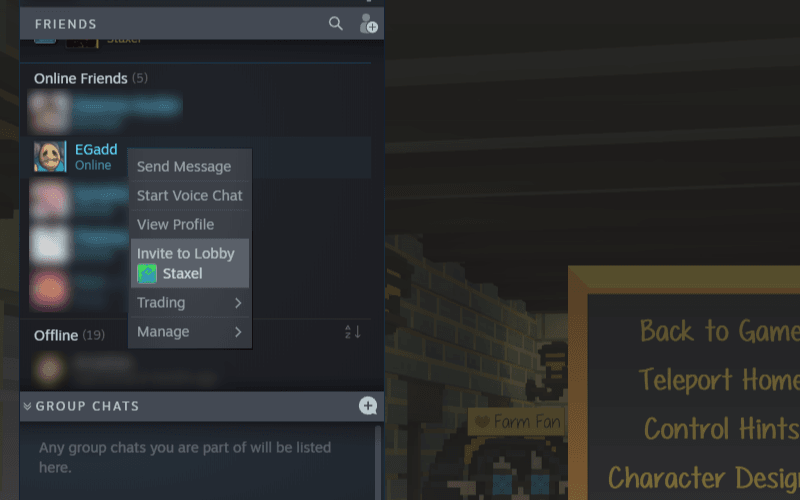
Then it’s just a case of inviting your friends to the session using Steam’s Friends List. Click on the little downwards arrow next to your selected friend’s name, and choose “Invite to Lobby”. This should send them an invite to the game and they’ll be able to load into the world straight away. Alternatively, your friends can click on your name from the Friends List and join your session in the same way.
Dedicated Server Wizard
Setting up a dedicated server is the most complicated of the three options, but technically it should supply the most stable connection for you and your friends to play on. It’s a good idea if the player with the best internet connection and a suitable amount of RAM is the one to set up the server.
Note that some port forwarding may be required to successfully host a dedicated server.
Start by opening up the server wizard.
If you’re using the Steam version of Staxel, you’ll get the option for “Launch Dedicated Server” when you click on the “Play” button in the Steam Client.
If you’re on the standalone or GOG version of Staxel, you can open up the wizard either from the Launcher, or by navigating to Staxel’s folder on your PC, going to the “/bin” folder and opening Staxel.ServerWizard.exe
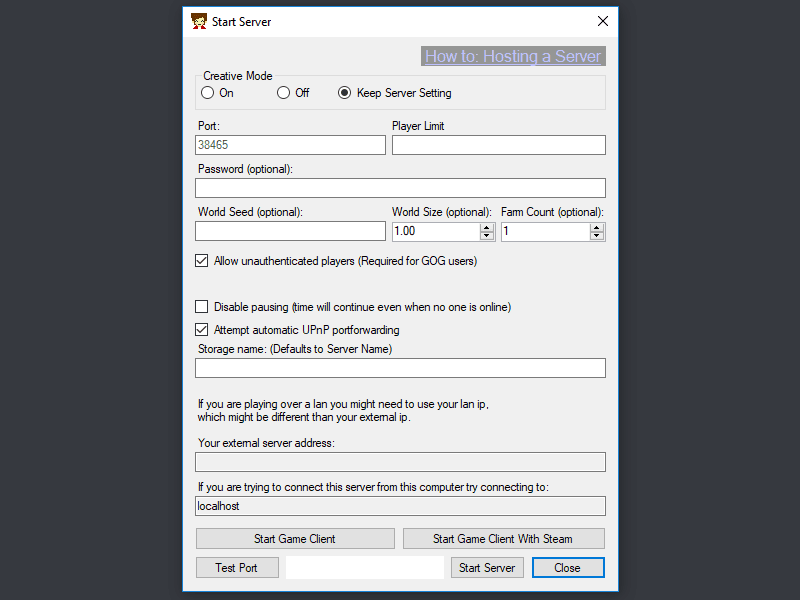
This is what the Server Wizard looks like. At the top you can see the “How to: Hosting a Server” link, which lists a couple of more in-depth tutorials but for this guide we’ll keep it simple and stick to the essentials which will get your server up and running.
Testing the port
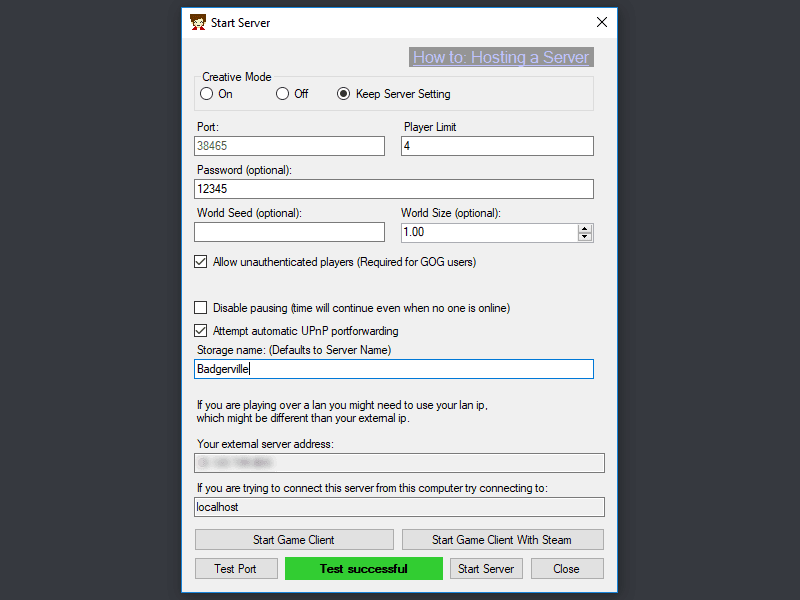
The first thing to do is make sure the port is open and able to communicate with your friends. To make things easier, you can select the “Attempt automatic UPnP portforwarding” checkbox. Some routers support this and some don’t but it’ll save you having to manually port forward if it does work.
Click on the “Test Port” button on the bottom left and wait for the wizard to test the connection. If it works, you’ll see the box next to the button turn green along with the message “Test Successful”.
If the test fails, you’ll most likely need to open the correct port in your router settings. There are many guides available for port forwarding on the internet so make sure to find one specifically for your router’s make and model.
The default port for Staxel is 38465 using the TCP protocol.
(note that your firewall/antivirus software may be blocking the port from sending/receiving data)
Setting up the dedicated server
Once your port test comes back positive you can start configuring the options for your server.
Most of the options here are self explanatory. The main things to pay attention to are the following:
Port
This is the port Staxel will use to send and receive data. You need to add this port number onto the end of the IP address that your friends will use to connect, separated by a colon.
E.g 86.100.100.256:38465
Password
You can set a password for the server here. Anyone wanting to join will need to enter this on the Multiplayer menu along with the server’s IP.
Storage name
This field is for the name of the world you want to play on. You can find the world folder names in the “LocalContent” folder in the Staxel directory on your PC.
Alternatively, you can leave this blank and it will create a new world with the default name “server”
Your external server address
This is your external IP which your friends will need when they connect to your server (along with the port number). The IP address will display once the port test is successful.
Once you’ve entered all the necessary information you can start the server by clicking on the “Start Server” button. A server console window will pop up and should be left open the entire time you want to have the server up.
Once you’re ready to play, click on the “Start Game Client with Steam” button (if using Steam), or the “Start Game Client” button (if using the standalone or GOG version of Staxel).
Joining the dedicated server
Connecting to the server is the easy part. From the main menu click on “Multiplayer”.
Here you’ll need to enter the server’s IP and port number, as well as the password if one was set up.
If you’re the host of the server, generally you’ll just want to put “localhost” into the Server Address field, instead of an IP address.
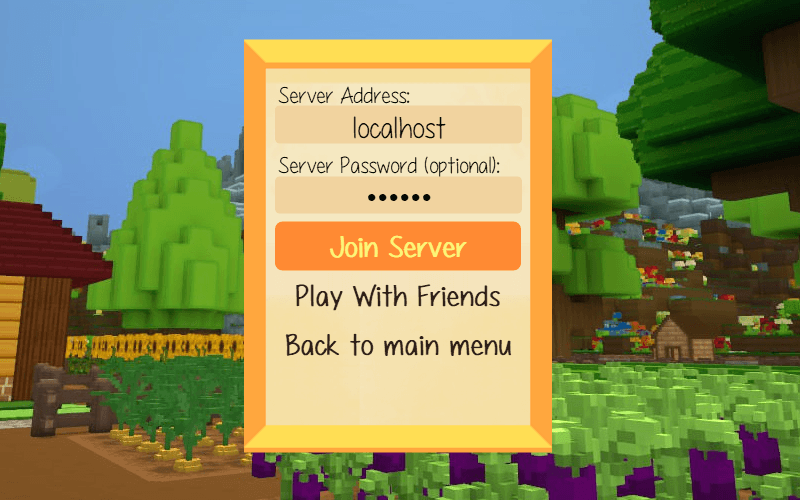
If you’re a guest on the server, you’ll need to enter the IP and port number (separated by a colon) into this field, along with the password.

Once that’s done, all you need to do is click “Join Server” and you should be good to go.
Additional info and Support
If you find yourself running into issues with Multiplayer. Please check out these links for more information on networking and some general troubleshooting tips.
https://wiki.playstaxel.com/Starting_a_Server
(includes a list of usable admin commands for server hosts)
Staxel Troubleshooting Guide
General troubleshooting guide for Staxel.