Table of Contents Show
Contains data on pantheons and religions, because this data is not available at all times, and you may want to do planning during those times.
Pantheons
- God of the Open Sky: 5000 FP, +1 wheat per worker, 5x hiring speed for wheat fields.
- Legends of the forest: 8000 FP, +1 wood per worker, 5x hiring speed for forest, forest doesn’t require wood to build.
- Goddess of Nature: 10k FP, +3 wood per worker for each temple, +3 faith per monk for each forest.
- Cromlechis: 15k FP, +3 masons per ritual, quarry doesn’t require gold to build.
- Pantheon of fat chickens: 25k FP, double farm effect.
- Handwashing: 99k FP, +30 seconds to ritual duration, +1 to ritual automation.
- Guru blessing: 600k FP, double school effect.
- God of War: 2M FP, double xp for heroes.
- Sacred path: 5M FP, cathedral not needed for relics, +5 faith/sec from monks, +25% to total faith production, +1 to ritual automation.
- Ancillary Justice: 1B FP, -50% to religious servants perk cost, +2 holiness per sec if servant is selected.
Religions
I’ll fill in the spells as I go along.
Chicken God:
+1 Holy/sec per wheat field
+2 Holy/sec per farm
x5 during wheat ritual
God of Stone:
+1 Holy/sec per quarry
+2 Holy/sec per temple
+3 Holy/sec per academy
x5 during stone ritual
-10 Holy/sec per farm
-10 Holy/sec per school
(Holy can’t drop below 0.)
Tremors of the Earth: (9999 holy, x? cost multiplier) +99 stone per mason during stone ritual, +99 wheat per worker during wheat ritual, +99 wood per logger during forest ritual.
Stone Skin: (99999 holy, x? cost multiplier) +99 armor to hero if hero starts battle during stone ritual.
Forgetful god: (1M holy, x? cost multiplier) resets cost of Tremors of the Earth, Stone Skin, and rituals.
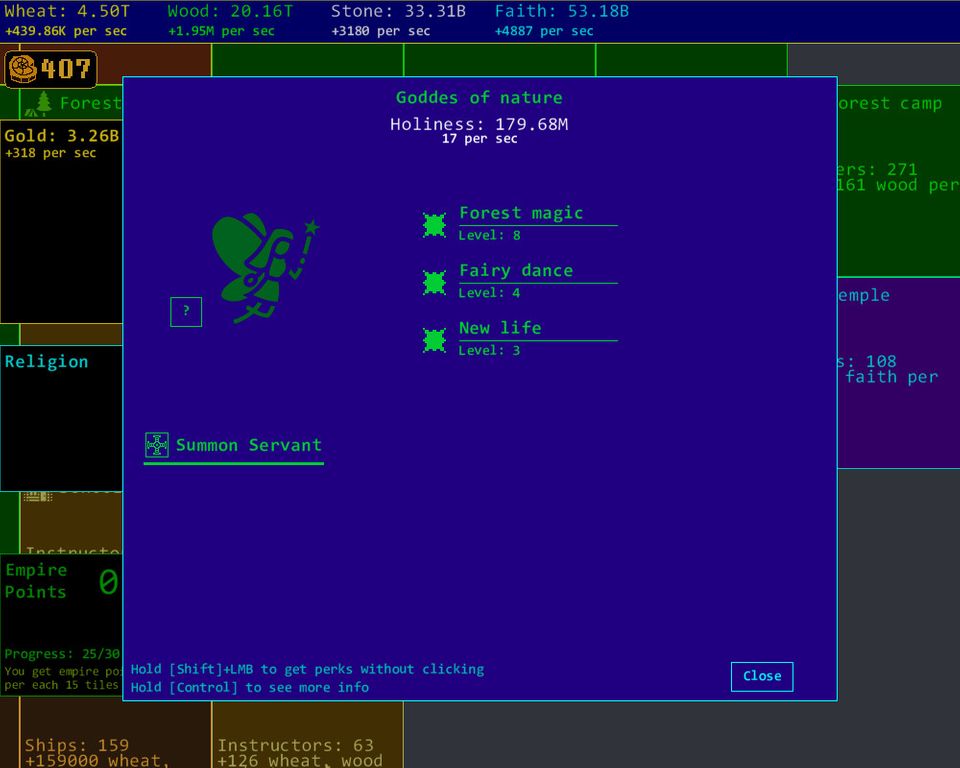
Goddess of Nature:
+1 Holy/sec per forest
+1 Holy/sec per temple
x5 during wood ritual
-1000 Holy per monster death
Forest magic: (1 holy, x10 cost multiplier) +10 wood per logger, +1 faith per monk.
Fairy Dance: (1 holy, x100 cost multiplier) +1 ritual power, +1 ritual automation.
New Life: (1 holy, x1000 cost multiplier) Cost of loggers is reset.
Oni:
+1 Holy per monster death
-10 Holy when healing hero
(Holy can drop below 0.)
Blade: (25 holy, x10 cost multiplier) +5 damage for hero.
Bloodrage: (100 holy, x100 cost multiplier) +1 HP per kill.
Spirits of war: (1400 holy, x? cost multiplier) hero will return from being wounded once, with HP set to damage.
Relics
Base:
1B faith: +3 to ritual automation.
5B faith: allow customizing the auto-hire ritual.
- Chicken god: 5B faith, +500 wheat at start of game, +1 wheat from workers on wheat fields.
- Goddess of Nature: 5B faith, +500 wood at start of game, +1 wood from loggers.
- God of Stone: 5B faith, +1 stone from masons, +300 faith when quarry is built, +600 faith when temple is built.
- Oni: 10B faith, unlocks hero classes.
Minor notes
Ritual automation lets you automatically recast rituals. A +1 to this stat lets you cast 2 rituals in a row before you need to click anything. The game will continue cast automated rituals while offline.
+1 ritual power increases the power of whatever the ritual does by one. (2 monks every 15 seconds instead of 1, or a x6 multiplier to speeds instead of x5.)
You can combine rituals. (Say, hiring speed + auto-hiring.) Cost increases linearly.
Faith per second is not used in calculating abdication gold.
The enemies are in a specific order. In the first 1000 areas, the order is crab, rat, spider, spider, rat, spider, in a loop. After area 1000, it’s bat, rat, wolf, spider, rat, wolf, crab, rat, crab, bat.
A good combo for a level 4 hero is:
Hammer: +4 damage, +2 armor/sec
Shield: +10 armor, blocks 1 damage
Helm: +20 HP, +5 damage
At level 5, switch to the helmet that gives +2 to damage after each battle. At this point, you can go to area 1000 without healing, as long as you start at the right time. (You really don’t want to fight a crab in your first couple of battles, because it will destroy your shield. After you have some extra damage, you can take it out quickly enough to keep going. Refer to the enemy order above.) To go beyond area 1000, pick Oni as your religion, and make sure to get Bloodrage while you’re still in the area 100-200 range. This will let you coast on your hundreds of HP and damage until area 1200 or so.
