A comprehensive walkthrough for The Long Dark Episode 4: Silence, Then Fury, including all chapters and side quests.
The Long Dark: Episode 4 Walkthrough Guide
A murderous gang of escaped convicts has captured Mackenzie. Desperate to escape one of the darkest corners of Great Bear Island, he must somehow survive his fiercest enemy yet. Can Mackenzie recover the Hardcase, continue his search for Astrid, and also save the innocents caught up in this deadly confrontation?
Overview: Episode 4: Silence, Then Fury
After the events of Episode 2, Will wakes to find that he has been captured by Mathis and his gang of escaped convicts. Despite a valiant escape attempt, he is imprisoned in the Blackrock Federal Penitentiary, which has been taken over by the inmates. The warden of the prison, who has been put in the cell next to Will’s, explains that Mathis is at Blackrock to free his son, Donner.
Mathis loses his temper and beats the warden to near death. Will then bargains for temporary freedom in exchange for getting medication for the warden. Will gains entrance to the prison infirmary and discovers that the last of the antibiotics and morphine has been taken down the road by one of the guards prior to the First Flare. He also picks up a phone call from a mysterious person who claims to be the reason Donner is still locked in solitary.
After retrieving the medication, Will returns to the prison and helps patch up the warden. Mathis reveals that he knows Will was let out and agrees to the situation under the condition that Will does his bidding. He then sends Will out to fix the power plant that supplies the prison. Once he reaches the power plant, Will is contacted again by the mysterious person, who reveals their name is Jace. After talking, Will agrees to help Jace sabotage the door mechanism that controls the solitary door.
Will then enters the steam tunnels and find the solitary door mechanism. He breaks it, and makes his way back to the prison. Inside, Mathis is furious that they can’t break Donner out, and reveal to Will that he knows someone is sabotaging the convicts. He intimidates the warden into revealing that there are old detonator caps at a nearby abandoned mine that could be used to ignite the old dynamite that Mathis found. As Will is let out to retrieve them, Mathis begins beating up the warden.
After getting the detonators, Will receives another call from Jace. She reveals that she is an astrophysics student studying under Doctor Atwood. Will learns that Atwood is at a research facility about 15 kilometers away, and the research there may provide an answer to the strange happenings since the First Flare. But neither of them come up with a solid plan to stop Mathis from using the dynamite.
Will returns to the prison, where Mathis reveals that Franklin told him everything about Will and Jace sabotaging the prison break. But before Mathis can kill Will, the dynamite explodes prematurely. Will then escapes with the help of Jace, and he makes his way to the warden’s office. After retrieving the hardcase, Will escapes to the power plant via the steam tunnels. He meets up with Jace, but they are cornered by the convicts. After a short fight with Mathis, Will and Jace make their escape via the river.
Important Events
- Will is imprisoned by Mathis’s gang of escaped convicts at the Blackrock prison
- Will makes contact with the mystery person opposing the convicts
- Will retrieves the medication for the warden and is recruited by Mathis to explore the region
- Will learns that the person sabotaging the convicts is named Jace and agrees to help her.
- Will breaks the steam mechanism that controls the solitary door.
- Mathis reveals that he has dynamite and sends Will to get detonator caps for it.
- Will learns that Jace is a student under Dr. Atwood, who can be found at a research facility
- Mathis’s plan to use dynamite to break Donner out backfires and the prison catches fire
- Will retrieves the hardcase and meets up with Jace at the Power Plant
- Will and Jace escape the convicts by jumping into the river
- In the credits, Astrid makes her way to Perseverance Mills via a boat
Important Items
- Distress Pistol/Flare Gun: Found next to the body near the powerline at the intersection of the power plant and trailer. See Chapter 2: The Power Plant for more details.
- Revolver: Found in the Powerline convict cache as detailed in Sidequest: Convict Caches OR next to the body of the power worker in the trailer–see Sidequest: Lost Power Workers for more details–OR in guard locker #8 as explained in Sidequest: Guard Lockers.
- Moose-Hide Satchel: Found in the suspicious person’s bunker. See Sidequest: Blackrock Rumours for more details.
Chapter 1: Blackrock Blues
Cool, another mini-section that I don’t feel deserves its own guide section. Instead, it just gets a header.
Anyways!
After that very exciting cutscene, we now have to escape the convicts. Well, it does make sense when you think about it; not much survival gameplay to be had when you’re tied up by criminals.
Escaping is easier than you think. Mathis and his fellows will never find you no matter how long you stand in one place. And all your stats are frozen, so there’s no risk of dying from hypothermia while you’re hiding. The path is also extremely straight so no getting lost.
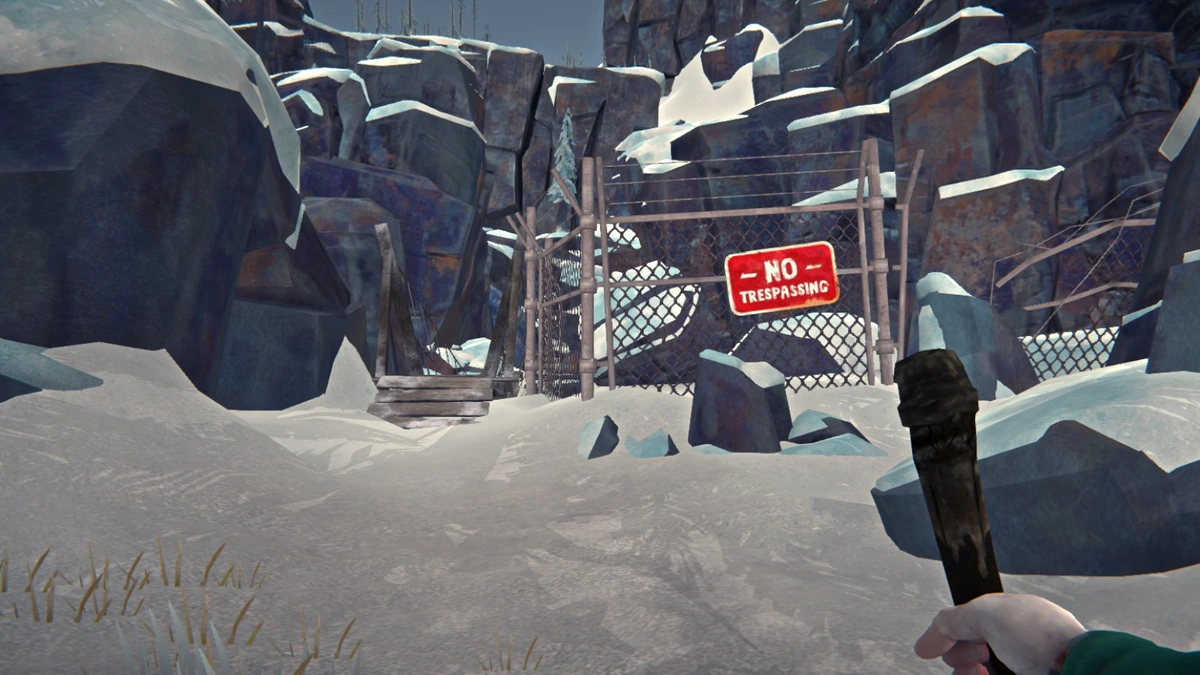
After you watch a cutscene where Mathis’s goons chat, the path will eventually open up from the narrow ravine you start in. It’s still a straight shot, so keep going until you see a run-down cabin on the left. There will be a saw stuck in the tree trunk out front that Will wants to use to cut the rope on his hands.
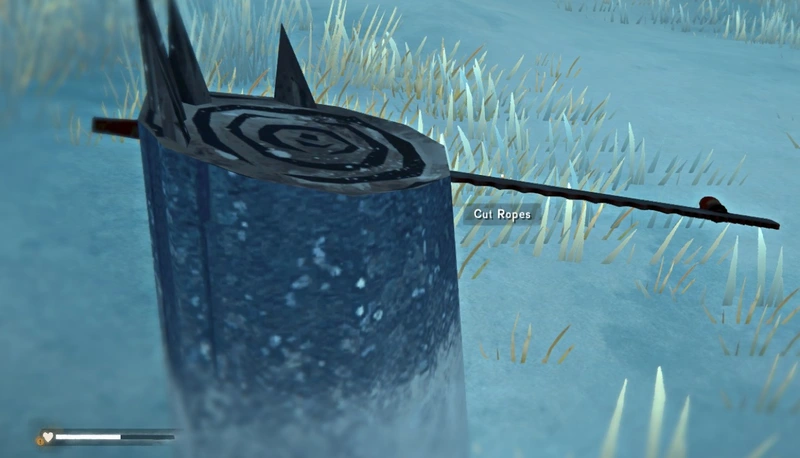
Now that your hands are free, it’s time to play the game we all know and love. Your stats are still frozen so you have to time to putz around and gather rosehips. When you’re ready to progress, continue on the path and climb up the vine-covered cliffs.
And it’s Mathis…. well that was a short escape sequence. Ah well, on to the chapter proper!
Great, we’re in jail. Not the best place, but at least our cellmate is friendly. Pop-up onto the toilet to have a nice chat with the former Warden of Blackrock Prison. He’ll fill you in on the backstory for the convicts, especially Mathis. Once you finish the conversation, there will be a lot of dialogue and then Will will talk his way out of the prison to get medical supplies. Good thing, since there isn’t much gameplay to sitting in a cell.
You’ll want to immediately search all the cars out front for supplies; Mathis took all our good gear from Episodes 1 and 2 so you only have the clothes on your back. The cars will set you up with basic clothing to prevent frostbite and a little food.
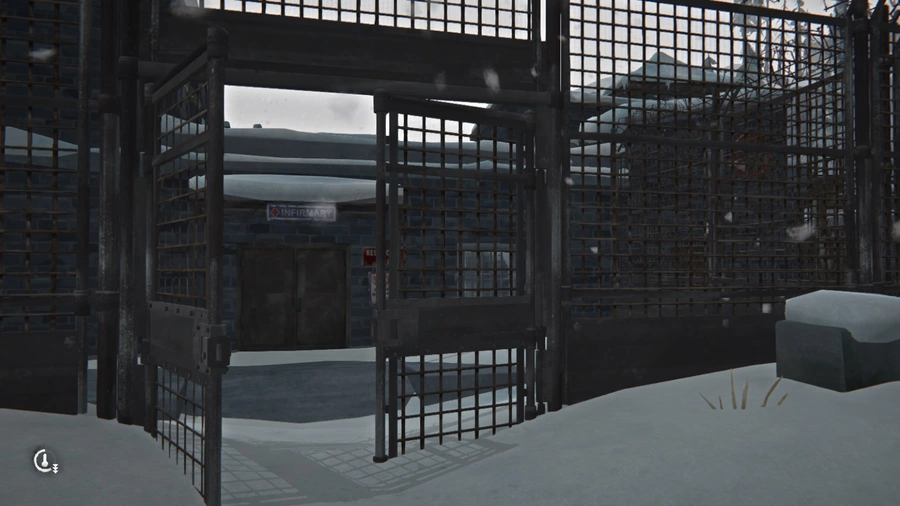
The prison entrance gates are locked so turn left to exit though a small chain fence. On the left is the infirmary that Will has so graciously volunteered to get medicine from.
Unfortunately…. it’s locked. So head right into the maintenance area to pick up some more goodies, including a prybar. You’ll also find a workbench, which you might want to use to make a torch. All the necessary materials are in the surrounding area and it will be on the only weapon against the many wolves stalking the prison. When you’re ready, exit the prison area entirely. Be careful, there’s a wolf eating a deer carcass right outside.
Now we could try and book it into the wilderness, but without any of our gear, it’s not a good idea. Not to mention the three wolves stalking the area. So instead turn left and hug the walls of the prison. Eventually you’ll come to another fence gate that will open and let you back into the complex (close the gate after you enter to keep the wolves out). Enter the building right in front of you and loot it for all it’s worth.
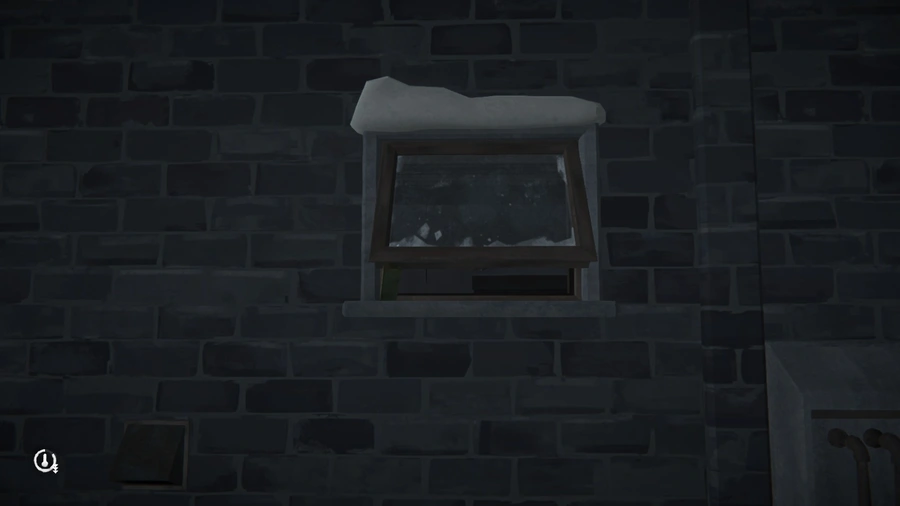
From the looks of it, this is probably the guards quarters. And the all important empty cans area in the kitchenette area. Once you’re done getting all the good stuff (and maybe patching up your clothes), head upstairs. You’ll come out on the roof and since this is a big-time prison, there are catwalks connecting all the buildings. You’ll just need to follow the walkways until you get to the roof of the infirmary. There isn’t a roof-top access door, but someone has graciously left the window open for Will to climb through.
Once in, you’ll want to search the area for more good stuff. To proceed with the story, turn right to find the nurse’s office and the medical storage area. Once you enter, the phone in the office will start ringing so go pick it up.
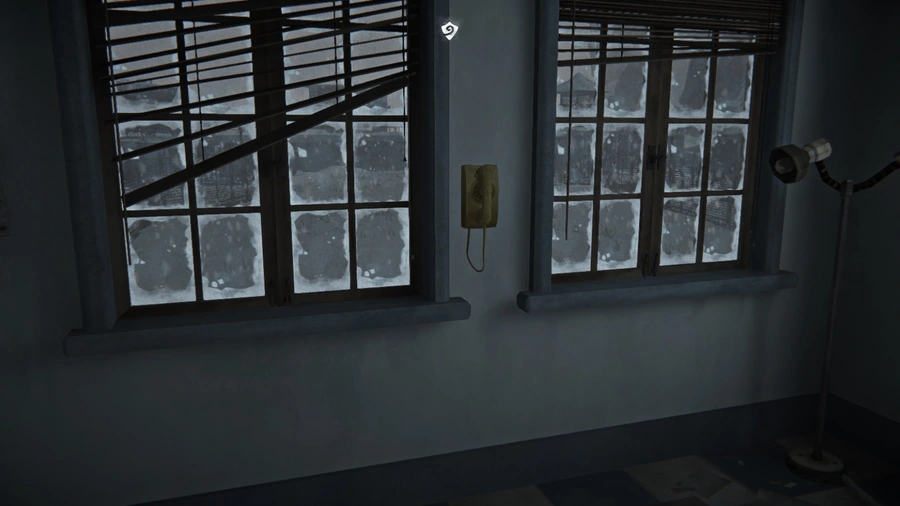
Ah, how familiar. Some mysterious woman calling from the internal telephone lines. While I don’t think it’s Molly from the voice, the two do have a somewhat similar sound to them. Anyways, the conversation will play out, leaving Will confused, and then it’s back to the objective. Pick up the note in the medicine cabinet and you’ll learn that the Blackrock staff had the brilliant idea to take their last remaining medical supplies and drive out into the wilderness with them. Genius guys…
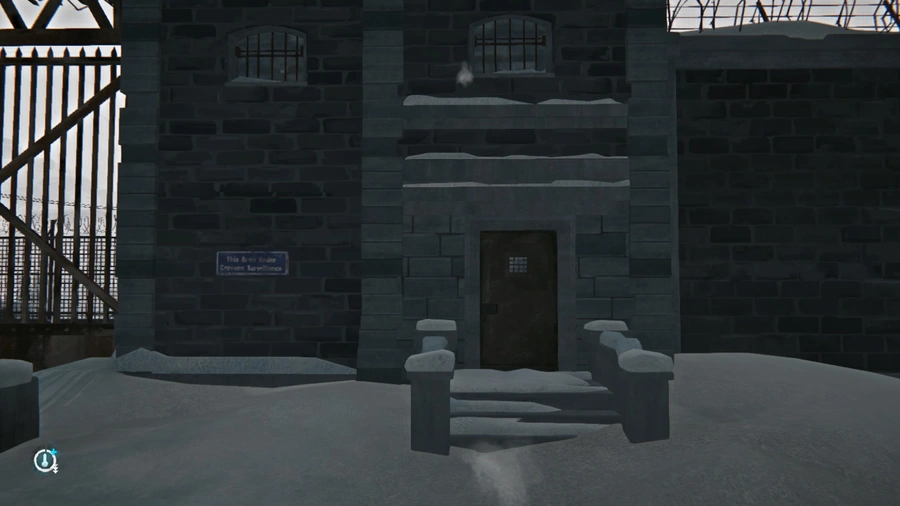
From here, you’ll need to head back to the front entrance of the prison. Thankfully, you can leave via the normal door that was locked from the outside, so no having to dodge the wolves. The key to the prison entrance door was attached to to the note you got earlier. If you didn’t take the time earlier, go back to the magic fire outside the prison doors to do any prepwork before leaving the prison complex via the door below.
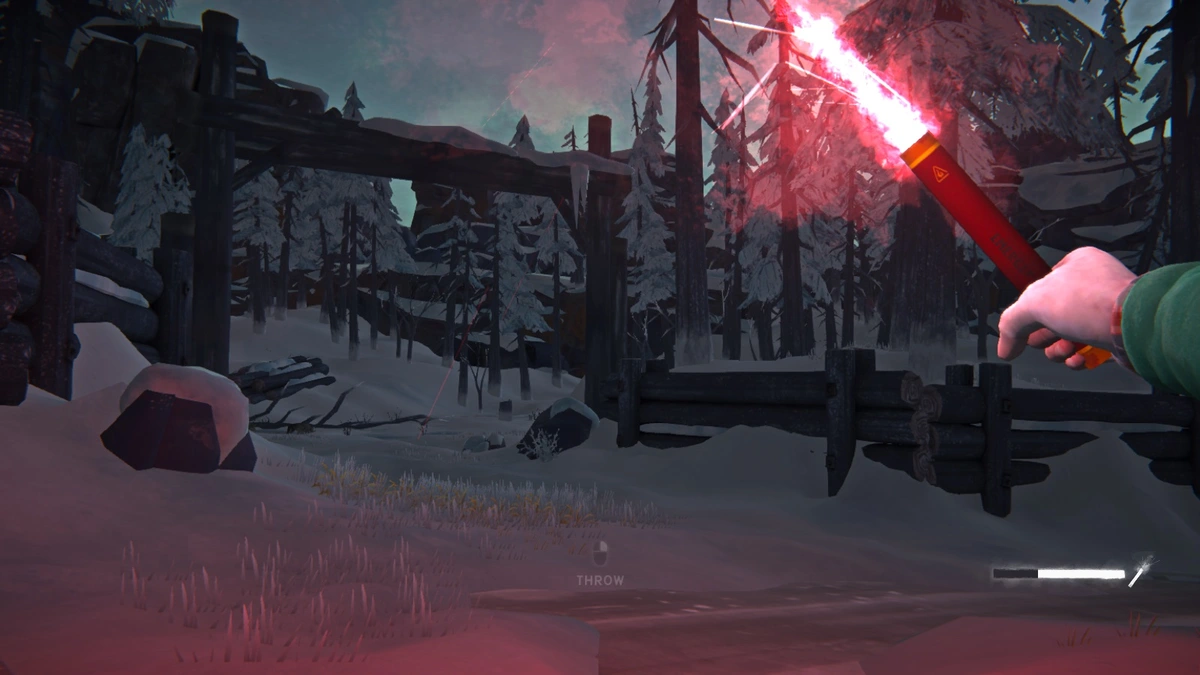
This leads to a little guard station. Make sure to check the weapons cabinet for a flare gun and some noisemakers. These are like little firecrackers that you light and then throw before the fuse runs out. While I don’t think you’ll be able to injure any wolves with them, the noise will scare all the animals in the vicinity. You’ll also get a blueprint for them so you can make more at a workbench. There are also a few notes that you can pick up to unlock more sidequests.
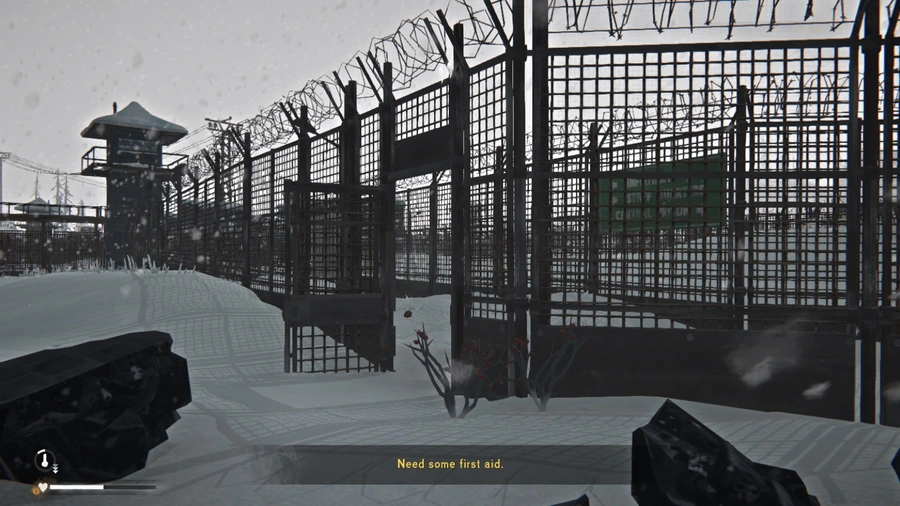
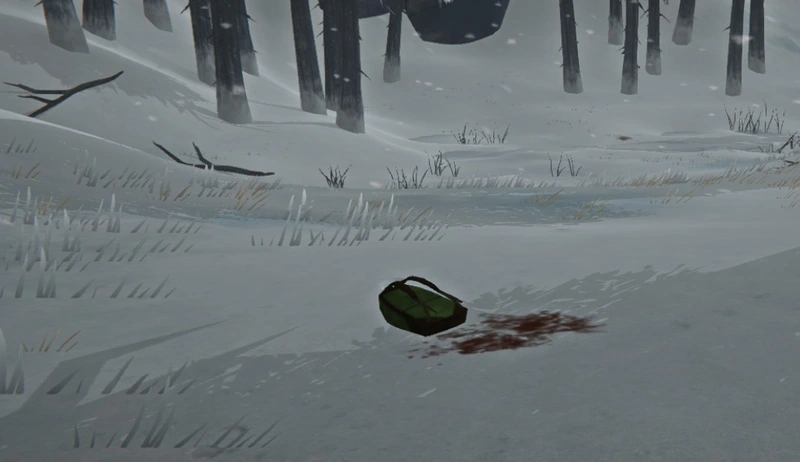
Anyways, back to the main quest. When we picked up the note in the infirmary, that also unlocked the map so take a look if you’re confused about where to go. But there’s only one road so you frankly shouldn’t get that lost. Just follow the road, making sure to search the first truck you come across for a hunting rifle, until you reach a fork. Go left and you’ll eventually come across a couple of cars and a climbing area sign on your right. Exit at the sign and you’ll immediately see a large bloodstain near a backpack.

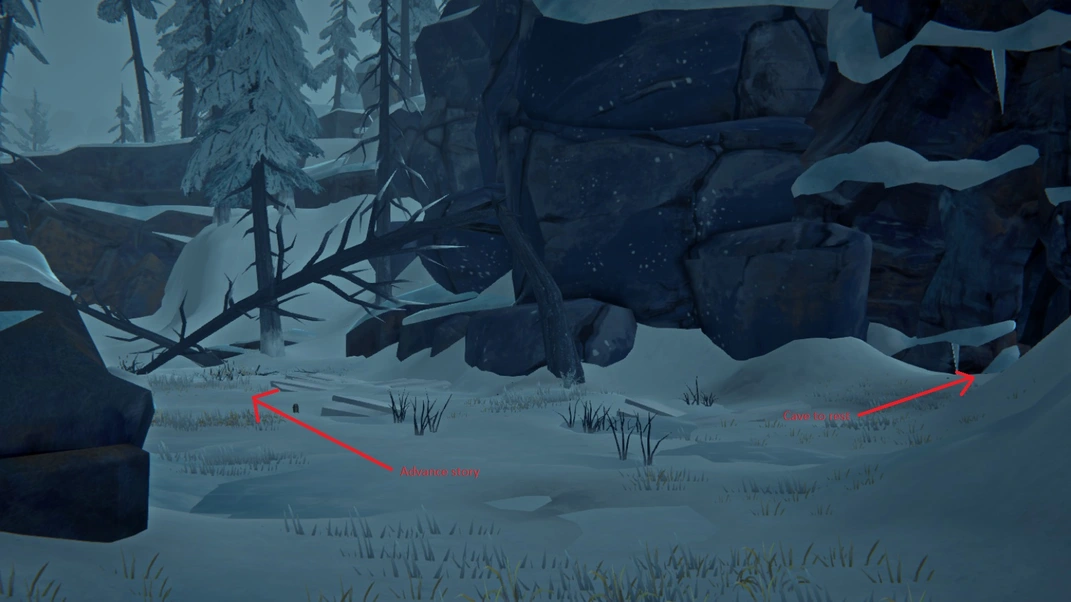
From here, it’s basic follow the blood trail. There are three wolves that are roaming the area here, so it’s a good place to practice with the noisemaker. Eventually, the blood will lead you to an area with a climbing rope and cave further ahead.
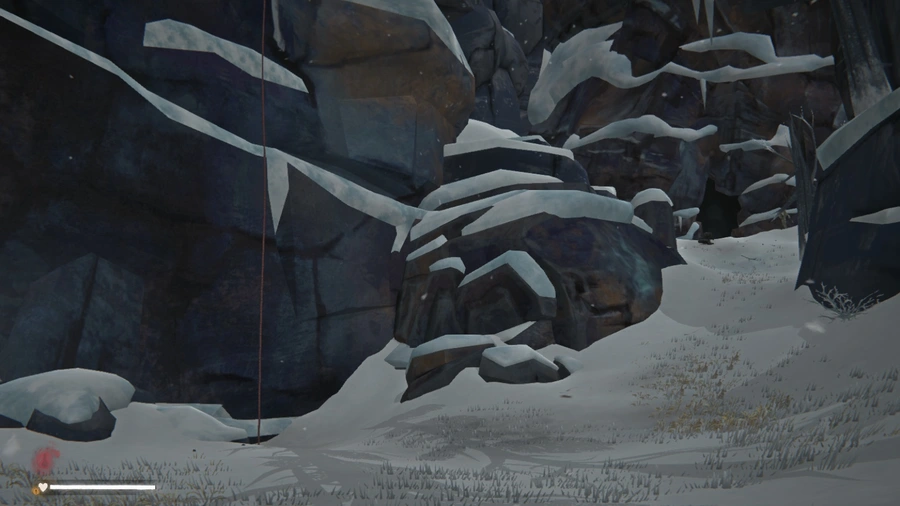
Go for the cave. In front of it, you’ll find a dead prison guard (possible being snacked on by a wolf) and medical kit next to him. Search it for the precious antibiotics.
Now you just need to head back to Blackrock. If it’s getting late and/or you’re tired, feel free to take a rest inside the cave. There’s a moss bed that you can use to sleep if you haven’t found a bedroll.
As you approach the prison, a pop-up will inform you to hide your gear to prevent the convicts from confiscating it. You have to put most items in some kind of container, but there isn’t any risk of being caught in the act so feel free to hide it any any convenient one. And things like guts and hides can be left on the ground to dry. But be sure to drop ALL your gear, not just items you’d expect them to take away. I tested with all my clothing on, and they took my hat, gloves, and outer jackets.
Once you’ve stripped, approach the doors and end the chapter.
Chapter 2: The Power Plant
Well, at least Mathis didn’t beat us up for going outside. Our next mission is to check out the power plant that supplies the entire prison complex. I do wish they hadn’t let us out in the middle of the night, but not much you can do. At least we have a new map icon showing where we need to go.
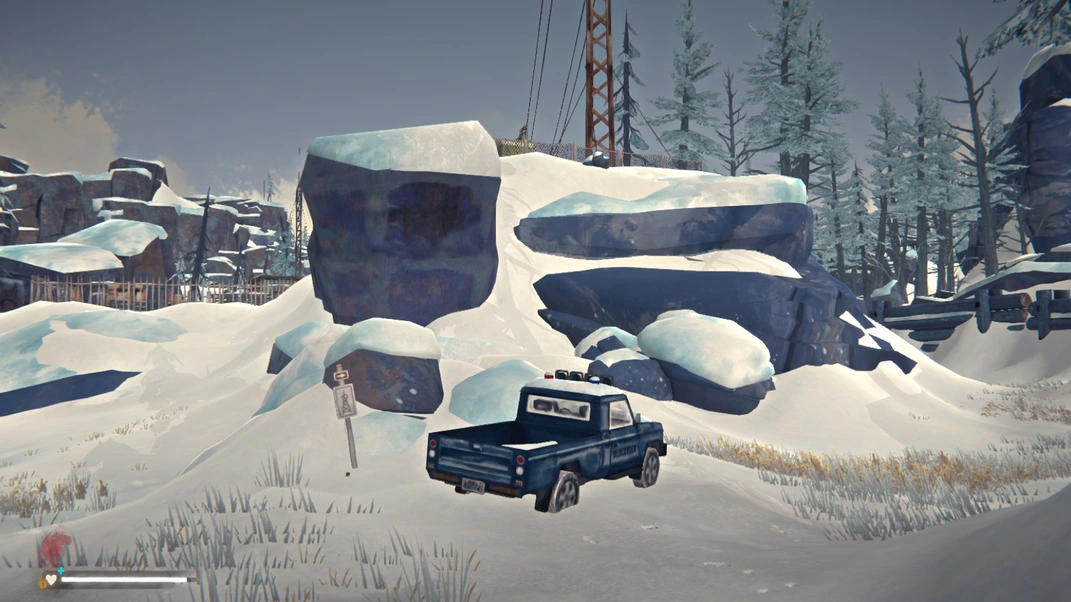
Once you’ve picked up all your gear, head out the main entrance. As you walk away from the prison, turn back and look up; you’ll see a large tower with power lines extending from it.
This is what the game means when it says to follow the high voltage power lines. If you’re not a fan of the map, you can just follow these lines to the Old Substation. That will lead to to a climbing rope which descends to behind the substation. You can also just follow the road like we did in chapter 1, but turn right at the fork instead. From here, just follow the road until you see the truck below.
The Old Substation is just behind it.
Now, there isn’t anything story-related inside the station itself, but I’d check it out anyways since there’s a lot of good stuff inside. There’s also a bed if you need to take a rest. Once you’re ready to head on, go back to where the truck is and take the left path. It will lead you to a bridge that you’ll want to cross.
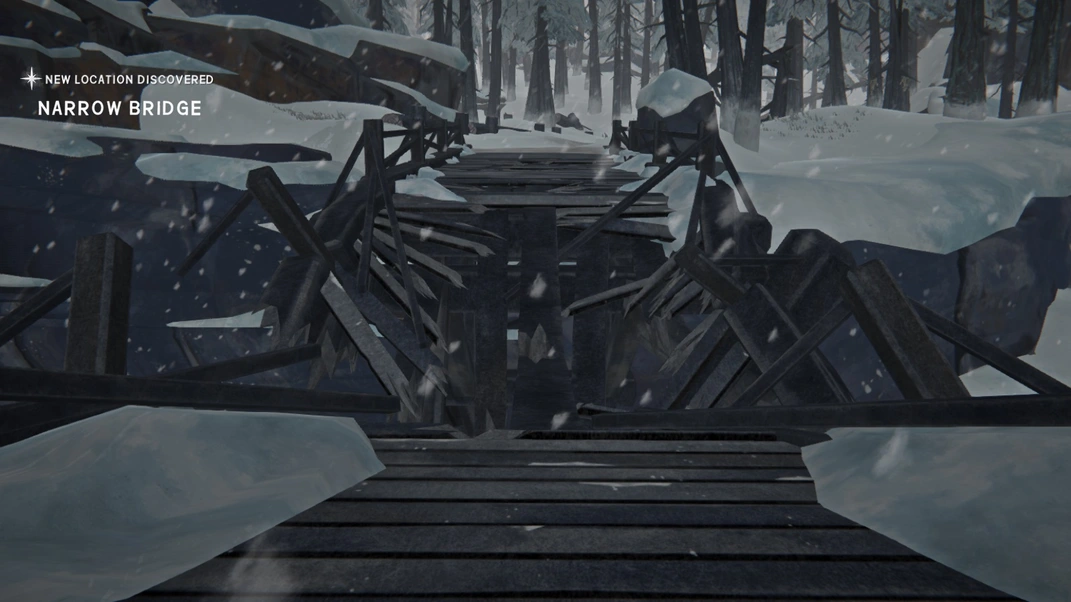
If you had come here during Chapter 1, the bridge would have been broken. From here, just follow the road. You’ll eventually come across a cave-like entrance. This is actually a landslide that Will needs to bypass. Just veer off to the left and head up the hill.
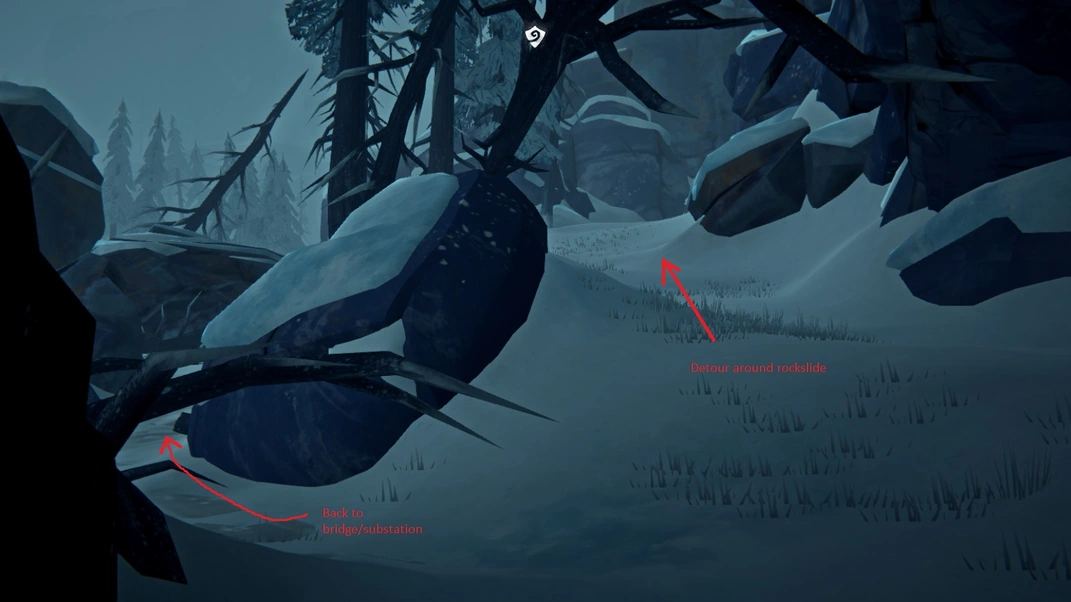
Honestly, this part is extremely linear. The big thing is to go right at the T-intersection if you’ve gone up the hill indicated in the picture. Going left will take you back to the bridge since there was an option to leave the road earlier. You’re on the right track if you see this fallen log bridge.
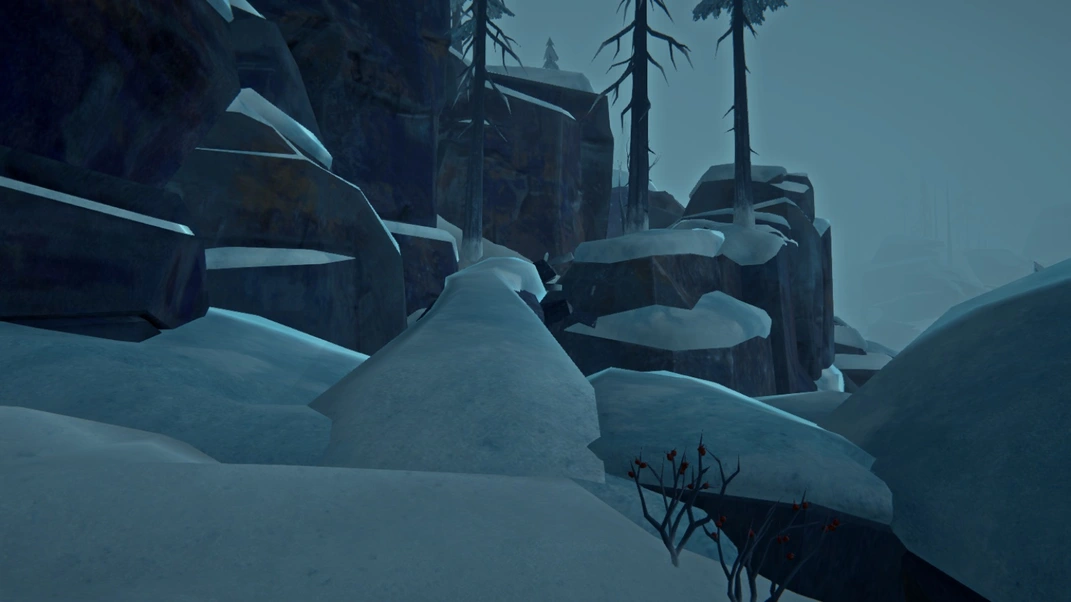
After crossing, just keep going where the game directs you. There will be some mini cliffs that Will needs to climb and more tree bridges. Eventually you’ll find the mini frozen pond below.
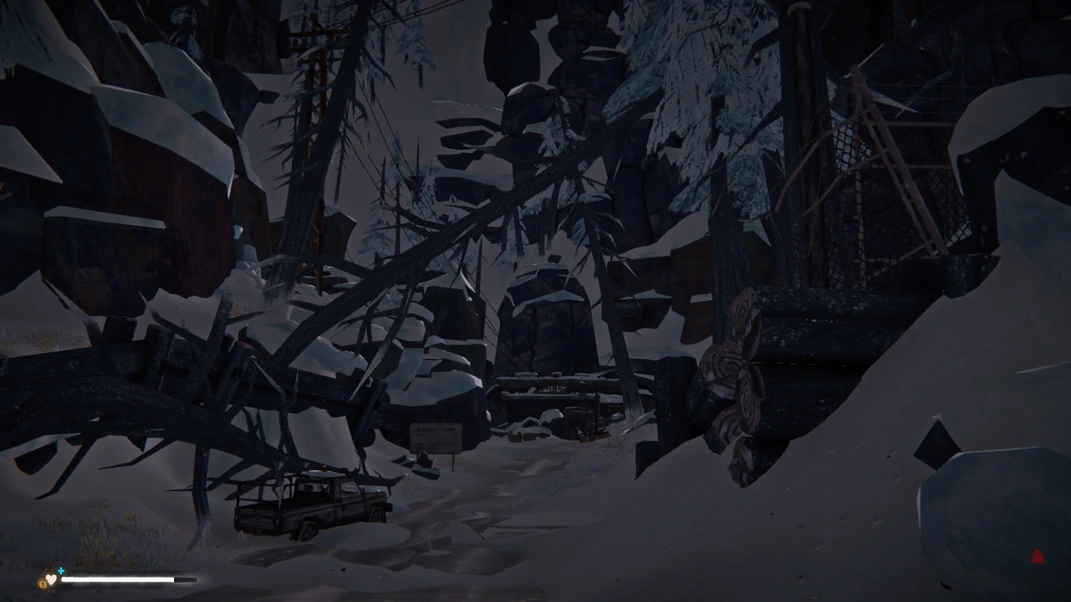
As labelled, go right if you need to take a rest in the cave or shelter for a little bit. Anyways, just follow the path until you reach a climbing rope. Go down it and straight ahead to find the road again.
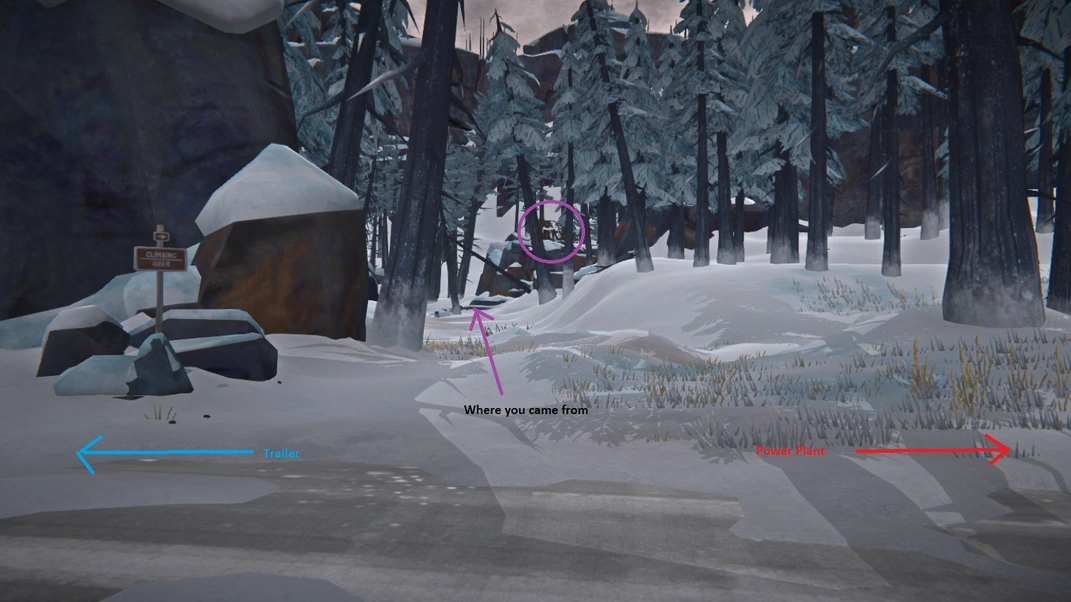
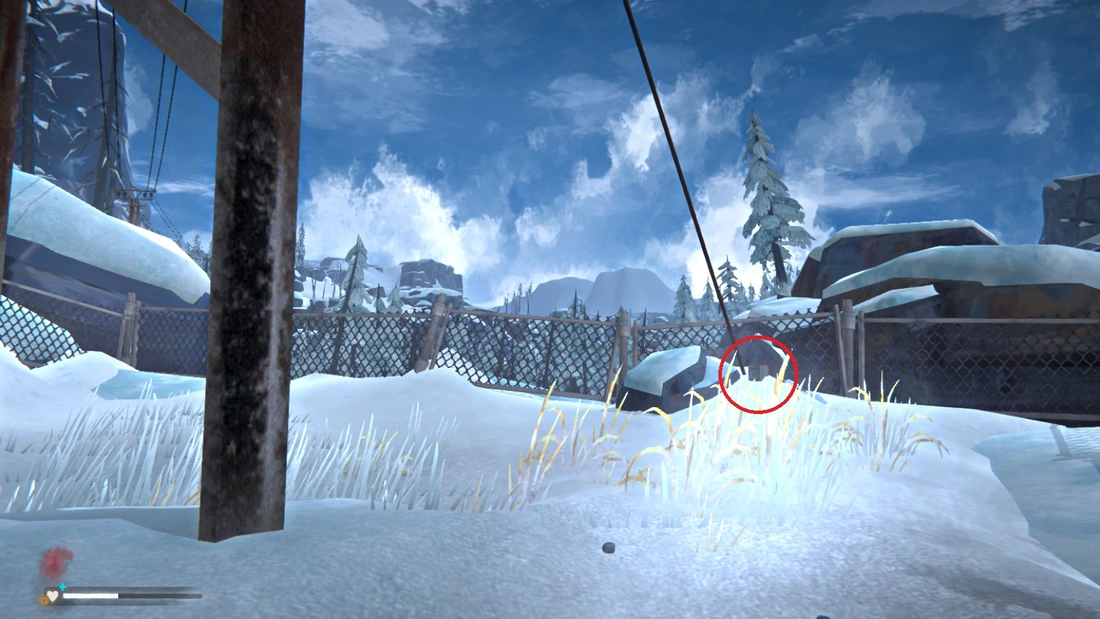
If you look to your left immediately after descending the rope, you’ll find a burnt down cabin (circled above). The important part is the workbench (if you need more noisemakers) and rifle that seems to spawn in all difficulties.
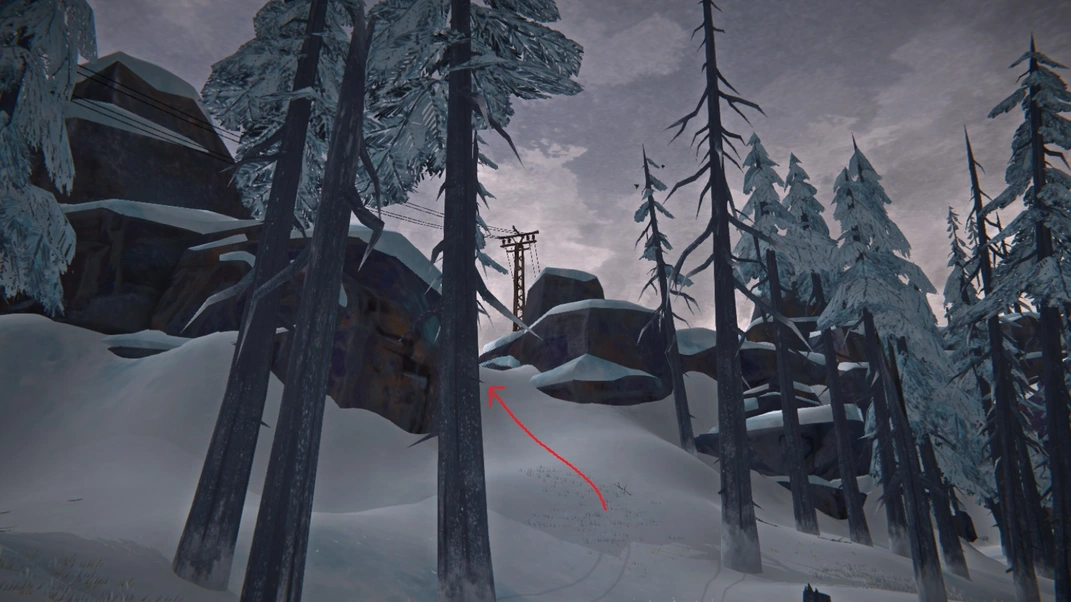
You may also want to climb up to the powerline shown in the picture below. There’s a guaranteed distress pistol spawn next to the dead body at the top.
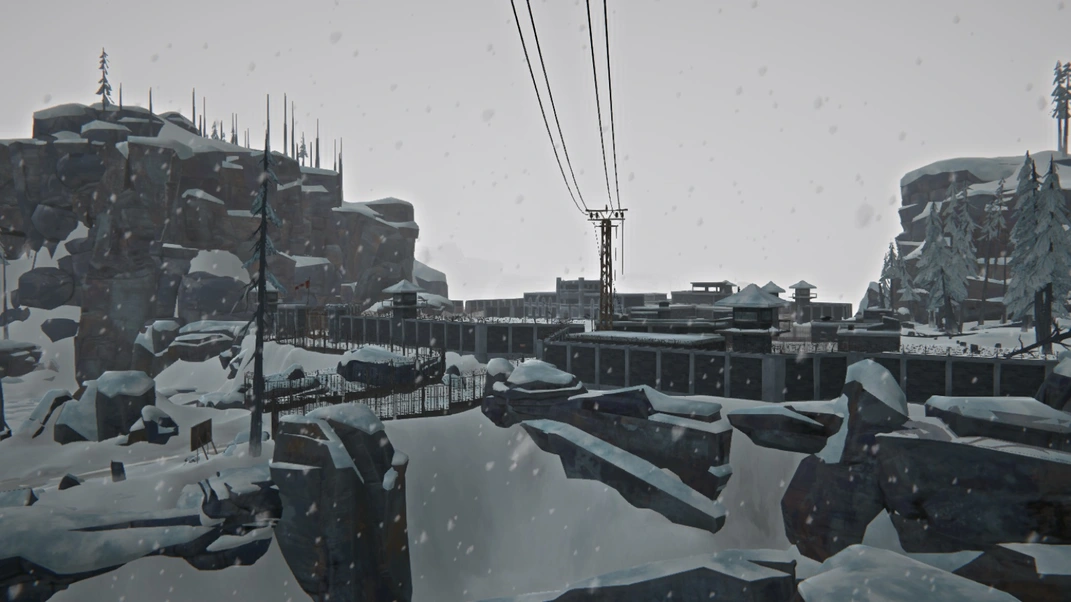
Back to the story. To get to the power plant, turn left once you reach the road and follow it. The power plant will come into view soon.
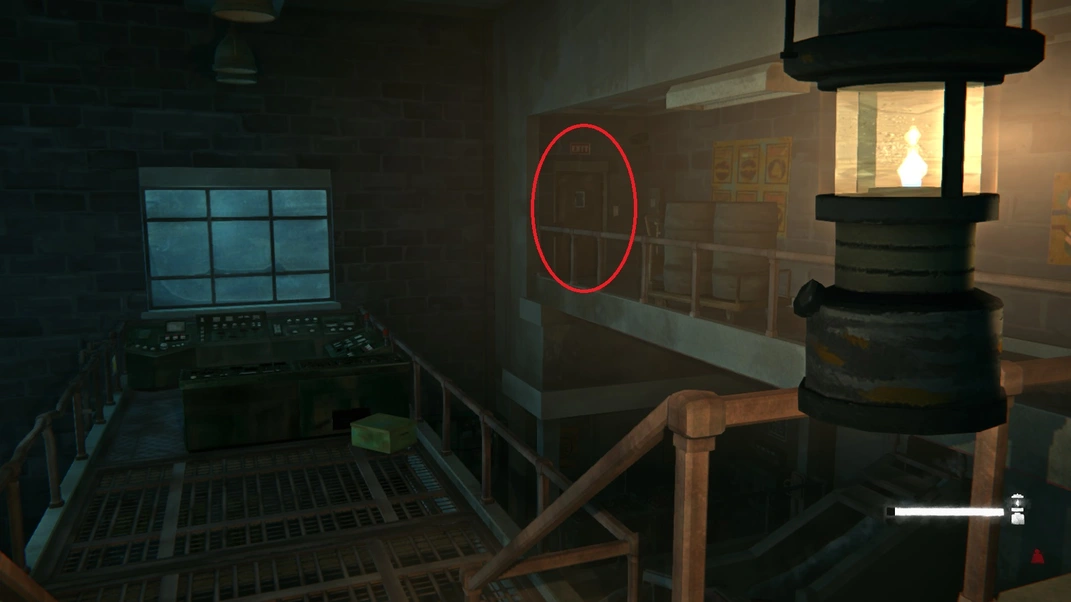
The gates to the external catwalk are locked so just head in via the front door. Once you take a few steps, the phone will ring. Pick it up to have a longer conversation with the mystery person. She reveals her name is Jace and that she were stranded here after the First Flare knocked out her car. Will agrees to prove that he’s trustworthy (and keep the psychopath Donner locked up) by breaking the door mechanism to solitary. Hopefully this will ensure the doors stay locked, even if the convicts find the button that opens it.
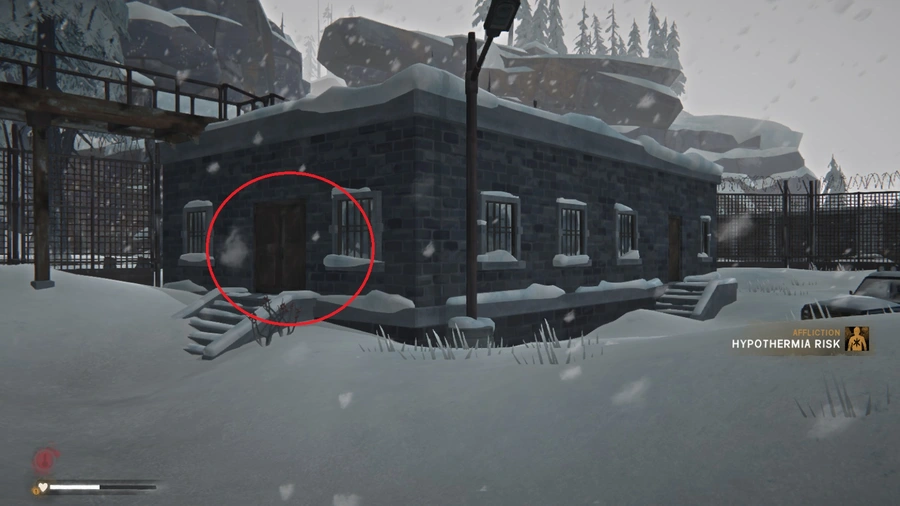
To leave, you need to exit via the circled door below.
Just a short walk away is the door to the maintenance tunnels. Head inside and just follow the tunnels until you reach the first open room. On the right you’ll find a bedroll and note that explains the steam tunnels are having pressure problems. You’ll also find a frozen door, which will introduce you to the basics of this area’s puzzle mechanic.
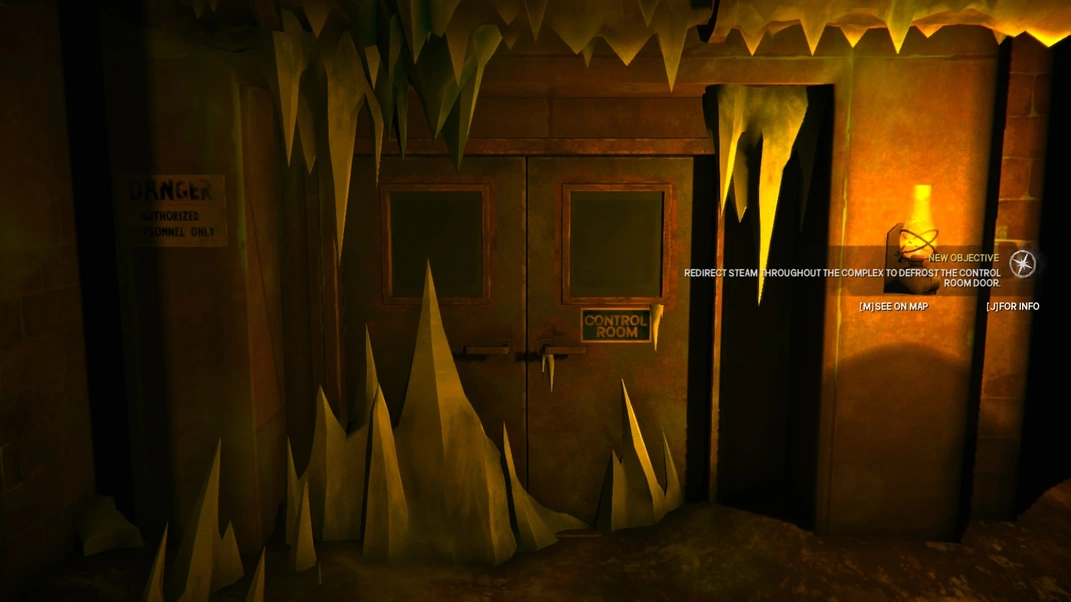
So, the basis of the upcoming puzzles is that the steam pipes and/or valves have frozen from the cold. Will’s job is to direct enough steam through the pipes that the valves and/or doors that the pipes lead to defrost. After the first tutorial door, you’ll enter an area with the door below in front of you, and two hallways to the left and right.
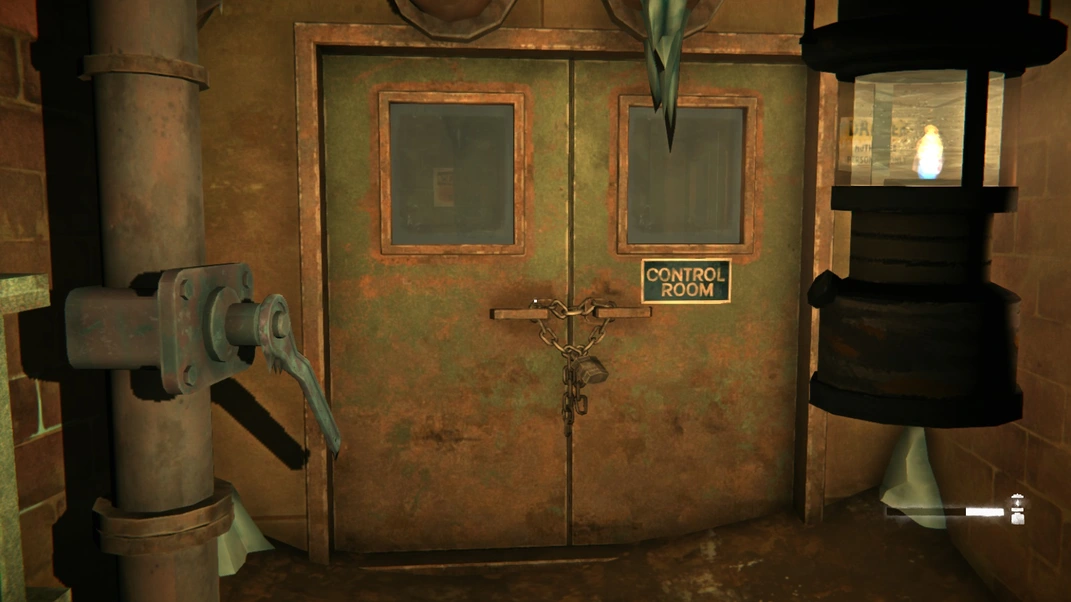
If you go down the hallway to the left, you’ll find the control room door, which is where we want to go. As you can see, it’s completely frozen solid. You’ll also see some pipes on the wall, but ignore those for now.
Go down the other hallway on your right, and you’ll come to another big room with the following machine.
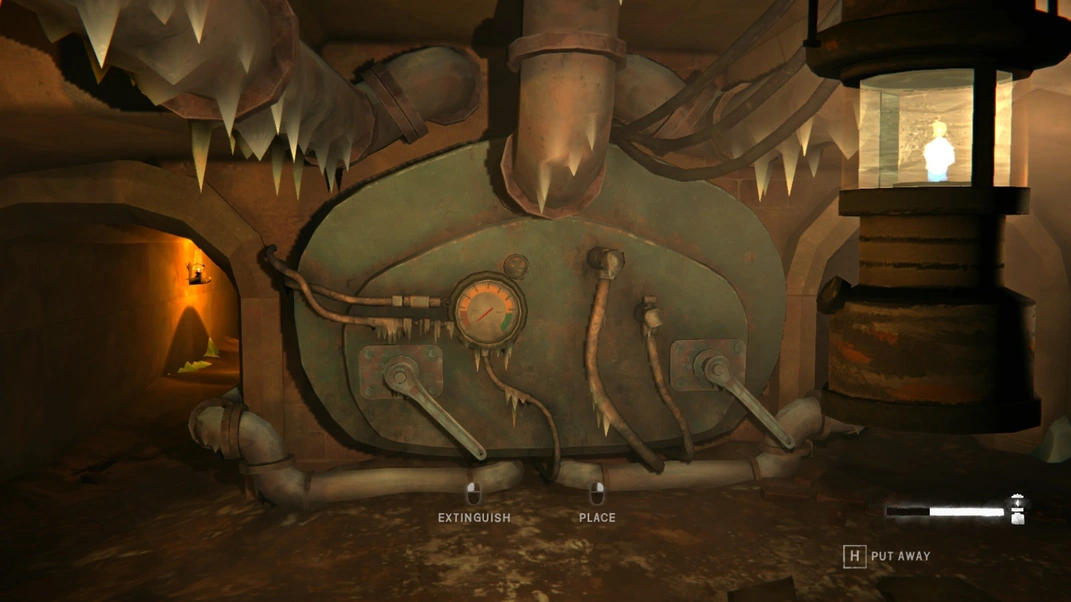
Okay. Puzzle time. From the big room above, go down the hallway on the left. You’ll come across a mess of pipes and levers.
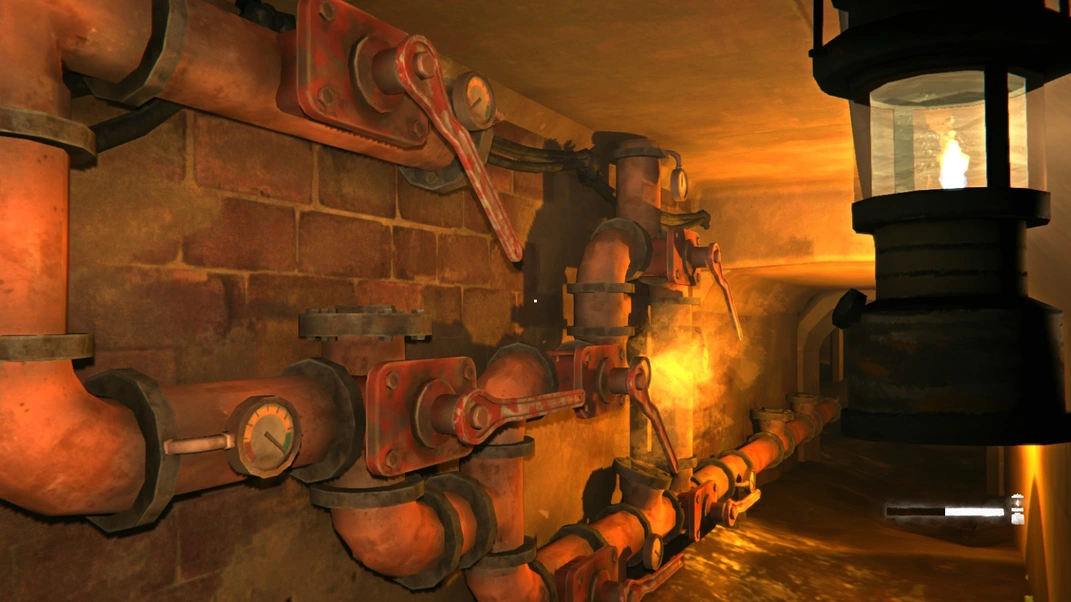
The good news is that there are only two big sections like this. The bad news is that the physics don’t make complete sense. As you can see from the pop-up in my picture, the goal is to make the gauges reach green. That indicates there’s enough steam to melt the ice. But the flow of steam doesn’t always fit how flow physics works. To combat this, I’ve taken two pictures; a before and after of the pipes. This will show the exact layout you need to melt the ice on the door(s). I will also list a step-by-step for the pipes since you will sometimes have to mess with the levers a bit just to get them all defrosted. The levers are labelled with the numbers used in the instructions on the before pictures.
Pipe Puzzle 1
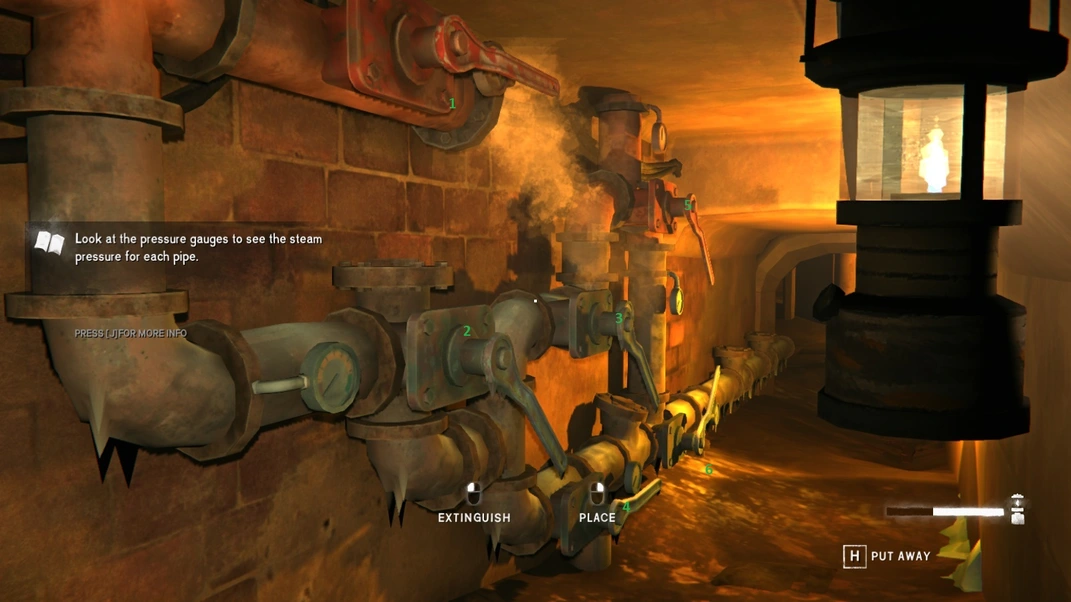
- Close lever 1
- Open lever 2
- Close lever 4
- open lever 3
- Open levers 5 and 6
- Close lever 3
- Open lever 4
After finishing that puzzle, return to the room with the big machine to find that the left side’s lever can now be opened. Do so, and the make your way back to the control room hallway, watching out for the steam gushing out of the pipes.
Pipe Puzzle 2

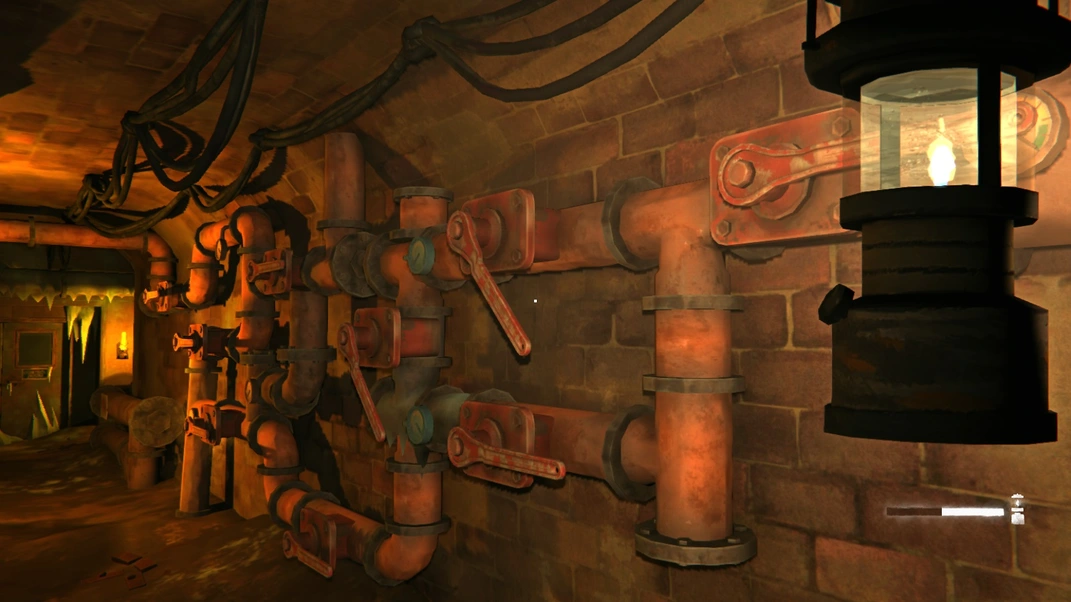
- Open lever 1 (the only one you can manipulate)
- Close lever 2
- Open lever 3
- Close lever 4
- Open lever 5
- Close lever 8
- Open levers 6 and 8
- Open lever 7
- Open lever 9
After this puzzle, go back to the room with the big machine. Now the right side’s level will be defrosted. Pull it, and go back to room with the lockers. You’ll find that the first door’s lever is defrosted. Pull it to unfreeze the door and head on through.
Here you’ll find more lockers and the following lever. Pull it.
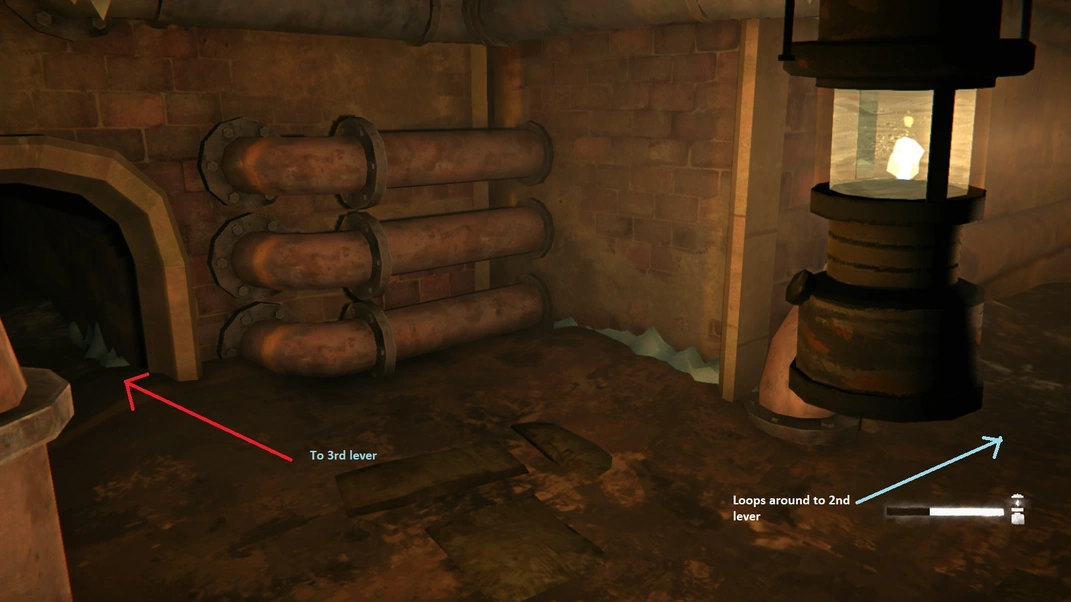
From here, head left from the new lockers you should find the door circled below. Go through it and down the narrow hallway to find the second lever you need to pull.
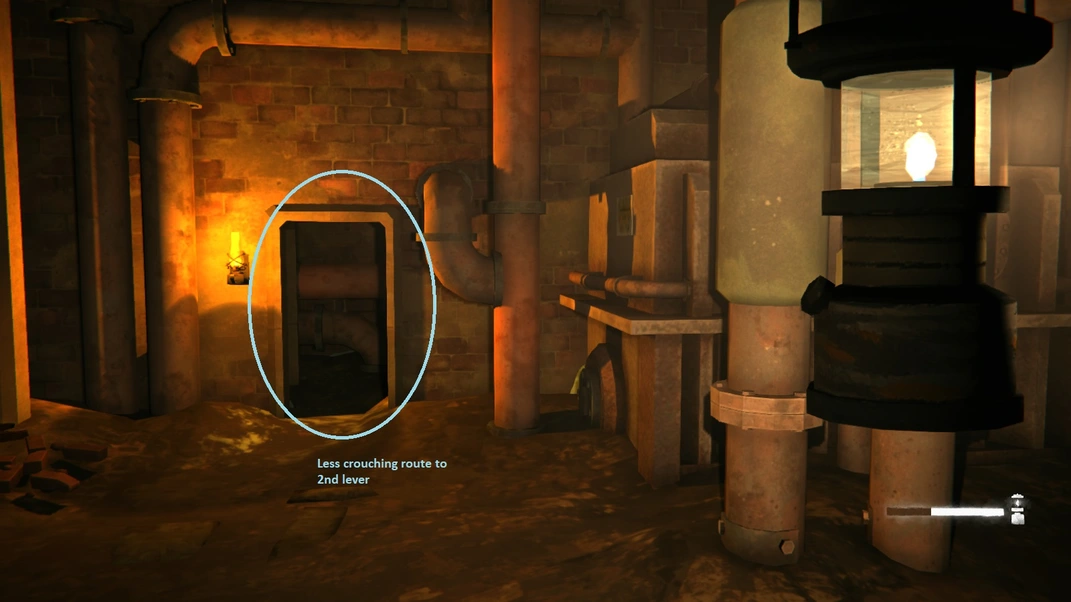
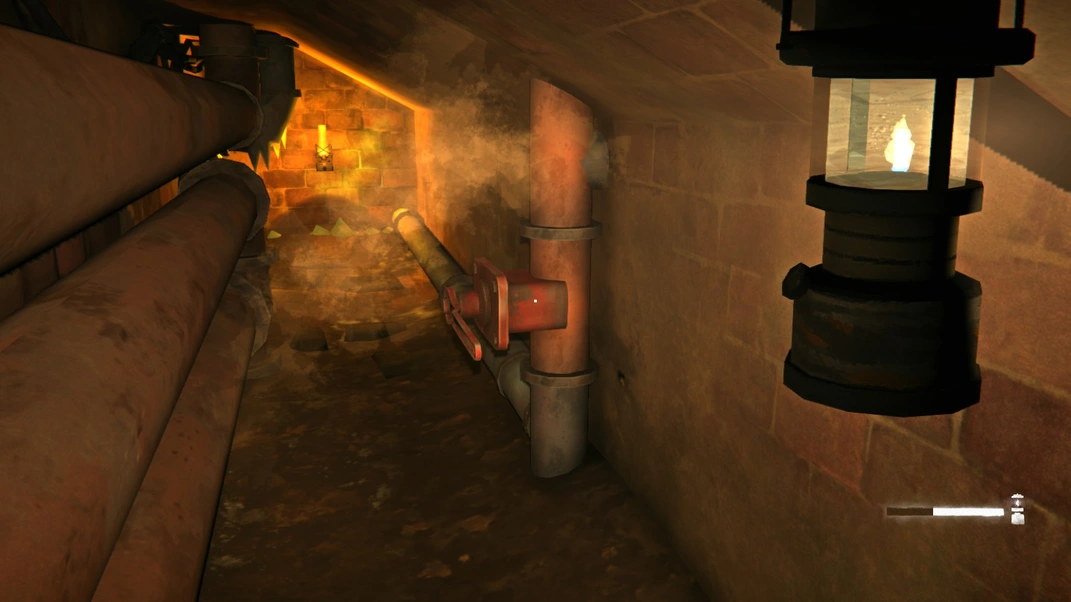
Pull it. The lever from before defrosted it. Now, you want to backtrack and go to your left when facing the door above. There will be a hallway with pipes splitting it down the middle Find the small hole on the left side and crawl through it.
It will lead you to another door for the control room, but this one is locked with a padlock. Still, the important part we want is the lever next to it. Oh, and pick up the heavy hammer on the shelf.
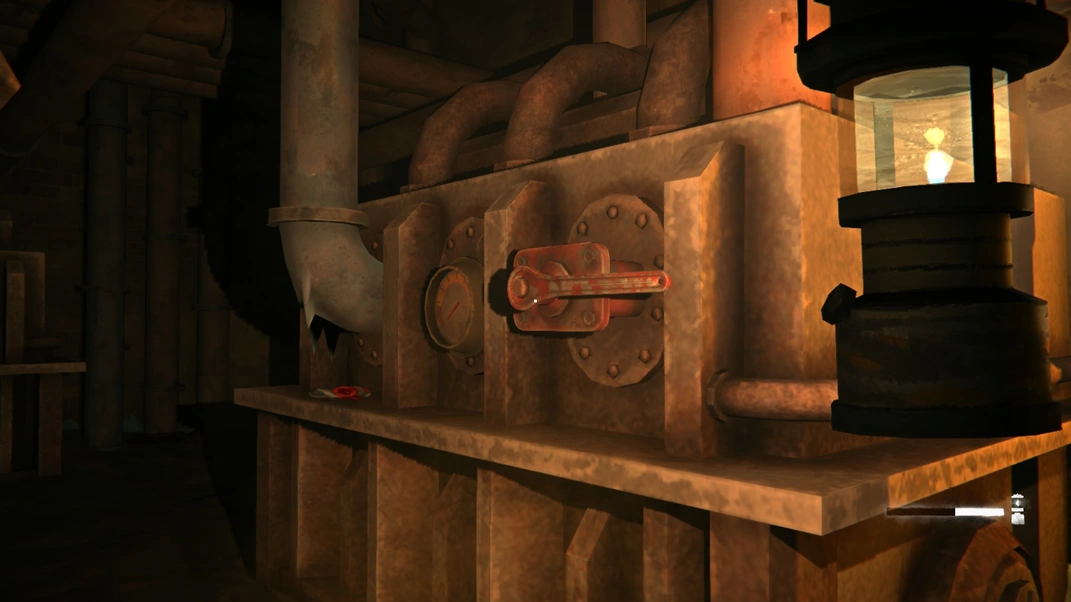
Like before, pull it. Even though it’s not immediately obvious, you’re done. Head back to the original control room door to find that its lever has been defrosted. Pull it and head on through.
The machine we want to break is on your left and pretty obvious. If you didn’t pick up the heavy hammer from before, go back and get it since Will can’t destroy the machine without it. You’ll be treated to a nice cutscene of Will most likely venting his frustrations at the convicts. Once he’s done smashing up the machine, you’ll be given the prompt to return to the prison. And the cool thing is that there’s a nice shortcut via the tunnels. First, grab your stuff from the lockers. Then, head back to the control room. If you just go straight from the entrance we opened, there’s another door we can go through (the door on the right is the padlocked one).
Just head on through and follow the linear path. You’ll eventually come to a stairwell (search the green box before ascending). At the top is another door that leads out to the maintenance yard portion of the prison. This also unlocks the door so you can go back through to reach the steam tunnels/power plant.
When you’re ready, head back to the prison entrance. And don’t forget to hide all your gear.
Chapter 3: The Detonators
I don’t know about you, but I have a bad feeling about Franklin…
Oh well, back to the game. Now Will mentions something about a blizzard, but I wouldn’t worry to much. From what I can tell, it pretty much stops by the time you get all your gear sorted. To get to the mines, you need to to just follow the road like we did in Chapter 1, but without veering off at the prison truck.
Important Note: This is the chapter of no return so be sure to finish any sidequest you want to complete before bringing the detonators back to the prison. Mentioning it now because there are a fair number of sidequests that can be completed on the way to the mines.
Anyways, back to the story. Honestly, you can just follow the road all the way to the mines. In fact, there are little mine signs dotted along the way. As a warning, you’ll probably want a flare gun with at least two shells because the road does pass right by a bear den. Also, be sure to bring at least 4 noisemakers. There are a stupid number of timberwolf packs between here and the mines.
At the end of the road, you’ll find a swaying rope bridge. Be careful because you can fall off and die. Just past, you’ll find the entrance to the abandoned mine.
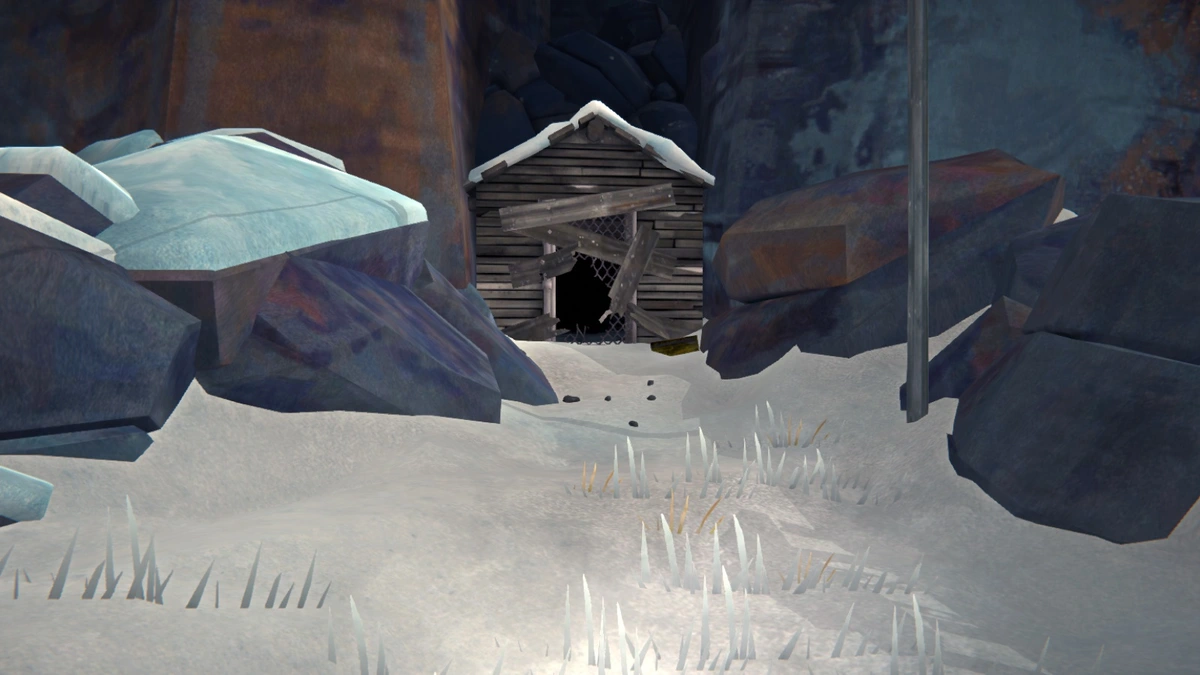
Alright, head in while veering to the left and you’ll eventually come to the large “doorway”. Once through, you’ll see a wooden staircase to the left and a passage to the right. Don’t bother with the staircase, but underneath it, near the painted orange square, is a door that you can investigate to trigger the Forest Talker Supply Cache sidequest.
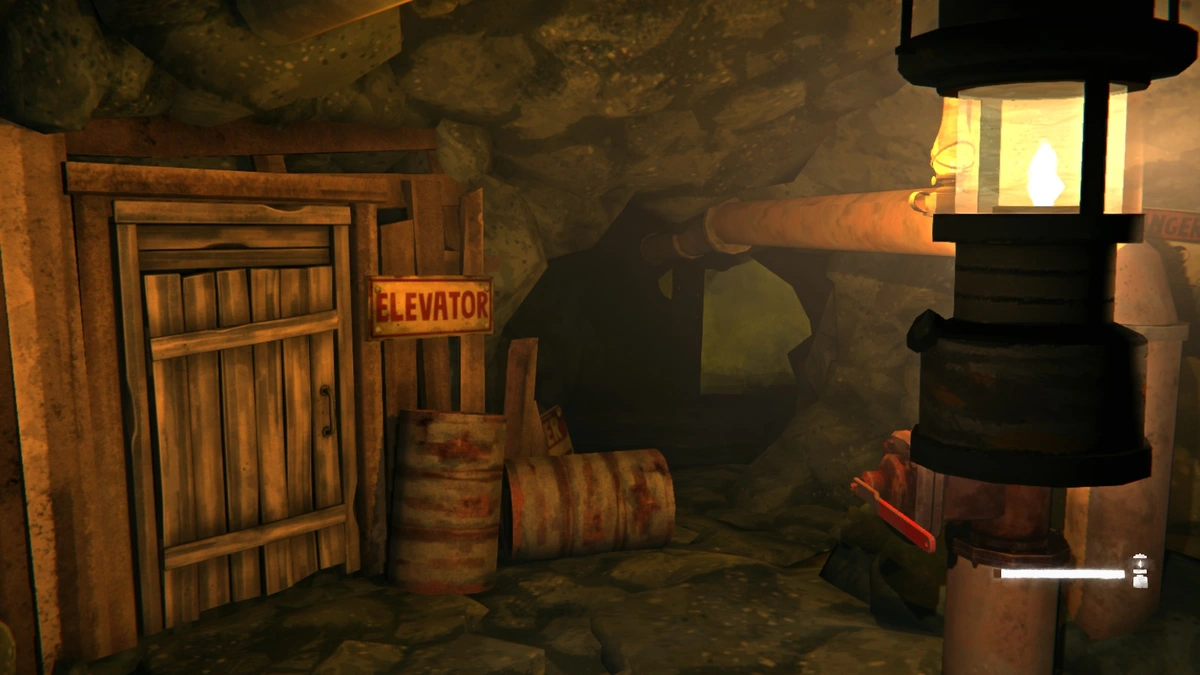
We want to go to the right, where there will be a couple of signs saying “elevator”. After a while, you’ll come to a small tunnel where you need to crouch. After going through, you’ll come to the below area.
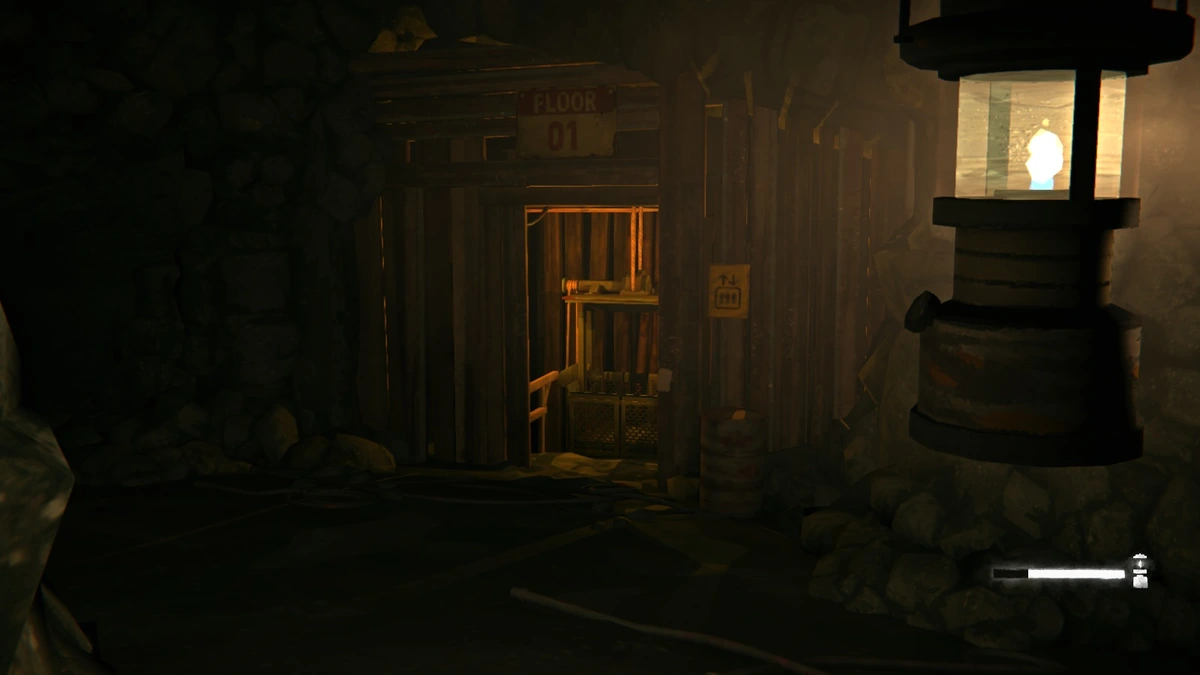
Head up the wooden platform and you’ll eventually come to the mine’s elevator. Sadly, it’s a manual handcrank elevator. On the plus side, the crank is in the locker area just off to the right.
Now, you’ll want to search and take advantage of the lockers here. Up ahead, there are some areas that require Will to move fast. Even when you’re not encumbered, you still move slower when you have 28 kg vs 15 kg. Plus you’ll burn through your sprint stamina faster when carrying heavy loads. So take the time to temporarily drop any excess gear. Stuff like guns and firewood are good to shed weight.
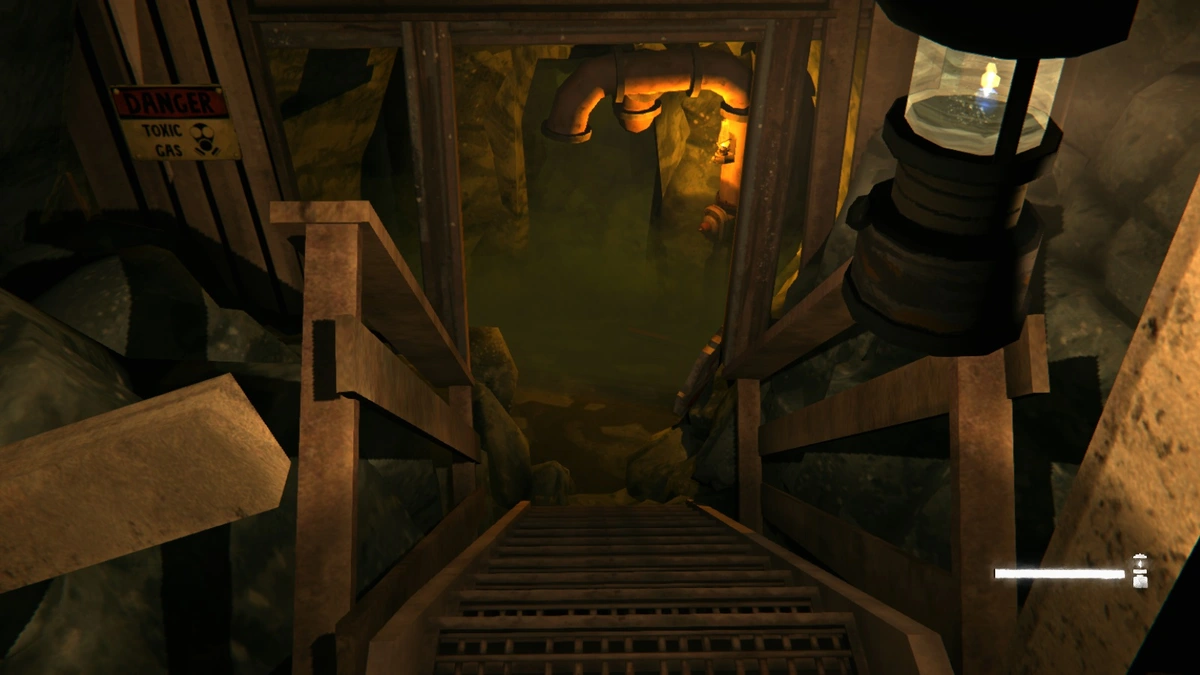
Once you’re ready, head back to the elevator and take it down to floor 3. Oh, and turn off the lantern if you want to conserve fuel.
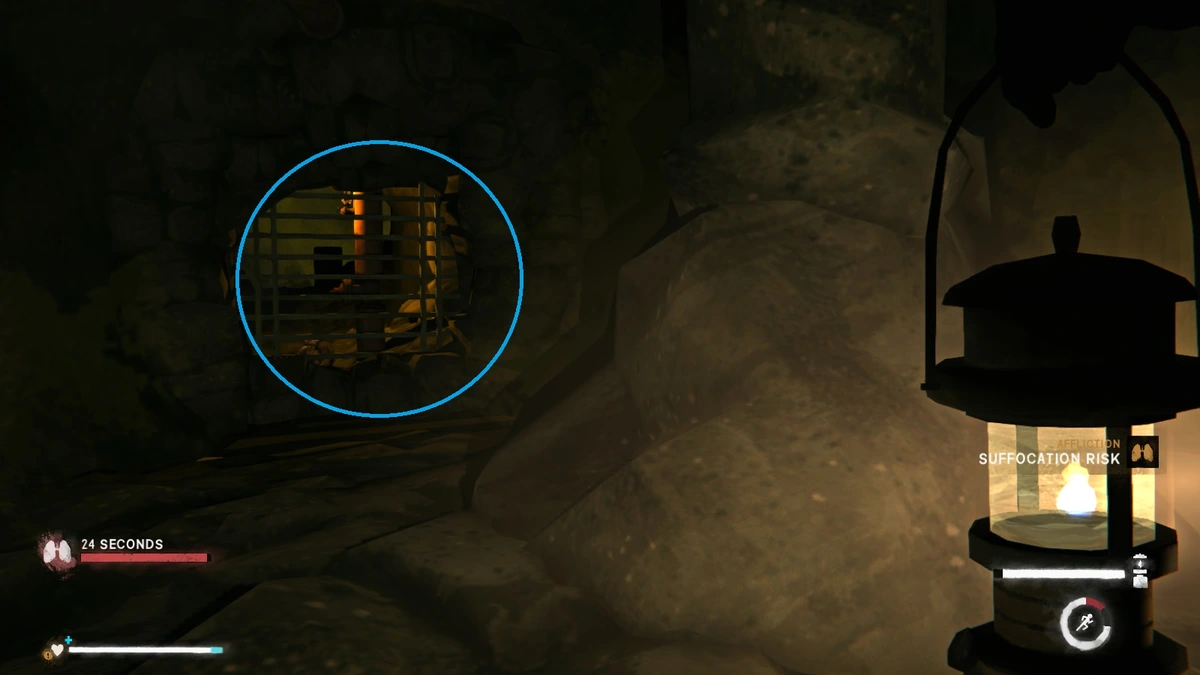
After leaving the elevator, you might have noticed some signs about toxic gas, as well as the mine notice on the front of the elevator on floor 1. Well, here’s what the gas looks like.
Entering it gives Will the “suffocation” affliction. The lung icon on the left shows how long until Will dies from lack of oxygen. You either need to get out or pipe in some clean air to remove the effect.
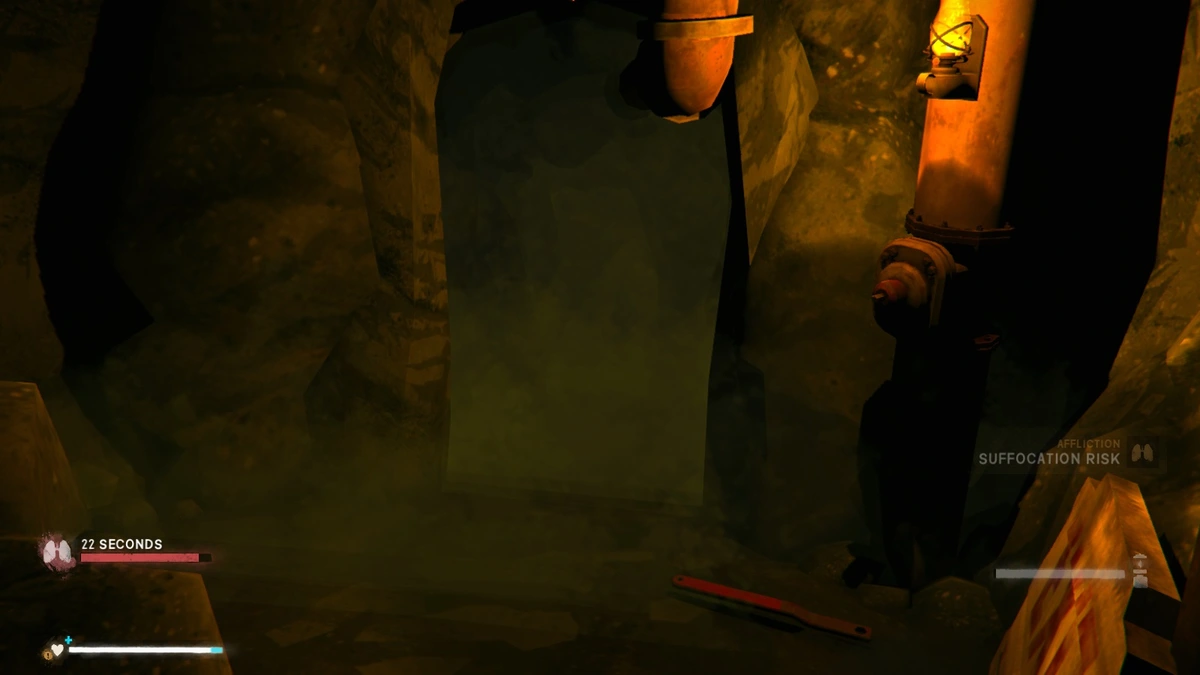
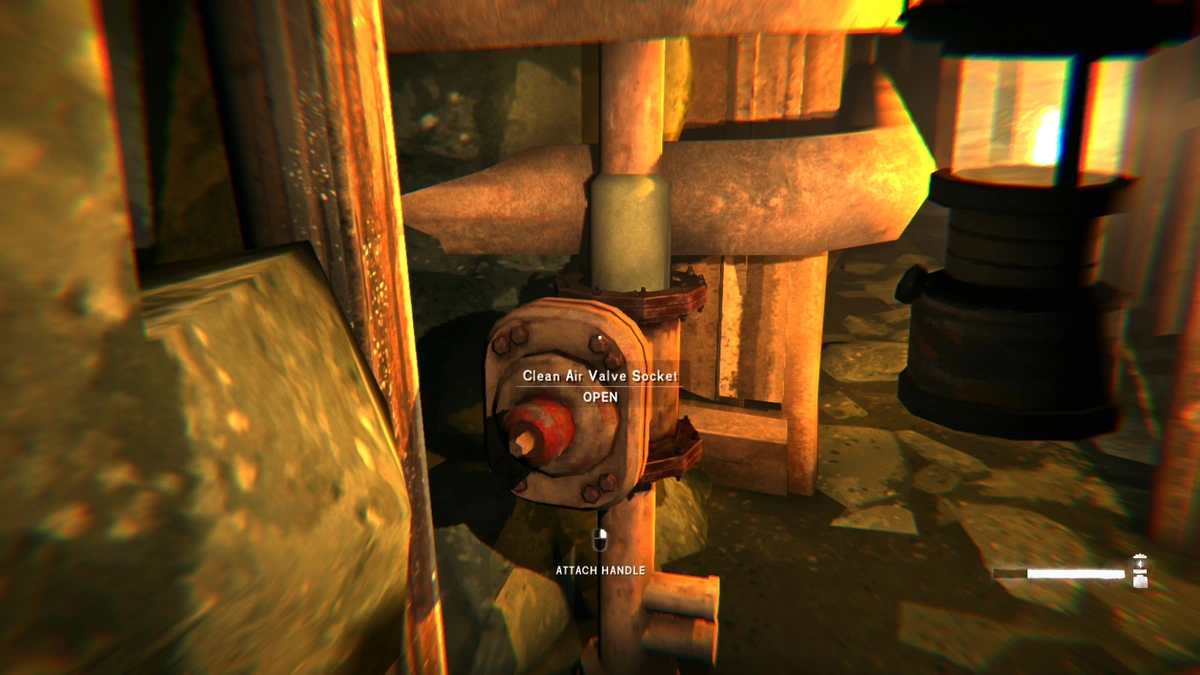
Speaking of piping in clean air, you’ll notice there’s a red lever on the ground in the above picture. Picking it up and placing on the valve next to it will allow you clear the toxic gas from this area (remember to actually open the valve after placing the lever). This makes up the main puzzle mechanic of this chapter.
After clearing the gas, grab the lever (it can be removed), and keep going. You’ll come to some more toxic gas, and there will be another valve just a little further in.
Sadly, this time the lever will stick, so no more instant clean air for Will. If you look around, you’ll also see a wooden door to the other mine elevator. Spoilers, that’s where we need to go. Unfortunately, you need a mine key first, so further in we go.
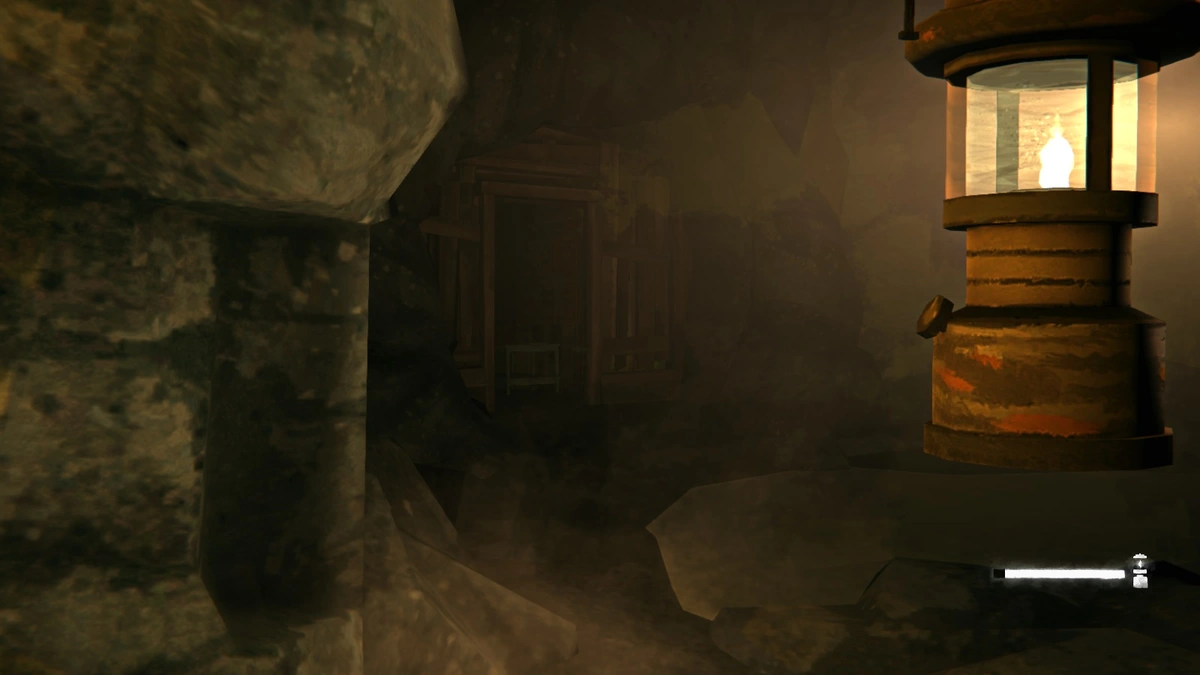
And some more toxic gas… To get through this, you need to run for the area in the below picture.
This is an “air pocket” as Will puts it. If you look through the bars, you’ll notice that there’s another lever. We need to get that, and here’s where the inventory emptying from earlier comes in. Getting to the other side of the grate will basically take almost all of Will suffocation meter. And if you’re encumbered, you probably won’t make it. Or you’ll make it, but be stuck.
Another side effect of suffocation is that, as the meter drops, Will’s energy level (the eye icon on the stats menus) will drop faster as well. If you have any energy drinks, take them. Will’s vision will also start to blur once the meter reaches about the halfway point. And it gets worse the lower the meter.
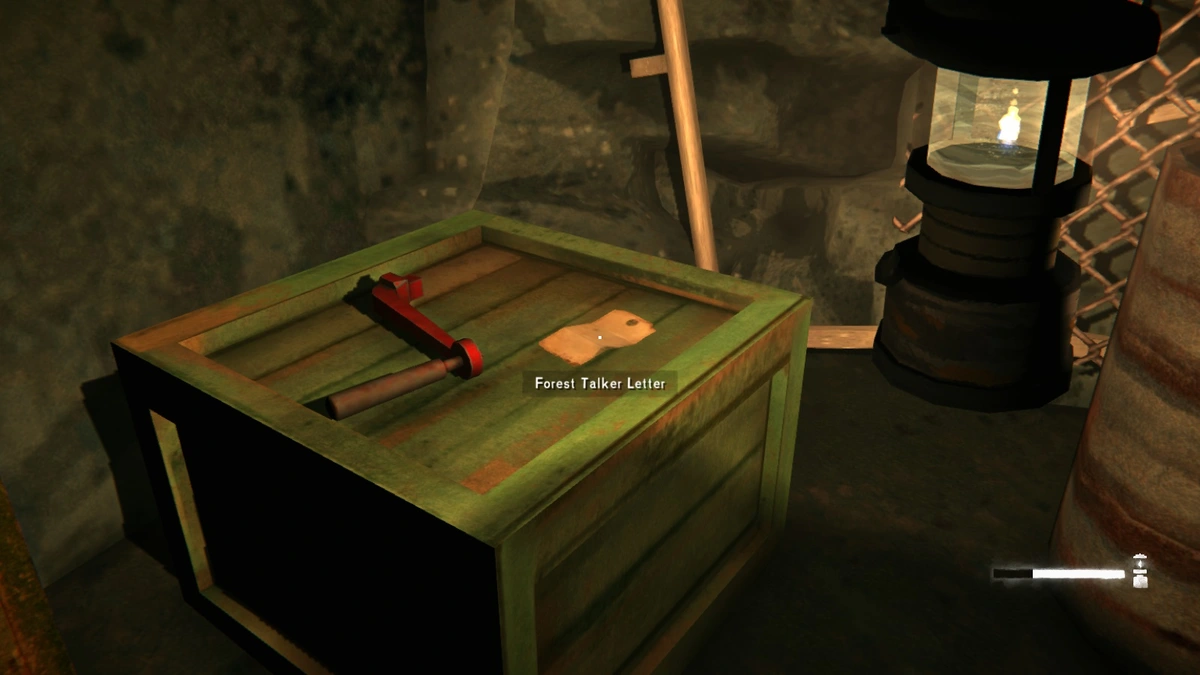
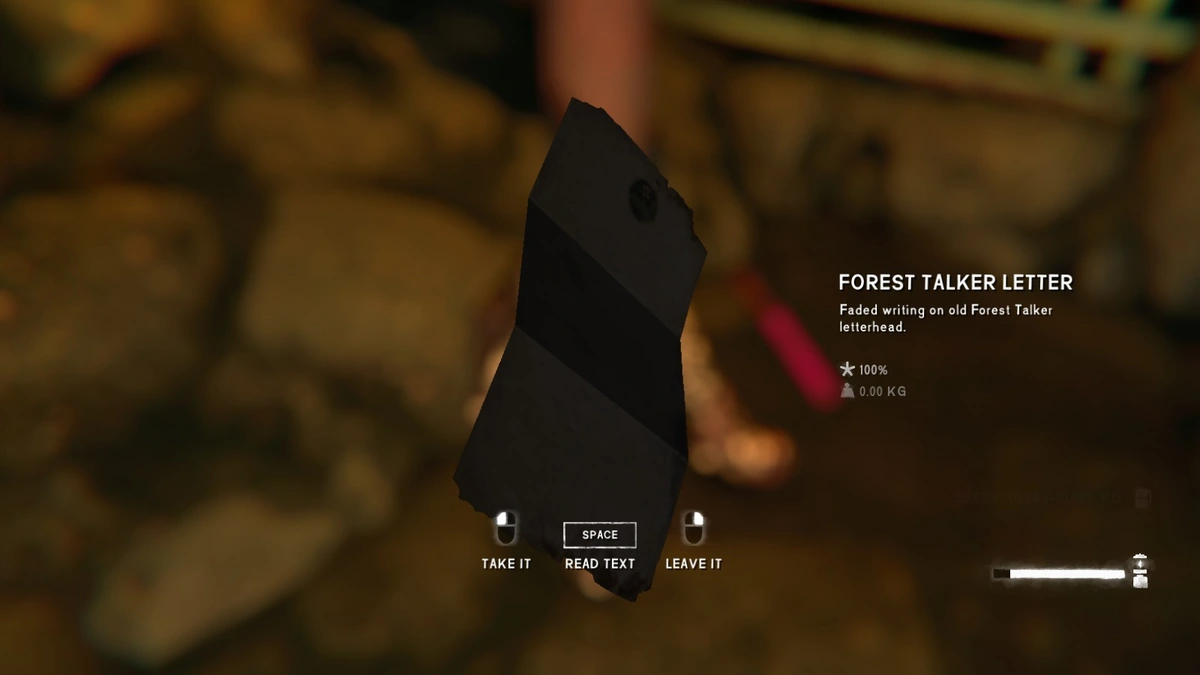
Once you’re ready, sprint through the wooden arch on the left. Thankfully the path is completely straight. After you reach the other side, pick up the lever and search the body. The guy will have the mine key and another Forest Talker letter.
Once you’re rested, head back to the wooden door and open it. You’ll come to an area where you need to crouch and, oh joy, there’s also toxic gas. The thing to keep aware of where you can stop crouching, since that will let you start sprinting. Your goal is the valve below. Use the lever as usual and take some time to recover. There will be another valve further on, so rinse and repeat.
You should also take the time to rest if Will is getting tired. In the picture above on the right, you’ll see my tiredness meter is just below half. While I can make the next stretch, I’ll need a nap pretty soon.
Now, you might have noticed that there’s an elevator in that toxic gas. That’s right, you’ll have to do elevator cranking while suffocating…joy. At least this one’s short. We’re heading for floor 2 by the way.
So floor 2 is thankfully free of toxic gas. Head on and you’ll come to an open area.
The gate is locked, so you’ll have to climb the planks to the left. This will drop you down to the area behind the locked gate.
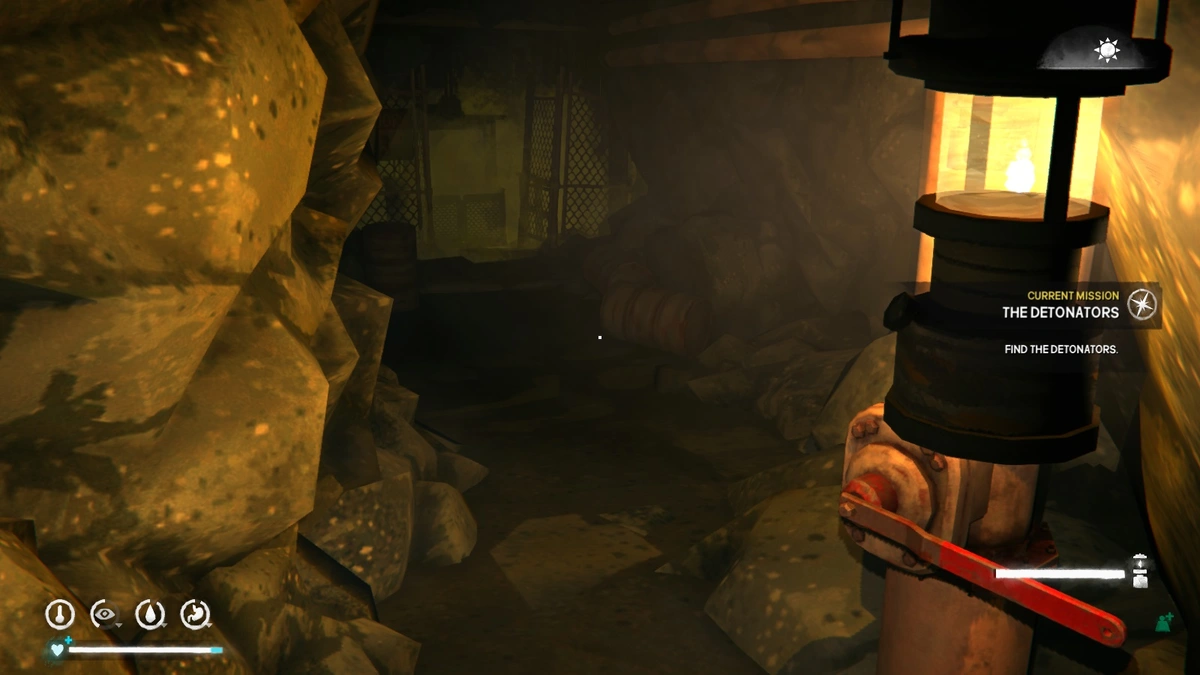
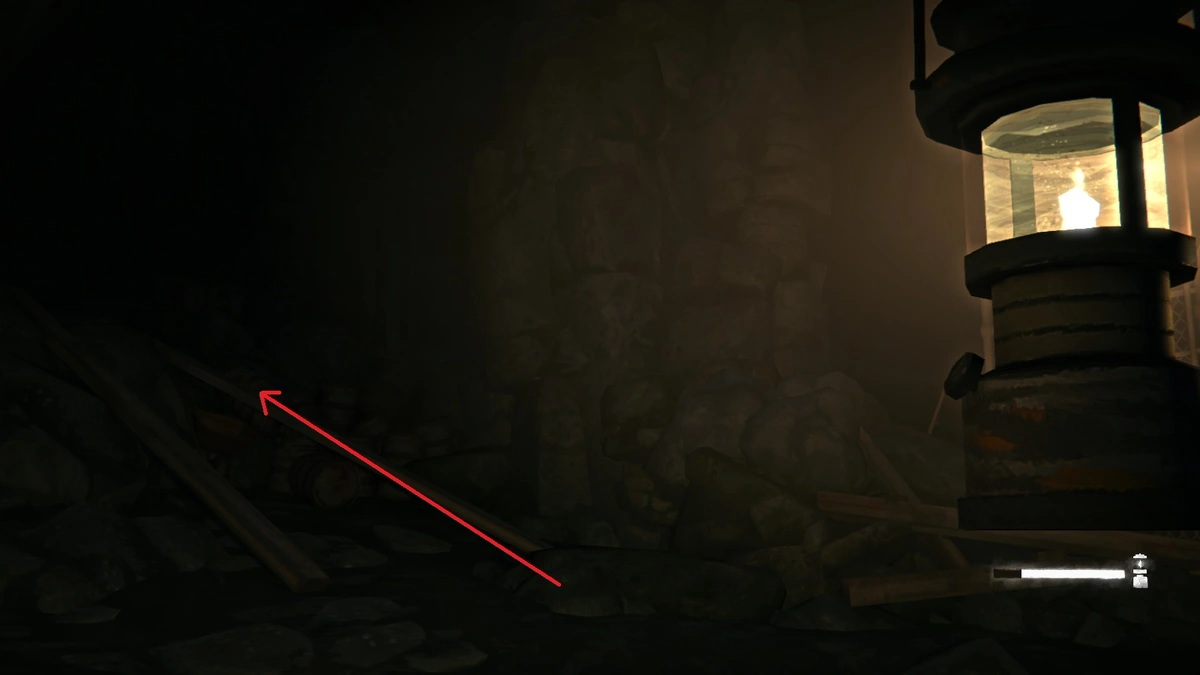
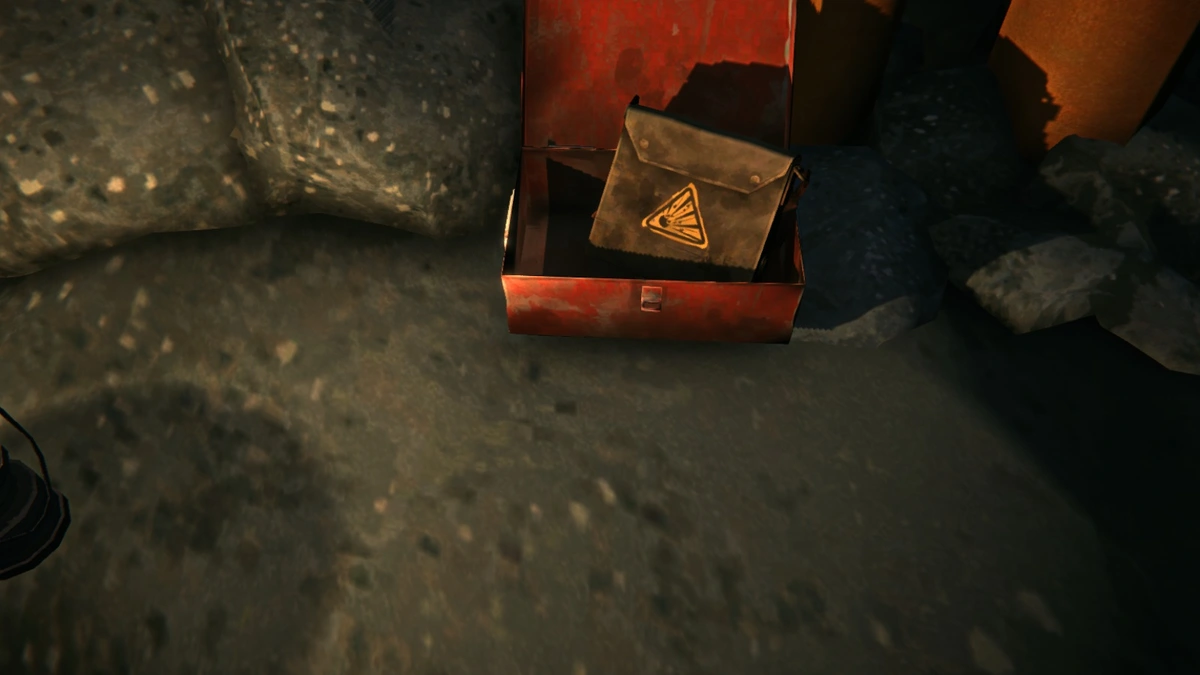
From here, turn right and walk toward the locked gate. On your left will be a mining pit. Climb the wooden plank to find the detonators.

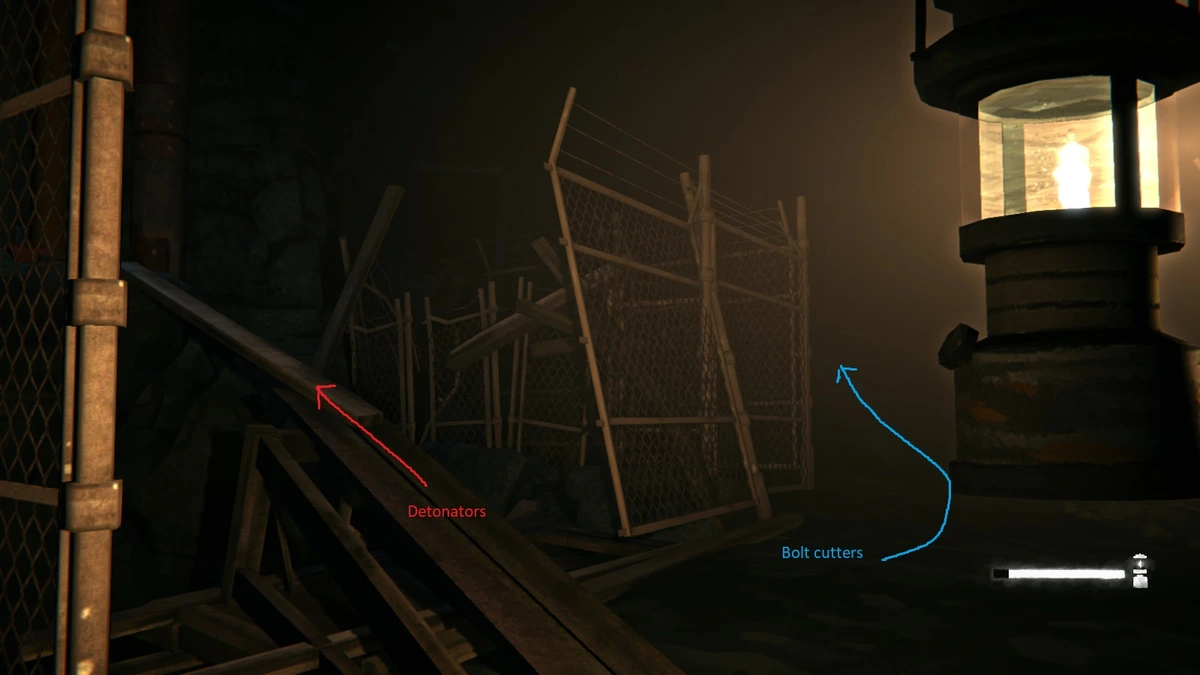
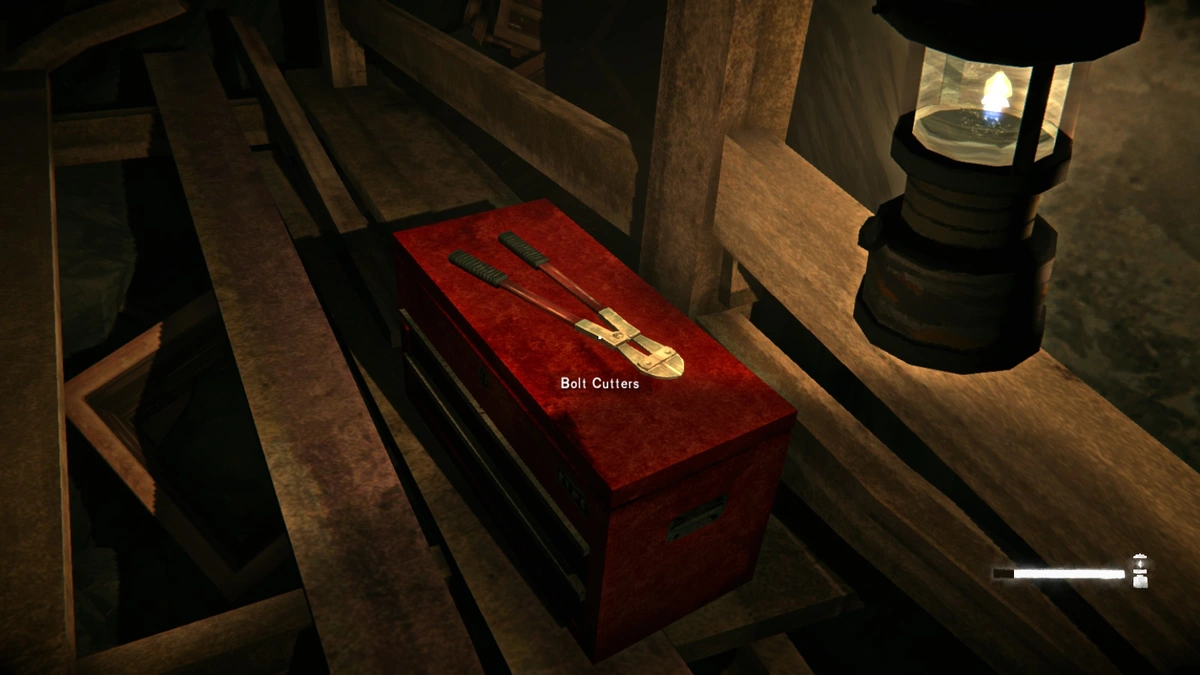
Awesome! Time to leave. But before that, you actually want to go up the staircase that’s just past the detonators. You’ll find some bolt cutters on the nearby toolbox, which means no backtracking through toxic gas.
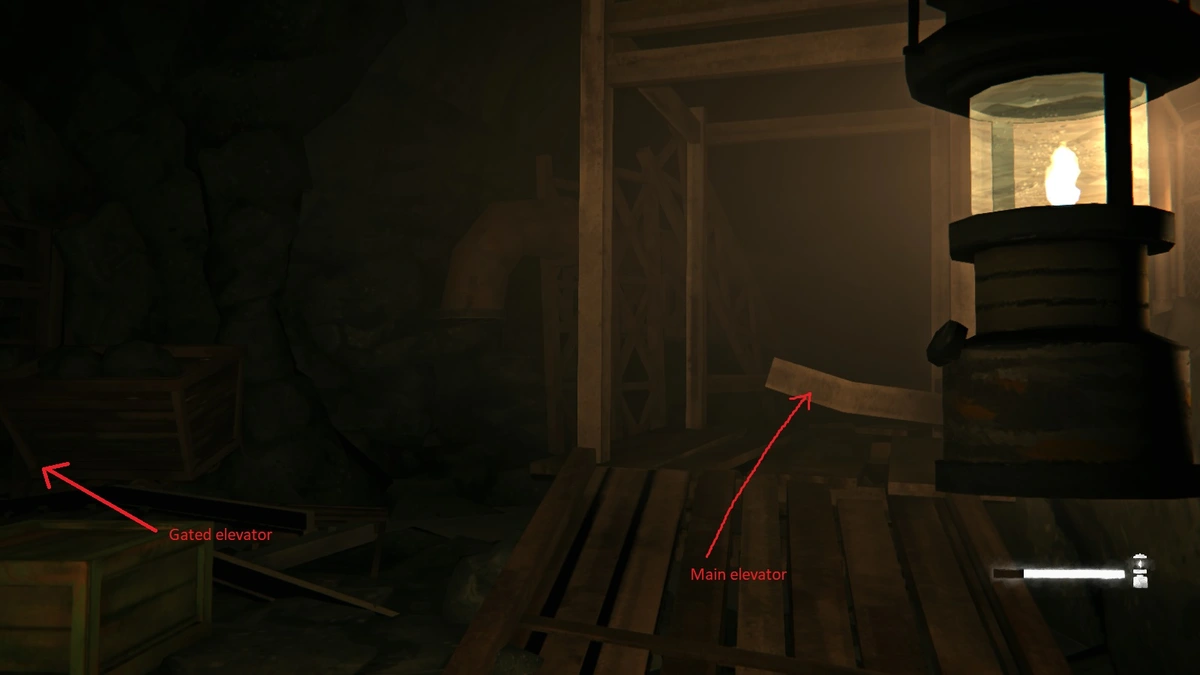
After picking up the last two Forest Talker clues (see that part of the guide for more details), head on back to the elevator and take it up to the 1st floor. From here, you can use the bolt cutters to open the gate, and the path will take you back to wood platform just before the main elevator (the picture above where I marked “gated elevator”). Grab your stuff and head out.
As you leave, the phone will start ringing. Pick it up to have a sobering conversation with Jace. Neither she or Will has any idea how to stop Mathis this time. You also learn that Atwood is an astrophysicist and Jace’s thesis advisor… very interesting.
After that somewhat depressing conversation, head on out… only for all the shaking to finally pay off and cause a mine collapse. At least Will came out better than Astrid; no injuries at all. But the main mine entrance has been blocked. Thankfully, just head on back toward the Forest Talker cache. Take the stairs and you can exit from there.
From here, it’s a pretty linear path back to to the prison. You can’t take the road, but instead you’ll be led to a couple of climbing ropes that drop down into the ravine. At the bottom, there are two wolves, but you can easily scare them away with a weapon, aurora or not. Just follow the natural path of the ravine, and eventually you’ll come across a fallen tree that you can “climb” up. This will lead you to another climbing rope, close to the prison. Use it, and you’ll come out overlooking the “lake” that surrounds the prison.
The game will again warn you to finish any sidequests that you want to complete. This is the last point where Will can freely explore the region.
IMPORTANT
Any clothing you want to keep must be stored in the maintenance yard. Just throw it into the toolbox next to the workbench.
Once you’re ready, walk up to the prison entrance for a rather ominous ending cutscene.
Chapter 4: Donner
Ugh, what a fine pickle Will is in right now. And while it’s sad that poor Franklin is dead, I am a little annoyed that he ratted use out to Mathis. Oh well.
Head on out of your cell and go left. You’ll see Mathis, and getting close enough will trigger a cutscene. Gotta say, not looking forward to seeing how Mathis gets revenge on Will in Episode 5.
So, here’s the part of the chapter I was dreading. Remember that suffocation mechanic? Yeah, it’s back. And there are no air pockets here. Instead, we have to navigate a prison, on a timer, while it’s on fire. Fun. The main positive is that we have a little more time on the meter since it’s fire smoke instead of toxic gas.
Honestly, it’s actually not that bad, but only if you know where you’re going. Making this run blind, you’re pretty much guaranteed to have at least one death since the vision blurring can really screw you in trying to find the correct path. Because of this, I have made a video of this section showing the way out.
The main thing that I want to stress is that you NEED to pick up the prybar on the way out. It’s very important as the convicts have stripped you of all gear and there are a couple of wolves between you and the maintenance yard, especially on Hardened Survivor mode.
Once you make it through the emergency door, you have a little breathing room. Go to the warden’s office, and you’ll see the hardcase. Don’t grab it just yet. Instead, head for the kitchenette/bathroom and pick up all the supplies around. There are insulated boots which you might want, although I would recommend not putting them on just yet.
When you’re ready, grab the hardcase. The phone will immediately start ringing. It’s Jace. Unfortunately, while she started the lockdown, she doesn’t seem to have much control over it. It’s only a matter of minutes before Mathis and his goons find Will. And just on time, here they come.
You need to book it! Any stalling at this point will lead to Will’s capture by the convicts and a game over. Below is another video of the path you need to take.
Once you hit the ground, you can slow down a bit. There’s no risk of the convicts catching you if go a little slow (obviously don’t take the time to sleep or anything like that). But you do need to avoid the spotlights. If one catches you, the convicts will start shooting at Will, and you could die that way.
After you loop around to the maintenance yard (watch out for wolves), grab your clothes. The game actually deletes anything that’s not clothing at this point. I had stored all my gear here earlier, and as you can see, the drawers are empty of anything that’s not clothing.
Anyways, the goal is the maintenance door that leads to the steam tunnels. After all, we need to meet Jace by the Power Plant. Be sure to click that door as soon as you can. It’s scripted for Will to be seen and shot at as he approaches, and if you take too long you will die.
So like everything else at Blackrock, the steam tunnels are also on fire. I’ve got another video for you, although I don’t think this is as confusing as the prison escape portion.
I suspect that you might be able to find some goodies in those lockers that I passed by, but I was a little concerned about the suffocation. If you want, just backtrack after reaching the fresh air since the suffocation timer will have restarted.
Anyways, just exit the tunnels and enter the power plant for the final cutscene(s) of this chapter.
Sidequest: Darkstar
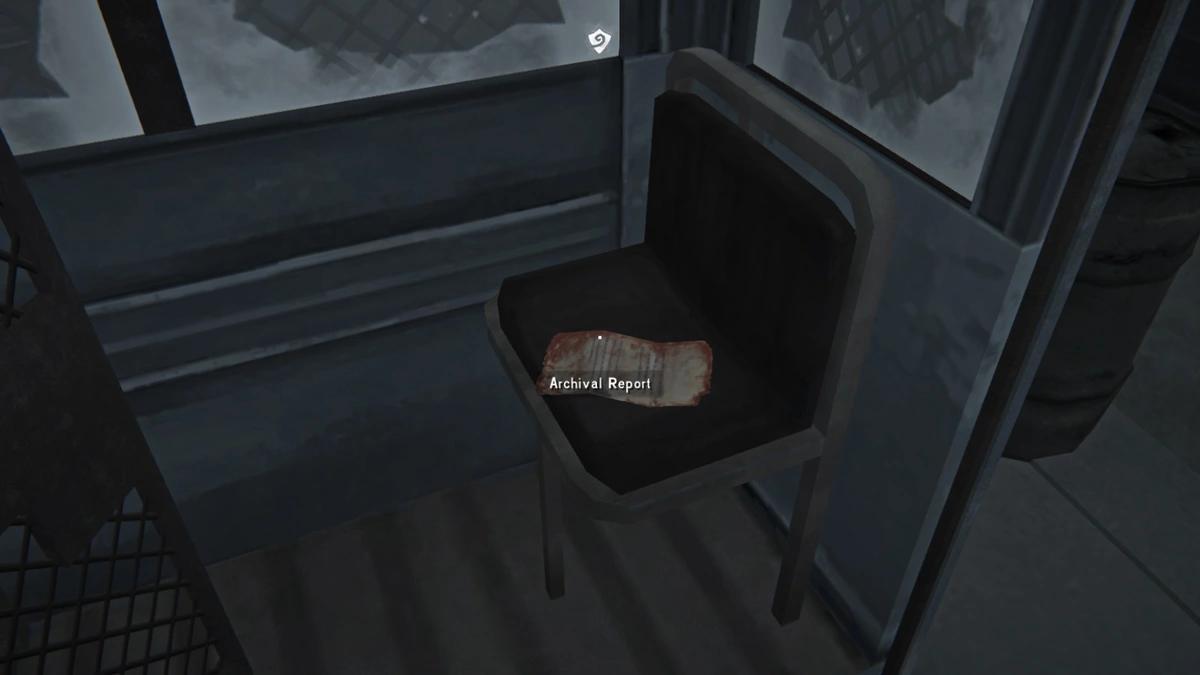
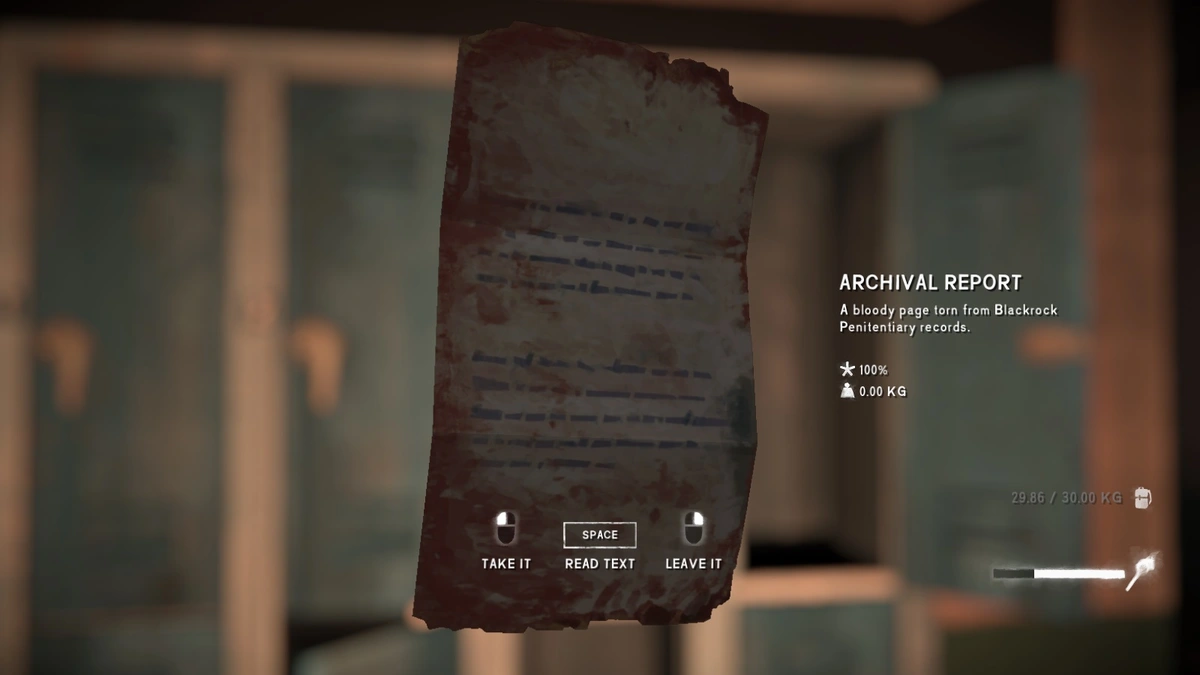
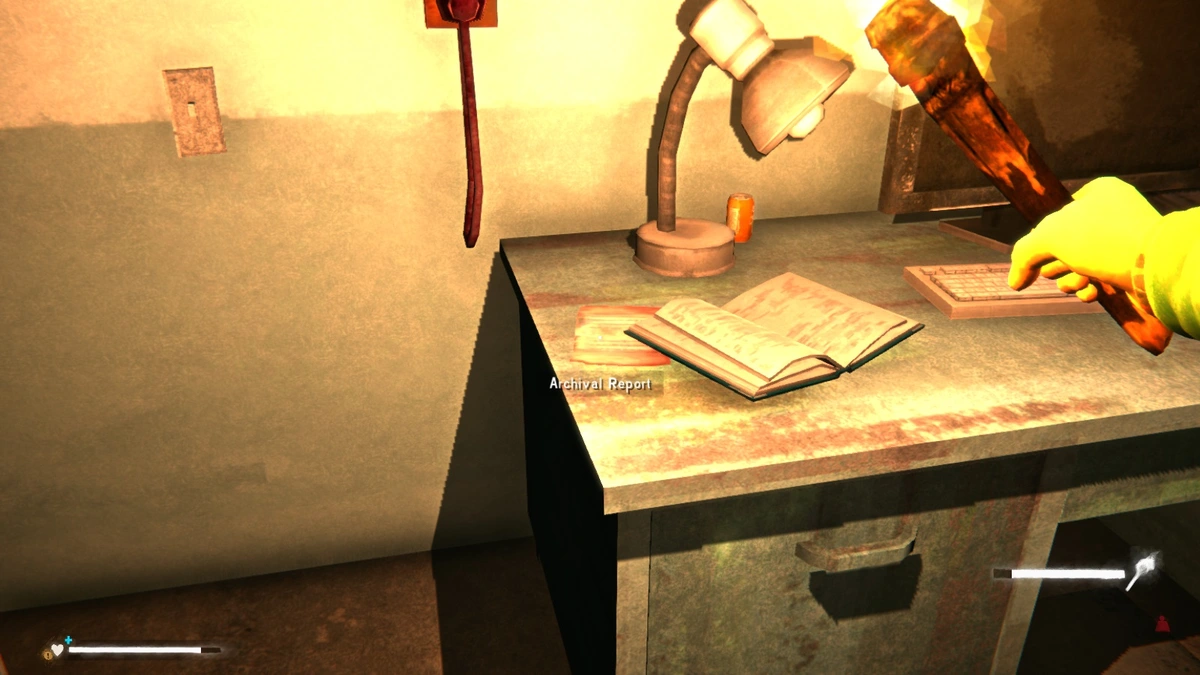
This sidequest can be activated by picking up any of the Blackrock archival pages found scattered around the prison. Reading all the notes will give you more insight into life at Blackrock prison prior to the First Flare. You’ll get a Steam achievement for finding them all, but no physical reward.
As an aside, all of the reports are just called “Archival Report” so I’m giving them personalized titles based on the contents.
A Wife’s Reflections
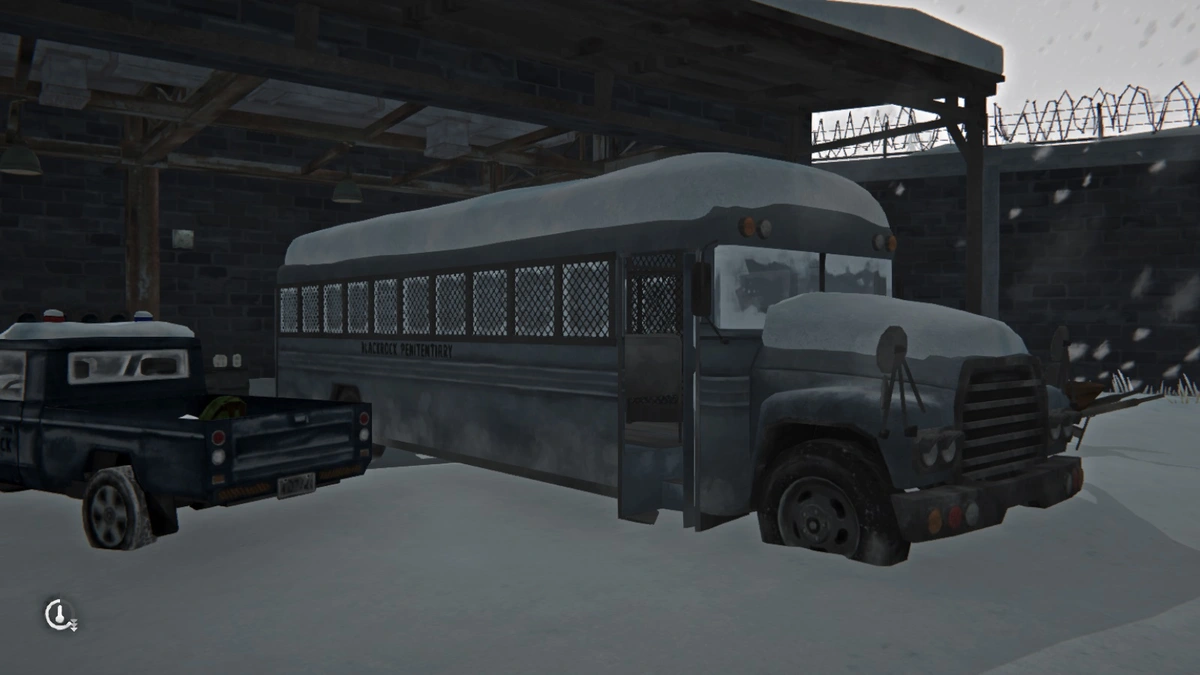
This will probably be the first page you find, activating the quest. The note will be lying on the backseat of the prison bus parked in the maintenance area of the prison. You’ll pass by it on your way to the infirmary during Chapter 1.
Building of Blackrock
This report can be found in guard locker #3. See Sidequest: Guard Lockers for more details.
A Cook’s Thoughts
This page can be found once you start chapter 2. The paper will be on the desk of the office in the power substation. This location will be highlighted on your map. Please see Chapter 2: The Power Plant for more details.
Memories of a Guard
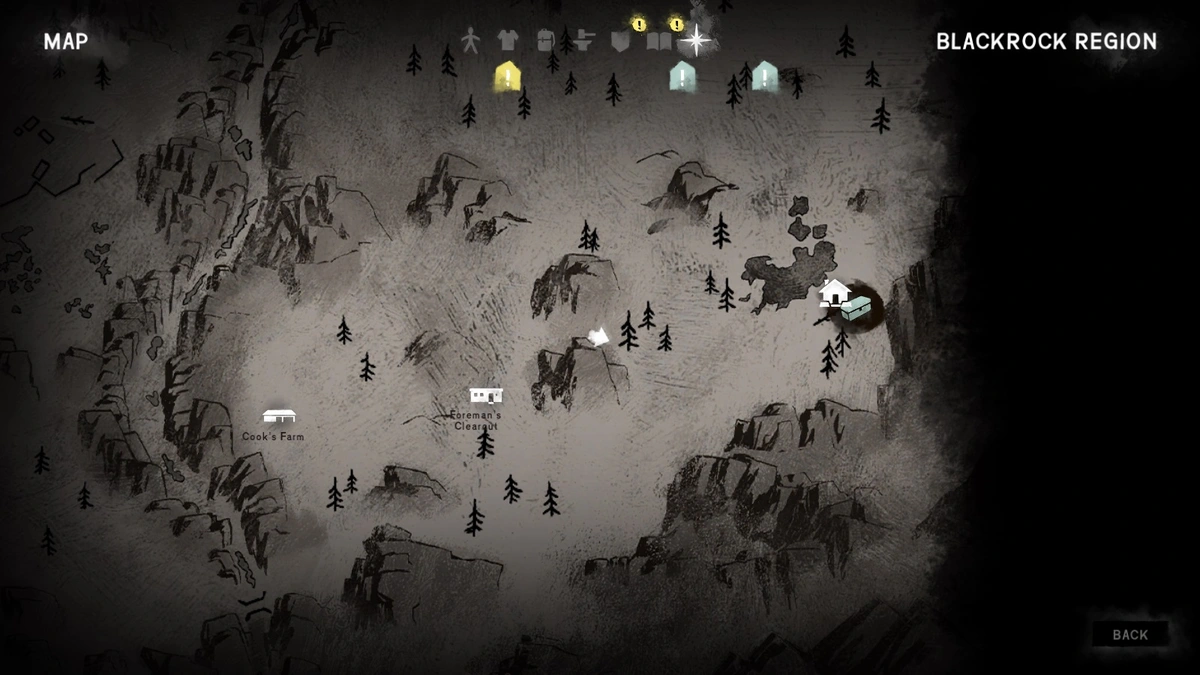
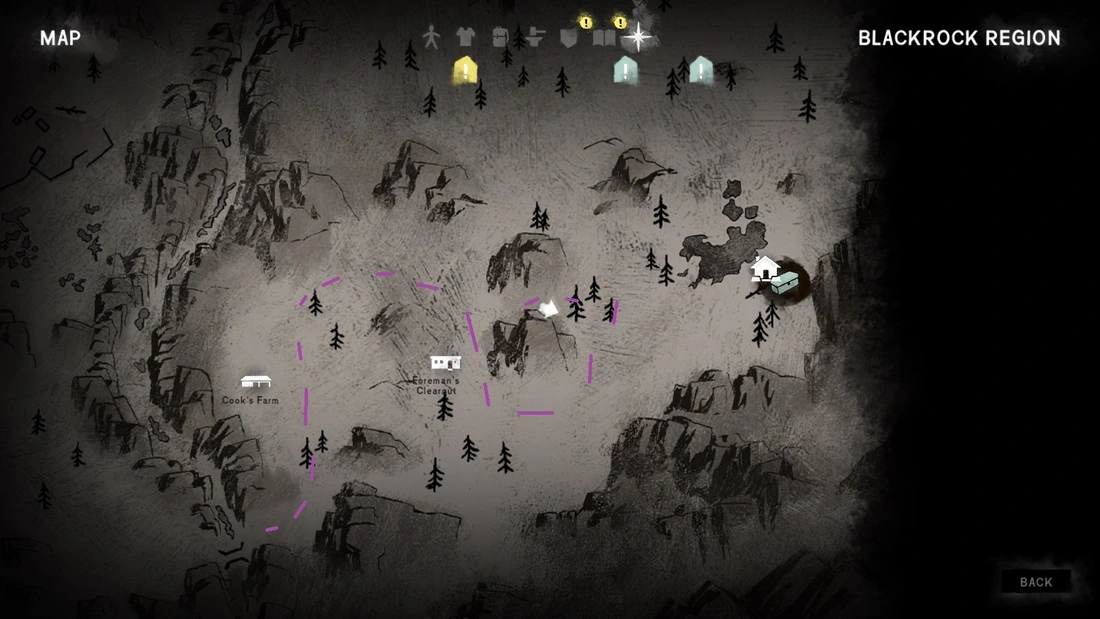
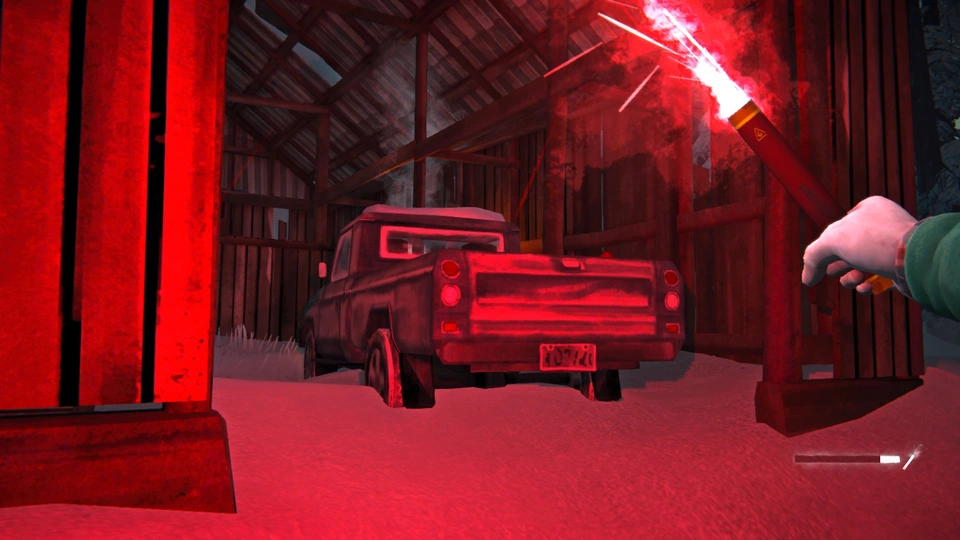
The mostly likely last page can be found in the trailer at Foreman’s Clearcut, a little down the road from Cook’s Farm. You’ll reach it either by following the road or by heading right through the field of cut trees just after you pass the farm. Inside, you’ll find a workbench with the report lying on it.

Sidequest: Blackrock Rumours
Yet another multi-part sidequest… yay. Unlike the one above, this sidequest deals with all the weird things that happened at Blackrock. You’ll get various items from each mini-quest, and I’ll note the important things below.
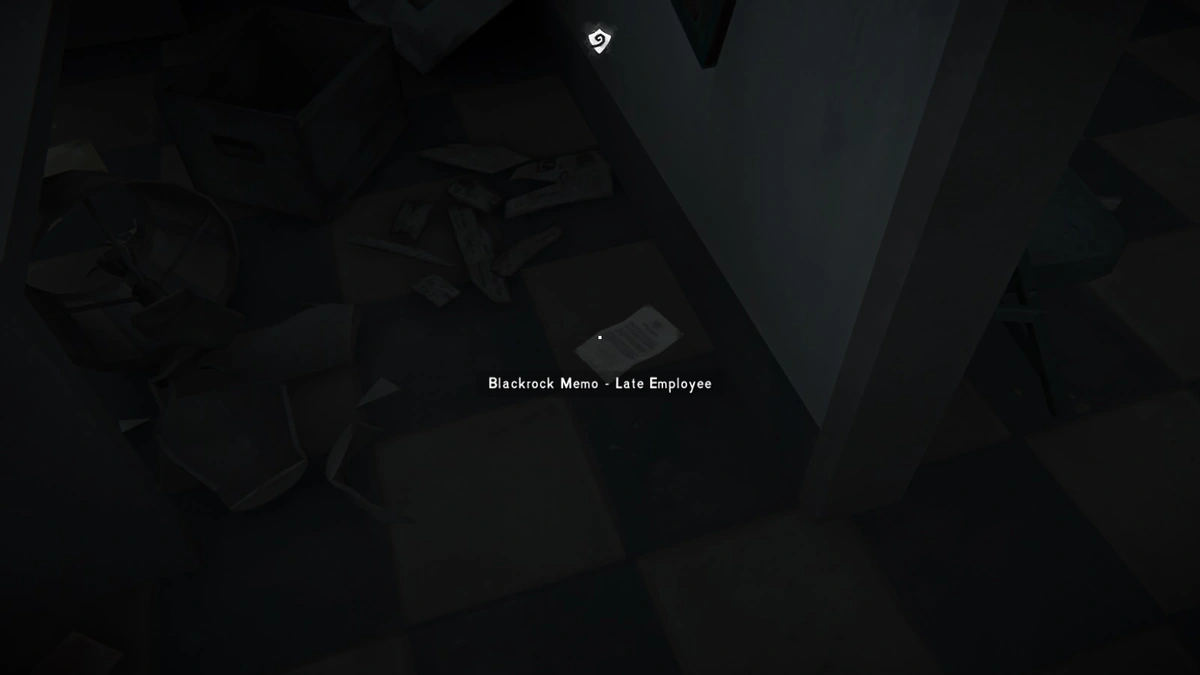
Missing Employee
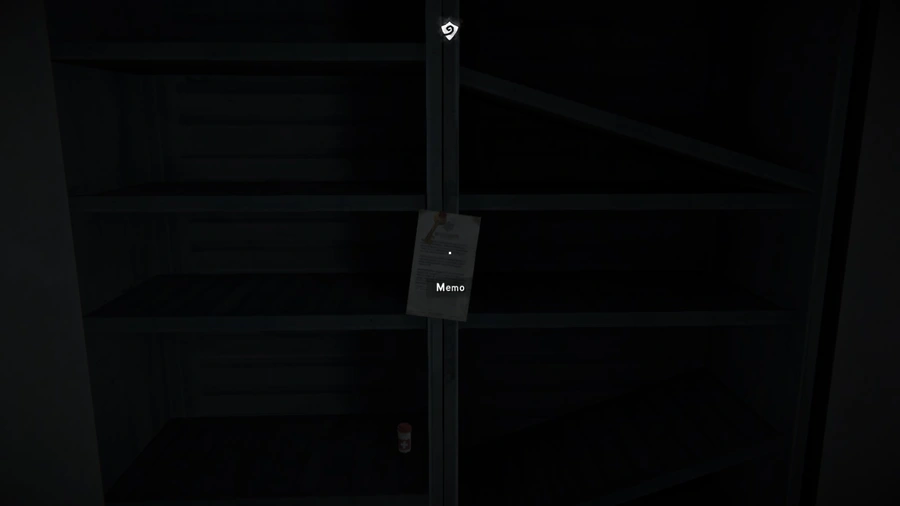
This will probably be your introduction to this set of quests. You can activate it by picking up the memo on the floor of the nurse’s office in the infirmary.
To find the employee, you need to head down the main road away from the prison. Then, when you reach the fork, go right. Head a little further down, and you’ll eventually come to a ranch-like arch on the left.
Go through and keep following the road to the left where there are a couple of ruined buildings. Search the buildings for some important early game loot and when you’re done, go past both of them until you reach a ravine.

If you head to the right, you’ll eventually come across a fallen tree trunk that you can cross, allowing you to walk down into the ravine. Go right from when you first entered the ravine, and you’ll eventually come across a dead body. Search it to discover that this is the missing employee and he has a lockbox key on him.
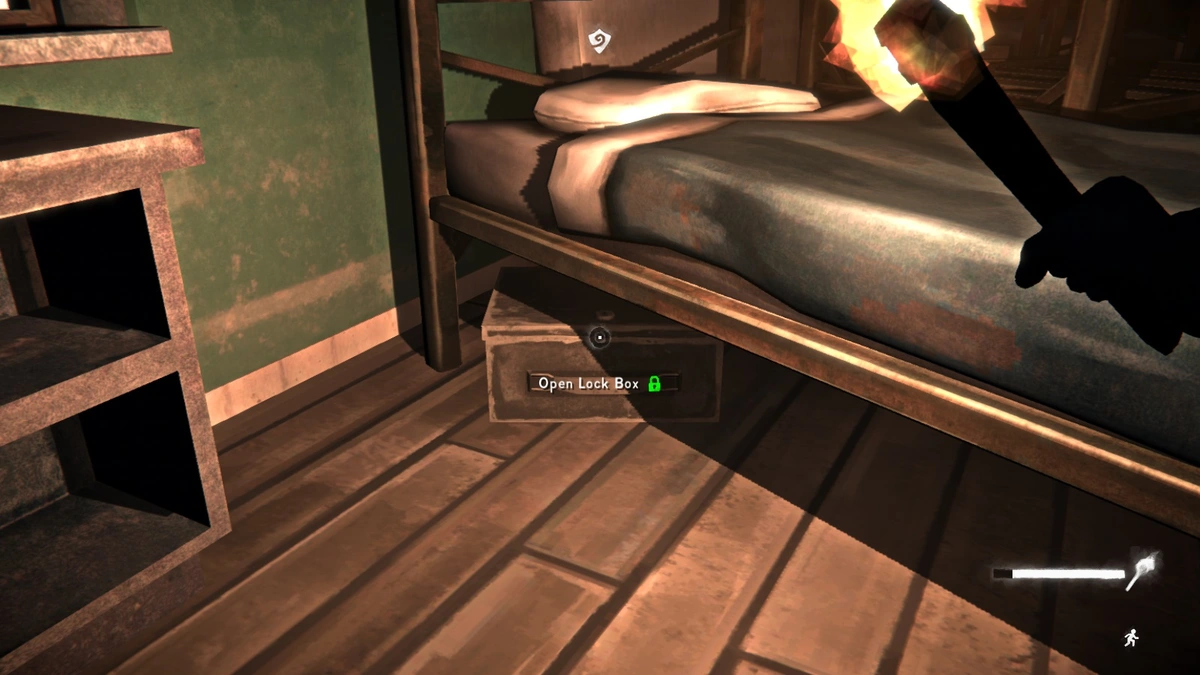
That key goes to the lockbox in the guard quarters near the infirmary. Head back there and use it to find a gold nugget (key item) and rabbitskin hat.
Aggressive Wolf
Ugh, what is it with Will and highly aggressive wildlife? I really didn’t need a wolf-equivalent to the Old Bear. Ah well, you can trigger this quest by picking up the memo in the locker at the guard office that allows you to exit the prison complex.
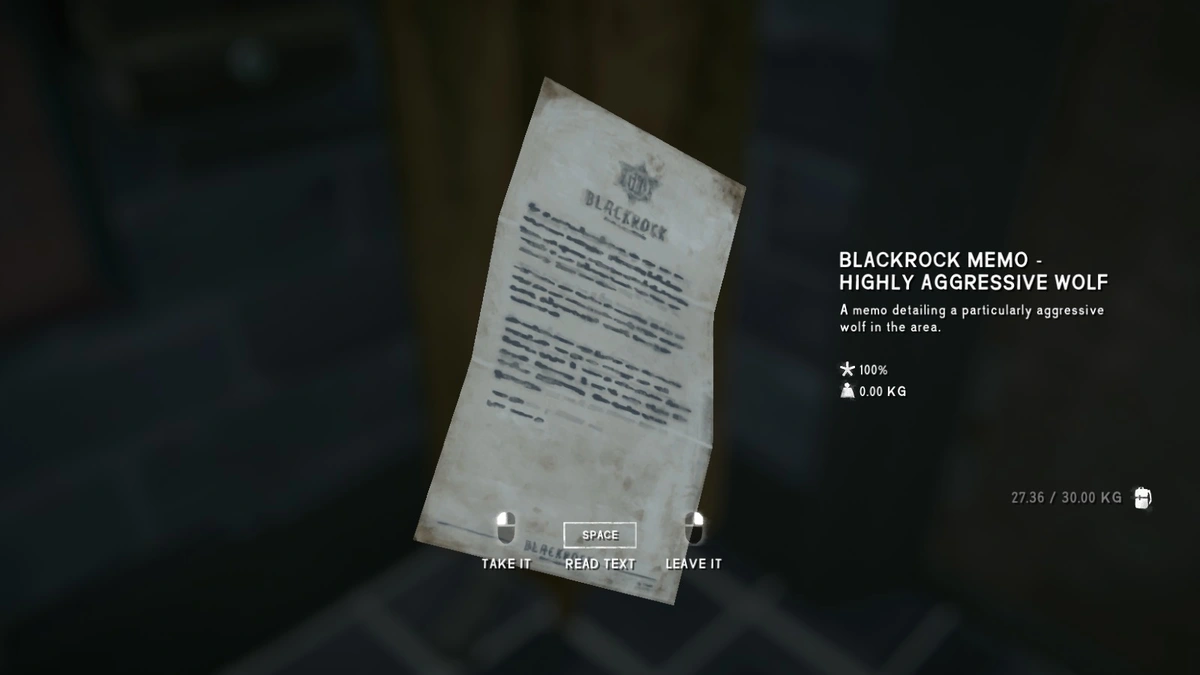
Apparently there was an overly aggressive wolf bothering the Blackrock staff even before the First Flare. And for some reason, Will has decided it’s a great idea to try and find its den. I think the idea is to find it there and kill it, but there are so many aggressive wolves in this game that I’m not sure killing one will do much to help.
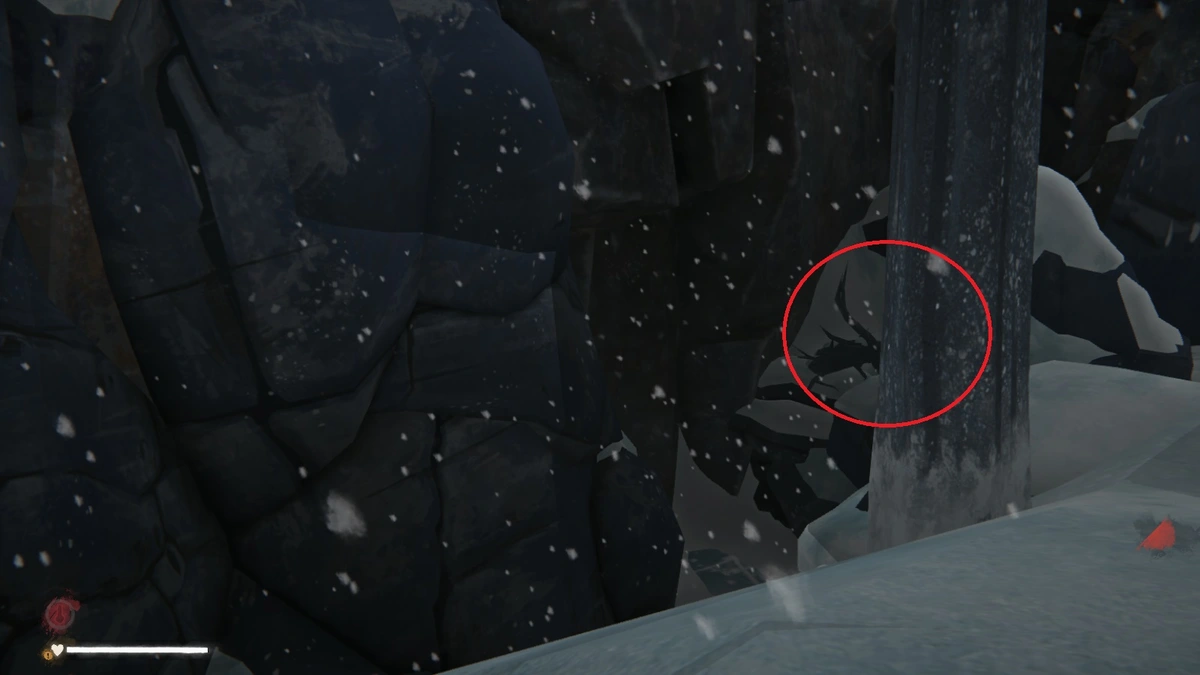
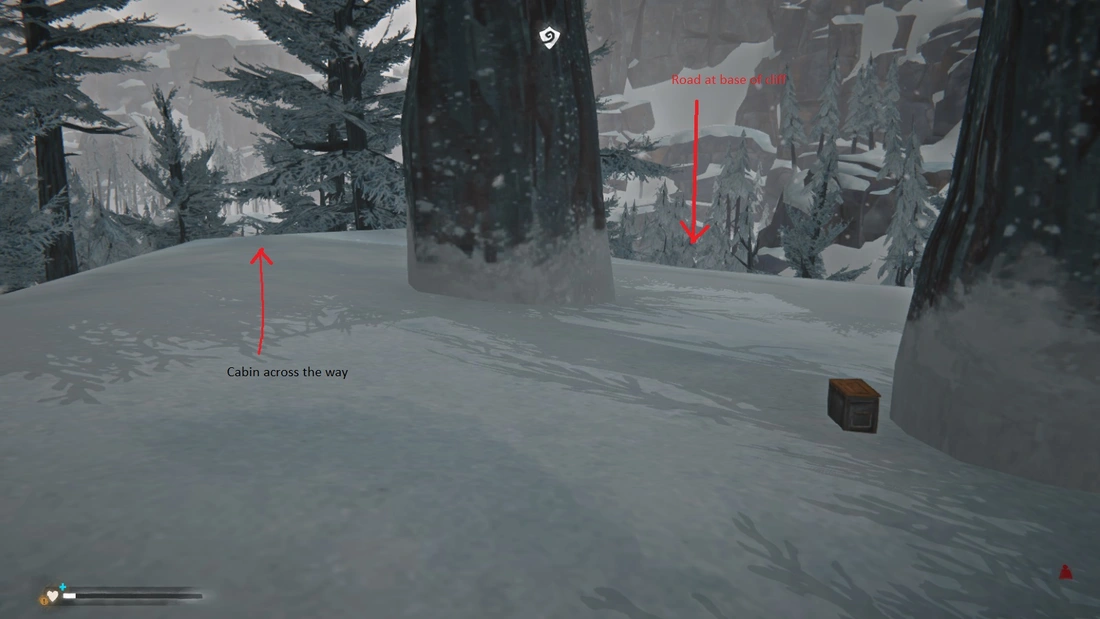
To get to the wolf, you’ll have to head to the top of the map, following the road to the old mine (See Chapter 3 for more details). Once you get close to the marker on the map, there will be a cave to your left. To be honest, it’s a straight shot if you’re following the map, although here are a couple of pictures.
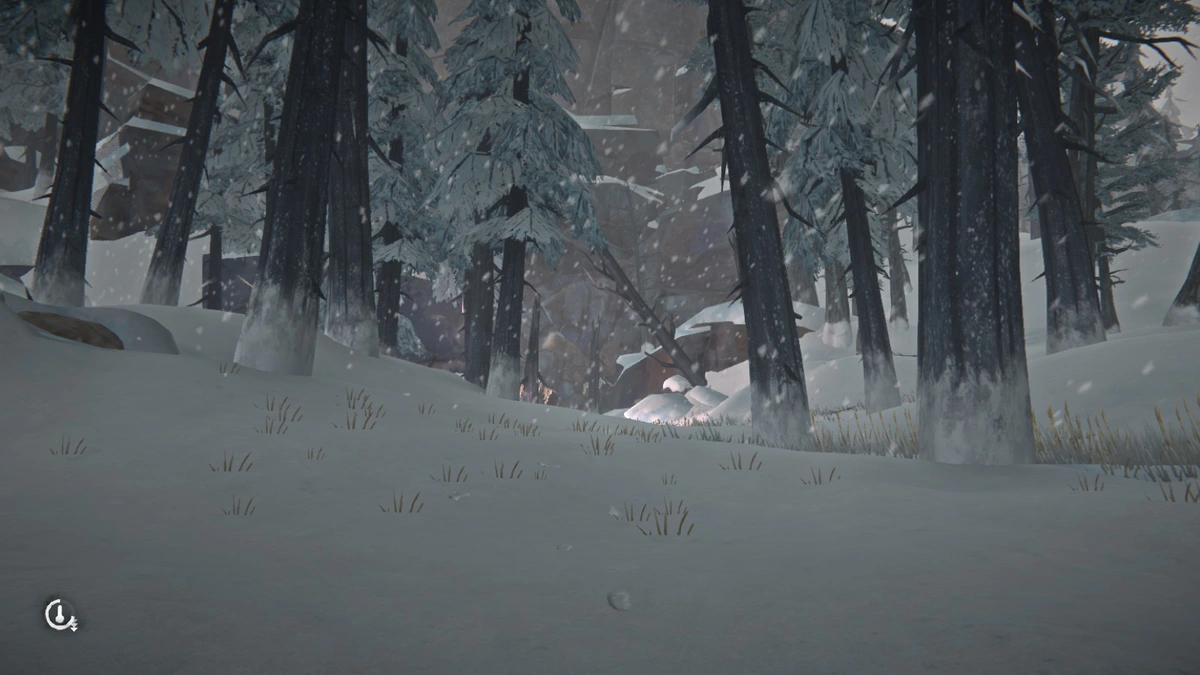
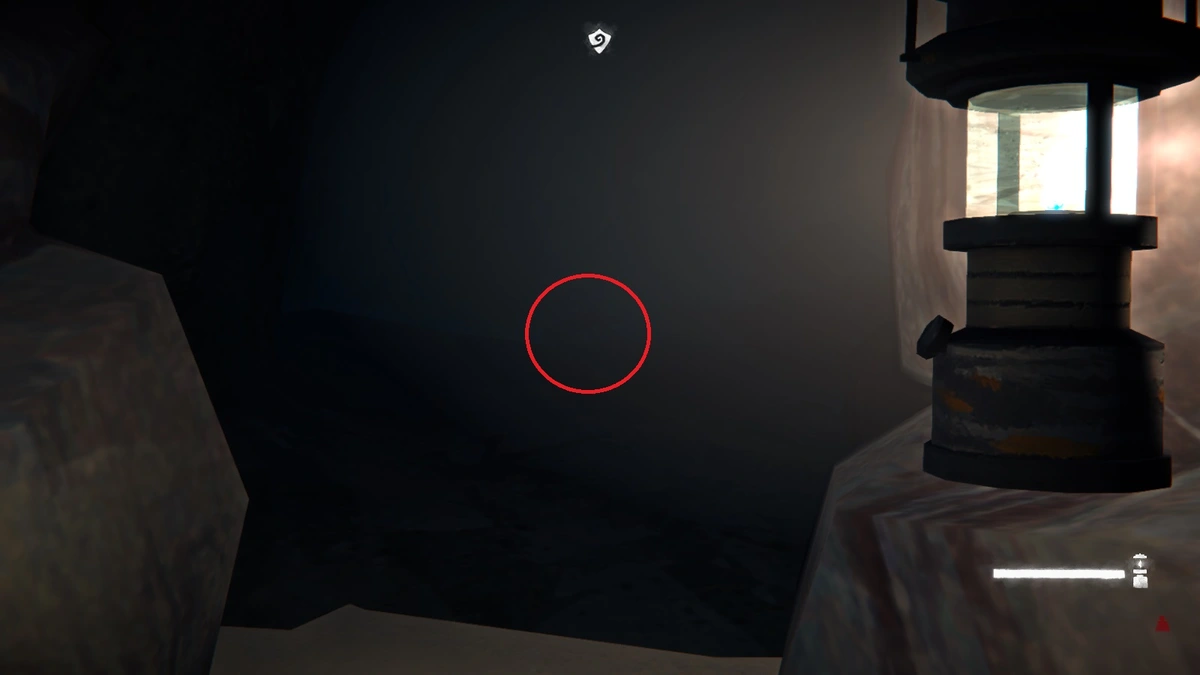
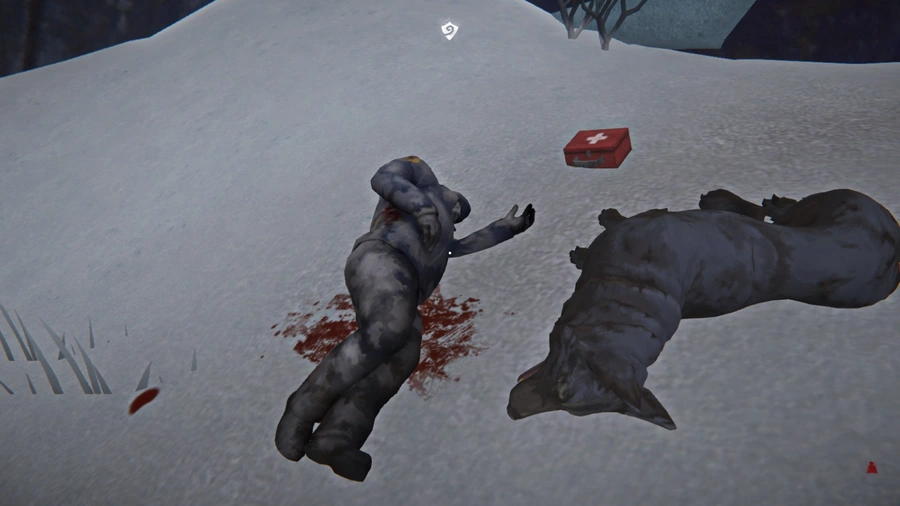
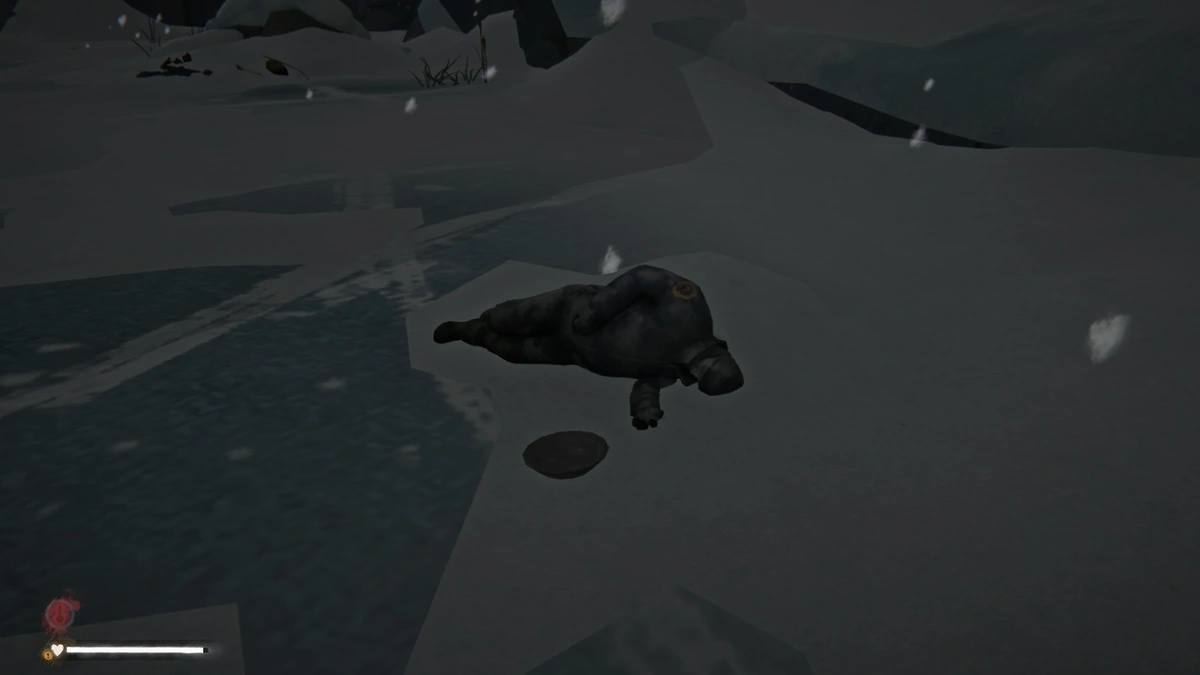
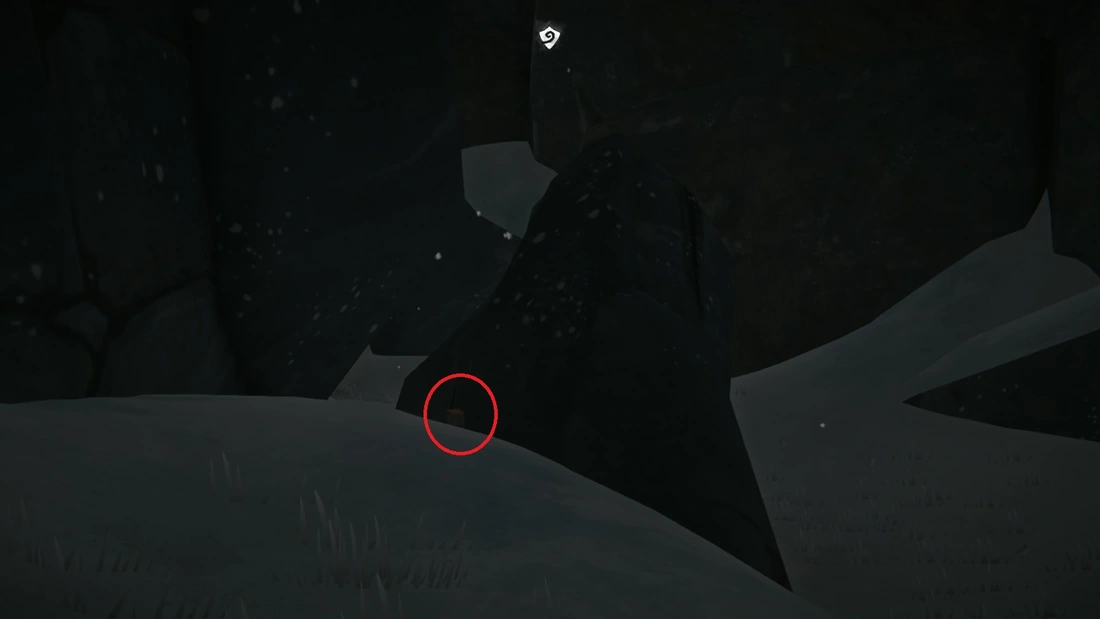
So I idiotically made the approach at night in the middle of a blizzard, which is why the cave photos are so dim. But I’ve circled the aggressive wolf in question; he’s chowing down on a deer carcass. Go ahead and shoot him, but be prepared for a potential attack if you don’t kill him immediately, especially for those on hardened difficulty. Once you’ve killed/scared him, check the back of the cave to find a dead body.

Search the body to discover that this is the wildlife expert sent to deal with the wolf. Clearly he wasn’t paying very close attention while in the middle of its den. Nevertheless, that will complete this part of the sidequest.
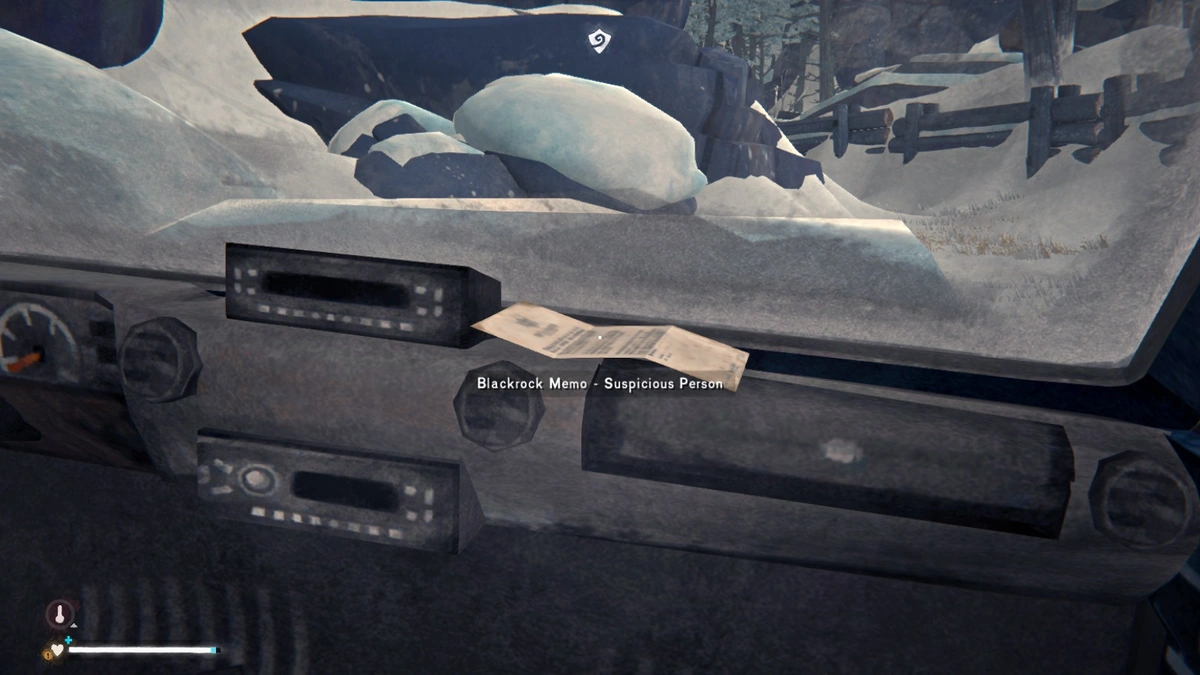
Suspicious Person
This quest triggers when you pick up the note in the truck just outside the substation. As a reminder, this is where the power lines lead to when you’re looking for the power plant in Chapter 2 (check there for more details if you’re lost).
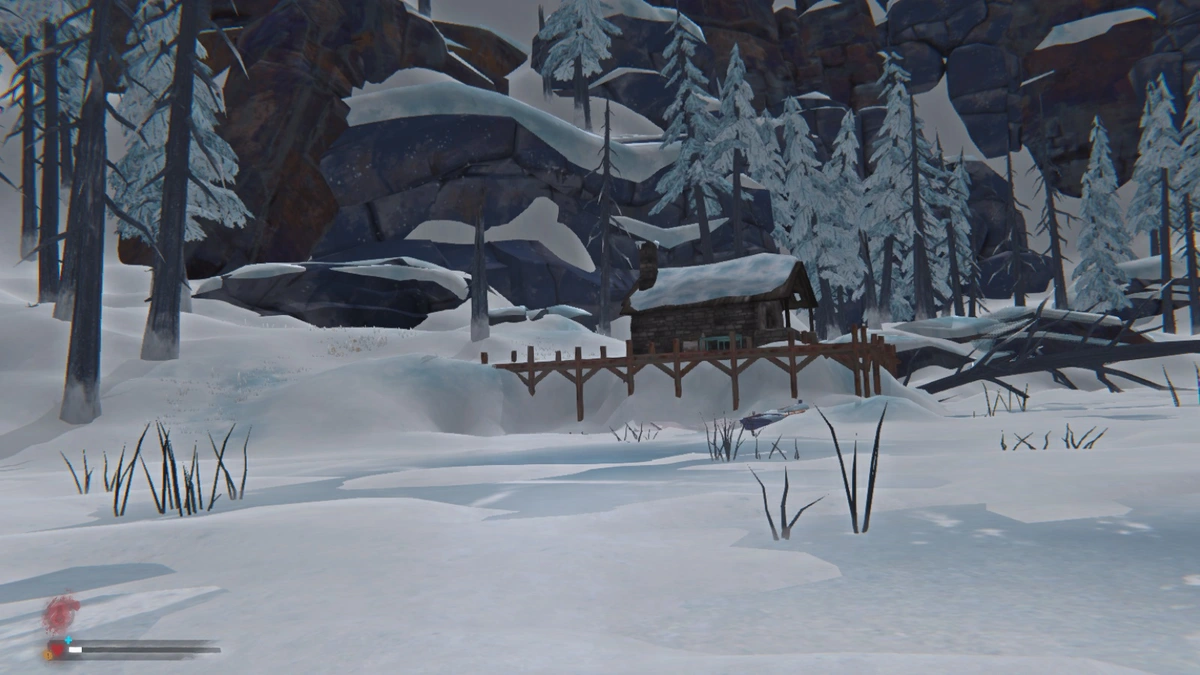
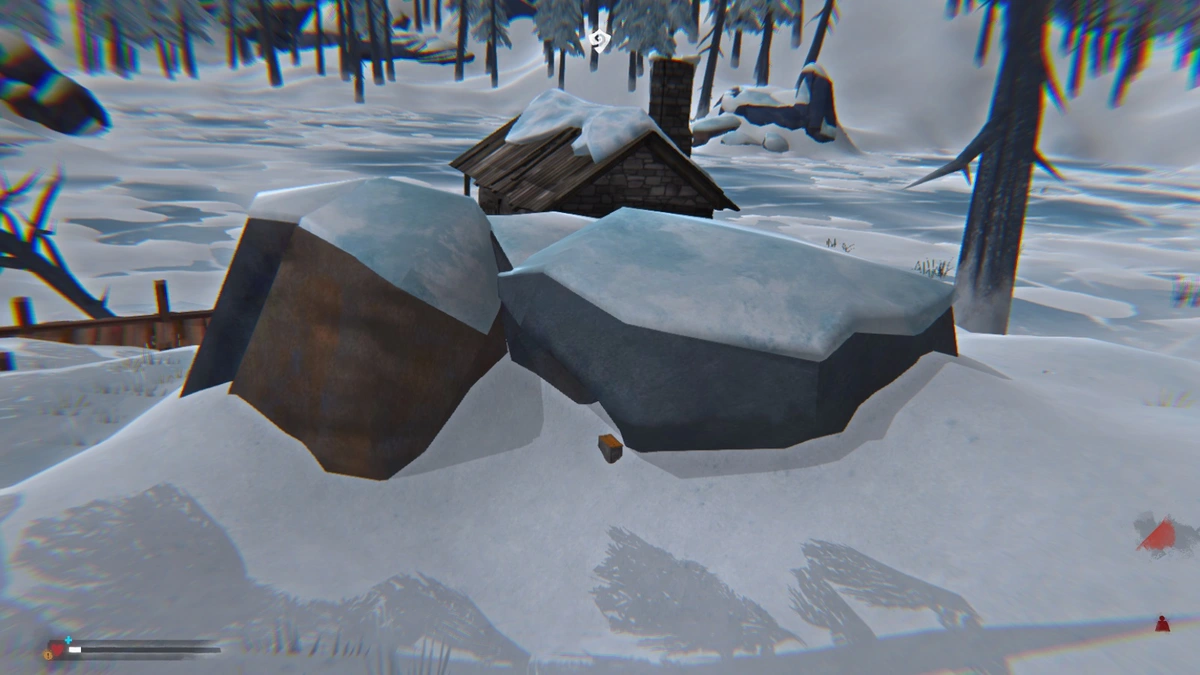
To proceed, head down the road like you’re going to the mines (see Chapter 3 for more details). On the way, you’ll eventually see a path to the right that leads to a cabin on the frozen lake.
Now what we want is actually behind the building so climb up the snow back and you’ll see there’s a hidden cache.
And as an aside, please resist the urge to kill the moose that frequents this area. I know it’s really tempting, but I promise there’s a much better reward the sooner you finish this quest.
Searching it will give you another clue to the real secret bunker. Now for anyone who like puzzles, you can try and figure out where the bunker is from the note alone. For everyone else, the game has graciously placed an icon on the map.
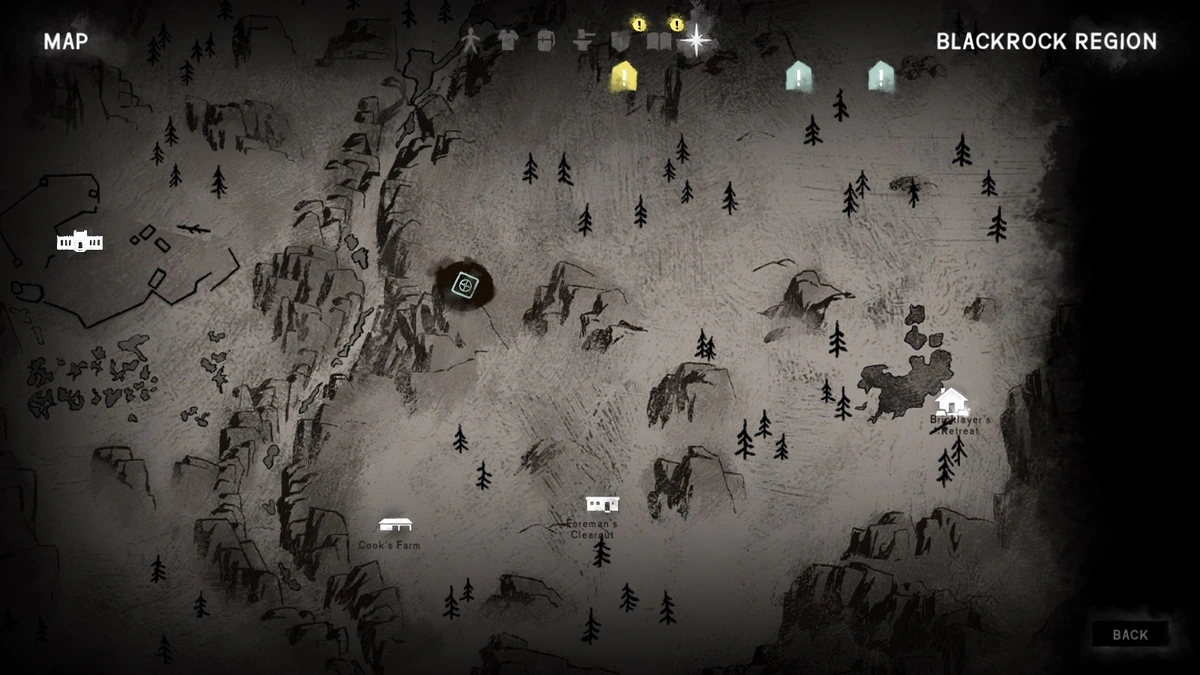
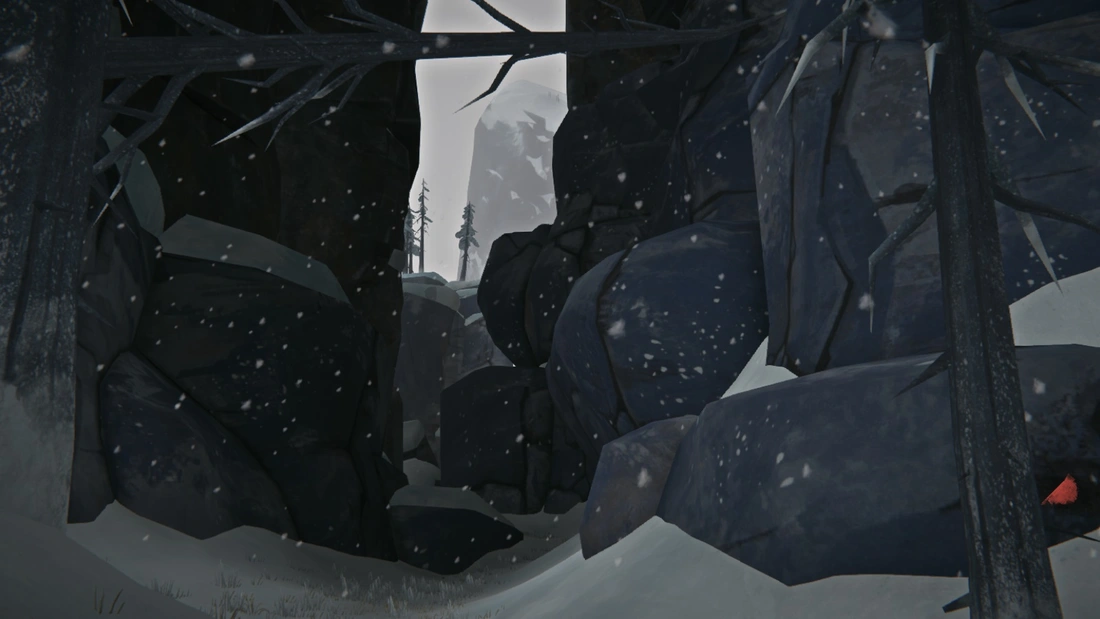
What you’re looking for is the below branching path off the road surround by tall rocks and trees. When you go through, the entrance to the cache will be immediately to your left.
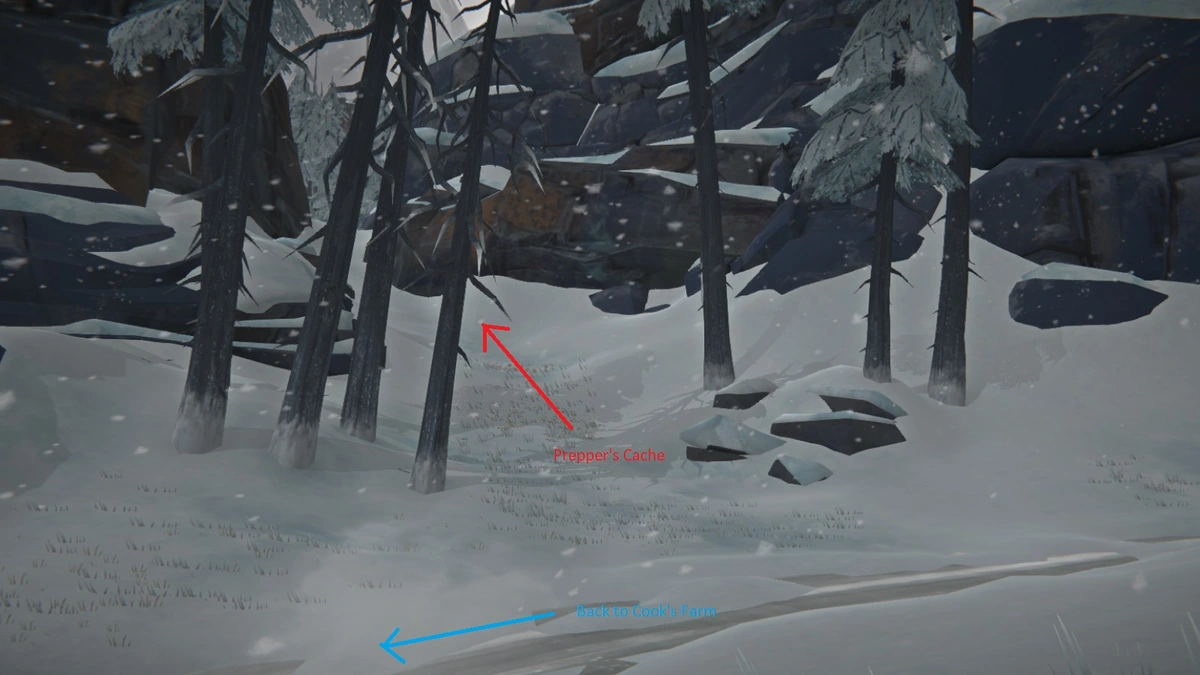
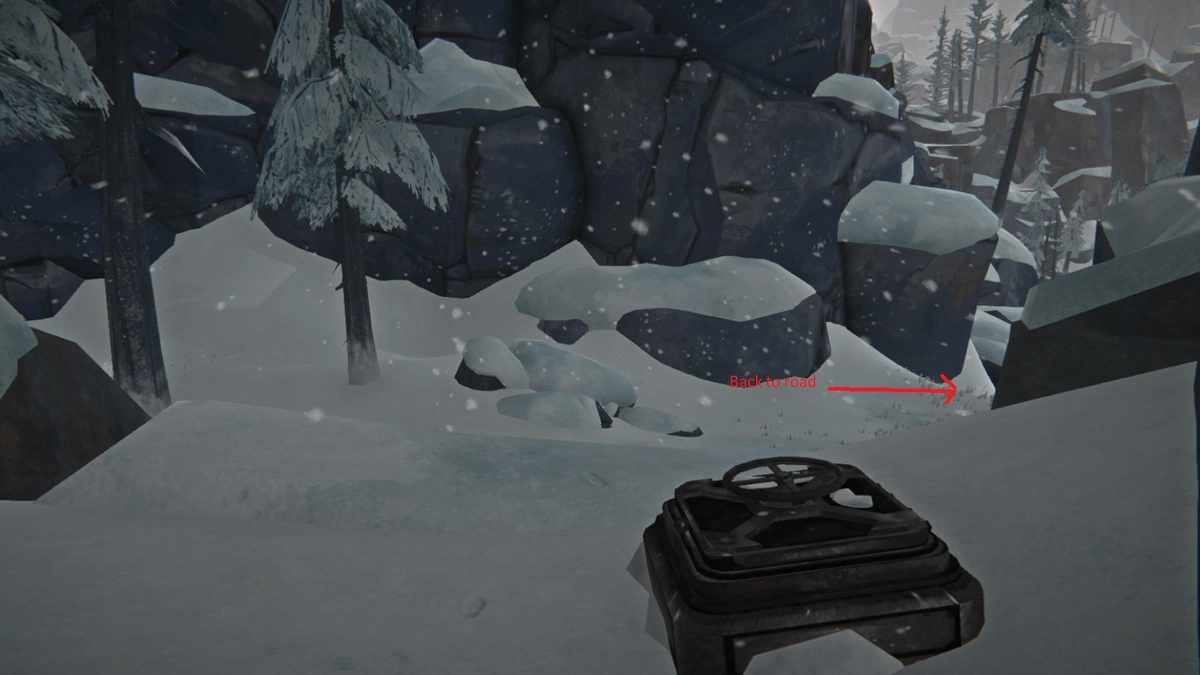
Inside are the things you’d normally expect in a prepper’s cache: food, fire materials, and a small cot. The real prize in the moose-hide satchel so be sure to pick it up. Also grab the note on the bed to officially complete the quest.
Sidequest: Convict Caches
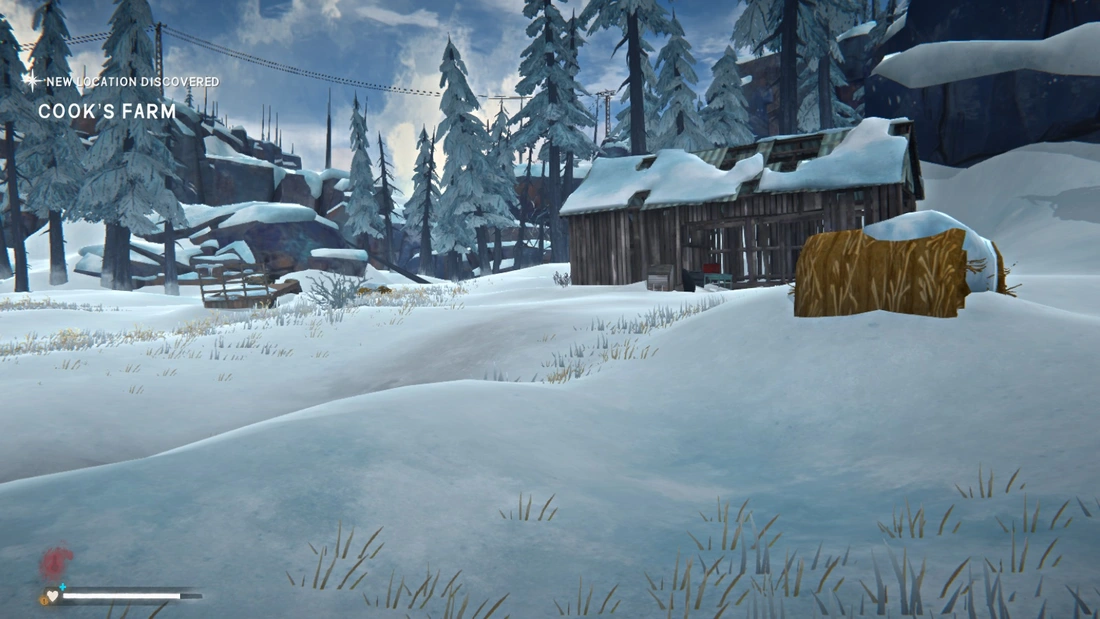
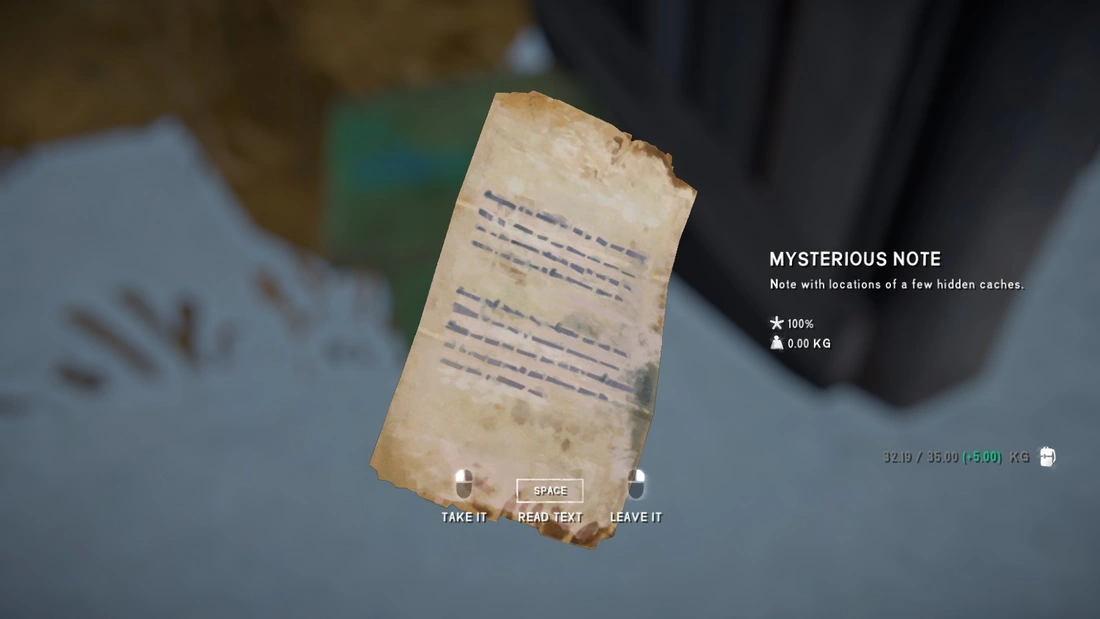
Another cache quest! This one is triggered by finding the note at Cook’s farm. To get there, head down the road out of the prison and go left at the fork. You’ll see the vehicles and climbing area sign from Chapter 1. Keep going past them down the road, and on your left a fence will come into view. This is the farm. The note itself is inside the metal container within the shed structure.
Like the ones from Episodes 1 and 2, the caches themselves won’t appear until you trigger the quest. And sadly they aren’t obviously named, so I’ll have to name them myself. Going left-to-right on the map:
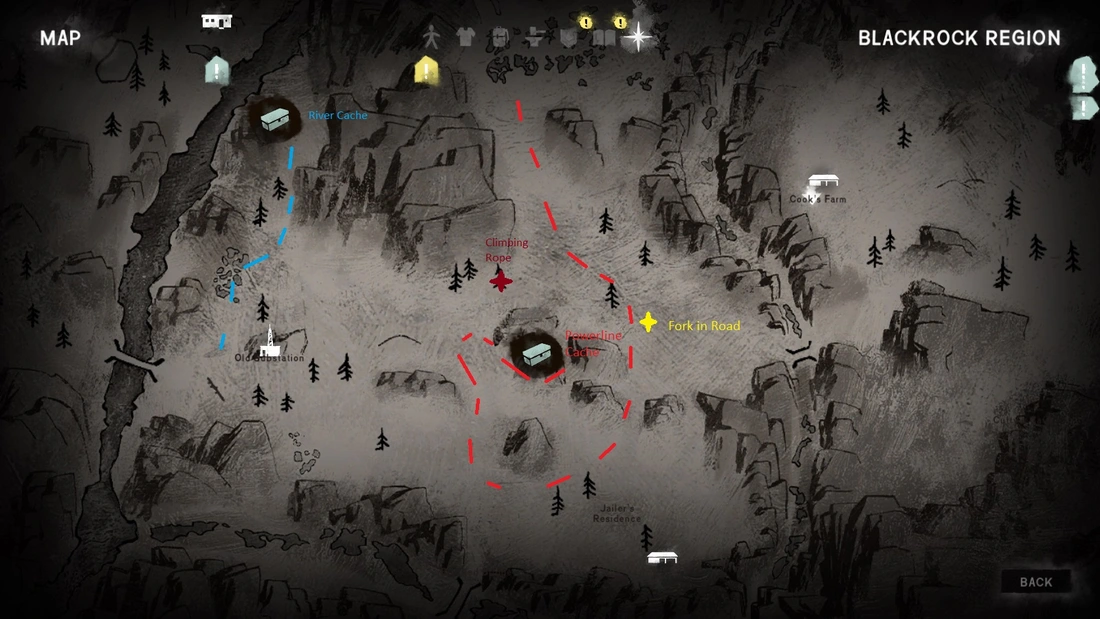
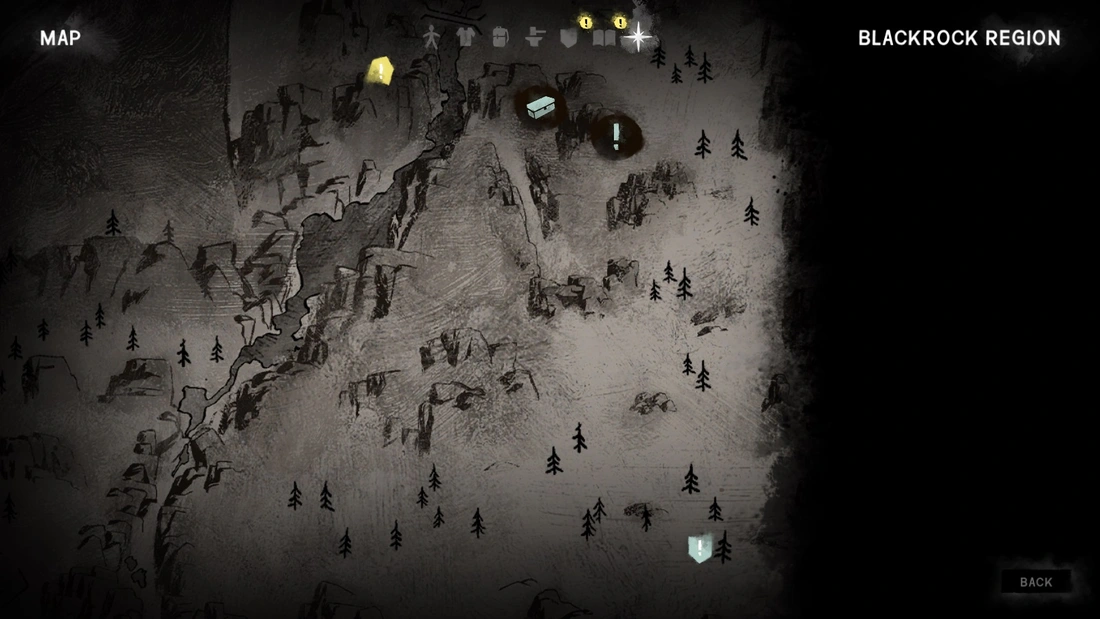
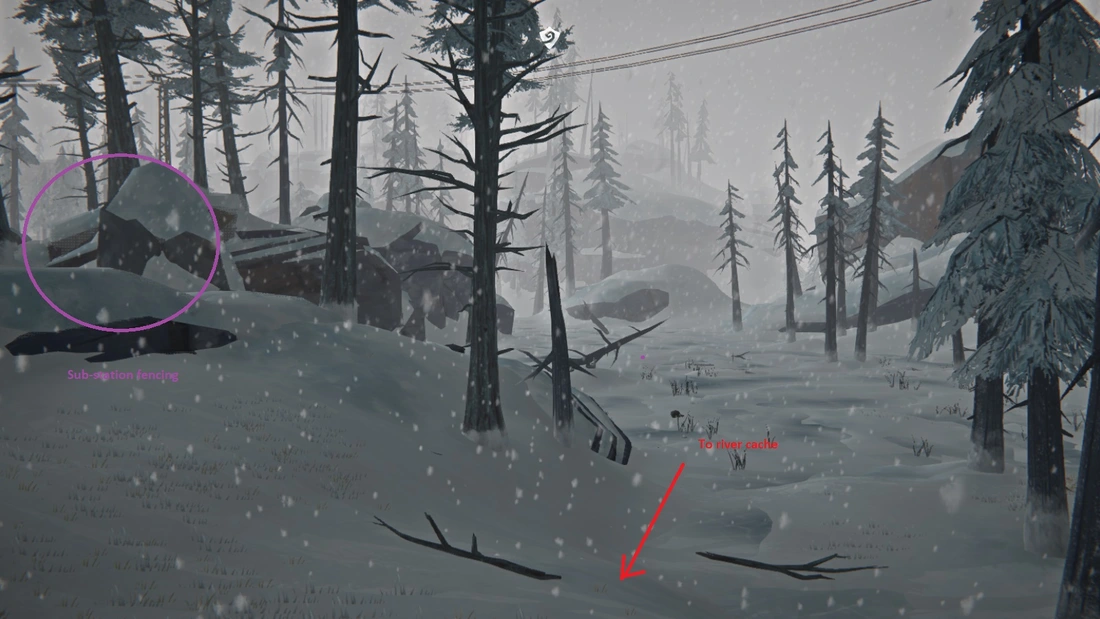
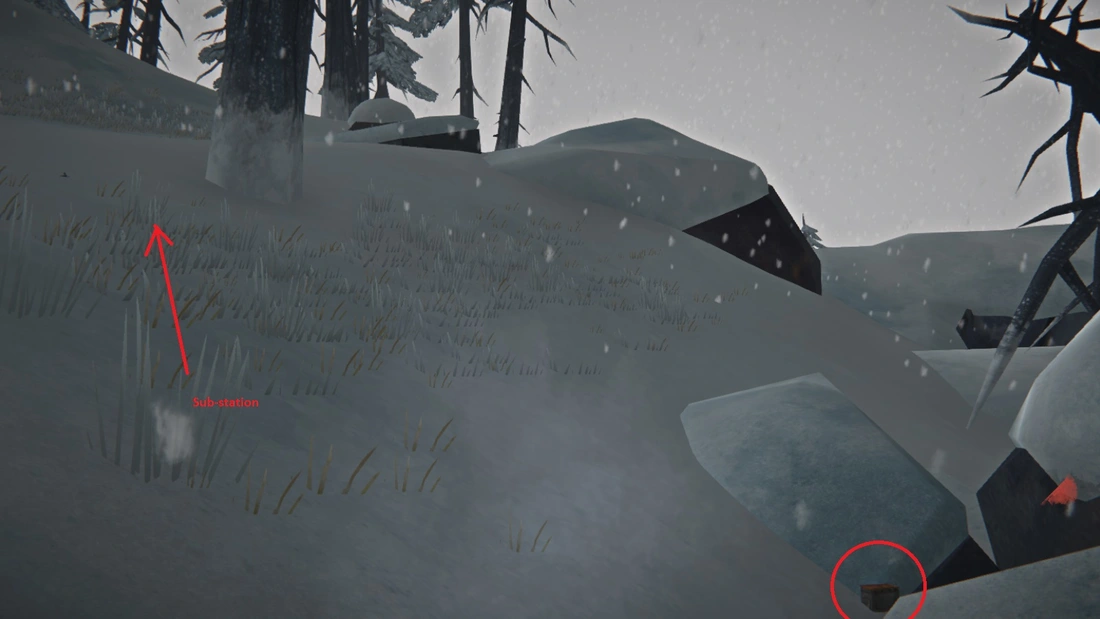
River Cache
So this cache can be found pretty close to the sub-station building. Essentially, you’ll want to follow the river upstream. Be sure that you have not crossed the bridge when you do this. The cache itself is tucked in a snow bank near the cliff that separates the sub-station from the prison.
Inside, you’ll find the awesome balaclava (now Will can fit in better with the convicts) and both types of gun ammunition.
Powerline Cache
This cache is a little tricky to get to as it’s on top of a sheer cliff. To get there, head down the road like you’re going to the sub-station. After you pass the staff quarters area (where there’s a timberwolf pack) there will be an abandoned car on the road. Veer to the right and climb the hill. There will be an alcove to your right (where there’s a climbing rope that leads back to the main road before the fork), and you want to take the small foot path that you see below (the climbing rope is to the left in the picture). You can also climb down the climbing rope mentioned if you’re not encumbered when first leaving from the prison.
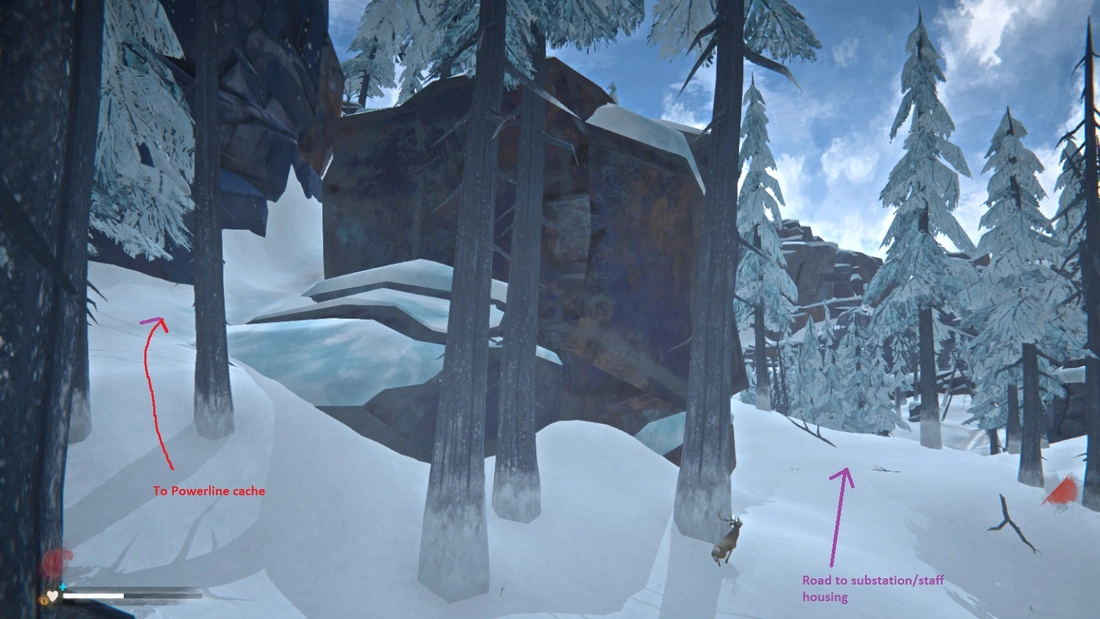
After you get to the top of the path, there will be a powerline tower. The cache itself is in a snowbank nearby.
This cache contains a revolver with ammunition and climbing socks. There are also some flare shells.
Clifftop Cache
This cache is easy to find but annoying to reach. If you follow the road past Cook’s farm, you’ll eventually see a lake to the right (where one of the Blackrock Rumors is located). On the left, is a tall cliff that you’ll need to climb. The cache is hidden at the base of one of the trees. In the map above, it’s where my player icon is (because I screwed up when trying to take a picture before picking up the cache).
Inside, you’ll find a couple of flare shells and some rifle ammo, as well as a emergency stim.
Cave Cache
This will probably be the last cache you find as it’s so far out. Head down the road like you’re going to the abandoned mine (see Chapter 3). You’ll eventually see a “cave” on the left, which has a very distinct fallen tree over the top. Head inside and there will be a standalone rock your right. Look behind it to find the cache.
Inside, the standout loot is a fire-striker and more revolver ammo.
Sidequest: Guard Lockers
This sidequest is officially unlocked when you pick up any of the keys to the lockers found in the guard quarters. As a reminder, this is the building that you first enter when trying to get into the infirmary.
Each of these lockers as various goodies in them, which will be detailed below. And competing all of them will get you a Steam achievements.
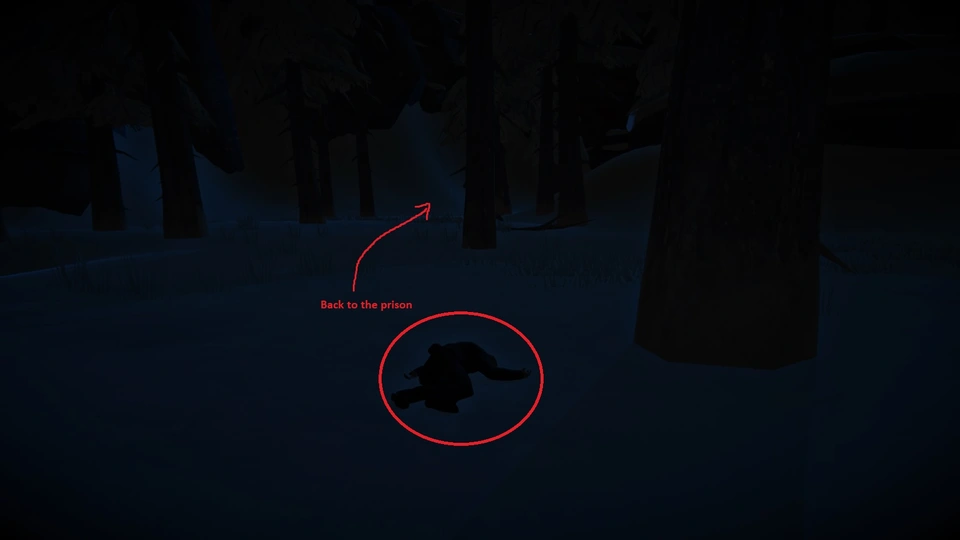
Locker Key #2
This key can be found on a dead guard just outside the prison’s perimeter gate. When you leave via the side-entrance (where the wolf is chowing on the dead deer), just keep going straight. You’ll essentially be hugging the wall on your right. Eventually you’ll come across a small clearing with a dead body. Search it for the key.
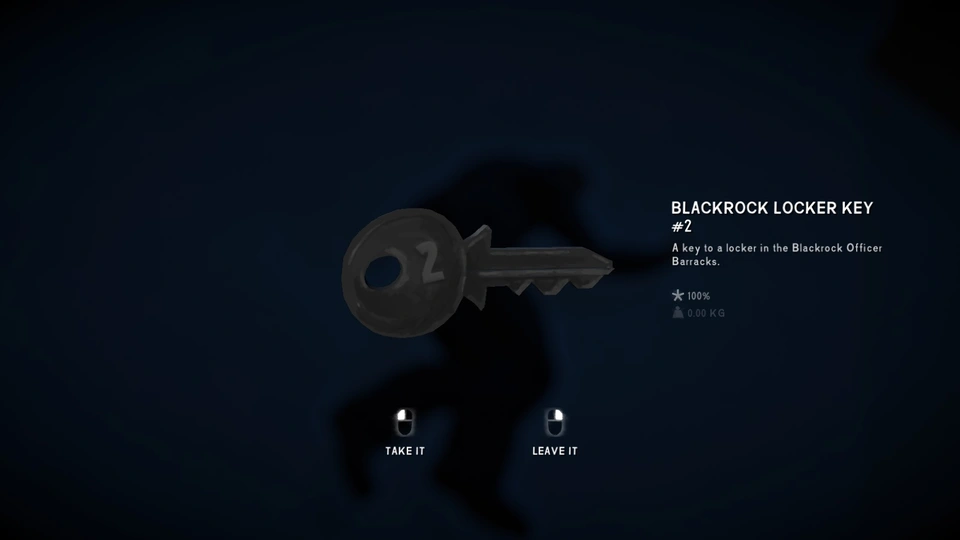
Opening this locker will net you some rifle ammunition, combat pants, and a military parka. These are great clothing items, especially at the beginning when you don’t have much defense against the wildlife.
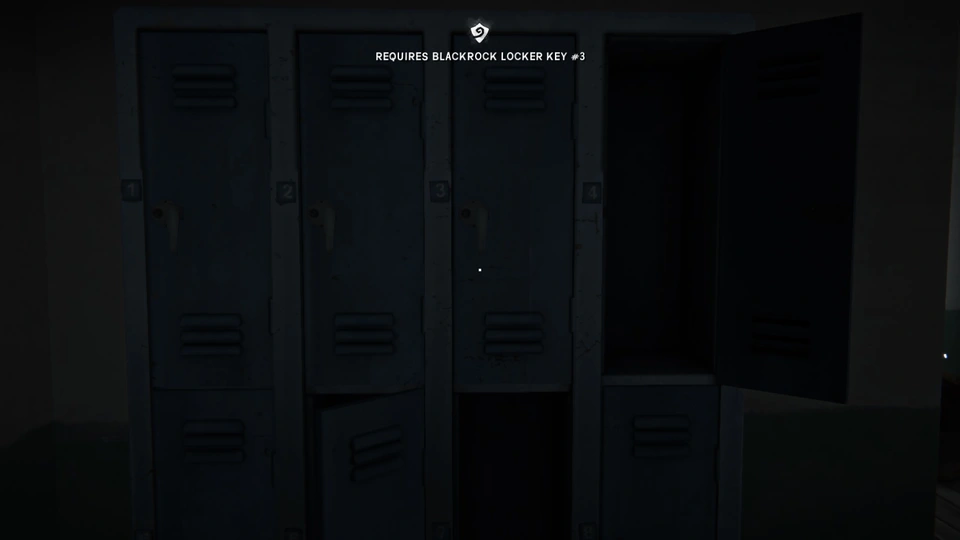
Locker Key #3
This key can be found in the abandoned staff housing area outside the prison complex. You can reach it by following the road out of the prison and going right at the fork. The entrance to the hamlet will be on your left.
As in the above picture, you want to aim for the building farther back. The key is in the circled truck’s glove compartment.
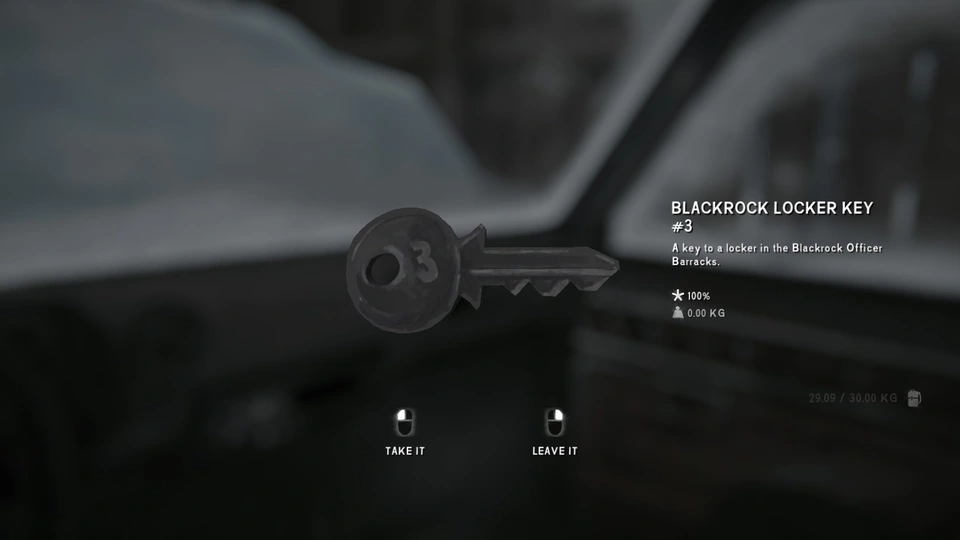
Head back to the guard quarters and unlock the locker to get a hunting knife, emergency stim, and more rife ammunition. You’ll also get a Blackrock archive report, which is necessary to complete the sidequest Darkstar.
Locker Key #8
You can only get this key after reaching Chapter 2: The Power Plant. It can be found in the steam maintenance tunnels, after you finish breaking the locking mechanism (see that section for more details). At the bottom of the stairwell that leads back to the prison, there is a metal box. Search it to find the locker key.
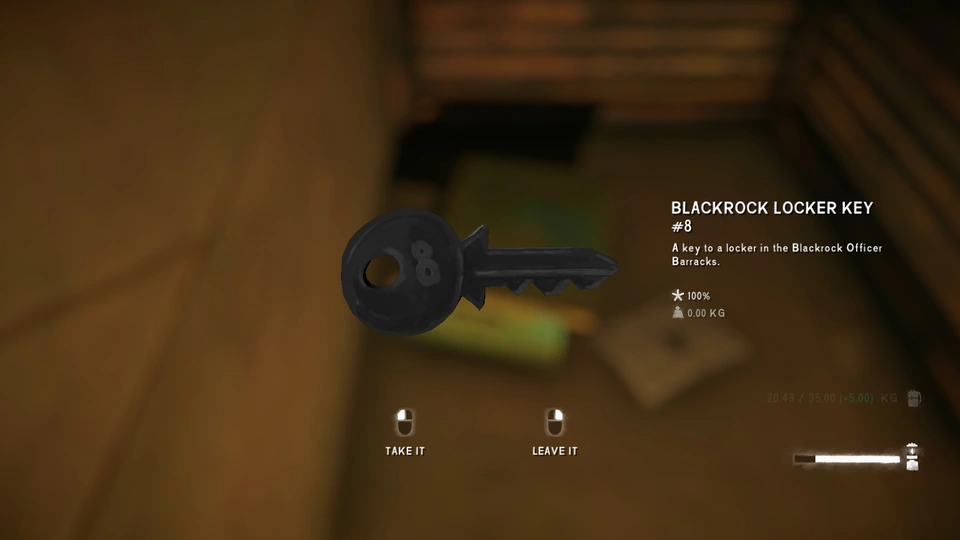
This locker has a revolver and some ammunition.