Table of Contents Show
Shows the location of all steam pipe valves, and how to operate them to get access to the control room.
Wintermute E4 Steam Tunnels Valve Puzzle Solution
The Steam Tunnels puzzle which gives access to the Control Room really isn’t a particularly hard one. But such puzzles are rather unusual for The Long Dark. Also, the tunnel area has a large enough size that it’s easy to lose track of where all the valves are, whether they’re open or closed, and how the puzzle fits together.
If you want to solve the puzzle yourself, here are a few general hints:
- Some of the valves are hidden in dark areas of the tunnels. Explore the Steam Tunnels completely with a good light source to make sure you don’t overlook anything. There’s also some other items laying around that may turn out to be important.
- The handles of closed valves are always at a 45° angle, the handles of open valves are always horizontal. The angles of the handle and the pipe are not related to each other.
- The valves are binary (either open or closed, nothing in-between). But the steam pressure is analog: Sometimes the pressure is more than zero, but less than the maximum. In these cases, you may need to redirect more steam into this section of the pipe by opening or closing additional valves.
- If a pipe is hot and red, but the valve it leads to is still frozen and blue, this probably means that the pressure isn’t quite high enough.
- There is no key to any of these doors. The only way through is to turn up the heat so the ice will thaw. Once the door is no longer frozen, it can be opened right away.
- Steam escaping out of pipes is very hot and will make you lose health rapidly if you walk into it.
Note that issues existed in TLD version 1.95 that could cause ice to melt prematurely or could prevent the opening of certain doors or valves, even though the pipes were already hot and ice has or should have thawed. If you experience such issues, it may help to just quick-save the game, then reload that save from the main menu. If this doesn’t help, you may have to replay from a checkpoint or earlier save. Setting the valves again should hopefully be easy using this guide. These issues seem to have been resolved with TLD update 1.97.
Obviously, this guide contains spoilers for the Steam Tunnels puzzle. It does not contain story spoilers.
Steam Tunnels Map
This is a rough sketch of the Steam Tunnels, with all valve locations marked in red. The valves are numbered roughly in the order they need to be manipulated. See below for a detailed walkthrough.
Opening Doors 1 & 2
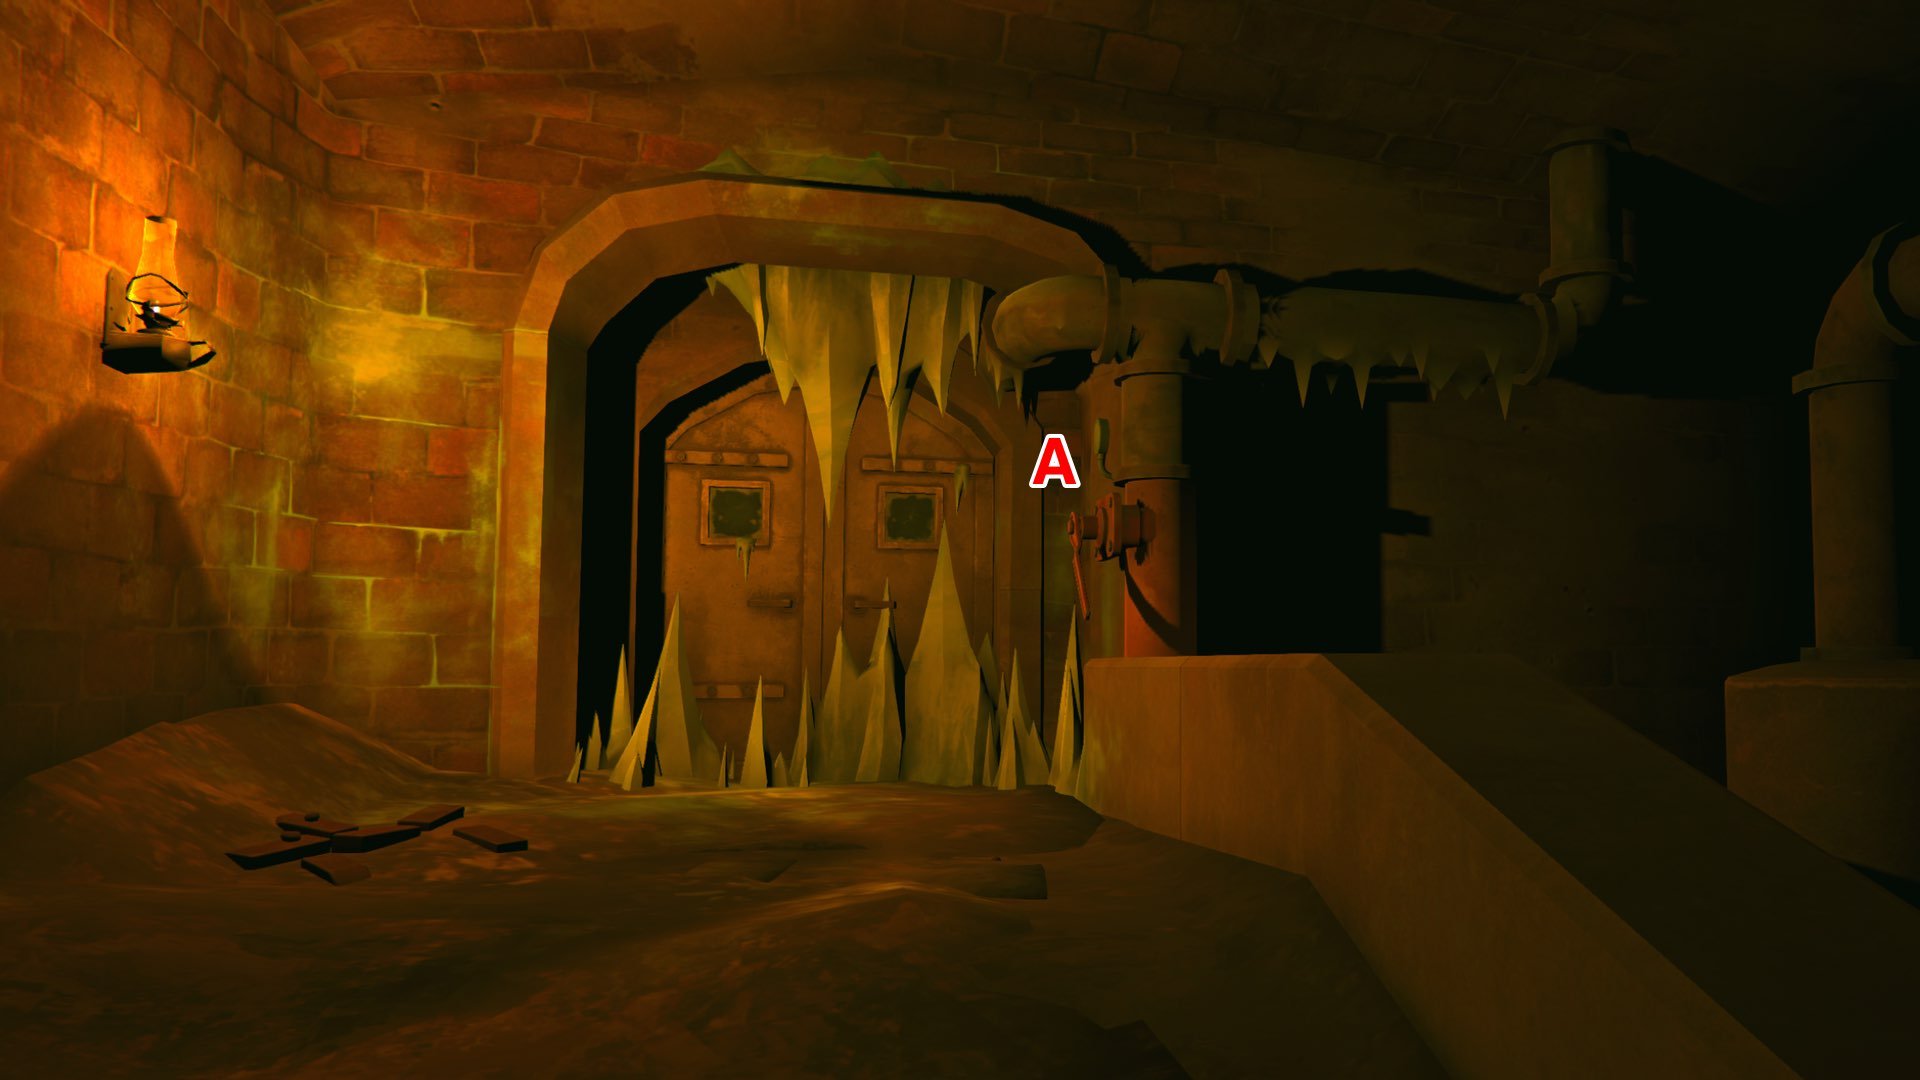
Door 1 is the access door to the Steam Tunnels. This is the first iced door you meet. Valve A is right next to it, and it’s already hot, so you can open the valve right away. This will thaw the door. Open it and enter.
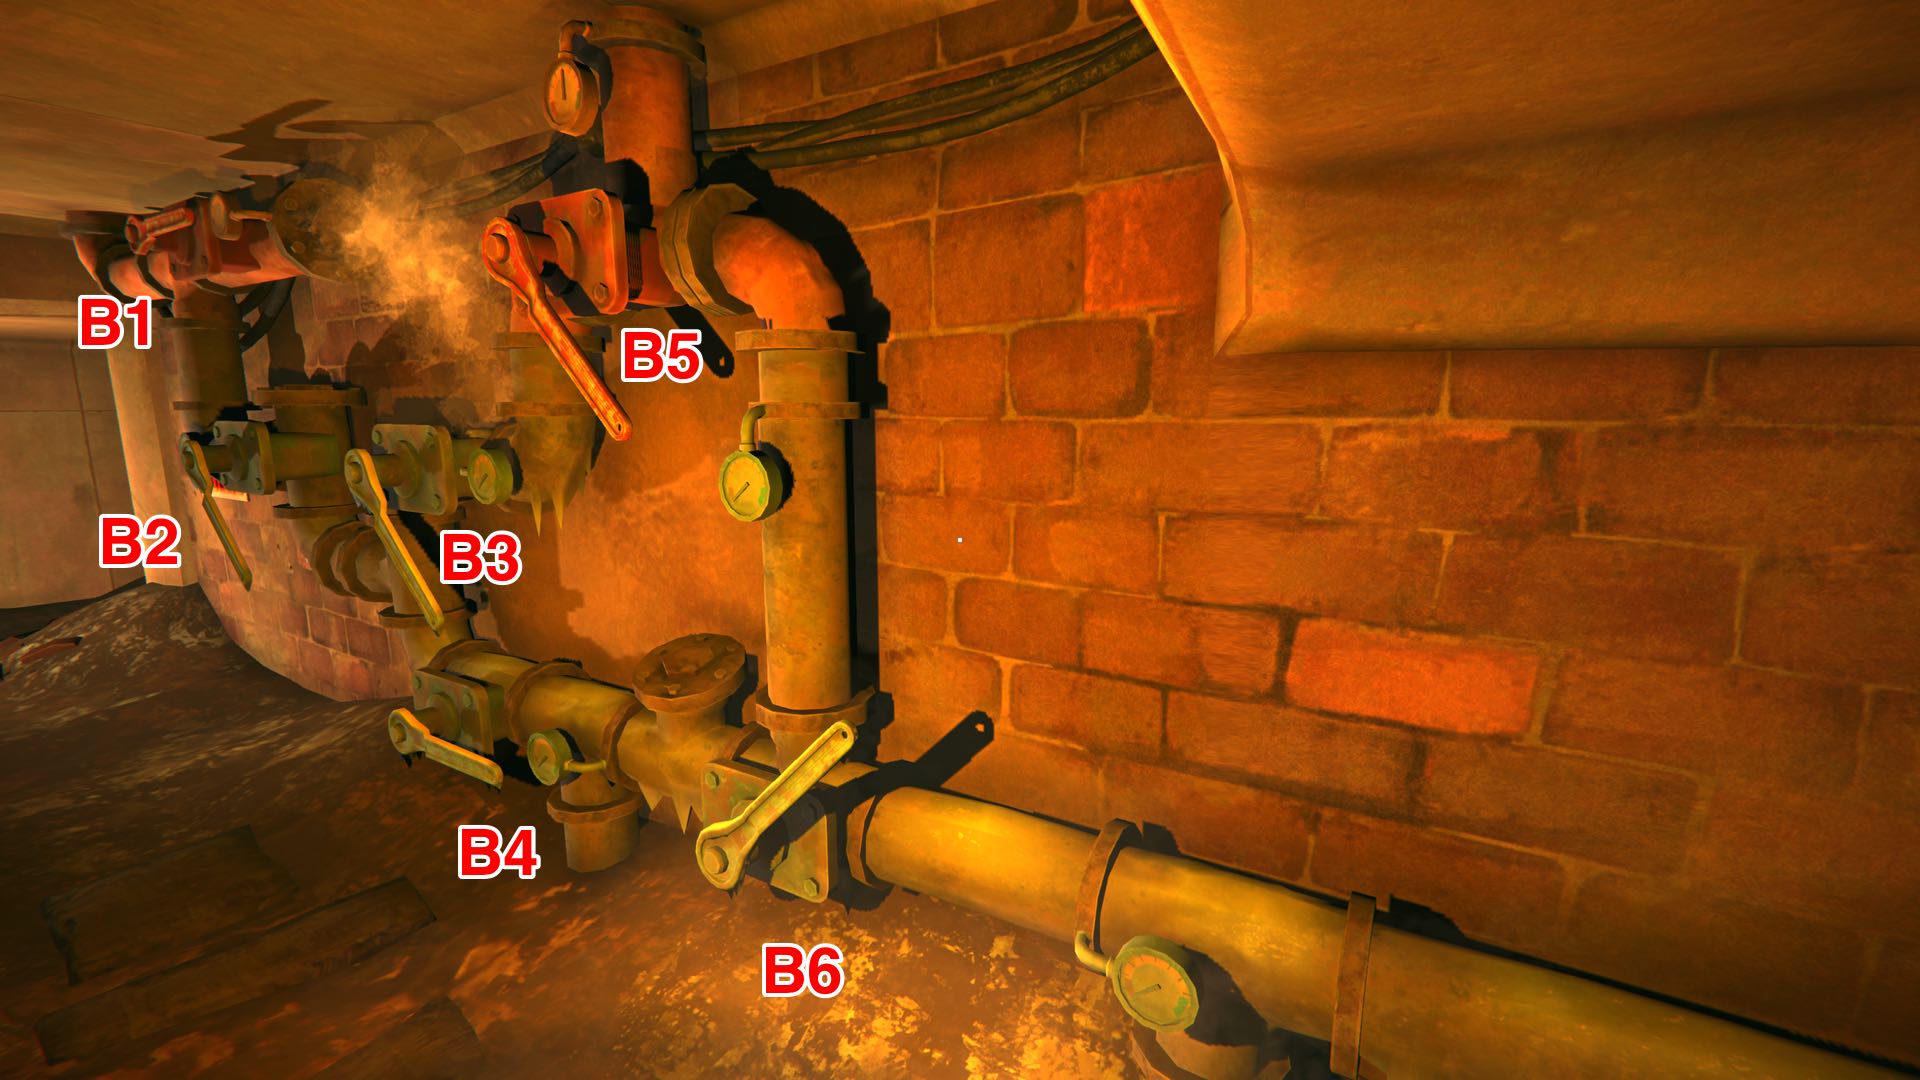
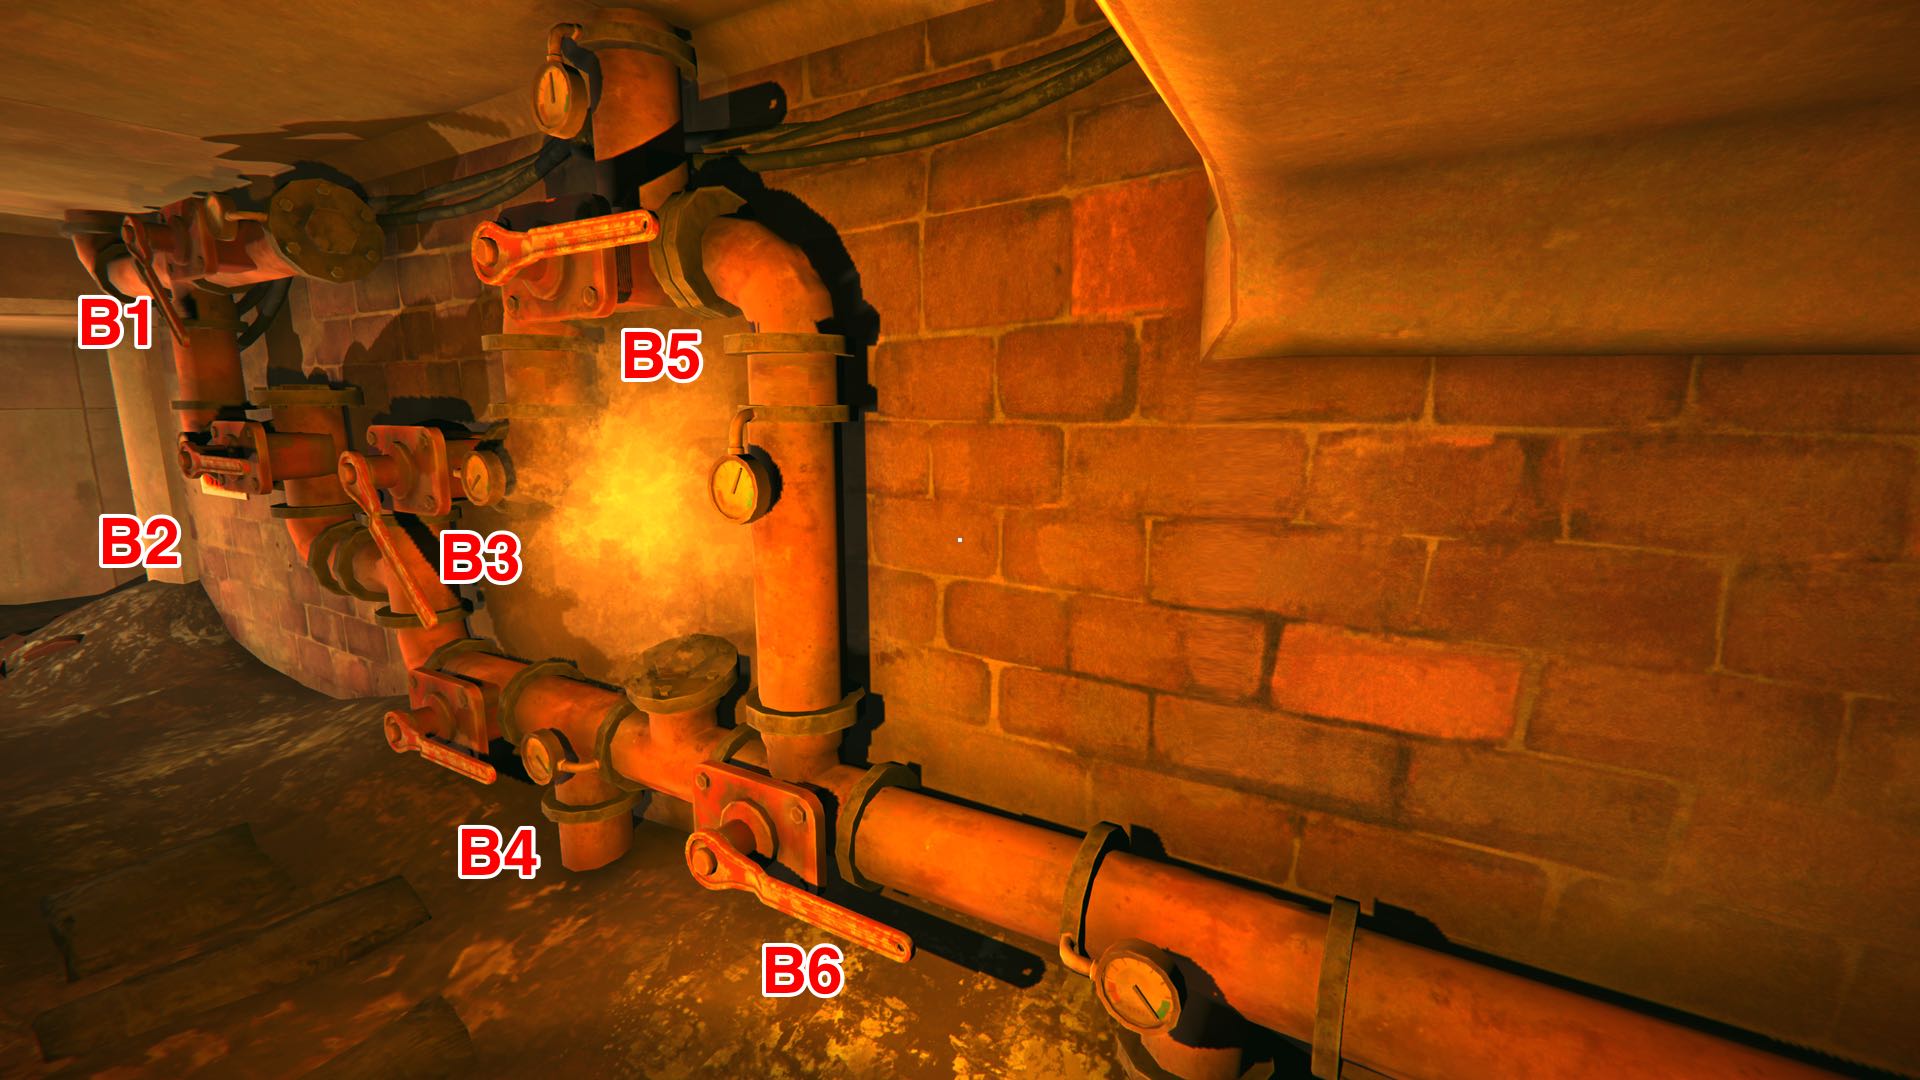
You’ll see door 2 straight ahead, also covered in ice. To open it, you have to put in a fair bit more work. Head off to the far right and operate the following valves in this order:
- close B1
- open B2 — thaws B3 & B4
- open B3
- close B4
- open B5 — thaws B6
- open B6
- close B3
- open B4 —thaws B7
See the following screenshots for reference (left before, right after the steps above).
Once all the pipes in this hallway are red and toasty, go back a few steps to the big panel and open valve B7. This will heat up one of the three pipes along the ceiling (and thaw valve C1). To open door 2, you’ll need to get all three of these overhead pipes hot. Head back past the main hall towards the control room to proceed.
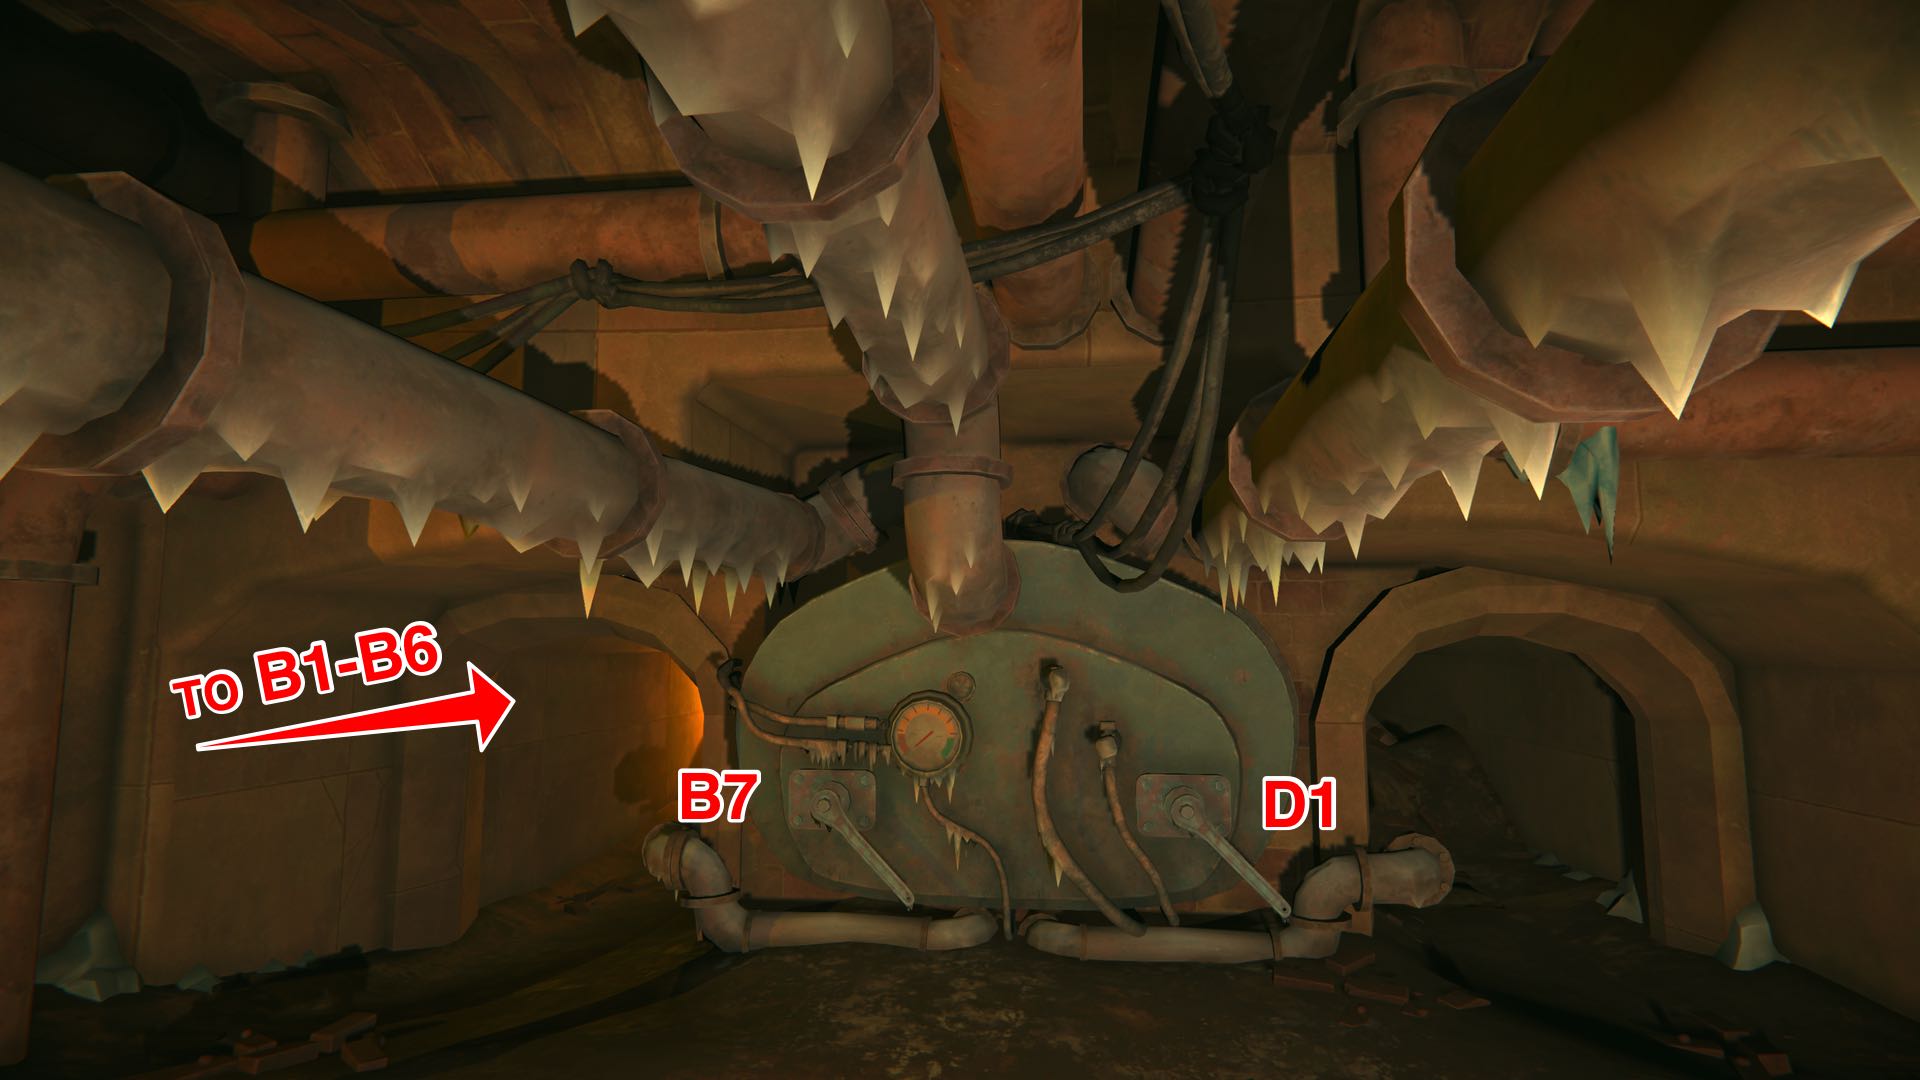
Note that these overhead pipes leak hot steam. Don’t burn yourself!
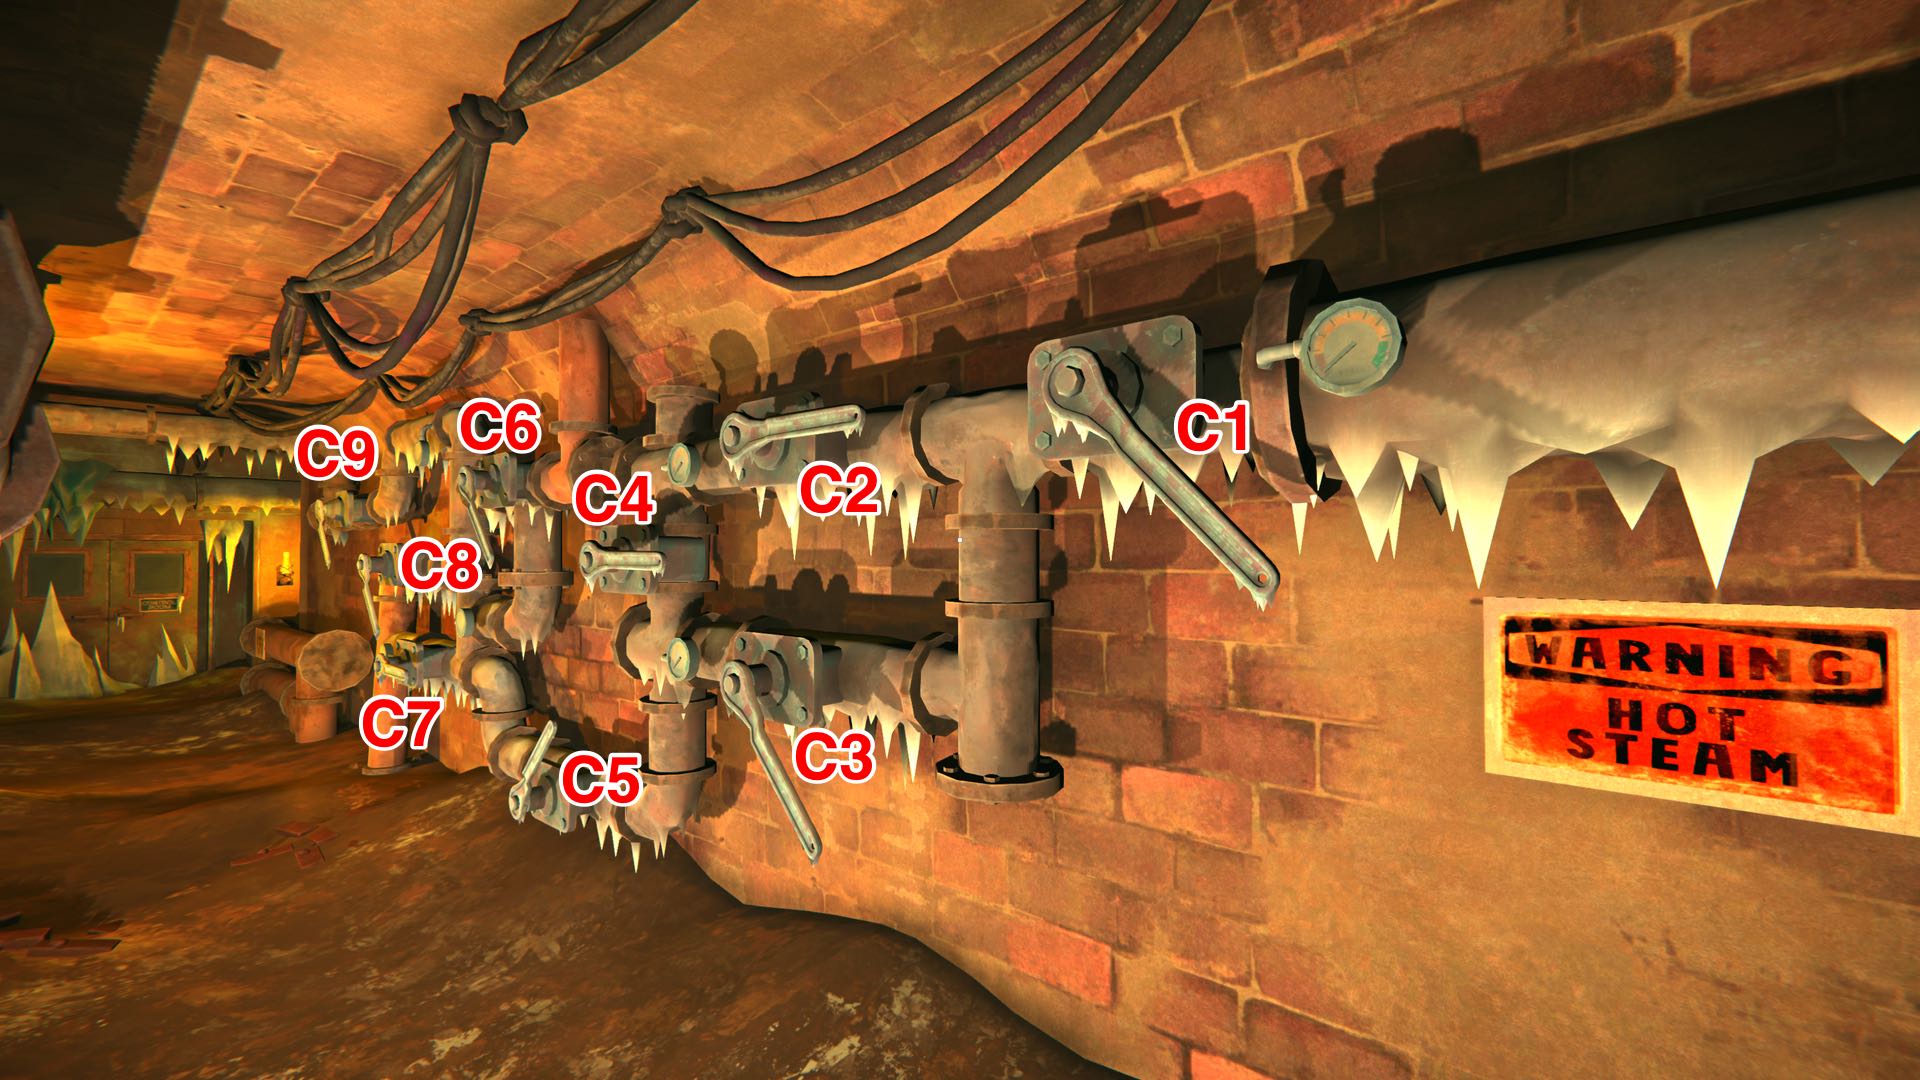
In the hallway in front of the control room, operate the following valves in this order:
- open C1 — thaws C2 & C3
- close C2
- open C3 — thaws C4
- close C4 — thaws C5
- open C5 — thaws C7
- close C7 — thaws C6
- open C6
- open C7 — thaws C8
- open C8 — thaws C9
- open C9 — thaws D1
See the following screenshots for reference (left before, right after the steps above).
Once you’ve done this, head back to the other side. You’ll see that two out of the three overhead pipes are now hot. Note that the second pipe is also leaking steam. You should either sprint through it and take some damage or crawl underneath the escaping steam.
- open D1 — warms third pipe, thaws D2
- open D2 — thaws door 2

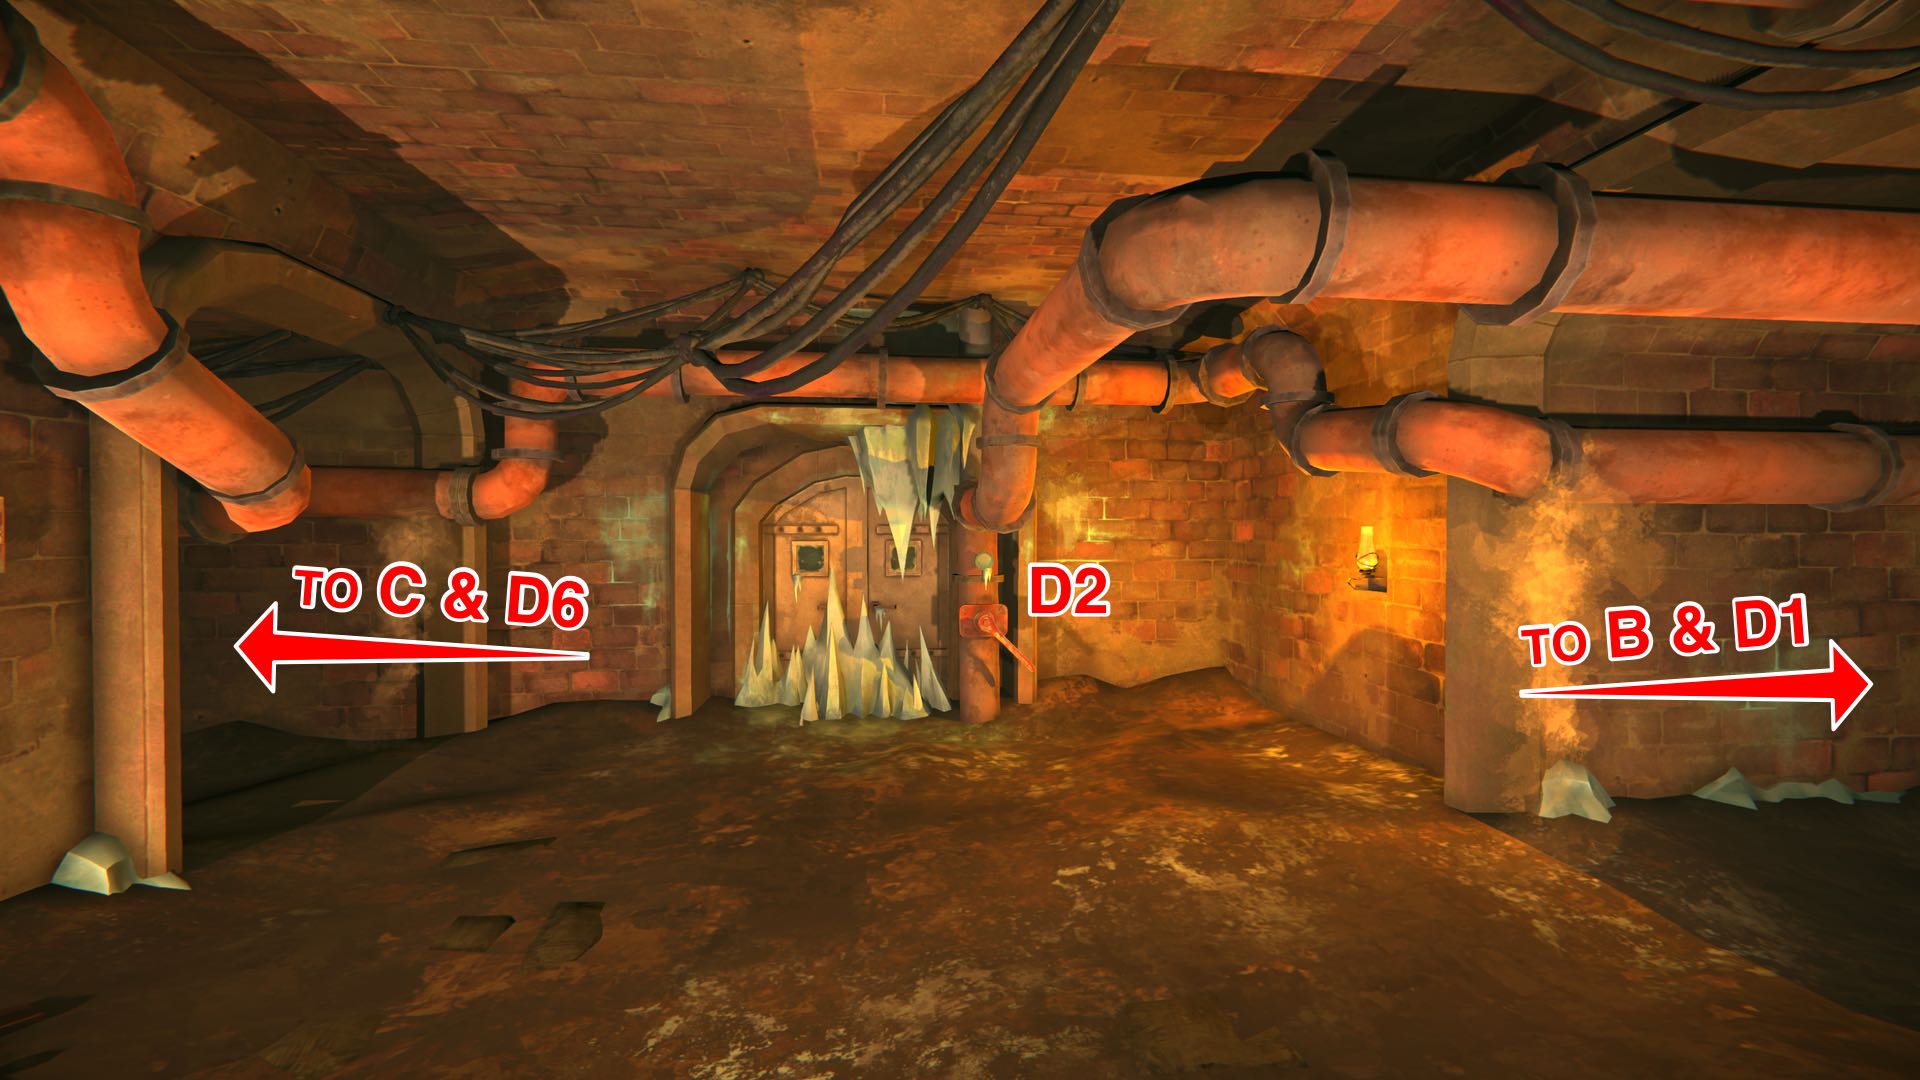
Now you can finally open door 2 and head through to the area on the other side.
Opening Door 3: Control Room
Once you go through door 2, you’ll reach a slightly larger hall with what maybe looks like some kind of large steam boiler. On this boiler is valve D3. You’ll see hot steam escaping on its side, so you’ll need to close D3 in order to redirect steam into the pipe leading out of the boiler. (This thaws D4.)
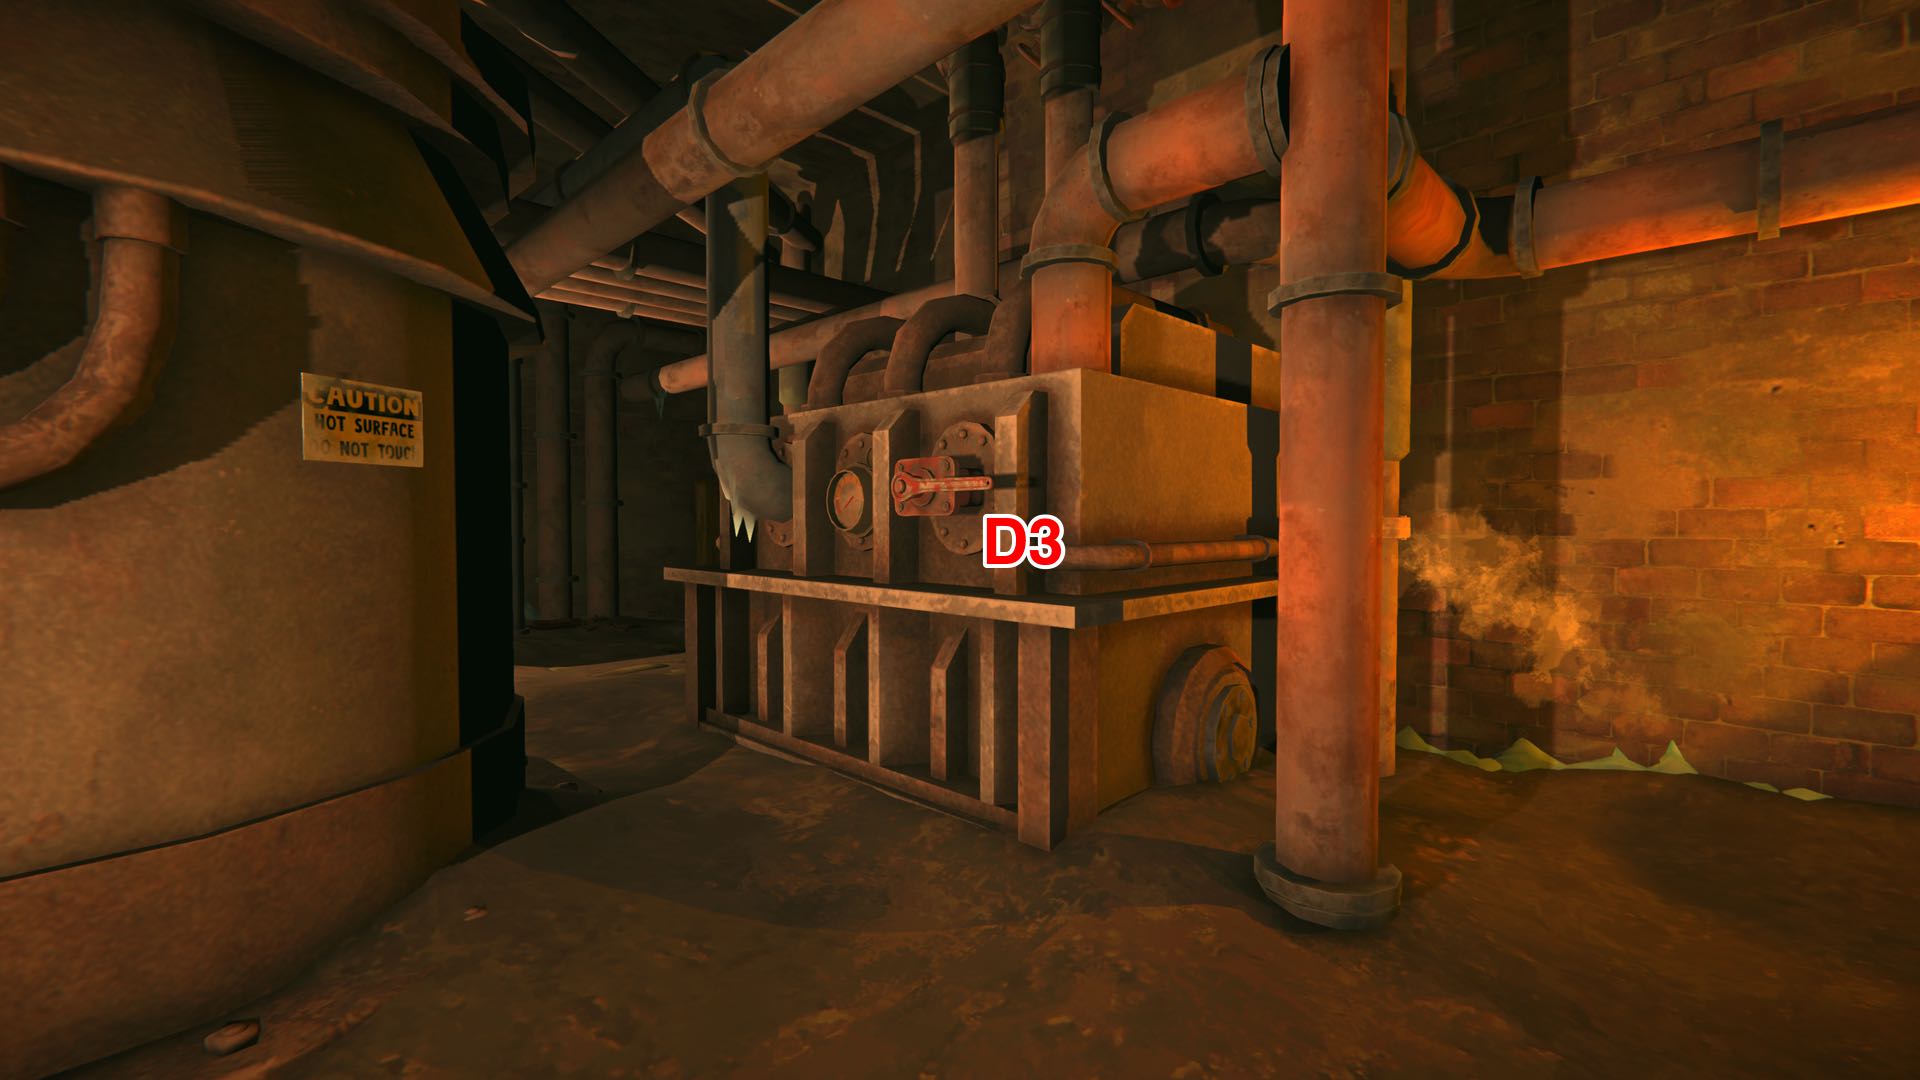
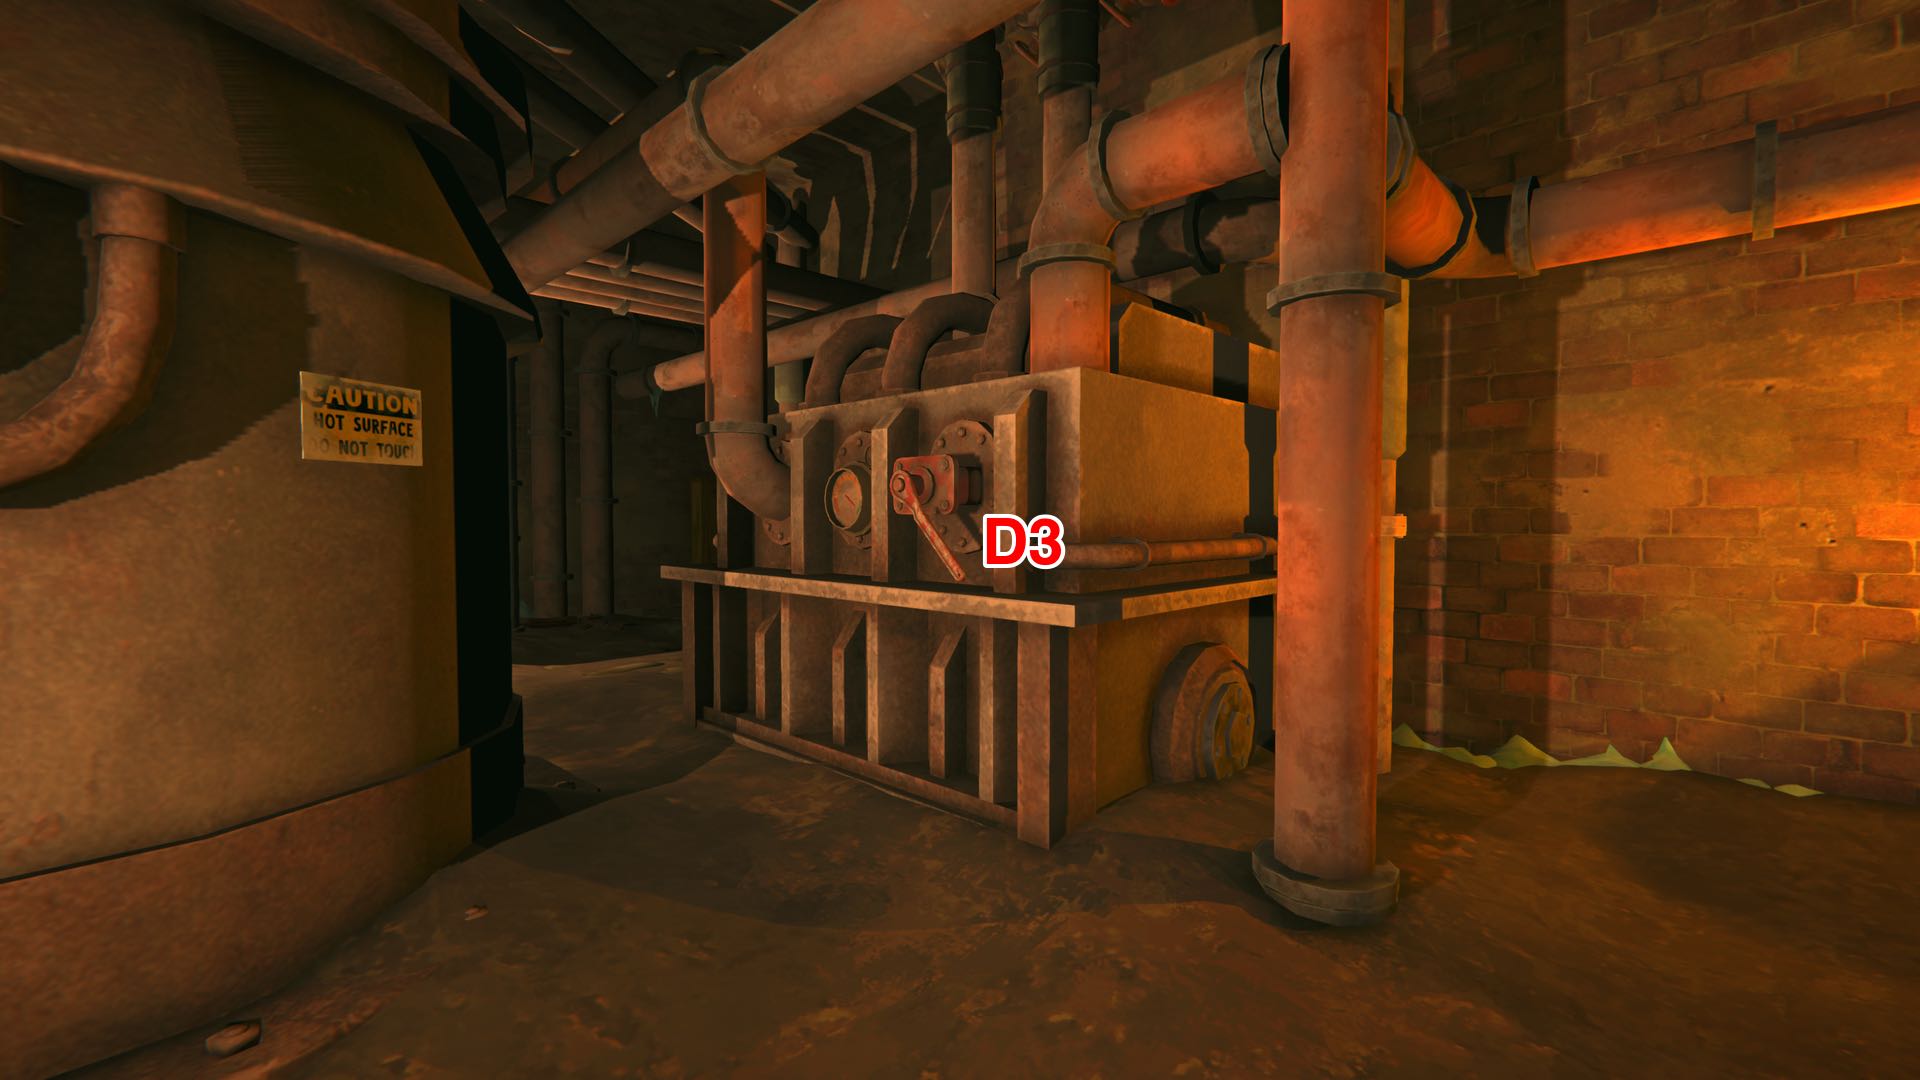
(left before, right after)
Turning to the left, you’ll see several tunnels leading out of this hall:
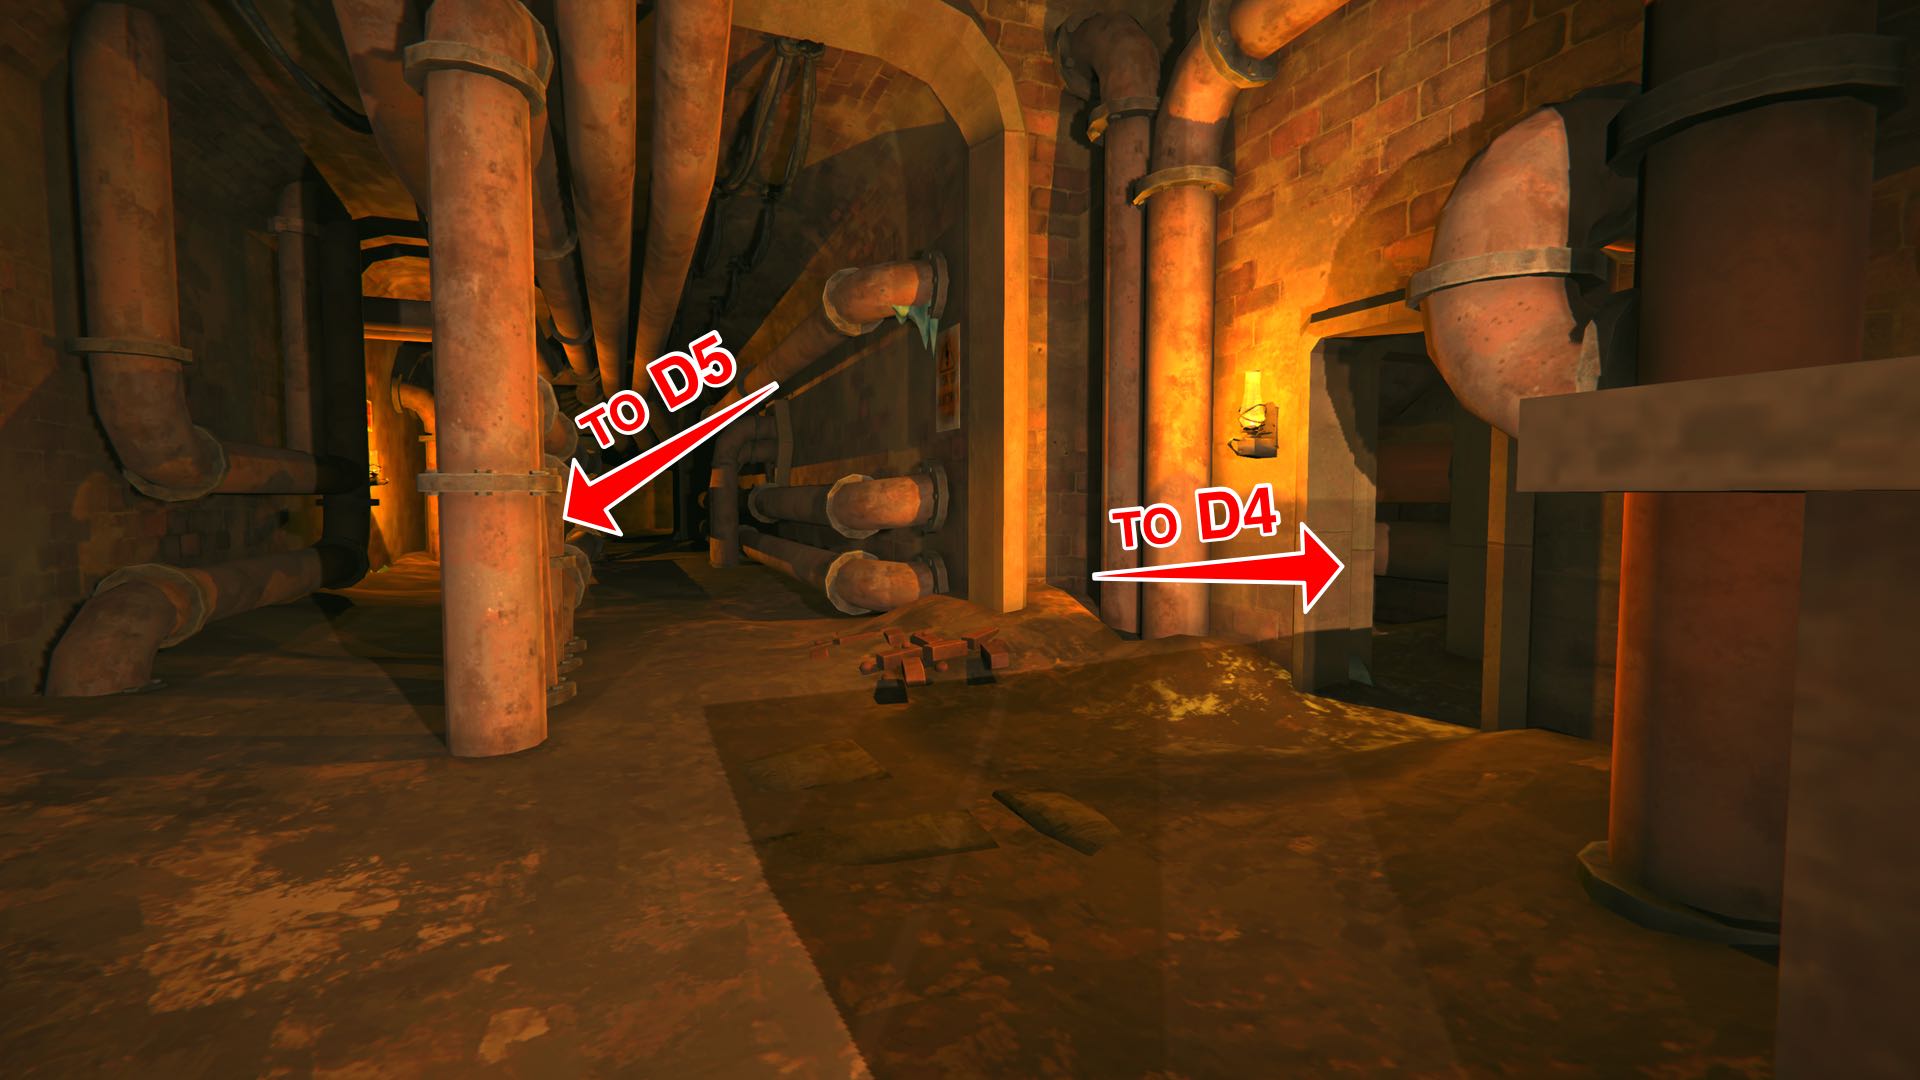
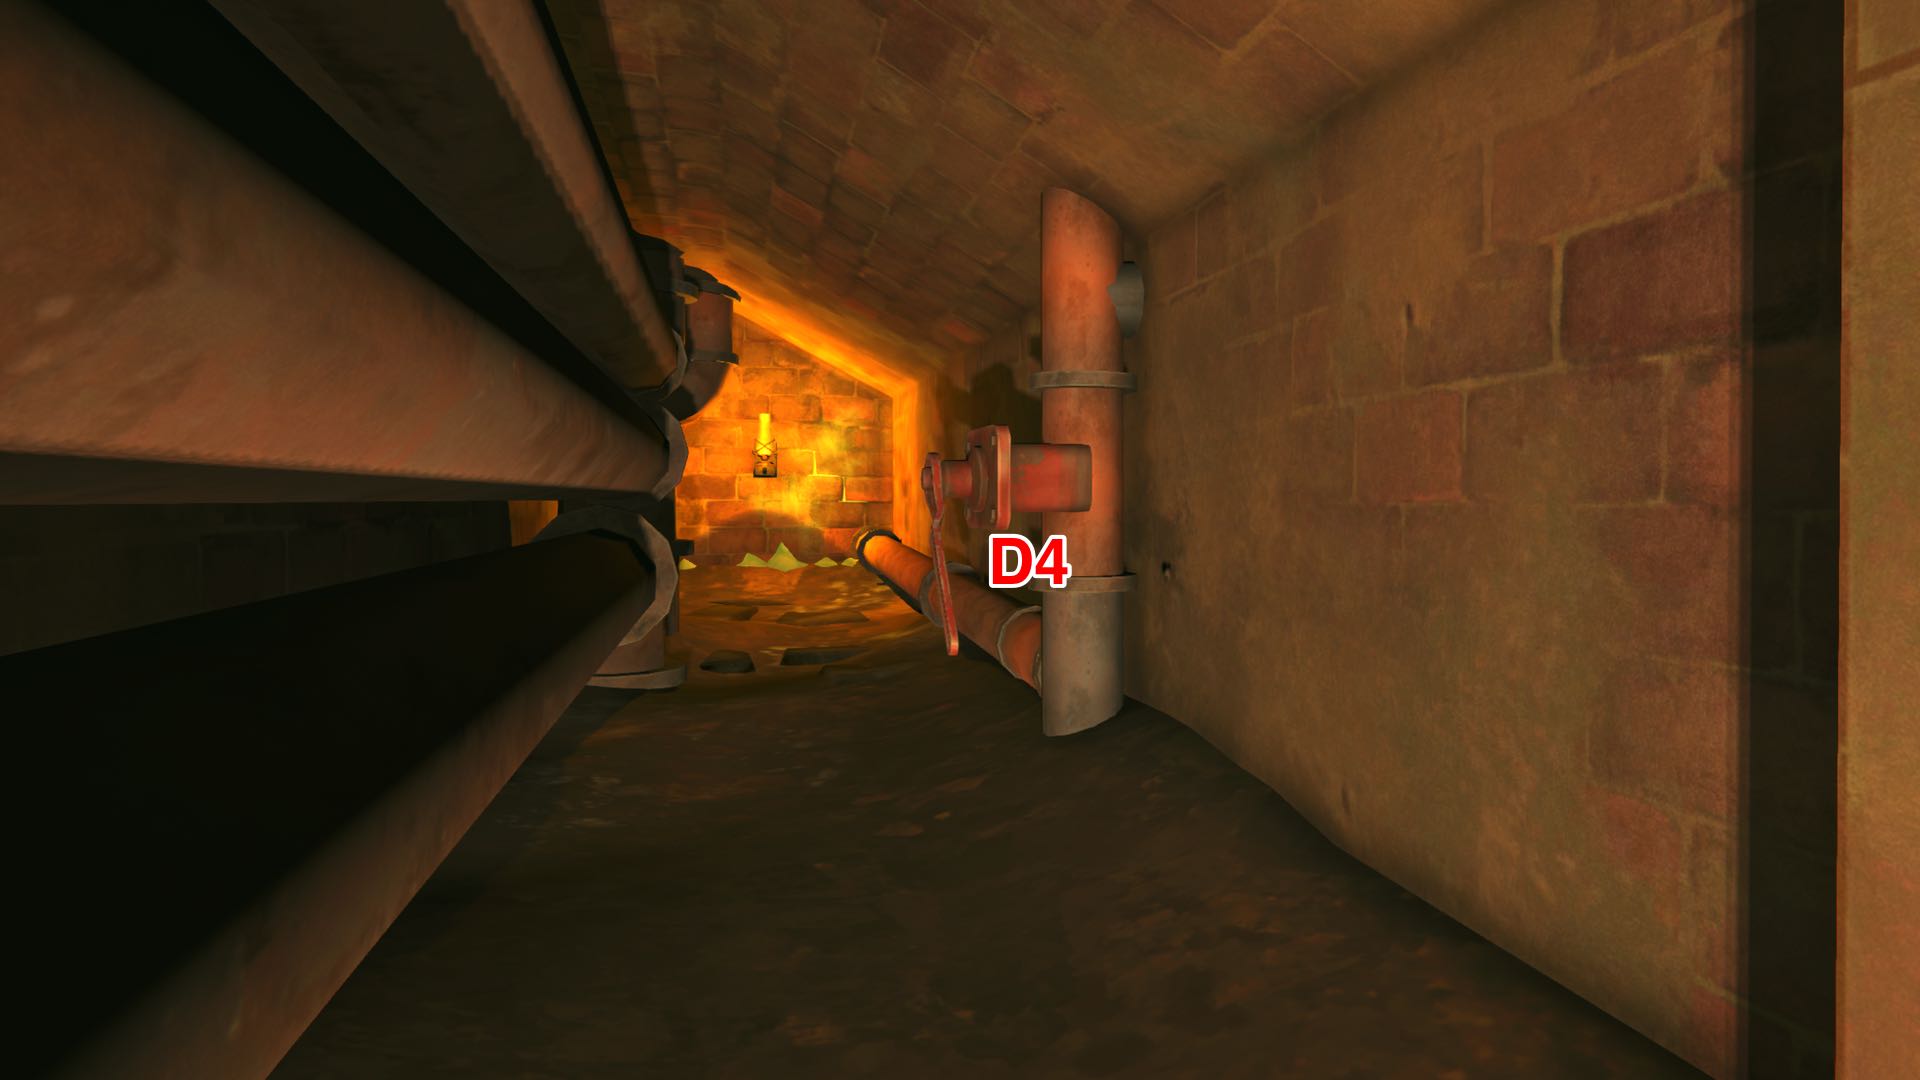
First, follow the tunnel towards valve D4. This tunnel actually forms a loop and gets back into this hall from the other side. Once you reach valve D4, you’ll find that there is no pressure gauge here, which makes it a bit more difficult to understand what’s going on. But you’ll see steam escaping here, so just like at D3 before, you need to close D4 in order to redirect steam where you need it to go. (This thaws D5.)
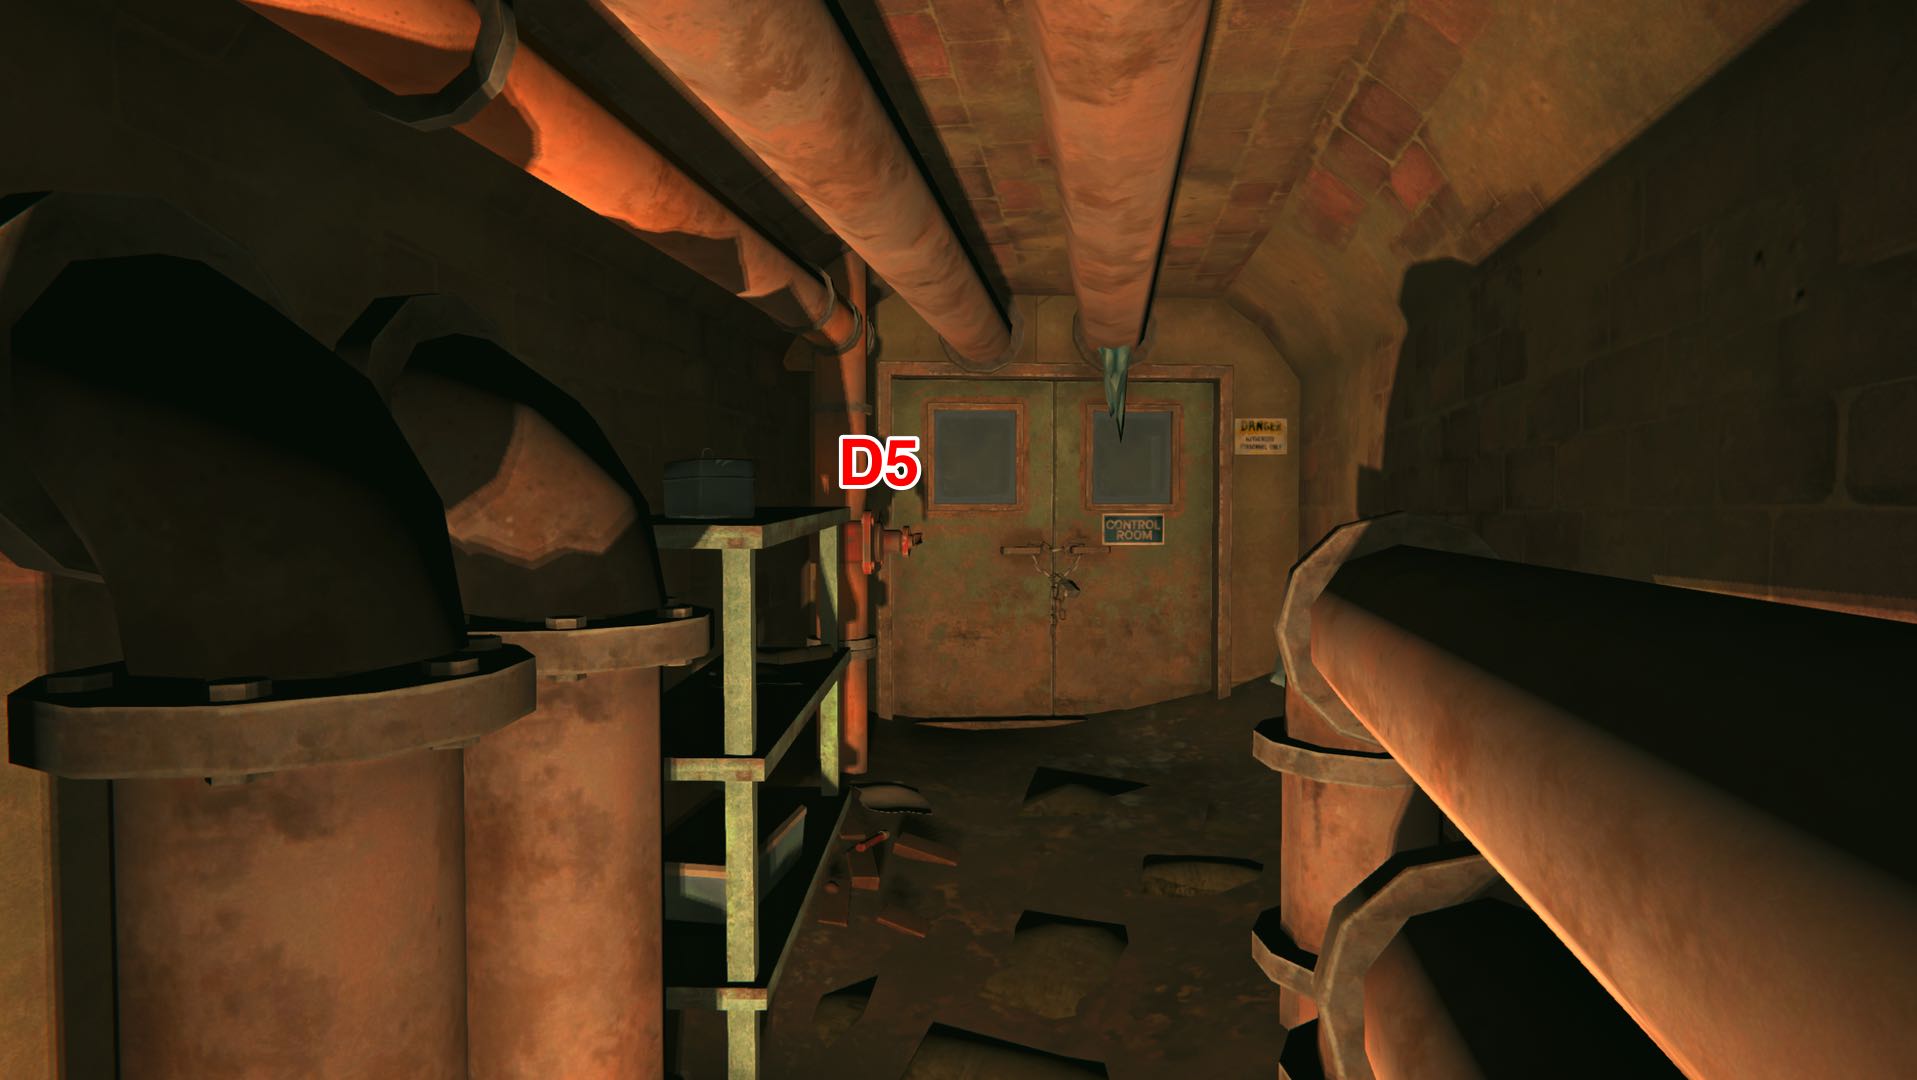
Next, follow the tunnel from the boiler hall towards valve D5. This tunnel can only be entered while crouching and it’s in a bit of a dark corner, so it may be easy to miss. Re-check the map and the screenshot if you can’t seem to find it.

Valve D5 is located at the back door to the control room. You can’t get in this way because the door is secured with a locked chain. Fortunately, you only need to open D5 to finally get hot steam all the way to valve D6 next to the front door to the control room.
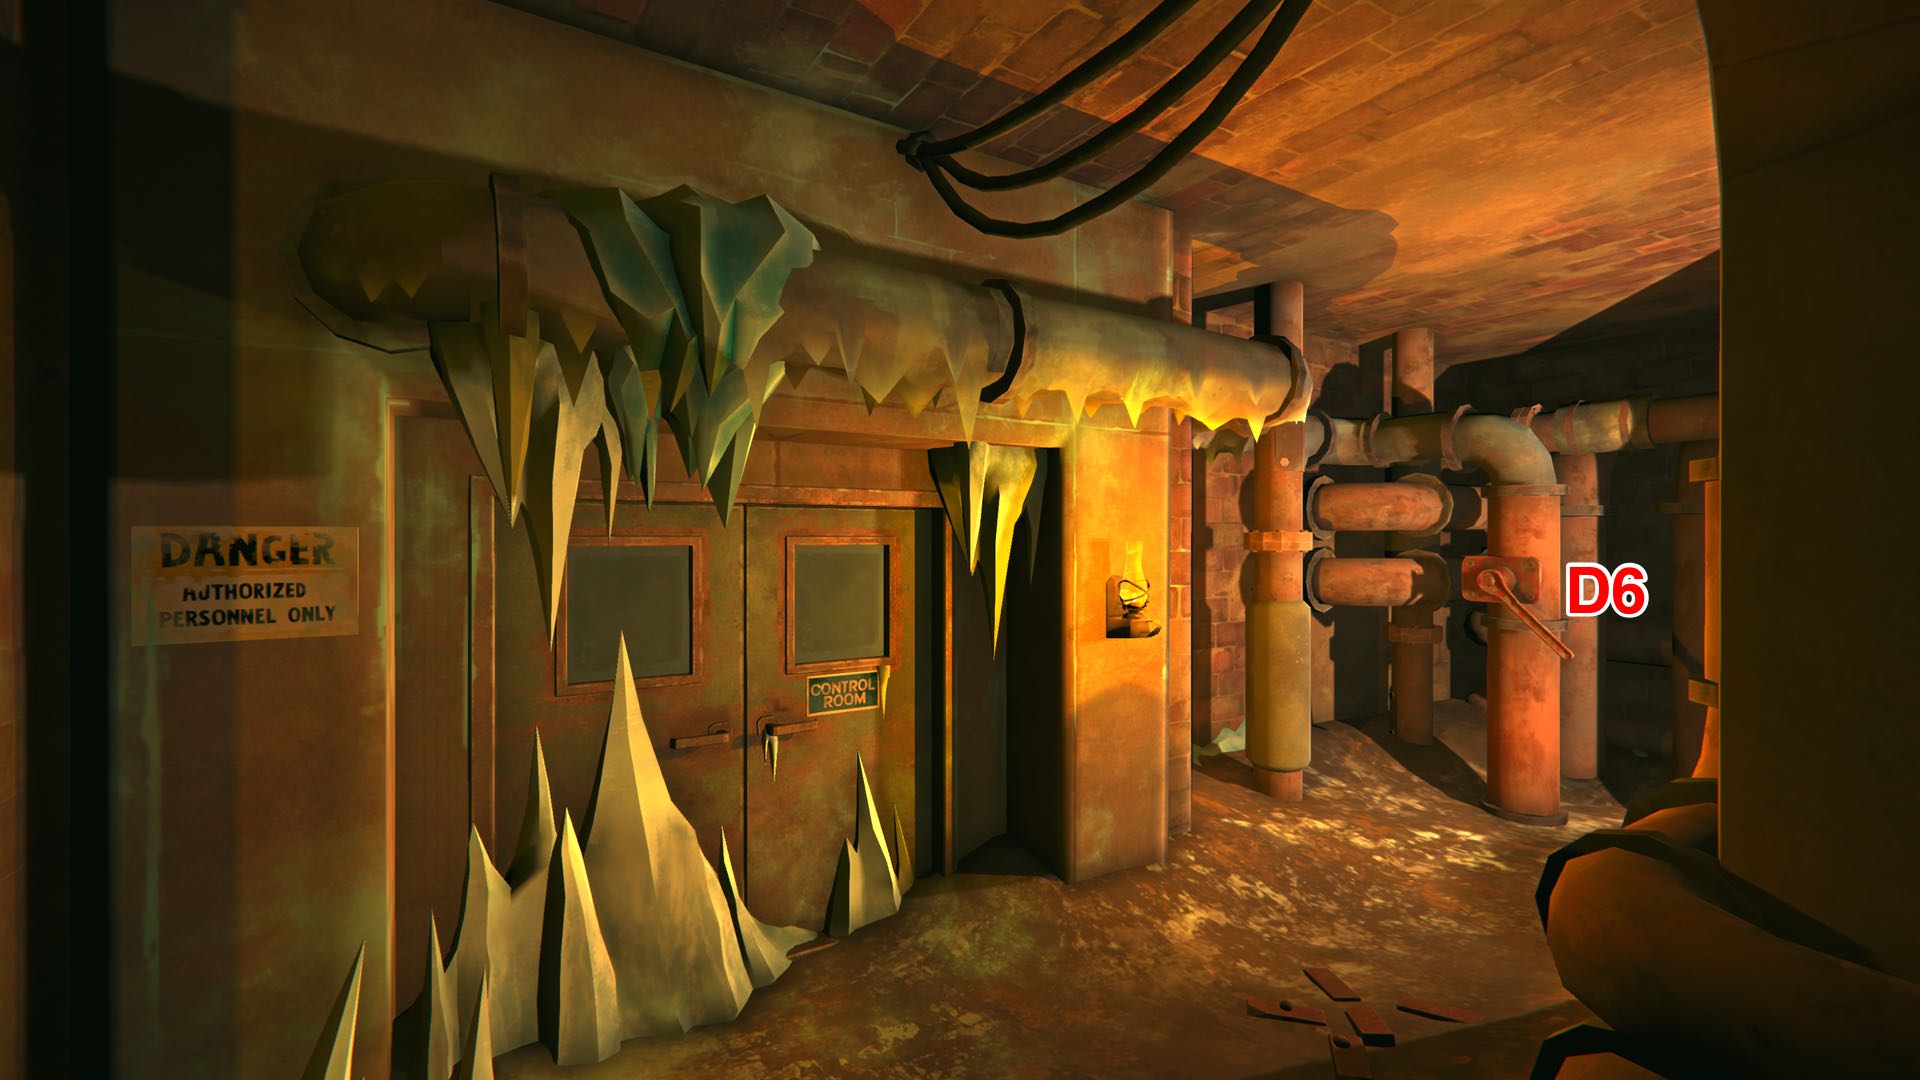
Finally, just open D6 to thaw door 3, which gives you access to the control room.
(Door 4 at the back of the control room leads to a staircase going up. It can be accessed once your objective in the control room is completed.)
