
Table of Contents Show
The majority of side quests in The Outer Worlds are simple. Speak with an NPC, follow the objectives, done. Make sure when you are attempting a specific quest, that it is selected in your journal. You can only track one quest at a time, so you want to ensure you’re chasing the correct markers.
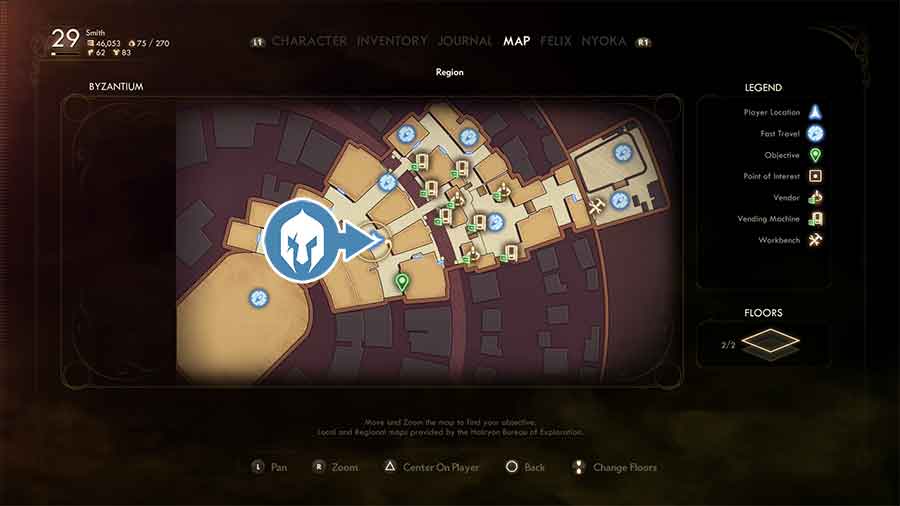
Byzantium Side Quest Guide
Byzantium is one of the Locations in The Outer Worlds. Byzantium is a prosperous city in Terra 2, that acts as the “Capital” of the system and the residence of The Board.. Locations are defined by their individual and varied biomes spread around the Halcyon System. Planets and other celestial figures house the inhabitable regions in The Outer Worlds.
Quests:
- The Demolished Woman (M)
- Long Distance (M)
- Signal Point in Space (M)
- Foundation (M)
- Kept Secret But Not Forgotten (M)
- At Central (S)
- Why Call Them Back From Retirement (S)
- The Low Crusade (C)
- Makes Space Suits, Won’t Travel (T)
- Cupid of the Laboratory (T)
- All Halcyon in a Day (T)
- The Lying Earth (T)
The Demolished Woman Walkthrough
Offer to convince Sophia Akande on Byzantium that she can trust you to accept this quest. You can speak with Sherman Bradshaw at the Bureau of Exploration and Persuade (40) him into letting you into the office for just a second. Or you can Pickpocket the key from him. He’ll tell you that she’s likely at Billingsly’s.
If you Lockpick the door in this area and discover the dead body of the receptionist and then confront Bradshaw, he’ll admit he’s an assassin hired to kill Lockwood. You can then tell him where she is located if you want, and he’ll offer to help kill her.
You can pay Mr. Billingsly in Prosperity Plaza of Byzantium for her location, though it is not cheap.
Rachel Lockwood is located in the Maintenance Tunnels beneath Prosperity Plaza. Finding her there will net you 24,000 XP. Speaking to her you’ll learn that she was asked to erase Edgewater from some maps of Emerald Vale. If you told Bradshaw where she was then he’ll appear and you can converse about how and when to kill her. If you let him kill her, you’ll gain 24,000 XP
If you decide not to kill her you will gain 24,000 XP and she will give you the key to her office where the documents Sophia wants are located.
If you decide to kill her you will gain 24,000 XP and she will have the key to her office and 2,000 Bit Cartridges on her corpse.
Use the key to get into her office up the elevator in the Bureau of Exploration. You can use the terminal to get some insight into what has transpired. The papers you need are on the desk there. Grab them and return to Sophia.
Return to Sophia to gain XP and 1,125 Bit Cartridges. If you didn’t kill Lockwood she will be displeased with you and give you slightly less Bit Cartridges. Either way you will begin the quest Long Distance.
Long Distance Walkthrough
This quest is obtained by speaking with Sophia Akande on Byzantium after completing the quest The Demolished Woman.
This quest is also available after stealing the chemicals Phineas wants from Byzantium for the quest The City and the Stars.
Head to Phineas’ Laboratory and plant the tracking signal by using the terminal to gain 27,000 XP. Then speak with Ada aboard the Unreliable and you will be contacted by Sophia. She’ll reward you with 27,000 more XP and you’ll lose Negative Reputation with The Board. She’ll then ask you to speak with her on Byzantium by using Adjutant Akande’s Landing Pad. Go in and Guard Esparza will let you through. If you speak with her there you will gain a further 27,000 XP.
During your conversation, depending on what you have done before arriving here (if you got this quest after The City and the Stars), you will learn the Emerald Vale plague is a result of malnutrition, and that the Roseway research for “Diet Toothpaste” was for this purpose as well. She will then ask you to wipe out Edgewater. Refusing to do so and telling her to go to hell botches the quest and makes everyone within the building aggressive.
You’ll get the Foundation quest at this point from her.
Sophia will then give you the quest Signal Point in Space and tell you to speak with Percival for your reward and Nav Key. This will net you 100,000 XP, 2000 Bit Cartridges and a lot of Reputation with The Board
If you speak with Phineas and let him know about the tracking signal, he’ll ask you to plant a corrupt signal to buy him some time. If you do this on the terminal you will gain 27,000 XP. Sophia will also not be aware that you corrupted the signal, and you’ll gain another 27,000 XP. Speak with her a gain on Byzantium to gain the same quest and receive the same XP.
Signal Point in Space Walkthrough
This quest is automatically gained after speaking with Sophia Akande during the Long Distance quest after turning in Phineas Welles.
Speak with Everett Gill in Stellar Bay on Monarch. He’ll tell you where you need to go to find the broadcasting station on Devil’s Peak. If you ask about getting some help, he’ll tell you to find Nyoka in The Yacht Club in Stellar Bay.
Nyoka is currently drunk and you’ll need to finish her quest Passion Pills in order to get her to help you. Once you do so you’ll gain 24,000 XP.
Once finished with Passion Pills you will need to head south from Stellar Bay to Fallbrook. The Devil’s Peak Station is a good ways northwest of Fallbrook, so it will take you a while to get there and you will likely do several other quests along the way.
Once you arrive at Devil’s Peak Summit speak with Joy Voivode regarding the relay tower she is guarding. Signal Point in Space will update with a note that you may be able to convince the C3 mercenary company to help you.
They are down the hill a short ways. You can Persuade (20) them not to kill you if you said you emerged from the tunnel, and then you can ask them to help you clear the Marauders from the Station. Additionally, if you inquire further about their boss you will obtain the Task: Mandibles of Doom.
If you complete this Task then you can convince the C3 mercenaries to help you attack the Marauders if you can get the main gate open.
Head the entrance of the Devils’ Peak Station and defeat the Marauders there. There are a lot so be careful. If you have a minute head northeast and loot the Unique Weapon: Hammer of Olympus at Sundered Rock. Then head up the ramp and head into Devil’s Peak Station.
Defeat the Marauders inside and then speak to the man via the Intercom, whom you will find out Hiram. If Nyoka is in your party he will recognize her. Hiram will ask you to wipe out the Marauders in exchange for double the going rate. He doesn’t want his broadcasting equipment destroyed. There is a Lockpicking (55) door nearby that has some loot inside, so consider picking it if you can. Then double back and head up the elevator that is now open.
You’ll need to kill all the Marauders here. If you finished the Mandibles of Doom task and convinced the C3 mercenaries to help you, they will help you wipe out the Marauders. Use the Intercom to open the door and speak to Hiram Blythe. You’ll gain 2,500 Bit Cartridges. Ask him about the Information Broker and you’ll gain an Achievement/Trophy and 16000 XP.
Hiram will ask you to jump start the tower by heading outside and flipping a switch. There is a terminal on the way that you can read some backstory about the Station if you wish. Once you flip the switch a ship will crash land nearby and Graham and Sanji will argue over what to do with it, and the Faction Quest: Canid’s Cradle will trigger.
Head back inside and speak to Hiram and tell him you need to shutdown illegal broadcasts. You can shut the place down but this will require you to attack and kill everyone left in the station including Hiram. You can Persuade (60) or Lie (60) to get him to work for Sophia Akande, or you can just tell him that will work. This will net you 24000 XP. In order to convince him you’ll have to have shut down the boadcasts at Stellar Bay and Amber Heights by completing the quests: BOLT with His Name, Errors Unseen, The Commuter and Pay for the Printer.
Return to Sophia and let her know what’s happened. She will be pleased if you brokered an alliance with Hiram. You will gain 2500 Bit Cartridges, 96000 XP and Reputation up with The Board. You will then watch a video from the Chairman about how Halcyon is running out of food and that they will freeze people to keep population down, while the brightest figure out how to solve the problem.
If you ask Sophia about what’s happening and pass a Perception check then you will learn that the research on Roseway was to develop and appetite supressent to keep people from eating too much. Sophia does not like the Bureaucracy, and is not a fan of the board. If you sided with the Adelaide McDevitt on Edgewater she will tell you that you need to wipe out the town and there can’t be any survivors. She’s sent a group of robots that can be set to malfunction and kill everyone. This will begin the quest Foundation.
Foundation Walkthrough
This quest is obtained if you removed Reed from power during the Comes Now The Power quest and completed the Signal Point in Space quest.
This quest is also available if you complete Lost Signal by obtaining it during the quest The City and the Stars.
Travel to Edgewater Landing Pad and fast travel to the Geothermal Power Plant. Head inside and speak to Captain Hogarth. You can Persuade (65) him, Lie (65) him or Lie (25) him if you have the Constables Badge. Head forward and use the terminal at the nav marker and set the automechanicals to attack the citizens of Edgewater (default) or themselves (New Target). Then execute the command. Either way they’ll kill the citizens if you haven’t done?
Fast travel to Edgewater if you set the mechanicals to attack the citizens, they will all be dead and you’ll need to wipe out the mechanicals. Once finished travel back to Sophia. You’ll gain?? XP, 2500 Bit Cartridges and Positive Reputation with The Board. You will also gain the quest Kept Secret But Not Forgotten. You will also gain the Ludwig Was Right Trophy/Achievement for doing this.
At Central Walkthrough
Accept Maverick Johnston’s offer when he speaks to you on the street of Prosperity Plaza in Byzantium.
Head to Odeon Pictures near the Bureau of Exploration in Byzantium, and take the elevator up. Use the intercom on the wall and speak to Maverick Johnston. He’ll tell you that the other actors have real weapons and you’ll gain 9000 XP and the quest will update.
Head inside the now open door and speak with the Actor. You can Lie (40) and tell him the crates are just decoys to gain some XP. If you have Intelligence and Science (65) you can tell him what he says is scientifically impossible for ??. Keep speaking to him and you can use Science (40) to gain more XP. You can tell him to try you, which he won’t and the scene will end. Or you can attack and kill everyone for some extra XP with no ramifications. Either way you’ll gain 9000 XP and Maverick will want to speak to you. Speak with Maverick to gain a further 9000 XP and 1,125 Bit Cartridges.
Why Call Them Back From Retirement?
There’s a lady arguing at this location, speak with her to get this quest. You need to head to the Maintenance Tunnels, you can fast travel to the Freight Port Landing Pad to get there quickly. It’s a simple quest, it involves fighting a lot of robots, so go in prepared. After you discover the truth about the retirement village, return to Hortense.
When you speak with her, if you tell her the truth, she’s delighted. You get paid. You can lie to her and convince her to check it out for herself, you get paid and get Board Reputation, then she vanishes into her home.
The Low Crusade Walkthrough
If you’ve completed Worst Contact and recruited Ellie this quest will trigger if you speak to her on The Unreliable once you travel to Byzantium. Head to the Fenhill Estate and speak with Ellie’s parents. You’ll learn that they collected on her life insurance policy by concocting an insane story and now they want her gone or they’ll lose their wealth. This will net you 12,240 XP.
Speak to Ellie outside the Estate and she’ll hatch a plan to steal the money. Agree to help her and you’ll gain another 12,240 XP.
Next you’ll need to examine the mailbox outside Greater Halcyon Insurance Group, next to the two guards in Prosperity Plaza. It’s right across from Auntie Cleo’s Salon Club, which is closed. Once you do the quest will update and you’ll be instructed to head to Fallbrook on Monarch and setup a dummy account.
Speak to the Insurance Agent there and change the beneficiary on Marilyn Fenhill’s life insurance policy. She will tell you you cannot do it, but will tell you that you can alter the beneficiary on the terminal in the backroom. Or you can Bribe her for 3800 Bits to do it, or Intimidate (30) her to do it.
You can Lockpick the back room if you have (45) Lockpick or you can Pickpocket the key from the Insurance Agent. If you Pickpocketed the Insurance Agent you can use the key on the terminal as well. Changing Ellie to the beneficiary will net you 12,400 XP.
Speak to Ellie afterwards and you’ll gain 1,313 Bit Cartridges and a Framed Insurance Check. as well as 53000 XP. This concludes Ellie’s quest line.
Makes Space Suits, Won’t Travel Walkthrough
Speak to Celeste Jolicoeur in Prosperity Plaza of Byzantium and agree to help her to obtain this quest. Acquire Iconoclast Armor and Headpiece, Marauder Armor and Headpiece and Spacer Armor and Headpiece and model them for her.
When looking for these Armors look in the description of the Armor as it will tell you what type it is. You can find the description below the Mod Slots of the Armor.
Example outfits:
- Marauder: Patched Low Pressure Helmet, Makeshift Low Pressure Suit
- Iconoclasts: Leaded Armor, Full Cranial Helmet
- Spacer: Water Resistant Wear, Casual or Streetwear, Basic, Enclosed Padded Helm
After modeling these for her, she’ll ask you to gather some materials. The Primal Leather can be gained from the Primal Nest in Emerald Vale. If you still need more, head to Scylla. Raptidon Flank Hide and Mantiqueen Chitin can be found on Monarch. You can also purchase these two things from Sebastian Adams in Stellar Bay.
When you return these materials to you, you gain 2,312 XP. You will then be tasked with retrieving a Lapel from the HPS. You will gain Writ of Consent that gives you the right to retrieve the item. Head there and speak to Olive Yates. She’ll tell you to go to window B. Speak to Wanda Chen in window B to learn the parcel is already out for delivery.
Head to the nav marker in the Estates District and read the note left on the door to learn that the parcel is now back at the HPS, you’ll get the HPS Delivery Unsuccessful quest item. Speak to Wanda Chen again and she’ll tell you to head to window A. Speak with Olive in Window A and show her your verification to receive the parcel and the Gold Lapel quest item.. Then head back to Celeste.
You’ll find Guard Command over her corpse inside her shop. You’ll find out that she was executed by the guards for making illegal clothing. This will net you a further 2,312 XP. Loot her corpse to gain Celeste’s Key. Inside her office you’ll find Chimaera, a Unique Armor and the quest will conclude granting you a further 10,300 XP.
Cupid of the Laboratory Walkthrough
Speak to Giles Molina near the elevator to the Maintenance Tunnels in Prosperity Plaza of Byzantium and offer to help him to accept this quest.
Head down the elevator and rescue the 6 Sprats. You’ll have to chase some of them, and press the interact button to capture them, so be prepared for that. If you are doing The Demolished Woman quest Rachel Lockwood will be located here.
As you explore, beware of Sprat Exterminator mechanics and an enormous Sprat called Kobalos that will attack you.
Once you have all 6 return to Giles to get 1,125 Bit Cartridges and 19,000 XP.
All Halcyon in a Day Walkthrough
Speak with Alonzo Vallejos in the Bureau of Exploration in Byzantium and accept his offer to obtain this quest.
The first beacon is located in a corner in Prosperity Plaza on Byzantium right under the Rococo’s Decor sign. This will net you 13,420 XP.
The second beacon is located in Emerald Vale north of Edgewater. It’s just east of the Abandoned Industrial Zone, and is guarded by some Primals. Defeat them and loot it. This will net you 3,420 XP
The third beacon is located on Scylla west of the landing pad. It’s located just outside the barrier so you’ll have to ninja out and grab it and back in before you die. You’ll only have a couple of seconds. This will net you a further 3,420 XP.
The last beacon is located outside Stellar Bay on Monarch. It’s a good ways southwest and is guarded by a few Canids. You’ll gain 3,420 XP for picking it up.
Return to Alonzo an speak with him to find out the tour is fake, and was shut down long ago by The Board. Alonzo started it back up to gain recordings of mercenaries dying gruesomely for ratings. You’ll gain 15,000 XP for completing the quest and Board Reputation Up, as well as a Unique Armor: Certified Explorer’s Hat.
The Lying Earth Walkthrough
You will obtain this quest when talking to Minister Clarke for the quest The City and the Stars. Clarke will ask you to use Rockwell’s access to message Earth. This unlocks the task: The Lying Earth, and gets you a cartridge with details on corruption on mismanagement: Minister Clarke’s Data Cartridge.
If you’ve completed Balance Due you will have access to the HHC building and won’t need to use the Maintenance Tunnels. You can also skip the tunnels by walking to the front door and bribing the guard for 2000 bits. Once inside the HHC building go straight ahead and talk to Guard Bachmeyer. You’ll take a lift heading to Percival Platt – he has nothing important to say so go left and unlock the door with Minister’s HHC Access Card. You can print the keycard at the terminal to gain the Ministry of Accuracy and Morale Key. You can also send Minister Clarke’s message completing the Lying Earth quest and earning you a small amount of Negative Reputation with The Board.