Table of Contents Show
In Dark Souls 2 SotFS, souls serve two purposes. The first purpose of souls is as experience points. The more souls you have in your soul counter, the more times you can level up by means of the Emerald Herald. At various points in your playthrough, you might find that levelling your character a few times prior to a boss fight can make the boss a bit easier because you now have more HP, more stamina, more Adaptability, or your weapon hits harder than previously.
The second purpose of souls is to serve as currency. Souls allow you to purchase various consumables, weapons, armour pieces, upgrade materials, ammunition, and services from various merchants scattered throughout the game. The consumable item you probably purchase the most often is Lifegem. Prior to visiting a new area, farm souls to help you stock up on Lifegem and restock your inventory of elemental resins for buffing your weapons. Each of the two blacksmiths in the game charges a certain amount of souls to upgrade your weapon to a particular level. The blacksmiths also charge souls for repairing broken weapons, armour pieces, and rings. Cromwell the Pardoner charges souls to absolve your character of any sins committed, the amount varies with the soul level of your character.
Enemies in the game randomly drop various items upon defeat. These items include consumables, covenant items, armour pieces, weapons, and ammunition. The dropped items can be sold to Gavlan for extra souls.
In NG+0, the best setup for farming souls includes:
- Nahr Alma Hood. Dropped by Titchy Gren upon death. Unfortunately, you must kill Titchy Gren for this head piece.
- Nahr Alma Robes. Can be purchased from Melentia for 5,000 souls after killing Titchy Gren.
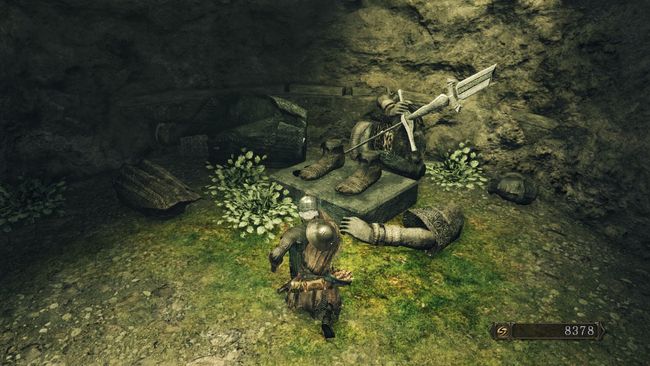
- Jester’s Gloves. Magerold sells this for 2,600 souls.
- Tseldora Trousers. Dropped by Maughlin upon death. Don’t kill Maughlin. You can farm the Tseldora Trousers from the Parasitized Undead and the Parasite Spider at lower Brightstone Cove Tseldora, unlocked after defeating the Prowling Magus and Congregation. Equip these to raise your Item Discovery: Watchdragon Parma, Covetous Gold Serpent Ring+1 (the +2 version is available from NG+1 onward), Jester’s Cap, and Prisoner’s Tatters. Pop a Rusted Coin if you have any.
- Covetous Silver Serpent Ring+1. Gifted by Melentia after spending at least 10,000 souls in her shop. The +2 version is available from NG+1 onward.
Drink from your Estus Flask as many times as possible. Avoid popping a Lifegem unless absolutely necessary. Each Lifegem costs 300 souls. You don’t want to lose souls while farming for souls.
Unlike other games in the Dark Souls trilogy, most non-boss enemies stop spawning after being killed a certain number of times. You have two options for spawning such enemies infinitely many times. The first option is to burn a Bonfire Ascetic. This respawns all nearby enemies and bosses, and raises the difficulty of the game. The spawning limit still applies to most non-boss enemies near the bonfire where you burnt a Bonfire Ascetic. The second option for having non-boss enemies spawn infinitely many times is to join the Company of Champions covenant. Joining the covenant does not re-spawn any boss, but your membership of the covenant does increase the difficulty of the game. Regular enemies now spawn infinitely many times without raising the bonfire intensity.
Some enemies in the game spawn infinitely many times without requiring you to burn a Bonfire Ascetic or being a member of the Company of Champions. Such enemies include:
- The Stone Soldiers near the King’s Gate bonfire at Drangleic Castle.
- The Leydia Pyromancer at Undead Crypt. Those found in areas with gravestones can stop spawning once the gravestones are broken. The ones found in front of the arena of Velstadt continue to spawn as long as you ring a nearby bell.
Forest of Fallen Giants
Before The Last Giant
Souls: approximately 2,860
Start from The Crestfallen’s Retreat bonfire. Two-hand the Morning Star or the Mace. Hollow Infantry x 2 are found wandering near the bonfire. Lure one to the bonfire, defeat the enemy, and dispatch of the other enemy. Head for the Ogre up the stream. Fight the Ogre on dry land, not while standing in the water. Bait an attack and position your character behind the Ogre to bait it into sitting down, then get in one or two hits. Rinse and repeat until the Ogre is defeated. Another strategy is to lure the Ogre to the entrance of the nearby cave, where you can find a wooden chest. Bait the Ogre to perform a body slam or a grab attack, or any attack where the Ogre drops to the ground, then get in one or two hits. You have the safety of the cave to rely on. On the other side of the stream sits a lone Hollow Infantry. Fight this enemy after you have defeated the Ogre, then rest at the bonfire.
Get rid of the same Hollow Infantry x 2 near the bonfire and head right to find a tree bridge for crossing the stream. A Hollow Infantry is hiding behind the other side of the bridge, further ahead is an archer, and behind him is a Hollow Infantry playing dead. Get rid of the enemy who’s hiding behind the bridge while you avoid the archer. A fourth Hollow Infantry would run out from the right alcove, above which is another enemy waiting to drop down.
Climb a ladder to find a bunch of Hollow Infantries playing dead. Kill one or two enemies nearest to the ladder and head to an opening to find another ladder. Climb up the ladder to trigger a Hollow Infantry to climb down from above, slide down the ladder, and defeat the enemy. Climb the ladder and make your way to the lone Hollow Soldier who watches over the Hollow Infantries playing dead. Defeat the Hollow Soldier and drop down using the opening in the platform. Fight one Hollow Infantry at a time by staying close to the enemy so as not to trigger other nearby enemies who are playing dead.
Proceed through an opening in a giant tree trunk, turn left into a hallway, and prepare for a Hollow Infantry to ambush you. Further along the hallway is an opening to your right, leading to a room containing Hollow Infantry x 3. Approach the opening to trigger two enemies to come out from the room, the third enemy is sitting in a corner of the room. In an alcove adjacent to the room is a Hollow Soldier waiting to ambush you. Further along the hallway is a flight of stairs where you can find a Hollow Infantry and an archer. The area at the top of the stairs contain a Hollow Infantry and a Hollow Soldier who stands on a tree root that hangs directly above the stairs. Beware of archers from afar whom you can’t reach at the moment. Climb the ladder and go straight ahead to find a Hollow Soldier. Rest at the Cardinal Tower bonfire.
After The Last Giant
Souls: approximately 4,296
Start from the Cardinal Tower bonfire. Two-hand the Morning Star or the Mace. Head outside the iron gates to find a lone Hollow Soldier trying to ambush you at the right corner. Go back inside the room where the bonfire is located, stand a little bit outside the large hole in the wall to lure a Hollow Soldier into the room, where you can safely fight him. Proceed along the path where an Old Ironclad Soldier stands and get rid of the archer who stands on an edge. Now fight the Old Ironclad Soldier. Bait the horizontal swing and run in for one hit. The horizontal swing combo is also a good opportunity. Wait for him to finish the combo and run in for one hit. Underneath the Hollow Soldier who throws Firebomb is an enemy that wields a halberd; defeat this enemy.
Descend the nearby ladder to reach the path leading to where you found Pate. To your right is a hole in a wall. Stand at the entrance of this hole to bait the Hollow Soldiers inside to fire the ballistae. If you do it right, the great arrows should hit a bunch of gun powder barrels and cause an explosion, thus killing some enemies. Alternatively, the great arrows can hit a Hollow Soldier who runs outside to fight you. Next, dispatch of the Hollow Soldier x 3 who were firing the ballistae. Proceed along the path that leads to a giant corpse. Fight the Hollow Soldier who is sitting on the ground, then the Hollow Soldier x 2 who are attacking the giant corpse.
Climb the nearby ladder and turn left into a hallway with a descending staircase. The hallway leads to the courtyard next to where Pate previously sat. Defeat Hollow Infantry x 3 and Hollow Soldier x 2. Head for the door that leads to the arena of The Pursuer, but don’t go through the door. Defeat the Hollow Soldier x 2 nearby and an Old Ironclad Soldier. Walk halfway up a massive inclined anchor to bait Hollow Infantry x 4 to drop down. Make your way along the hallway that leads to the shortcut to the Cardinal Tower bonfire. To your right is a Hollow Soldier sitting on the ground. To your left is the door leading to a ladder. Defeat the Hollow Soldier sitting near the door. A Hollow Soldier who wields a halberd would cross the stone bridge to fight you. On either side of the bridge is a Hollow Soldier playing dead. One plays dead near a door and the other plays dead near a hole in a wall. Make your way to the Cardinal Tower bonfire.
After The Pursuer
Souls: approximately 4,764
Start from the Cardinal Tower bonfire. Two-hand the Bastard Sword, or use the Morning Star or Mace if you prefer. Descend the nearby ladder and defeat Hollow Soldier x 4 near the bottom of the ladder. Go through the shortcut door near the ladder and to your right is a Hollow Soldier sitting on the ground. Straight ahead are Hollow Soldier x 2 who wield shields and spears. Bait both enemies to thrust with their spears, wait for them to finish their combo, and run in for the kill. An Ironclad Soldier is hiding behind a cart laden with wooden boxes. Walk halfway up the inclined anchor to bait Hollow Infantry x 4 to drop down.
Make your way through the door that leads to The Pursuer. At the top of the first flight of stairs is a Royal Swordsman. A second Royal Swordsman would run down from the second flight of stairs. The third Royal Swordsman stands at the top of the third flight of stairs, close to an archer. Run across the arena where you fought The Pursuer to find Hollow Soldier x 2 attacking a giant corpse.
Drop down a ledge onto a platform above where you fought the Old Ironclad Soldier behind a cart. Proceed through a hallway leading to a bunch of barrels, some of which contain gun powder. Don’t dawdle near the barrels; two enemies above would throw Firebombs at the gun powder barrels. Lure Hollow Soldier x 2 away from the barrels and fight them.
Head for the giant corpse. Defeat a Hollow Soldier who is sitting against a wall and Hollow Soldier x 2 who are attacking the giant corpse. Hollow Soldier x 4 can be found near the ballistae that aim their great arrows through a hole in a wall. Climb the ladder near the Cardinal Tower bonfire to defeat Hollow Soldier x 2. One wields a spear, the other wields a halberd. Go straight ahead and turn left to find a Hollow Infantry archer and an Old Ironclad Soldier. Be wary of the enemy throwing Firebomb from atop a raised platform. Enter the room where the bonfire is located and proceed through the iron gates to find a lone Hollow Soldier. Finish your route at the Cardinal Tower bonfire.
Heide’s Tower of Flame
Souls: approximately 8,220
Start from the Tower of Flame bonfire. Equip the Covetous Silver Serpent Ring+1 and two-hand the Bastard Sword. Go to the arena where you fought the Dragonrider and wait near the Old Knight for the wandering Heide Knight to approach you. All Heide Knights should be aggressive toward you because the Dragonrider is defeated. Fight the Heide Knight within the arena, then defeat the Old Knight. If the Guardian Dragon is still alive, you should be able to summon Masterless Glencour to help you distract an enemy while you look for opportunities to deal damage or fish for backstab. Fight one enemy at a time and use the Short Bow and arrows to lure an enemy toward you or Glencour.
In the rotunda where Old Knight x 3 are located, use the Short Bow and arrows to shoot at the nearest Old Knight, then run to the entrance of the Dragonrider arena. Two Old Knights would likely chase after you. Wait near the entrance for one Old Knight to return to his original position, allowing you the opportunity to fight one-on-one with an Old Knight. Let Glencour distract a Heide Knight while you look for opportunities to backstab. Use the Black Separation Crystal to send Glencour home. End your route at the Heide’s Ruin bonfire.
No-man’s Wharf
Souls: approximately 15,000
Start from the Unseen Path to Heide bonfire. Equip the Covetous Silver Serpent Ring+1 and two-hand the Greatsword. You might have to equip the Royal Soldier’s Ring to maintain your Equip Load below 70%. Have a secondary weapon ready in case the Greatsword is low on durability. All or most of the sconces at No-man’s Wharf should now be lit and you should have unlocked all shortcuts.
Head to the very first Hollow Infantry playing dead next to a sconce. Get rid of this enemy and then lure the nearby Stray Hound away from its position. Cross the wooden platform and head for the Hollow Infantry archer. Beware of Varangian Sailors trying to ambush you by hanging from the edge of platforms. Dispatch of the archer first, then deal with any nearby enemies. Proceed to the ship and defeat Varangian Sailor x 2 and an Undead Jailer.
Go to the dwelling where Hollow Infantry x 2 are playing dead. Above the dwelling is a Varangian Sailor who snipes you. Defeat a Hollow Infantry who plays dead next to a sconce and wait for Hollow Infantry x 4 to run out from two dwellings. An Undead Laborer is found nearby. Kill this enemy for a chance to obtain a torch and wait for a Varangian Sailor to drop down from a platform.
Make your way to the building where you found Lucatiel. Defeat a Varangian Sailor and a Stray Hound. A Hollow Infantry is playing dead inside an opening in a wall. Approach this enemy and another Varangian Sailor would run down the stairs toward you. Stray Hound x 2, Varangian Sailor x 2, and a Hollow Infantry are waiting to ambush you at the top of the stairs.
Run to the path where Dark Stalkers are stationed and fight one Dark Stalker at a time. If you’re unable to hold the torch in the left hand and one-hand your weapon, then two-hand your weapon. Bait the double horizontal swings, the double arm ground slam, or the arm thrust, then run in for one hit. Spacing is important when fighting a Dark Stalker because this enemy hits hard and each hit builds up your bleed metre. Defeat the Dark Stalker x 4 inside the building where you collected the Greatsword, outside the building stands a Varangian Sailor archer.
Enter the nearby wooden shack to find Varangian Sailor x 2 up the stairs. Exit the shack and find the bell you rang. Drop down the platform where the bell is located and enter a building to find Dark Stalker x 2. Outside the building are Varangian Sailor x 2: one standing on an edge and the other hanging from the edge waiting to ambush you. Above your head is a wooden platform, underneath which is a Suspicious Shadow who clings to the platform. Another Suspicious Shadow clings underneath a platform below you. Suspicious Shadows are dangerous because they are fast and each hit builds up your bleed metre.
Enter a building to find drunken Varangian Sailor x 2 napping, resting their heads on a table. Take the opportunity to backstab one enemy. Let the other enemy attack the poison pots and wait for him to die from the poison. Enter the building where you found Gavlan to defeat the lone Varangian Sailor inside. Proceed through the shortcut to find a gang of Varangian Sailors: two stand on a wooden platform and 11 are inside a building, three of whom are drunk napping. Backtrack through the shortcut and proceed to the shack where Dark Stalker x 2 are located. Run back to the Unseen Path to Heide bonfire.
The Lost Bastille
Souls: approximately 21,456
Start from The Tower Apart bonfire. Equip the Covetous Silver Serpent Ring+1, the Bracing Knuckle Ring, and two-hand the Greatsword+6. Go along a ledge into a room containing a Royal Swordsman and Stray Hound x 3. Knock a gun powder barrel over the edge to cause an explosion, which should kill one or all Stray Hounds. Climb up the iron ladder and kill the lone Undead Jailer. Proceed along the path littered with gun powder barrels to find another Undead Jailer. Royal Swordsman x 2 are found near a bunch of barrels and wooden crates.
Open an iron door and enter the room to lure out Royal Swordsman x 5. Inside the building, you can find another Royal Swordsman x 4. Bait them into attacking the various gun powder barrels and the explosion should kill them. Descend the flight of stairs to find an Undead Citizen and a Royal Swordsman.
Make your way to the McDuff’s Workshop bonfire, dispatching of an Undead Jailer along the way. Rest at the bonfire to restore the durability of your equipment. Find Stray Hound x 7 nearby and get rid of them before dealing with the crossbow enemies on raised platforms. Break a wooden barrier to reveal a hole in a wall and enter the building to find an Undead Citizen. Dispatch of the Stray Hound x 2 near the well before dealing with a further Undead Citizen x 2 in a jail cell.
Go to the well and a Royal Swordsman should drop down from a rooftop. Royal Swordsman x 3 are trying to ambush you inside a room. Don’t enter the room via the door. Instead, climb an iron ladder, defeat the crossbow enemy near a window, drop down to a platform to defeat the second crossbow enemy, and the third Royal Swordsman should attempt to reach you via a ladder.
The adjacent room contains a Suspicious Shadow who hangs from the ceiling. Ride an elevator up to a room where Undead Citizen x 4 are trying to ambush you. Descend the stairs to find a further Undead Citizen x 8. Make your way down a spiral staircase, underneath which is a Royal Swordsman. Rest at the Servants’ Quarters bonfire.
Proceed to Belfry Luna where you would find Bell Keeper x 7, defeat them, and rest at the Upper Ramparts bonfire. Warp to Straid’s Cell bonfire and get rid of the Undead Citizen x 5 there. Descend a flight of stairs to find another Undead Citizen x 4. Head outside the building to find a Royal Swordsman hiding around the corner. Go to Sinner’s Rise, defeating an Undead Jailer and Royal Swords x 5 on your way to The Saltfort bonfire.
Huntsman’s Copse
Souls: approximately 13,188
Start from the Undead Refuge bonfire. Equip the Covetous Silver Serpent Ring+1, Bracing Knuckle Ring, and two-hand a Raw Greatsword+6. Proceed through the cave and defeat Undead Prisoner x 6. An Undead Prisoner is hanging from the edge near the Bridge Approach bonfire. A Rogue stands at the top of a building, waiting to ambush you. Go to the entrance of the building to trigger the Rogue to drop down. Alternatively, use a bow and arrows to snipe the Rogue from afar. Run inside the building and go to the wooden door to bait the Rogue inside to break the door, then backtrack and run outside again. A number of enemies would follow you outside. Make your way through the broken door to find another Rogue. The room has another Rogue x 2 and Undead Prisoner x 4. Climb the iron ladder to the rooftop to find Rogue x 2. Drop down from the roof and rest at the Bridge Approach bonfire.
A wooden ladder is found nearby, at the top of which is a Rogue waiting to ambush you. Stand near the ladder to bait the Rogue to drop down. Make your way to the Undead Lockaway bonfire. On your way, kill Undead Prisoner x 2 and a Rogue before crossing the first stone arch bridge. A Torturer can be seen standing near an edge. Use bow and arrows to lure the Torturer to drop down. This enemy is dangerous because they hit hard and can build up your bleed metre. Wait a while for an Undead Prisoner to drop down from the same edge. Cross the bridge to find an Artificial Undead and a nearby Undead Prisoner. Use bow and arrows to snipe the various Great Moths that rain poison mist. Locate another Artificial Undead standing in a corner.
Enter one of the mounds to summon Bashful Ray to help you clear the area. A Rogue stands atop a mound near the second stone arch bridge. Cross the bridge to find a Torturer and a skeleton. Go through a narrow passage and locate Torturer x 5 standing on elevated platforms, trying to ambush you. Use a bow and arrows to lure one Torturer to drop down at a time. Head for the bridge that leads to the Undead Lockaway bonfire. Be wary of Rogue x 3 and a Stray Hound trying to ambush you. An Undead Prisoner is playing dead inside the mound where you pull a lever to lower the bridge. Rest at the Undead Lockaway bonfire.
Travel along the outside path that leads to the arena of Skeleton Lords and back to the bonfire again. (You can choose to first go through the cave if you want.) Rogue x 4 are found on the path before the fork near where Merciless Roenna invaded you. Further along you will find Rogue x 5 and Undead Prisoner x 2 within a cave. Head into the cave where Skeleton x 8 are located. Be wary of the curse pots. Stay far away from them or roll into them. Rest at the Undead Lockaway bonfire.
Harvest Valley & Earthen Peak
Souls: approximately 14,952
Harvest Valley is not ideal for farming souls because it’s filled with poison. Being inflicted with the poison status effect means that you must pop a bunch of Lifegems to counteract the poison, possibly wasting a thousand souls or more. You’re trying to farm souls, not spend them.
Start from the Poison Pool bonfire. Equip the Covetous Silver Serpent Ring+1, the Bracing Knuckle Ring, and two-hand the Greatsword. A Raw Greatsword+6 is recommended. Run through the first poison area. Avoid fighting in a poison area if you can. Head to the area before The Mines bonfire, where you can find Desert Sorceress x 2 and Undead Laborer x 5. A skeleton from the first poison area might follow you. Don’t fight a Desert Sorceress head on. Snipe with bow and arrows from a distance where her fireballs can’t reach you. Rest at The Mines bonfire.
Head to the narrow passage where a Mounted Overseer can be found. Go into an adjacent area containing a bunch of Artificial Undeads and an Undead Laborer. Funnel the enemies through the narrow passageways to allow you to fight one or two enemies at a time. Take care not to drop down into the various poison caves. If you happen to be in a poison cave, use the torch to increase your visibility and make your way out of the cave as quickly as possible. Ignore the Mounted Overseer x 2 in the second poison area. Fight the Undead Steelworker who stands on a wooden bridge, but be wary of fireballs raining from above. A Manikin is ambushing you from above. A further Undead Steelworker x 3 can be found in the room before the boss arena of the Covetous Demon. Let them smash through the various poison pots to poison themselves and wait for them to die from the status effect. Before the boss arena stands a Desert Sorceress. Use a ranged weapon to deal with her. Kill the Poison Horn Beetle x 2 near her. Another Manikin is trying to ambush you from a corner. Nearby is an Undead Laborer sitting, facing various poison pots. An adjacent room has an Undead Supplicant and Poison Horn Beetle x 2. Rest at the Lower Earthen Peak bonfire.
A Manikin is hiding behind a wooden chest. A further Manikin x 2 are standing on a stone bridge, one of them is an archer. Use a bow and arrows to snipe them. Go up an inclined plane to trigger a Manikin to drop down and an Undead Steelworker to approach you. Get rid of the Manikin as quickly as possible before the other enemy reaches you. The Undead Steelworker would most likely be poisoned from breaking the various poison pots. At the other end of a stone bridge stands a Grave Warden. Use a ranged weapon to lure this enemy to your position and fight him there. Approach a wooden ladder to bait Manikin x 2 to drop down. Get rid of the first Manikin as quickly as possible before the second arrives. Climb the ladder to find a Grave Warden standing in front of a windmill. Rest at the Central Earthen Peak bonfire.
Ascend an inclined plane and locate Manikin x 4. One is at the top of the inclined plane. The other three are ambushing you from above. Climb a ladder to find a Manikin archer at the end of a narrow passageway. Desert Sorceress x 2 are standing nearby, one of whom is hidden in a corner. A Manikin is hiding in the pit below. Manikin x 2 are hiding behind a bunch of poison pots. Go along a passageway to find a Grave Warden. A Manikin is standing on a ledge above, trying to ambush you. Ignore the Grave Warden at the far end of a broken bridge. Turn a corner and find yourself on a path outside, where a Manikin and an Undead Laborer are located. Head inside and climb a ladder to find a Desert Sorceress standing on a balcony. Proceed along a passageway filled with poison pots, snipe a Suspicious Shadow who is clinging to the ceiling, backtrack, and let the enemy be poisoned by breaking the pots. In one corner is a Desert Sorceress. In the other corner are Undead Supplicant x 2 and Grave Warden x 2. Rest at the Upper Earthen Peak bonfire.
Doors of Pharros
Souls: approximately 10,245
Start from the Gyrm’s Respite bonfire. Equip the Covetous Silver Serpent Ring+1, Warlock Mask, and Jester’s Gloves. A Raw Greatsword+7 is recommended. Defeat a nearby Primal Knight. While you fight this enemy, a Gyrm Warrior would slowly walk down an inclined path towards you. Go up the inclined path to find a Gyrm kneeling in front of a wooden chest. Take the opportunity to backstab the Gyrm.
Backtrack to the bonfire and proceed through a narrow opening to find a Primal Knight and a Dog Rat. Wait for the Dog Rat to run towards you, dispatch of the enemy, and then fight the Primal Knight. You might want to equip the Ash Knuckle Ring because a Dog Rat can build up your petrify metre. Locate a Pharros contraption on the floor in the water. You should have inserted a Pharros’ Lockstone into that contraption to reveal a small opening, behind which is a Primal Knight. The enemy can’t reach you through the small opening. Use the opportunity to cheese the Primal Knight. Proceed along the right wall to find a room where Dog Rat x 2 are waiting to charge at you.
Climb a stone ladder and make your way along a path, fighting Gyrm x 3 along the way. Go through an entrance to find Gyrm Warrior x 3 on elevated platforms. You will find three Pharros contraptions side by side. You should have inserted a Pharros’ Lockstone into the middle contraption to reveal a small opening. The Primal Knight inside won’t be able to reach you through the small opening. Cheese the Primal Knight as per above. Rest at the Ordeal’s End bonfire if you want.
Make your way to Brightstone Cove Tseldora. A Gyrm Warrior who wields two great axes is blocking your path. Bait him into throwing both weapons at you, then fight him. Push forward to find a Gyrm kneeling in front of a sconce and take the opportunity to backstab this enemy. A Gyrm Warrior is waiting near the exit of Doors of Pharros. Rest at the Royal Army Campsite bonfire.
Iron Keep
Souls: approximately 53,328
Start from the Threshold Bridge bonfire. Equip the Covetous Silver Serpent Ring+1, Jester’s Gloves, and Raw Greatsword+6. Equip the Warlock Mask if you have it. Defeat the Alonne Knight on the bridge. Stand near the opened iron doors, facing the first fire-breathing bull head. Move your character slightly inside the building to lure an Alonne Knight at the top-right corner to approach you and fight him outside the building. Go inside the building, turn right, and ascend a flight of stairs to defeat Alonne Knight x 2. Find two illusory walls. An Alonne Knight is standing behind the second illusory wall. Descend a staircase and you should see an Alonne Knight running towards you.
Enter the area containing a lava pool. Stick to the left path and Alonne Knight x 3 should run towards you. Defeat these three enemies. Cross the draw bridge to find an Alonne Knight shooting great arrows. The draw bridge is lowered by pulling two levers. A further Alonne Knight x 4 would run towards you. Run to the other side of the bridge to find Alonne Knight Captain x 2, one to your left and one to your right. Backstab each enemy one at a time. Backtrack to the middle of the bridge, locate an Alonne Knight hiding underneath a ledge, and use a bow and arrows to lure this enemy towards you. Drop down from the bridge, and onto the iron staircase, to fight the enemy. Drop down onto the platform where the Alonne Knight was hiding, open an iron door, and climb an iron ladder to find an Alonne Knight Captain standing in front of another iron ladder. Climb the second iron ladder and drop down onto a platform where another Alonne Knight Captain is standing. Perform a plunging attack if possible. Backtrack through the draw bridge and rest at the Ironhearth Hall bonfire.
Ahead is an Alonne Knight and to your right is a passage leading to a bridge where Alonne Knight x 2 and an Ironclad Soldier stand. Use a bow and arrows to lure one Alonne Knight at a time to your location. As you approach the Ironclad Soldier, he would start pummeling a segment of the bridge. After a few hits, the segment would break and you must jump over the opening to reach the other side of the bridge. However, if you’re quick enough you can get in one hit and draw the attention of the Ironclad Soldier towards you.
Cross the bridge. Ahead is a lever and to your left is an iron door. Wait behind the lever for an Alonne Knight to drop down and fight you. Go up the staircase and wait for an Ironclad Soldier to run towards you. Use a bow and arrows to bait each of the remaining enemies to your location near the staircase. Make your way through the maze-like paths and proceed along a narrow hallway to find a descending flight of stairs. An Alonne Knight would drop down and run at you. Above you is another Alonne Knight standing on a narrow iron beam. Defeat the first enemy, then use a ranged weapon to lure the second down. Descend the staircase and enter a narrow path to find an Ironclad Soldier. A second Ironclad Soldier is hiding behind a corner, trying to ambush you. A third Ironclad Soldier is found further ahead along the path.
Backtrack through the narrow passageway and the staircase and locate an Alonne Knight Captain standing on a platform below. Use a bow and arrows to cheese this enemy. Pull the lever found near the iron door and you should find an Alonne Knight shooting great arrows. Open the iron door and make your way to Belfry Sol, where you should defeat all Bell Keepers. Backtrack to the iron door near the lever. Go along the platform, climb an iron ladder, then climb another iron ladder. Ascend a flight of stairs and you should see Alonne Knight Captain x 3. Use a Homeward Bone to return to the Ironhearth Hall bonfire.
Brightstone Cove Tseldora
Souls: approximately 31,807
Start from the Royal Army Campsite bonfire. Equip the Warlock Mask, Jester’s Gloves, Covetous Silver Serpent Ring+2, and the Raw Greatsword+8. You should be able to one-hand the Greatsword. Use a bow and arrows to snipe the Falconer x 2 on raised platforms, otherwise they would shoot arrows at you while you fight the other enemies. An Undead Peasant can be found digging at a nearby field. Use a bow and arrows to lure a Falconer to your location, where you can easily engage in one-on-one combat. One Falconer is hiding inside a tent near the bonfire. You should find Enslaved Pig x 2 wandering around near the well. A third Enslaved Pig can be found underground, accessible by dropping down the well.
Go along a path to find a bunch of Undead Peasants, some of whom are standing near two boulders, waiting to ambush you. Use a bow and arrows to shoot the barricades that are holding back the boulders, thus preempting the ambush. Climb a wooden ladder and defeat any surviving Undead Peasants. Descend the ladder to find two groups of Undead Peasants nearby. Faced with a group of Undead Peasants, you might find the one-handed R1 of the Greatsword to be effective at crowd control.
Enter a building to find a cave where Parasite Spider x 3 lie in wait. The cave further ahead has many more Parasite Spiders. You don’t need to hold the torch in the left hand to repel the spiders. The one-handed R1 of the Greatsword is effective at targeting multiple spiders. Make your way past the arena where you fought Prowling Magus and the Congregation. Rest at the Chapel Threshold bonfire.
Descend the nearby flight of stairs and defeat Parasite Spider x 2. The adjacent room has a bunch of Parasite Spiders clinging to the ceiling, waiting to drop down and ambush you. Enter the room to trigger the spiders to drop down, then backtrack through the door. The narrow door should funnel the spiders. A Hollow Mage is standing on the edge of a platform. Use a bow and arrows to snipe Hollow Mage x 2 below and Parasite Spider x 2. Backtrack up the staircase and drop down on to the other side. Or use the zip line to reach the other side.
Enter the room where Creighton and Pate were fighting. Go outside to the balcony, where you can safely use a bow and arrows to snipe a bunch of Parasite Spiders. A Parasitized Undead is sitting on a ledge, in front of a Parasite Spider hanging on a wall. Drop down onto a platform and enter a room where you can find Parasitized Undead x 2 and a Parasite Spider. Go outside and drop down to the sand floor. Be wary of Sand Basilisks hiding underneath the sand. A Parasitized Undead is found near a wooden cart. Explore the surrounding buildings and defeat the various groups of Parasite Spiders and Parasitized Undeads. Hollow Mage x 2 are hiding above the Lower Brightstone Cove bonfire.
Proceed to the wooden bridge that leads to the building above Freja’s arena. Use a bow and arrows to lure the Undead Peasant x 4 to you. Enter the building and trigger the various Parasite Spiders to drop down. You might have to use a bow and arrows to snipe some spiders that refuse to drop down. Find a Parasitized Undead standing in front of a wooden ladder. Light the torch, climb the ladder, and drop down to the area in front of Freja’s arena. The torch should repel the spiders as you make your way to the floor. Note that the torch doesn’t repel the Undead Peasant x 3 located on the floor. Use a Homeward Bone to return to the last bonfire where you rested.
Drangleic Castle
Souls: approximately 60,077
Start from the Ruined Fork Road bonfire. Have some Poison Moss ready. Equip the Raw Greatsword+10, Covetous Silver Serpent Ring+1, Warlock Mask, and Jester’s Gloves. Proceed to the Shrine of Winter, defeating Falconer x 4 and various other enemies along the way. You might want to one-hand the Greatsword and R1 to deal with each apparition-like enemy. From the Shrine of Winter, push forward to the entrance of Drangleic Castle. The Primal Knight x 2 on the staircase before the entrance can be difficult to handle because they would gank you. Get in one hit and back away. Rinse and repeat. Defeat the Royal Swordsman x 2 in front of the entrance. Slowly approach one of the statues to see whether it would transform into a Royal Guard. There should be Royal Guard x 3. Enter the castle and find the same statues scattered in a hallway. Four of these statues would transform into Royal Guards, one of which is blocking the door to the King’s Gate bonfire. Open the door and enter the room to find a Royal Swordsman disguised as a statue. Descend the iron ladder and rest at the King’s Gate bonfire.
Equip the Tower Shield. Enter the room repleted with Stone Soldiers. Use the one-handed R1 of the Greatsword to dispatch of one Stone Soldier at a time. Beware: one or more Ruin Sentinels would run out of their rooms to fight you. Try to lure only one Ruin Sentinel out of their room and into a different, but larger room to fight. Use the Tower Shield to block and strafe behind, then get in one hit. Make your way to the Central Castle Drangleic bonfire. Along the way, you would find numerous statues of Royal Swordsman and Royal Guard, some of which are actual enemies in disguise. You must get past a room filled with poison traps. Consume a Poison Moss if necessary. Rest at the Central Castle Drangleic bonfire.
Climb a steep iron ladder to reach a room filled with statues of Stone Soldiers. Get close to the door to trigger a Wall Warrior to appear. The adjacent room has Manikin x 2 clinging to the ceiling. Use the doorway to funnel these enemies. The adjacent large hall contains various Old Knights. One Old Knight can be found standing at the top of a staircase. Use a bow and arrows to lure the enemy down. Use the Tower Shield to block attacks, strafe behind the knight, and get in one hit. Two other Old Knights can be found on the top floor. Lure them to the entrance connecting the room where the Manikin x 2 were found. The Old Knights are too large to get through the entrance, giving you an opportunity to cheese the enemies. Two-hand the Greatsword, get in one hit, and back away. Exit the large hall to find an Alonne Knight Captain and a Gargoyle standing on the rooftop of a building. Use a bow and arrows to cheese the Alonne Knight Captain. Climb a ladder to reach the rooftop, where you can fight the Gargoyle. Use the Tower Shield to block attacks, strafe behind the Gargoyle, and get in one hit. Enter a room underneath to find Desert Sorceress x 2. Use a bow and arrows to cheese each enemy. A Wall Warrior is found near the entrance door. Exit the other door to find the Central Castle Drangleic bonfire. Push ahead to the area in front of the arena of Looking Glass Knight. Approach the boss arena to trigger Stone Knight x 4 to wake up and attack you.
Undead Crypt
Souls: approximately 34,717
You should have broken all tombstones in this area to prevent the Leydia Pyromancers from spawning. Otherwise the area can be a nightmare to farm for souls. All sconces in the area should also be lit to help improve the visibility of the area.
Start from the Undead Crypt Entrance bonfire. Equip the Raw Greatsword+10, Covetous Silver Serpent Ring+1, Nahr Alma Hood, Nahr Alma Robes, Jester’s Gloves, and Tseldora Trousers. If you want, equip the Watchdragon Parma to increase your item discovery. Ascend the staircase to find Royal Guard x 2, each blocking an archway. Behind them is a Torch Hollow and an Imperious Knight. The Imperious Knight is almost impervious while he is blocking with his double great shields. R1 him a few times to make him hostile towards you, then bait an attack and go in for one hit. The room ahead has Leydia Witch x 2 and Undead Laborer x 5. One-hand the Greatsword and run to the back of the room to R1 the furthermost Leydia Witch. The other Leydia Witch would spam magic at you. Use a pillar to block the magic and stand near the pillar to wait for the Undead Laborers to approach you. Then defeat the remaining Leydia Witch. Run past the room where Agdayne is located, exit the room, and drop down to find Undead Laborer x 2. Climb the iron ladder. As soon as a Wall Warrior appears, slide down the ladder a bit and then quickly climb to the top of the ladder to defeat an Undead Laborer. Drop down and use a bow and arrows to snipe the Wall Warrior. Rest at the Undead Ditch bonfire.
Exit the room containing the bonfire and locate an iron ladder at the right corner. Climb the ladder to find a Leydia Witch standing next to an iron chest. Drop down, go up a small flight of stairs, and enter a room to find Wall Warrior x 3. Go along a hallway to find another Wall Warrior x 3 and Imperious Knight x 2. Handle the Imperious Knights as discussed above. Use the narrow hallway to funnel the knights. Reach the end of the hallway and drop down to an area that was previously filled with intact tombstones. Make your way outside to the stairs in front of the Undead Ditch bonfire. Find a lever and drop down to find an Imperious Knight blocking with his shields and standing in front of an iron ladder. Climb the ladder, descend the other ladder, and you should be at the Undead Ditch bonfire again. Rest at the bonfire.
Push ahead to the area in front of the arena of Velstadt. You should have already defeated the Dragonrider who stood next to the Royal Guard x 2. Underneath the flight of stairs is a room where an Undead Laborer stands in front of a bell. Get rid of this enemy and stay inside the room, waiting for another Undead Laborer x 2 to approach you. Ring the bell to spawn Leydia Pyromancer x 4. Use a bow and arrows to lure one Leydia Pyromancer at a time to your location where you can engage in one-to-one combat. Finally, defeat the Royal Guard x 2 at the far end of the room. Run back to the Undead Ditch bonfire.
Aldia’s Keep
Souls: approximately 34,742
Start from the Foregarden bonfire. Two-hand the Raw Greatsword+10 and equip these: Covetous Silver Serpent Ring+1, Nahr Alma Hood, Nahr Alma Robes, Jester’s Gloves, and Tseldora Trousers. Equip the Watchdragon Parma in the left hand to raise your item discovery. Leave the Kobolds alone because their attacks can build up your petrify metre. If you insist on fighting them, at least equip the Ash Knuckle Ring to boost your petrify resistance. You should have lit all sconces, opened one locked door within Aldia’s mansion, and pulled the lever within a locked room.
Go up the stairs, enter Aldia’s mansion, and be greeted by a Basilisk near the entrance. Head on up to level one where you should find a bunch of mirrors on the wall. Approach one mirror. Wait and see whether a Looking Glass Phantom would spawn and break out of the mirror. In case a Looking Glass Phantom does spawn, position your character to the side of the mirror, wait for the phantom to break out of the mirror, stand behind the phantom, and R1. Go up to level two to find a Giant Basilisk. Enter the room that contains a statue of an iron dragon and pull the lever to open a door to the back portion of Aldia’s mansion.
If you have pulled a lever found inside a locked room, you should see an Ogre nearby along the hallway. Use a bow and Poison Arrows to poison the Ogre and/or bait the Ogre to sit down so you can get in one hit. Attack the various paintings hung on the wall to reveal Dragon Acolytes. Further along the hallway you would find a Basilisk and another Ogre. Stick to the left wall and open the first door you encounter. The room inside contains the Ritual Site bonfire. Don’t rest at the bonfire. Instead, descend the staircase to find Hunting Dog x 2 standing in a pool of corrosive liquid. Use a bow and arrows to lure one Dog at a time out of the pool. Exit the room, continue along the left wall of the hallway, and enter the large hole in the wall to find a lone Dragon Acolyte. At the end of the hallway is another Ogre. Enter the room that was previously locked to find Prowling Magus, Dragon Acolyte x 3, and a Belfry Gargoyle. First, lure each Dragon Acolyte outside the room, using the doorway to funnel the enemies. There is a fourth Dragon Acolyte who refuses to be lured outside the room. Next, run inside the room, get one hit on Prowling Magus, and run outside. Rinse and repeat. Finally, lure the Gargoyle to the doorway, where it can’t fit, and cheese the Gargoyle. Rest at the Ritual Site bonfire.
Dragon Shrine
Souls: approximately 80,616
Start from the Shrine Entrance bonfire. Two-hand the Raw Greatsword+10 and equip these: Covetous Silver Serpent Ring+1, Nahr Alma Hood, Nahr Alma Robes, Jester’s Gloves, and Tseldora Trousers. If you want, equip the Watchdragon Parma to increase your item discovery.
Go up the stairs to find a Drakekeeper and the first group of Dragon Knight x 2. Use a bow and Poison Arrows to poison the Drakekeeper. Once the Drakekeeper is poisoned, use Wood Arrows or Iron Arrows to chip the enemy’s HP. One backstab from the Raw Greatsword+10 should kill any of the passive Dragon Knights. All Dragon Knights from the group would be hostile towards you as soon as you attack a Dragon Knight. Use the one-handed R1 of the Greatsword to fight a hostile Dragon Knight. Whenever you’re overwhelmed by multiple Dragon Knights, sprint to the bridge that connects Dragon Shrine to Dragon Aerie. Ascend another staircase and use the above strategy to deal with the Drakekeeper and Dragon Knight x 2. Make your way through an archway and go up two flights of stairs to find Dragon Knight x 2. Drop off a ledge to find a Drakekeeper and another Dragon Knight x 2. Drop off another ledge to find a wooden chest and the summon sign of Bashful Ray. Here you would find a Drakekeeper and a Dragon Knight. Now summon Bashful Ray to help you distract the final horde of Dragon Knights before the arena of the Ancient Dragon. Use a bow and arrows to lure one Dragon Knight at a time to your location. If multiple enemies are running towards you, use the narrow hallway to help you funnel the enemies. Use the Aged Feather to warp back to the last bonfire at which you rested.
Giant Lord
Souls: approximately 263,154 at bonfire intensity 2, but increases with each bonfire intensity.
Fighting the Giant Lord is the best method for farming souls because:
- The boss arena is located right next to a bonfire, i.e. The Place Unbeknownst bonfire.
- The arena has a Bonfire Ascetic. This item respawns each time you burn a Bonfire Ascetic at The Place Unbeknownst bonfire. You don’t need to farm for Bonfire Ascetics at a separate location, e.g. at Aldia’s Keep or within one of the three Dark Chasms of Old.
- Burning a Bonfire Ascetic at The Place Unbeknownst bonfire would increase the amount of souls obtained after defeating the Giant Lord, but at the cost of raising the difficulty of the fight.
- The Giant Lord is relatively easy to cheese by using a ranged weapon such as magic or miracle projectiles. A raised platform is found right next to the boss. Use the platform to cheese the boss with magic or miracle. An alcove is located just before the giant stone head. Use the alcove as cover while you shoot Poison Arrows and other types of arrows at the boss. A few Poison Arrows are enough to poison the Giant Lord. You might need to equip the Hawk Ring and Durgo’s Hat to increase the range of your bow. A melee strategy is possible. For a quick kill, two-hand the Raw Red Iron Twinblade+10 and buff it with Dark Weapon.
Start from The Place Unbeknownst bonfire and burn a Bonfire Ascetic to respawn the Giant Lord. If the boss is still alive, you would not be able to burn a Bonfire Ascetic. Equip the Witchtree Branch+10 (or a catalyst that can cast hex) in the left hand, the Raw Red Iron Twinblade+10 in the right hand, and equip these: Covetous Silver Serpent Ring+1, Nahr Alma Hood, Nahr Alma Robes, Jester’s Gloves, and Tseldora Trousers. Enter the arena, grab a Bonfire Ascetic on the raised platform to your left, and wait for the giant stone head to start rolling. Buff the Red Iron Twinblade with Dark Weapon and two-hand the buffed weapon. Sprint to the Giant Lord, while avoiding the fire projectiles and enemies in the area. As you approach the boss, he would perform an overhead slash. Roll diagonally toward the boss and away from the attack. Get in a few hits on one leg, then move to the other leg. Being underneath the Giant Lord, your camera blocks most visual cues that indicate an incoming attack from the boss. You must rely on audio cues and the movement of the legs. Don’t linger by a leg for too long.
You obtain souls from defeating the boss, together with these items: Giant Lord Soul, Ring of Giants+2. Collect a Fire Seed from a corpse hanging on a ledge and a Divine Blessing from a corpse sitting in a corner. For extra souls, consume the Giant Lord Soul and sell the items you collected from the arena. Exit the arena and burn a Bonfire Ascetic to repeat the process. Note that from bonfire intensity 8 onward, the amount of souls you receive from defeating the Giant Lord doesn’t increase.