Table of Contents Show
Tips, tricks, and strategies for getting past the hardest part of Zero Sievert: the early game.
Getting Started
- The 6 starter gear choices are a matter of personal preference. #1 (Assault Rifle) and #3 (Sniper Rifle & Pistol) are good choices, but it’s really up to the player. They are JUST gear choices, not related to the player-character or future skill progression.
- The early game is a complete bastard. Expect to die a lot, but treat each death as a learning experience.
- There are 4 quest-givers at the base: the Barman, the Doctor, the Trainman, and the General. The General doesn’t become available until you complete a couple early quests. Make sure to visit each one and get all their quests. The Barman and Doctor both sell things, so check out their inventory. The General does not, but just to his left is another room to buy/sell military gear. The Trainman only has one mission, and unlocking it allows access to The Mall map area.
- Shop gear & money resets at 7:30am
- Sleeping is important. When setting the sleep slider, the top number is how many hours you are sleeping, and will turn green if it’s enough to get Stamina back up to nominal. The bottom number is what time of day the player will awaken.
- In the early game, water is critically lacking, with only ONE sure source: The Barman. Each day, make sure to buy everything drinkable and use the crafting station to turn the irradiated water into drinkable water. In the early game, this will BARELY be enough, so don’t miss each day’s buying opportunity.
- Decide what constitutes success for an away-mission, and leave when that is achieved. If you complete a couple missions or get some decent loot, it is probably best to head for the exit straightaway. It’s very disheartening to die 10 meters from the extraction point — with a completely full inventory — simply because you saw ONE LAST SHINY THING to loot, and didn’t notice the soldier in the trees just beyond. It happens. Don’t be greedy. Get what you came for and bug out. ESPECIALLY in the early game. (Reminded by one of the comments, thank you!)
Controls
The E, Q & C keys are unused by default. These keys are immediately adjacent to the ASDF movement keys, so important time-sensitive actions should probably be moved there. Thus, some easy rebinds to consider:
- Map: rebind to E
- Night Vision / Lights: rebind to Q
- Change Ammo Type: rebind to C
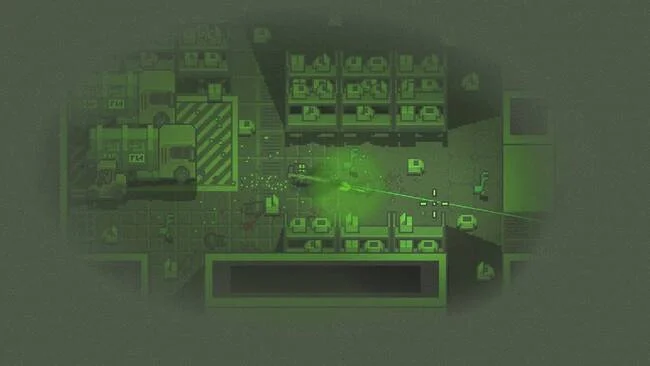
Note: I consider the ability to toggle Night Vision pretty important. When doing night missions, there will be a lot of external light sources like burning barrels, etc. These burn brightly in night vision and can obscure easy-to-see items (like bodies). It’s also nice to click them off and see what the world looks like to other people. Long night missions might go into morning, and you won’t be able to tell the difference with the NVG’s on. Turn them; off and realize, “Oh $hit, it’s morning, I’m not hidden at all!!!”
Combat
- Put laser sights on all assault weapons. Turn on with the L key at the beginning of a mission, and leave it on. Absolute game-changer for run & gun situations where there is no time to aim carefully.
- Ever run out of ammo with most of a wolf pack still chasing you? Instead of dying, RUN with the SHIFT key. You can run while reloading, too. Be sparing with how much you run on a mission. Not only will your stamina go down, you will go through food and water faster. Stamina appears to be ignored while in the base, you can run everywhere on that map.
- Learn how many enemies normally spawn in certain areas, and then make sure you get them all before looting. Most small camps have 2-3 enemies, so if you see less than that, look for bodies. If there are no bodies, someone is likely hiding nearby.
- After killing one bandit, the others will often run off into the woods, or around behind a structure. Circle around and look for them.
- Be patient and smart. If you just killed one bandit from below their position, circle around to another location and hit them from there. The AI is better than most games. They will look for you. They will move to new locations and hide. They will fire off exploratory shots where they think you might be or saw you last. Try to imagine what you would really do and do that; barging in from the same direction as before is a certain way to take a bullet to the face.
- Scout & control an area completely before looting. The bodies aren’t going anywhere, but anyone who heard or saw the firefight is gonna be looking for you. Secure the area first.
- Before starting a fight, especially with bandits at a camp or structure, scout the surrounding area. You should have an idea if there are any (1) obstructions, like water, (2) areas of cover, (3) high radiation areas, and (4) areas with hostiles. This way, if you have to run, you already know which ways to go and (more importantly) not go.
- Ammo types matter a lot. Soldiers and other armored enemies cannot easily be damaged with normal rounds. Make sure to bring a stack of ammo with a higher “Piercing” value. To change ammo hit Y to see a list of ammo types in inventory for the current weapon, use scroll wheel to choose the correct one, then hit Y again to reload with the new ammo type. If nothing happens, you probably selected the same type that is already loaded.
- In the current release of the game, factions like Green Army and Crimson Corp forget about your actions the moment you exfiltrate from the mission. You can shoot all the soldiers you want. They’ll fight back and hate you for the rest of that mission, but when you return home, any faction hostility is reset to its default friendly state.
Death & Progression
Early missions will result in a lot of deaths. A LOT of deaths. What happens when the player dies?
Lost
- All loot is lost
- All quest progress is lost
Retained
- (some) XP from combat is retained (about 25% is my guess)
- Any skills learned from skill books are retained. If you find a skill book while on a mission, USE IT IMMEDIATELY. There is no good reason to risk carrying it around.
- Skill upgrades gained while using skills like Stealth & Shooting are retained.
- XP levels determine what you can buy in stores. Higher level gear is unlocked, and new items may appear.
After death, the player will re-appear at the Trainman. Both time-of-day & player inventory will revert to what it was before the failed mission. The player can immediately leave on a mission again without re-equipping. All loot & quest progress from the mission will be lost but skills are retained. Thus, the player can die, and die, and DIE (this is a certainty) without losing existing inventory, progress toward the next XP level, or skill levels.
Tips for “The Forest” Starter Area
- The Forest is the only map needed for the first many hours of game-play. Get to know this map, what types of camps & structures that can be found, and how many enemies to expect at each type.
- After arriving, hit M to open the map, then find and mark the exit waypoints. Also, note where the main structures are located. The Forest has two that show up on the map: (1) the Sawmill, which shows up as a grey rectangle, and (2) the village, which should always be at the center of the map.
- Hit up any camp you find with Green Army or Crimson Corp soldiers. They often have loot boxes that specifically spawn weapons & attachments. Get expensive items like silencers for free. Remember they will be friendly unless you shoot first, and they don’t mind you looting anything you find in their camp.
- The Sawmill is very dangerous, with 5-8 armed enemies. Avoid it until more experienced. The main building also has 3 more enemies. However, there are plenty of looting opportunities here, once gear is leveled up a bit. Avoid in the early game.
- The village is a great place to raid, early game. It has two “areas”: the outer “ring” of houses, and the Police Station in the center. The area directly around the police station is dangerous. Lazar and his gang hang out there. However, the houses around the station can be looted without alerting the gang. Most of the houses have 1-3 ghouls hanging about, but shooting them never has attracted any attention from the gang in the middle. Most of the stuff needed for base upgrades can be found looting this area.
- Be aware that regardless of what is seen on the map, lots of unseen houses, forts, and other waypoints can be found all over the place. None will be marked, and some can spawn right next to each other. RNG changes each map, each time, so each run can be very, very different. Go slow, be stealthy, and sight out as far as possible while exploring. Right-click to zoom out even further (or scope, depending on gun setup).
Important Map Locations
I didn’t mean to write any guide material outside the bounds of The Forest map, but there are some really useful locations for the new player to be aware of. I’m not revealing any significant spoilers here, other than the existence (and sometimes purpose) of the locations.
The Forest
- Sawmill – Probably a death sentence for the new (read: barely equipped) player. There will be 5-6 guards outside, 3 inside the main building. There are multiple ways to assault this location, so be sure to scout around. The primary danger is a frontal assault, which can easily result in a firefight against multiple enemies, all shooting at you simultaneously. Not good. A very deathy situation to be in, and should be avoided until well armed.
- Police Station – Found at the center of the cluster of homes that spawns in the middle of the map. Lazar’s gang can be found here, guarding the outside of the Police Station.
- Igor’s House – Appears after a certain quest.
- Ghoul Cave – Appears after a certain quest. Lots of ghouls (which move very quickly) in very tight corridors. Be sure to bring extra meds for staunching bleed damage. If they even touch you, expect bleed damage.
Makeshift Camp
- Mr. Junk’s Sewer – The small entrance to Mr. Junk’s underground home is little more than a silo entrance with a ladder sticking out of it. It will appear in random locations, making it hard to find the first time. After completing the mission, Mr. Junk’s location will be marked on future maps with a little circle. Complete a quest for Mr. Junk and he becomes a highly useful vendor, selling large stacks of scrap metal, scrap ammo, scrap weapons, and a few random items like the Game Boy.
- Motel – The entrance to the Motel is blocked by cars and will likely have several ghouls nearby. Unblocking the entrance is done by way of completing quests for The Green Army general in the main base.
- Laboratory
Industrial Area
The industrial Area can be very dangerous. Lots of soldiers and mercenaries. Keep in mind that the Green Army and Crimson Corp soldiers are friendly to the player by default and there are plenty of both in this map. Being a little too itchy with your trigger finger might start an accidental fight, with many of them against one of you.
- Cargo Center
- Oil Refinery
- Crimson Corporation Camp – Pay 5000 credits to get in the camp. Do a couple missions for them and they will let you in for free. In the camp is a small building with a gun vendor. They sell some REALLY excellent guns. When you start to feel you are outgrowing the guns sold at the Green Army vendor, come here.
Note: If you’re really confident, here’s a solid way to acquire a lot of money and primo loot. Go to the Industrial Area and find a couple good fights to get in. Some of the interior buildings have lots of fights going on inside with 6-8 heavily armed enemies. Mop up everything, and take your haul to the Crimson trader on the same map. Sell. Repeat until they run out of money, then take a final load of gear back to the extraction point and finish the mission.
Swamp
- Sewer
- Abandoned Village
Loot Priority
The order of some of these items may change as you progress. In the early game, drinks are VERY hard to come by. Anything related to keeping alive should be top priority, with making money coming in second place.
- Skill Books (use immediately)
- Drinks
- Medical
- Food
- Quest items
- Weapons
- Crafting materials
After food & water is no longer a scare resource, bring double the food and drink necessary for away missions. I like to go out with at least 2 water sources, 2 stacks of sandwiches, a couple chocolate bars, and assorted other needs. It might seem like excessive weight to carry, but if a mission gets long, you’ll eat & drink it all to keep your indicators green. Note: There is a medical specialty that gives you bonus stats if you keep yourself well fed & hydrated.
Base Upgrades
Base upgrades are a three-stage process: (1) Use the J key and then click the building icon. Choose a location for the component you plan to build, and install it. (2) Craft the component at the workbench. (3) Open inventory, right-click (“Use”) the component. New base equipment should appear.
- Choose room locations wisely. If the player uninstalls a room, the installed component is destroyed and must be rebuilt using new materials.
- Early game suggestions: (1) Weight room (passively increase carry weight), (2) Shooting range (passively increase combat stats), (3) Bedroom (passively increase skills), (4) Ammo (allows ammo crafting), (5) Workshop (self repair weapon & armor).
- Some rooms, like the Ammo store, provide resources and can be interacted with. Others, like the Shooting Range, passively increase stats without requiring player interaction.
Skill Progression
Watch skill progression thru the J-key UI. When a skill gets fully maxed out, the player can choose a specialization. Highlights:
- Strength: The obvious choice is “Pack Mule” which will almost double your carry weight.
- Charisma: “Storage” causes shops to have more of the same inventory items: more water, more ammo, more meds, more everything. The same exact inventory options will appear, but there will be more of each item for sale. This will more than solve any ammo, food, or water shortages.
- Shooting: The “Sniper” specialization massively improves the scope’s ergonomics, stability, and speed.
- Medical: There is a great specialization that passively gives bonus health & stamina boosts for being fully fed & hydrated.
Early Gear Goals
The game changes a lot when after leveling up some skills & gear. Though there are lots of guns & specializations to choose from, here is a practical target to aim for:
- Important Specializations: Mule, Stealth, Sniper, Storage
- Weapon #1: F90 with silencer, scope, and laser sight (obtain from the Green Army vendor)
- Weapon #2: Carbon fiber Mozin with silencer & scope (obtain from The Old Man mission by killing the old man.)
- Armor: Police is a good starter, but move up to the grade-2 & 3 military armor ASAP
- Light source: Using a headlamp at night is as about as stealthy as firing a cannon. It will attract unwanted attention from hunters & other dangers. They will come and find you. Save up for NVG’s and avoid being out after dark until then. The Military grade-2 & 3 night vision goggles are a complete game changer.
With better weapons, armor and night vision, start going out on night missions. With the Stealth perk and silencers on all weapons, away missions will transform and become highly profitable. Take down enemies without them even being aware of your presence. In the dead of night, you become the hunter.
Imagine getting 500+XP and 30,000 roubles on an good run. My best “Forest run” so far is 575XP and 56,000 roubles, and it was done in complete darkness. You’ll want to bring double food & water for such missions, as they can start in the dead of night and still be going on after daybreak.