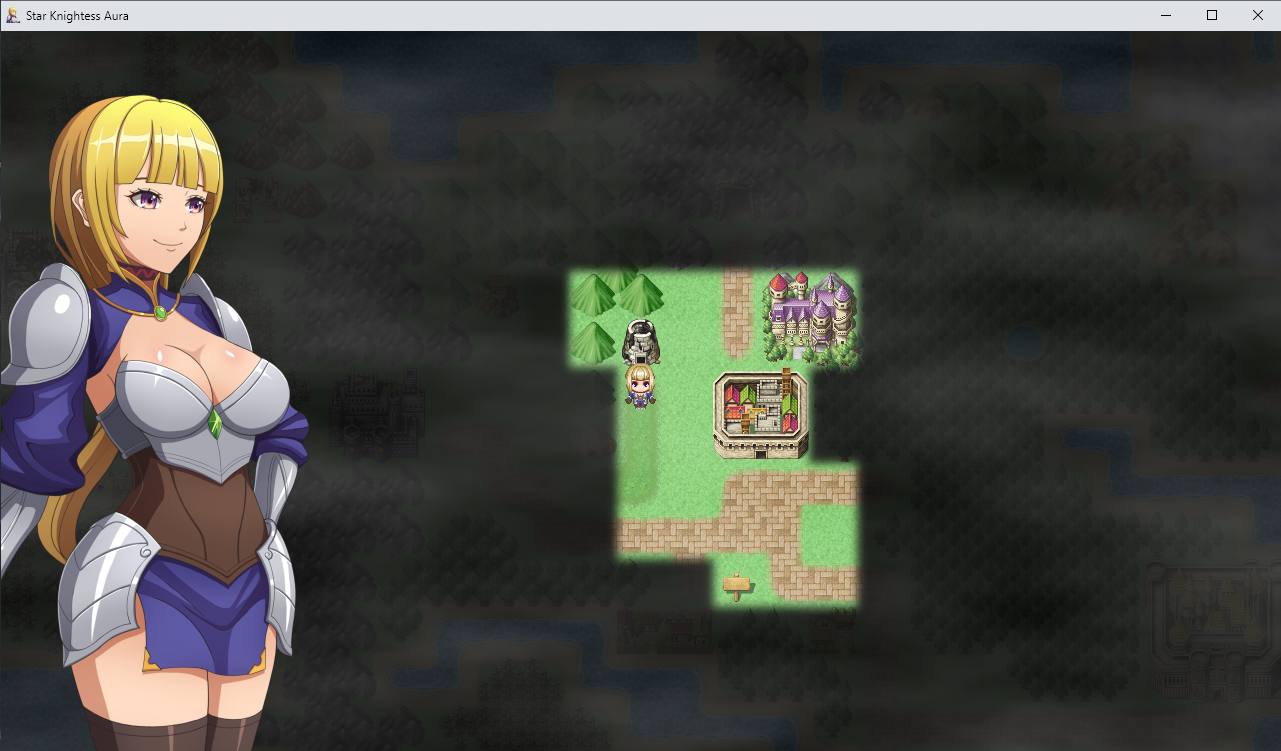
A beginner’s guide to Star Knightess Aura, covering controls, difficulty modes, key mechanics, and Day One in Roya.
Star Knightess Aura: Beginner’s Guide
Source: Bookman
This guide provides directions on where to go and what to do while minimizing story spoilers.
1) Options First
1a) Basic Controls
Note that you can change these to your liking under Options -> Controls, but these are the default keys:
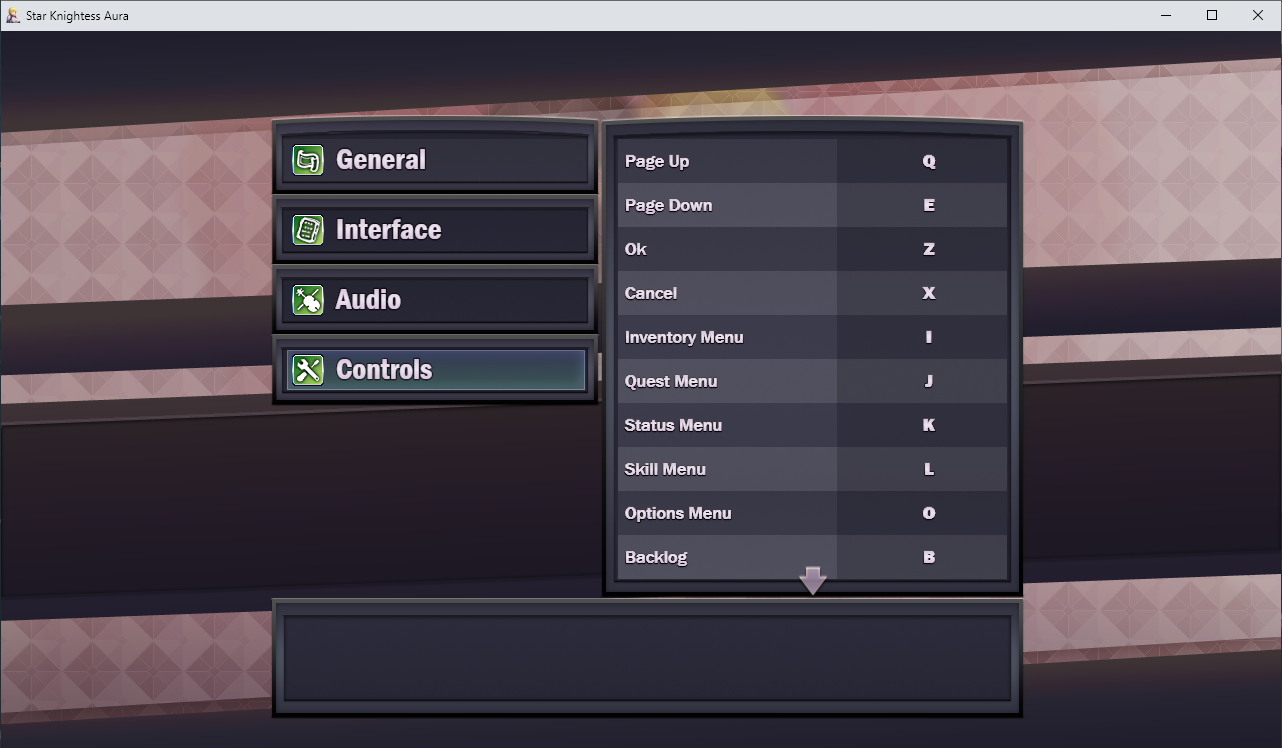
- WASD – Movement. The arrow keys also work.
- Z – Confirm, Continue dialogue.
- X – Cancel, speed up dialogue, Open the Menu (when not in combat or during dialogue).
- Q and E – PageUp and PageDown. You use these the most when moving to the next/previous page when saving or loading your game, but they also work if you ever amass a huge inventory.
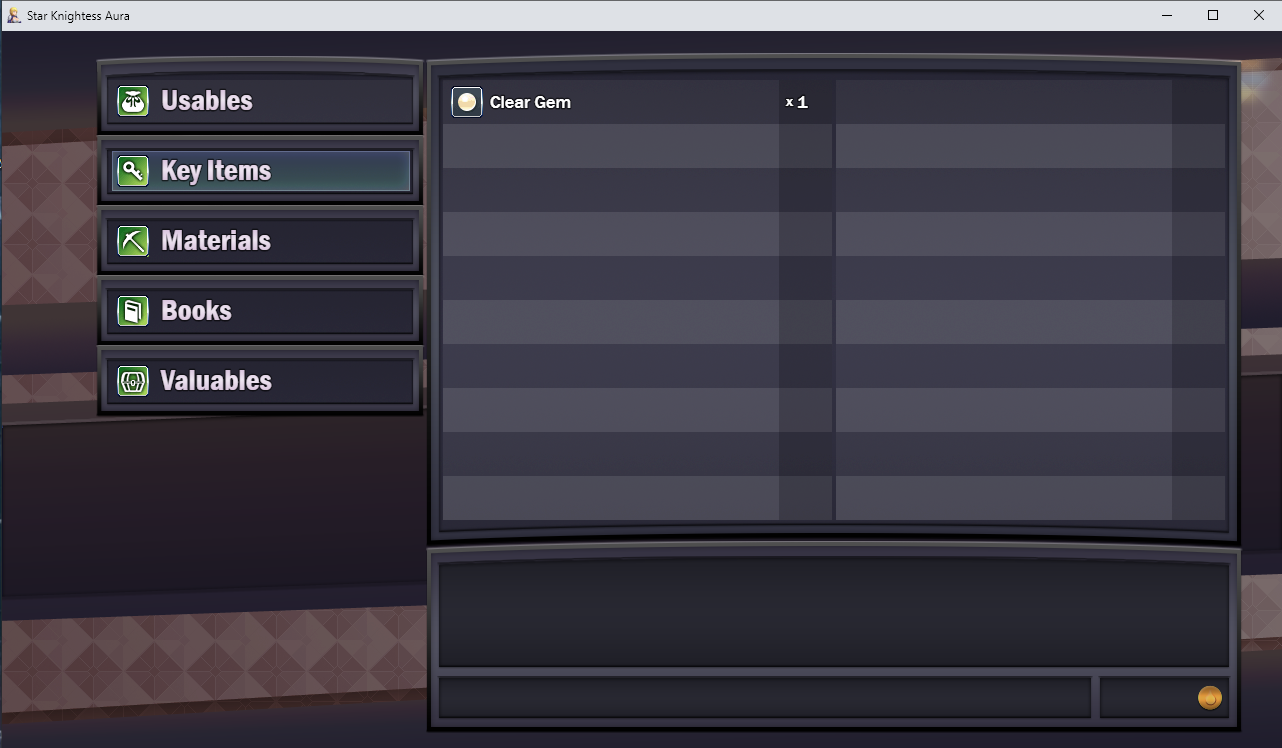
- I – Inventory Menu, split up into Usables, Key Items, Materials, Books and Valuables.
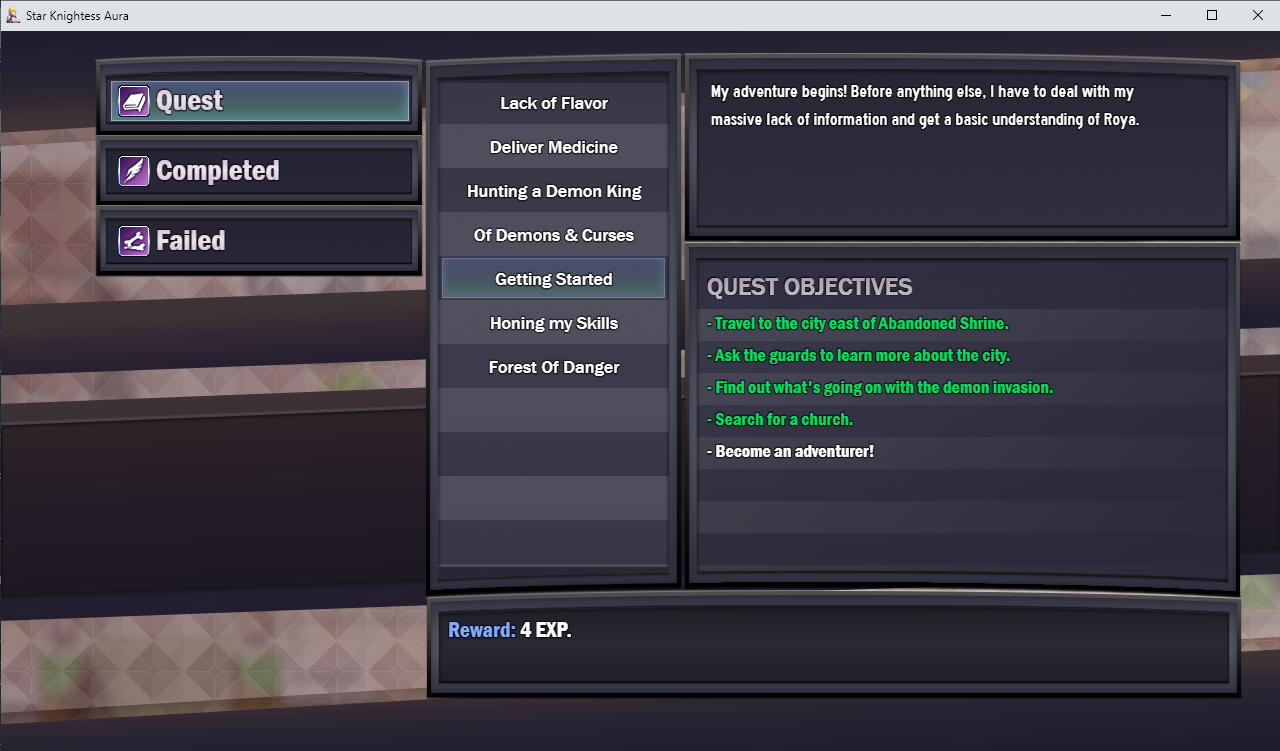
- J – Quest Menu, split up into (active) Quests, Completed quests and Failed quests.
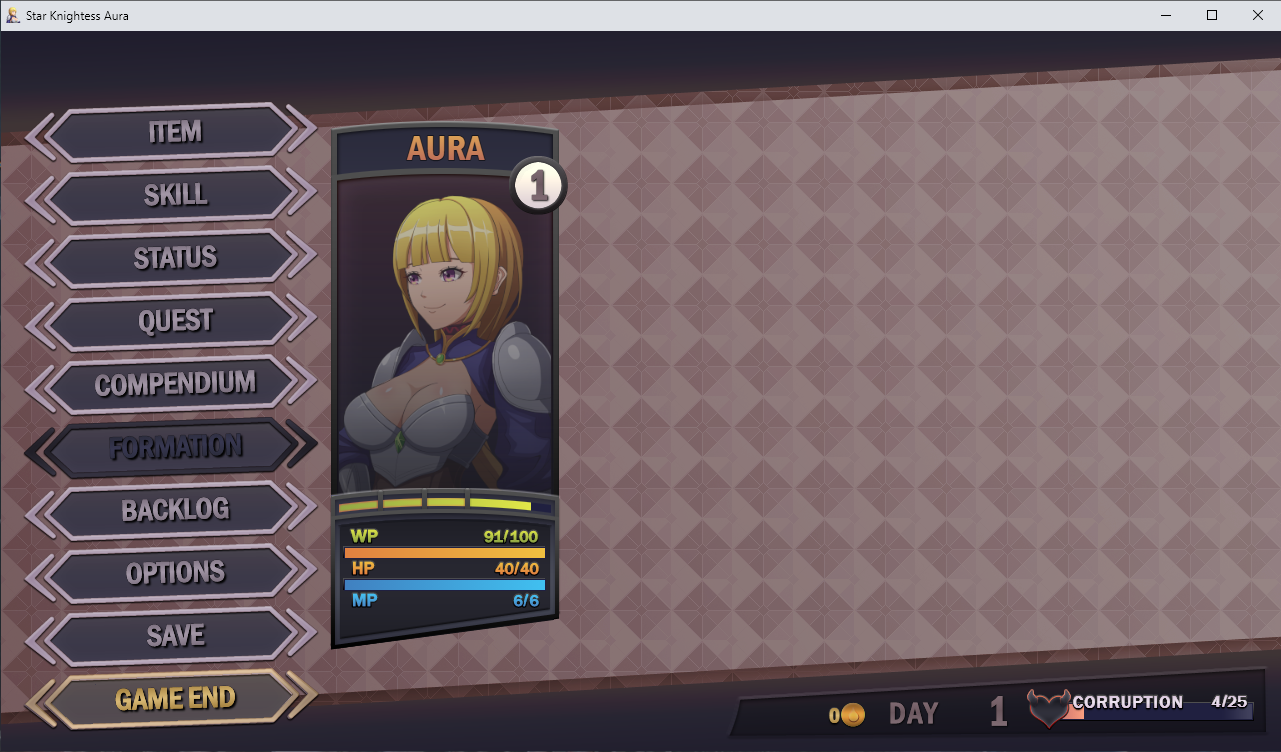
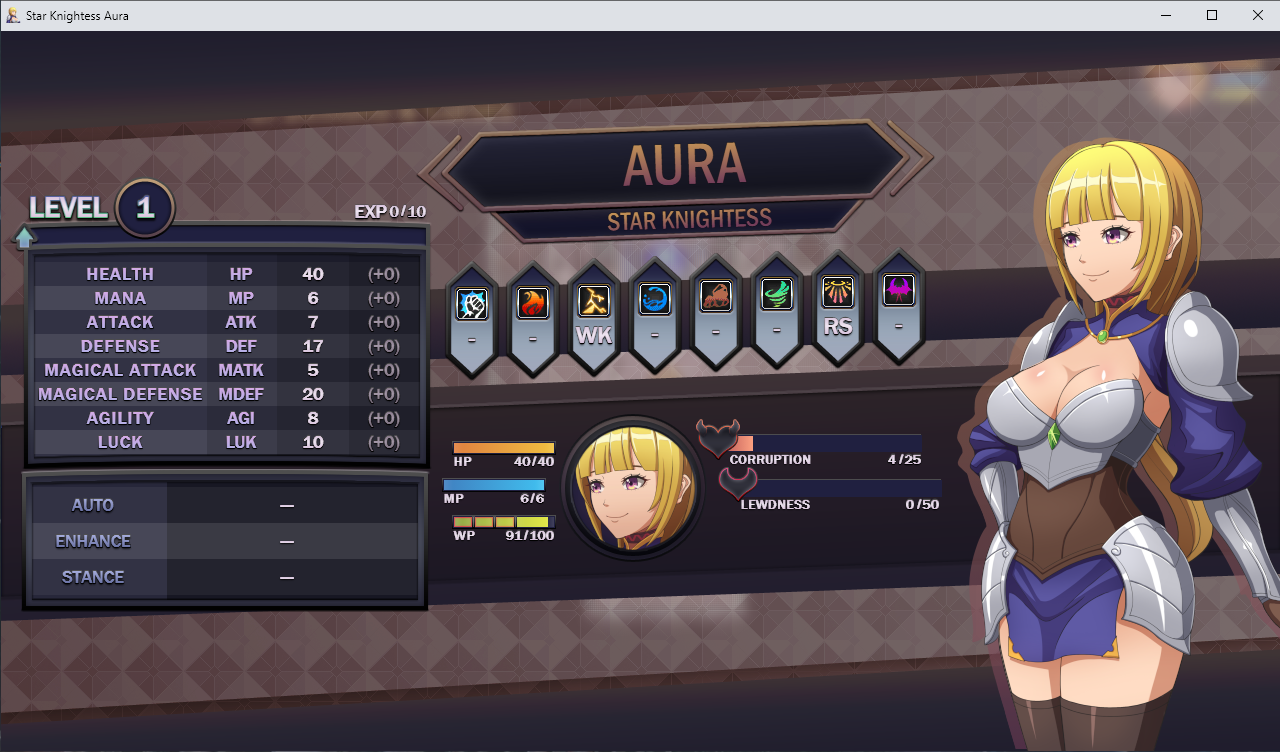
- K – Status Menu, showing Aura’s current stats, level and exp until next level, her elemental weaknesses and resistances, as well as whether she you’ve set an Auto Spell, an Enhance spell or a Stance skill for her.
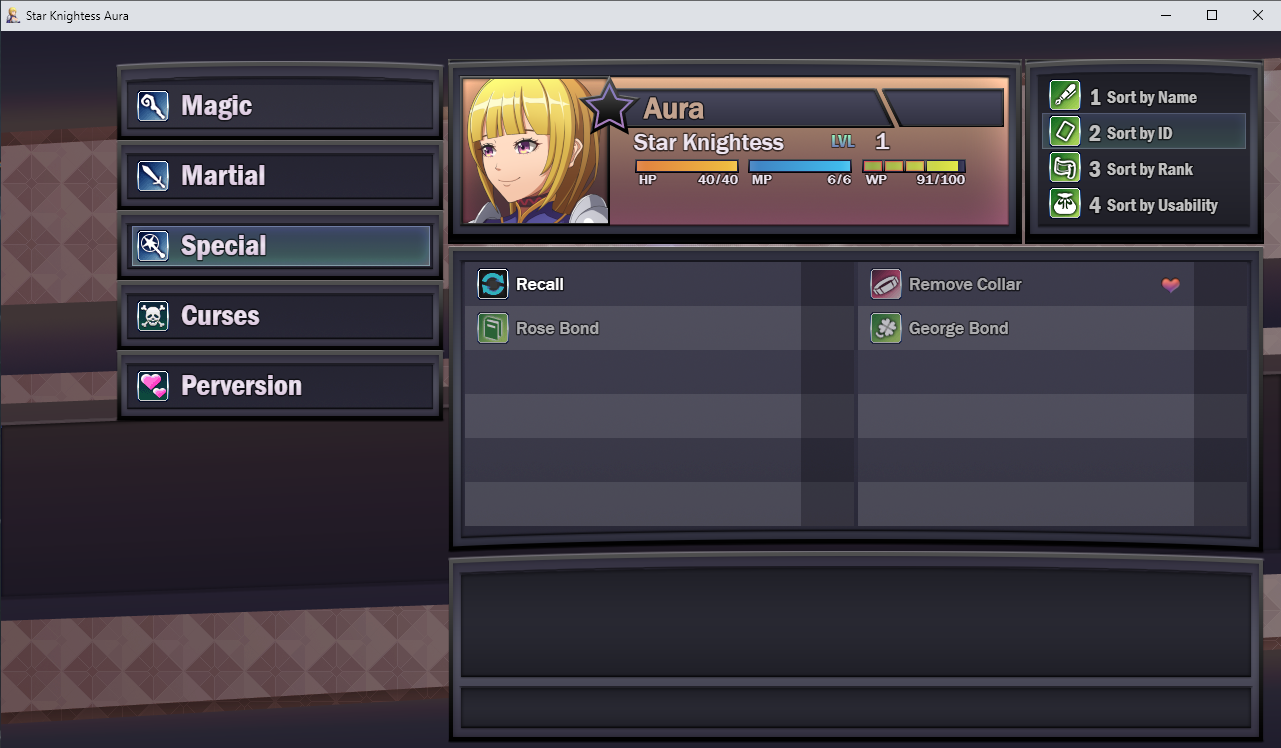
- L – Skills Menu, split up into Magic, Martial, Special, Curses and Perversion.
- O – Options, split up into General, Interface, Audio and Control.
- B – Backlog, which includes not just dialogue for what everyone said, but also combat messages and what loot you’ve picked up.
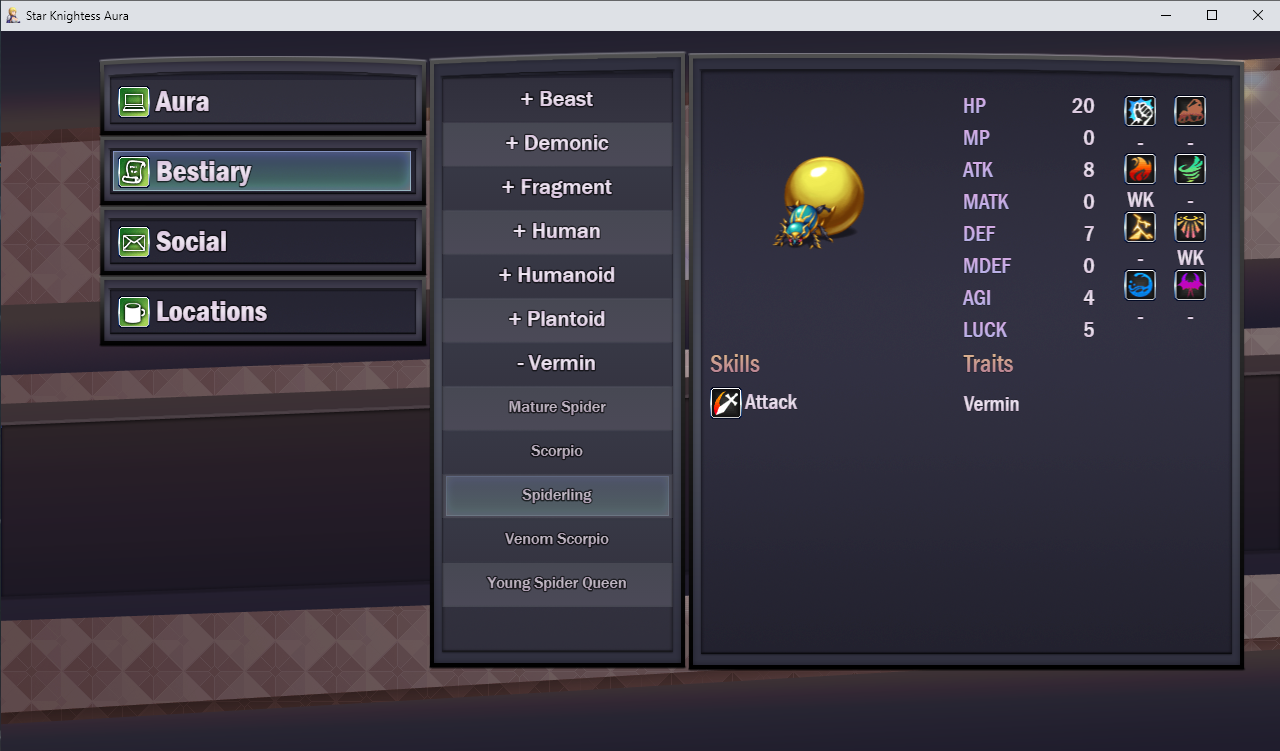
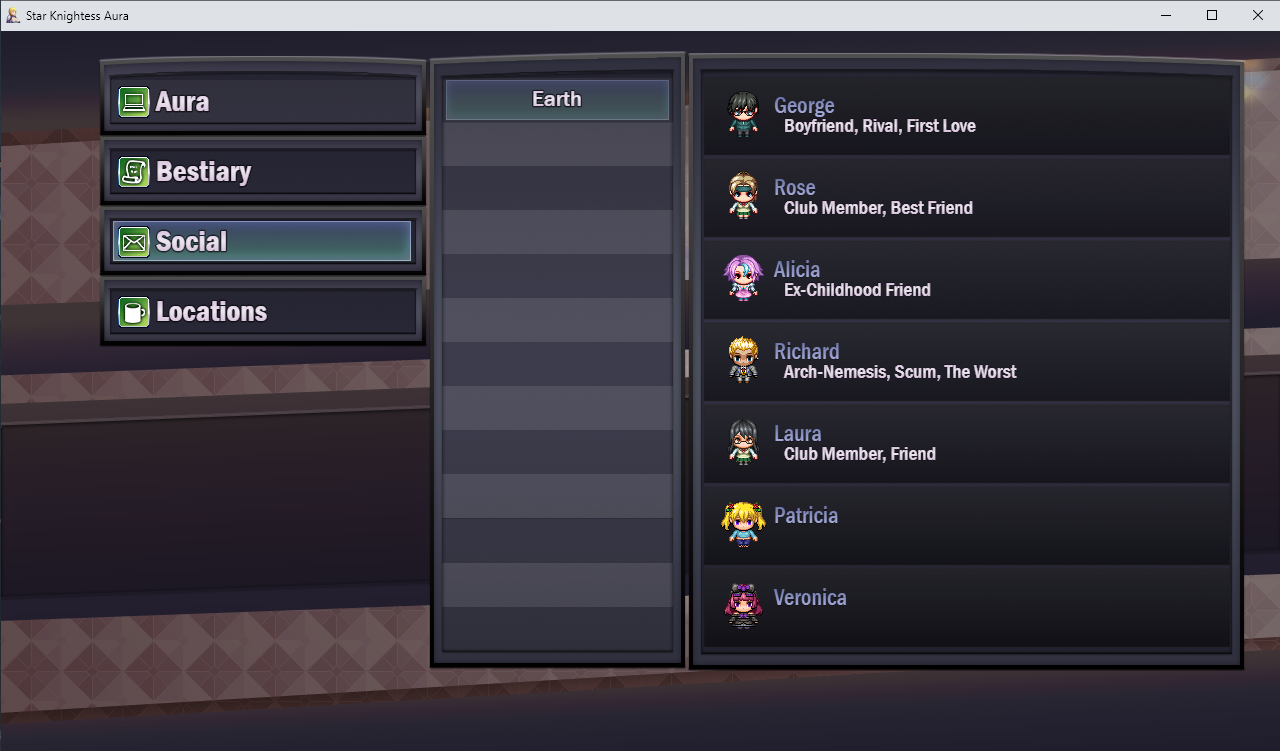
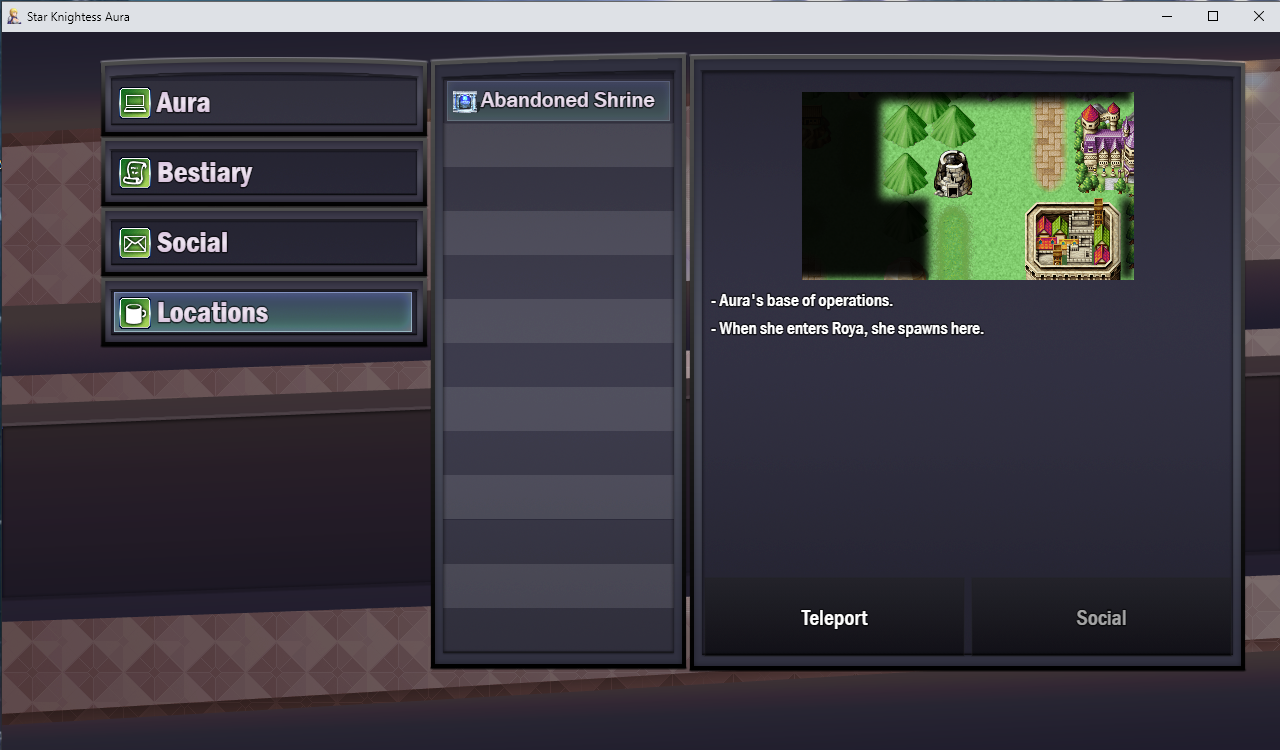
- C – Compendium, split up into Aura’s information, a Bestiary of all the enemies you encounter, Social info about the characters you’ve met, and Locations that you visited.

- H – Hide the dialogue box, revealing more of the character images. You’re welcome.
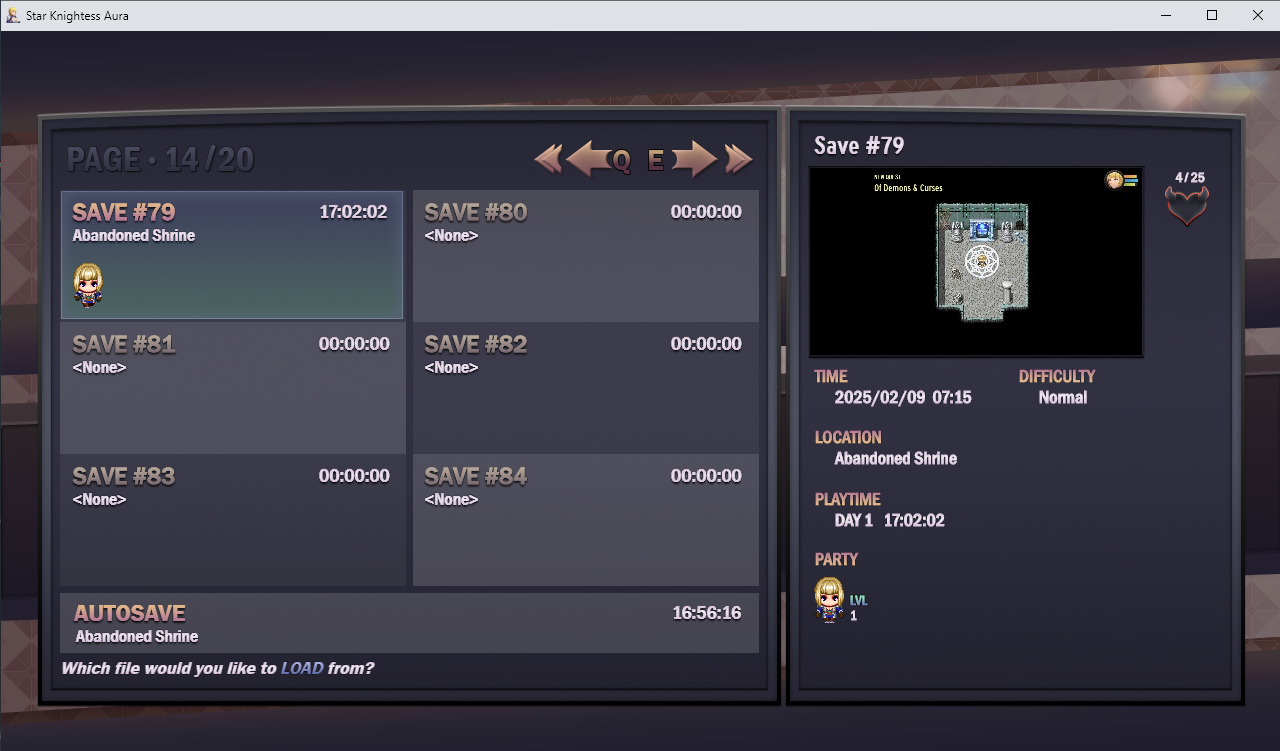
- F6 and F9 = Save Game and Load Game, respectively. These keys work even during cutscenes, so you can save the game at the end of a long cutscene before jumping into a hard battle, or right before making a choice if you want to try the different options and reload afterwards. Using these can save a lot of time in the long run.
1b) World Fog (found under Options -> General)
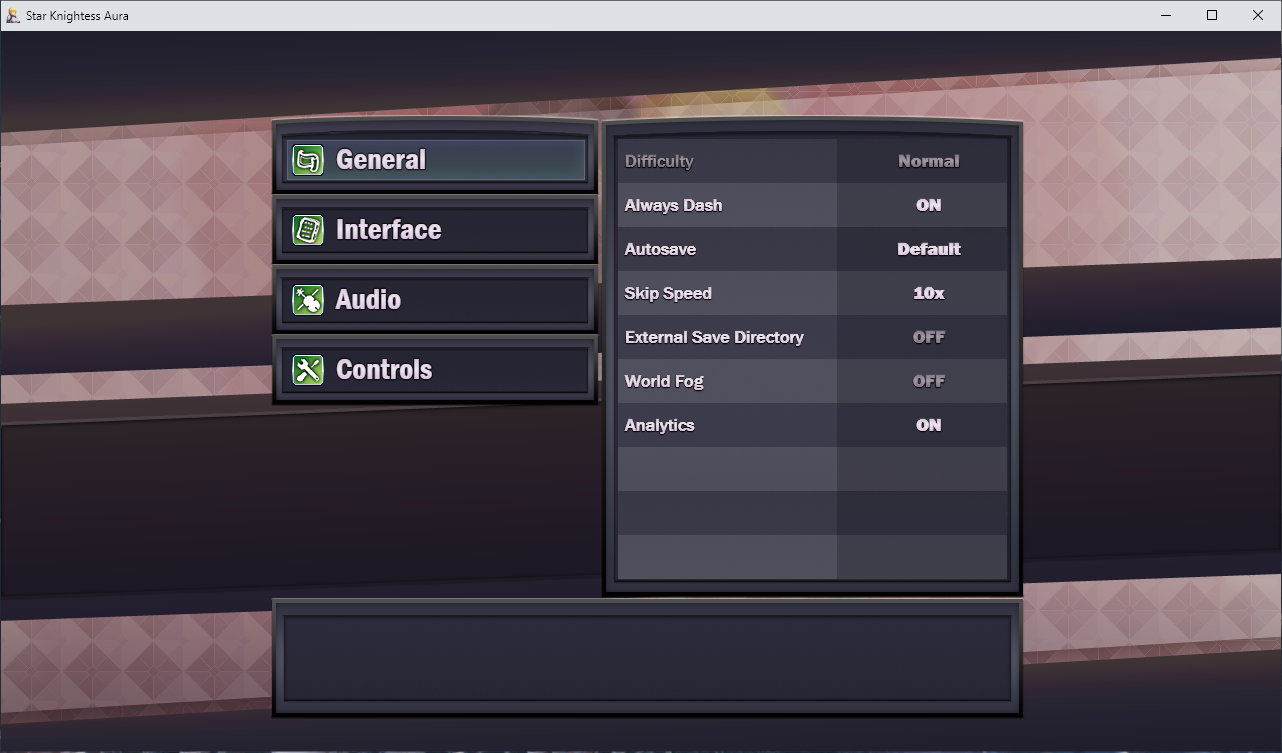
If this option is set to OFF, then you can view the entire world map and walk anywhere from the start, although you still can’t enter areas until you receive a quest that mentions them. If this is set to ON, then part of the map will be shrouded in fog, revealing only the areas you have already learned about. Whichever one you use is a matter of preference, but when ON the fog can be a helpful indicator that hints at new areas as soon as you’ve gained access to them.
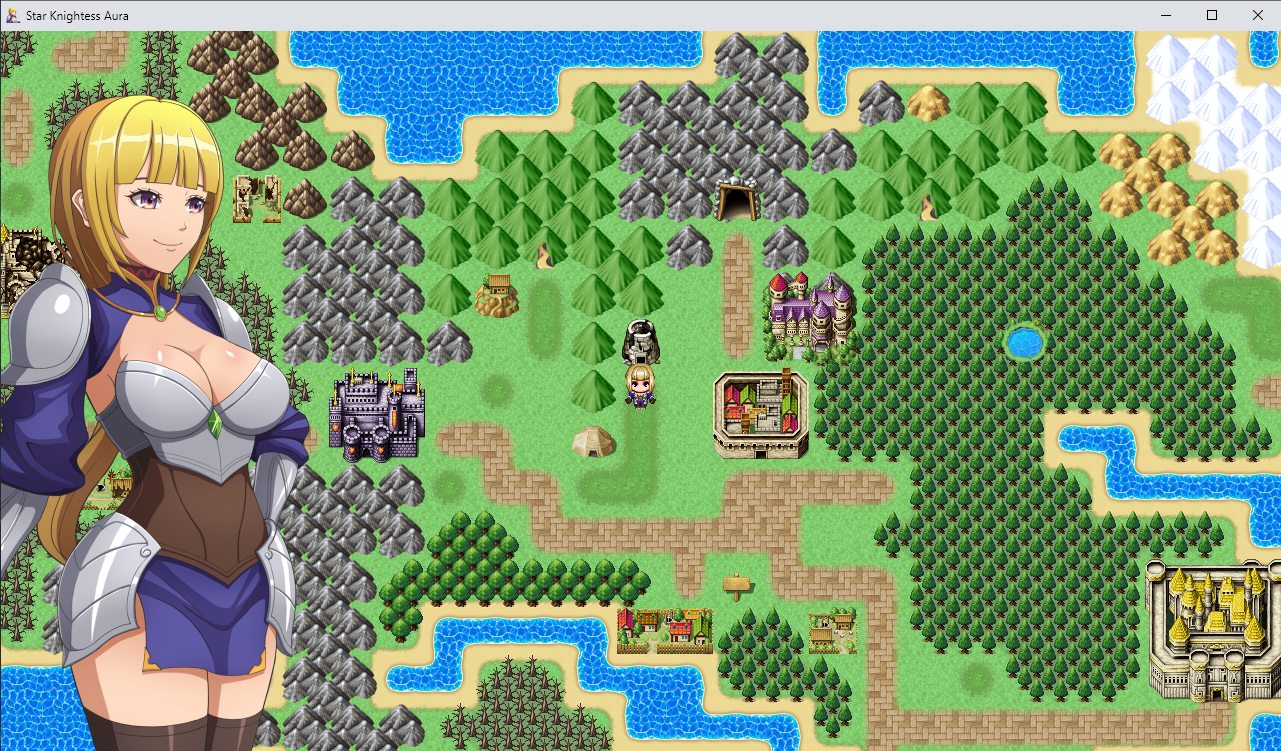
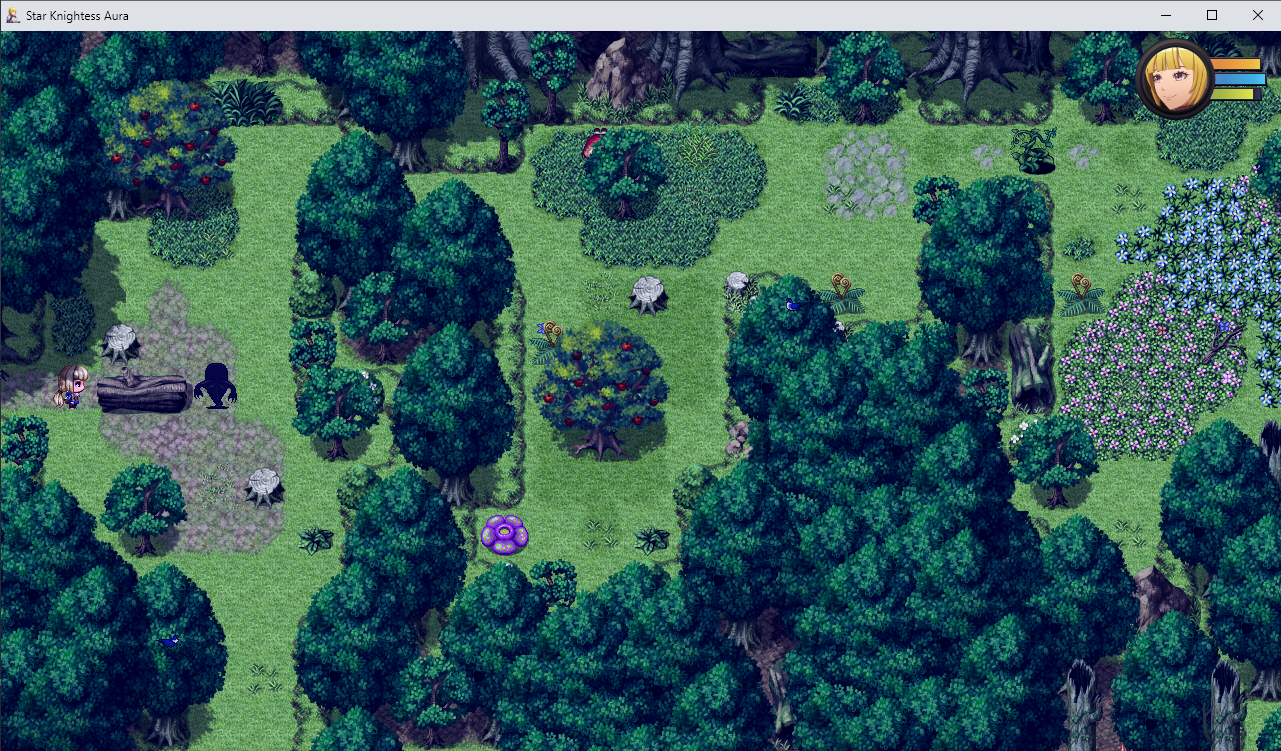
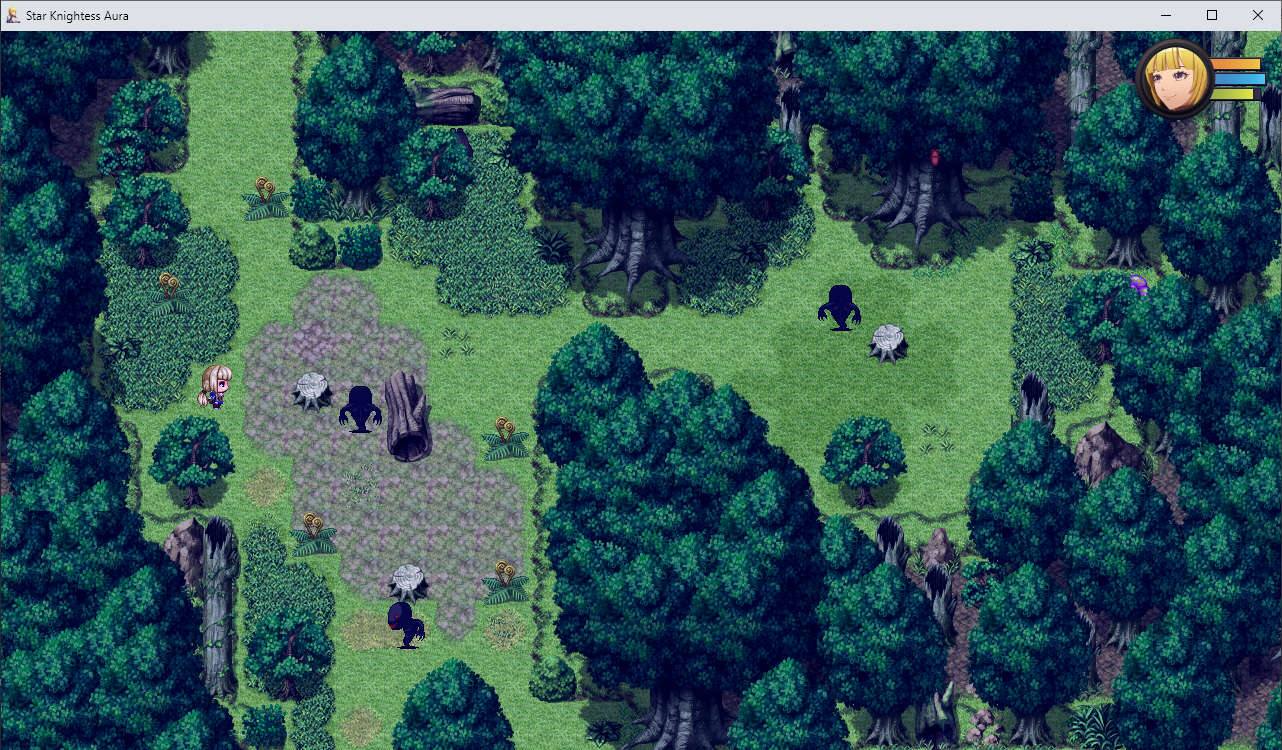
Map of Roya with World Fog turned OFF
Map of Roya with World Fog turned ON, upon first exiting the Abandoned Shrine.

Map of Roya with World Fog turned ON, upon accepting quests in Trademond that unlock new areas.
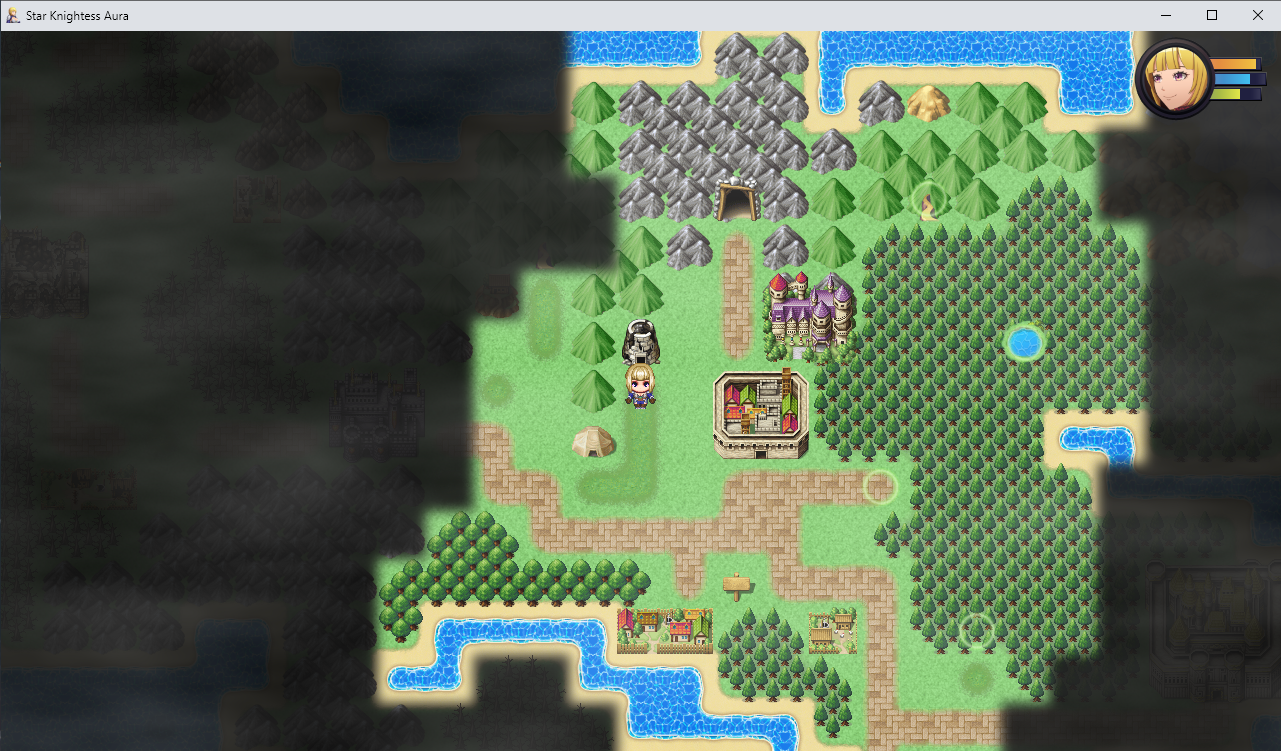
Map of Roya with World Fog turned ON, around the end of Chapter One content.
1c) Difficulty Modes
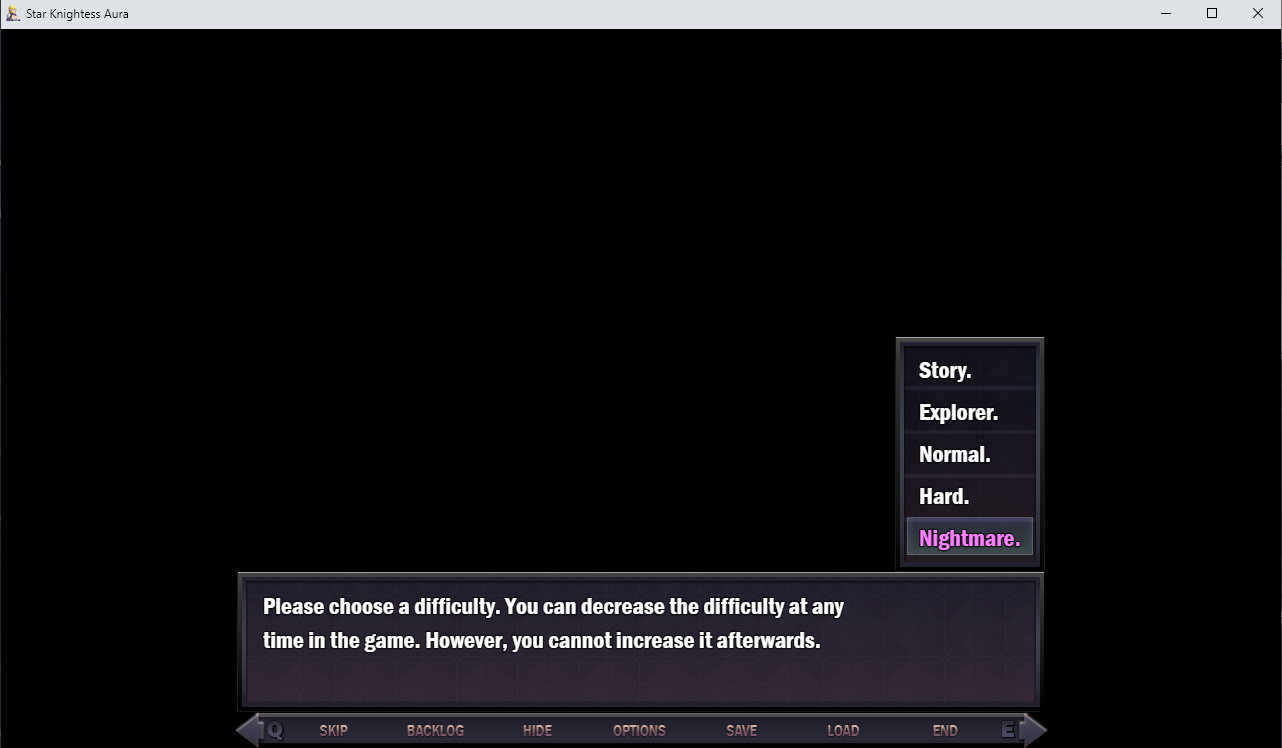
This game has five different Difficulty Modes, as well as New Game+ bonuses to encourage replayability. Going from easiest to hardest, they are called Story Mode, Explorer Mode, Normal Mode, Hard Mode and Nightmare Mode.
If you’re unsure what to pick, I’d recommend starting from Normal Mode and then changing it only if you find the game too easy or too difficult for your tastes.
- Story / Very Easy Mode (“I only want the story!”): Encounters reduced by 30-50%, Enemies Debuffed by 50%, Gold Drops x10, Purifying Effects x2, Workshops don’t end day, Soul-Break Bad End is disabled, Score Multiplier: 10%.
- Explorer / Easy Mode (“I want to play at my own pace!”): Encounters reduced by 30-50%, Gold Drops x2, Purifying Effects x2, Soul-Break Bad End is disabled, Score Multiplier: 20%.
- Normal Mode (“I want the normal experience!”): All values on default, Score Multiplier: 100%
- Hard Mode (“I want to be challenged!”): Curse Effects Doubled, Workshop Enhance prices x2, Score Multiplier: 150% (Victory), 110% (Defeat)
- Nightmare / Very Hard Mode (“I want to suffer and despair!”): Enemies buffed by 30%, Curse Effects Doubled, Workshop Enhance and Blessed Water prices x2, +2 Required Reading Progress, Score Multiplier: 200% (Victory), 120% (Defeat)
2) Important Mechanics (2a – 2c)
While most mechanics in the game get explained at some point, in case you miss them or need a refresher, here’s a few things that every SKA player should keep in mind.
2a) How Aura’s Curse works
During the Introduction, Aura challenges the Demon King and receives a Curse that seals her powers. This curse brings her down from level 99 all the way to level 1, it slowly produces corruption and strains her Willpower with every day that passed since the last time Aura commited a lewd act or used a purifying item (Blessed Water).
Aura starts the game with only the Womb of Lust curse, but during the course of the game she can receive other curses. When Aura’s Willpower weakens, she receives a Cursed I/II/III debuff that decreases six of her eight stats (HP and MP are unaffected), making weak enemies dangerous again and tough bosses unbeatable until that debuff is removed. But because Blessed Water is expensive and comes in limited supply, you need to use it sparingly.
This means that there will be days when Aura isn’t fit to fight, but you’re trying to wait before you actually purify her. Such days are a good time to go around collecting materials, upgrading her stats, or learning new spells and martial skills. Sometimes training takes up more than one day, because of this you want to plan ahead so that you don’t waste days when Aura’s willpower is high and you can progress through the various dungeons and their bosses. Once you get a feel for this, it becomes almost natural to plan out your days as focused on either combat or training and gathering.
2b) How Tactical Advantage works
Tactical Advantage is the first status effect introduced by the game, and arguably the most powerful of them all. It increases a character’s EVA by 50%, helping them dodge attacks and martials (but not spells), plus it guarantees that the character’s next attack or martial will be a critical hit, dealing triple damage.
To gain Tactical Advantage, you have to hit an enemy’s Weakness. That’s easy in principle, but since different enemies have different weaknesses, you have to learn each enemy’s weakness (either in combat or by researching them) and possess the right skill or item to strike that weakness. A tough enemy or boss can be brought down if you exploit their weakness and make good use of your Tactical Advantage. Some enemies can even change their weaknesses (like when a Slime changes its color) or gain temporary ones (enemies that use Rampage or Lunge become Exhausted afterward, gaining a weakness to Physical damage).
Keep in mind that your enemies can and will use Tactical Advantage against you, too. Aura has an innate weakness to Thunder damage (she shares this with most Human enemies you will face) and some Demonic enemies can use skills like Avaritia to inflict a Dark weakness on your party, then deal Dark damage to gain Tactical Advantage and follow up with a devastating critical strike. You can sometimes dodge their crit with your own Tactical Advantage, but your own attacks might miss enemies with Tactical Advantage too. Ideally, you want to gain and use Tactical Advantage first, and deny the enemy any chance of doing the same to you, or when you cannot stop them at least Guard to block most of the damage.
One final detail about Tactical Advantage is that you can only gain it -every other turn-. You gain it if you don’t have it already, and once you have it then it lasts until the end of your next turn, so you cannot just spam the same attack or spell to hit an enemy’s weakness and gain Tactical Advantage indefinitely. Sometimes the correct move is to wait a turn, by casting a buff or simply Guarding, and gain Tactical Advantage on the second turn to crit on the third turn – enemies tend to have a consistent battle plan, so if you fight a few times and learn their pattern, you can usually spot an opening when they can be crit for the best damage.
2c) Sneaking around and the Surprise Round
As mentioned in the game’s Introduction sequence, you can see enemies on the map before you get to battle them. Some enemies remain stationary or turn around, while others patrol an area along a predetermined route or move about semi-randomly within a specified area. In general, an enemy can see up to four tiles ahead of them, and if Aura moves into that range the enemy starts chasing her to engage in battle.
If Aura gets caught by a chasing enemy, with her back turned towards them, then during the first round of combat the enemies can act while Aura (and her allies, if any are present) are surprised and can’t act at all. On the flip side, if Aura sneaks up on an enemy from behind, then she gets to act while all enemies are surprised and cannot act. In any other case (either side catches the other from the front or side) neither side is surprised and everyone can act on round one. Note that enemies with very specific move patterns, including most bosses, follow their pattern from round two even if they were surprised – they don’t bother starting with their round one action at all. Sometimes this can work to your advantage, but most enemies rarely open with their best moves, so skipping their opening move is no big deal.
If you can use the surprise round to strike an enemy’s weakness and gain Tactical Advantage that way, then having it already on round two can help you dodge the first wave of attacks. This is especially helpful when facing enemies faster than Aura, so their attacks might miss altogether instead of wearing you down with chip damage.
2) Important Mechanics (2d – 2f)
2d) When and Why to Remove Collar
Although the curse has sealed Aura’s almighty Star Knightess, she can tap into her full power when the need is great. You do this by choosing to ‘Remove Collar’, either from the Special tab in battle, or when prompted outside of battle, usually when facing an obstacle such as a large rock, a cracked wall, a tangle of plants or a gap that can be jumped through. For a short time, Aura transforms into her level 99, fully-armored self – either until the current battle ends, or just long enough to get through an obstacle. In battle, she has access to all 12 of her super powerful skills, and her stats outclass just about every enemy you will encounter.
Note that each time you choose to Remove Collar, the strain on Aura’s soul makes the curse advance, producing 4 corruption points. These additional corruption points can cause Aura to become Cursed I/II/III if she wasn’t already and they push her under the appropriate Willpower threshold. This won’t affect her in the current battle, but once the fight ends her Willpower is recalculated and the Cursed debuff is applied accordingly.
The other limitation is that Aura can choose to Remove Collar only once per day. You get a little icon next to the action that shines if it’s available, and it’s greyed out if it’s been used already. Under special circumstances Aura might be able to use her Star Knightess more than once per day, but this always comes at a high cost.
When Aura is fighting alone, losing a battle simply ends the day. However, if Aura has any allies with her (summoned creatures don’t count for this), then she will automatically use her Star Knightess power if it’s available, in order to save them. If she cannot transform, or if she transforms but still loses the fight (that’s difficult to do since activating Star Knightess heals Aura completely) then you get a Game Over instead of ending the day.
So when and why should you use the Star Knightess? It really depends on your playstyle and what you’re trying to achieve. If you’re trying to keep Aura as pure as possible throughout the game, then you might never Remove Collar, unless the game itself decides for you (it’s automatic for certain boss fights). If you’re trying to collect lewd scenes and corrupt Aura as soon as possible, then you might try to Remove Collar every single day, to generate more corruption points and change her faster. If you’re not committed to either of these styles, then you probably won’t need to use her Star Knightess unless you’re truly stuck at some part, like a difficult boss or an obstacle you can’t pass normally, at which point this becomes a cost/benefit analysis – does the cost of a few corruption points justify the benefits you gain this way? Sometimes it doesn’t, but sometimes (like when it determines whether Aura receives a curse at full power or its incomplete version) it’s the price you need to pay to avoid suffering another stiffling handicap.
2e) Experience, Materials, Upgrades and Training
Unlike in most RPGs, the main way for Aura to gain EXP is to finish quests for their EXP reward. Some powerful bosses also give EXP, but they are rare and tied to story progression so quests remain your main source of EXP for the entire game. Furthermore, while some enemies give gold and/or materials when defeated, most of them don’t give anything at all, so it can be wise to skip fighting enemies that only chip away at your HP and MP. An early example are the Spiderlings in the Northern Mine – as John tells Aura, if you defeat the boss the little spiders will go away, so conserving your strength and rushing straight for the boss is smart.
The other half of this problem is that Aura only gains a few stat points from leveling up, and doesn’t automatically gain new skills per level. So even once your level increases, it doesn’t make you that much stronger overall.
Instead, the main way that Aura gets stronger is by upgrading her gear for better stats and/or by learning new spells and martial skills from various trainers, for the right price of course. You can also read books, which are cheap but often take multiple days before you gain any benefit from them. Most of the above are also day-ending activities, so if Aura’s in fighting shape you want to go to a dungeon and/or progress a quest or two, then consider what you need the most for the next day.
Whether you focus on upgrading your stats to take on stronger enemies or learning skills that help you exploit their weaknesses, is a matter of personal preference. You need a mix of both, because without enough stats you can’t take too many hits and your crits won’t deal enough damage, but without the right skills to set up for Tactical Advantage you might find yourself walled anyway. Experiment, try a few different skills or upgrades, and if you don’t like the results, it’s fine to reload an earlier save and spend your money and time differently. And if you’re truly stuck in one area, sometimes it helps to do a few side quest and get stronger before returning to the main quest and try your luck again.
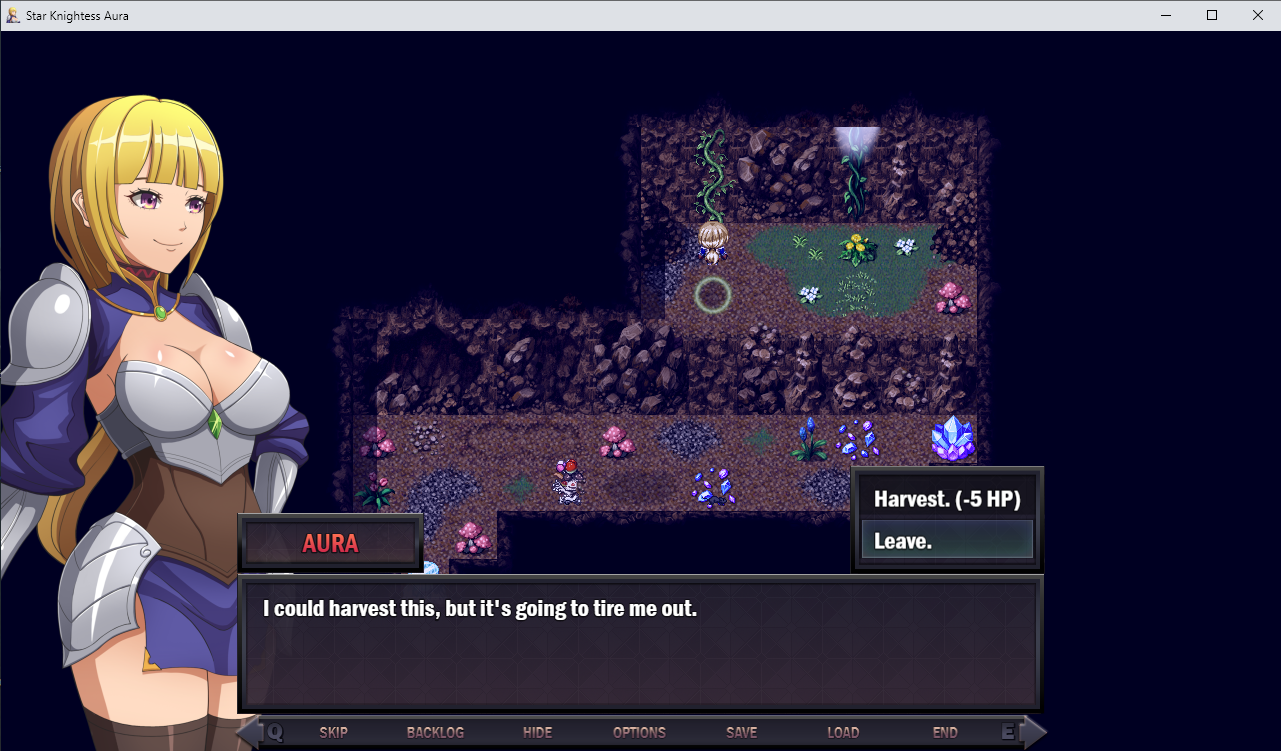
Regarding materials, they usually cost HP to harvest. Vines that give Rope cost 5 HP, most other Deposits cost 10 HP, while Large Deposits cost 25 HP to harvest and leave behind a normal Deposit you can harvest again. Although you can harvest and heal up afterwards, that spends your healing consumables – but if you defeat all enemies in the area and return later, on a day when Aura is Cursed and can’t fight, you can harvest just fine.
2f) Getting Lewd
There are lots of lewd scenes in this game, many of which tied to specific NPCs. When an NPC offers a lewd scene, you will see a pink heart pop up above their head. Speak to them and agree to their terms to trigger the scene.
The ‘problem’, if you’re hunting for such scenes, is that Aura is initially unwilling to do any lewd acts at all. She’s very idealistic and prude when it comes to sex, and it will take time and effort to get her to ‘loosen up’ and accept that kind of behaviour.
Mechanically, this is tied into corruption points and her lewdness score. Just like the curse slowly generates corruption, lewd acts produce one or more corruption points, which can then be spent to make further changes to Aura’s morals and personality. Lewdness represents how much sexual experience Aura has gained and how far she’s come since the days of squirming at the mere idea of kissing anyone other than George. The more her Lewdness increases, the more comfortable Aura will be with acting naughty, eventually barely needing a reason to do it.
Each lewd scene has certain prerequisites, like a minimum Lewd score Aura needs to even consider agreeing to get lewd. Her Willpower also allows Aura to refuse these offers, so on days when her Willpower is low (especially when she’s already Cursed I/II/III) it’s easier to get her to agree. Furthermore, her Lewdness and her various sexual stats apply a Willpower penalty when the proposal is made, and if these exceed her current Willpower then Aura cannot refuse at all. In such cases, you get a pink scene, which changes the narration slightly and increases all stat gains from the scene – including corruption points, lewdness increase, and any stats corresponding to the kind of scene you unlocked.
Note that sometimes your Lewdness and stats don’t increase because your overall Lewdness has grown too high, usually once it’s 10 points above the minimum threshold required by the scene – at that point, Aura is so lewd that committing the act barely phases her, and you need to find even lewder and rougher acts to improve her stats.
After triggering a scene, you can view it later in the game’s Gallery – you need to use the Clear Gem (one of your Key Items). You also need the adult content patch installed, or the gallery will be locked. Unlocked scenes persist across playthroughs, so you can unlock them over time instead of going for all of them in one playthrough.
3) Day One in Roya (3a-3c)
3a) Hello World
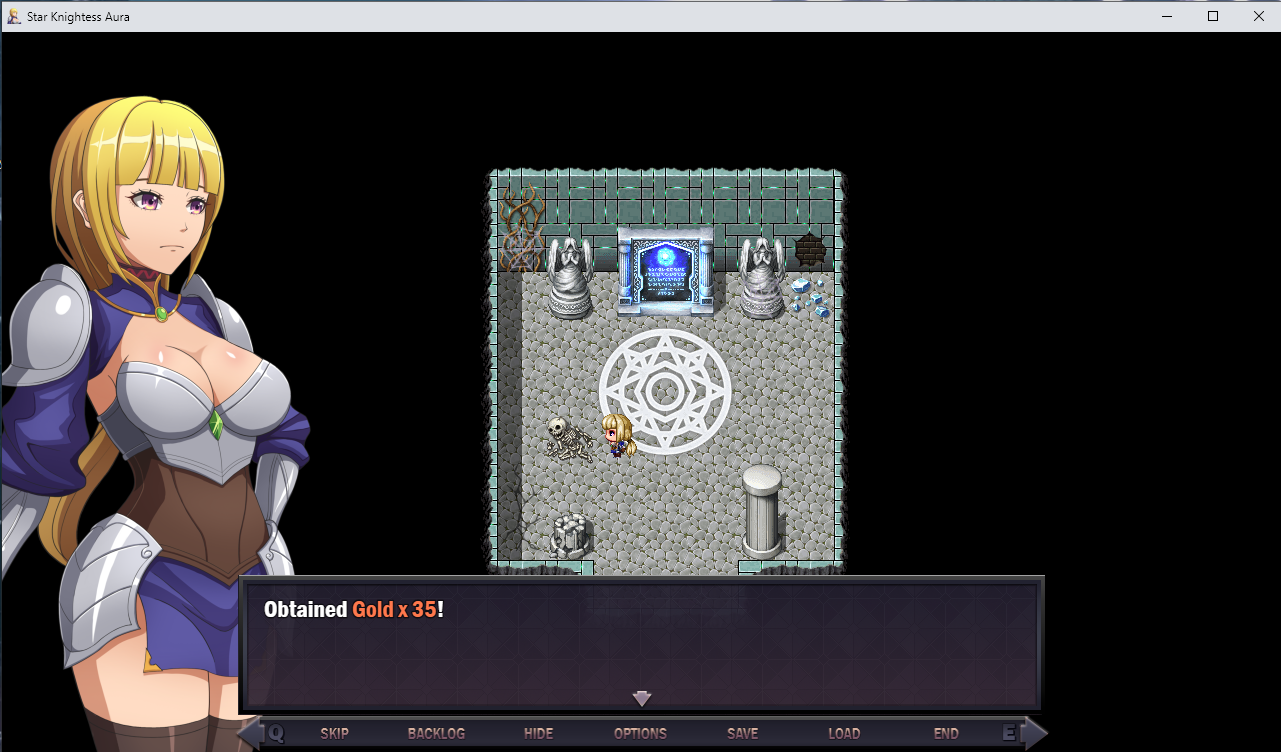
The day opens with a long cutscene, after which you’re in control of Aura. She’s level 1 – if you played through the Intro section, you know why she’s lost her level 99 powers.
You’re in the Abandoned Shrine. Grab the Clear Gem (the sparkle on the ground) and check the skeleton for 35g, then exit to the South.
If you have World Fog turned OFF, you can view the entire map and go anywhere you want, however there’s only one location where you can progress the game – seen clearly if you have World Fog turned ON. Go East and enter the town of Trademond.
3b) Visiting Trademond
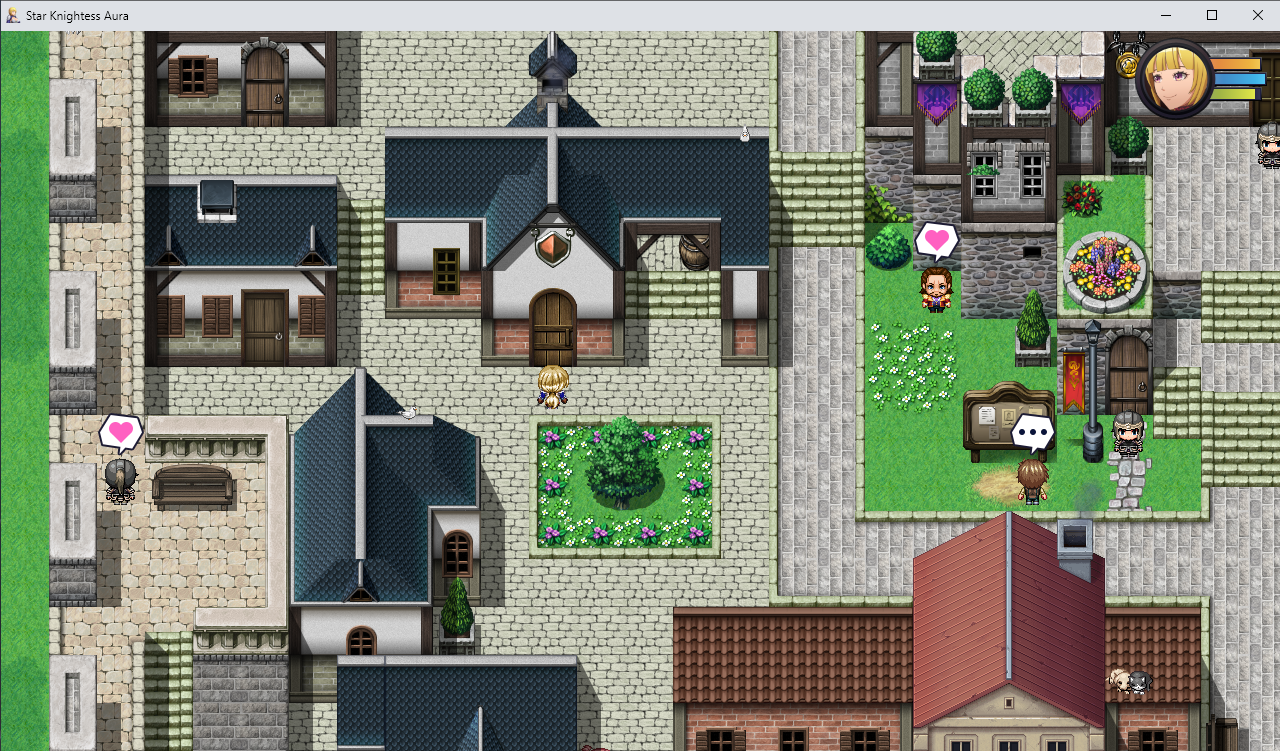
After the cutscene your quest gets updated. There’s a few things you have to do for ‘Getting Started’, and a few more quests you’re going to pick up. In general, I recommend that you go everywhere and talk to everybody, but at a bare minimum you should talk with the Gate Guard just East of Aura.
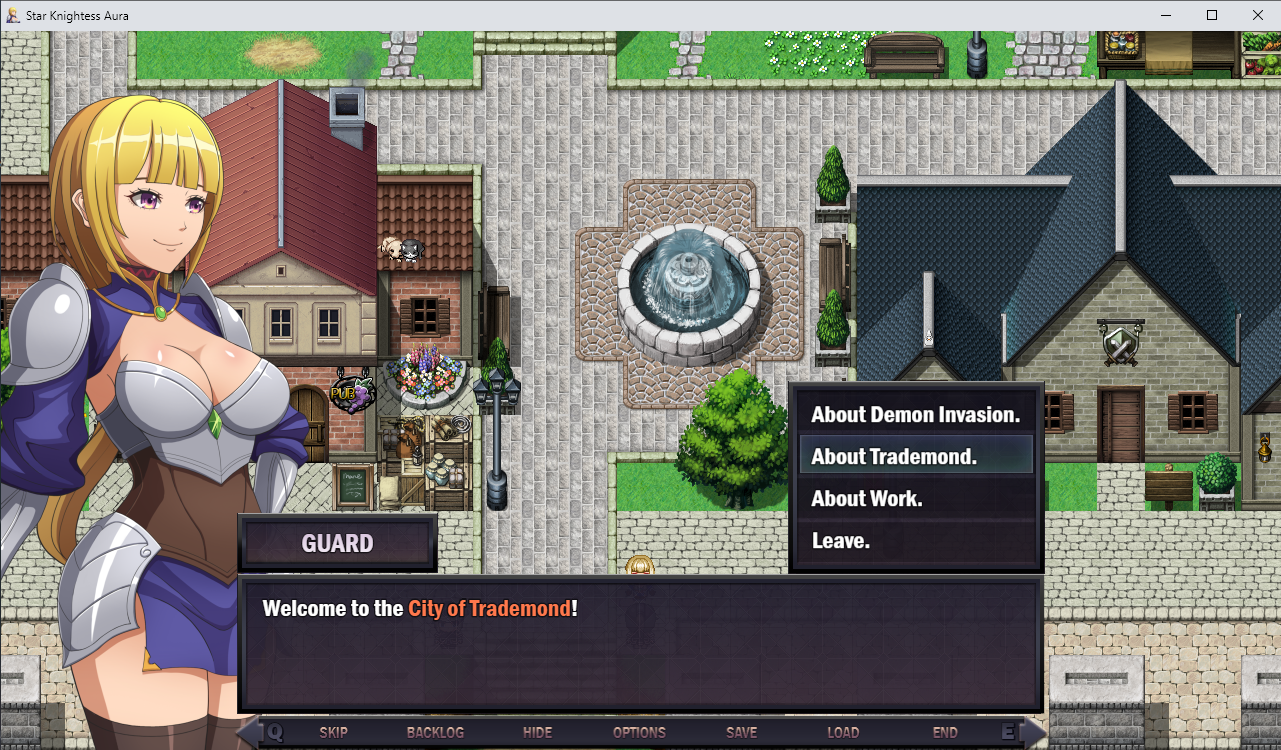
- The building to the East is the Adventurer’s Guild, and further East is a Bookstore and the Monster Lorist.
- To the West, you have the Boar Hut Pub. Go there next.
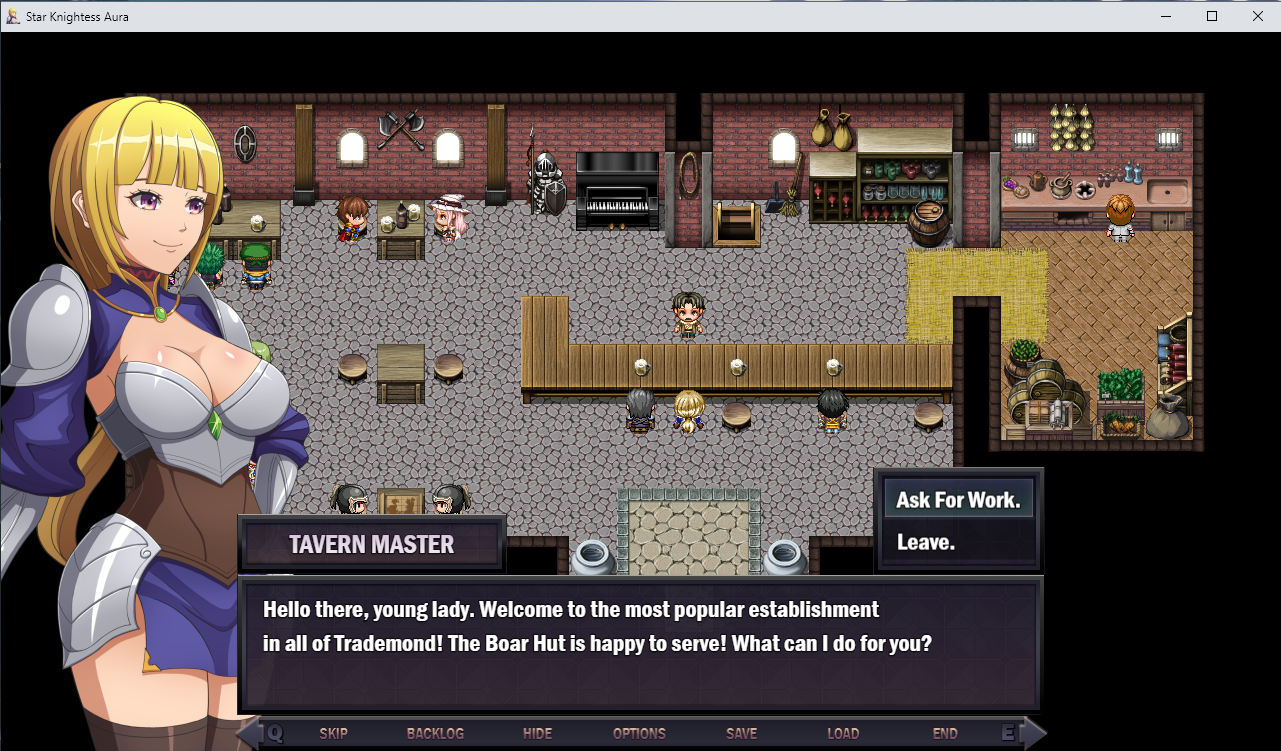
- Talk to the Tavern Master to start the quest ‘Lack of Flavor’.
- Talk to the two guards to progress ‘Getting Started’.
- Exit the Boar Hut Pub, go West and a bit North.
- The building in front of Aura is the Workshop, where you can upgrade your gear. It costs a lot of gold, so there’s nothing you can do in there right now, but keep it in mind for later.
- The building to the East, in the very center of Trademond, is where the Merchants’ Congregation has its offices. It’s closed for now though, so proceed North.
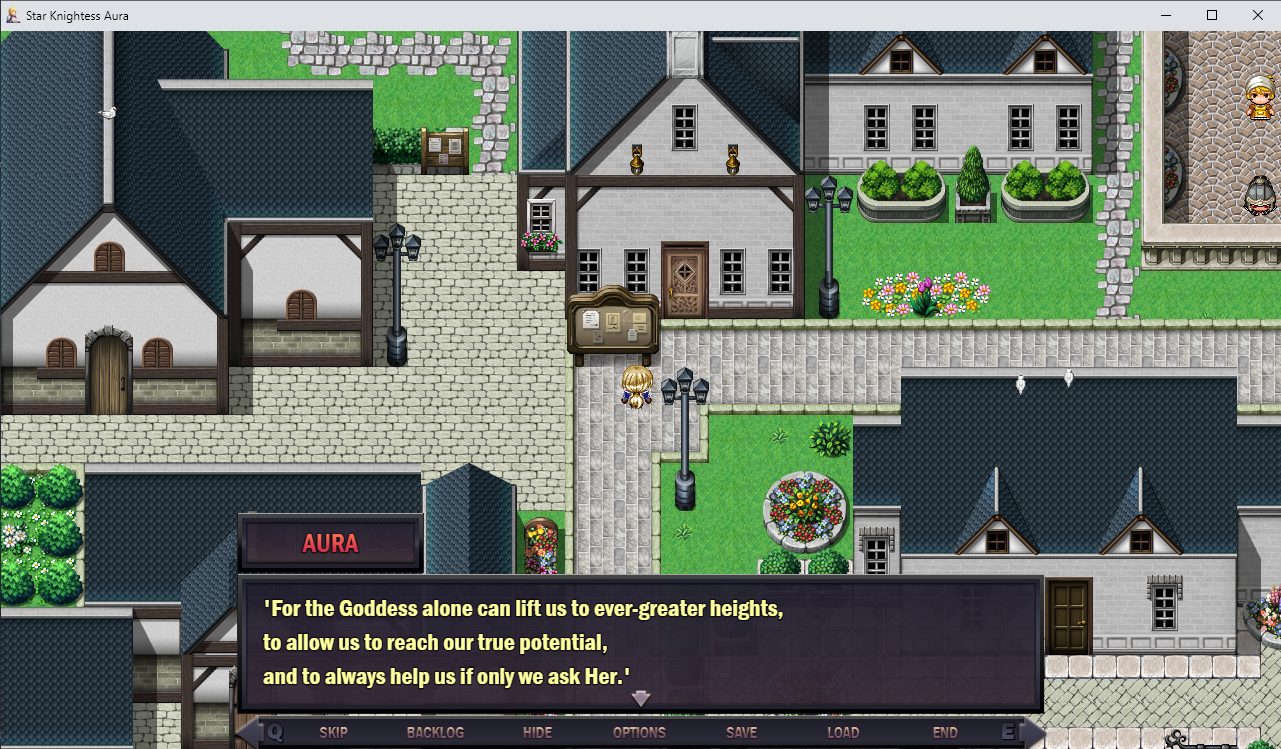
The building just ahead of aura is the Church of the Goddess (of Roya). Walk inside.

Talk to the Black Priestess in the alcove to the East to receive the quest ‘Deliver Medicine’ and one ‘Envy Curse Medicine’ key item. Also touch the Stone Tablet to activate it for later.
Exit the church and go East.
Talk to the shirtless man to start the quest ‘Honing my Skills’. Then go North into the Barracks building, and West up the stairs.
- Talk to Guard Captain Julian to start the quest ‘Forest of Danger’. Head East to exit the Barracks.
- The guards won’t let Aura into any of the mansions in this district, so go South instead.
- The Apple Merchant here sells Apples, which are your main way of healing in this game – don’t buy any just yet, but keep it in mind.
- The General Merchant sells Ropes, and later some crafting materials.
- The Spellshop just East of them is where Aura can learn new spells and raise her MATK and max MP stats, for a price.
- The Alchemist sells various consumables, including bombs and energy potions. Before you buy from him though, you need to know that he offers a certain discount…
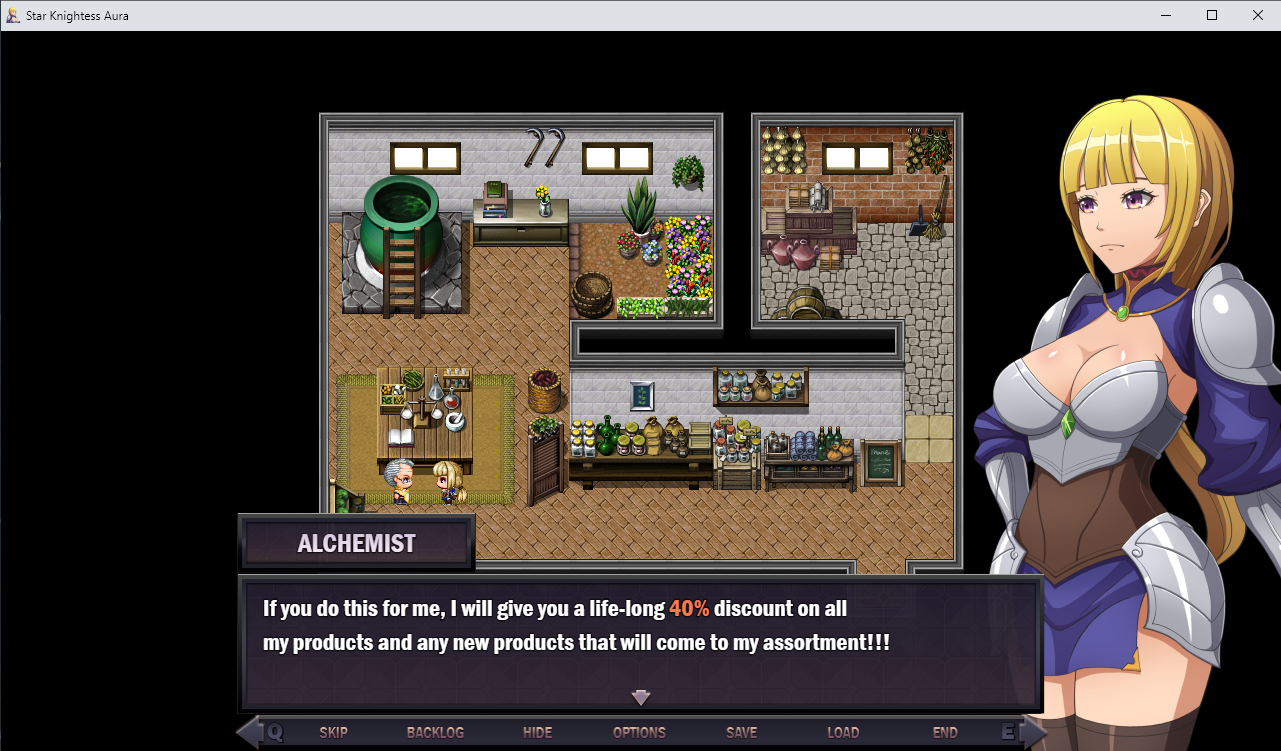
If you’re doing a pure run, you want to avoid this, but otherwise this is a pretty good deal. If you do decide to take advantage of his offer, then it’s recommended to avoid shopping here until Aura is ready to accept his deal (this may take a few days and is beyond the scope of this guide, but just keep that in mind).
With all that done, you can return to the main gate and exit Trademond.
3c) Delivering Medicine

The little farm just South of Trademond belongs to Jacob. Go there and trigger the cutscene to exchange the medicine for the diary.
Exit his farm and go East, into the circle at the edge of the forest.
3d) Collecting Herbs > 3e) Saving Albrecht
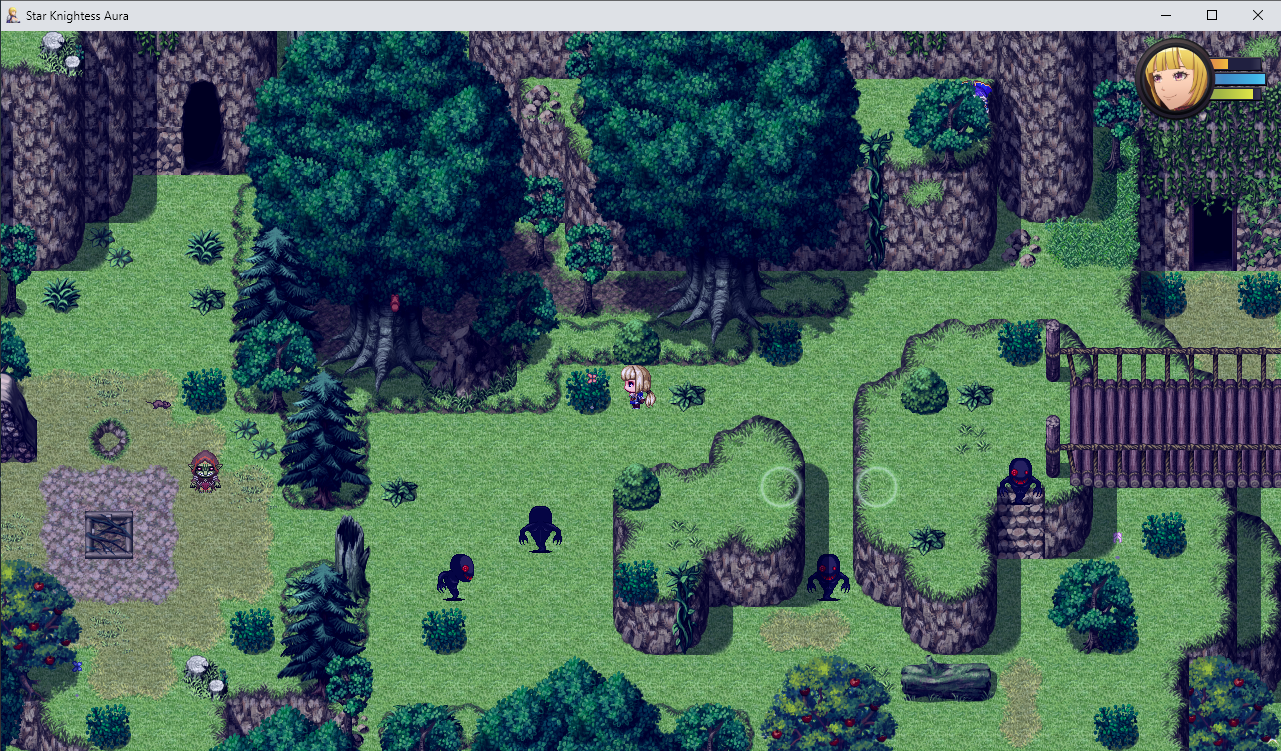
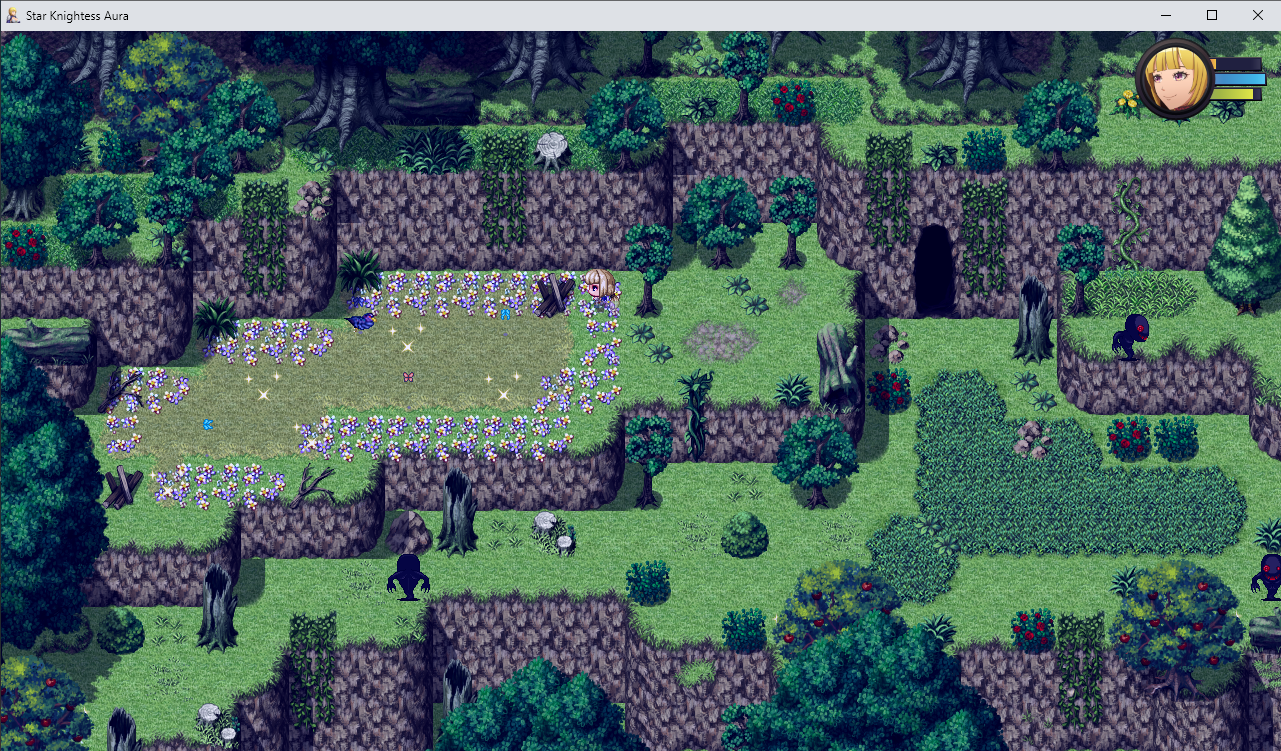
3d) Collecting Herbs
As you enter the Central Forest of Runes, pay attention to the enemies wandering through here. Each enemy group follows a set pattern, including moments when they turn in place to look around them. Remember: they can see up to four tiles ahead, though any obstacle that blocks movement, like fallen logs and tree stumps, also blocks their sight.
You’re only level 1, so you’re not really here to fight – all you want to do is grabfour Hydrangea Herbs and deliver them to the Tavern Master. They’re big and purple, you can’t miss them really. Start by going North, touch the sparkle under the tree for an Apple (they’re all over this area). Walk East and check on the corpse to get five more Apples, get the Sparkle to the South (again, under a tree) and the first of four Hydrangea Herbs.
Note the tangle of vines standing in your way of proceeding East. This is what I’ll call henceforth a Plant Barrier, one of many obstacles you might face. You can Remove Collar to destroy it, but it’s just a shortcut to another part of this area – later you will learn Fire I to burn it down. For now, save your game, then retrace your steps and go South, avoiding the patrolling enemy.
Wait for the patrolling enemy to pass, then you can follow them for a bit. Check the corpse North of the log to grab a Bomb, then proceed East, mindful of the next enemy group. Collect the second Herb and return to the log, then continue South, pass the stationary enemy and, when the path forks, take the Western side first.
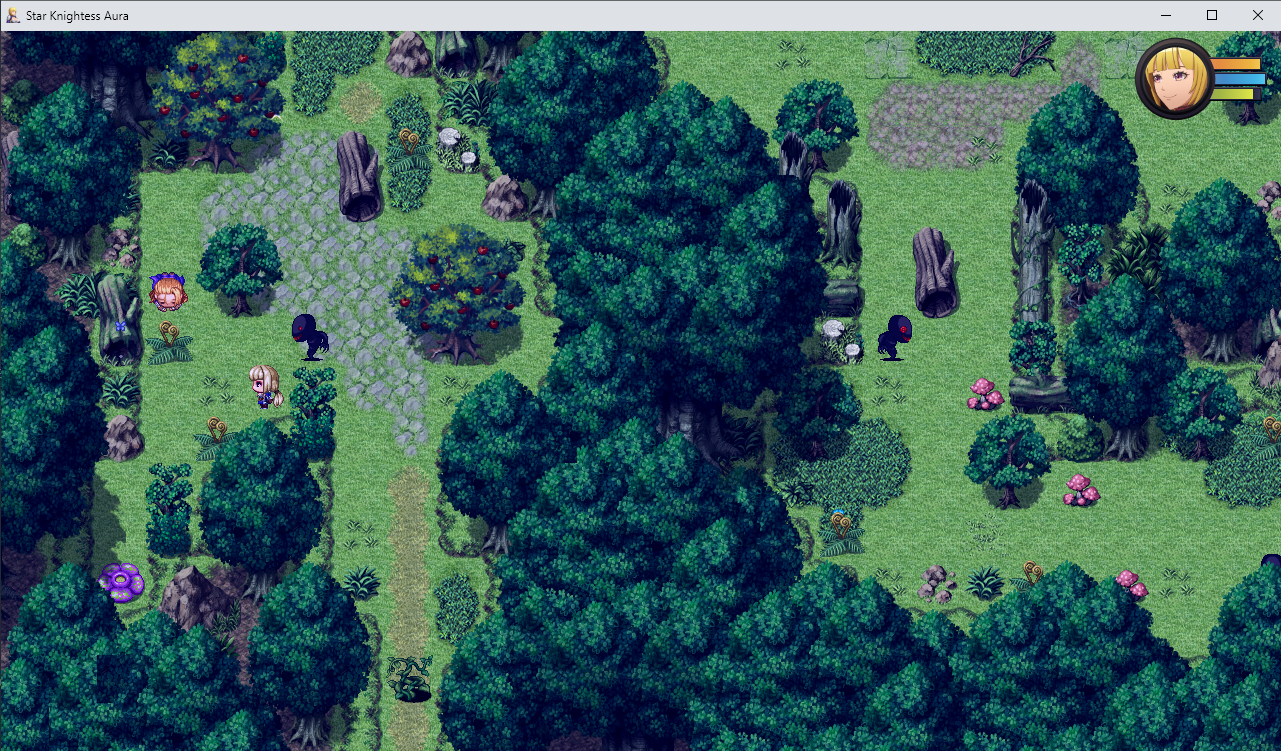
The two apple trees both have sparkles under them, so grab two more Apples, but beware – this enemy likes to watch left and right and will catch you if you linger too long. Check the corpse for an Energy Potion, but keep in mind the tree doesn’t block sight so leave quickly. Head for the SW corner and grab the third Hydrangea Herb.
Note the Plant Barrier blocking the exit to the South. This is the entrance to the Southern Forest of Runes, which has faster and harder-hitting enemies. Ignore it for now, save your game, then retrace your steps to the stationary enemy and this time, head East.

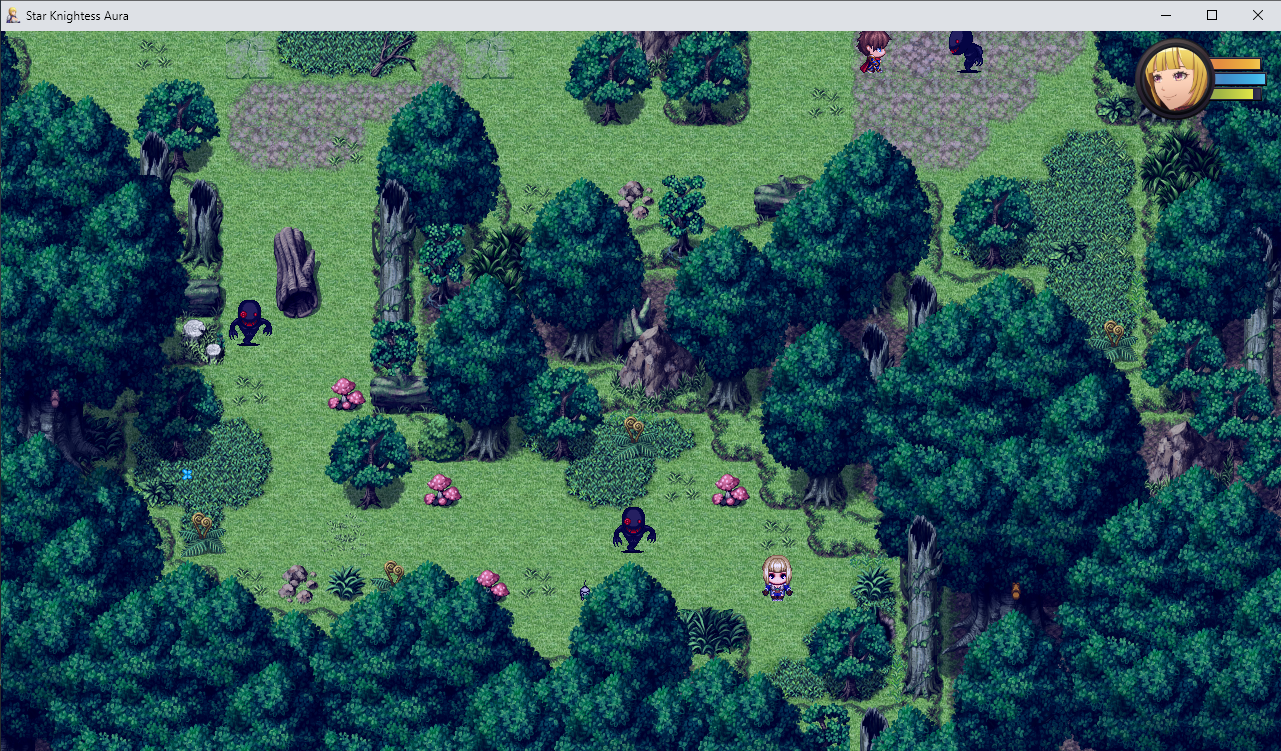
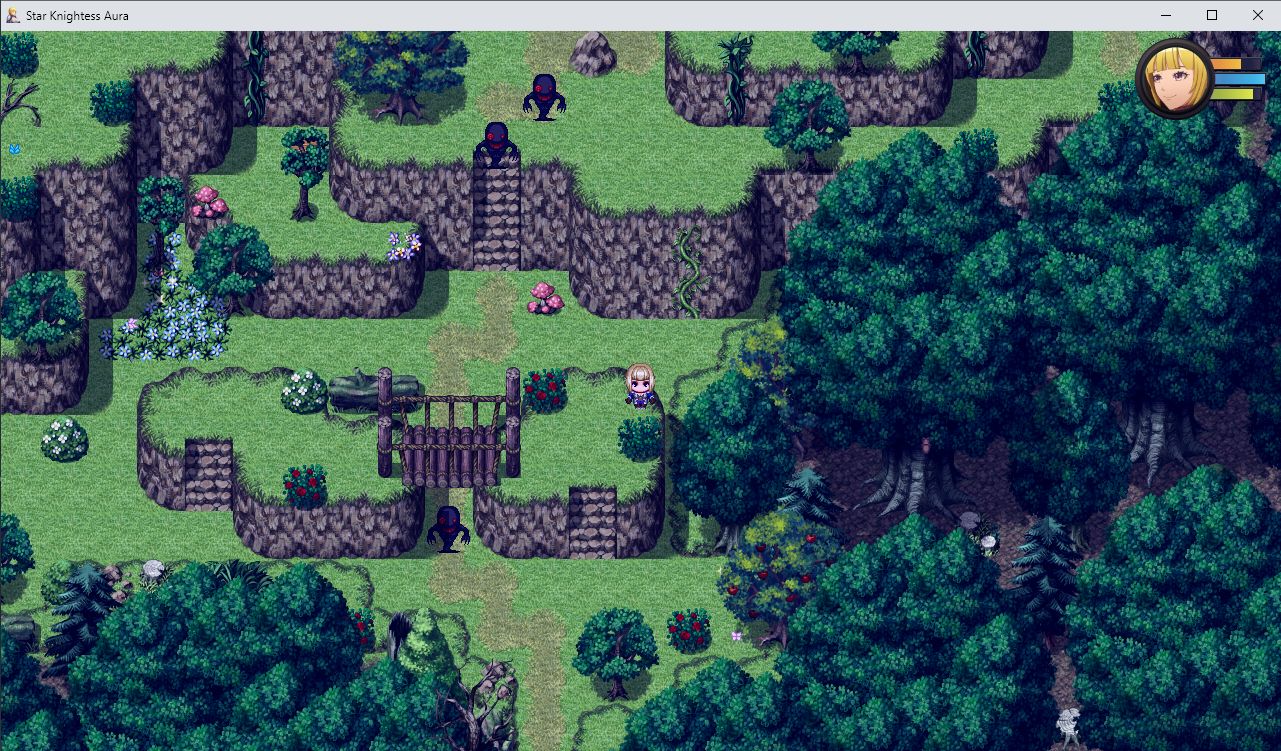
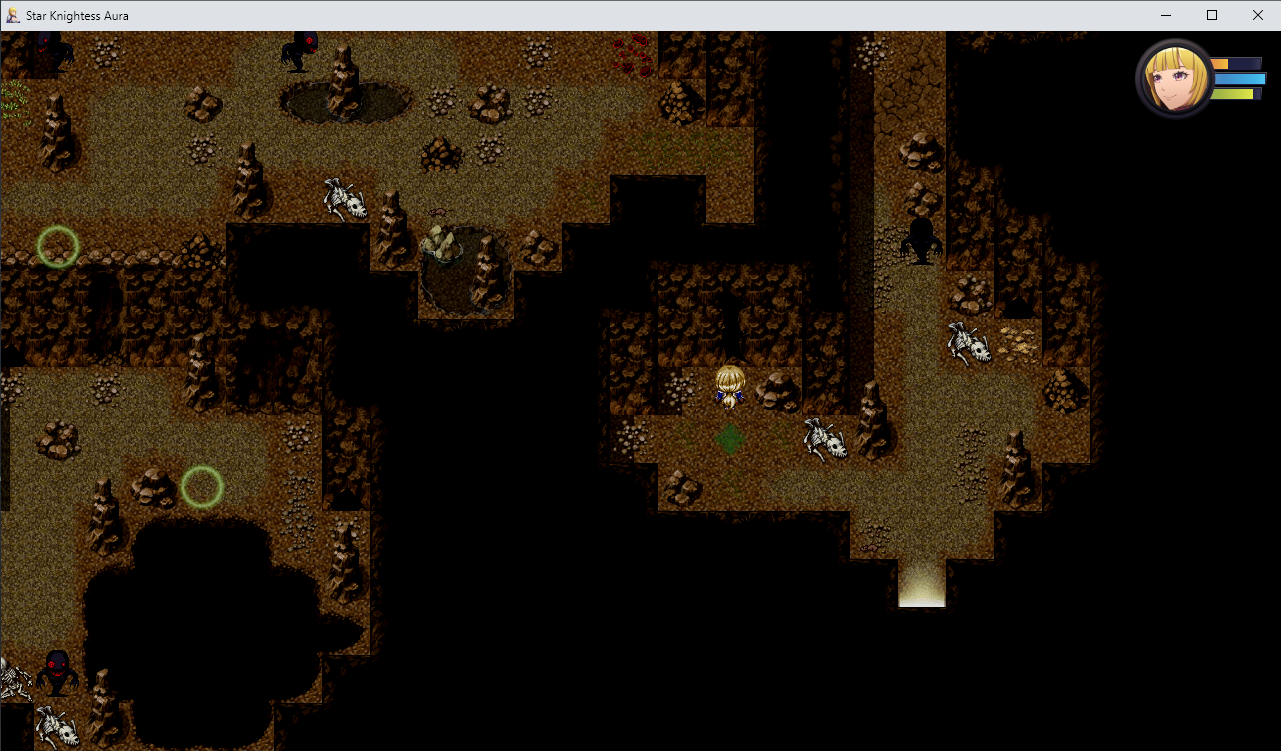
3e) Saving Albrecht
Sneak past the moving and stationary enemies, grab the fourth herb for the quest and move into the spot where Aura’s standing on the screenshot. At this point, make sure to save your game (you have been saving regularly as you wander through here, yes? it’s a good habit) and walk East to trigger a battle with a temporary ally.
After you win, Albrecht returns to Trademond and you receive the quest ‘Lost Engagement Ring’. If you took damage, you can eat an Apple so that Aura has at least 36 HP for the next part.
Save your game after the fight, then walk back West and go South.
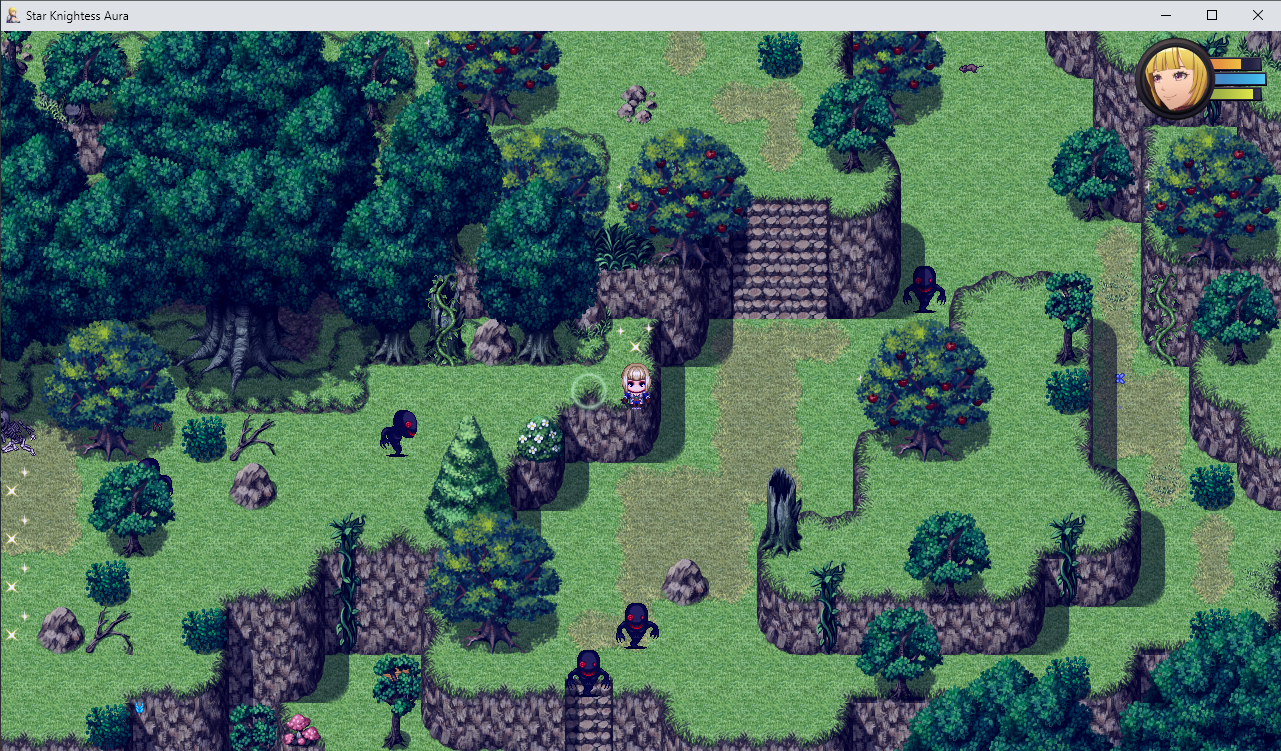
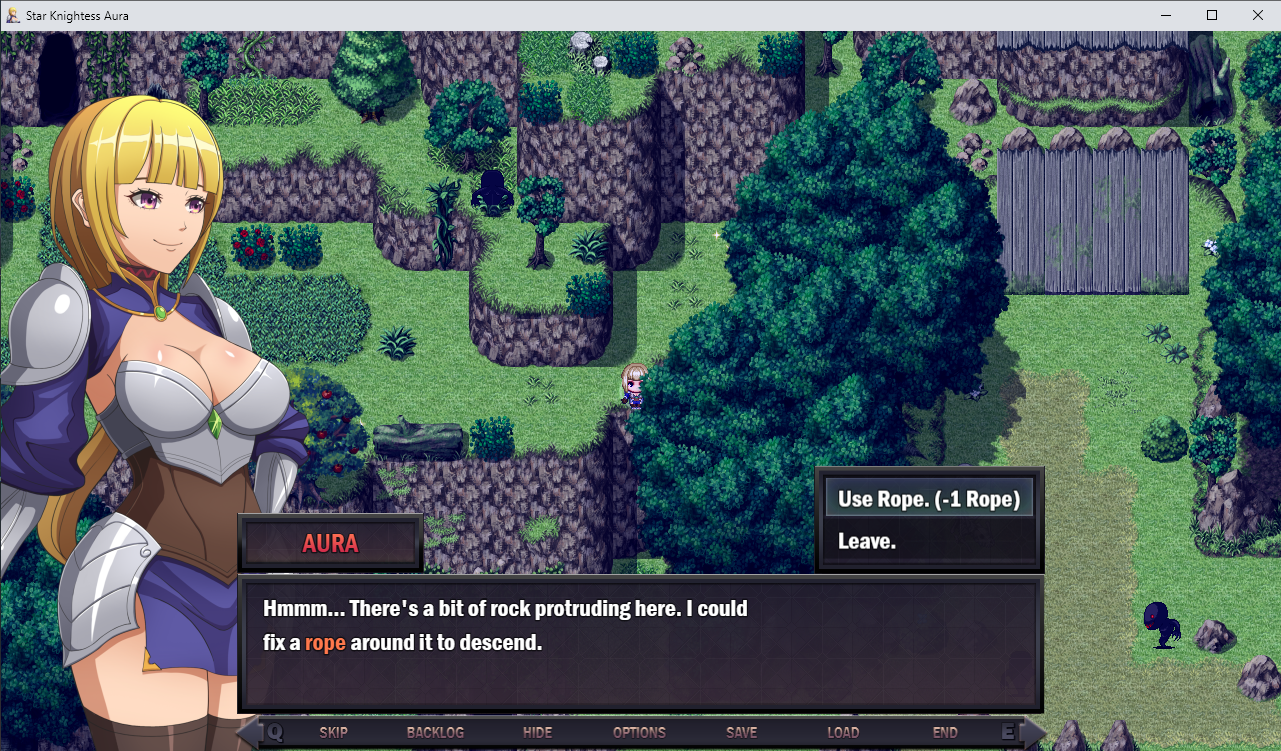
Sneak around the wandering enemies in this mushroom-filled section until you stop in Aura’s position from this screenshot. There’s a barely visible hole behind that bush, and if you take one step South and two steps East, you will enter a small cave.
The wandering enemy is a boss monster, so you really don’t want to engage it. Instead, check the vine to harvest a Rope (costs 5 HP), then use it to descend onto the lower level. Ignore the Ether Deposit to the East, but grab the Star Metal to the West (this costs 10 HP to harvest) and run back out of the hole.
Return to where you’ve met Albrecht and continue to the North. Note another Plant Barrier – this one is blocking the entrance to the Eastern Forest of Runes, with powerful magic using enemies. Remember it for later but walk West, then sneak North past one final enemy group and enter the area of the Goblin Shaman.
The Goblin Shaman has three Goblins with him, and knows Fire I, so you don’t want to challenge him at level 1. Instead, go for the item chest (Aura is facing it on the screenshot) and grab four more Bombs. Then head North towards the Big Rock, use a Bomb to blow it up and proceed to the next area… the Northern Forest of Runes.
3f) Looting Almost Everything
3f) Looting Almost Everything
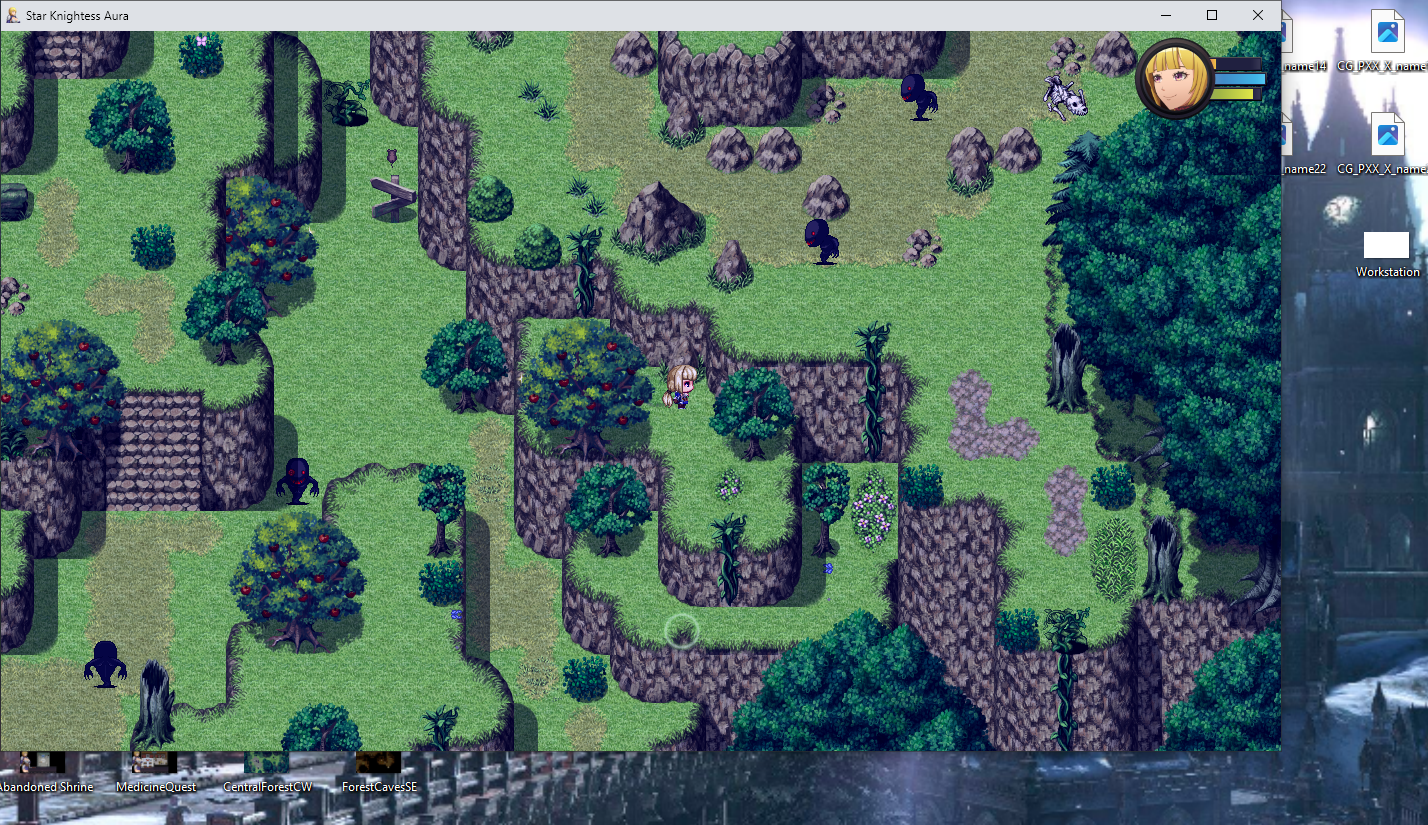
Entering the Northern forest of Runes, remember that Aura is only level 1 while this area has stronger enemies than the last. You really don’t want to fight any of them, but there are still lots of resources you can loot without ever engaging in battle.
Start by grabbing the sparkle to the East for an apple, then use the bridge to go above the stationary enemy.
- Note the harvestable vine, but you can’t reach it without starting a fight – leave it for later.
- Grab the sparkle just North of the stairs for another Apple, and proceed West.

The sparkle to the West is another Apple you can’t reach without a fight, but climb up the vine and up the stairs onto a small clearing.
There, grab another Apple under the tree, and collect the first four sparkles of the trail of coins for (1+2+6+20) 29g. SAVE YOUR GAME, then try to grab the last 20g… yeah. THAT happens. So reload, but keep this in mind – once you get stronger and return here to beat these enemies, you can also collect loot from the two skeletons: the Western one has 50g, while the Eastern one has a Mana Stone on it, which is a consumable that increases Aura’s max MP by 2.
Instead, proceed East and climb down the vine to grab 100g from the chest, then back up the vine, sneaking around the patrolling enemy.
Harvest the vine for a Rope (-5 HP), grab the sparkle for another Apple, SAVE the game and jump down from the shiny spot. Run SE and climb the vine, get the sparkle for one more Apple, climb down the vine further to the East, harvest another vine (-5 HP) and walk to the North. The Plant Barrier blocks your path, but the roadsign reveals that there’s an Abandoned Mine up ahead. Grab the Apple from under the tree, then retrace your steps across the two vines, sneak around the patrolling enemy, grab one more sparkle with an Apple and climb the stairs, then turn West for another Apple just past them.
Beware the two stationary enemies, but move under the bridge and climb up the vine, then check the corpse to pick up a book (it’s the Advanced Theory of Magic, which you can’t use without buying and reading the Basic Theory book from the store in Trademond). To the South there is one more Apple right under the stationary enemy’s nose, so grab it while you’re here. You can climb the vine and approach the shiny spot to see that Aura might jump this gap, but she needs an AGI of 12 – don’t bother at this time, but keep it in mind for later so you can ambush this enemy another day.
Instead, study the movements of the wandering enemy groups, then run past them into the area with another roaming Goblin Shaman. Grab the sparkle for another Apple, then dodge him around the campfire and head North, into the caves.
The enemies here can one-shot Aura with Pierce, so watch out. From the entrance, check out the Cracked Wall and use a Bomb to blow it open, then pass through. Sneak over to the West.
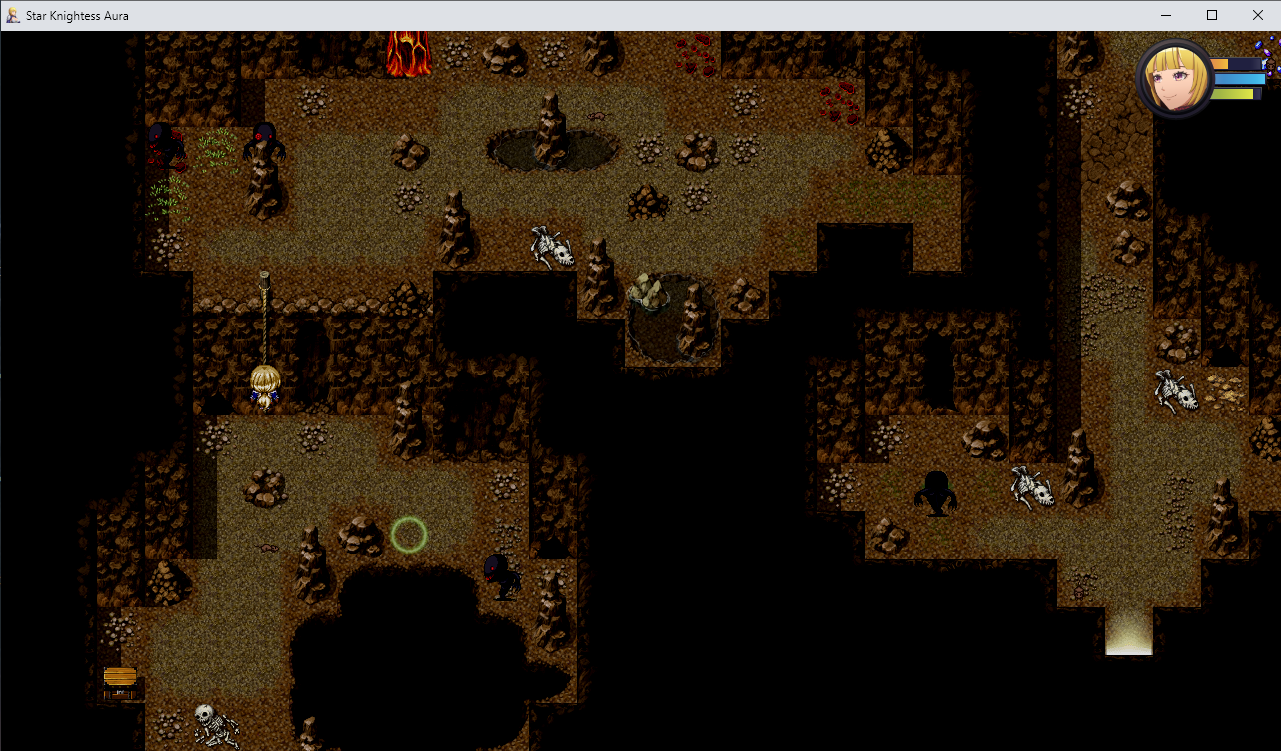
Use a Rope to descend into the lower area, then grab a Vitality Potion from the Skeleton and two Blessed Waters from the chest. Ignore the Large Pyromantium Deposit, you can return for it another day, head back through the crack and go North, careful not to run into any enemies.

Leave the Ether Deposit for later, sneak around the enemies and climb the vine to reach a higher level of the caves.
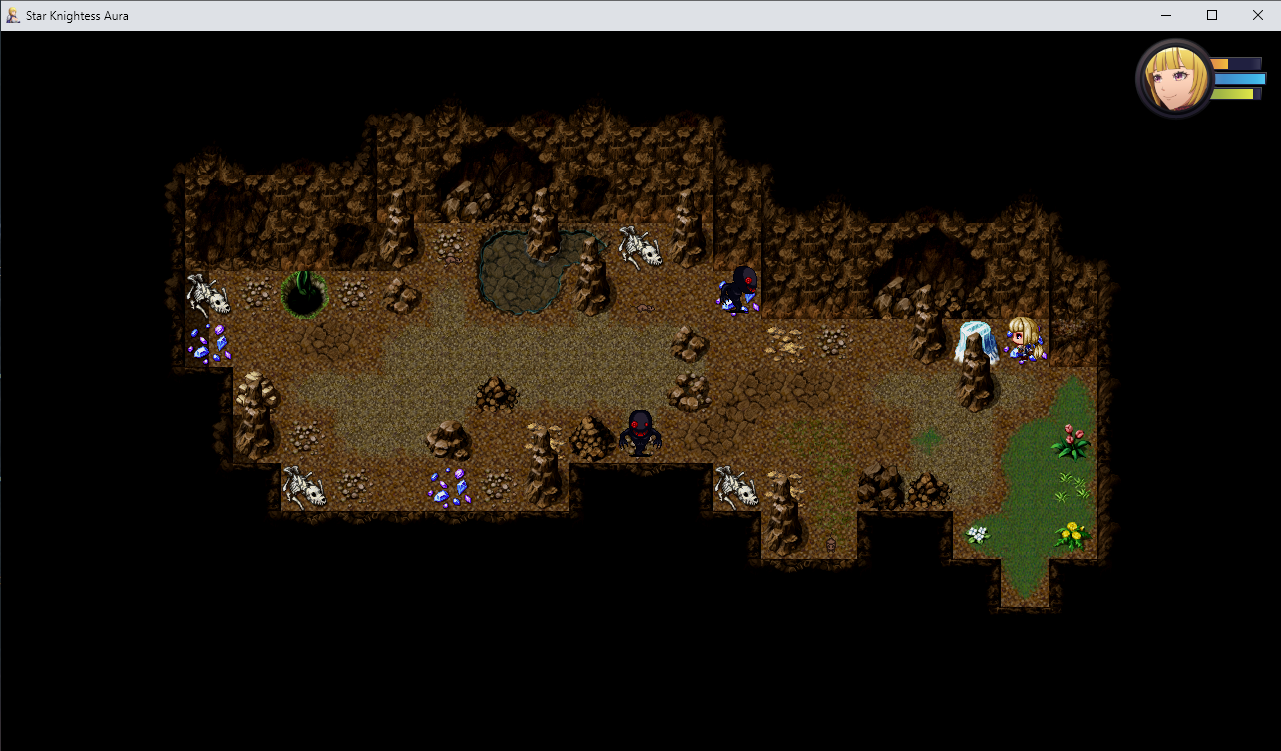
You emerge from the hole in the NW corner, the exit is to the SE, but before leaving grab the Star Metal from this area (this costs 10 HP, eat an Apple to heal if you need to – this is the last thing you need to harvest today).
When you exit the caves, you emerge above the areas you’ve explored before – I call this section the Crow Cliffs.
There are four more sparkles with apples on this level, two just South of where you exited, one to the far East and one to the far West, as well as another harvestable Vine, but sneaking around the flocks of Crows can be troublesome because they move so slowly. Instead, the Mothercrow boss up above moves rapidly and unpredictably, but if you can steal all of it’s gold, you’ll get (13+15+56+23+43=) 150g in total, and that’s not bad at all.
In my personal opinion, this is the hardest part of day one overall, requiring a lot of saving and loading. You can make it easier by exploiting the AI a bit – when you pick up anything, as long as the text box stays open enemies cannot see you. So grab each gold pile and wait for the Mothercrow to turn away, then rush to the next one. You might want to grab two on the way to the furthest one, then two more on the way back, spaced out to give yourself some breathing room.
If you do manage it, congrats. Things go easy from here – literally downhill, even.
Go to the Eastern edge of the Crow Cliffs and you can tie a Rope to descend here safely. This way you bypass the enemies guarding the bridge entirely, and you can later ambush foes here (I call this sub-area the Ogre Hills).
Pay attention to the guards at the bridge, they turn around at different times, but pass them one at a time and you’ll be fine.
Once more you can descend the vine, grab the two sparkles here for two more apples. Note the shiny circle, it’s a jump off point, but don’t use it – we’re not done here.
The Plant Barrier in the SE corner of this area leading to an extra long vine marks an exit to the World Map, which you can eventually unlock to return here much faster.
Hug the Eastern side around the rocks, they’ll lead you safely to the inner circle and the boss stomping around on the highest hill.
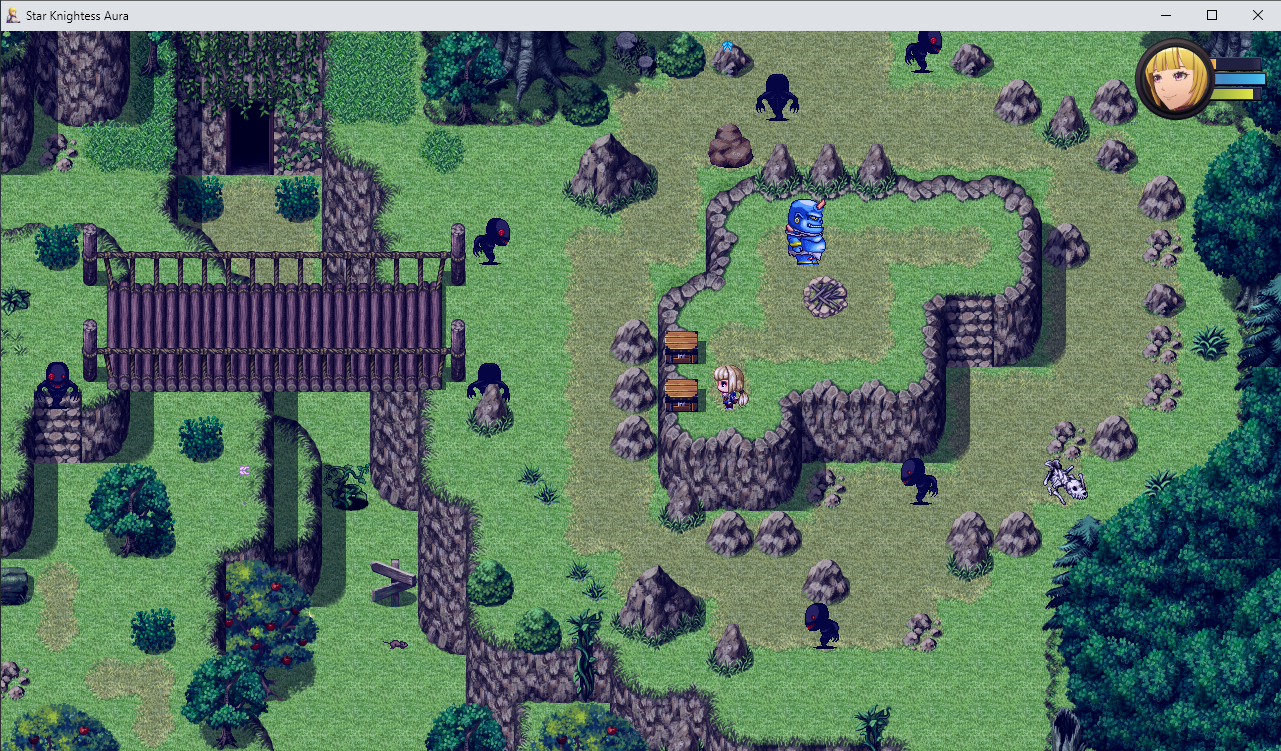
Sneak around the stationary enemies when they’re turned away, then get in there and grab the two chests from right under the boss’ nose – he slowly walks around in a circle, as long as you’re quick he won’t notice you. The chests contain a Living Heart and 500g.
Hit the skills menu, go to special. And press Recall.
You appear right back in the Abandoned Shrine. Not bad for Day One, eh?
3g) Ending Day One
3g) Ending Day One
You can use the Stone Tablet to teleport straight back to the Church (as long as you activated the tablet the last time you passed by). Do it and hand over the curse diary, finishing the quest.
Go back to the Boar Hut Pub, hand over the herbs to the Tavern Master and collect your 150g reward.
Checking your inventory, if you collected every piece of loot I’d mentioned over this guide (and if you skipped some, you know how many and where they are) then you should have the following:
- 976g in cash (make it 826 if you skipped the Mothercrow)
- 24 Apples (minus any you’ve skipped or used to heal up Aura in order to harvest resources)
- 3 Bombs remaining (you had to use 2 of the 5 to blow up the Big Rock and the Cracked Wall)
- 1 Energy Potion
- 1 Vitality Potion
- 1 Living Heart crafting material
- 1 Advanced Theory of Magic book
- 2 Blessed Waters, aaaand
- 2 Star Metals in your inventory.
The Star Metals are important because it takes some forethought what you want to do with them. You can sell them at the General Store, getting 1000g for each one sold there, but there is another option…
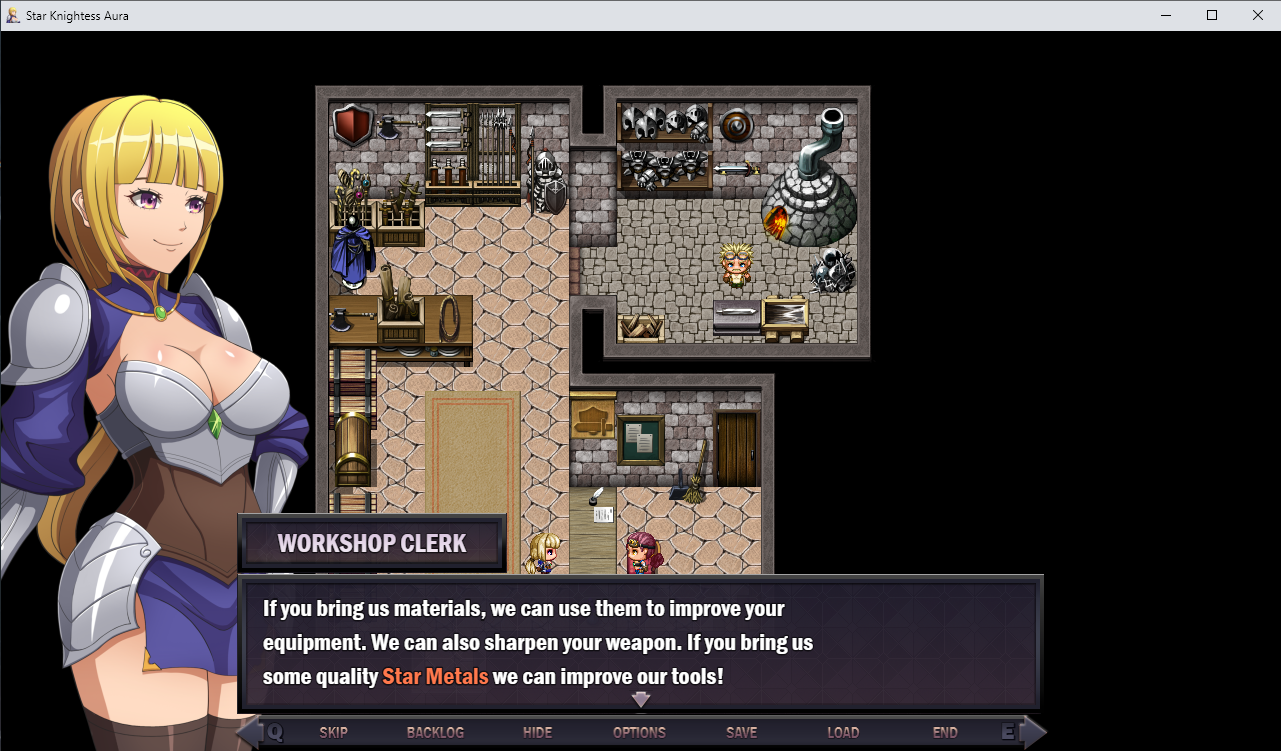
If you visit the Workshop, you can sell the StarMetal to let them improve their tools. You only get 250g back this way, but with better services they can help you during the game: Aura can select Sharpen Sword one additional time for each Star Metal you’ve sold here, plus the Alchemist’s wares expand over time, and eventually you even increase the EXP gain for Aura’s allies.
What you do with the Star Metals is up to you, it’s your journey. As for a day-ending activity, before you start thinking about upgrading at the Workshop, or learning Light I at church for a discount, there’s one last thing you absolutely have to do…
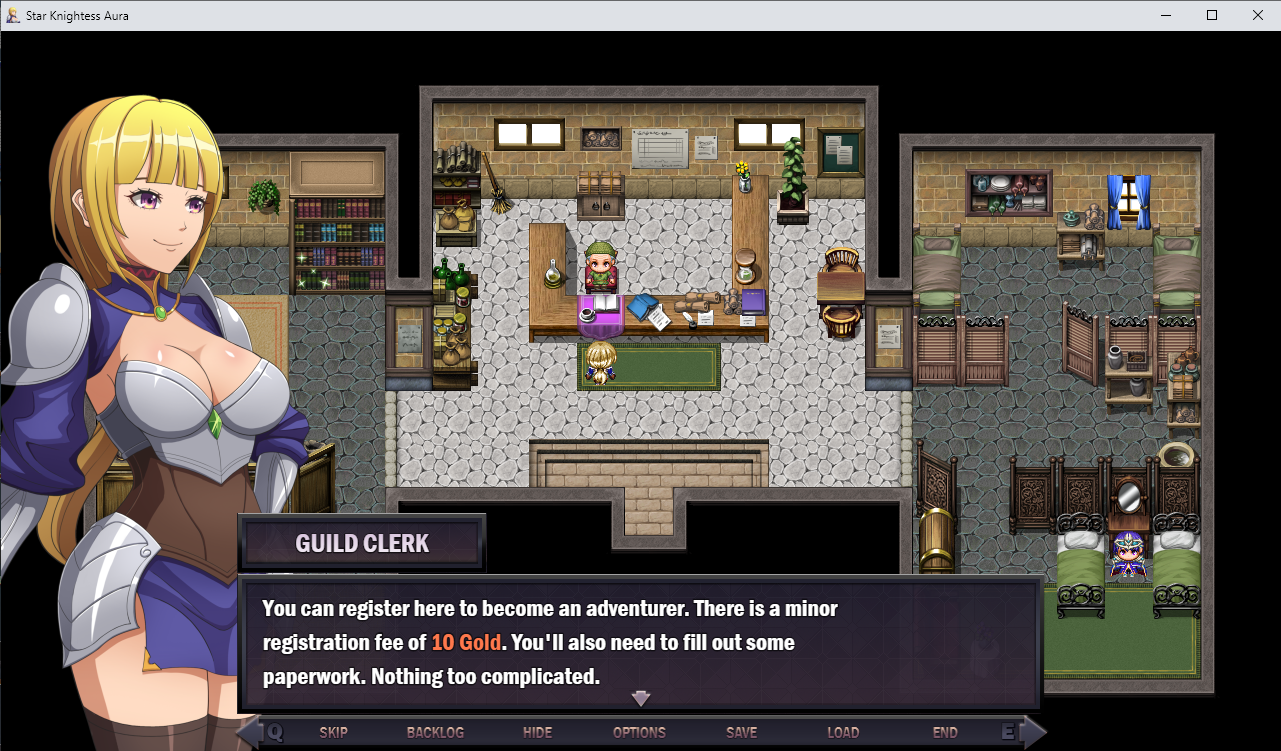
Return to the Adventurer’s Guild and do the necessary paperwork. This not only allows Aura to officially join the guild, it also unlocks new quests she can select as early as day two. And since you also finished Lack of Flavor and Deliver Medicine already, Getting Started ending brings Aura to level 2, increasing her HP, MP, ATK, MATK, AGI and LUCK by +1 each, and her DEF and MDEF stats by +2 each.
4) Day One on different Difficulty Modes
I will keep this section brief, because while I wrote this guide assuming that players have selected Normal Mode, most of it applies unchanged on other difficulty modes. At least, I don’t think the changes specific to Explorer Mode or Hard Mode make a difference, not on day one.
For those that do change things up, here is what you should know.
4a) Story Mode
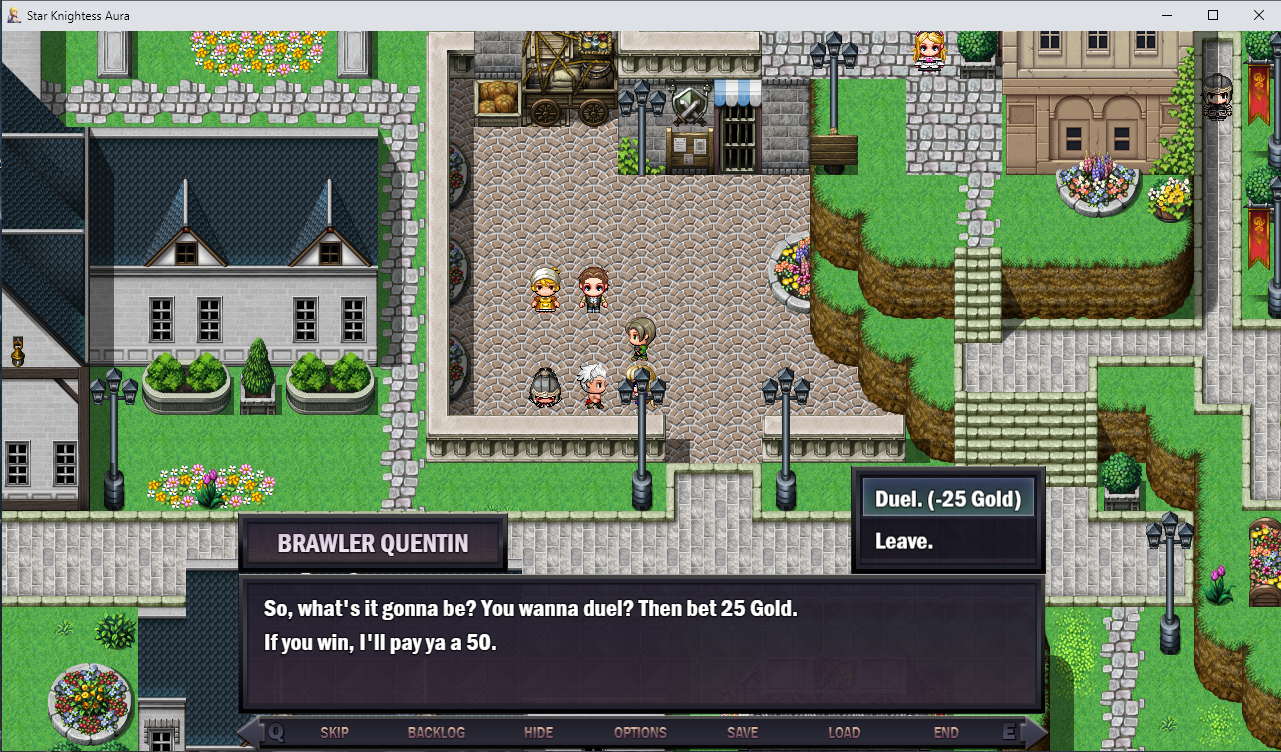
Enemies are so weak on Story Mode that you can brute force your way to a win in most fights. This matters for the quest ‘Honing my Skills’, because even at level 1, I’ve found that Aura is strong enough to beat both Brawler Quentin and Guard Lorentz, so you might as well go do that while you’re in Trademond. You get 50g and 100g from them respectively, plus Dueling Experience I and II, for a total of +2 ATK and +10 max HP. You’re off to a good start, and things only get easier from here.
You also gain 10 times as much gold from battles, so you will be swimming in cash and have the option to buy basically everything you want. You can even upgrade with the Living Heart right away, for an early +20 HP to make the easy fights even safer and to spend it on harvesting materials when you’ve run out of enemies to beat up.
4b) Nightmare Mode
The boosted enemies from Nightmare Mode are so tough that I’ve found it difficult to save Albrecht. It’s theoretically possible if Aura Guards and Albrecht attacks, and doesn’t get targeted by the Goblins, but if they aim for him he goes down in two hits and then at level one Aura really isn’t strong enough to beat them on her own.
But because the Blessed Waters cost 504 already on day one in this mode, I really wanted the second Star Metal, so badly that I’m willing to use the Bomb you find on the corpse in Central Forest on one Goblin, to gain Tactical Advantage and kill the other one. This is consistent, too, and with a bit of luck the goblins will miss Aura, or hit Albrecht instead of her, leaving her at full HP to harvest everything just like the guide describes.
Five Blessed Waters on Nightmare Mode cost 2520g. You will have enough if you sell both Star Metals at the General Store, get 500 from the Ogre’s chest, plus you get 100 from the other item chest, can steal 150 from the Mothercrow, get 150 for finishing ‘Lack of Flavor’ – and from day two you should get by, although it’s still by no means easy. But it’s definitely a strong start, and that was my intention all along.