Complete walkthrough, tips, mechanics, and speedruns guide for making faster progress in Tower Wizard.
Tower Wizard: Walkthrough & Guide
Tower Wizard features complex resource mechanics where costs escalate exponentially, pushing players to optimize their strategy. To progress, players must either efficiently manage resources or use Prestige Points to unlock Blessings, permanent buffs that facilitate further advancement up the tower.
Core Mechanics
Mechanics are listed in the order they are or can be encountered:
| Mechanic | Ascension | Description |
|---|---|---|
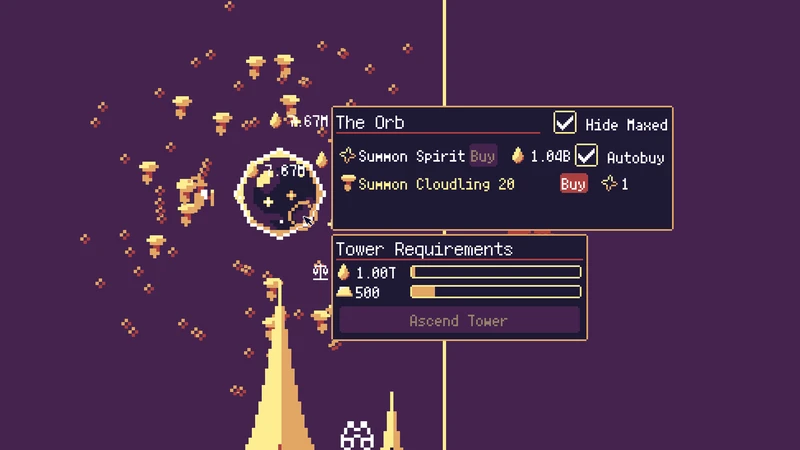
| Orb | 1st | Your Spirit unit summons Cloudlings, which are the primary producers of Magic – essential for summoning more Spirits and expanding your magical influence. |
| Study | 2nd | Spirit units now summon Library Tomes, generating Knowledge. This crucial resource is used to acquire in-game buffs and construct various helpful buildings. |
| Forestry | 3rd | The Spirit can now summon Druids, who produce Wood. Wood is used to purchase powerful Totem buffs that enhance your tower’s capabilities. |
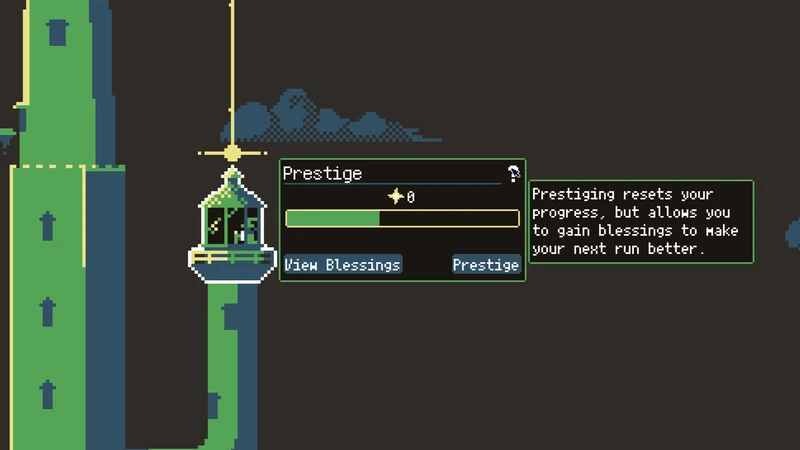
| Prestige | 4th | Earned through your cumulative Magic and Damage output, Prestige Points allow you to allocate to Blessings (permanent buffs). This process resets your current tower build, but the long-term gains are significant for future ascensions. |
| Building – Spirit Housing | Varies | This mechanic allows the construction of advanced structures like the Academy, Dragon Nest, and Embassy using Knowledge. Additionally, you gain 4 free Houses with each tower ascension, which can be specialized to boost your Magic, Knowledge, or Wood production. |
| Academy | Varies | Your Spirit can summon Sages here. Research conducted at the Academy augments your Magic, Forestry, Dragon, and Alchemy mechanics. |
| Dragon Nest | Varies | The Spirit summons a Keeper, fostering the growth of a dragon. As your dragon matures, it grants various Abilities that enhance Knowledge, Academy output, Magic, Alchemy Lab efficiency, or your powerful Fireball attacks. |
| Embassy | Varies | Spirit units summon Diplomats to the Embassy. Through Trade, you gain Trade Agreements with different Nations, each providing unique fixed buffs. Once agreements are reached with all Nations, your Diplomats are returned. |
| Alchemy Lab | Varies | The Spirit summons an Alchemist to the lab. Here, Magic Gold is created, which in turn allows for the creation of Relics. These Relics provide powerful buffs to your Magic, Knowledge, and Dragon mechanics. |
| Sorcery | Varies | Your Spirit unit gains the ability to summon powerful elemental beings: Shaman, Ifrit, Gorgon, and Zephyr, each with their own unique contributions. |
| Runecraft | Varies | The Spirit summons a Runesmith. Crafted Runes can be applied for a variety of beneficial buffs throughout your tower. |
| Temple | Varies | (Further details for the Temple mechanic are not yet available.) |
The later mechanics are way more powerful and synergistic than the earlier mechanics. The exception is the Prestige system, whose Blessings are also locked in tiers, provide the scaling to advance to the later parts of game.
While the cost of resources in Tower Wizard escalates exponentially, the buffs gained from both the later game mechanics and the Prestige Blessings generally provide linear multiplicative bonuses. This creates an interesting dynamic where raw resource accumulation quickly hits a ceiling. Without the scaling provided by the Prestige Blessing system, a typical run will likely cap out around 100 Spirits, effectively halting any further advancement.
Therefore, the only viable path to completing the game lies in strategically utilizing Prestige Points. By earning and investing these points, you can raise the inherent exponential cap on Spirits, allowing you to summon far more and push deeper into the more potent, late-game mechanics. This strategic interaction is key to overcoming the ever-increasing costs and ultimately achieving victory in Tower Wizard.
Essential Tips
To master Tower Wizard, you’ll want to optimize your resource management and understand how different mechanics scale. Here are some key tips to guide your ascent:
General Strategies
- Active Progression: Don’t just sit and wait! Hold-clicking on most mechanics, including Sorcery, will significantly increase their progress. There’s almost always something you can be actively boosting.
- Bulk Building: To build in increments of 10, simply hold Shift while clicking. This saves time when expanding your tower.
- Ascension Ready? Keep an eye on the shortcut bar at the top of the screen; it will highlight when your Orb is ready to ascend, signaling a new stage of progression.
- Resource Management: Regularly check the Resources bar on the left. It’s your quick reference to see what you have available to spend.
- Spirit Allocation: Resist the urge to overspend your Spirits on early-game mechanics. They’re far more effective when invested in the powerful later-game mechanics.
- Prestige Points: These points are crucial for long-term progression. They’re earned cumulatively, even before the Prestige mechanic is unlocked. Early on, focus on generating Magic as it’s the primary way to earn Prestige. Later, adapt your strategy based on the damage approaches outlined below.
- Blessing of Population: When navigating through the Embassy, this Blessing can be incredibly helpful for pushing through.
Blessing Tier List
Generally, Blessings that directly impact later-game mechanics are far more potent. Be aware that the last tier of Blessings is often less impactful due to the likelihood of completing the game before they’re fully utilized.
- A-tier Blessings: Research, Totems, Dragon, Alchemy, and Runecraft.
- B-tier Blessings: Dragon Wisdom, Fire, 60, Doubling, Multitasking, Crafting Totem, Specialization
- C-tier Blessings: Supervision, Balance, Population, Debt, Forest Keeper, Compounding
- D-tier Blessings: Magic, Knowledge, Forest, Sage Totem, Effects
- F-tier Blessings: Curses, Gorgon, Diplomacy, Few
Wall Best Strategies
- Early: Combine Zephyr with Dragon (and/or another unit in a support role) to break through initial barriers.
- Mid: Focus on Dragon Fireball paired with Sage. Alternatively, Curse can also be an acceptable option here.
- Late: The ultimate combination for late-game progression is Dragon Fireball, enhanced by Ifrit Molten, and supported by the Blessing of Fire.
Optimized Walkthrough

This walkthrough offers a streamlined path to game completion, focusing on efficient Prestige Point acquisition at key thresholds: 5, 10-11, and 21+.
0th Prestige Run (0 Prestige Points)
Your initial goal is to unlock the Prestige mechanic and accumulate 5 Prestige Points. This is essential for accessing the second tier of Blessings in your next run.
- Start by building 2-3 Wood Totems, then prioritize Magic Totems.
- Allocate 12-16 Spirits to Druids and Tomes, with the rest going to Cloudlings.
1st Prestige Run (5 Prestige Points)
Select Research+2 and Totems (focus on Supervision and Magic Blessings within this branch).
Your objective is to gain 5-6 additional Prestige Points by maximizing Magic output using the Academy, Dragon, and eventually the Alchemist. These points will unlock crucial third-tier Blessings.
- Begin with 4-6 Wood Totems, then balance between Knowledge and Magic, initially favoring Knowledge.
- Limit Cloudlings, Tomes, and Druids to around 30 each. Conserve Spirits for the more impactful Academy, Dragon, and Alchemy mechanics.
- Utilize your Dragon in a support role, distributing its Ability points as they become available.
- Use free Spirit Houses to adjust your Magic or Knowledge needs.
- Skip the Embassy entirely this run.
- Once Alchemy is unlocked, focus exclusively on producing Mana Stones to boost Magic for Prestige Points.
2nd Prestige Run (10-11 Prestige Points)
Choose Research+2, Totems, Alchemy+2, Dragon+2, Dragon Wisdom, Supervision (consider Balance/Population and Magic/Knowledge).
Your aim is to reach a total of 21+ Prestige Points for your final major Prestige run. This will be a longer run, requiring you to push through the Embassy path even without specific Embassy Blessings. Expect a high demand for Knowledge, as Embassy, Combat, and Rune Mastery buffs are expensive but vital.
- Build 6-8 Wood Totems, then heavily prioritize Knowledge over Magic.
- Keep Cloudlings, Tomes, and Druids at no more than 30 each, reserving Spirits for the Embassy and later mechanics.
- Your Dragon continues in a support role, now benefiting from increased effectiveness due to Blessings. You can save some Dragon Ability points for Fireball during the Embassy run, or rely on Sorcery for damage.
- Power through the Embassy run quickly by hold-clicking and liberally allocating Spirits.
- Initially, set up your Spirit Houses as Book Houses for increased Knowledge.
- To tackle the Cloud Wall, avoid over-allocating spirits. Instead, use 60 Zephyrs combined with Shamans and your Dragon.
- Unlock only the runes for Zephyr Lightning and Infinity, possibly Alchemy Boost. Spend remaining Rune points on Infinity Runes for damage.
- Actively hold-click on Sorcery to rapidly boost damage and scale your Zephyrs.
3rd Prestige Run (21+ Prestige Points)
Select Research+2, Totems, Alchemy+2, Dragon+2, Dragon Wisdom, Supervision, Fire+2, 60+2, Doubling, Multitasking, Runecraft+2, Crafting Totem+2, Specialization (consider Balance/Population). The Blessing of Destruction augment will auto-unlock.
Your ultimate objective is to complete the game.
- Primarily build all your Spirit Houses as Book Houses for maximum Knowledge.
- Start with 12 Wood Totems, then transition to Crafting Totems, balancing between Wood and Crafting.
- Limit Cloudlings, Tomes, and Druids to no more than 60 each, saving the rest for Embassy and later mechanics.
- Alchemy should exclusively build Ouroboros to augment your Fireball damage.
- Immediately put your Dragon into Fireball mode. Do not allocate any Ability points until Fireball is gained, then dump all points into it. Dragon Fireball combined with Ouroboros and Combat Magic buffs will easily destroy the Cloud Wall.
- During the Embassy run, head directly for Chronara, then proceed clockwise through the path as quickly as possible, using hold-click liberally.
- After the Embassy, raise Sage, Dragon, Alchemy, and Runesmith allocation to 60 to gain their Blessing buffs.
- After acquiring all Runes, get 60 Ifrits first, then 60 of every other Sorcery unit.
- When you hit the Infinity Wall, initially focus on gaining levels for Forest Keeper and building more Wood Totems.