Table of Contents Show
This guide will cover all the Canonical choices made by Corvo Attano in Dishonored, no matter how small! Hope this helps and is intresting to you Dishonored fans! Guide will contain lots of spoilers!
Guide Overview
This guide will try and cover a complete canonical story for Dishonored by gathereing information from the following sources:
Dishonored
- Dishonored: The Knife of Dunwall
- Dishonored: The Brigmore Witches
- Dishonored Notes & Lore
- Dishonored 2
- Dishonored: Death of the Outsider
- Dishonored: The Corroded Man
- Dishonored: The Wyrmwood Deceit
- Dishonored: The Peeress and the Price
- Dishonored: The Return of Daud
- Harvey Smith’s past Tweets, Reddit discusions & Interviews
As new material is still being released the guide may be updated and changed. The guide will also contain heavy spoilers!
Please note:
The overall chaos canonical ending is the low chaos ending, however, Corvo still did kill a few people but not enough to achieve high chaos.
Choices in italics mean they do not have a confirmed outcome as canon. I have speculated and applied knowledge of Corvo’s character built up from the franchise to try and reason what I believe he would have done.
I am not perfect so this guide may have typos, errors, and information within the games and media that I have missed! Please feel free to comment any of your ideas, information etc.
Guide contains speculation in parts. Feel free to discuss and share information I may have overlooked in the comments.
Introduction – Returning Home
The introduction to Dishonored takes place at Dunwall tower and there are no real big decision that are game changing although there are some very minor ones.
Corvo’s Big Choices:
- No big choices to be made.
Minor Choices:
- Corvo did not drink the drink from next to Campbell, thus not chaning Sokolov’s painting.
- Corvo did kill the Assassins.
- Corvo did play Hide and Seek with Emily.
Evidence & Reasoning:
For the painting – In Dishonored 2 this painting can be found and has the drink within the painting meaning Corvo did not drink the drink
Corvo killed the attackers – In the Daud DLC corvo can be seen killing the attacking Assassins and this makes sense as he is protecting his lover and Daughter from trained killers.
Corvo chose to play Hide and Seek with Emily – In the Dishonored book “Dishonored: The Corroded Man” Corvo reveals he did play Hide and Seek with Emily before seeing the Empress.
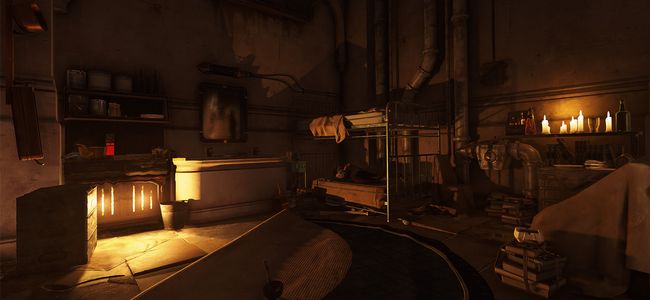
Mission 1 – Dishonored
The first mission in Dishonored takes place within Coldridge Prison as Corvo must find away to escape. It is a simple mission with very few choices to be made.
Corvo’s Big Choices:
- No big choices to be made.
Minor Choices:
- Corvo did not kill many (if any guards).
Evidence & Reasoning:
- Low chaos – These men are just doing their jobs and Corvo doesn’t want to look guilty and murderous.
Mission 2 – High Overseer Campbell
The second mission in Dishonored revolves around taking out High Overseer Campbell, the leader of the religious group called the Overseers, and one of the key people behind the Empress’ assassination.
Corvo’s Big Choices:
- Corvo did not kill Campbell, non-lethal takedown of Campbell was used.
- Corvo helped Curnow escape alive from the Overseers.
Minor Choices:
- Corvo would kill few (if any) guards and Overseers.
- Corvo does help Granny Rags the first time in dealing with the “Gentlemen Callers” but does not help her poison the distillery.
- It is unclear whether Corvo saves Berthold and Elsa in this mission.
- It is unclear whether Corvo saved Griff from the Slackjaw’s gang.
Evidence & Reasoning:
- Campbell’s fate – This is actually confirmed by Harvey Smith in a Reddit discussion he did a while back and in Dishonored 2 an Overseer in the second mission makes reference to his branding.
- Curnow’s fate – In the Dishonored canon Curnow escaped the Overseer base alive, and recognizes Corvo’s help in making it out alive. In the Corroded Man novel, he is enjoying retirement with his wife.
- Low chaos – These men are just doing their jobs and Corvo doesn’t want to look guilty and murderous.
- Granny Rags missions – Corvo dealt with the “Gentlemen Callers” but didn’t want to help with the second side activity because it would spread the plague in Dunwall.
- Elsa & Berthold’s fate – There is no evidence for what Corvo did for these two people.
- Griff’s fate – There is no evidence for what Corvo did for Griff, although I think it is very likely he helped save Griff.
Mission 3 – House of Pleasure
The third mission in Dishonored takes place in the Distillery District and the Golden Cat and involves saving Emily and taking out the Pendleton twins, Morgan and Custis.
Corvo’s Big Choices:
- Corvo killed both Pendleton twins.
Minor Choices:
- Corvo did not kill many (if any guards).
- Corvo did help Slackjaw retrieve the information from his missing guy but did not proceed to get Slackjaw the code to neutralize the Pendleton.
- It is unclear whether Corvo looted the Art Dealer’s safe, although I think it is unlikely he did.
- It is unclear whether Corvo helped the woman being harassed by the City Watch guards, but I think it is likely he did help her if he passed that way.
Evidence & Reasoning:
- The Pendleton’s fate – Corvo decided to kill the Pendleton himself has Slackjaw’s method was risky and he wouldn’t put all his trust in a Gang leader like Slackjaw.
- Slackjaw’s missions – Corvo helped him get the info because he wanted an easier way into the Golden Cat but didn’t help Slackjaw get the code because he wanted to get Emily safe quickly and he couldn’t put all his trust in a gang leader.
- Low chaos – These men are just doing their jobs and Corvo doesn’t want to look guilty and murderous.
- The Art Dealer’s safe – There is no evidence for Corvo looting the safe, but I think it is unlikely he did, because he wanted to get Emily to safety as quickly as possible and didn’t have time to extract the code and loot it while trying to make sure Emily is safe. (Not confirmed)
- Harrased woman – There is no evidence that Corvo helped this woman but, I think it’s likely he helped because Corvo seems to like helping people in need. (Not confirmed)
Mission 4 – The Royal Physician
The fourth mission in Dishonored takes place around Kaldwin’s Bridge and involves kidnapping the Royal Physician, Anton Sokolov.
Corvo’s Big Choices:
- No big choices to be made.
Minor Choices:
- Corvo did not kill many (if any guards).
- It is unclear whether Corvo looted Pratchett’s Safe.
- It is unclear whether Corvo helped the woman trapped by plague rats in the Midrow Substation, but I think it is likely he did help save her.
- It is unclear whether Corvo helped the Pearl Scavenger, but I think it is unlikely he did.
- It is unclear whether Corvo freed Sokolov’s test subjects, but I think it is likely he did help free them.
Evidence & Reasoning:
- Low chaos – These men are just doing their jobs and Corvo doesn’t want to look guilty and murderous.
- Pratchett’s Safe – It is never clear whether Corvo looted Pratchett’s Safe, it is up to you.
- Save the Survivor – I think Corvo would have saved this stranded woman as he would not want someone to needlessly get the plague and die. (Not confirmed)
- The Scavenger – I think it’s unlikely Corvo helped the Scavenger because he would have thought there was a reason for him being locked up by the guard and he looks like thugs Corvo has come across before. (Not confirmed)
- The Captives – I think Corvo would have saved the captives for Sokolov’s experiments because he would likely not agree with them being held prisoner and experimented on. (Not confirmed)
Mission 5 – Lady Boyle’s Last Party
The fifth mission in Dishonored takes place in and around the Boyle Mansion and involves eliminating the Lord Regent’s Mistress.
Corvo’s Big Choices:
- Corvo did not kill Lady Boyle, non-lethal takedown for her was used.
Minor Choices:
- Prerequisite: It is unclear whether Corvo bribed or intimidated Sokolov.
- Corvo did not kill many (if any guards).
- It is unclear whether Corvo signed the ledger in the Boyle Mansion.
- It is unclear whether Corvo participated in the duel with Lord Shaw.
Evidence & Reasoning:
- Lady Boyle’s fate – In Part Three of the novel Dishonored: The Corroded Man, the non-lethal abduction of Lady Boyle was established as canon
- Sokolov Prerequisite – I think this one can be argued either way and is up to your interpretation.
- Low chaos – These men are just doing their jobs and Corvo doesn’t want to look guilty and murderous.
- Guest Ledger – I think it is unlikely Corvo would sign the ledger as this would give a clear idea of who is responsible for Lady Boyle’s disappearance, whereas in the book it is unknown who was responsible.
- The Duel – I think Corvo would have participated in the duel as it would be a noble act and within the law. He may have still felt mislead by Lord Pendleton though.
Mission 6 – Return to the Tower
The sixth mission in Dishonored takes place at Dunwall Tower and Corvo must assassinate the Lord Regent, Hiram Burrows.
Corvo’s Big Choices:
- Corvo killed the Lord Regent and then played the broadcast of his confession to the Empire.
Minor Choices:
- Corvo did not kill many (if any guards).
- Corvo killed the Royal executioner Morris Sullivan.
Evidence & Reasoning:
- Lord Regent’s fate – Never confirmed 100% but seeming Corvo killed the Executioner it is likely Corvo would kill the Regent. Corvo would have most likely looted the Lord Regent’s safe and found the confession and the journal etc and then killed Hiram Burrows and then broadcast the confession to justify his execution to the Empire.
- Low chaos – These men are just doing their jobs and Corvo doesn’t want to look guilty and murderous.
- Morris Sullivan – In a Reddit discussion Harvey Smith said that Corvo killed him.
Mission 7 – The Flooded District
The seventh mission in Dishonored takes place in the Flooded District and Corvo must escape the area back to the Hound Pits Pub to find Emily.
Corvo’s Big Choices:
- Corvo fought Daud but then spared his life.
- Corvo helped save Slackjaw from Granny Rags.
Minor Choices:
- Corvo did not kill many (if any guards or Whalers).
- Corvo recovered his gear from the Greaves Refinery.
Evidence & Reasoning:
- Daud’s fate – Confirmed by the canon ending for the DLC in which Corvo spares Daud after they fight. Daud talks to Corvo after a fight and then asks for his life which Corvo grants. (Also confirmed as Daud appears later in Dishonored: The Return of Daud novel and Dishonored: Death of the Outsider as well as mentions from other novels and Dishonored 2.)
- Slackjaw and Granny – In Dishonored: the Corroded Man Corvo seeks the help of Slackjaw, now known as Azariah Fillmore, and they reminisce on Corvo saving him from being cooked by Granny Rags.
- Low chaos – These men are just doing their jobs and Corvo doesn’t want to look guilty and murderous. The Whalers are just people trying to make a living in hard times aswell. Although Corvo may be more likely to kill them he would try and reduce bloodshed where it is not needed. Shown in the DLC when in low chaos Corvo knocks out Whalers in Dauds dream etc.
- Corvo’s gear – Corvo would need his gear to rescue Emily and tackle Daud’s Hideout.
Mission 8 – The Loyalists
The Loyalists is the eighth mission in Dishonored, in which Corvo Attano must return to the Hound Pits Pub in search of Emily Kaldwin.
Corvo’s Big Choices:
- Corvo rescued Piero and Sokolov by using the Arc Pylon set to put the enemies to sleep.
Minor Choices:
- Corvo did not kill many (if any guards).
Evidence & Reasoning:
- Piero and Sokolov – Corvo rescued these two as they went on to cure the plague together in the lore of the franchise. Corvo would have also got the blueprints and used the pylon as this would render all enemies unconscience, freeing the two scientists and allowing easy navigation of the area without having to kill lots of people. When he rescued Emily they would have control over these guardsmen.
- Low chaos – These men are just doing their jobs and Corvo doesn’t want to look guilty and murderous.
Mission 9 – The Light at the End
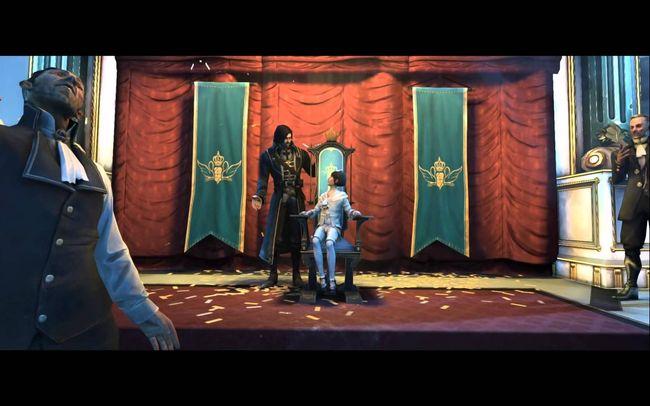
The Light at the End is the ninth and final mission in Dishonored, in which Corvo Attano must confront the leaders of the Loyalist Conspiracy and rescue Emily Kaldwin from Kingsparrow Island.
Corvo’s Big Choices:
- Corvo killed Farley Havelock and rescued Emily from her room.
Minor Choices:
- Corvo did not kill many (if any guards).
Evidence & Reasoning:
- Havelock’s fate – On the first page in Issue #1 of Dishonored: The Peeress and the Price, it is revealed that canonically Corvo killed Havelock by slitting his throat from behind. This is reaffirmed by Emily in Issue #2.
- Low chaos – These men are just doing their jobs and Corvo doesn’t want to look guilty and murderous.
The Cannonical Ending
“So ends the interregnum, and now Emily Kaldwin the First will take her mother’s throne, after a season of turmoil. You will stand at her side, Corvo, guiding her young mind, and protecting her from those who seek to exploit her, or cause her harm. You watched and listened when other men would have shouted in rage. You held back instead of striking. So it is, with the passing of the plague and Emily’s ascension, comes a golden age, brought about by your hand. And decades hence, when your hair turns white and you pass from this world, Empress Emily -Emily the Wise, at the height of her power- will lay your body down within her mother’s great tomb, because you were more to her than Royal Protector. Farewell, Corvo.”
Emily takes the throne with Corvo there to protect her as Royal Protector and Sokolov and Piero cure the plague with a new elixer. Calista and Geoff are reunited and Corvo and Samuel return to the Hound Pits Pub for a drink in the new golden age of Dunwall as it recovers from the plague.