Table of Contents Show
Base Building for Alpha 17
Time and again I hear people have troubles building solid forts in A17 that can withstand hordes. Well, here’s my suggestion for what I’d say is a very easy to defend and also easy to expand basic defense position.
Note that it is neither pretty nor comfortable. It’s a defensive position for those times when you know the Z’s are coming for your sweet, sweet brains.
Location, location, location
You know the old saying, in real estate the three main criteria are location, location and location. True as well here. What you want is an area that’s relatively flat, that’s not on top of a hill or even has some steep inclines on either side (so Zs can’t spawn there and dig through the incline and underneath your base, which could make it collapse), preferably in the Forest biome (for temperature reasons) and not too far from a town, for looting reasons, but also not too close to one, for Z spawning reasons.
Foundation
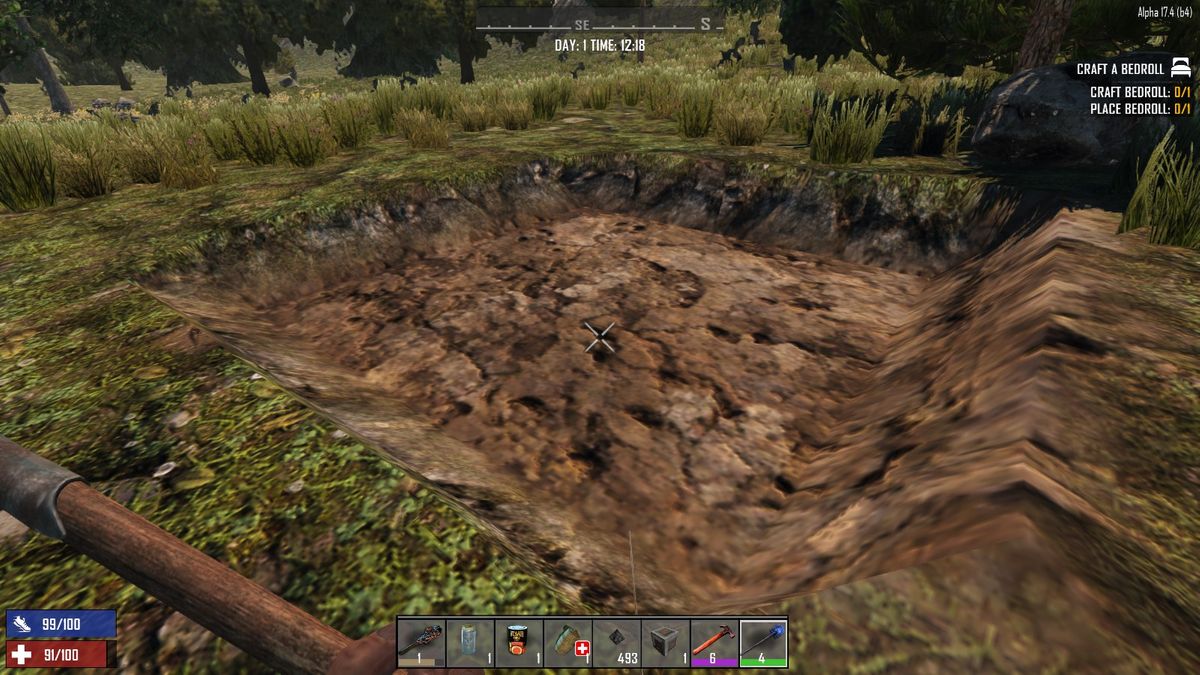
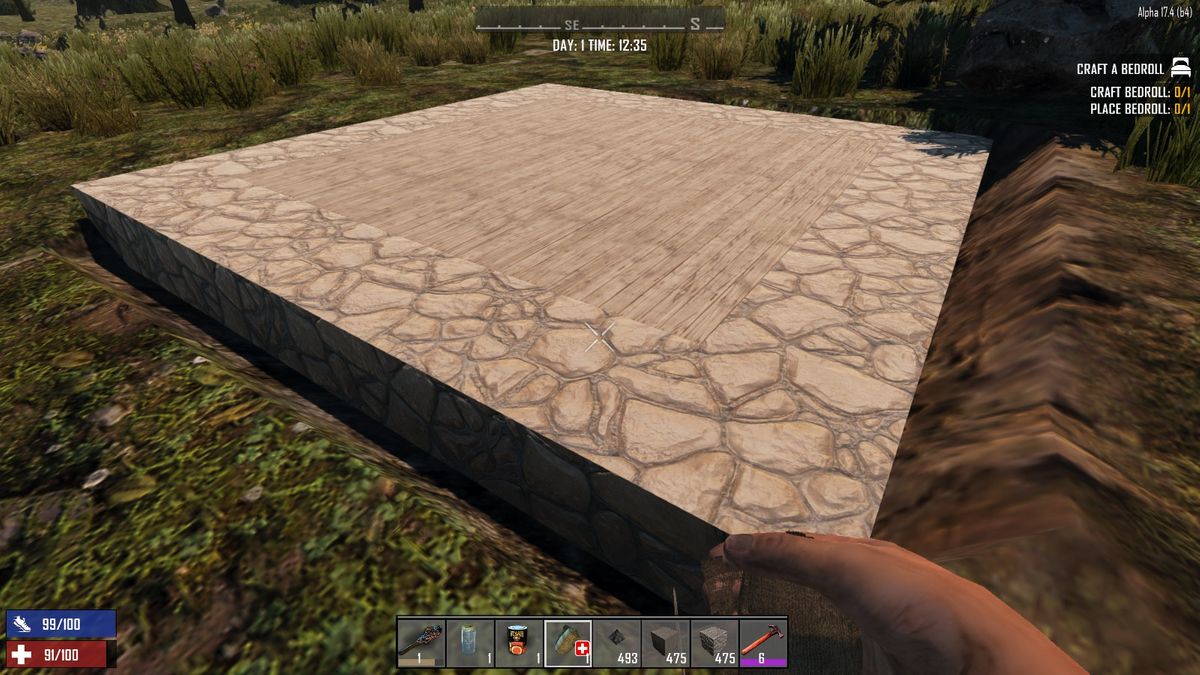
When you are happy with a site, dig out a rectangular area of about 7×7 (if you play alone) or about 10×10 to 15×15 (if you play with others that can take care of food, loot and other tidbits). The larger your base is the more comfortably a lot of people can live together inside (and the more workbenches, forges, cooking fires etc you can house in it) but every square added also means more resources needed to build it.
I also do recommend making your base a square, first, mapping that roof out in a stable way is way easier and second, in a square base it doesn’t matter where the zombies come from, your defense is equally good into every direction.
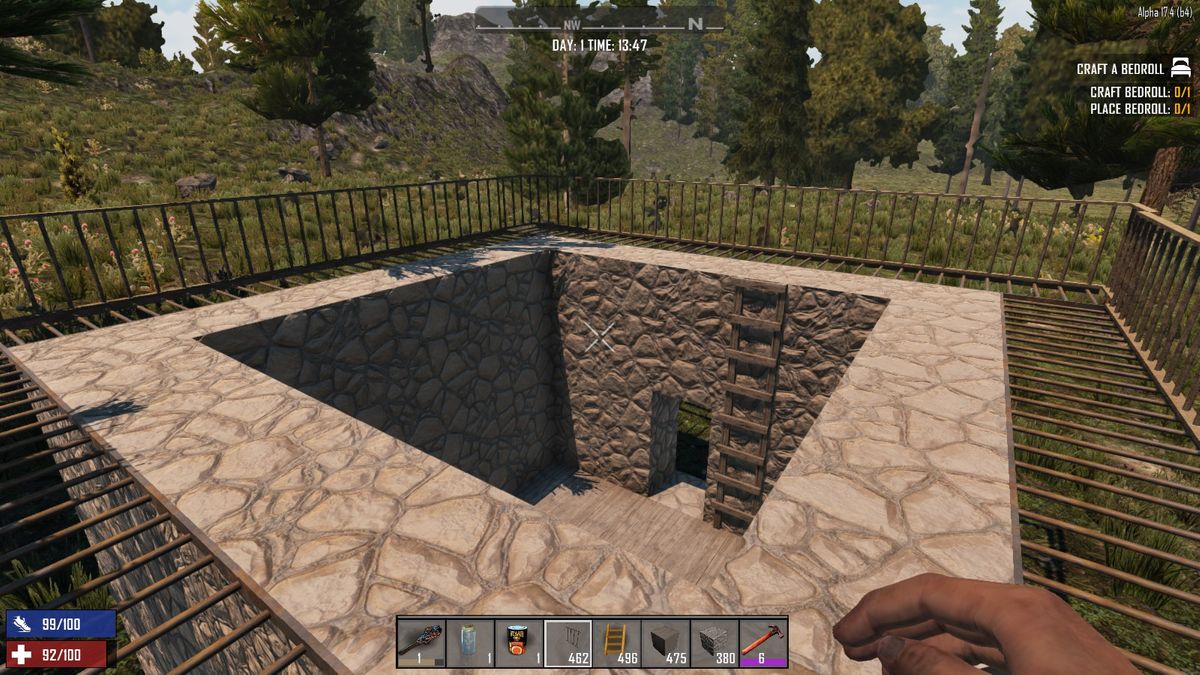
You should at the end of your digging effort have a rectangular hole in the ground, one level deep.
Building materials
Eventually, we want concrete. Now, of course, we don’t have that at the start of the game, needing a mixer (which needs a lot of parts that are in short supply at the start), a forge to make the cement and most of all quite a few skillpoints that are more importantly spent on other things during the early days.
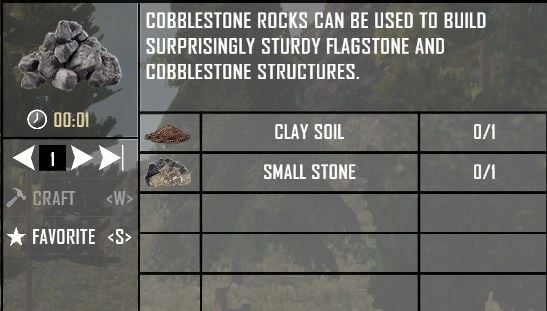
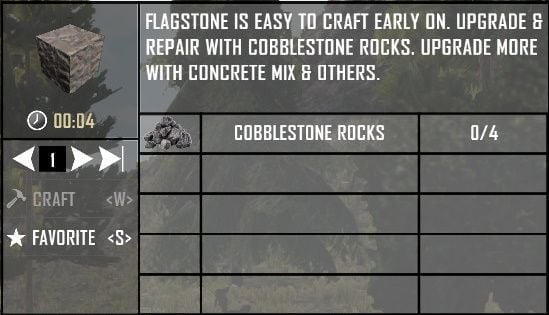
What we can build right from the start, though, is cobblestone, which allows us to make flagstone blocks. Flagstone, while a far cry from concrete, beats any wooden walls any houses can provide us with and can be upgraded to concrete later.
So hack away with your stone axe on some of the builders that are abundant above the ground, that way you also get a bit of iron, nitrate and lead as well, and mix the stone with the dirt you got from digging the foundation of the base.
Foundation and the first walls
Lay down a ring of flagstone blocks in your 1-level deep hole to lay the foundation of your base. You can either fill the inside (the “floor” you stand on) also with flagstone or with wooden blocks, which would be easier to procure at this point.
Build up the wall on the flagstone base you put down, it should be at least 3, better 4, levels high (not counting the foundation layer) and of course leave a one-block wide hole for the door. For now, this will be a wooden door (until we have a forge that lets us make iron), and this will be the weak spot of your base, at least for now.
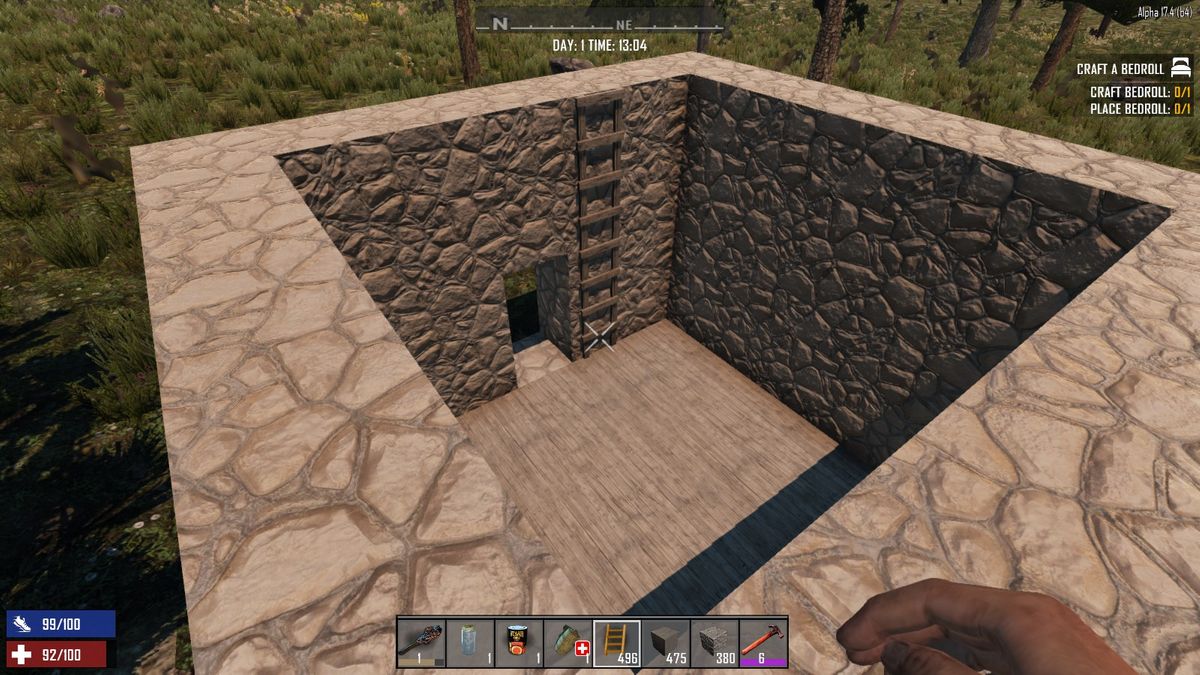
Put a ladder onto the wall so you can climb on top of it and shoot down at any Z’s that might come your way. This is also as good as it gets until you have access to a forge.
Arrow sli… grates
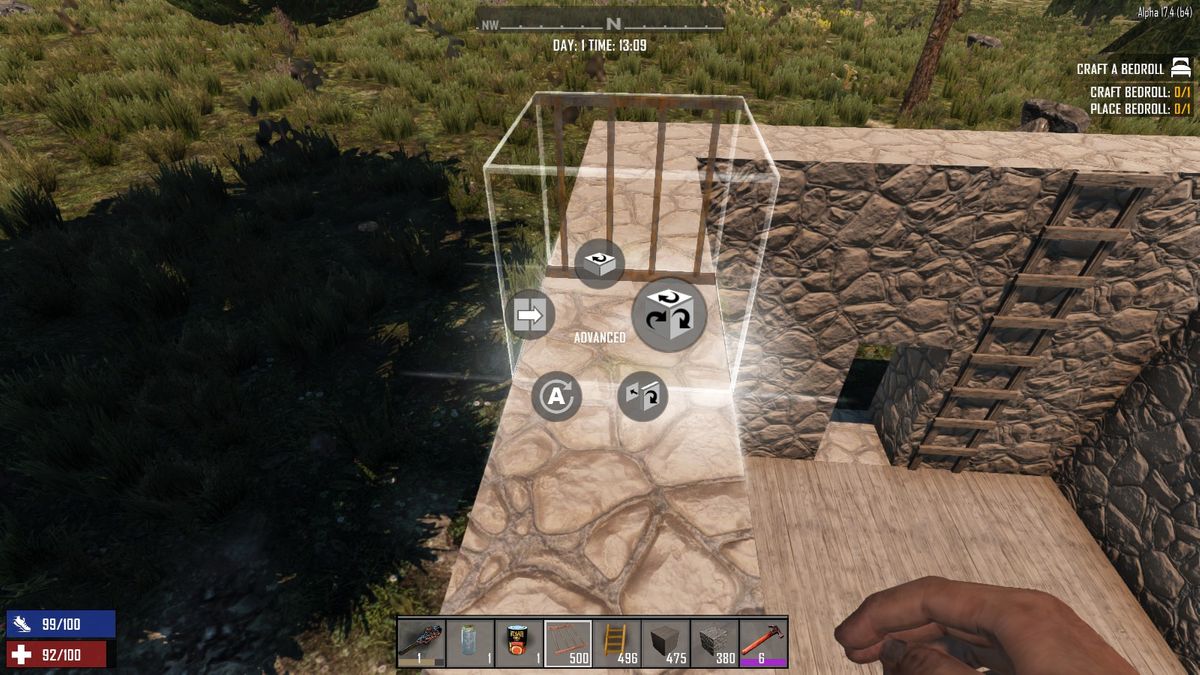
Once you have access to a forge, we can add a way to shoot down at the Zs. Build some Metal Bars (not the centered kind), one for every block around the wall. Turn them so that they’re horizontal (hold R and activate advanced turning) so you can attach them to the topmost wall so that you can stand on them and look down through them.
This allows you to literally rain death down on the Z’s trying to get into your base.
Experience shows that it’s a good idea to add some upright wooden bars to the side as rails so you don’t fall off in the heat of battle later.
Also, take a bit of that iron you smelted and upgrade the wooden door to an iron one. Again, 2 upgrade levels are possible, max this out.
A roof
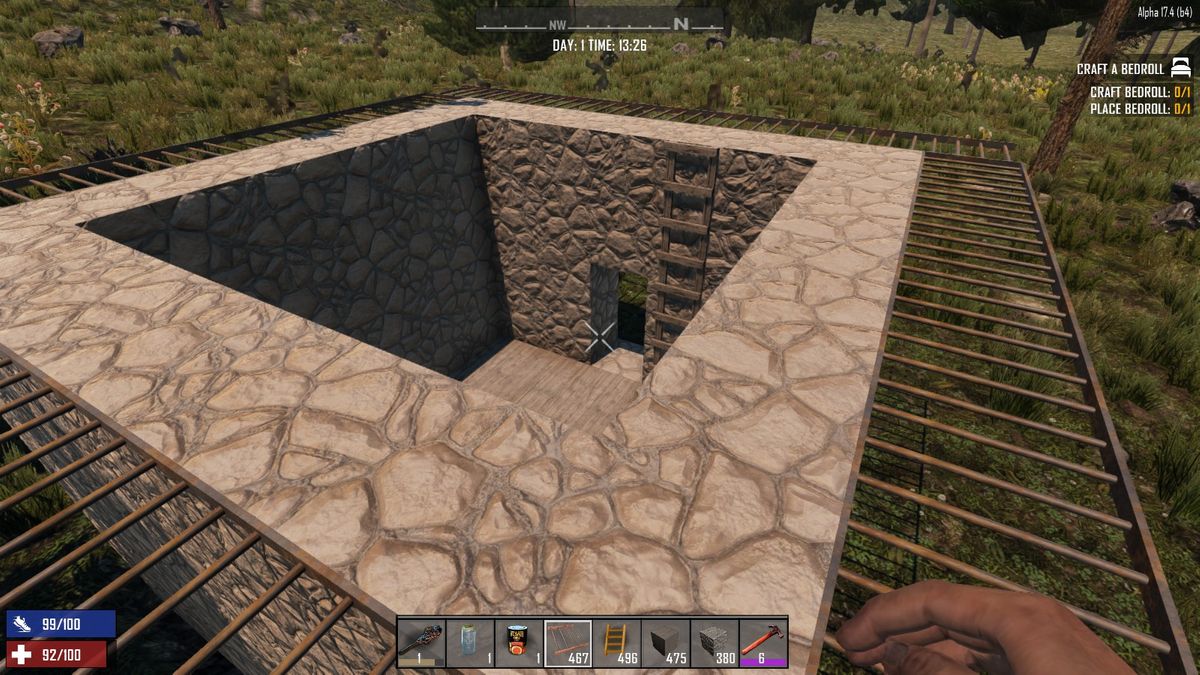
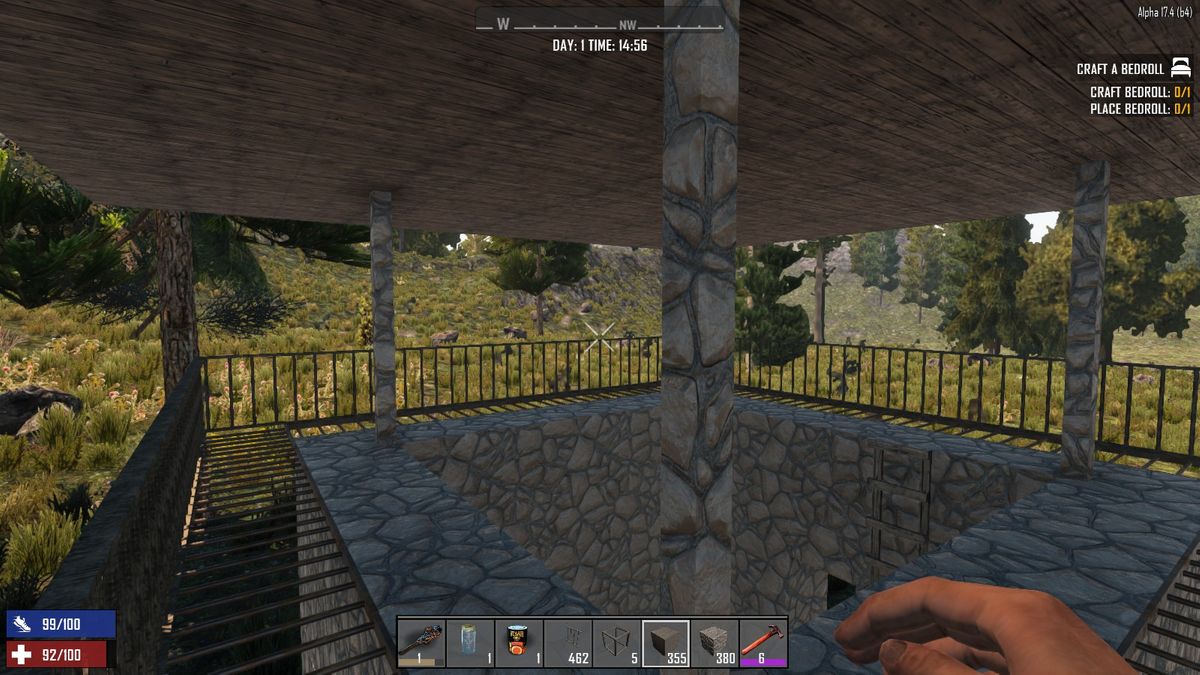
With the return of flying threats, in our case here the dreaded vultures, the need for protection from airborne attacks has arisen. What we want is a roof about 3 blocks above the wall and metal grates, i.e. where we’ll stand when defending the base.
Due to how physics work in the game, any block is as good as any other when it comes to holding anything up, so choose the slimmest flagstone beams you can find and put one on every corner of your wall. Personally i put them on the inside corner so they don’t get in my way, but anything you like is fine. If your base is larger than 10×10, I highly recommend putting also one in the middle of the wall, again, because of the game physics.
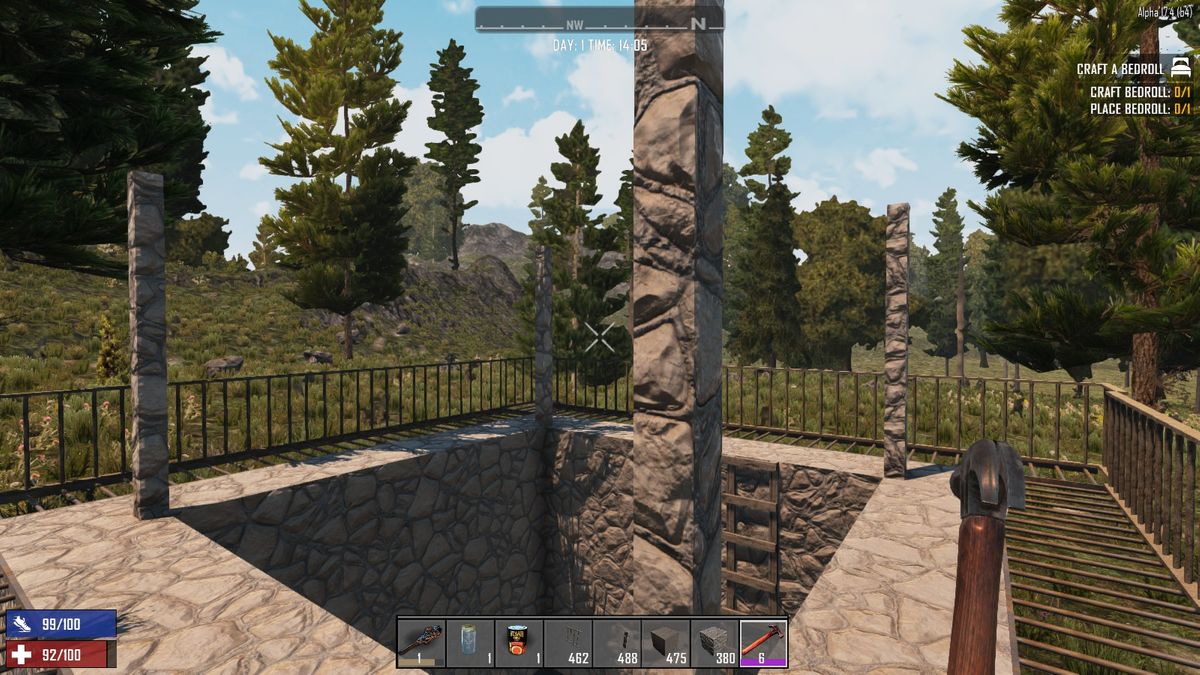
Put down a pillar every 5 blocks or so inside your base to carry the roof, then build a roof out of wooden blocks. You can of course also use flagstone and, eventually, you will want to upgrade to flagstone anyway if you plan to put anything on top, but for now, wood will do.
Extend the roof one or two blocks to the outside of the base so it hangs over the metal bars you will stand on by a block or two. That way, you force the vultures to come at you from the front and they can’t swoop down onto you from above or behind you.
Prepping for the first blood moon
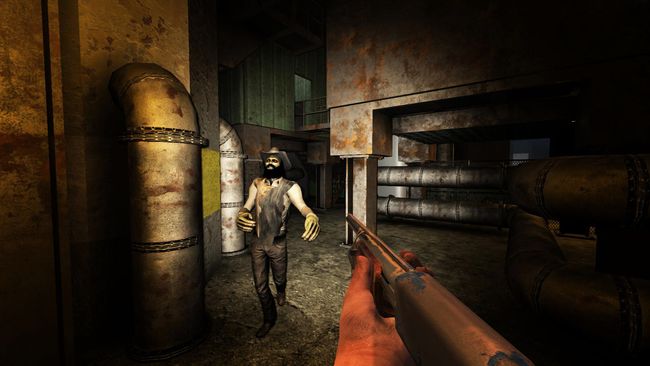
This will probably take you ’til day 5 or 6, maybe even 7, so this is what you’ll probably have at your disposal when the first blood moon comes. Upgrade the flagstone walls once more with flagstone, raising their HP from 500 to 1500. If you have the wood, craft some wooden spikes and distribute them liberally around the base and especially right next to your wall where Z’s almost HAVE to come to during blood night. Since the door still is your most vulnerable spot (and Z’s inexplicably know this and come to that spot), make sure that your door is extra well guarded by spikes, you might even want to sacrifice a bit of that still-precious iron to upgrade them to iron spikes around your door.
When the blood moon night starts, make sure you have all the weapons and ammo you could need, then whack away that ladder (make sure you have a few spare ladders in your inventory, just in case you fall off) and shoot down on your attackers.
The first night you’ll probably not see a lot of specials, maybe a spitter but most certainly not an exploder, so your cobblestone walls should mostly hold down the assault. You might end up with a hole or two, but it shouldn’t be serious. If you’re playing with friends, have one of them on repair duty to repair or even replace the wall sections that receive the most punishment.
Improvements past the initial stage
Once you have a mixer and learned how to make cement, go nuts with it. Upgrade the flagstone walls to concrete, then as soon as the concrete is dry, upgrade it again with more concrete. You now have walls with 5000 HP each that take about a minute to remove with a pickaxe, even an exploding policeman doesn’t cause an immediate problem anymore.
Come steel, you want to upgrade your door to a steel door. This comes in three levels, and while even the first level is already basically overkill, go all the way for good measure.
Check out jwoodles killing corridor. Still the best design I’ve seen.