Table of Contents Show
The faction enemies of the Shroud. It’s worth noting that in every combat within the shroud, a combat effect can happen that causes your heroes to randomly get blind or vuln, and sometimes stress. You won’t get both blind and vuln on the same character. This effect is random, but its ability to show up any time after turn 1 means that high alpha comps have a distinct advantage against the gimmick. Otherwise, Comps that deal with being moved well are superb here as Fisherfolk love to move you around, and flexible damage plans tend to perform well against the myriad threats and against the boss himself.
Darkest Dungeon 2 Fisherfolk Guide
Some of the Fisherfolk can inflict a special token: The Barnacles token. It causes heroes to gain 1 bleed when they move, no matter how they move. Wears off in 3 turns and is limited to 1.
Wharf Rat
Priority: 5 in front, 3 in back
HP: 14, Speed: 6
Starts stealthed 25% of the time
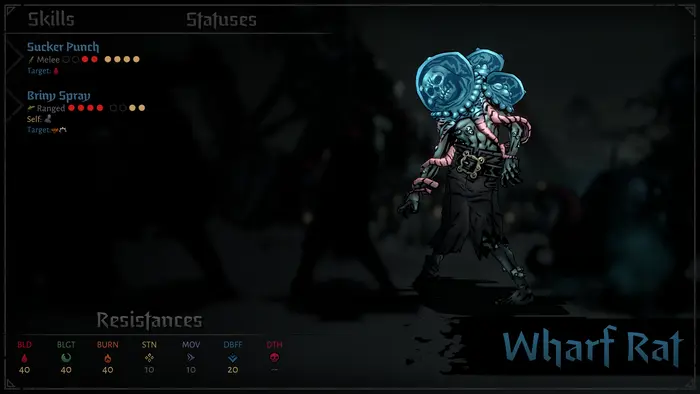
A fairly basic enemy. He either uses sucker punch, which is a normal damage move that inflicts some bleed, or Briny Spray, which will stealth him and inflict 2 stress and the barnacles token. He can only use Briny spray in the back, hence the priority difference. It’s a rather crappy move due to the high stress, but it does have a 2 turn cooldown, meaning his priority drops back to 4 for a couple of turns after he uses it. If he’s in the front you can generally leave him alone for other enemies, which is great because tons of enemies in the Shroud are way more dangerous than this guy.
Fish Monger
Priority: 2, (4 if in rank 1)
HP: 16, Speed: 4,
Gets 2 turns per round
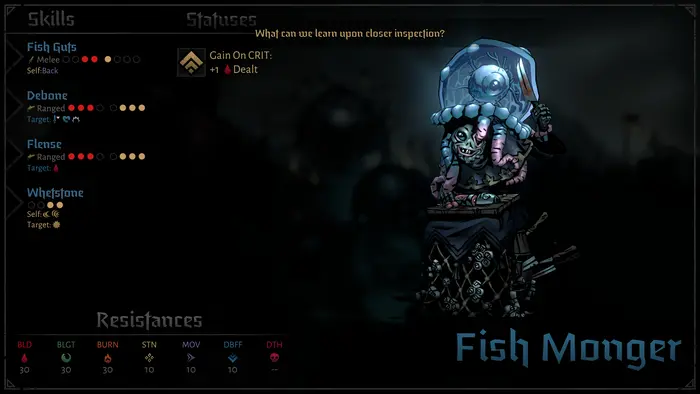
A backline sniper that focuses on setting itself up for crits, the fishmonger doesn’t typically deal crazy damage on its own, but it can ramp up slightly over time. It has a permanent condition that will allow it to deal 1 extra bleed when it uses its bleed attack after it crits with any move (for the whole fight). It tends to open using Whetstone, which gives it dodge+ and a crit token, before immediately following up with Flense. This unit’s relatively low HP and multiple turns mean that DoT damage absolutely melts it, but high direct damage options can quickly kill it before it can do much as well. It can also use Debone as a debuff move, inflicting a weak or a vuln, which is irritating but far from the worst the Shroud throws at you. It’s more dangerous than the wharf rat, but less than many of the other enemies. It’s fairly reasonable to kill this thing quickly, preventing its ramping and output almost entirely, and it’s forced into a weak move to back up if it’s in exactly rank 1, though with two actions per turn this is less crippling than other enemies. The big danger is the stress that her high number of crits and debone can inflict onto the party, as well as her ability to slow the party down with Debone and her Dodge. Only occasionally is the problem the actual damage.
Cabin Boy
Priority: 1
HP: 13, Speed: 4
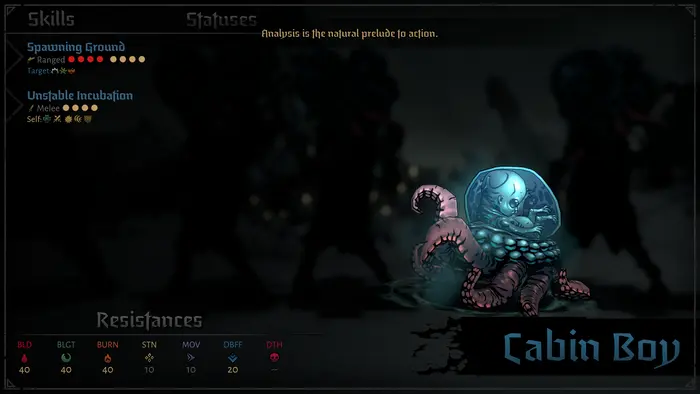
You’d think the enemy called ‘Cabin Boy’ wouldn’t be priority 1, but his gimmick is that he buffs up turn 1, and then hits someone (and often diseases them) turn 2, randomly transforming him into any other Fisherfolk enemy. That includes Dockers, by the way, if he has room. The buff can give him tons of different tokens, but only 1. If he transforms into something it will start with 2 block+ tokens and a unique permanent buff giving it 25% more damage, 3 speed, and a 33% chance to produce a block token when hit for free. So yeah, kill this thing before it can transform. Your life will be much easier.
Bosun
Priority: 3 (2 if in midranks)
HP: 17, Speed: 3
The staple enemy of the Shroud, these guys are notable for being fairly bulky, pushing and pulling people around, and stunning. Yeah, the basic shroud enemy has a stun. Only midrank Bosuns have access to that stun, and it has a 2 turn cooldown. It also debuffs your move resist slightly. Otherwise they use a push (if up front) or a pull (if in back), targeting the front and back respectively. The stun can target anyone. He doesn’t hit that hard though any barnacle tokens can allow him to inflict bleed as he disrupts the party. Generally a higher priority if your comp has issues with being moved around, though the real problem is often that stun in particular. Quite the powerful tool to see on a basic enemy, and one that certainly incentivizes you to kill the midrank Bosuns more quickly than any other Bosun.
You’d think I’d have a picture of the Bosun, but apparently I didn’t take one.
The Hull Keeper
Priority: 2 (1 in midranks)
HP: 24: Speed: 5, DBR: 25%
The champion version of Bosuns, now with DBR. Has all the same moves, though his sodden rigging has a cooldown of 1 and applies vuln, a movement resistance debuff, and a lotta stress. His movement skills both move 2 instead of 1, making him far more disruptive. His special move, which he can only use once per battle, is Riptide, which hits everyone and has a chance to give out barnacle tokens as well as a debuff that causes bleeds to last longer. The rules for this guy are more or less the same as the Bosun, though with the caveat that Sodden Rigging is oh so much worse now. He’s worth killing quickly if he’s in the midranks, and even outside of there his movement skills can be the bane of heroes like Leper.
Captain
Priority: 1 if in 4, 3 otherwise
HP: 23, Speed: 2
The Captain is the strongest enemy buff machine in the game due to his special skill, All Hands on Deck, which gives all his friends 2 random positive tokens. It has a cooldown of 2 and requires him to be in the back to use it. So you’d better pull him or kill him before he does it. Seriously, that buff is ridiculously strong on any enemy in the shroud. Otherwise he’s mainly relegated to some debuff and damage moves, which can apply weak, stress, barnacles, and that special bleed debuff. I’d say that outside of the back rank he’s usually less annoying than Bosuns, since he doesn’t have a stun or moves, but does hit harder. He will bring high damage and stress to a team if you allow him to buff his friends, and especially if you let him do it more than once. You can also kill a friend of his, like a wharf rat, quickly and corpse clear as an alternative.
Docker
Priority: 1
HP: 46, Speed: 0, DBR: 33%
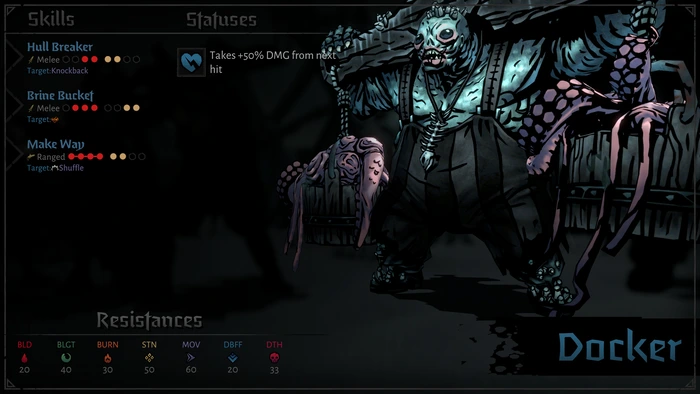
He would perhaps be the most dangerous size 2 enemy in the game were it not for Ghoul and Shambler. Docker is primarily dangerous for 2 reasons. One, he hits as hard as he looks like he’d hit. Hull breaker hits for an insane amount of damage and can easily put a squishy hero right onto death’s door. It also has a knockback attached to it sometimes. He also has an even more annoying ability in Make Way, which cleaves, stresses, and shuffles the whole party. It has a cooldown of 3, so you’ll ideally only see it once, but it can mess up the party cohesion all by itself. If he’s in the back he’ll use Brine bucket, which is a weaker move (for him) that applies barnacles and can reach into 3.
Docker is an enemy you either kill quickly or mitigate, ideally both. His reliance on raw damage is his biggest flaw, allowing characters like Man-At-Arms to handle him well with tanking, or characters like Alhazred to greatly weaken him with a debuff. You should generally never just leave him alone, unless you have no choice. When you are effectively mitigating him he actually isn’t that dangerous outside of his shuffle, but the moment you let him hit you in the face with a full strength Hull Breaker, there’s a good chance that someone’s in severe danger. It’s a blessing that he can’t really follow up on it very well by himself.