Table of Contents Show
Troll Lair Depths Walkthrough
Enter the Troll Lair Depths
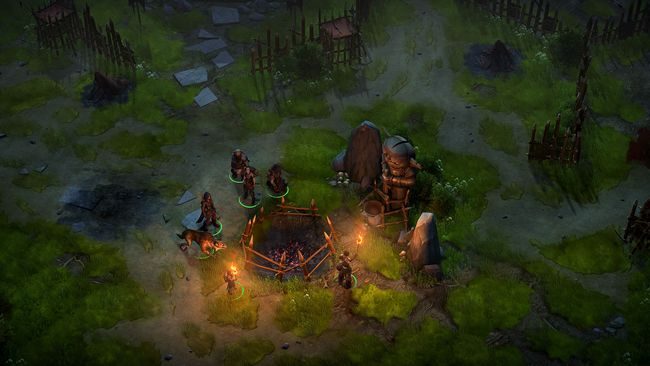
When you arrive on the next level, continue downstairs and into the first room where you’ll be warmly welcomed by a Trollhound and two Kobold Sentinels. Wipe out the weaklings, then turn southwest to find a lock door to the southeast you can’t open. Looks like there are still more keys out there. Pass a [Perception 16] check to find a floor tile with some gems hidden under it, then loot a board to score a Token of the Dryad. With that loot secured, return back northeast to find two more doors, one to the northwest and one to the northeast.
Jason’s Last Stand
The northwestern door begs for a key to open, but unlike the other locked door to the southwest it can be opened with a [Trickery 30] check, which may take a little luck to manage. It doesn’t really matter anyway, because the door to the northeast will allow you to circumvent the door to the northwest. Pass through the northeastern door to enter a room where Jason – if you spared him – now lurks.
The pacifist troll is understandably distraught at your assault on Trobold, and while he’s decided he must now defend his home from you, he refuses to compromise on his civilized ideals. He’ll even condemn – with more justification than is comfortable – your concept of justice as genocidal if you pick the [Lawful Good] response! Oh, Jason, if only all the trolls of Trobold were like you…
A fight here is inevitable, and while Jason is stronger than your average troll, he’s not powerful enough to warrant special action on your part. Target the Kobold Flame Shaman with your archers to hopefully knock him out of the fight quickly and engage the trolls with your warriors. Thrash these foes, then loot Jason for a suit of Hide +3 and the Kobold Flame Shaman for a Belt of Incredible Dexterity +2. The suit of Hide +3 is roughly comparable to a Breastplate +1, being lighter and allowing for a higher Maximum Dexterity Bonus, lower Armor Check Penalty and lower spell failure, which may make it more appealing to secondary warriors like Regongar or Ekundayo.
Be sure to loot a slab of rubble near a fire to the east of Jason to find a Dwarven Helm Shard, then note the dwarven rune on the wall to the northeast. Alas, the two adjacent symbols have been successfully vandalized by the trolls. Continue northwest and you’ll find a door to the southwest, and if you pass a [Perception 1] check you’ll find a poorly hidden door to the northwest.
Go through the northwestern door first to reach a small room with three chests in it. Loot the easternmost one first to find a Shock Light Crossbow +1 and 191 GP, the central chest contains three Potions of Cure Light Wounds and some gems and gold, while the westernmost chest is exclusively full of shiney stones and gold coins.
Leave the room and head through the previously neglected door to the southwest to find yourself in the hallway beyond the locked door that connects back to this level’s entry chamber. Watch your step, however, as there’s a trap [Perception 22] down the hallway a short distance to the northwest. Spot it, disarm it [Trickery 22], then seach back down the hallway to the southeast to find a hidden wall panel [Perception 16] which shelters two Scrolls of Acid Arrow and some gems and jewelry.
Loot the hidden coffer, then turn back around and head northwest down the hallway. Tread carefully and keep your high Perception character up front, as there’s another trap [Perception 22] along the way that you’ll need to disarm [Trickery 22] in order to safely continue. At the end of the hallway you’ll find more foes waiting for you in the form of a Branded Troll, three lesser Trolls and three Kobold Archers. Deal with this threat as you see fit, then occupy their position at a fork in the hallway. The path to the southwest leads to the more populated depths of the ruins, but you can wrap up the northeastern path quickly, so head northeast first.
Giant Spider Chamber
You’ll immediately find yourself confronted with a trap [Perception 28], which isn’t just more difficult to spot, but also to disarm [Trickery 28]. Whatever lies beyond this trap, it must worry Trobold. Remove the trap, loot a pile of rubble beyond it to find a Torag’s Pendant, then turn northwest to find a chamber occupied by Giant Spiders. While numerous, these spiders aren’t much of a challenge anymore, and there’s a good chance they won’t be able to hit your tank without rolling a twenty or near it. You can further simplify this fight by forming your party up in the hallway to the southeast and luring them down to you, where they can be bottlenecked and cut down one at a time. The only complication is a Kobold Flame Shaman that dwells with them, who will merrily needle you with magic. Devote an archer’s attention to him to limit the damage the kobold can do while you work your way through the spiders.
After the fighting is over, loot the Kobold Flame Shaman for a Silver Dwarven Key, then look for two chests at the back of the Giant Spider chamber. The eastern one holds some gems and jewelry, while the western one [Trickery 21] will yield a suit of Chainmail +1.
Explore the Hallways
Backtrack to the fork where you slew several residents of Trobold, then proceed down the hallway to the southwest, stopping when you find [Perception 22] a trap [Trickery 22]. Disarm it to be safe, but before you continue down the hallway further, note two side chambers, one to the northwest and another to the southeast. You’ll be coming back to these rooms when you’re done exploring this hallway.
Continue down the hallway to the southwest, and when the hallway turn southeast stop long enough to dispatch a Trollhound, two Kobold Sentinels and a Kobold Archer. As you explore down this second hallway, keep your eye out [Perception 28] for another difficult trap [Trickery 28]. Once past this hazard you’ll find two more doors, one to the southwest and one to the southeast. They’re both locked, and the former requires a key, while the latter can be opened with a heroic effort on the part of your Rogue [Trickery 30]. If you get this door open you’ll find yourself in the chamber the other set of stairs on the upper level led to, for what that’s worth.
Aside from the area transition, the only thing of note in here is a locked [Trickery 32] chest that you may just want to leave alone until you get a key that opens it. Even a relatively highly skilled Rogue will likely struggle with this lock at this point in time, but if the save/loads aren’t too tedious you’ll be rewarded with a Soot-Blackened Hammer (will go well with those gloves you found earlier!), two Potions of Cure Moderate Wounds and a Shock Frost Heavy Mace +1. Any weapon that adds 2d6 elemental damage per hit is a weapon to take note of, and Harrim and Valerie are both capable of putting it to good use.
Classroom Clash
Return back up the hallways to where you found the two rooms and enter the southeastern room first to find a class in session. Fittingly, a Kobold Teacher is instructing the class on words in the common tongue, and when he spots a “meat” specimen interrupting his class, he’ll sic his pupils on you. The collection of students includes the Kobold Teacher (an arcane spell caster who fights similarly to a Kobold Flame Shaman), a variety of Kobold Sentinels and Kobold Archers, and some Trolls. None of these foes should present any significant difficlty, just focus on the Kobold Teacher to limit his casting.
When they’re dead, search the northwestern wall to find a hidden panel [Perception 21] which is also trapped [Perception 22]. Disarm the trap [Trickery 22] then loot the coffer to score two Potions of Cure Moderate Wounds and a Headband of Inspired Wisdom +2. In the center of the room you’ll find a pair of sun and moon statues, which you’ll get to gawking at later. For now, concentrate on the loot and search to the northeast of these statues to find two chests, one of which is hidden [Perception 16]. In the larger, unhidden chest you’ll find a Potion of Cure Moderate Wounds and some gems and gold, while the hidden chest will yield a Scroll of Hold Person, a Potion of Aid and some coins.
Solve the Celestial Puzzle
Now turn your attention to the statues you neglected earlier and note the runes on the ground near them. To the southwest of the moon statue is a rune shaped like an abstract angular fish (or a diamond with a “V” attached). Northeast of the sun statue is another rune shaped like an angular “S” (or “Z”). These almost certainly correspond to the rotating floor symbols on the level above.
Did You Know?: The “dwarven” runes used above were popularized as such by J. R. R. Tolkien’s “The Lord of the Rings”, where the abstract “fish” rune stood for the letter “U” and the “S”-shaped symbol stood for the letter “Y”. Everybody stands on the shoulders of giants, however, even Tolkein, who derived these “dwarven” runes from an ancient Anglo-Saxon script. The “dwarven” “U” rune symbolizes the “œ” sound in Anglo-Saxon while the “dwarven” “Y” (the “S”) was originally the letter for the “S” sound in Anglo-Saxon.
Might as well go sort this out now, and if you cleared the route to connect both area transitions on the second level of Trobold, the running around you’ll have to do will be significantly diminished. First head out the southwestern-most area transition to arrive on the western end of the upper level. The rotating floor device near this area transition is the moon, as close inspection of the device will reveal. Rotate it twice until the northeastern “fish” rune is revealed, then head back down to the Troll Lair Depths, work your way to the northeastern-most area transition and manipulate the sun rotating floor device twice until it reveals the southeastern “S” rune.
When that’s done, return once again to the celestial statues in the classroom and a panel on the floor near them should have moved, revealing a container you can loot. Inside you’ll find a whopping 2,122 GP and the Blessed Path suit of armor. This Full Plate +2 also has the “Blessed” property, giving its wearer a +2 bonus to Wisdom and Charisma, as well as a +4 Sacred bonus to Saving Throws against compulsion effects and poison. Furthermore, if equipped by a Paladin, that Paladin will gain the ability to Smite Evil twice per day. While it might be a little heavy for Tristian (although it would benefit him quite a bit), it’ll also serve Valerie well provided you don’t have a protagonist more deserving of it. At the very least that +2 Wisdom will boost its wearer’s Will Save, easily making it the best suit of heavy armor you’ve found thus far.
To the Throne Room
Well, that was certainly worth running around for. With that puzzle solved, return northwest to the adjacent hallway and continue northwest into another, as of yet neglected chamber. Inside you’ll be met by a Troll and a Trollhound, which should be little more than speed-bumps by now. Crush them, then follow the rubble to the northwest, then north to find some trolls and kobolds arguing over some plunder. Seems the residents of Trobold have the same aesthetic sense as the Mites under the Old Sycamore did, and despite the object of their quarrel being junk, that won’t stop them from threatening to tattle.
After they’re done arguing you’ll be free to engage the group of monsters, including two Trolls, three Kobold Sentinels, two Kobold Archers and a Kobold Sniper. None of these foes are particularly dangerous, but their numbers – and the lack of favorable terrain – may cause trouble. Still, it’s nothing a little spell-buffing can’t resolve, and if you lead with your tank and focus on the trolls you shouldn’t suffer too much.
Defeat the residents of Trobold then loot some rubble [Perception 7] near the mounds of pilfered “treasure” lying around to obtain a Dwarven Helm Shard. Follow the northwestern wall of this chamber to the southwest until you find three chests, two apparent, one hidden [Perception 16]. The eastern-most chest contains a gem, 65 GP and the Commandant’s Journal (Second Half), the central chest contains some gems and jewelry, and the third yields an Old Dwarven Chest Key, a Scroll of Haste and… some fruit?
Follow the nearby rubble to the south and you’ll come across another group of monsters, including a Branded Troll and no fewer than seven Trollhounds. You’ll need to be wary here, as the Trollhounds may be too numerous to be easily intercepted by your warriors, which may tempt them to slip around behind your line and attack your squishier characters. A well-placed Web to the northeast of the nearby pillar may protect your flank, as will keeping your archers and casters back until the enemy has fully engaged your warriors.
Dispose of your opposition, then loot a pile of rubble [Perception 7] to the south of the fire to find a Torag’s Pendant. Obtain this trinket, then venture southeast along the wall, stopping long enough to spot [Perception 22] and disarm [Trickery 22] a pair of traps. When you reach an apparent dead-end, turn southwest to spot a door you can open, beyond which await three Branded Trolls ready to challenge your passage. Cut them down, then consider retreating, resting and healing, as beyond you’ll find the lair of Trobold’s two leaders.
Battle: Hargulka and Tartuk
This can be a pretty rough battle, and yes, a fight is guaranteed (although evil characters can make things significantly easier on themselves) no matter what you’ve done up until now. Hargulka is spoiling for violence, and he’ll get it, as Tartuk will quickly conclude that there can be no peace while violent borbas oppose them. There are only two enemies you’ll have to face, but they both compliment each other well.
Hargulka’s Armor Class isn’t very impressive, but he’s got enough HP to weather an assault, and his offensive powers are brutal. He sports around a +20 Attack modifier and can perform multiple strikes per round, dealing around 25-30 damage per strike. Hargulka can easily fight his way through any warrior you put in front of him; he’ll even hit tanks regularly, and take them out of the fight in two or three rounds on average.
Tartuk, for his part, is less well-endowed with HP, but his Armor Class more than makes up for it, frustrating mid-tier warriors like Jaethal and Valerie. A well-built protagonist warrior, Amiri or Ekundayo may find their attacks landing more regularly, but Tartuk has an answer for this, too, as he prefers to start the fight out with Stoneskin. This will shave off ten damage from every attack that lands, and while there’s a limit to the damage this can deflect, its primary purpose is to slow you down and allow Hargulka more time to wreak havoc. After Stoneskin he’ll likely cast Haste (which won’t benefit them as much as it does you, but Hargulka doesn’t need to be even more dangerous!), followed by several rounds of Hold Person. Be sure to flank Tartuk, as the bonuses this provides to your Attack rolls is significant.
Simply put, everything Tartuk does is to make it more likely that Hargulka will be able to wipe out your warriors. If he succeeds at this, there’s a very good chance of suffering a party wipe.
This battle will likely be won or lost before it’s ever even started, and spell-buffing will be key to the outcome. Normally Blur would suffice to protect your tank, but for this fight, you might want to drop a third level spell slot on Displacement to provide extra protection. Slow is incredibly effective, too, and Hargulka’s Will Save isn’t high enough to regularly prevent the spell from functioning, but Tartuk will, of course, try to counter it with Haste. As for your own Haste, ensure you’re Hasted when you start the fight, as you’re not going to want to waste a round casting it. Other than that, load up with whatever buffs you can manage, including Shield of Faith, Bless, Prayer and Bull’s Strength. Apply the longer-lasting buffs first, then the ones with a shorter duration, and save your game before engaging. No need to waste time re-buffing if something goes wrong, after all.
Send your tank up alone to confront Tartuk and Hargulka to ensure the troll focuses on them and they’ll enter into dialogue with you (don’t worry, your buffs won’t be winding down during dialogue). What you pick here doesn’t make much difference, so use it as an opportunity to define your protagonist’s alignment or to accuse Tartuk of being a certain Gnomish rival of yours… The only unique option requires you to have an evil protagonist, who can pick the dialogue option “I see you haven’t taught your pet to heel, Tartuk. Serves you right – these trolls may be strong, but the village dog has more obedience and sense than they do.”. After this, the well has sufficiently been poisoned and whatever you say afterwards will result in Hargulka turning on Tartuk – a supremely stupid move on the troll’s part, as he’s a likely match for your fully-buffed party without Tartuk interfering.
While the intro conversation might not be too meaningful for most characters, you’ll get more options when you’re victorious, but how you choose to prosecute the fight will heavily influence your choices. Whichever foe you defeat first will be well and truly dead, while the second one to bite the dust will surrender when depleted of HP, allowing you to negotiate with them. This may influence how you decide to carry out the fight, although if the end result doesn’t interest you too much, it generally seems easier to dispose of Hargulka first, as he’s a softer target and is individually more dangerous.
Whichever of the two you save for last and hence end up negotiating with, the conversation goes quite similarly. You have a few more background questions you can ask Tartuk to learn about the Tartuk-Tartuccio crossover (some of his answers may require you to pass an [Intimidate 10] check, which should be nothing more than a formality at this point) but your choices ultimately boil down to: finishing off your foe, sparing them and letting them flee, or accepting them as a vassal. The last of the three options requires your protagonist to be [Chaotic] – it’s certainly not traditional to allow Kobolds or Trolls to remain on your lands as subjects! – and will not make Ekundayo happy, possibly to the point of abandoning your party, especially if you haven’t killed Kargadd yet.
Make what choices you will, but take into consideration the loot each of the two monsters will leave behind, treasures you won’t gain by sparing them.
Tartuk will leave behind a Headband of Alluring Charisma +4, a Ring of Protection +3 and a Ring of Luck, while Hargulka forfeits a Scroll of Cure Serious Wounds, a Scepter of Denial and a Belt of Physical Might +4. Most of these items are self-explanatory, although the Scepter of Denial is a Heavy Mace +3 that deals 2d6 base damage and gives the user Free Action (by far the best weapon you’ve found) and the Ring of Luck gives a +1 Luck bonus to all Saving Throws. Both will also drop an Iron Dwarvern Key, which will make getting back out easier, as this key opens all the doors you couldn’t open without a key earlier.
Having permanent Free Action on your Cleric is a wonderful idea, but the potency of a weapon like the Scepter of Denial is somewhat wasted on Harrim and Tristian, when Valerie could make much better use of it. On Valerie it’ll also allow her to freely wade into Web spells, giving that aging strategy some new legs. The Headband of Alluring Charisma will go great on Regongar, should you have no other home for it, while the Belt of Physical Might +4 can replace the lesser +2 version you found earlier, which in turn can replace a Belt of Giant Strength +2.
Finish Exploring Trobold
If your appetite for loot is not yet sated, continue northwest to find Hargulka’s throne, next to which you’ll find two small chests (to the northeast) and a large chest (to the southwest). The smaller chests contain merely gold and gems, while the largest chest holds an Amulet of Natural Armor +2, some Soot-Blackened Tongs and another Iron Dwarven Key.
Secure this loot, then make your way southeast opposite the forge to find a locked door, which the Iron Dwarven Key will open. Beyond is a large, abandoned hall that houses some more treasure. Loot two chests along the northeastern wall (one of which is locked [Trickery 16]) to find some gems, gold, and a Scroll of Cure Serious Wounds.
As you explore the chamber, note the hallway southwest of the large fire in the center of the room, which leads to an area transition. There’s an encounter waiting for you if you exit via this tunnel, but before you leave Trobold, there’s more treasure to collect. Along the southeastern end of this room you’ll find three more doors, including two doors to the southeast and one to the northeast. The latter leads to the hallway that connects to the Trobold classroom (with the sun and moon statues), while the northeastern-most of the two southeastern doors leads to the chamber immediately beyond some stairs leading back up to the first level (the chamber where you’ll find the chest with the Shock Light Crossbow +1).
Go through the southwestern-most of the two southeastern doors to find yet another small treasure room, occupied by two chests and a secret wall panel [Perception 16]. Just because the chests are out in the open, however, don’t be quick to trust them, as one of them is trapped [Perception 22]. Open the wall panel [Trickery 16] to get at two Potions of Cure Moderate Wounds, then disarm [Trickery 22] the trapped chest to safely plunder a Masterwork Greataxe, two Masterwork Daggers, a suit of Half-Plate and a Longsword +1. In the final chest [Trickery 16] you’ll find two Scrolls of Scorching Ray and two Potions of Shield of Faith.
Now, there’s one more closed door left which you can now open. Make your way through the nearby tunnels to the northeastern-most area transition (the stairs down which you originally descended) and from this area transition head southwest to find this locked door. Open it with your Iron Dwarven Key, ascend the stairs beyond, then make use of the area transition they lead to. This will take you back to the first level of Trobold, namely the depressed central area beneath the broken bridge.
When you arrive make your way southeast, stopping only to loot a chest (inside you’ll find a Scroll of Aid and a gem) just past the bridge, along some rubble to the northeast. Another lootable container lies amongst some pilfered treasure to the south of this chest, but before you go after it, there are some more foes to attend to. Continue southeast to find a large group of enemies, including three Branded Trolls and five Trollhounds. With any luck you won’t have to fight them all at once, but if you do, some Web spells may slow their approach and allow you to defeat them piecemeal. Once they’re defeated, loot the aforementioned container [Trickery 17] to find a Scroll of Cure Serious Wounds. A final bit of loot can be fished out of some fire, just make your way to the east to find a bonfire burning and loot the chest [Trickery 20] within to grab a Scroll of Raise Dead.
With all the loot in the area secured, return back to the Troll Lair Depths (the second level of Trobold) and make your way back to the hall just southeast of Hargulka and Tartuk’s throne room. Once here, head down the tunnel to the southwest and exit the area to find a group of Kobolds waiting for you. Pick the dialogue options “What are you doing here? What do you want?” then “Do any of you speak common?”. After this you’ll get more options including two [Intimidate 18] checks, one of which varies based on whether you spared Tartuk or not, while the other, a [Lawful Evil] moral choice, just boasts of your capacity to cause them more grief. Either inform them they can live in peace with Tartuk, warn them of the consequences of attacking humans in your lands, or exile them. Provided you succeed at your Intimidate check, the kobolds will move on and you’ll get some experience.
- Reward: For intimidating the Kobold citizens
240 XP
Plans After Troll Trouble
You’re now done with your quest to rid your lands of the troll menace. Yep. That’s it. No fanfare, no parade, no gratitude… Nobody ever said it would be easy being baron. If you have an oustanding event card related to the troll raids (e.g., Troll Sightings) those will still play out as normal, the results varying depending on the check made by the leader assigned to handle the event (if indeed any were assigned at all!). Thankfully, however, no more of these events will pop up, giving you time to work on more kingdom events or projects, explore, or really do whatever you wish without fear of trolls devastating your domain.
The next section of the guide, Baronial Business after Troll Trouble will be similar to the Baron’s Business in Tuskdale section earlier in that numerous events will be discussed as they happen. You’ve got quite a bit of free time on your hands, and there’s a lot of freedom with how you can spend it, so the guide will paint with broad strokes. Any of the areas covered above that have not yet been explored should be tackled as you wait for new events to appear and old events to resolve, while new side quests, companion quests and areas will be covered as they become available.
Those who were more adventurous earlier may find some free time that just needs to be passed, which is perfectly fine as well. You’ve actually covered quite a bit of ground already, and there’s no harm in burning some time in the capital. The ideal way to both be productive and advance time (aside from exploring new areas, that is) is to deal with various projects that require you stay in Tuskdale. These include projects such as “Support the General’s Endeavors” and similar leader-based projects that pop up, which will require you to advance through two weeks to see them resolved. Unlike events, during these projects you won’t be able to do anything else, so if you have any exploration yet to do, see to that first.
Blessed Path cannot be used by Valerie (on account of her being neutral). Tristian would lose all his spells if he equips it, too. Useless item for companions.