Table of Contents Show
The Wardstone Legacy Guide
Table of Contents
Defenders’ Heart Walkthrough
Start heading for the surface. Before you get there you’ll encounter Irabeth, an orc that’s just gotten done fighting and Anevia’s wife. After she explains the importance of the Wardstone to you, you’ll join forces to take down the cultists in the area. Buff up, then follow Irabeth (note: all side doors will be inaccessible, with the exception of the one near the second floor stairs).

Fight your way through the cultists. Before you go up the stairs, make sure you’re buffed and rested, as you’re about to fight the lesser demon Minagho.

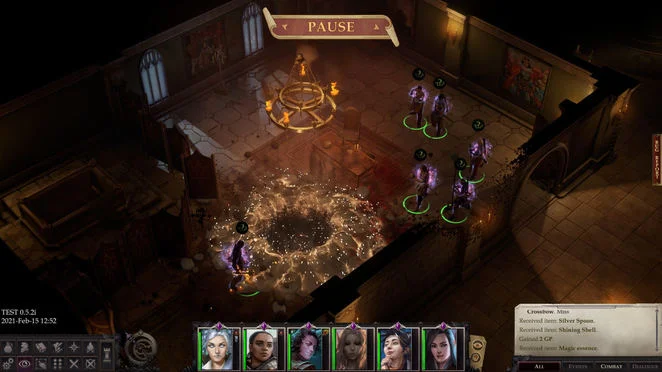
Take out Minagho’s minions first, then pass the Mobility check at the end of the room to reach her and the Wardstone.
If you take the Evil/demon dialogue option and fail your Will save, you’ll go into a rage and attack Staunton. (Talk to him about this back at Defenders’ Heart later and he’ll give you Cloak of Unbending.) Either way, she’ll knock you out and resume her plan to use the Wardstone for her own ends.

Irabeth will be there when you awake. Give her the Cultist’s Dispatch and she’ll set you up with your next quests, including Seelah’s A Friend in Need Is a Friend Indeed.
- Outside your room, talk to Anevia to trigger The Divided City.
- Chat with Staunton Vhane (adjacent to Avenia) and he’ll point you to Blackwing Library where you might find the Storyteller you seek. Spitting in his face won’t bother him, if you want to play evil.
- Horgus at the bar will give you your reward for taking him to the surface. He’ll also offer you a bodyguard job (for the same money).
- Ask the bartender (Gemil Hokks) if there’s anywhere worth visiting and he’ll direct you to Pitaxian Wine Cellar. He’ll also sell Dark Omen (ring), Gloves of the Neophyte, Dark Veil (item), and Spicy Pastry (recipe).
- Jernaugh near the bar can point you to Chilly Creek
- You can hire mercenaries or respec via Hilor if you like
- Forn Autumn Haze near the basement stairs wants you to find and kill a cultist named Kaylessa (The Outcast).
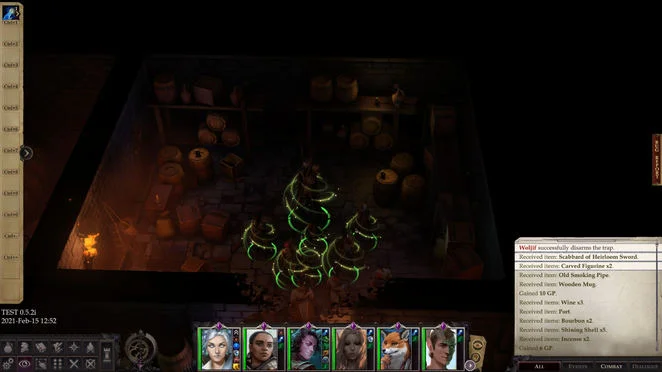
- Downstairs you’ll find Woljif. Tell Irabeth about him to free and recruit him (Out on Parole). Doing so will earn you 180 XP, reveal Thieflings Hideout on your map, and trigger Stolen Moon.
Market Square Walkthrough
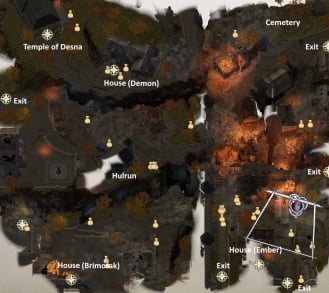
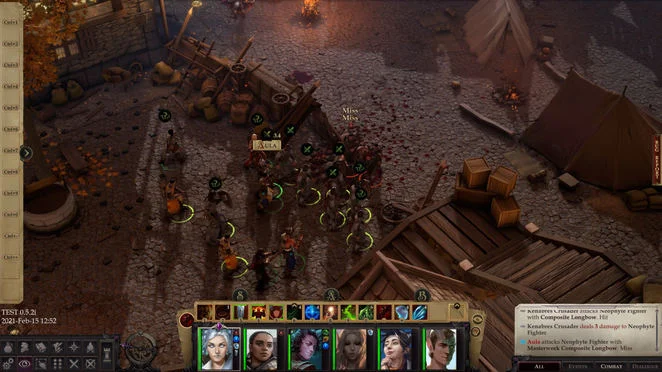
- After you enter the area, walk slightly west and take out the Abrikandilu, then pass the Athletics check to assemble a bridge from the rubble and complete A Divided City. Buff if needed to pass the second Athletics check (“get across the rubble”), and continue north to fight a Fiendish Giant Fly and Centipede. After defeating them, look for the pile of junk. Pass the Athletics check to earn 80XP and minor loot. Speak to Grandma Gretlen afterward to earn 80XP.
- In the northeast corner you’ll find a cemetery and some ghouls, as well as a grave containing Throwing Axe +1 (Perception DC20).
- In the north center of the map you’ll find Curl checking out some bodies among the rubble. After speaking with her, Jannah will show up (A Friend in Need Is a Friend Indeed). Slightly south, pass the Mobility check (“use the trunk”)
- Northwest you’ll run into Counter Arendae’s Servant, who will point you to Arendae Party House (No Better Time For a Banquet). Later, head there on the world map and defeat the enemies. Loot the room to acquire Decimation, then speak to Aranka to receive Aranka’s Shawl followed by Daeran (the latter of which will join your party). Tell him you want gratitude to receive Arendae Family Ring.
- Once you have the shawl from Aranka, return to Market Square to find Kenabres Crusader (Thall the Wallflower) at the entrance and give him the shawl, after which the Inquisitor will show up and arrest him. Defend Thall, who will thank you later, then go northwest to the Temple of Desna. Inside, your friends will teach you a song (which you can use later to recruit Arueshalae early). If you join in on the song, you’ll have the opportunity to become an Azata. Either way, you’ll receive 460XP and Wand of Remove Disease.
- In the northwest corner of the map (slightly east of the Temple of Desna) you’ll find a house with a chest next to it. Disarm the trap inside then enter the basement. Take See Invisibility scroll from the body. Buff your party and equip any magical or Good or Cold Iron weapons, then use the See Invisibility scroll to reveal Shadow Demon. Focus it with the aforementioned weapons and magic. After it dies, pass the Athletics check to clear the blockage in the corner. Unlock the chest to find Wicked Longbow.
- On the west side of the map there is a scrawny tiefling trapped under some rubble next to a church. Free him to earn a little XP and learn about a secret entrance to Gray Garrison.
- Slightly east of Temple of Desna, you’ll find some loot amongst the trees adjacent to a building. Prepare your party (ensuring your frontline formation has at least two party members next to each other on it to avoid being caught flat-footed) then take the loot to trigger an encounter with a Babau. It hits hard but if you’re buffed and have good formation, you’ll be fine. Take Cold Iron Shortspear +1 from the body.
- In the east central area you’ll run into a few ghouls and cultists (one of which will proclaim their true passion is raising undead). Wipe them out (Grease is handy), then loot Dark Horn from the bodies.
- Around the center of the map (somewhat east of the central west exit), look for a wooden cart and rainbow coloured decorations. Loot Midnight Bolt from a board leaning against the cart.
- At the south central portion of the map (look for the “Mongrel” marker), take out the Schirs and loot the bodies to find Club with Nails.
- In the southwest corner of the map you’ll find a small house containing Brimorak. He likes to lob fire spells at you so Fire resistance will help a great deal here. Offensively, go with cold spells, anything that targets Reflex, and Good or Cold Iron weapons. Afterward, loot Signet of House Vespertilio, Piece of a Holy Symbol, and Abrupt Force from the bodies and chests.
- Look for the mongrels on the south side of the map center who will agree to form a pincer attack in the upcoming fight if you ask them.
- In the southeast corner you’ll find Kaylessa collapsed on the ground near the tower by the area exit (The Outcast). Pass the Perception check and you’ll find she does in fact hate demons, though is holding back on you. Let her go and you’ll earn 184XP.
- In the southeast corner (slightly west of Kaylessa) you’ll encounter Ember being attacked by crusaders. Convince them to stop and they will; free them and Ember will be pleased (and join your party). Inside the house, take out the rat swarms and disarm the trap, then loot the area for Hide Armour +1 and Seasoned Wings and Thighs (recipe).
Feud of the Faithful
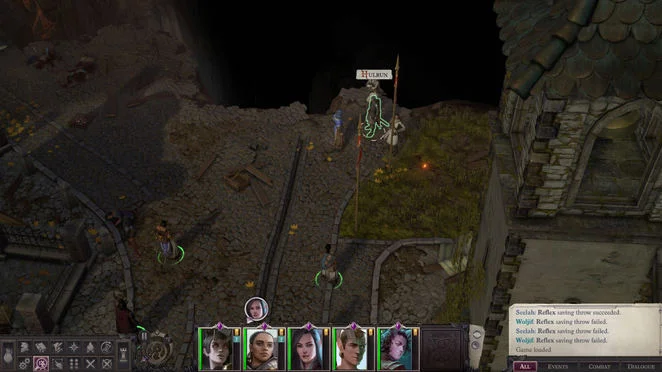
At Market Square, in the south central portion of the map you will run into Hulrun and Ramien. Regardless of what you say, Ramien will run off and you will be left with the option of killing Hulrun (and acquiring Longsword of Right) or hunting down Ramien (northwest, and slightly south of the Temple of Desna, by the trees and broken cart).
Talking to Ramien will reveal a third option (broker peace between the two) as well as a quest (Starward Gaze).
If you fight Ramien, he will vanish and you will fight Ilkes in his place (an easy fight that won’t yield any notable loot). Return to Hulrun with the news to earn 530XP and complete the quest (460XP). If you attempt to broker peace, Hulrun will simply attack you and you’ll acquire Longsword of Right. Return to Ramien with the news to earn 530XP and complete the quest. The Clerics of Desna will join the crusaders if you ask him to head to Defender’s Heart (A Common Cause).
Stay of Execution Walkthrough
Eventually, while wandering the world map, a Messenger will approach you and announce Defender’s Heart is being attacked by demons. Make sure you’re fully rested, have Grease, and buff up your main character beforehand, because you’ll need it.
Note: if you lose the fight, the game won’t end, but your fight for the Wardstone will be much harder now as you’ve lost half your fighters and had your arsenal raided.
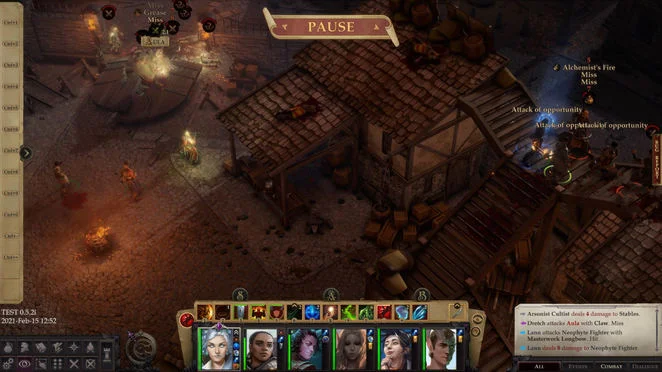
Phase I: West Gate / Arsonists
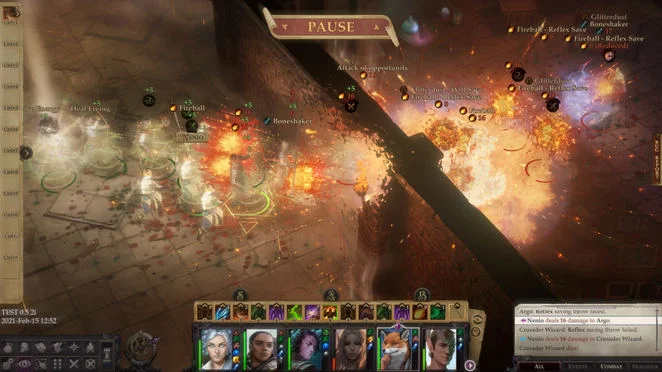
Position all but your main tank and a ranged/melee character behind the Crusaders in front of the tavern, using them as your frontline. The tank and ranged/melee you should position on the high ground where the enemies spawn and have them use ranged attacks whenever any Arsonists are on screen (if you don’t kill them asap, you will lose), and melee when there aren’t. Buff them when you get a chance.
After taking down a bunch of enemies, more will approach the wall and begin to climb the ladders.
Continue with your plan, taking special care to kill the Arsonists as soon as possible, of which there will be more now.
Phase II: Minotaur
The minotaur will approach from the east gate now and attack the Crusaders. The Grease you placed earlier plus Evil Eye – AC will make short work of him in combination with your ranged attacks (from the initial four party members) and the Crusaders.
Phase III: Cleanup
From here you can get aggressive, moving all party members forward as needed to take out the Arsonists, which can still cause you to lose in the blink of an eye if they aren’t dealt with immediately, no matter how well you might be doing at this point. Boneshaker can be a good idea here, taking them all out in one shot each with a little luck.
Aftermath
Post combat you’ll confer with Irabeth and receive 690XP, Bite, and Heavy Flail of Weakness. Before you leave, chat up your comrades and grab some gold and supplies.
- Anevia will point you to Topaz Solutions.
- Indarah will give you Claw of Jistka if you pass one of the conversation checks upon engaging her in debate.
- Vissaliy will help you with your dreams problems (Days of Strife), earning you 150XP. He’ll also sell you scrolls and crafting supplies.
- Talk to Nenio to progress More Than Nothing.
- Tell Forn Autumn Haze about Kaylessa (The Outcast). If you freed her, you’ll earn 69XP and Forn will commit to hunting her himself.
- Loot the cart outside for 1254GP.
- Joran Vhane in the yard will sell you wares.
Gwerm Family Secrets Walkthrough
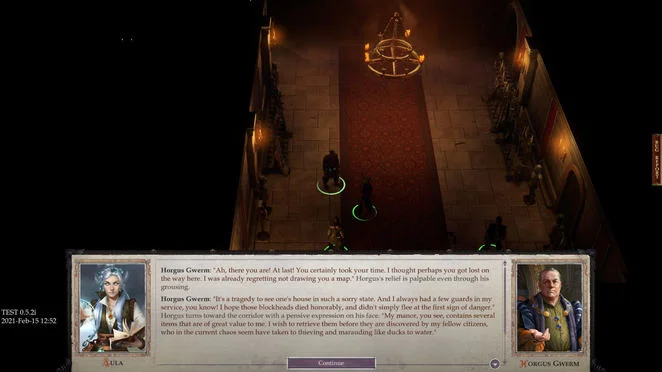
Once you’ve reached the surface, take Camellia to Gwerm’s Mansion (south of Defenders’ Heart). There, Horgus will instruct you to clear out the rooms of ruffians.
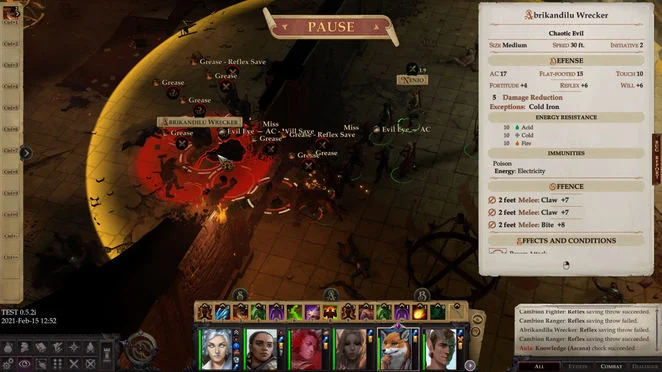
In the northeast room with the Abrikandilu, loot d Soup (recipe) from the chest. The Abrikandilu itself will go down a little easier with cold iron weapons; Barkskin on your front liner will help as well.
In the southeastern-most (locked) room, loot Sickle of Falteras from the chest.
To the west you’ll find the stairs to the second floor. Before you head up, kill the two Cambions in the room south of the stairs and take Silver Robe from the chest.
Defeat another Abrikandilu in the northwest room and take Magic essence from among the loot.
In the northeast room, defeat another Abrikandilu as well as a surprise Babau (debuffing the latter probably isn’t worth it; just focus on buffing your Armour Class as well as cold iron/good damage to get around its Damage Reduction). Post-fight, disarm the trap on the chest in the corner and take Shortbow of Code from inside.
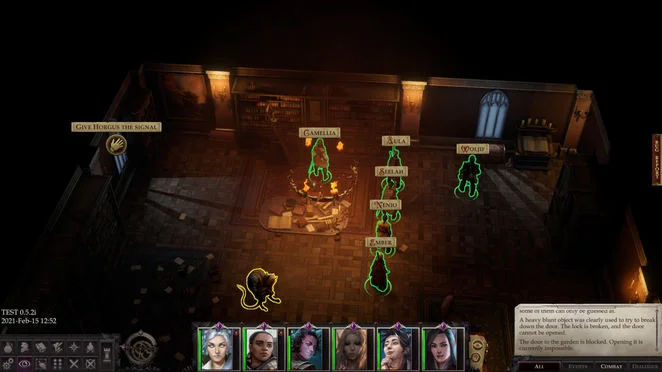
Next, look for the interact button on the window in the corner to signal to Horus, then go southeast past the secret exit behind the armoire. Follow him and pass the Perception 9 check to find there’s something off about the paintings he’s after. Ask him who’s in the paintings to discover he’s not the real Horgus, and Camellia is his daughter.
Killing them both will end the quest here and yield 1000G, Headband of Alluring Charisma +2, and whatever loot Camellia had on her. Letting them live with net you 2000G and 460XP. Lockpick the armoire in the back for Breastplate +1.
Spies Amidst Our Ranks Walkthrough
Travel south to Estrod Tower and fight the Vision of Yaniel (which will go down easily). Afterward, Greybor will greet you and tell you to climb up to his location.
Once on the upper level, you’ll encounter some evil types fighting amongst themselves as they plot to destroy Defenders’ Heart. Despite what Greybor leads you to believe, the fight is entirely winnable right here. Simply use every buff known to man and keep your ranged characters on the high ground as much as possible. Also, approach the column on the far left with a ranged character and the right column using a melee character. Use Invisibility or Vanish on both beforehand, then have them push the columns to initiate the battle.
After the fight, loot Buckler +1 from the rubble near the right column (Perception 16 check required), as well as Heavy Mace of Fire from the bodies.
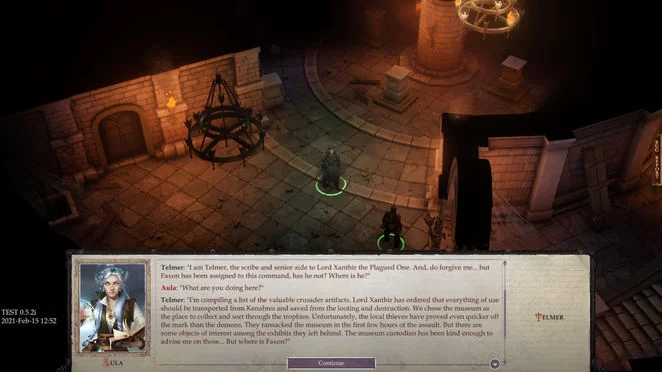
Enter the basement through the doorway in the back (under the stairs), where you’ll encounter Telmer. If you save him or let him die, the letter he’s holding will be partially destroyed, yielding Largely Destroyed Letter. If you save him, you’ll instead receive Masticated Letter.
Loot the surrounding rooms for Entrapping Longbow, Grace of Peace (kukri), Magic essence, and Lady Callandra’s Chainshirt.
In the back east room you’ll find Teldon. Convince him to hand over his keys or otherwise steal them or kill him (though as the loot is missing from this area, he won’t yield anything for killing him).
Tell Irabeth what you’ve learned for 529XP, completing the quest.
The Burning City Walkthrough
- You can find Irabeth right after you leave Kenabres Underground.
- When you follow Irabeth clearing the cultists, it’s a good idea to use ranged attacks and let her tank for your team.
- Be sure to loot all valuables in your path in Grey Garrison, once you reached the third level, the road will collapse, forbids you to return.
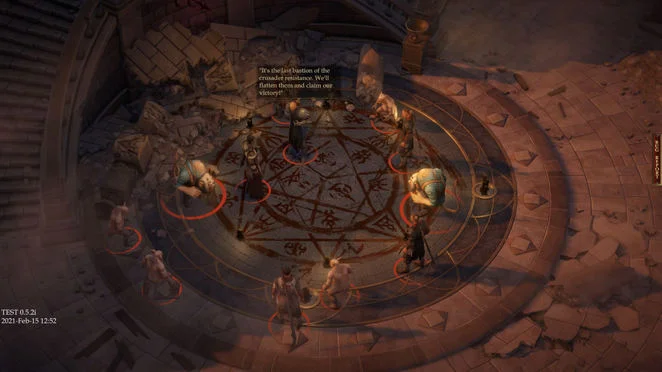
- You will find the demoness in front of the Wardstone. If you succeed in persuasion checks, you may turn some cultists to your side. However, the battle itself is unwinnable, once your whole team been put down, a cutscene will happen and 8 hours later you wake up in Defender’s Heart.
- The secret entrance to the Grey Garrison can be found at Market Square, near some tieflings. The ones you can help to add to the quest A Common Cause.
- The Purple Stone Knife can be found near the place where Terendelev died. You have to interact with a crumbled tower. During this interaction, you have the possibility to retain the Aeon’s power within yourself. It requires the Aeon Mythic Path.
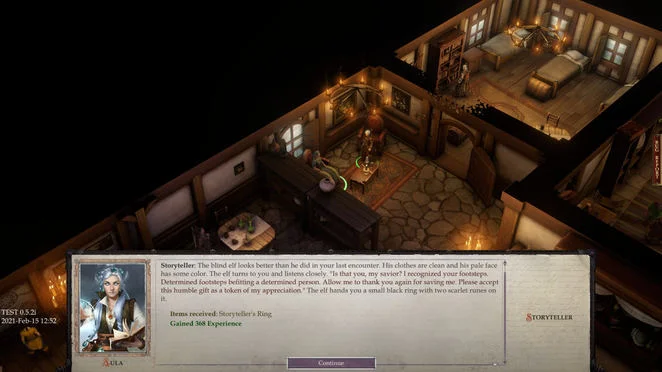
- The Storyteller can be found at Blackwing Library, if you have high Perception skill and Lore (Religion) Skill, you can find that the crusaders there are imposters. You can use high Athletics skills to knock out one enemy before the fight begins. If you meet the requirements, you can also use the Mythic Trickster choice to send the cultists to the Grey Garrison, avoiding a fight entirely.
- After you deal with the traitors, talk to the Storyteller and escort him back to Defender’s Heart.
- Talk to the Storyteller again at Defender’s Heart and show him the Purple Stone Knife, you gain 368 Experience. Then speak with Irabeth. If you have gathered all three group of allies (quest A Common Cause) and are confident to attack Gray Garrison, tell Irabeth it is time to strike now.
- Depends on how many allies you gathered in A Common Cause, there may be several crusaders and tieflings show up in Gray Garrison to help you.
- The first floor of Gray Garrison is now filled with demons and cultists, try to lure them out one by one using doors, and always watch for traps.
- There’s a succubus at the center of this level, if you have the detect magic skill and high persuasion, you can turn some of the charmed recruits to your side.
Statues Puzzle
- After you defeat all the enemies, examine the statues located along the walls. There are three statues of people and three statues of angels. In the hands of statues can be a staff, a hammer, only a sword or a shield with a sword.Then, examine the altar, on which lies a book with a prayer. This is the key to solving the puzzle. Read the prayer carefully to understand the sequence of interaction with the statues. There are both people and angels in prayer. You also need to know who and what weapon used.You can solve the statue puzzle by following order:
- Statue of a human with sword and shield
- Angel statue with shield and sword
- Angel statue with sword
- Angel statue with a hammer
- Statue of a human with a staff
- Statue of a human with a sword
- On the second floor, you can loot Amulet of Natural Armor +2, Cloak of Resistance +2, and Scythe +2 from Jeslyn.
- To reach the third floor, you need to use the top right stair at the 1st floor first to reach the right side of the 2nd floor.
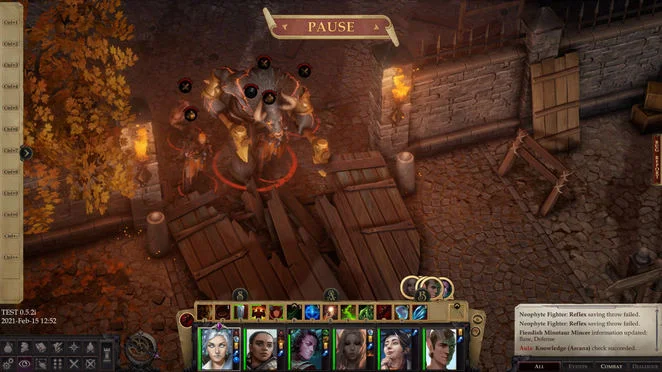
- A giant minotaur guards the stair of the third floor, you can loot Blocker (+1 Greataxe) from him. You have to a pass a Mobility check to reach the wardstone.
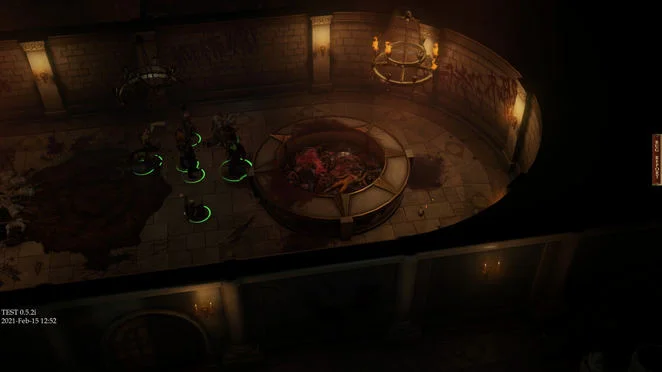
- Once you reached the Wardstone, you will have to decide what to do with it. But before you make any decisions, buff your team, and get ready for a fight. Minagho will then appear with lots of demons to attack you.
- Once the battle is over, Minagho will vanish. Leave the area. A cutscene will be triggered in the tavern where everyone is celebrating the victory over the demons.
The Wardstone
Once interacted with, the Wardstone will give you 5 different options:
- Destroy the stone with all the Angels inside.
- Quell the anger of the red warriors by offering them peace. This is a Good action and requires Angel Mythic Path.
- Cleanse the Wardstone, destroying the fallen celestials. This is a Lawful action and requires Angel Mythic Path.
- Wield the stone’s magic and return the celestials to their rightful plane, as the aeon would have wanted. This is a Lawful action and requires Aeon Mythic Path.
- Unleash the demonic fury. This is an evil action and requires the Demon Mythic Path.
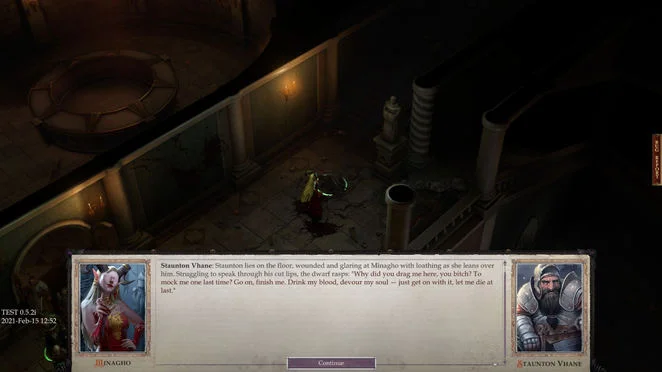
After the demoness been defeated, Staunton Vhane will appear and rescue her.
In the book event, decide what to do with the angels trapped inside the Wardstone. You will gain a Mythic Hero class.
Gray Garrison Walkthrough
Make a hard save now as there’s no going back.
Once you’ve dealt with everything else, speak to Irabeth to begin your attack. Once inside the Gray Garrison, Klaem will buff your men and party with Haste (at least if you won the battle at Defender’s Heart).
Move forward to the southwest room, looting Scabbard of Heirloom Sword from the junk on your left, past the first doorway and the trap. Next, take the northeast exit.
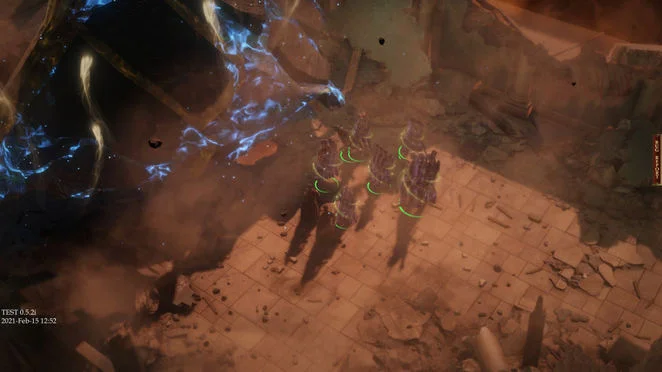
Take out the cultists and ignore the magic door for now. Go up the second set of stairs. After the Vermlek’s take a nap, Coup de Grace ’em.
Wipe the enemies in the next area out (above where Irabeth and her soldiers are fighting), then take the stairs down.
Kill the mages then open the magically sealed door (with the blue symbol) to fight a few more enemies. Make your way into the back room to battle Othirubo and his minions. The usual Grease and Glitterdust will serve very well here; Faerie Fire may as well. Take care to position your back liners carefully or they’ll take big damage. Also be sure to position your party outside the door to exploit the choke point. Among the loot you’ll find Belt of Incredible Dexterity +2 and Tail Sting.
The next (locked) room over you’ll find Lesser Sonic Quiver and Razor-Sharp Claw. Across the hall, pass the Athletics check and enter the room to fight Abrikandilu and acquire Magic Essence.

Northwest you’ll find a large trap on the floor. Pass the Trickery 35 check (may require many tries, so don’t give up; Guidance will help). In the rooms beyond, take The Malady, Magic Essence, and Shiny Dagger. In the room with the lone Cambion Rogue, position your tanks in the rear, as you’re about to be flanked.
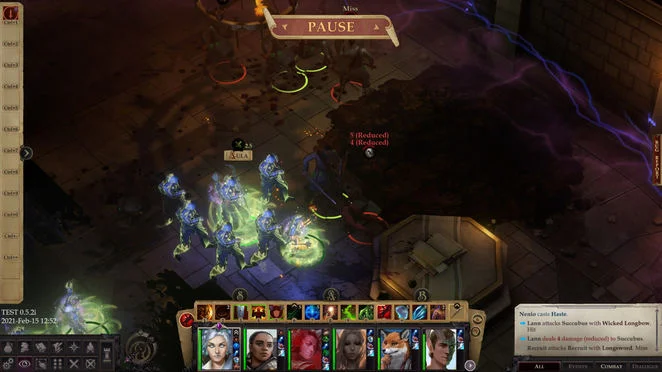
Once the battle is over, head through the large main door to encounter a succubus with several recruits under her spell. Dispel Magic will restore some of their senses, making the ensuing fight easier. Use Grease on the Succubus and focus her.
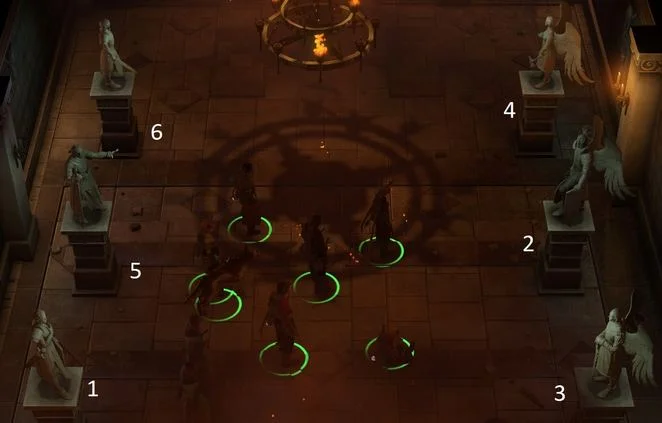
Solve the statue puzzle according to the screenshot above, prompting a door to appear. In the back room, pick up Flail of Lightburst and Cold Iron Falchion +1.
Second floor
Take the northwest stairs to the second floor now. Take out the two Schirs with Coup de Grace, then buff like crazy before entering the left room with Jeslyn and his minions. This is one of those fights that’s very difficult if you don’t respect the almighty power of doors and very easy if you do. Position everyone but your main tank a ways behind the door (not in the room where the enemies reside) and send your tank in to trigger the fight.
Once the battle begins, immediately position your main tank a few feet away from the doorway in the hallway (on the side the rest of your party is located). Once they engage, cast Grease on the doorway and watch hilarity ensue. Take special care to ensure none of your party members step in the Grease and you should win easily with some Alchemist’s Fire, Fireball, Glitterdust, etc. Evil Eye – AC on Jeslyn to counter his buffs may help as well.
Post-combat, loot Befouled Key, Scythe +2, Amulet of Natural Armor +2, and Cloak of Resistance +2.
Passing Perception 25 check near the chests at the end of this room will reveal a hidden room behind them. Loot it to acquire Bulky Pick.
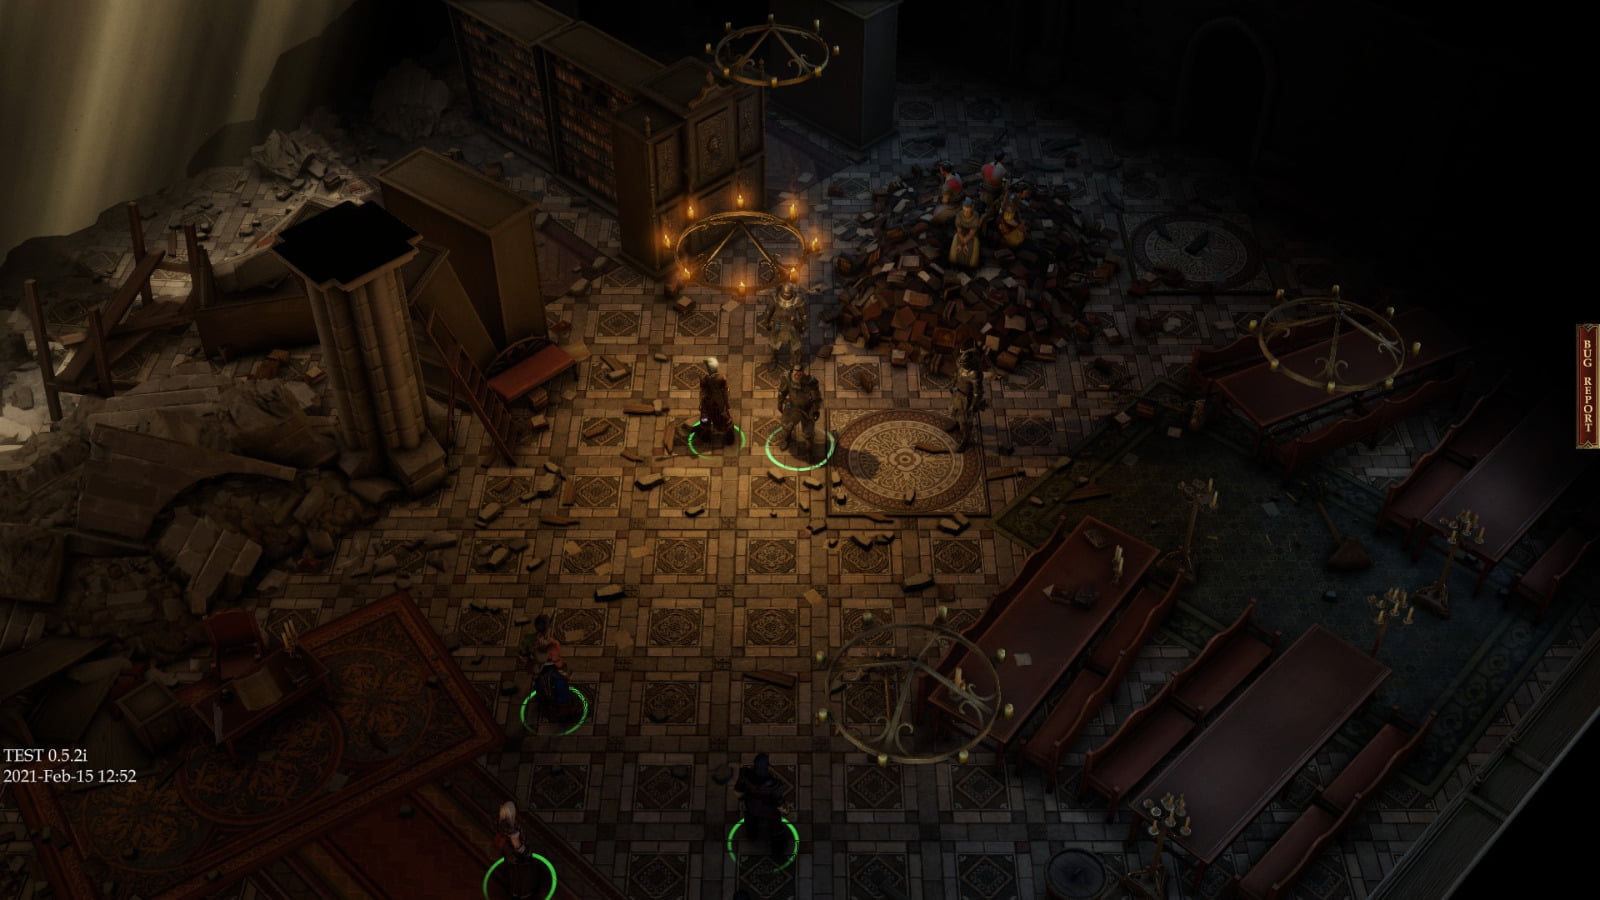
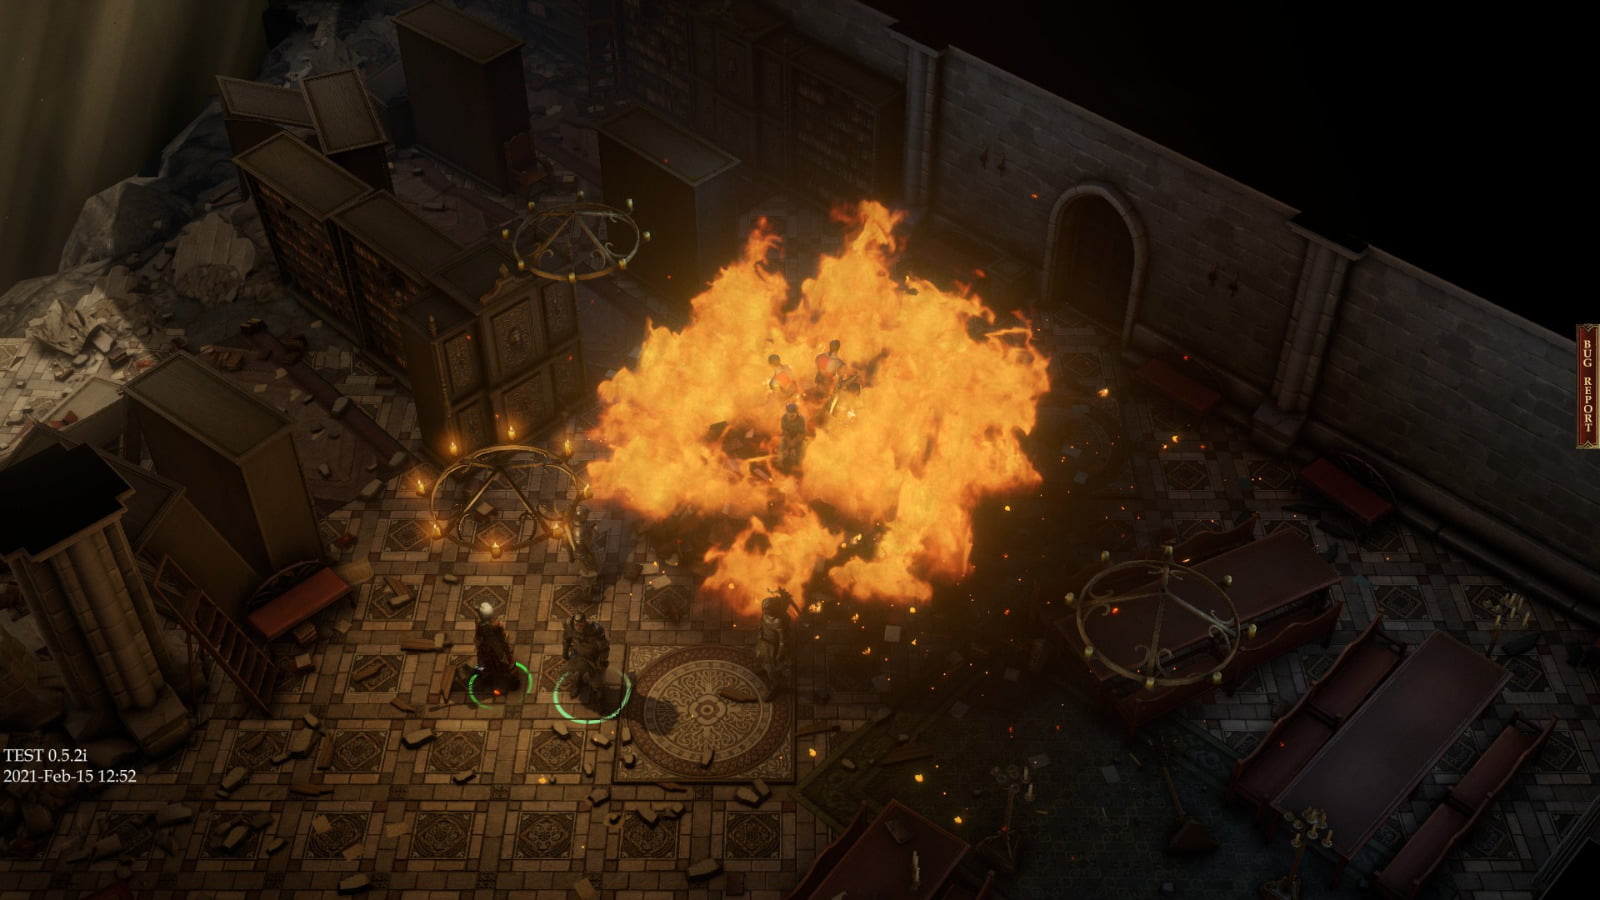
In the west room (with the Conjurers), take Elven Notes from the Gray Garrison off the table. Continue into the far east room (open the door to obtain access) with the hexagonal table and the clerics. Take ’em out then move south to the room with the large circular relic corrupted by the Abyss and cleanse it (after defeating the enemies along the way).
Take the exit to the right of the relic to meet with Staunton Vhane and Minagho again. The “good” dialogue option will see him attack Minagho before both of them run off. Follow after them to encounter Deradnu. He’ll charge your backline, so prepare for it. Post-fight, loot Blocker (greataxe).
Pass the Mobility check, then interact with the Wardstone. The “evil” option will result in the “doings of mortals” being of no concern anymore to the aeons.
Next up, fight Minagho at last. Since you’re imbued with Mythic powers, the fight will be a slaughter (in your favour). Afterward, Staunton will show up to rescue his woman. The good and evil dialogue options will have no effect here: he’ll set off with her regardless.
Obtain your Mythic abilities, then exit back to Defender’s Heart via the door to end the chapter.
Cold Waters Walkthrough
Progress Sword of Valor until you have access to Chilly Creek (northeast of Kenabres), then head there and meet with Jernaugh.
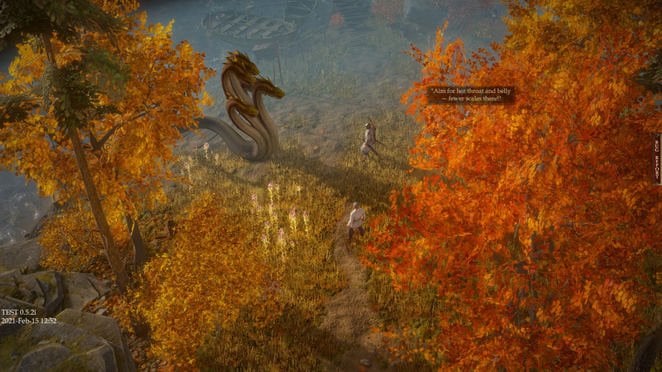
Run a little ways north and help kill the hydra. Afterward, whether or not you attack the villagers, the quest will end.
Loot the chest behind the hydra to acquire Oppressor’s Gloves. Further back, in the north corner of the village, take Godspeed Salad (recipe) from a chest.
Head to the world map via the southwest exit.